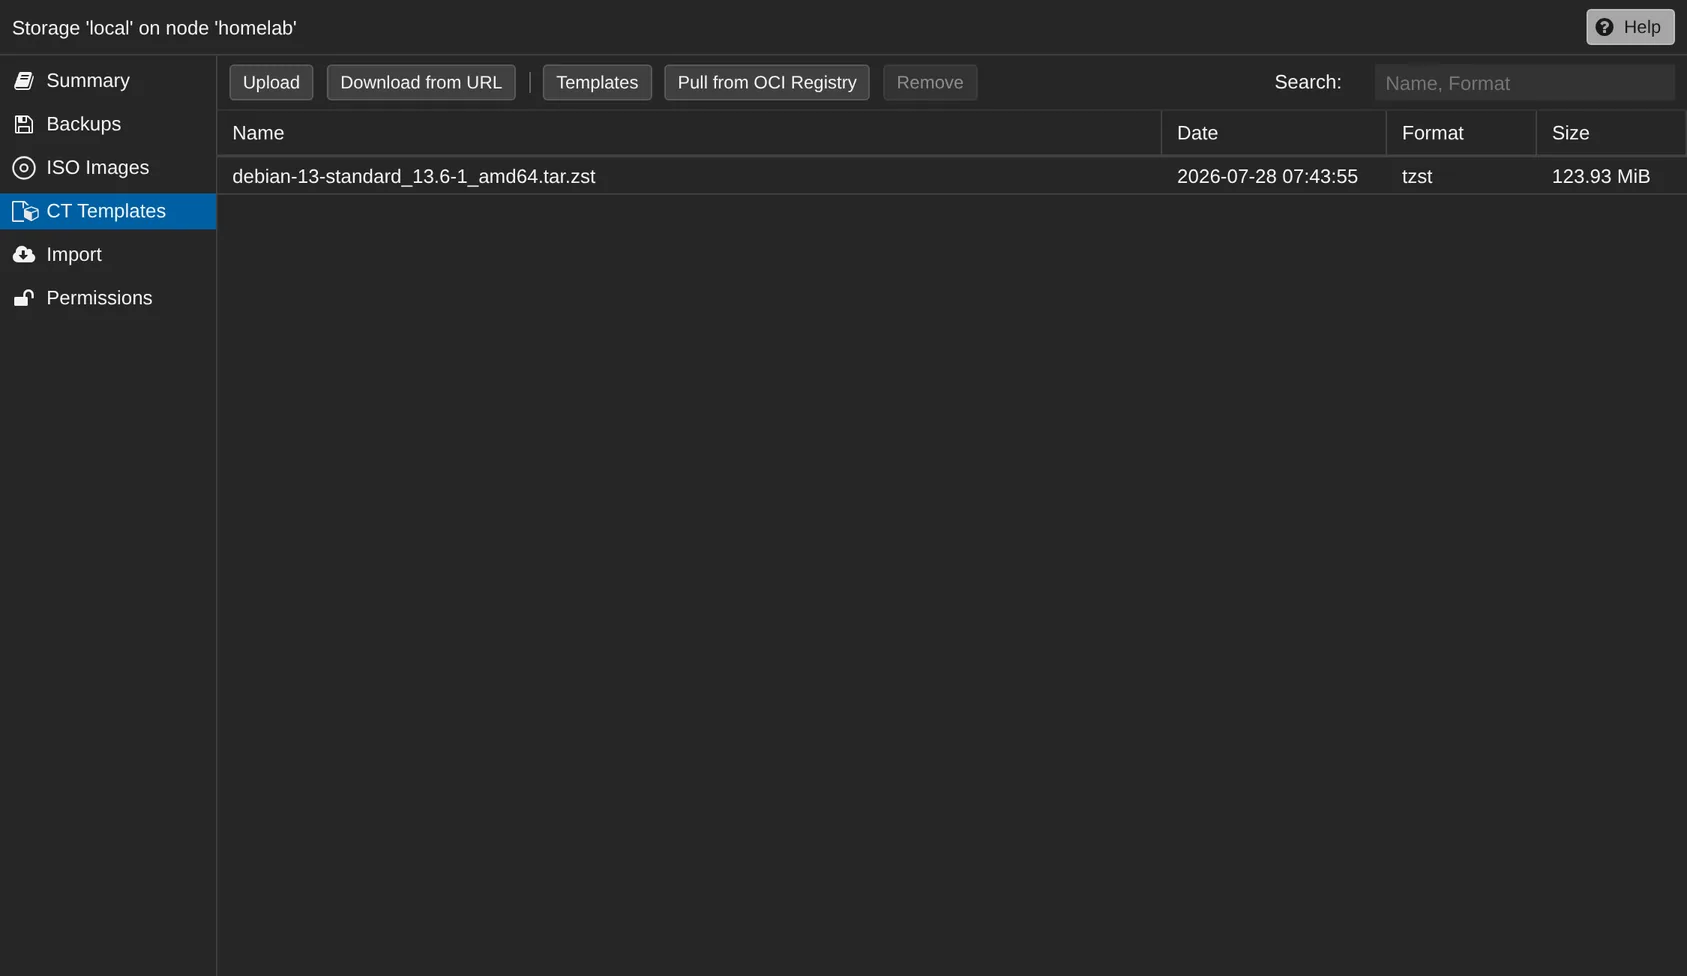
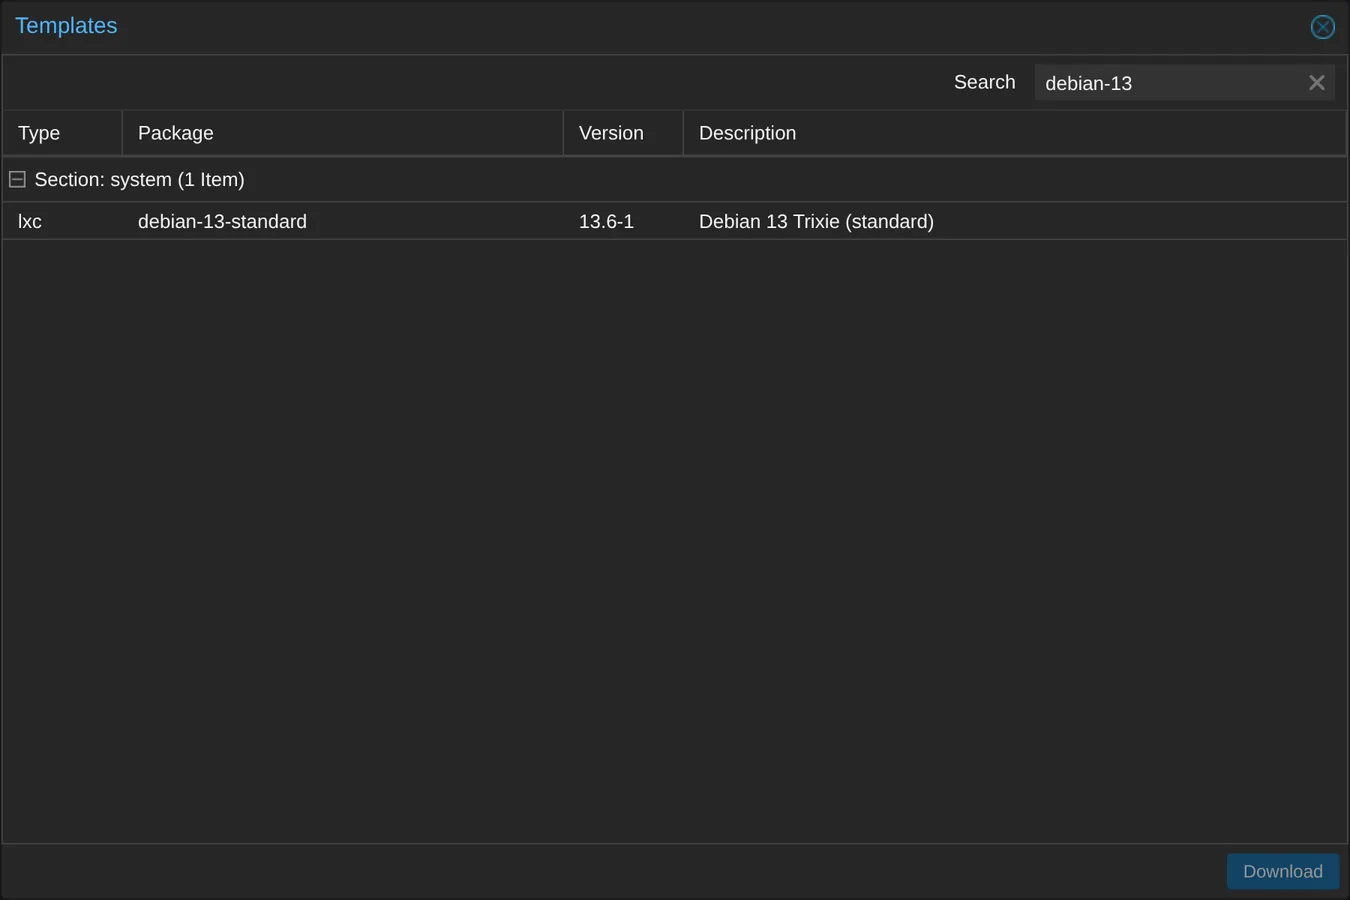
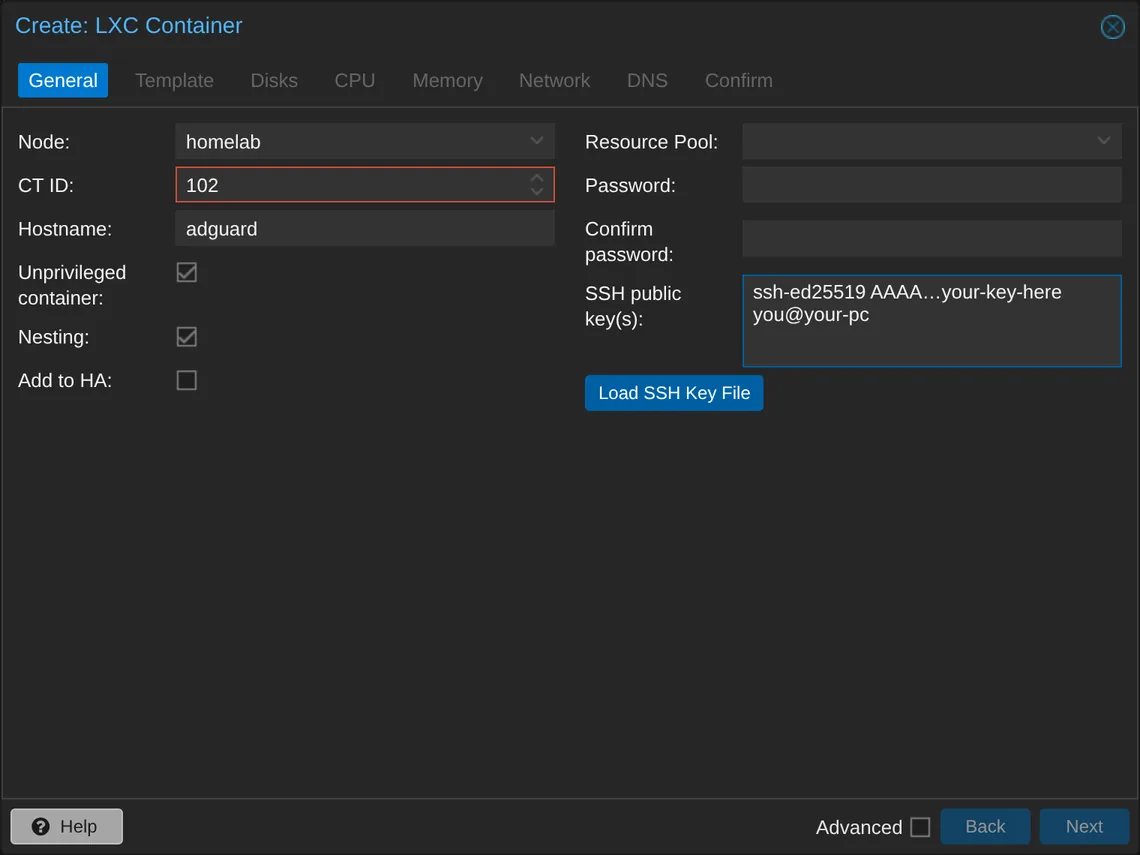
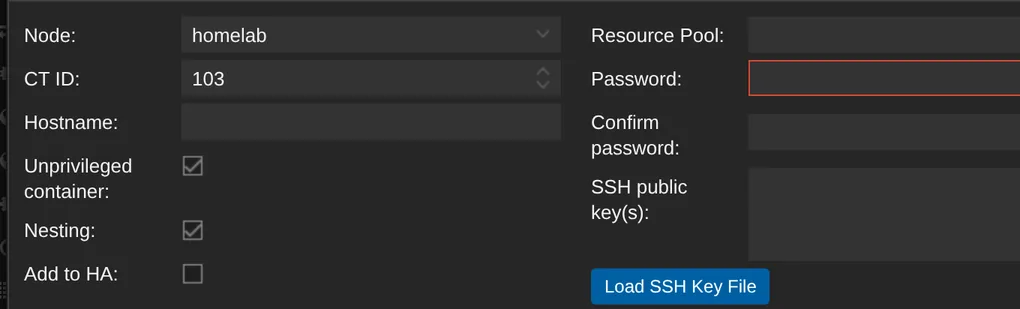
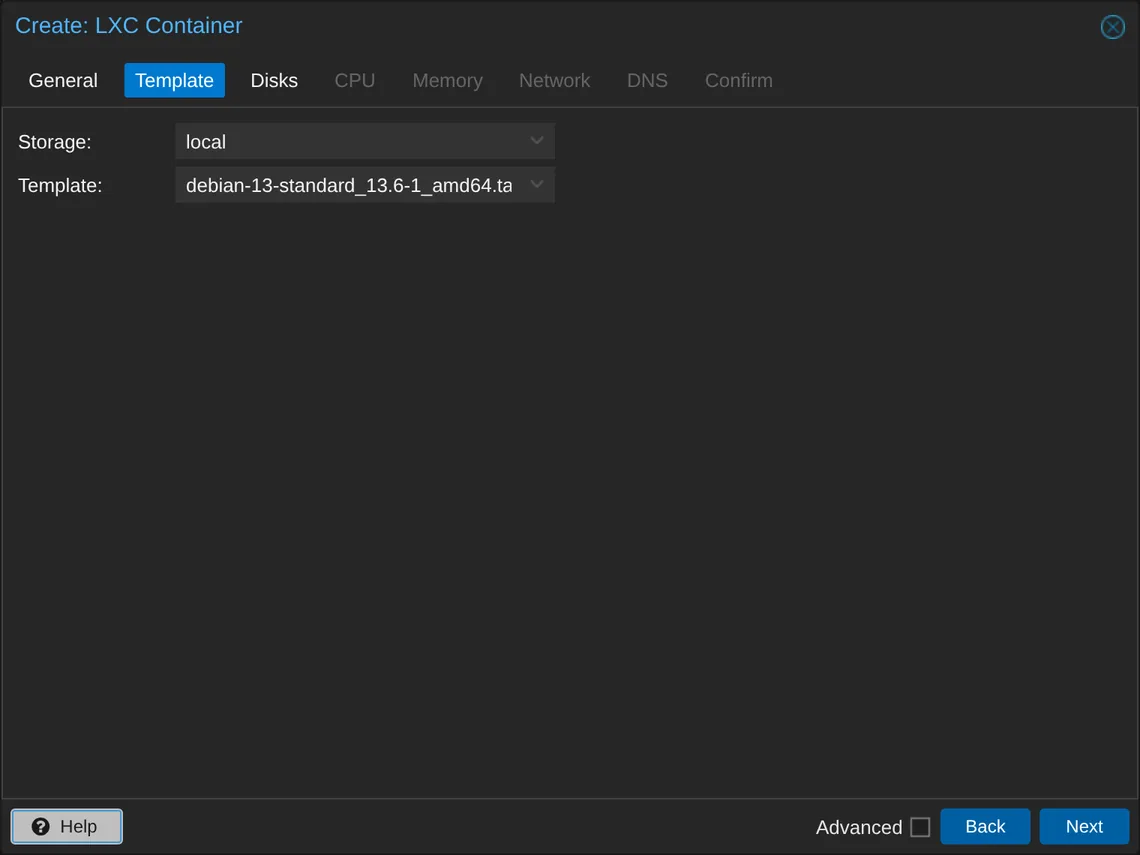
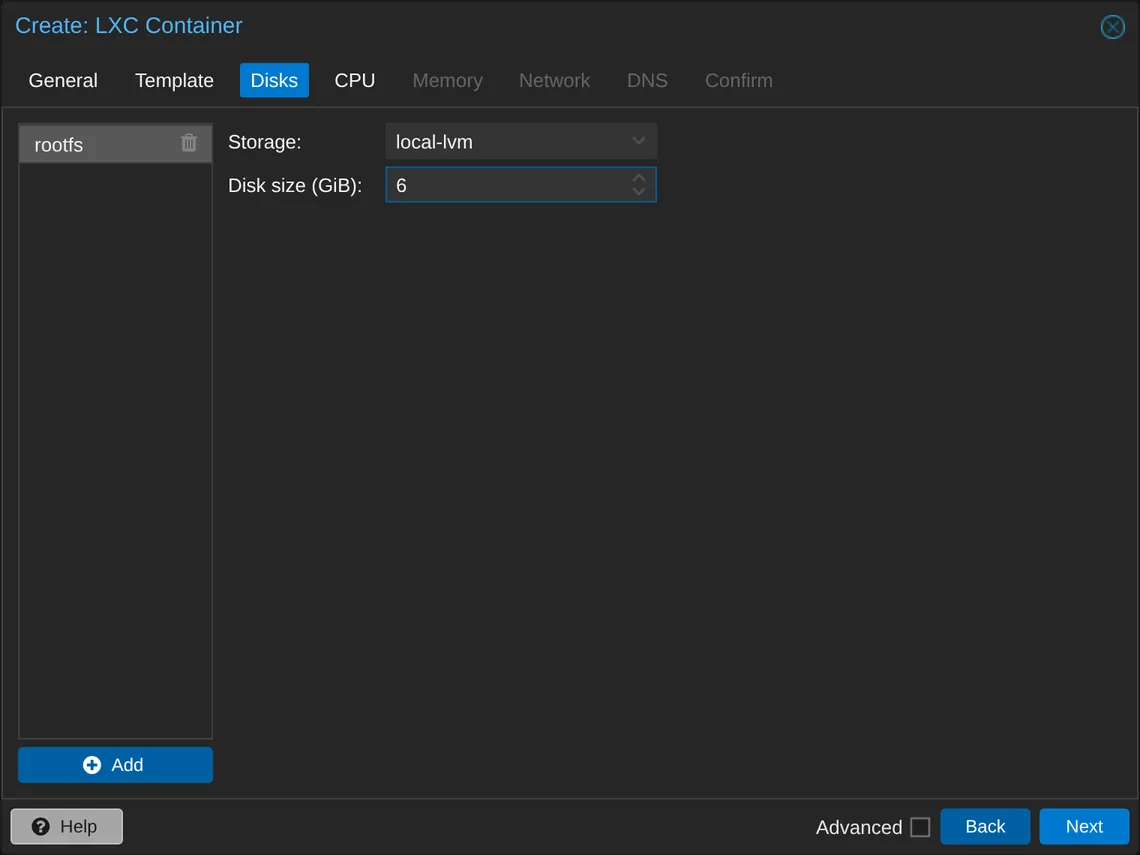
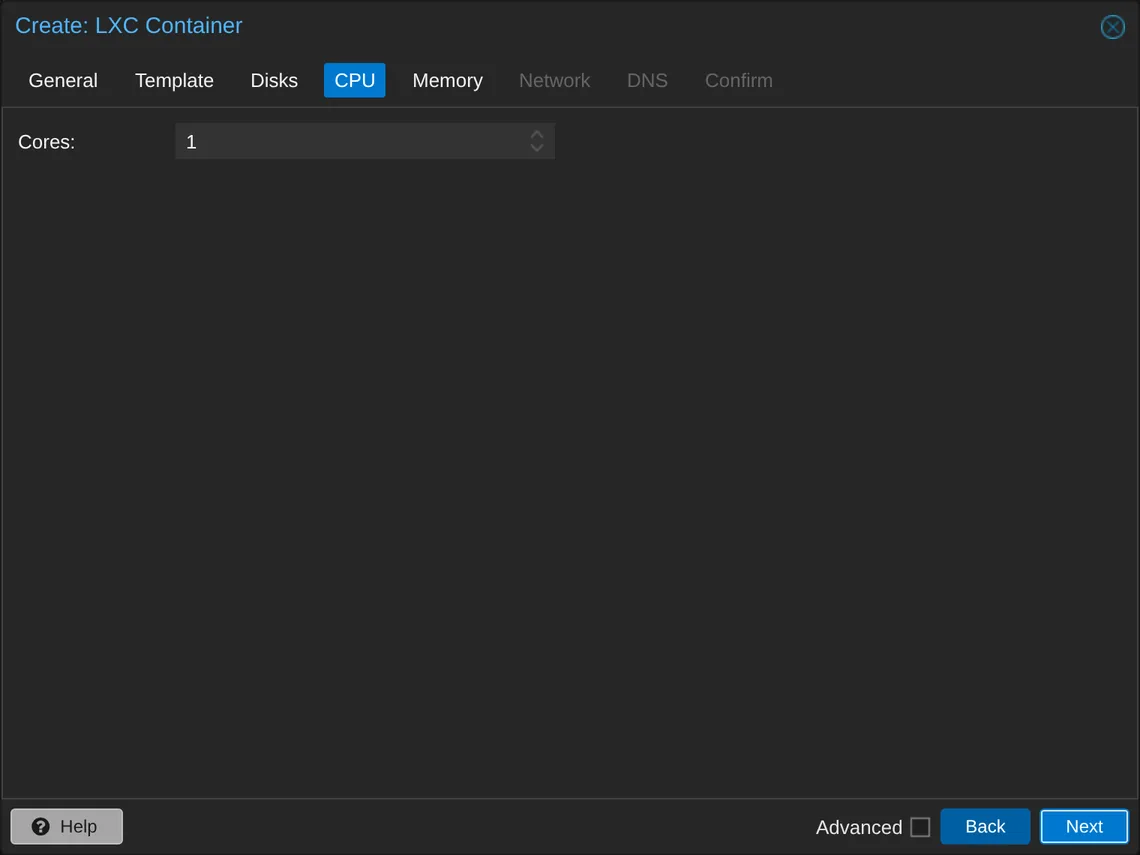
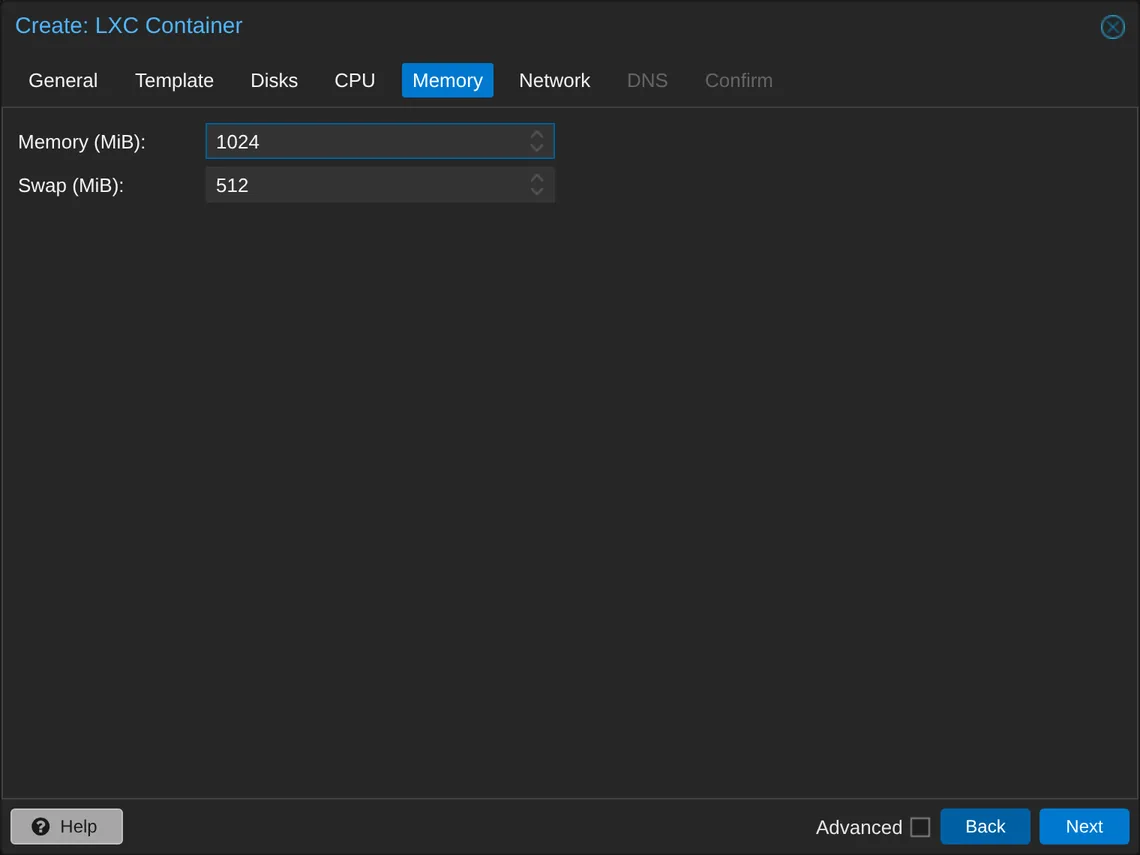
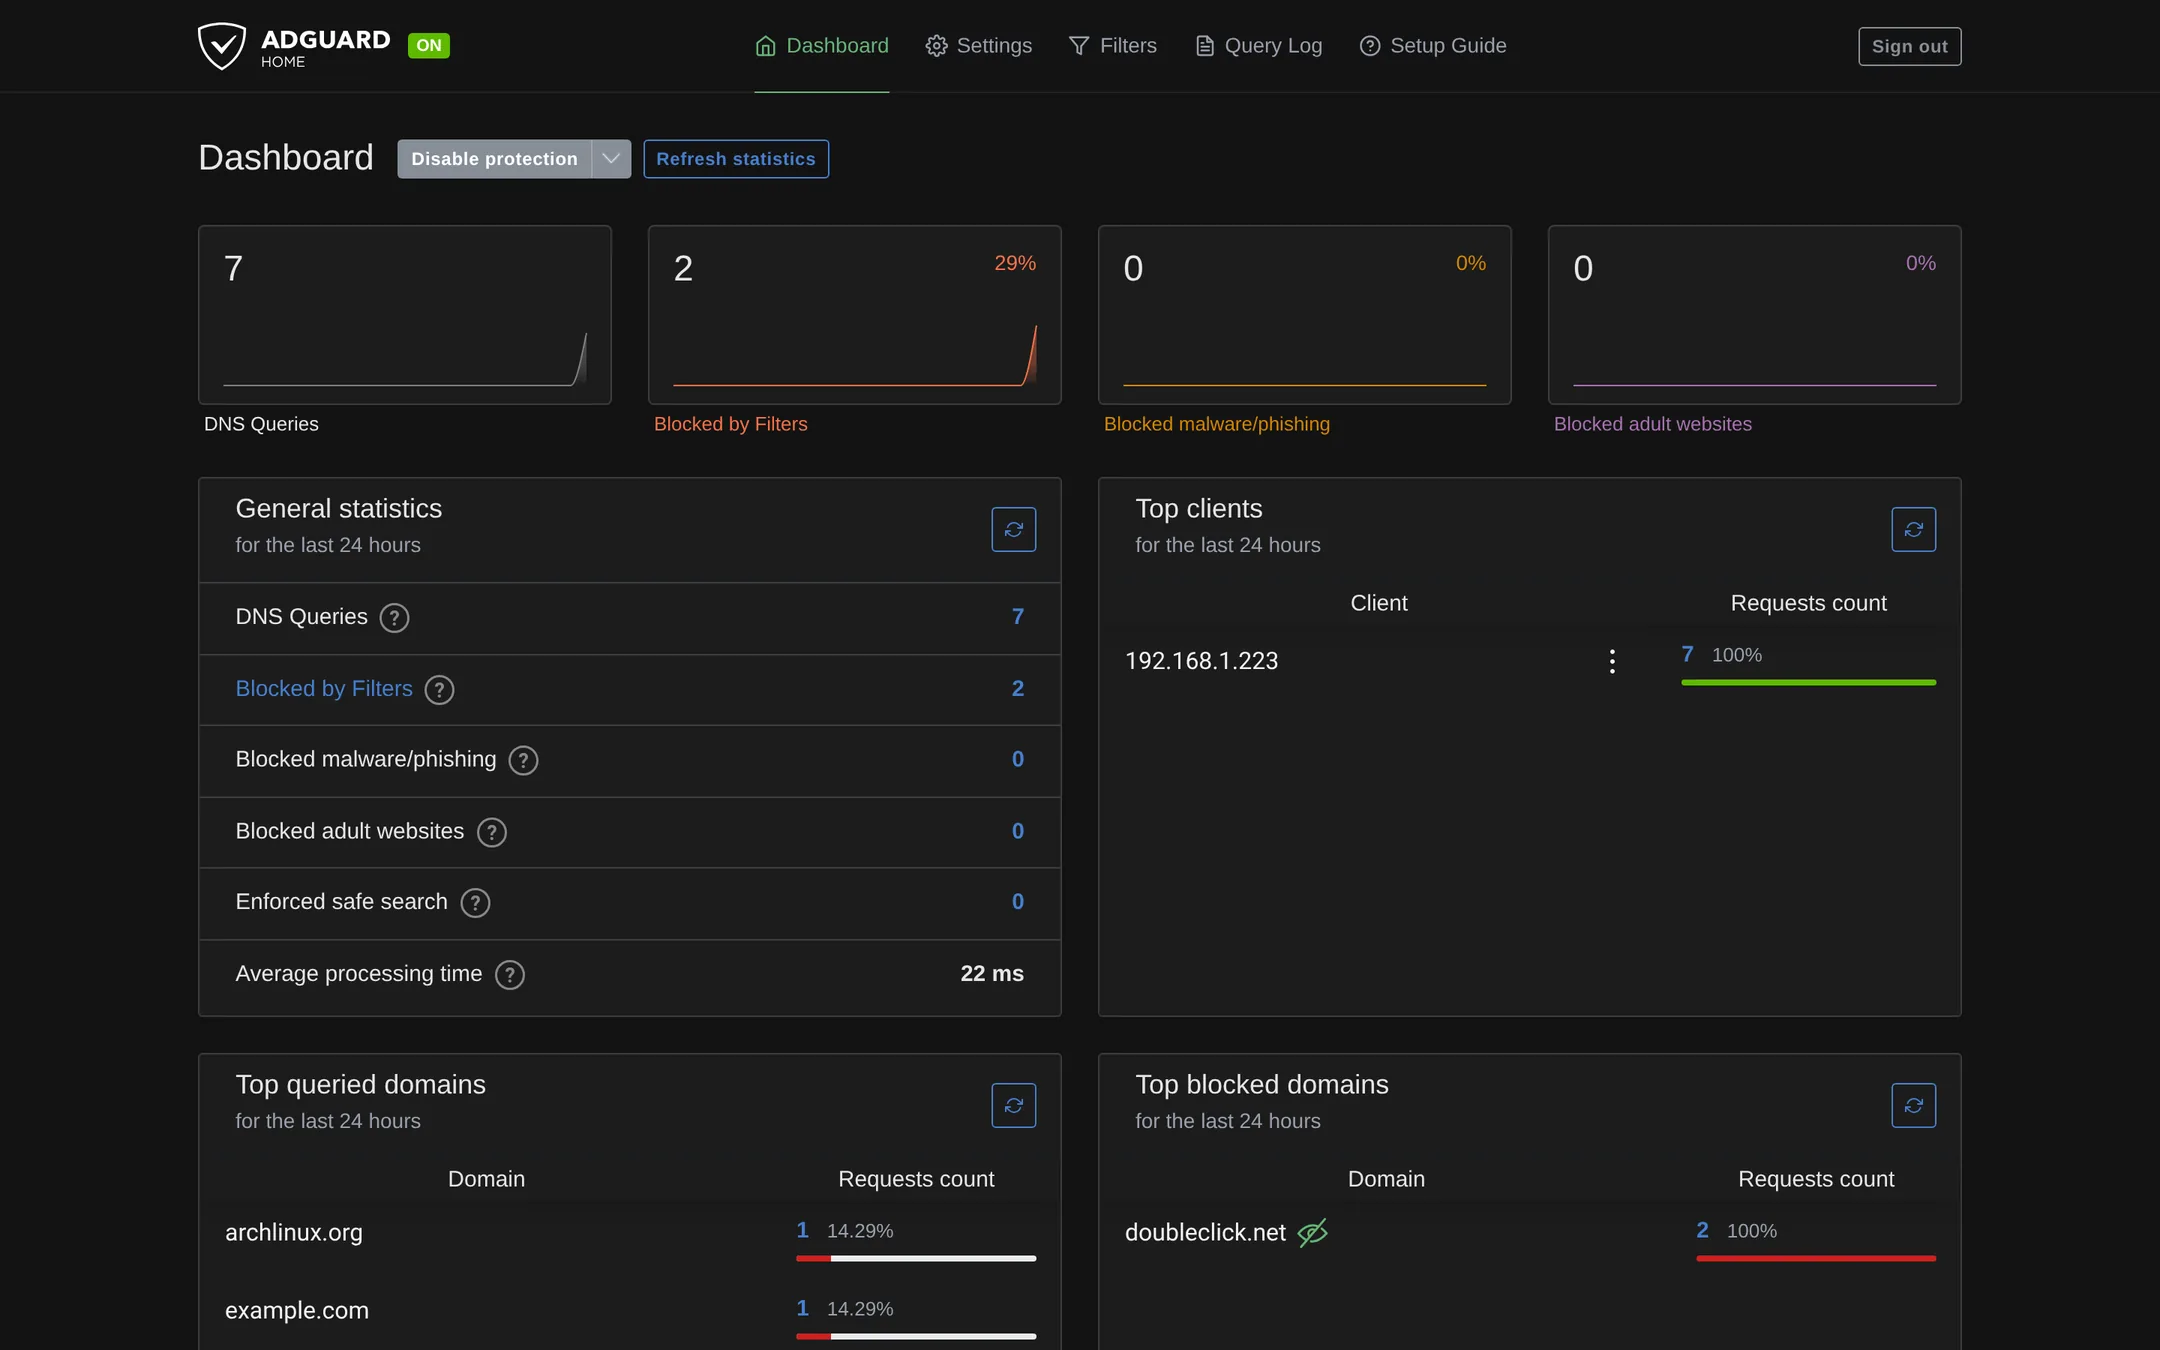
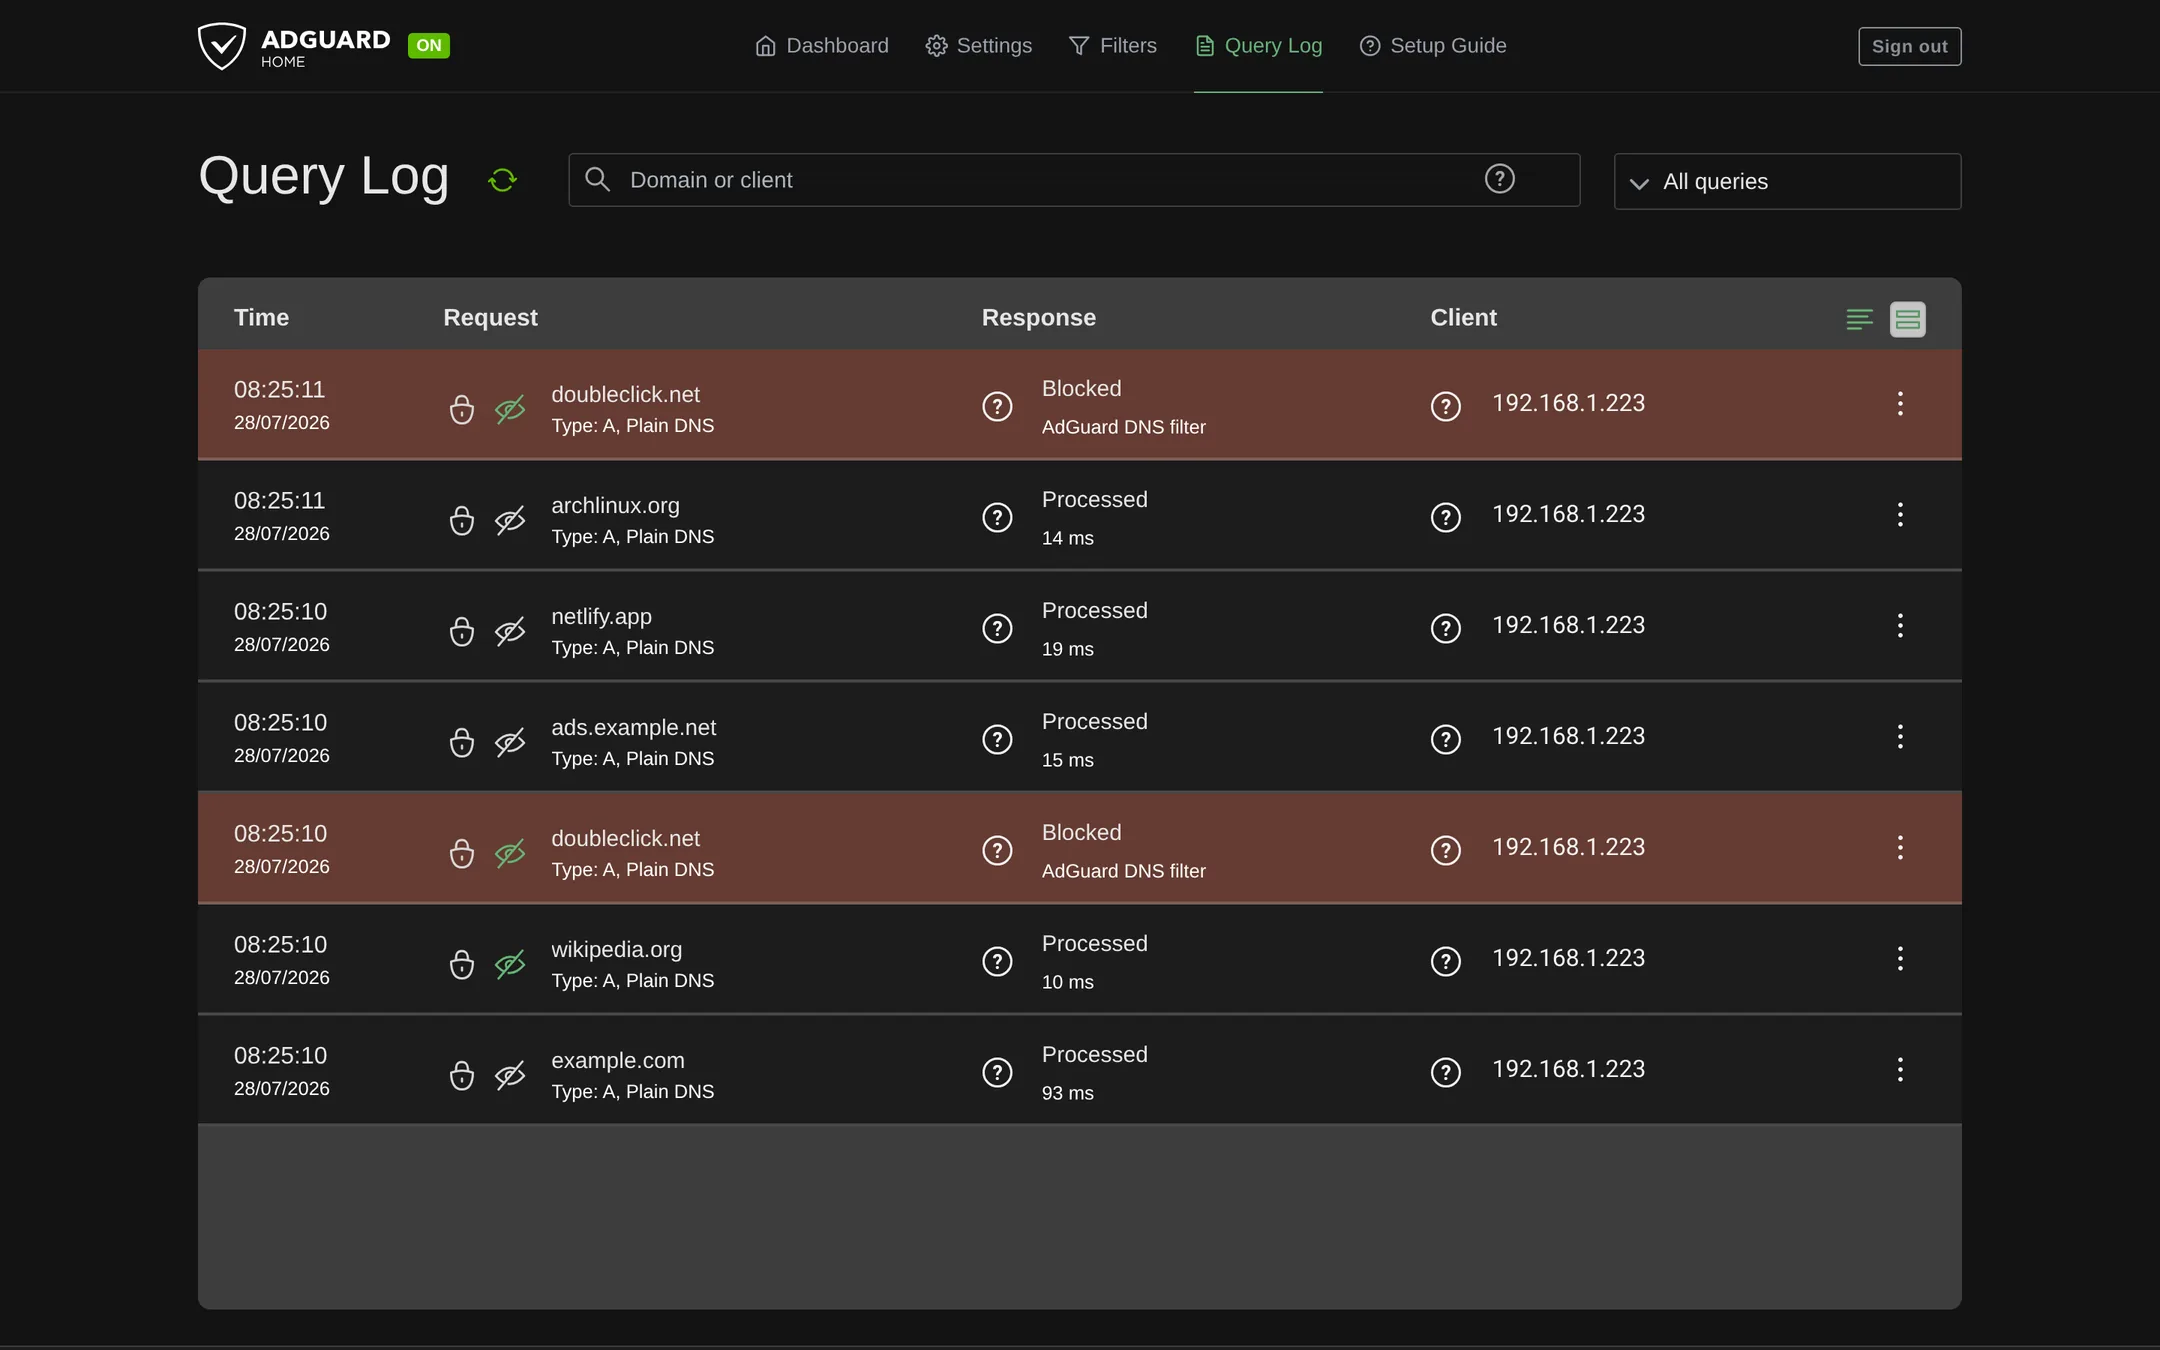
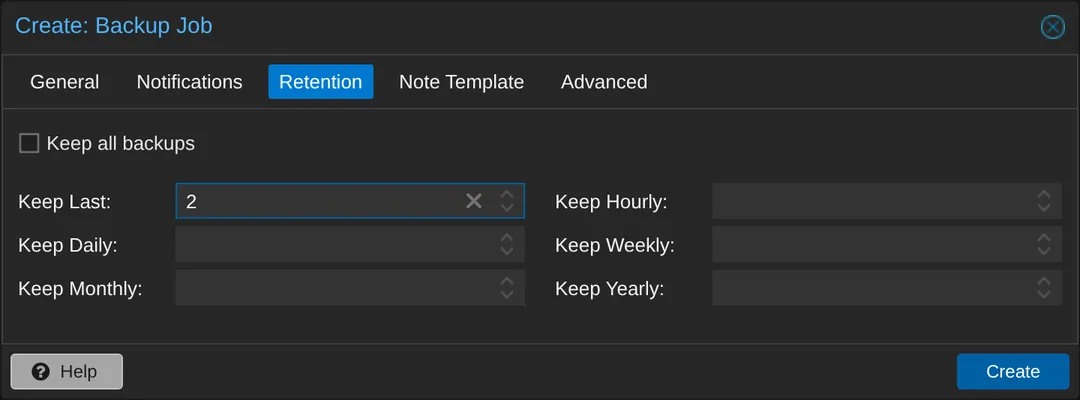
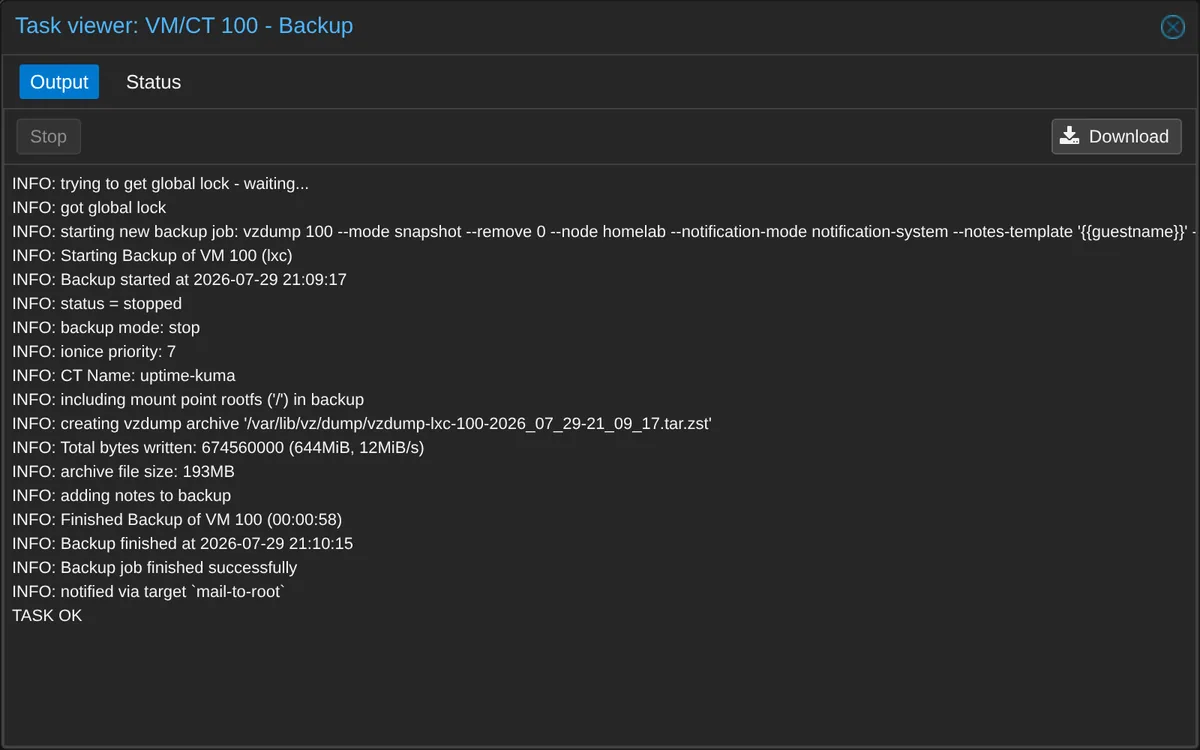
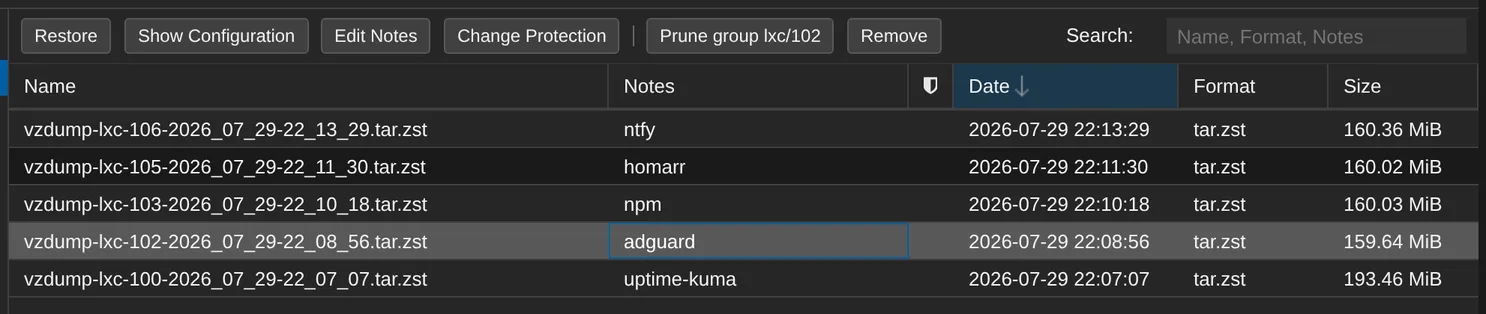
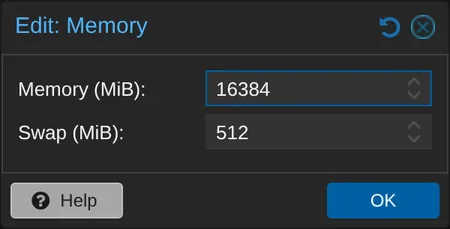
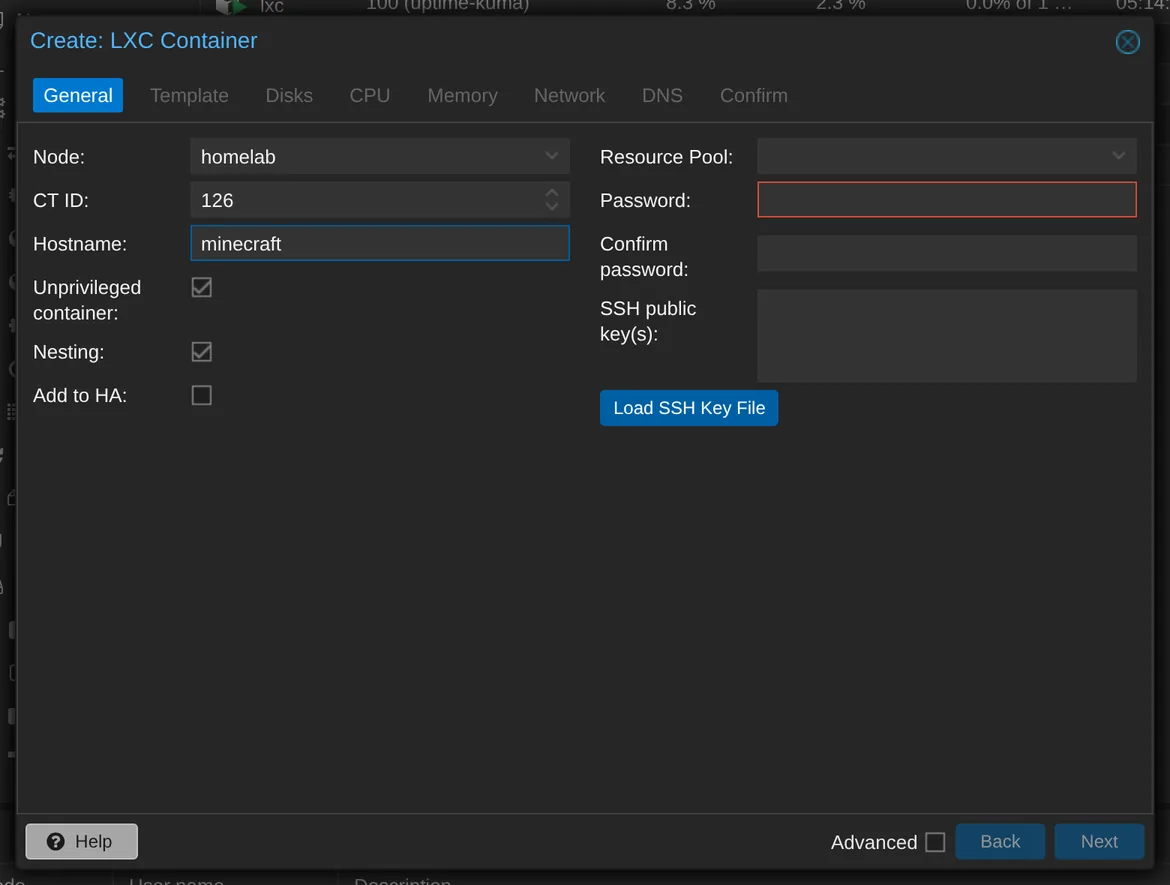
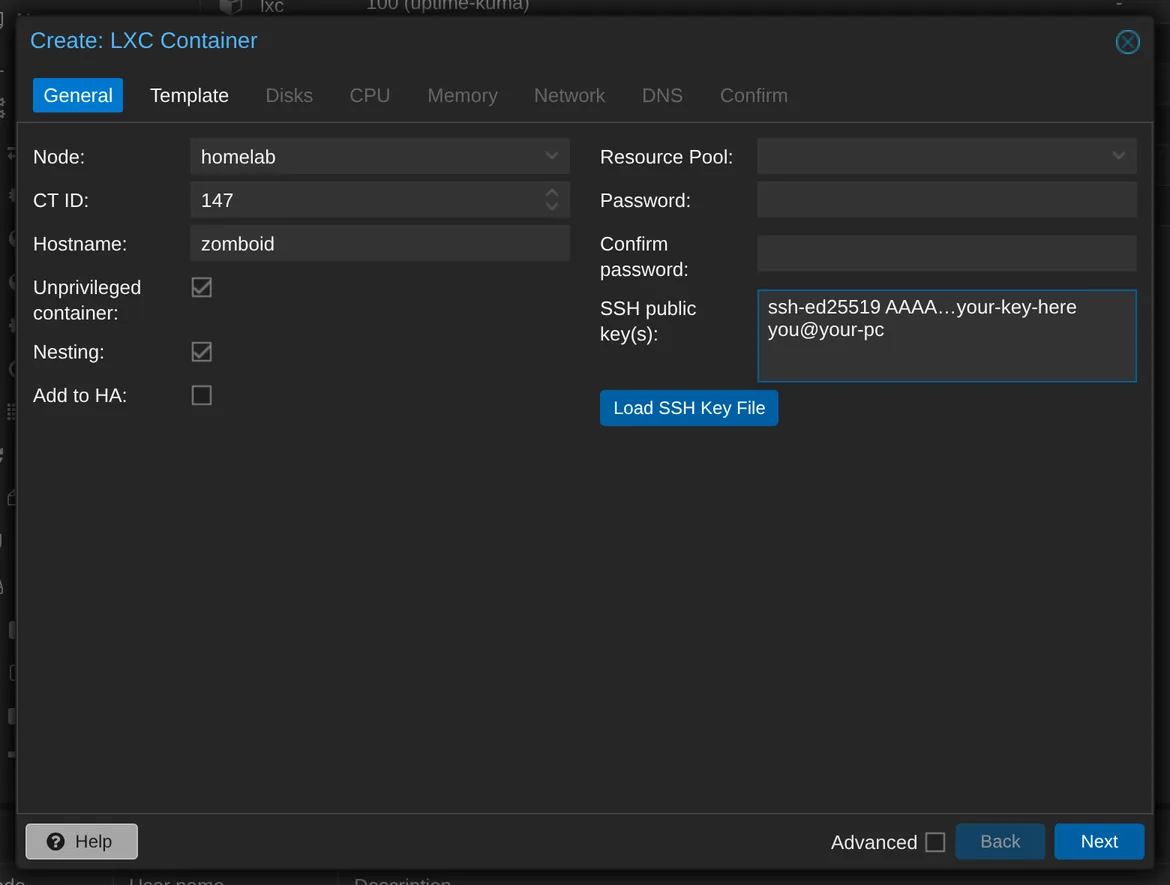
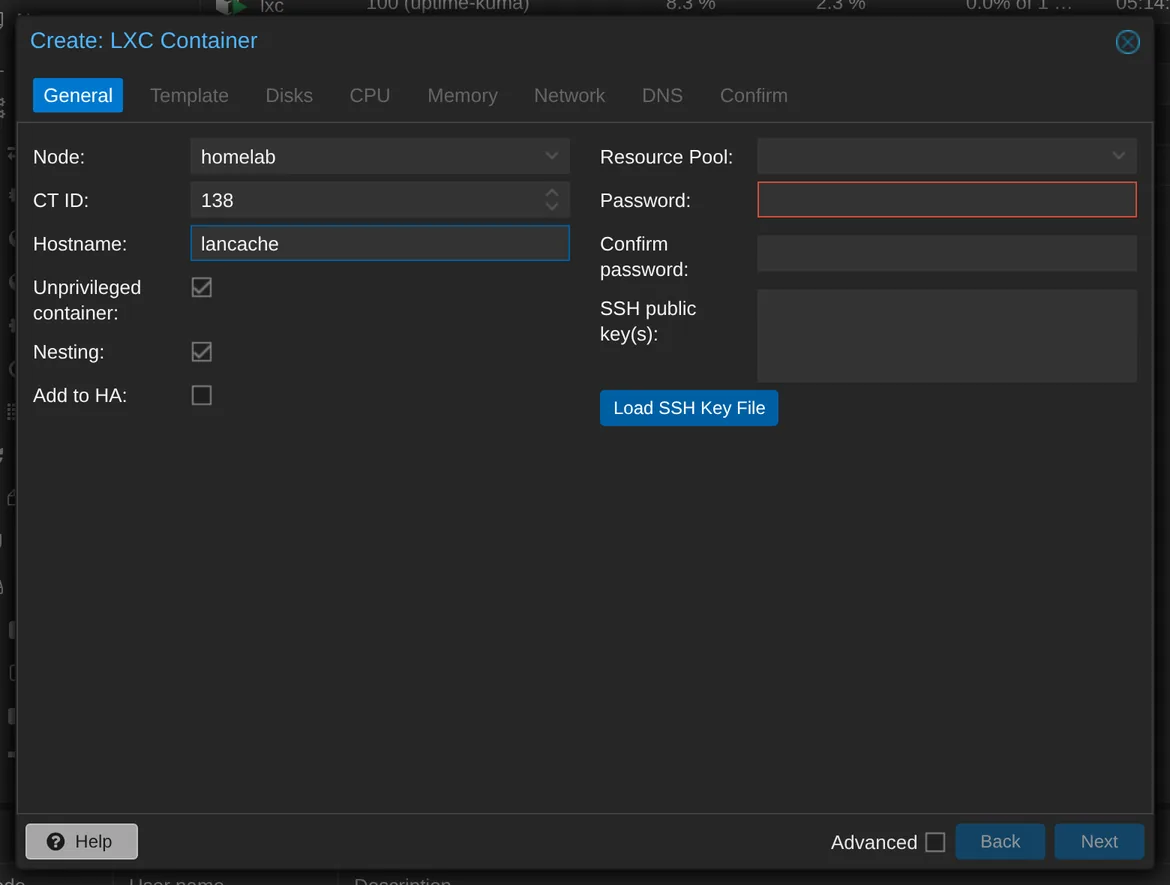
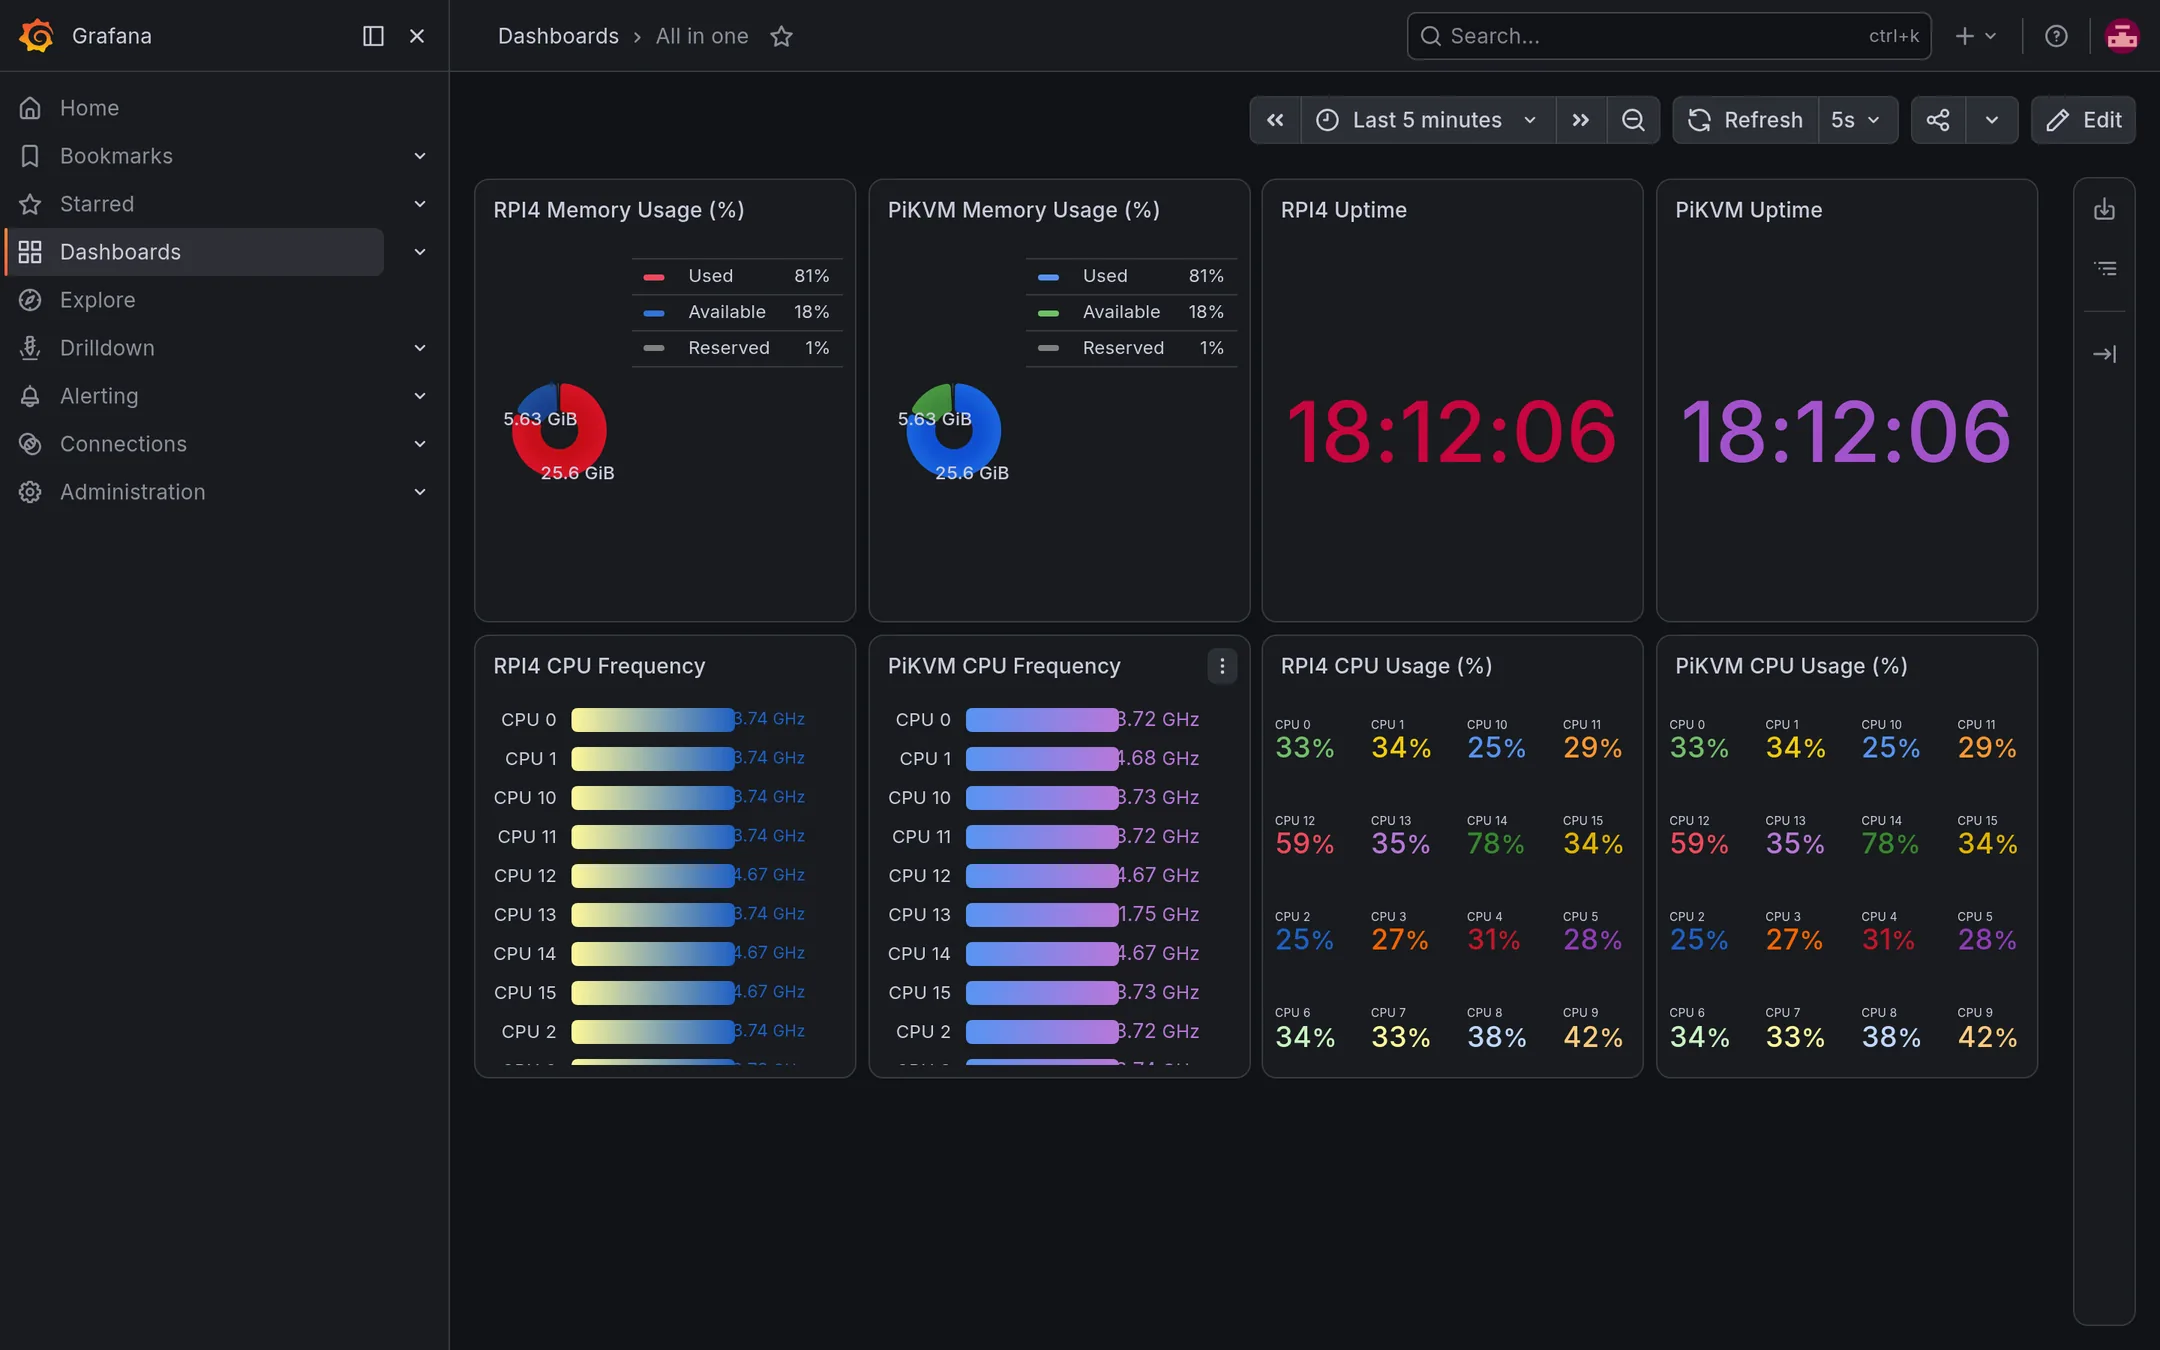
Turn a mini-PC or spare desktop — 4 cores / 8 threads, 16 GB RAM, 500 GB SSD into a private server that blocks ads for the whole house, streams your media, guards your passwords, and more — one numbered step at a time. No prior experience needed.
Version 1.6.14 · co-written with Claude (Anthropic) · example network 192.168.1.x · server “homelab” at 192.168.1.220
This site counts visits with GoatCounter: no cookies, no personal data.
Three ways in
Build from zero
You have the machine and a free afternoon. This is the spine — walk it in order.
A homelab is a computer in your house that works for you all day and all night. This manual turns a spare PC into one. You go step by step, and every command is explained.
In this chapter
1.1
What a homelab is
A homelab is a small computer in your home. It has no screen. It sits on a shelf and runs all day and all night. It blocks ads on every phone and laptop in the house. It plays your movies on the TV. It keeps your passwords, photos, and documents on hardware that you own. None of it is in the cloud of another company. It can run a Minecraft server for your friends. This computer is a homelab. Building one is a hobby, and it can save you money. It is also one of the best ways to learn how computers really work.
You do not need to be a programmer. You do not need to be "good with computers." You need to read with care. You need to type what you read. And you need to enjoy it when a thing works because you built it. This manual explains everything else when you need it. This includes what an IP address is, what a container is, and why you sometimes type commands and do not click.
Notice — easier paths exist
You can get apps running in fifteen minutes with almost no learning. This manual is not the only way. CasaOS gives you a one-click app store. Umbrel makes self-hosting feel like a phone. YunoHost has helped beginners install apps for more than ten years. They are good tools. They make the decisions for you. This manual takes the other road. It uses Proxmox as the base. Each app gets its own container. A container is a small, closed box that holds one app and nothing else. Every command is explained. The first day is slower. In return, you understand how your server works. You can fix it and extend it. And you never depend on the app store of one project. Does this trade sound right to you? Then keep reading.
1.2
How the manual is organized
The manual is a numbered path. Parts A to C are the base. Read them in order. After that, you choose what you want.
Part A (you are here) — what you need, how to read this manual, and a ten-minute tour of the network ideas that everything else uses.
Part B — erase the spare PC and install Proxmox. Erase means that all data on the PC is deleted. Copy off anything you want to keep before you start. Proxmox is free software that lets one computer run many small servers safely. Part B also teaches the few steps that you repeat for every app.
Part C — the six services that every homelab needs first: monitoring, ad blocking, friendly addresses, a dashboard, phone alerts, and safe remote access. The last chapter turns on weekly backups. In that chapter you restore a backup one time, to prove that the backups work. You do this before you install any apps.
Parts D, E, and F — the catalog: passwords, documents, recipes, RSS, media streaming, photo backup, and game servers. Pick only what you want. Each chapter works alone.
Part G — for later, when 500 GB is not enough. You add drives and do backups the right way.
Part H — what to do when something breaks (something will, and it is fine), and the small monthly tasks that keep everything healthy.
Notice — the cost
All software in this manual is free and open source. You need only a PC that you already have, a USB stick, and, if possible, an Ethernet cable. The only cost that repeats is a few watts of electricity. A mini-PC uses less power than a light bulb when it is idle.
Part A · Read me first
2What you need
You need one spare computer, one USB stick, your everyday PC, and access to your router. This is the full shopping list.
In this chapter
2.1
The server machine
Almost any PC from the last ten years can be a homelab. Office mini-PCs are good. These are the small black boxes that companies sell off in large numbers. An old gaming tower or a retired desktop from the closet is also good. All numbers in this manual fit the example machine below.
The example machine — "homelab"
Part
Example — and what matters
CPU
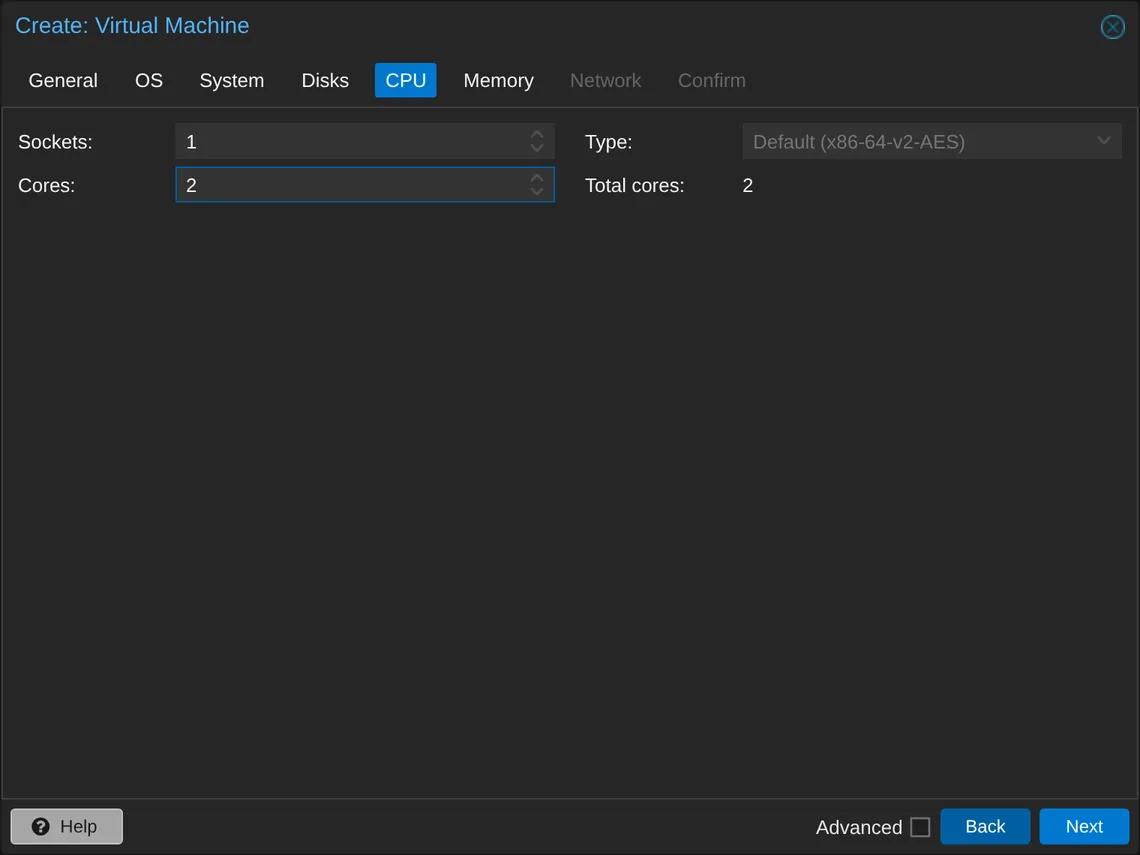
4 cores and 8 threads. Most processors work. The CPU must be a 64-bit Intel or AMD chip. Virtual machines also need the virtualization feature of the CPU (called VT-x on Intel and AMD-V on AMD). You turn it on in the BIOS. You do this in Ch. 6 · Install Proxmox. Containers do not need it. More cores let you run more apps at the same time. Even 2 cores can run the essential services.
RAM
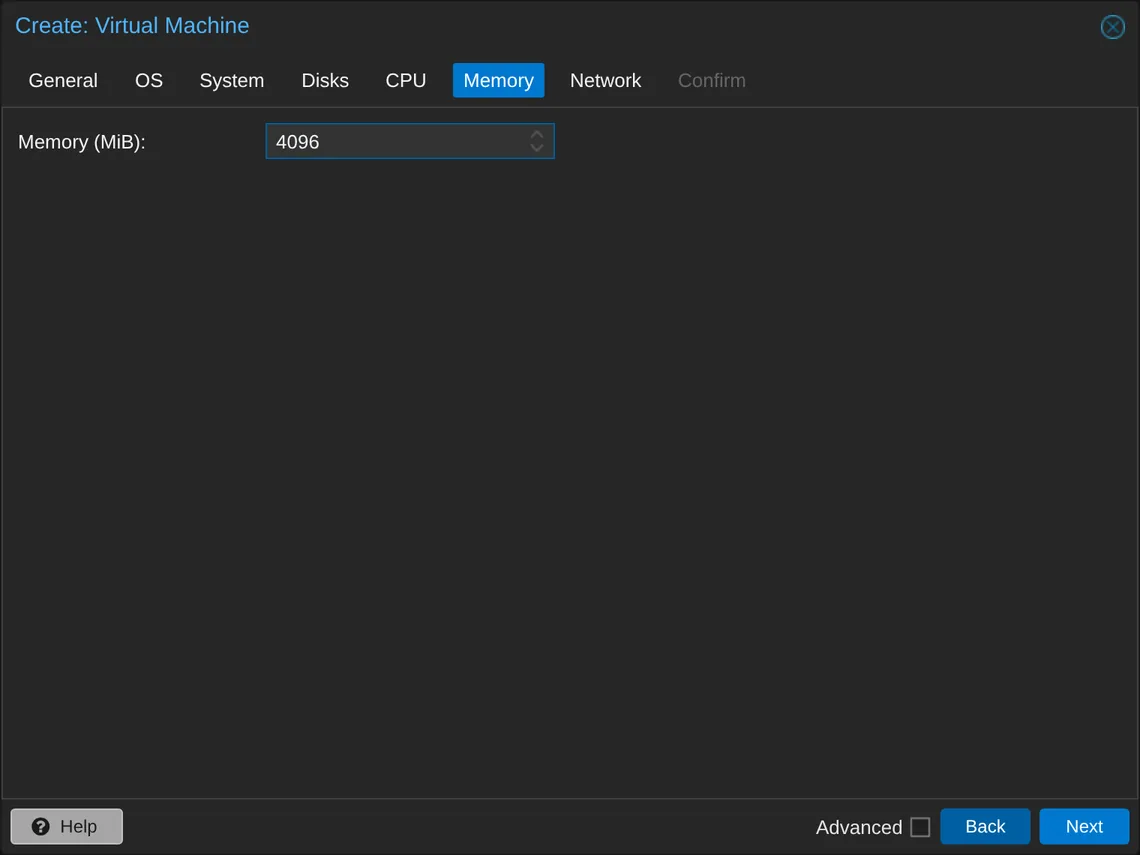
16 GB. This is a comfortable amount for everything in this manual. 8 GB works if you run fewer apps at the same time. With less than 8 GB, use only Parts B and C.
Storage
One 500 GB SSD. This is enough for the system and for every app. Media libraries and photo archives need more later. That is Ch. 65 · Add an external drive, for later.
Network
An Ethernet port, connected to your router with a cable. You must use a cable. The setup program in Ch. 6 · Install Proxmox has no field for a Wi-Fi password. To use Wi-Fi after the install, you must edit text configuration files by hand. This manual does not show that. The machine has no Ethernet port, or the router is too far for a cable? A powerline adapter works. It plugs into any wall outlet. A USB-to-Ethernet adapter, about $15, also works.
Screen and keyboard
You need them for about twenty minutes, one time, during the install. After that, the machine runs without a screen. You control it from your PC.
Do not worry about the specs too much. Your machine can become slow in the middle of a build. For example, apps are slow or the memory is full. In that case, build only Parts B and C and stop. Or move everything to a larger machine later. You do not lose what you learn. Each chapter works the same on any machine.
Notice — it runs all day and all night, and that is fine
A homelab stays on all the time. This is how your house reaches it at any hour. A mini-PC uses about 5–15 watts when idle. This costs a few dollars each month. An old desktop uses more, about as much as a lamp that stays on. Most mini-PCs are silent. An old tower has fans that you can hear. Put it where the noise does not disturb you. Put it on a shelf with air around it. Do not put it on a carpet. A machine that breathes dust from a carpet gets hot.
Warning — this PC will be completely erased
Part B erases the whole disk of the server machine. Every file, every photo, and the whole Windows or macOS system are deleted. You cannot get them back. Copy off everything that you want to keep before you continue. Do it now, not later. From here on, this manual treats the machine as disposable.
2.2
Everything else
A USB stick of 4 GB or more. 8 GB is safer. The installer image is 1.7 GB. A stick that says "2 GB" usually has less space after formatting, so the image does not fit. The install also erases the stick. Do not use the stick that has your tax documents.
Your everyday computer. It can run Windows, macOS, or Linux. You control the server in two ways. One way is the browser, for the graphical dashboard. The other way is the terminal. The terminal is a text window where you type commands and do not click. Ch. 9 · SSH & the terminal explains it. This manual calls your everyday computer "your PC".
Access to the admin page of your router. A sticker on the router usually shows the address and the password. You use it two times. The first time, you look up some network settings. The second time, you make every device in the house use your new ad blocker. Ch. 16 · AdGuard Home explains the second step.
About one free afternoon for Parts B and C. After that, each app chapter takes 15–30 minutes.
Notice — no screen for the server?
The server machine has no screen? Use your TV with an HDMI cable for the twenty-minute install. After Part B, the server never needs a screen again.
This is the full list. No other item is added later. Ch. 5 · Safety rules & passwords asks you to check each item one more time, just before Part B. That is a check. It is not a new requirement.
Part A · Read me first
3How to read this manual
Five minutes here save hours later. This manual uses a few visual signs: boxes, badges, pictures, and placeholders. Every chapter uses them.
In this chapter
3.1
The most important rule: our numbers and your numbers
The networks in this manual use example numbers. Our example house network is 192.168.1.x. The router is at 192.168.1.1. The server is at 192.168.1.220. Each app container gets its own fixed address between .200 and .254. The spec plate of each chapter shows the exact address. Your house network probably uses similar numbers. But it does not always use the same numbers.
Find the numbers of your network one time. Write them inside the front cover. Change the numbers as you read.
On your PC, open a terminal. On Windows, press Win, type cmd, and press Enter. On a Mac, press Cmd-Space, type terminal, and press Enter. On Linux, you know where it is.
Type the command for your system from the box on the right. Press Enter.
Find the line with the word gateway. The gateway is your router. The next chapter explains it. For now, only the number matters. Windows calls it "Default Gateway". It looks like 192.168.1.1 or 10.0.0.1.
The first three numbers are your network. Suppose yours is 10.0.0. Then, each time this manual shows 192.168.1.220, you type 10.0.0.220. This is the whole rule. It works the same for any other prefix.
Your system also shows the gateway on a network settings page. You can find it with the mouse. But that page moves in each new version of Windows and macOS. The command does not move. It is the same on every machine. So this manual uses the command.
⌨ Windows — type this
Before you run anything on this page: every 192.168.1.x address below is this manual's example network. If your own network uses different numbers, substitute yours as you type — the rule is in Ch. 3 · How to read this manual. A command that runs with the wrong address usually succeeds and leaves you unreachable.
default via 192.168.1.1 dev eth0 proto dhcp metric 100
The real output is usually longer than these examples. It can show several adapters and more than one Default Gateway line. Use the line of the adapter that you really use. This adapter also shows an IPv4 address in the same block. An adapter that is off shows an empty gateway or none. Virtual adapters from VPNs and virtual machines do the same. Ignore them.
Two adapters can both look active. For example, a laptop has a cable and Wi-Fi. This usually does not matter. On a home network, both adapters are behind the same router. So both show the same Default Gateway. That shared number is the one you want. If the two gateways are really different, choose the adapter that carries your normal internet traffic. This is the cable, when a cable is connected. A wrong guess here gives every container in this manual the wrong gateway.
Notice — other placeholders you will meet
Region/City is your timezone, for example America/New_York or Europe/Berlin. You set it later, inside the server or a container. It is not set on your own PC. To see every valid name, run timedatectl list-timezones there. Or look at the date and time settings of your system now. A wrong zone makes clocks and schedules look odd. Nothing breaks.
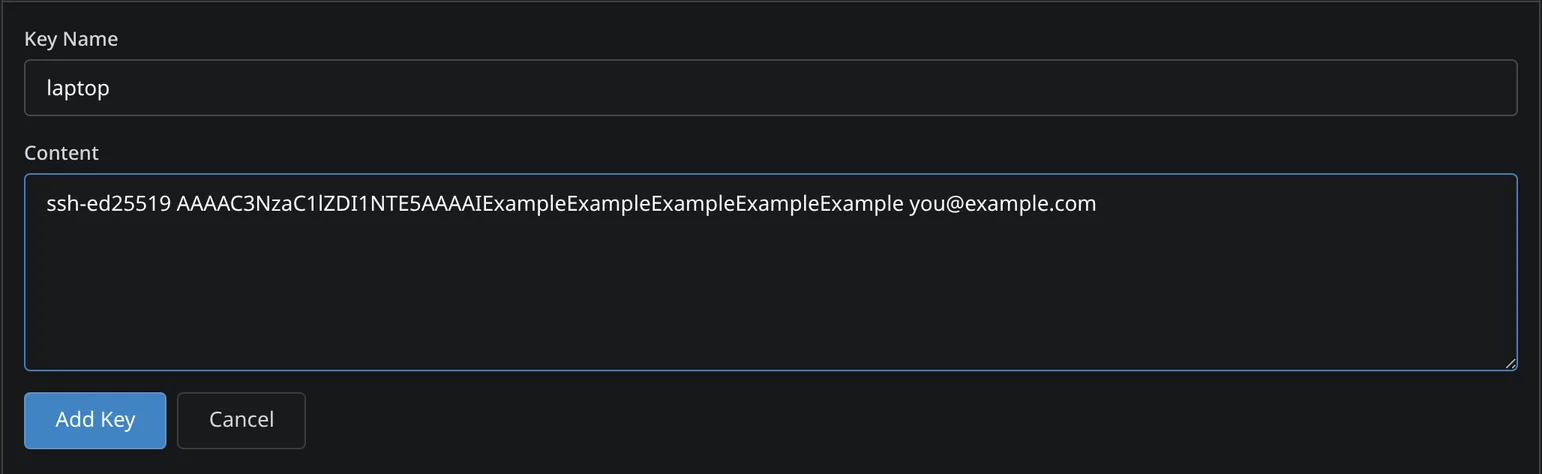
ssh-ed25519 AAAA…your-key-here you@your-pc is your own SSH key. You make it in Ch. 9 · SSH & the terminal.
YOUR-PUBLIC-IP is the internet address of your home. To see it, search "what is my ip" in any browser.
youruser is your own user name.
You never type a placeholder as it is written.
3.2
The visual signs
You already met most of them. The black boxes are command listings. The badge on the bar of a box shows where you type the command. This is important.
HOST badge — type the command on the server itself. This is the Proxmox machine, homelab.
CT badge — type the command inside a container. The chapter always shows first how you get inside. Usually you use pct enter on the host.
YOUR PC badge — type the command on your everyday computer.
The Copy button copies the whole listing. A comment starts with #. It is a note for you. Copying it with the command does no harm. The computer ignores it.
📋 NOTES cards are references. You paste them into the Notes field of Proxmox for later. They are not commands.
A box with a blue header and the word NOTICE holds important information. A box with stripes and the word WARNING means that data loss, an outage, or a security risk is possible. Read it two times.
Each chapter starts with a spec plate. It shows the number of the container, its address, the disk and memory sizes, a time estimate, and a link to the official docs of the app.
Numbered headers, such as the "2" next to this one, give each paragraph an address. Suppose another chapter says "see 15.3". Then you go to chapter 15, section 3. Words with a dotted underline are glossary terms. Click them. The next section explains the parts that you meet inside a task: the click paths, the pictures, and the fold-out boxes.
Notice — dark mode, search, and your progress
The ◐ button in the top bar switches between a paper theme and a night theme. The manual also follows the setting of your system.
The ☰ button hides the contents sidebar.
The search box at the top of every page takes you to a chapter by its name.
The Ctrl+F of your browser (Cmd+F on a Mac) searches only the chapter on the screen. To search the whole manual, first click ⛶ All. This opens every chapter on one page. Then use Ctrl+F. Click the button again (it now says ⛶ One) to go back to one chapter at a time.
Each chapter has a ☐ Mark done button. It remembers your progress between visits. It shows a running count at the top of the Contents page.
The manual remembers your choice of theme, sidebar, search mode, and mark-done state.
3.3
How each task is taught: buttons first
Almost everything in this manual happens in a web page. These are the Proxmox dashboard at https://192.168.1.220:8006 and the screen of each app. So each task is taught first with the mouse. The keyboard way comes second. A task always has the same shape:
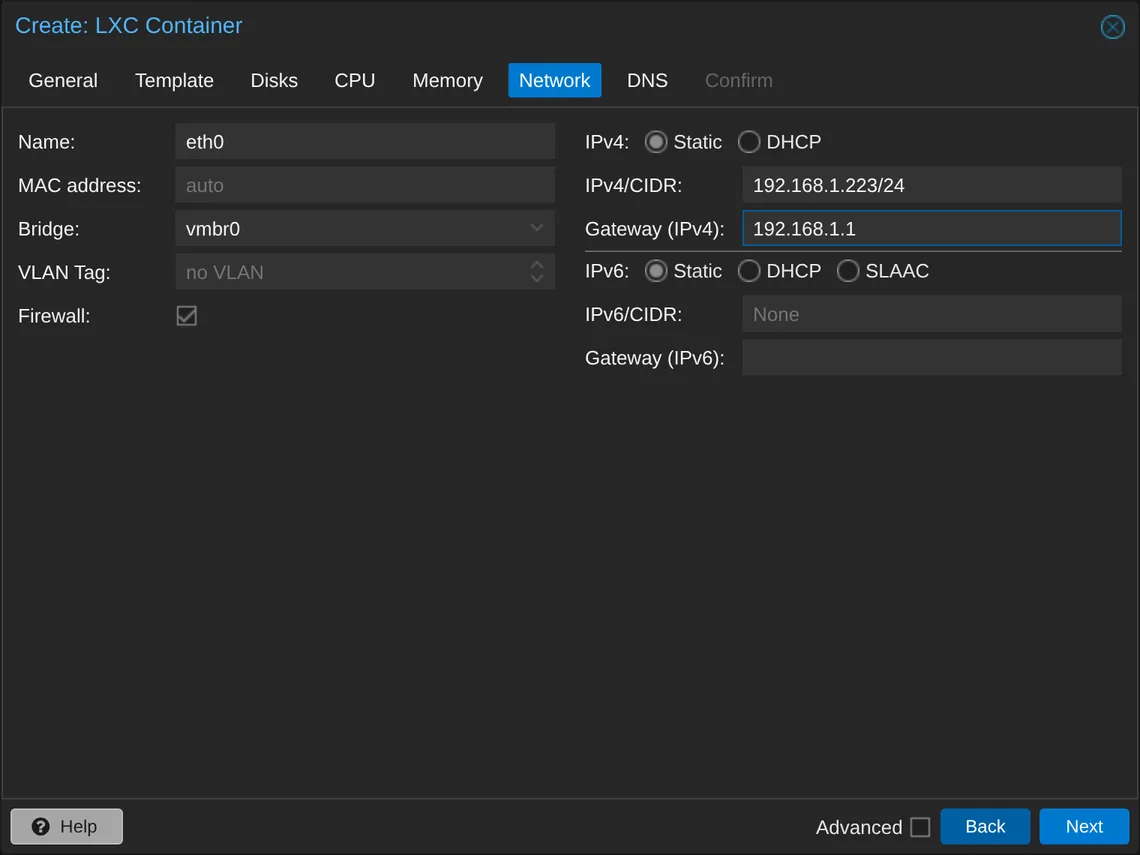
The click path. Each step shows the exact route in one grey pill, for example homelab → Create CT or CT 102 → Options → Features → Edit. An arrow means "then click".
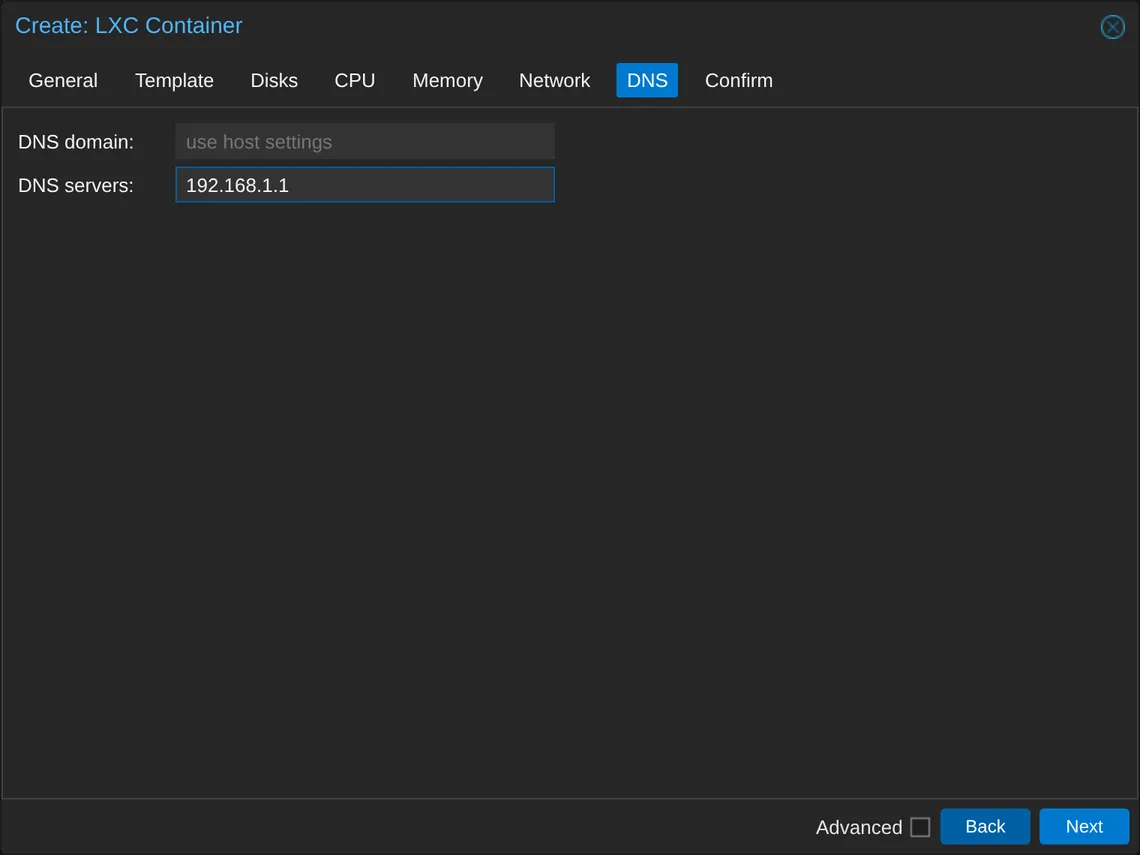
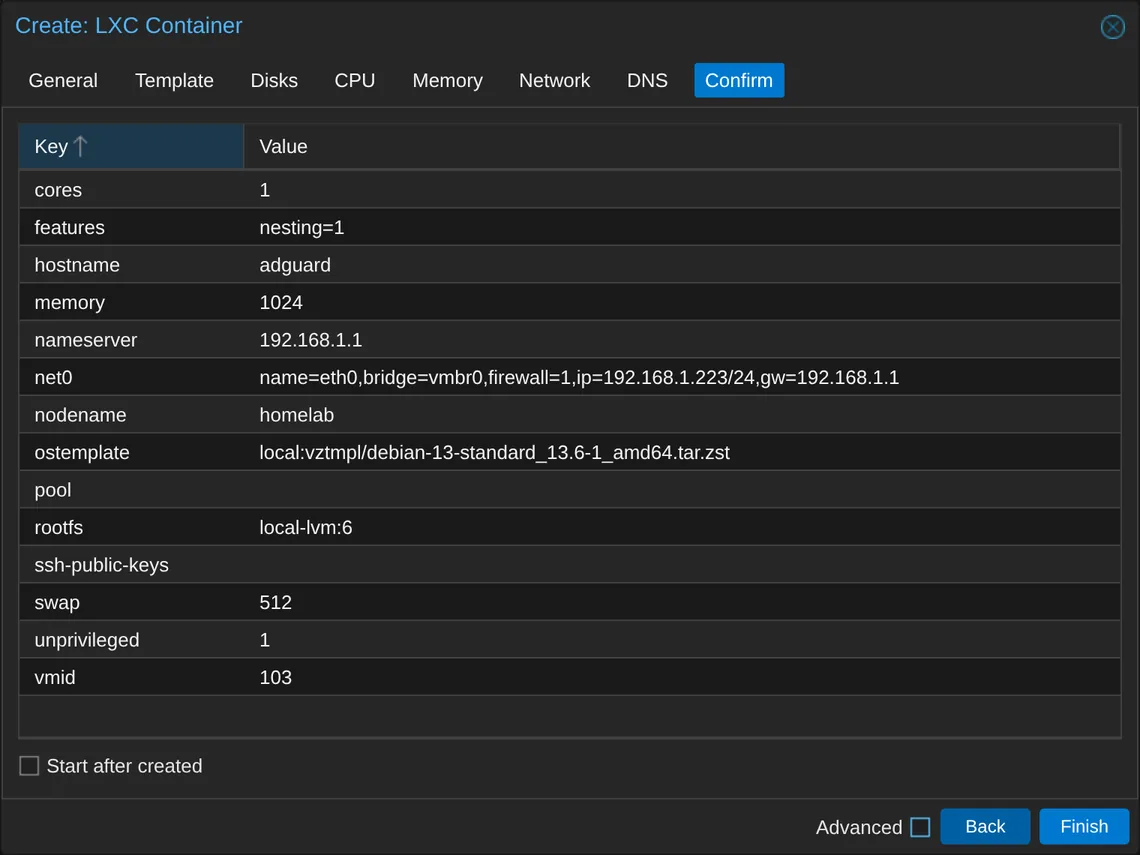
One picture for each step. Below the step, you see the screen that you look at. Compare it with your screen before you click.
The keyboard way, folded away. A grey bar named "Prefer the terminal?" is below the clicks. Click it to open the same task as one or two commands. If you ignore it, you lose nothing. Both ways give the same result.
The exception. Some work has no buttons. The manual says this in one line and shows the commands.
A few tasks are buttons and one command. One example is a setting that Docker needs. It is a permission switch called keyctl. The Create CT wizard has no box for it. One command sets it, together with the timezone and start at boot. Another example is a folder that is shared from the server into a container. The data of the app then stays outside the container. For these tasks, the manual shows the clicks. Then it shows one black command bar. Then it gives one sentence that says why no button is used for that step. Type that one command. It is not optional.
Picture reference — the three frames
Frame
What it shows
Full panel
A complete dialog or page, as wide as the text. Use it to check that you are on the correct screen.
Step picture
A smaller picture between two steps. It shows the screen at that step only.
Crop
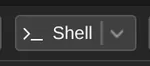
One button, one field, or one row, cut close. Use it to find a small control that is easy to miss.
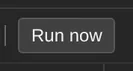
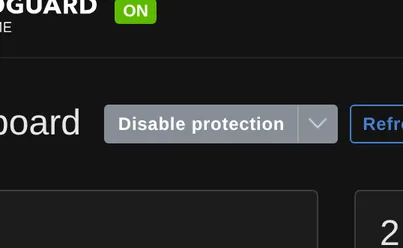
A real Crop. It shows one button, cut close. This is what the row above describes.
Notice — your screen and our screen
Each picture comes from a real Proxmox server and a real app. They are set up exactly like the example in this manual. So the pictures show the example names and numbers: the node homelab and addresses in 192.168.1.x. Your screen shows your own. Apps also change their look between versions. A button can move or change its color. The words of a step are the instruction. The picture only confirms it.
Some work happens inside a container. For example, you install packages, run the app, or edit a configuration file. Proxmox has no buttons for this work. These parts start with one plain line. It is always the same line:
Notice — what "no buttons" looks like
"This part has no buttons. You type commands inside CT 102. You are already there from pct enter 102 above. (Did you close that shell? Open homelab → >_ Shell and run pct enter 102 again.)" Opening the host Shell is the one mouse step. You type everything after it. The manual never invents a button that does not exist. One point about names: the same terminal window has two names. A container or a VM opens it as >_ Console. The host node itself (homelab) opens it as >_ Shell. It is the same terminal. Only the label changes. This manual always uses the label that Proxmox shows on that screen.
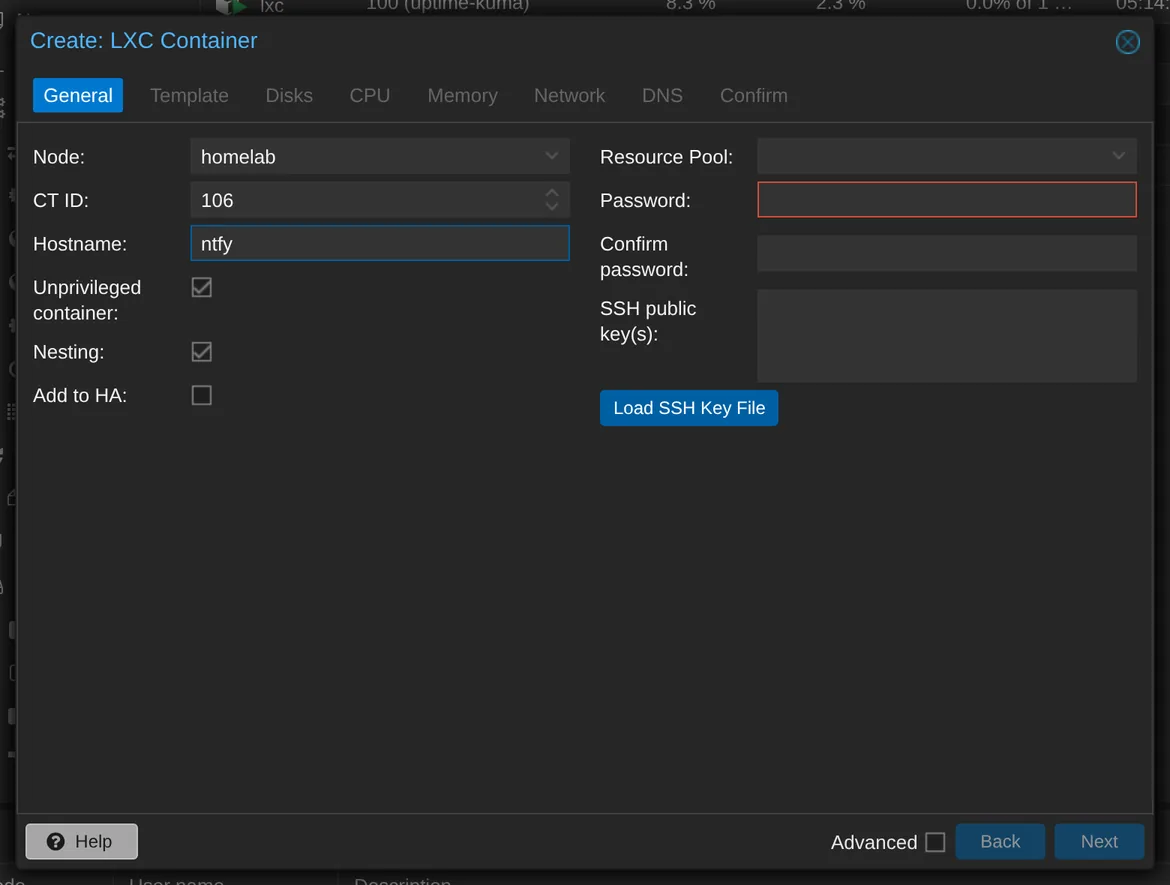
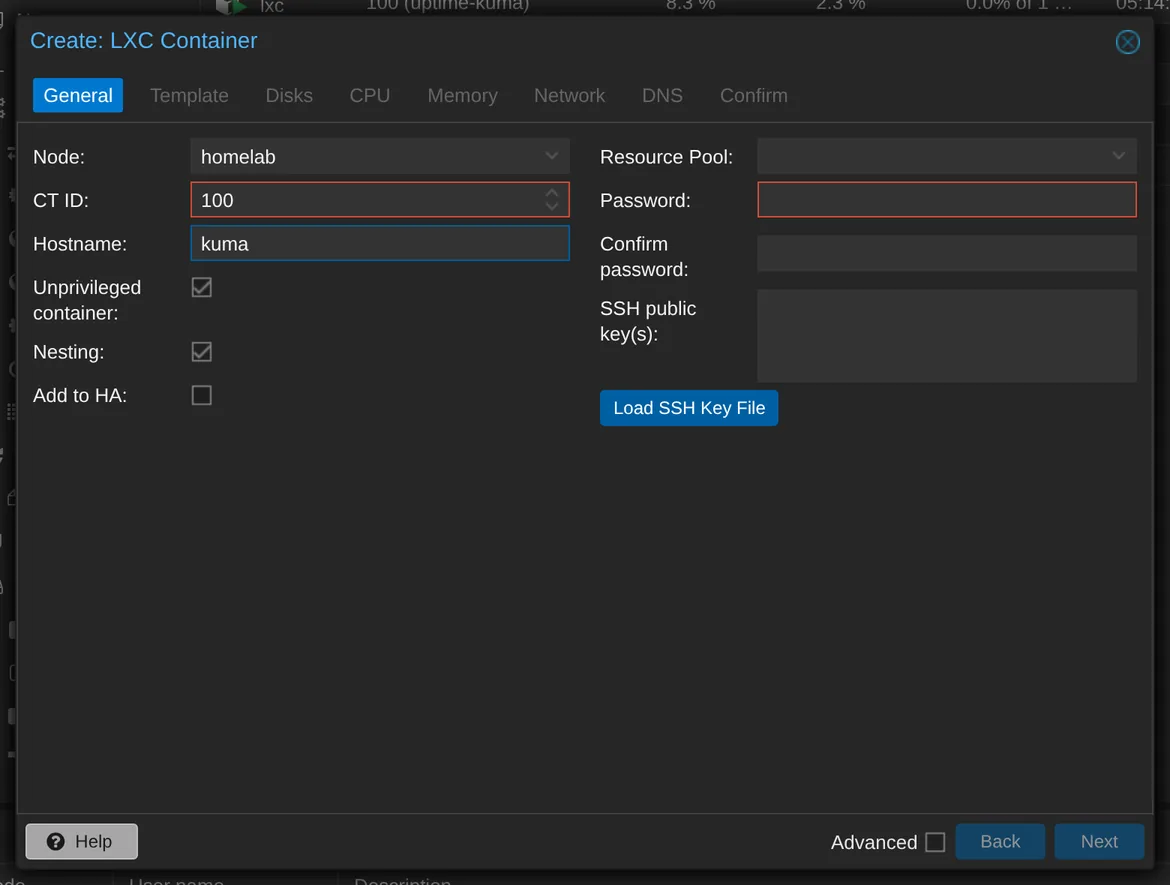
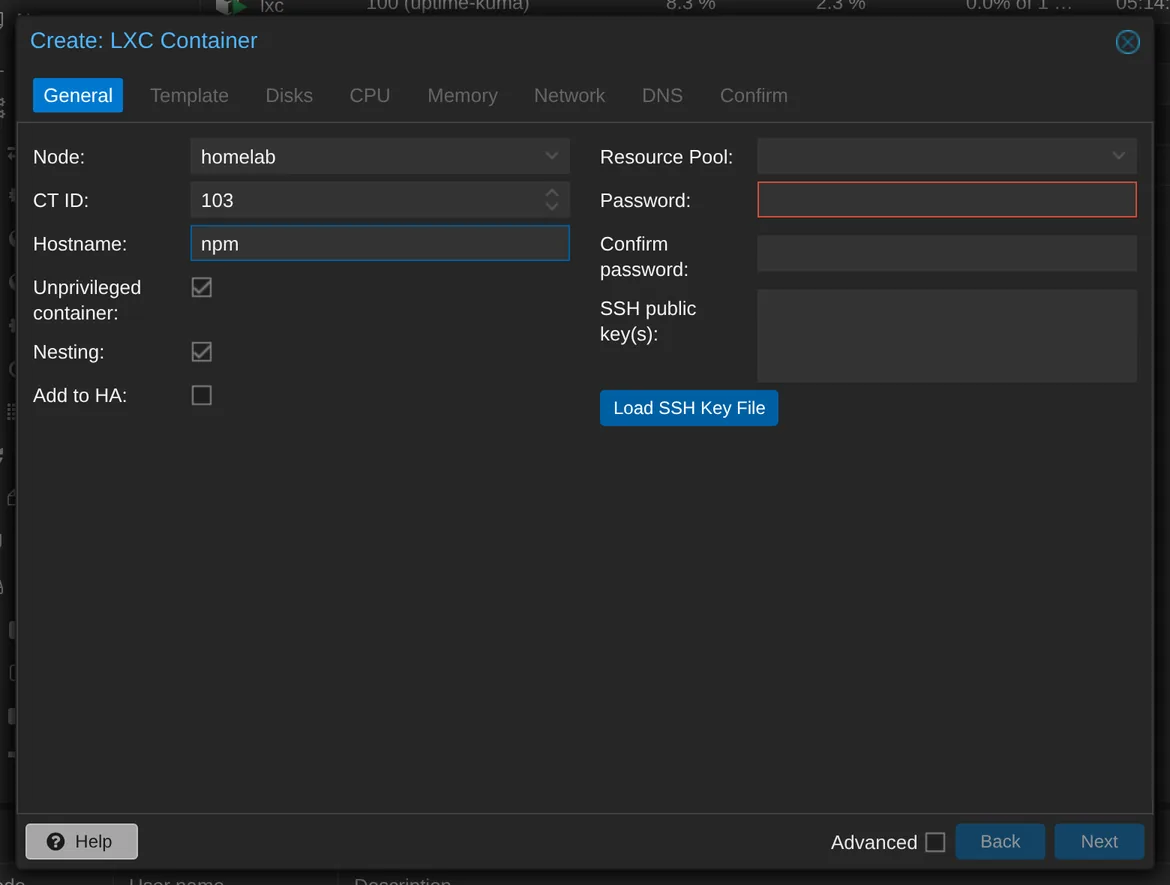
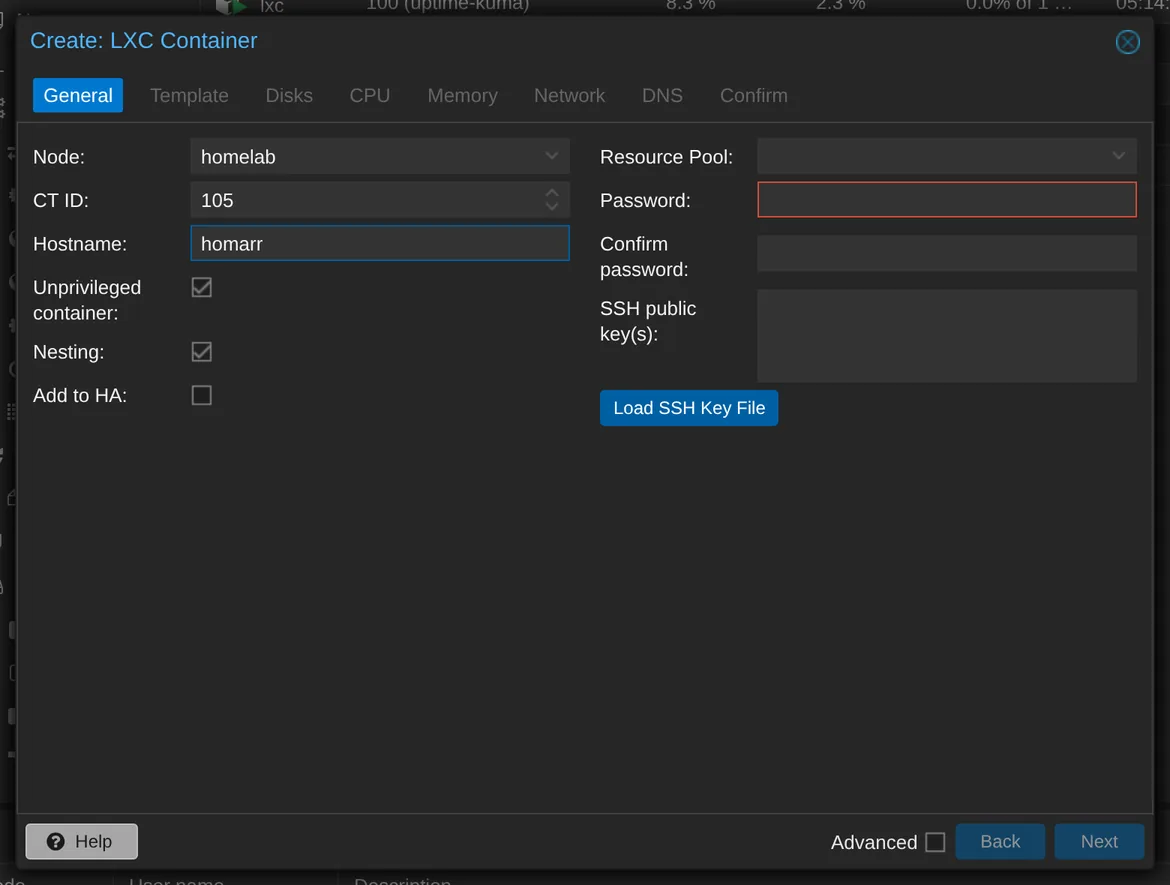
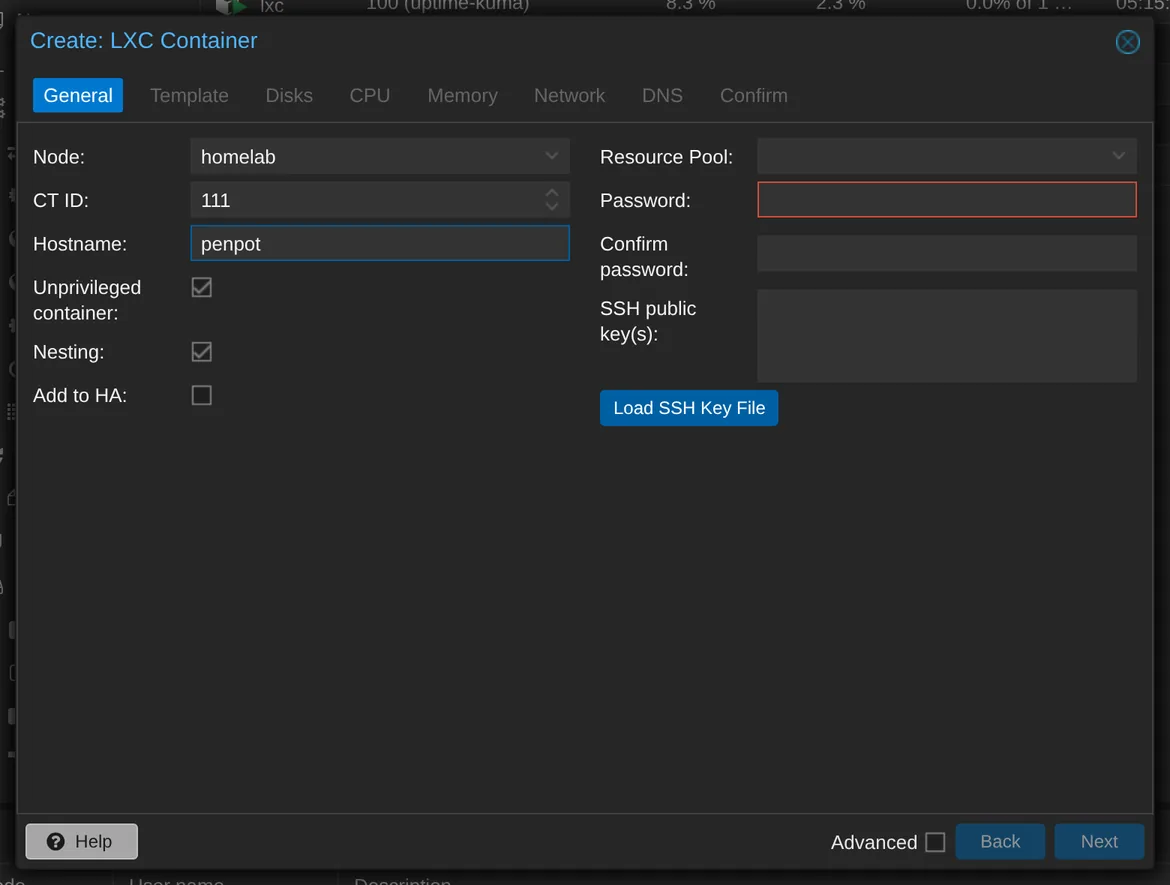
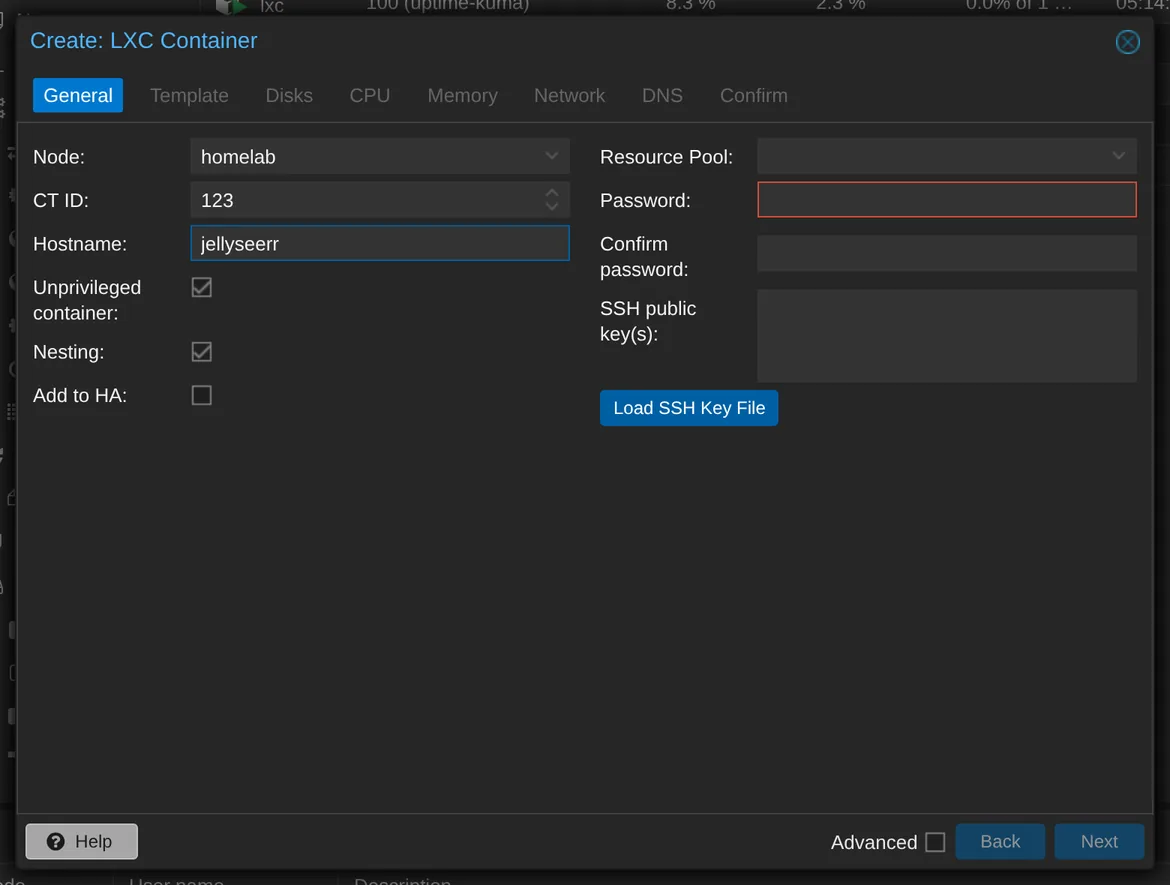
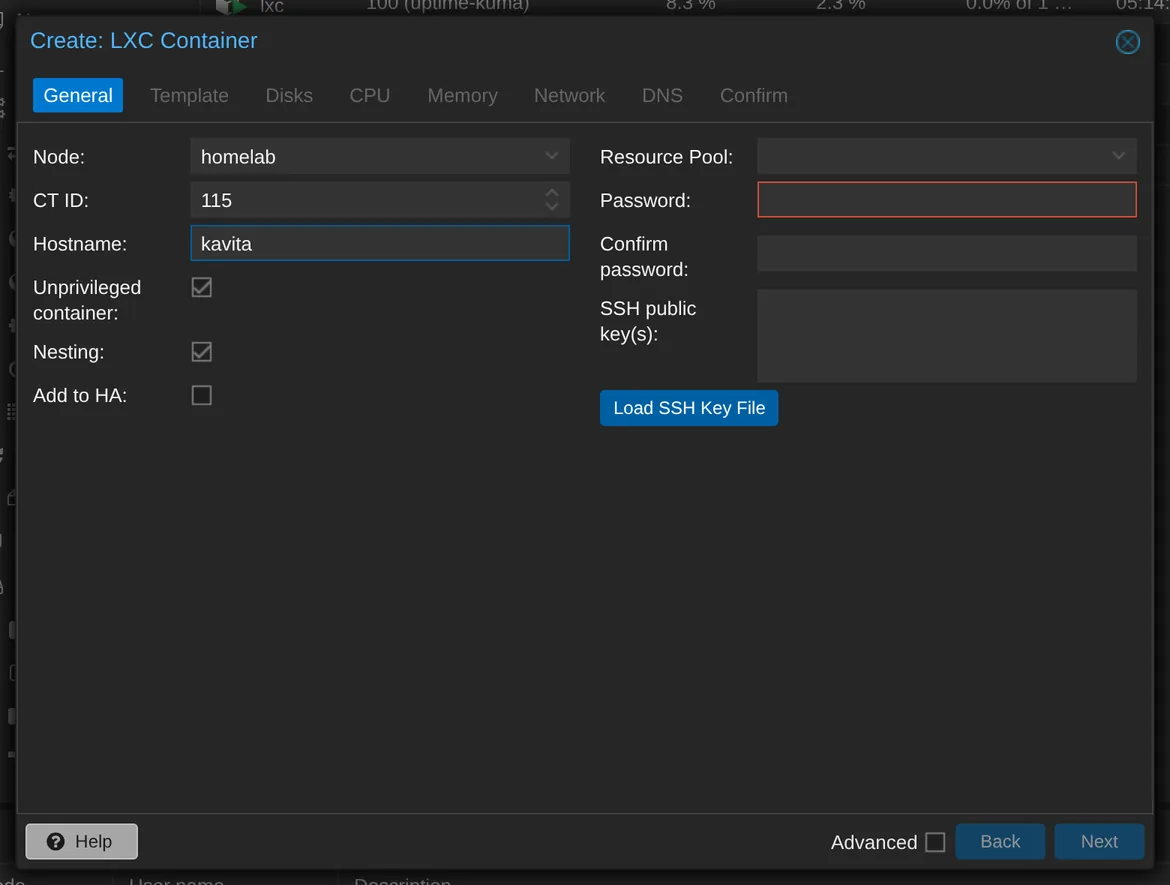
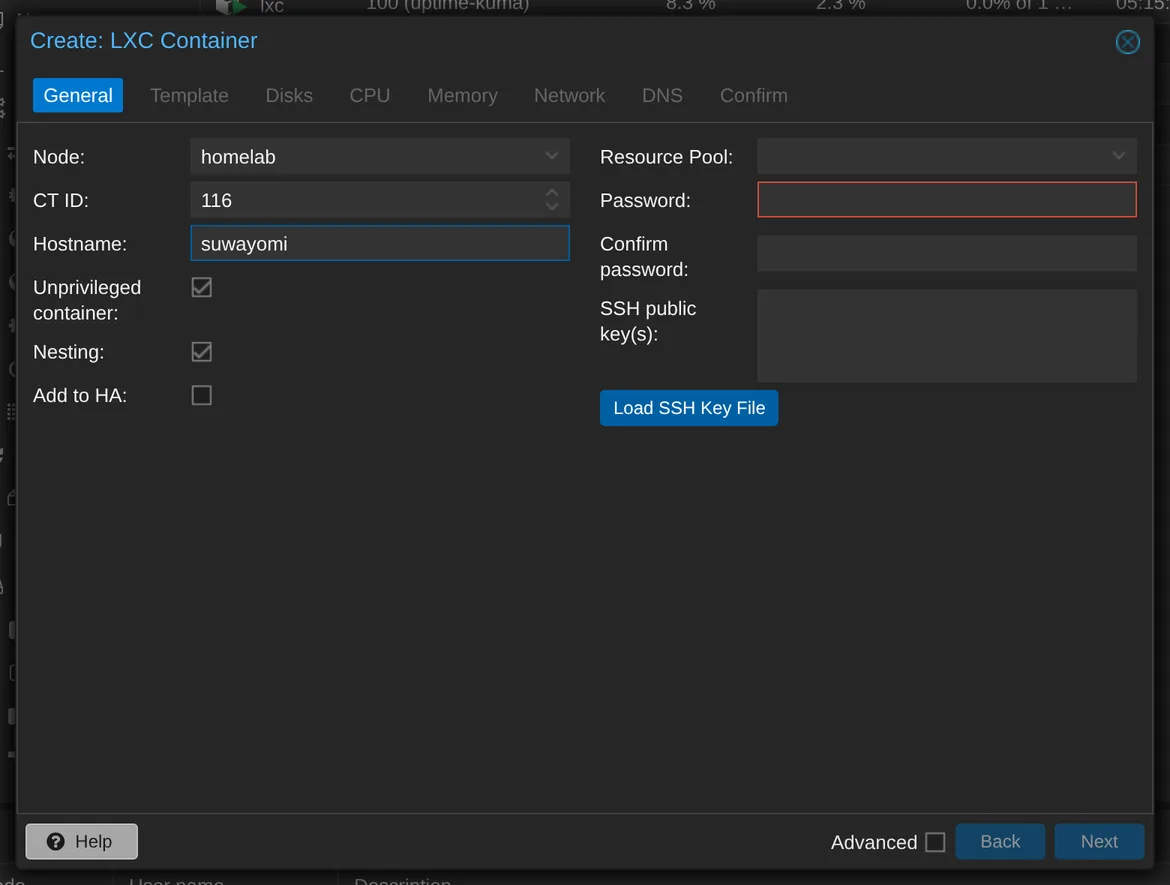
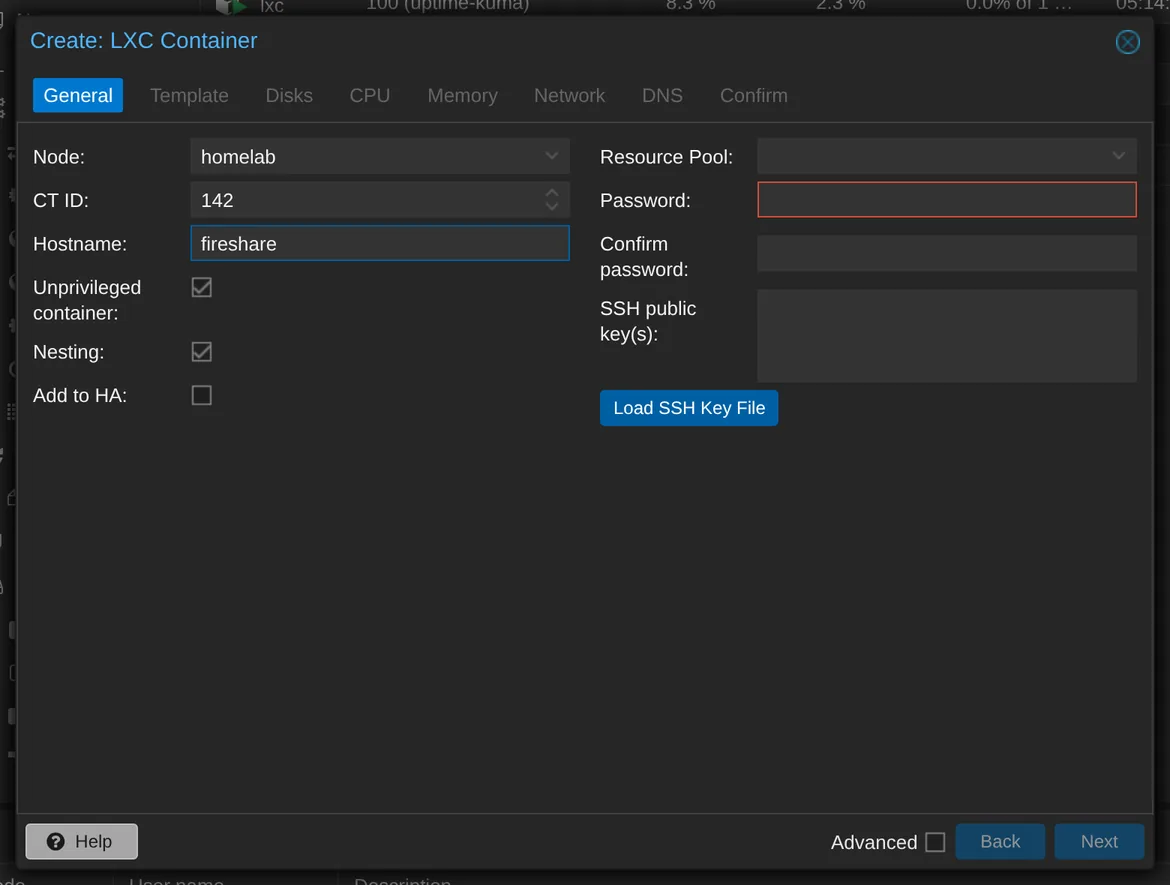
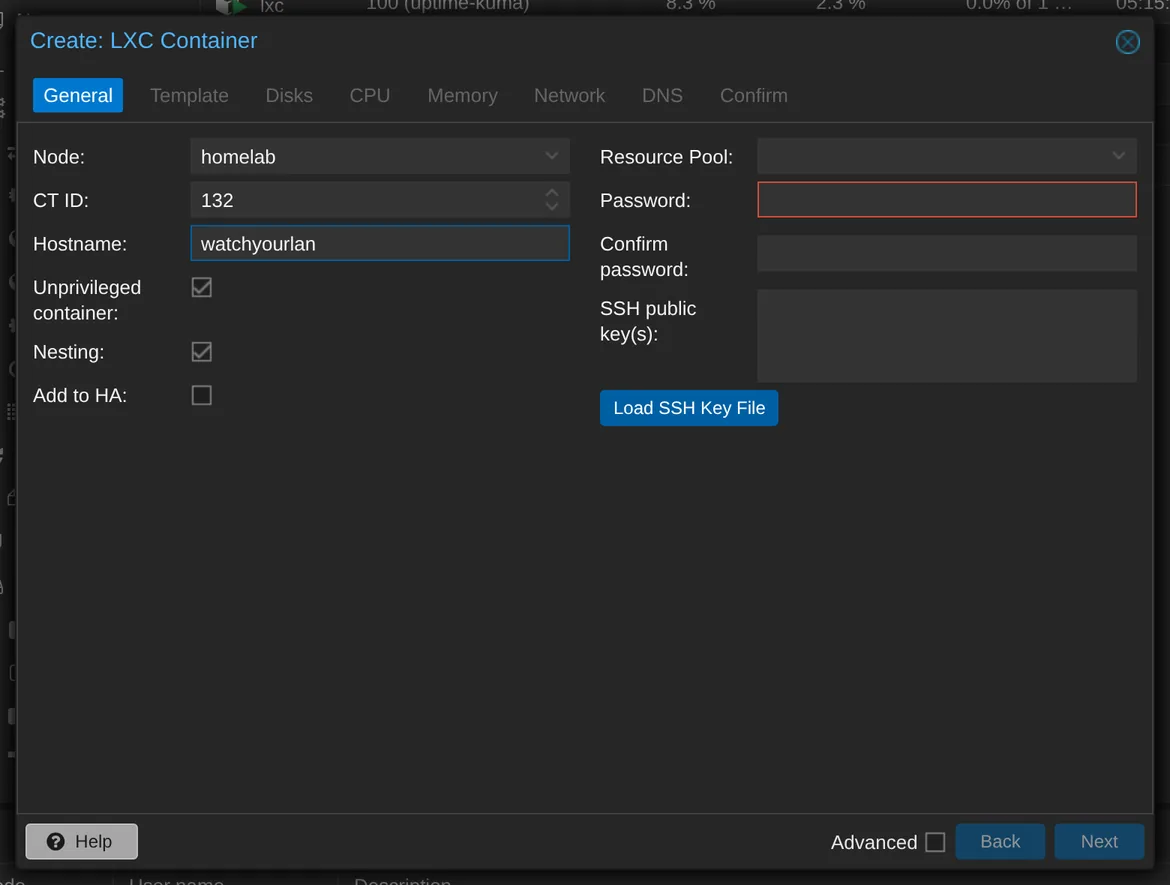
The Create CT wizard is shown one time, tab by tab, in Ch. 10 · The container wizard. Later chapters show only the screens that differ. They list only the values that you must change, and they point back to Ch. 10 · The container wizard to explain what each setting means. This keeps the chapters short.
Prefer the terminal? — this is what a fold-out looks like
Inside, you find the command for the task that you just did with the mouse. Often there is also a list that explains each part. This example starts container 102:
⌨ Type this on the server
pct start 102
pct
The Proxmox command for containers. Every container command starts with it.
start
The action. Other actions are stop, reboot, and enter.
102
The container number. It is the same number that you typed in the CT ID field of the wizard.
Read the list one time for each new command. After that, you know the parts.
3.4
Reading order
Parts A, B, and C: read them in order. Do not skip. Everything later needs them.
Parts D, E, and F: choose what you want. Each chapter works alone. Each chapter states its prerequisites in its first lines.
Part G: read it when your disk is full, or before you store anything that you cannot replace. Part H: read it when something does not work.
Each chapter in the sidebar is complete. Nothing here is a stub or a placeholder.
You are lost? The boxes named "Three ways in" on the Contents page give you a guided route. There is one route to build from zero, one to fix something broken, and one to look things up.
Part A · Read me first
4Networking in 10 minutes
In this chapter
Before you start
You do not need to build anything first. This chapter is reading, plus one look at your own router. You can do it from any computer on your home network. The server does not need to exist yet.
Have the admin page of your router ready. Its address is the gateway number that this chapter teaches you to read. The login is usually on a sticker under the router.
Ten minutes, seven ideas. Everything in this manual uses these ideas. None of them is hard.
4.1
Addresses: your router runs a small town
1 · IP addresses. Each device on your home network has a number such as 192.168.1.37. This is its address. Think of street addresses. The first three parts (192.168.1) are the street that your whole house shares. The last number is the door. Two devices cannot use the same door.
2 · DHCP. Your router gives out the numbers. Your phone joins the Wi-Fi and asks: "Does anyone have an address for me?" The router lends it one. The router only lends. Next week, the phone can get a different number. This is DHCP. It is perfect for phones and laptops.
3 · Static addresses. A server is different. Everything in the house must find it at the same door every day. So we give the server and each of its containers a fixed address. We choose the address. It is high in the range, from .200 up. The pool of the router rarely reaches this high. You do not do this now. In the install chapters, you set the address for each container. You use the IPv4 field, set to "Static". You see this field in Proxmox when you create a container.
First, check one thing about your router. Find its DHCP range. This is the block of addresses that the router gives out. You do not need to change anything now. Only note if your range reaches .200 or higher. The install chapter has you fix it at the time that it matters. Follow these steps:
Find the address of your router. It is often on a sticker on the router. It also shows as the "gateway" address in the network settings of your PC.
Type that address in a browser.
Log in. The sticker usually shows the default user name and password. The sticker is missing or the login does not work? Try admin and admin, or admin and password. Or search for the model number of your router online. Nothing works? Skip this check. Do it later, in the install chapter.
Look for a menu named DHCP, LAN, or Network Settings. The range is there. It is usually a start address and an end address.
Read the range. Many routers lend from .100–.254 or even from .2–.254. These ranges include .200 and up.
Your range includes .200 and up? Then you have two choices in the install chapter. One choice is to end the range of the router below .200. This is usually one number field and a Save or Apply button. The menu is different for each brand. The other choice is to pick a block for this manual outside the range.
Do you change the range? Then check that the change worked. Follow these steps:
Do not use your PC or phone to check. They keep their old address until the lease ends. They stay online whether you typed the range correctly or not.
Connect one device again. Turn its Wi-Fi off and on.
Look at the address that the device gets. It must be inside the new range.
The address is not in the new range? Then the range was not saved. Open the router page. Type the range again. Press Save or Apply. Test again in the same way.
The old address still shows after a second try? Some routers apply a new range only after a restart. Restart the router. Test again.
4 · Ports. One address can host many services. Ports are the apartment numbers behind one street door. The text 192.168.1.223:3000 means "address .223, apartment 3000". Web pages usually use port 80. Because of this, the browser does not make you type it. DNS uses port 53. SSH uses port 22. A listing such as -p 80:80 has two apartment numbers. The number before the colon is the number that you type on your PC. The number after the colon is the number that the app uses inside its own box. They are often the same. But they can differ. The text -p 8080:80 is also normal. You see this -p format again when you install apps. For now, a port is only an apartment number.
4.2
Names, doors, and remote hands
5 · DNS. Nobody remembers numbers. So the internet has a phonebook. DNS changes wikipedia.org into an address. Your homelab can be the phonebook of your house. This is how ad blocking works. Ch. 16 · AdGuard Home answers the question "ads.example.com?" with "I do not know this name". This is also how vault.home can point to your own password vault (Ch. 17 · Nginx Proxy Manager).
6 · SSH. Your homelab server usually runs without a screen. No monitor is connected. SSH is a secure remote keyboard. On your PC, you type ssh root@192.168.1.220. This opens the command line of the server in your terminal window. It works as if you sit in front of the server. A key pair replaces passwords. One secret file is on your PC. One public file is on the server. You make your key pair in Ch. 9 · SSH & the terminal.
7 · Containers. The server runs each app in its own container. A container is a light box. It has its own address, its own files, and its own small Linux inside. The boxes cannot hit each other. An experiment can go wrong. Then you throw away one box and build it again in a few minutes. All other boxes keep running. This is why a homelab is safe to learn on. Ch. 8 · Containers vs virtual machines explains it in detail.
The whole map: the router (town hall) lends addresses to everyday devices; the server owns a fixed address in the quiet high range; every app is a container with its own address and port-doors; DNS is the phonebook; SSH reaches in from your PC, and Tailscale tunnels in from anywhere — without opening a single door to the internet.
4.3
What stays inside your house
You can reach everything that you build in this manual only from inside your home network. The exception is a chapter that says a service is reachable from the internet. Your services are not on the internet. Strangers cannot reach them. The numbers show why. Addresses that start with 192.168., 10., or 172.16 to 172.31 are private. Every home in the world uses the same blocks. The public internet has no route to them. This is why your services are invisible from outside by default. You must do something on purpose to expose one.
You want to reach your homelab from a coffee shop? Do NOT open holes in your router. Use Ch. 19 · Remote access: Tailscale. It builds an encrypted private tunnel between your devices. It does not add anything that strangers can see.
Warning — the one rule of exposure
Never forward a port on your router "to make something work". Do it only when the chapter that you follow tells you to, and explains the risk. Random scanners on the internet find each open door within hours. The safe default of this manual is: no open doors. Use a tunnel to go in.
Part A · Read me first
5Safety rules & passwords
Five habits make the difference between a homelab that you enjoy and a homelab that teaches you a hard lesson. Start them on day one. They take only a few minutes.
In this chapter
5.1
The five rules
Give each service its own password. You make a dozen admin accounts during setup. Do not use one password for all of them. You build a password manager in Ch. 22 · Vaultwarden. Until then, a paper notebook next to the server is fine. At home, the risk is that you forget a password. The risk is not a thief with a list of passwords.
Do not forward ports. Never. Unless a chapter tells you to. Port forwarding tells your router to let strangers on the internet reach a service on your server. Ch. 4 · Networking in 10 minutes explains it. It is also a rule here, because half of all homelab horror stories start with "I opened a port to test something."
Update each month, on purpose. Do not update automatically. Do not skip updates. Ch. 71 · Monthly maintenance is a ten-minute checklist. Put a repeating reminder in your calendar now. Automatic updates can break things at 3 a.m. If you never update, the system gets old and gets security holes.
Before you store anything that you cannot lose, set up backups the right way. You can build and learn for weeks without backups. You can build everything again with this manual. This changes when real photos, documents, or years of data are on the server. Then you cannot build them again. Ch. 64 · Backups done right (3-2-1) shows the right way. Do not skip it forever.
Understand a command before you run it. Almost every command in this manual has an explanation. It is in a fold-out box, or in the chapter that the command points to. Read it. You do not need to memorize it. You learn it so that, one day, a stranger on a forum (or an AI) gives you a command, and you can tell what it does before you paste it into your server. This skill is the real thing that this manual teaches.
5.2
Make it yours — change these before you go live
This manual uses example values. The example network is 192.168.1.x. The example server is called homelab. Many readers follow the same text. So many servers start out with the same names, the same ports, and the same default logins. Attackers know this. They scan the internet for those exact defaults. Change the items below, and your server is no longer one of a thousand copies.
The addresses on your home network are not the danger. An address like 192.168.1.220 only works inside your own house. A stranger cannot use it from outside. The dangers are default logins, example passwords, and ports that you open to the internet.
What to change
In the manual
Change it to
A login that an app ships with (for example admin / admin, or admin@example.com / password)
A new password of your own. Change it on the first login, before you do anything else. Store it in your password manager.
A password or token that you see as an example
One that you make yourself. The manual shows how, for example with openssl rand -base64 24. Never copy a value from a screenshot or from a forum post.
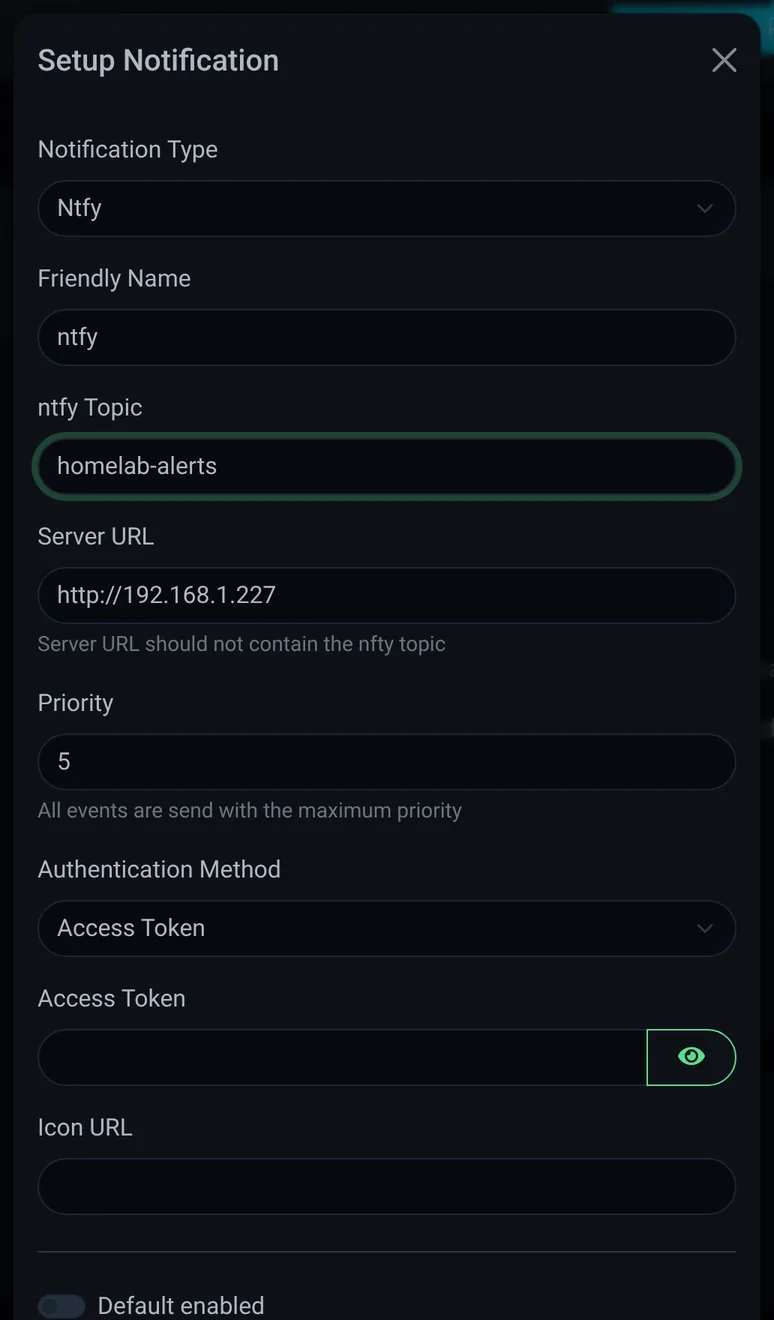
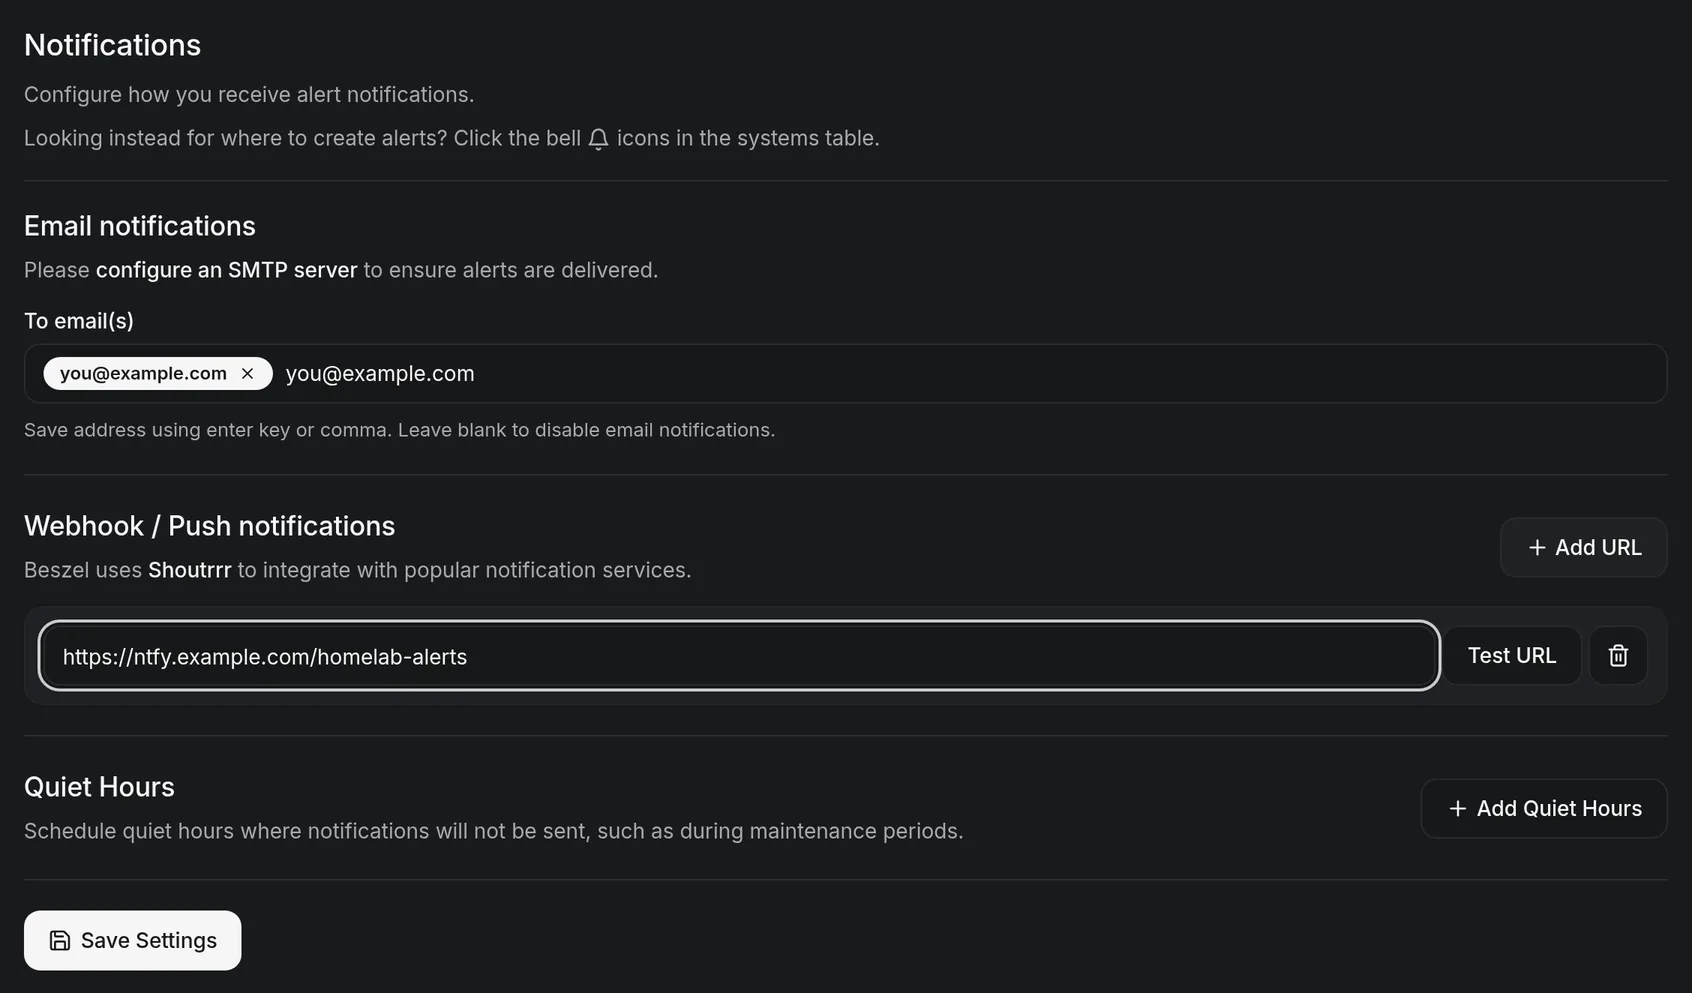
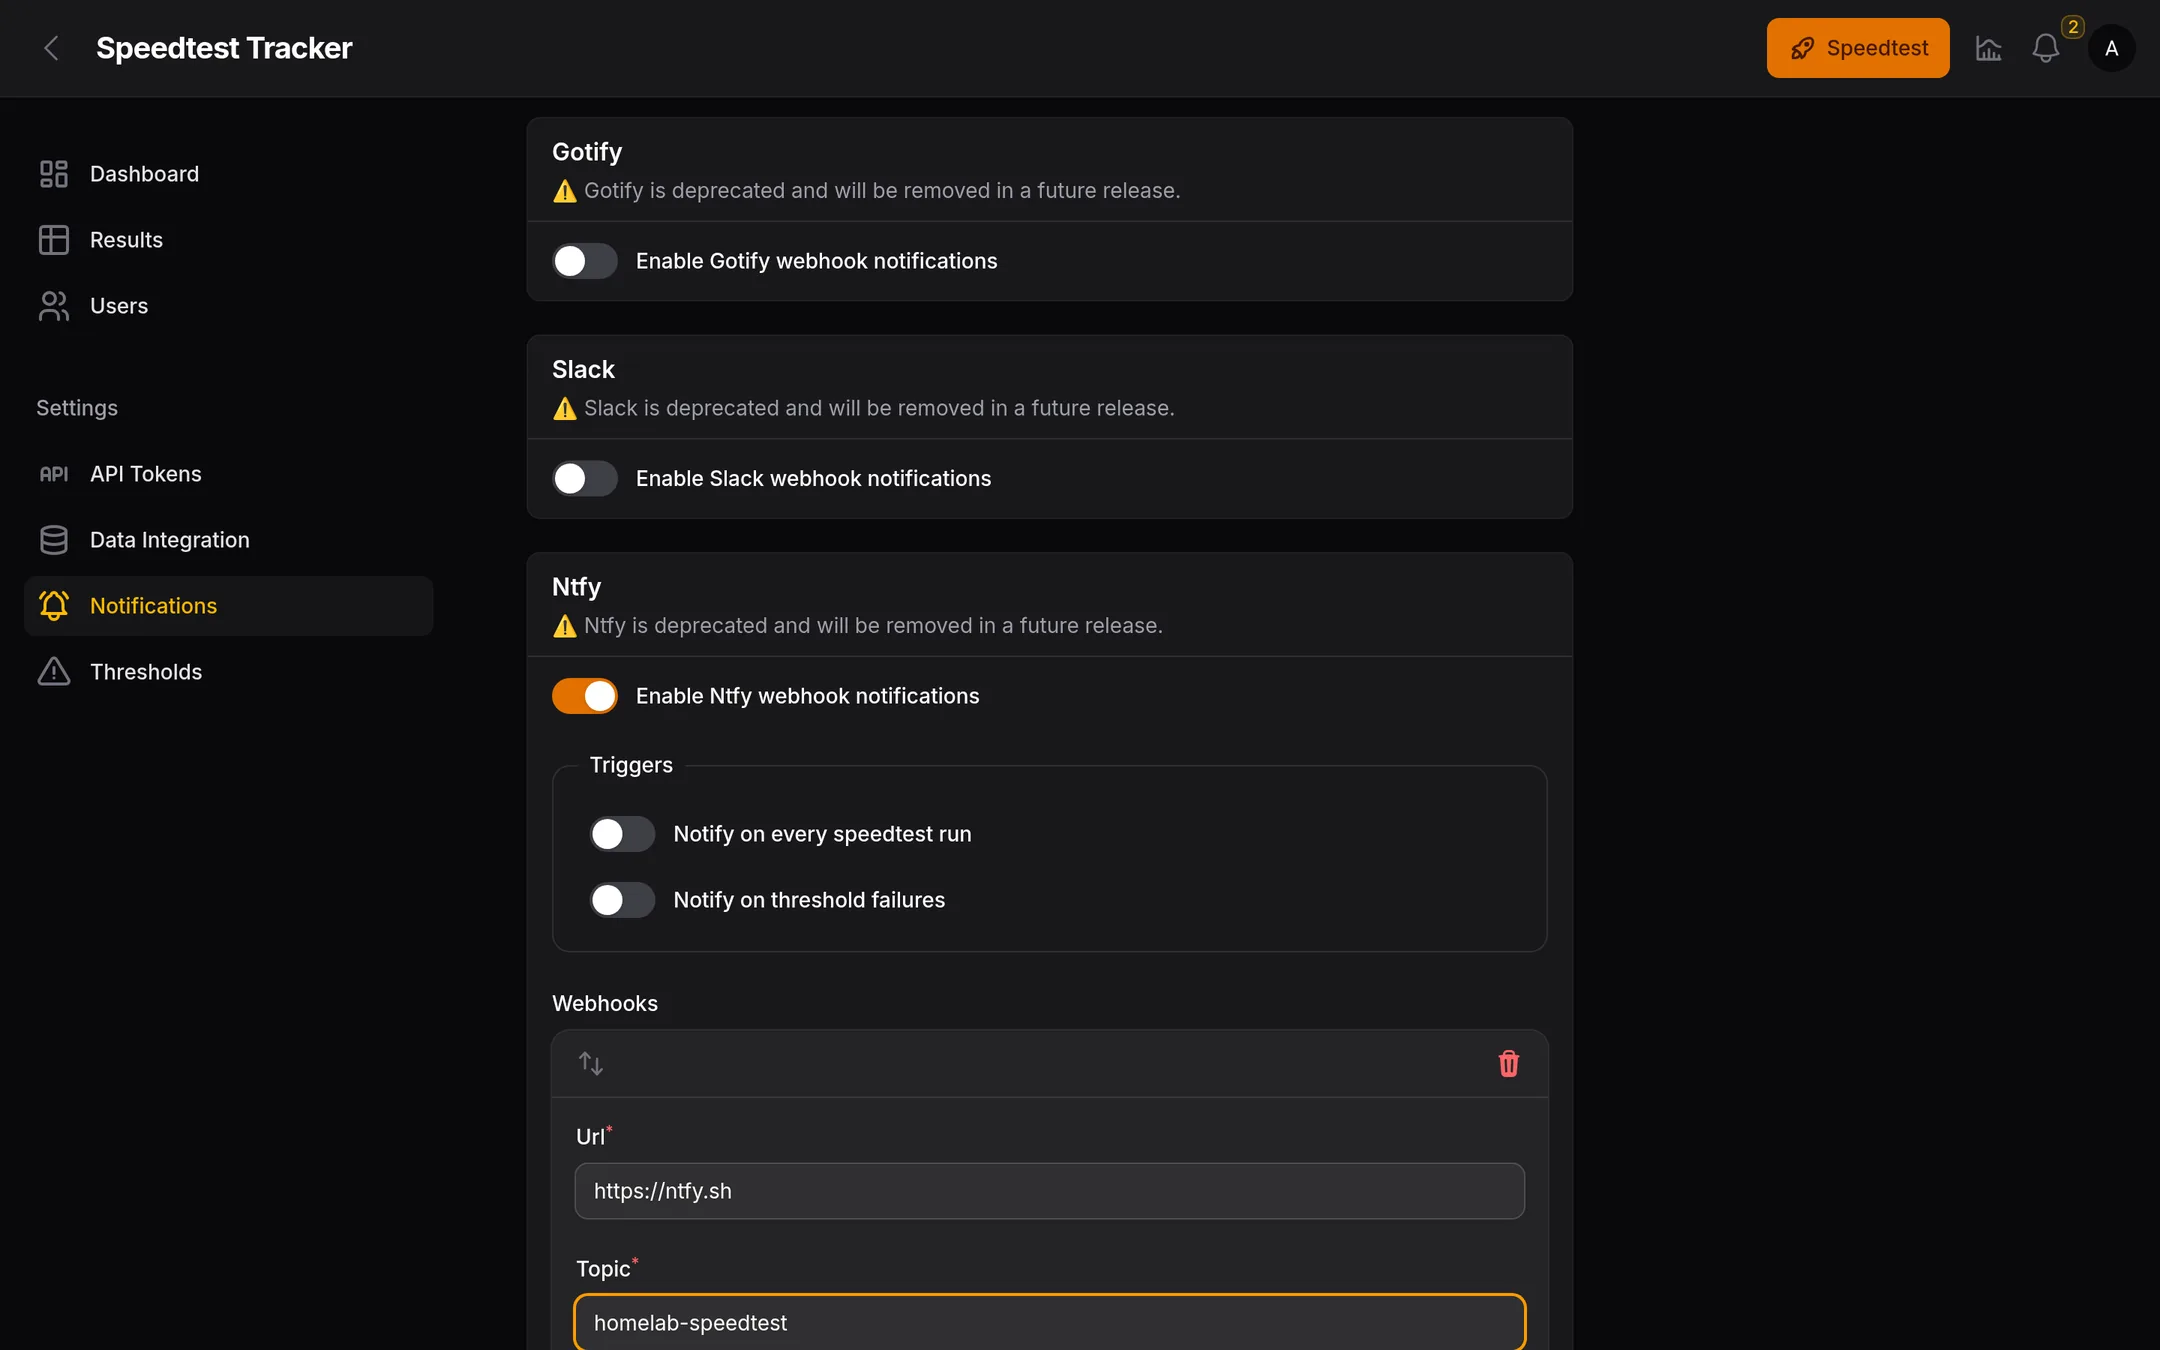
The name of a topic in ntfy (for example homelab-alerts)
A name that is long and that nobody can guess. On a public ntfy server, anyone who knows the topic name can read your alerts.
Your SSH key
A key that you create yourself, as Ch. 9 · SSH & the terminal shows. Never share the private key. Never copy one from another person.
A port that you forward on your router
Forward nothing unless you must. Every open port is found by scanners within minutes. Common game ports are scanned the most. You need friends to join a game server? Use Ch. 19 · Remote access: Tailscale first. You forward a port anyway? Set a strong password on that server, and keep it updated.
The example network and the example names
Your own values. Your network may not be 192.168.1.x. Ch. 3 · How to read this manual shows how to find yours. A name such as homelab is fine inside your house. Do not use your real name, your street, or your PC name in a server name or a domain name.
Warning — what never to post online
When you ask for help on a forum, remove your public IP address, your domain names, your tokens, and your passwords from the text and from each screenshot. A screenshot of a terminal or of a settings page often shows more than you think. Look at the whole picture before you post it. Ch. 78 · Where to go next has more on how to ask for help.
5.3
When something breaks
Something will break. This is not a failure. It is part of the hobby. Follow this calm sequence:
Nothing that you did today is fatal. Each app on the server runs in its own container. A container is a small box that you can throw away. It holds one app and its files. If an app breaks, the worst case is that you build its box again. This takes ten minutes.
Read the error message. Read it fully. Half of all fixes are in the message.
Check the logs of the app. The Reference card of each app chapter shows the log command. The chapters that build no container have none. The Home Assistant VM has none.
Are you still stuck? Search for the exact error text and the name of the app. You are never the first person with this problem.
Notice — you can break things
The container design exists so that experiments cost little. The people who become good at this are not the careful ones. They are the ones who built the same broken app four times, and who now know it well.
5.4
Pre-flight checklist
This is the end of Part A. It is the calm before the build. Go through these seven items before you turn the page. Tick each one. Then you have everything you need:
You backed up the spare machine, and you agree to erase it. Everything on that disk is deleted in Part B.
You have a USB stick of 4 GB or more. 8 GB is safer and easier to find. You agree to erase it.
You have an Ethernet cable that is long enough to reach your router. The install sets a fixed wired address. This is a network address that never changes, so you can always find the server. The server does not use Wi-Fi.
You have a screen and a keyboard for the server. You need them for about twenty minutes, during the install. A TV with an HDMI cable works as a screen.
You have your PC. This is the laptop or desktop that you already own. You use it to control the server from a distance.
You have the admin login of your router. It is usually on a sticker on the router.
You flash a USB stick, boot the server from it, and install Proxmox VE on the single SSD. This is the one job that needs a monitor and a keyboard. After it, the server runs without a screen.
The installer formats the SSD and deletes all data on it. This is expected. A homelab server does only this job. Before you start, make sure that the machine has nothing that you want to keep. It has one disk, a 500 GB SSD. Proxmox uses all of it.
6.1
PREPARE THE BIOS
Before you install the operating system, change a few settings in the firmware of the machine. This is the BIOS (also called UEFI setup). You do this one time. You use the screen and keyboard that you plugged in. Two of these settings matter later. First, turn on virtualization. The Home Assistant virtual machine in a later chapter needs it. Second, set the server to turn itself on after a power cut. No one stands next to it to press the button.
This part has no pictures. Each board maker draws its own setup screen. The same setting has a different name on each board. One photo would confuse more readers than it helps. Follow the menu paths below. Read the words on your own screen.
Plug a monitor and a keyboard into the server. Turn it on.
When the logo of the maker appears, tap the setup key. It is usually DEL or F2. Watch the boot screen. It shows the key for one or two seconds. The one-time boot-menu key is a different key. It is usually F12, and sometimes F11 or DEL. You use it later, to boot from the USB stick. You do not use it now.
Turn on virtualization. Look in Advanced → CPU Configuration. On Intel boards, the setting is named Intel Virtualization Technology or Intel VT-x. On AMD boards, it is named SVM Mode or AMD-V. Set it to Enabled. Without it, the Home Assistant VM does not start.
Set Restore on AC Power Loss to Power On. It is usually in the Power menu or in APM. The name can differ: "After Power Failure" or "AC Recovery". A server without a screen must start itself after a power cut. If it does not, it stays off until someone visits it.
Optional: turn on Wake-on-LAN. It is often named "Power On By PCIe/PCI" or "Resume By LAN", in the Power menu. It lets you wake the server over the network later. Skip it if you cannot find it.
Save and exit. The key is usually F10. The machine restarts.
Notice — check that virtualization is on
You cannot check this setting from the BIOS. Check it after the install. Open homelab → Shell in the web page. Run cat /proc/cpuinfo | grep -Eo 'vmx|svm'. The command prints nothing? Then virtualization is off. Go back into the BIOS and check the setting again. Do this before you reach the Home Assistant chapter.
Notice — Secure Boot
Proxmox VE installs and starts with Secure Boot turned on. Normally you change nothing. Change it only if the USB stick does not start in a later step. Go back into the setup. Set Secure Boot to Disabled. It is usually in the Boot menu or in Security. Then try the boot menu again.
6.2
FLASH THE INSTALLER USB
Proxmox is one downloadable file. This file is an ISO, a complete installer in one image. You write the image to a USB stick. The server then starts from the stick and installs itself. You need a spare USB stick of 4 GB or more. 8 GB is safer. A stick that says "2 GB" usually has less space after formatting, so the installer does not fit. Flashing erases the stick.
You do this with the mouse, in a small free app named balenaEtcher. It runs on Windows, Mac, and Linux. By default, it shows only removable drives. This is why it is the safe choice.
On your PC, open https://www.proxmox.com/en/downloads.
Download the newest Proxmox VE ISO Installer. At the time of writing, it is 9.2.
Download balenaEtcher from balena.io/etcher. Open it.
Plug in the USB stick.
Select Flash from file. Pick the Proxmox ISO that you downloaded.
Select Select target. Pick your USB stick. Check the size. The stick is the small drive, a few gigabytes.
Select Flash. Wait until it writes and checks the stick. Close the app. Unplug the stick.
balenaEtcher has no picture here. Its window has one row of three large buttons: the image, the target, and Flash. The next button lights up when you fill in the previous one. It is hard to lose your place.
Warning — dd erases the disk that you name
The terminal way below writes to the disk that you name. It has no undo and no confirmation. First run lsblk and read the result with care. The USB stick is the small removable disk. It is usually a few gigabytes, not hundreds. You are not sure? Use balenaEtcher above.
Prefer the terminal? — flash the stick with one dd command
On Linux, dd is already installed. You install nothing. Name the correct disk.
⌨ Run this on your PC (Linux)
Before you run anything on this page: every 192.168.1.x address below is this manual's example network. If your own network uses different numbers, substitute yours as you type — the rule is in Ch. 3 · How to read this manual. A command that runs with the wrong address usually succeeds and leaves you unreachable.
lsblk                                # find your USB stick's name (e.g. sdb)
sudo dd if=~/Downloads/proxmox-ve_9.2-1.iso \
  of=/dev/sdX bs=4M status=progress conv=fsync   # replace sdX with that name
Explanation of each part
lsblk
Lists each disk that the PC sees, with its size. Use the size column to tell the USB stick from your own hard drive.
if=…proxmox-ve_9.2-1.iso
The input file. This is the ISO that you downloaded. Change the version number to the file that you have.
of=/dev/sdX
The output file. This is the whole USB stick, not one partition on it. Replace sdX with the name that lsblk printed.
bs=4M status=progress
Writes in blocks of 4 MB. This is fast. It also prints a progress line. Without it, the command is silent.
conv=fsync
Forces all data to the stick before the command ends. When the prompt comes back, you can unplug the stick.
6.3
BOOT THE INSTALLER
The server normally starts from its own SSD. This one time, you need it to start from the USB stick. You tell it with the one-time boot menu. The firmware of your board draws this menu. Proxmox does not draw it. So the picture below shows the shape of the menu. It does not show your exact screen.
↑↓ = move · Enter = boot. Your menu's wording differs — look for “UEFI” + your USB stick's brand name.
A typical boot menu. The entry you want names your USB stick, usually prefixed “UEFI:”. If the machine boots straight into its old operating system, the boot-menu key was missed — restart and tap it from the first second.
Plug a monitor and a keyboard into the server. Put the USB stick in any port.
Turn the server on.
When the logo of the maker appears, tap the boot-menu key. It is usually F12, and sometimes F11 or DEL. Watch the boot screen. It shows the key for one or two seconds.
In the boot menu, select the USB stick. Choose the entry that starts with UEFI, if it is in the list.
The blue Proxmox menu appears. Select Install Proxmox VE (Graphical). Press Enter.
Notice — which entry to pick
The Proxmox menu also has a terminal installer and advanced options. Pick Install Proxmox VE (Graphical). This is the point-and-click version that this chapter explains.
6.4
THE INSTALLER SCREENS
The graphical installer is a short wizard. It has six screens. After them, it writes the disk. Go through the screens in order. Each screen has a picture below its step.
Warning — get your own network numbers BEFORE the network screen
The network screen is the screen that breaks builds. Each address in this manual, for example 192.168.1.220 and 192.168.1.1, is an example. Suppose your network uses different numbers, and you type these addresses as they are. The install still shows success. But https://192.168.1.220:8006 never loads, and nothing tells you why. Many readers then install again, and type the same wrong numbers again.
Read your real numbers now, on a computer that is already on your network. It takes one minute. You cannot do it from the server after the installer starts. The first section of Ch. 3 · How to read this manual explains it in detail. In short:
Windows — open PowerShell and run ipconfig. Find the adapter that you use. It shows an IPv4 Address. Write down its IPv4 Address and its Default Gateway.
macOS or Linux — open Terminal. On Linux, run ip route | grep default. On macOS, run netstat -nr | grep default. On Linux, the address after via is your gateway. On macOS, it is the address after default.
Your gateway is 192.168.1.1? Then the examples in this manual match your network. Type them as they are. Your gateway is another number, for example 10.0.0.1, 172.16.0.1, or 192.168.2.1? Then each192.168.1.x in this manual becomes your own number. Keep the first three numbers of your gateway. Change only the last number. A gateway of 10.0.0.1 makes the server 10.0.0.220 and AdGuard 10.0.0.223. Write your gateway on paper. Keep it near you for the rest of the manual.
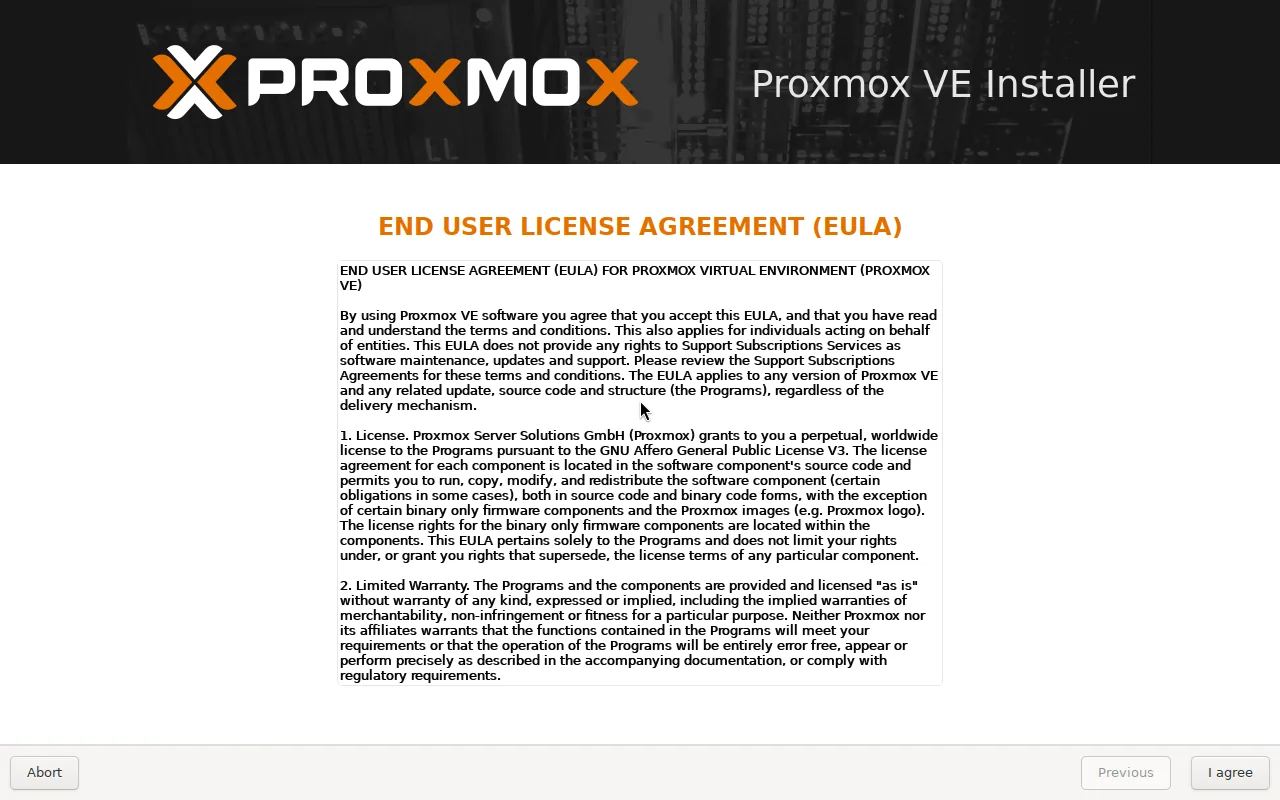
EULA. Read the license. Select I agree.
The license screen opens the wizard.
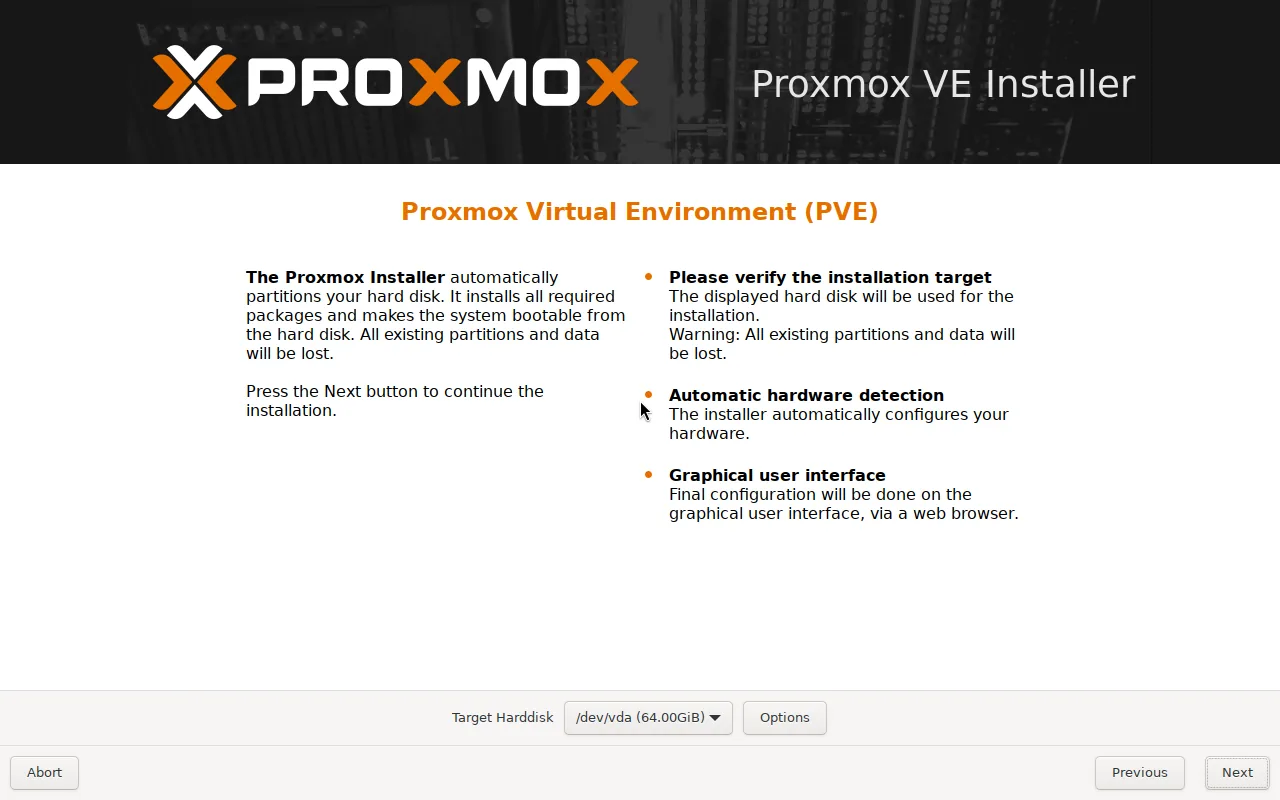
Target harddisk. Select your SSD. It is the only disk in the machine, so you have no choice to make. Keep Options at the default filesystem, ext4. Proxmox uses the whole disk.
One disk, one filesystem. The defaults are correct here.
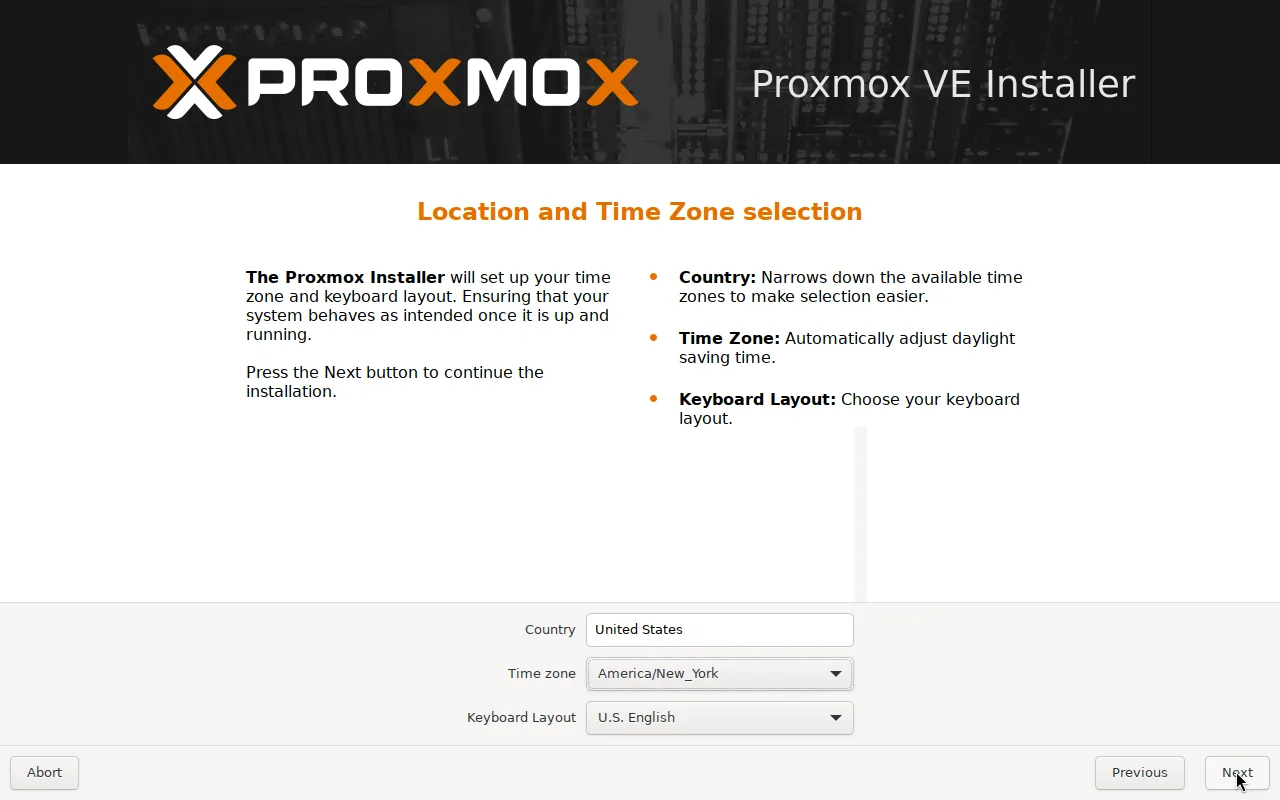
Location and Time Zone. Set Country to your country. Set Time zone to Region/City. Pick yours from the list. Set Keyboard Layout to your keyboard. It is usually U.S. English.
The country that you pick fills in the time zone and the keyboard.
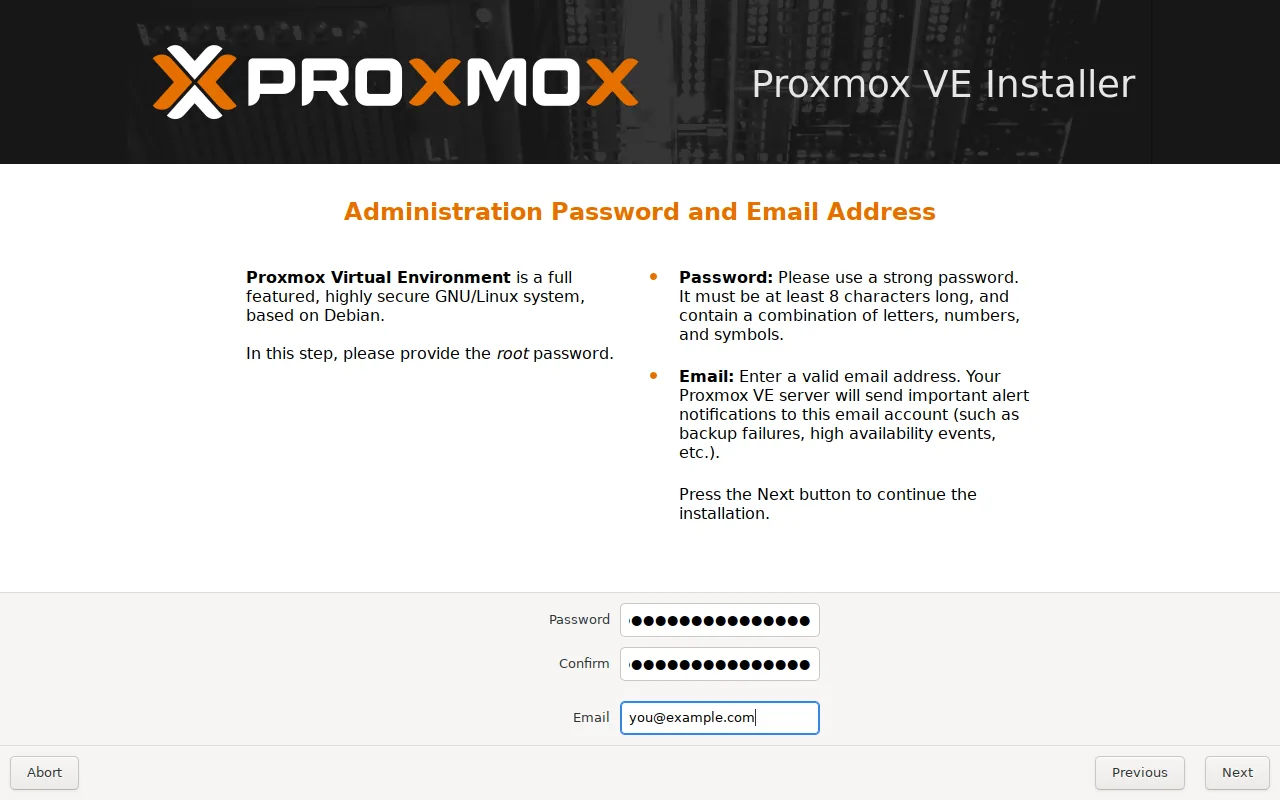
Administration Password. Set the root password. This is also your login for the web page. Make it strong and save it. Type your email. Proxmox sends server alerts to it later.
Write this password down before you leave the screen.This address does not give you working alerts by itself. Proxmox stores it. But a new install has no mail server. Each message goes to a local mailbox on the machine, and nobody opens it. It never reaches your inbox, and nothing reports the failure. Type a real address anyway. Get your real phone alerts later from Ch. 13 · ntfy and Ch. 14 · Uptime Kuma. Those chapters test the alerts when you build them.
Notice — check the DHCP range of your router first
Do this before you type an address on the next screen. Open the admin page of your router. Type 192.168.1.1 (or the address of your router) in the browser of your PC. Log in. The user name and password are often on a sticker on the router. If you never changed them, they can be "admin" and "admin". Find the DHCP lease range. Some routers call it the "DHCP pool". The range reaches up to .254? Then shrink it so that it ends below .200. Or pick a fixed address outside the range, in place of the address below. The fixed addresses of this manual start at .200. They assume that the router never lends one of them to a phone or laptop. If it can, two devices later share one address. Then other things on the network stop at random, and nothing shows the cause.
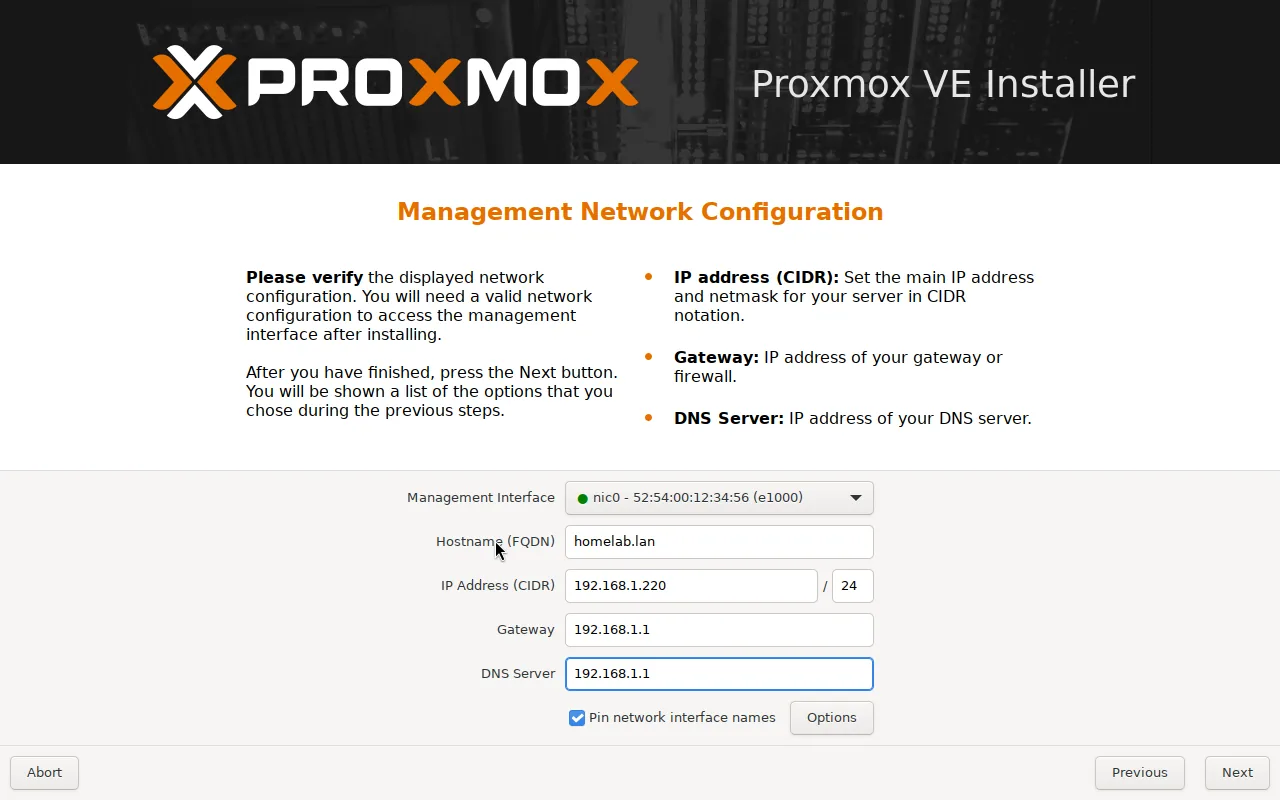
Management Network. Keep Management interface on the one network card. It is usually already selected. Set Hostname (FQDN), the full name of the machine, to homelab.lan. Set IP (CIDR) to 192.168.1.220/24. Set Gateway to 192.168.1.1. Set DNS Server to 192.168.1.1. The /24 at the end means that all devices with the same first three numbers are on the same network. Keep /24. It is correct for a home network, whatever your own numbers are.
This screen sets the address that you type for the rest of the manual.
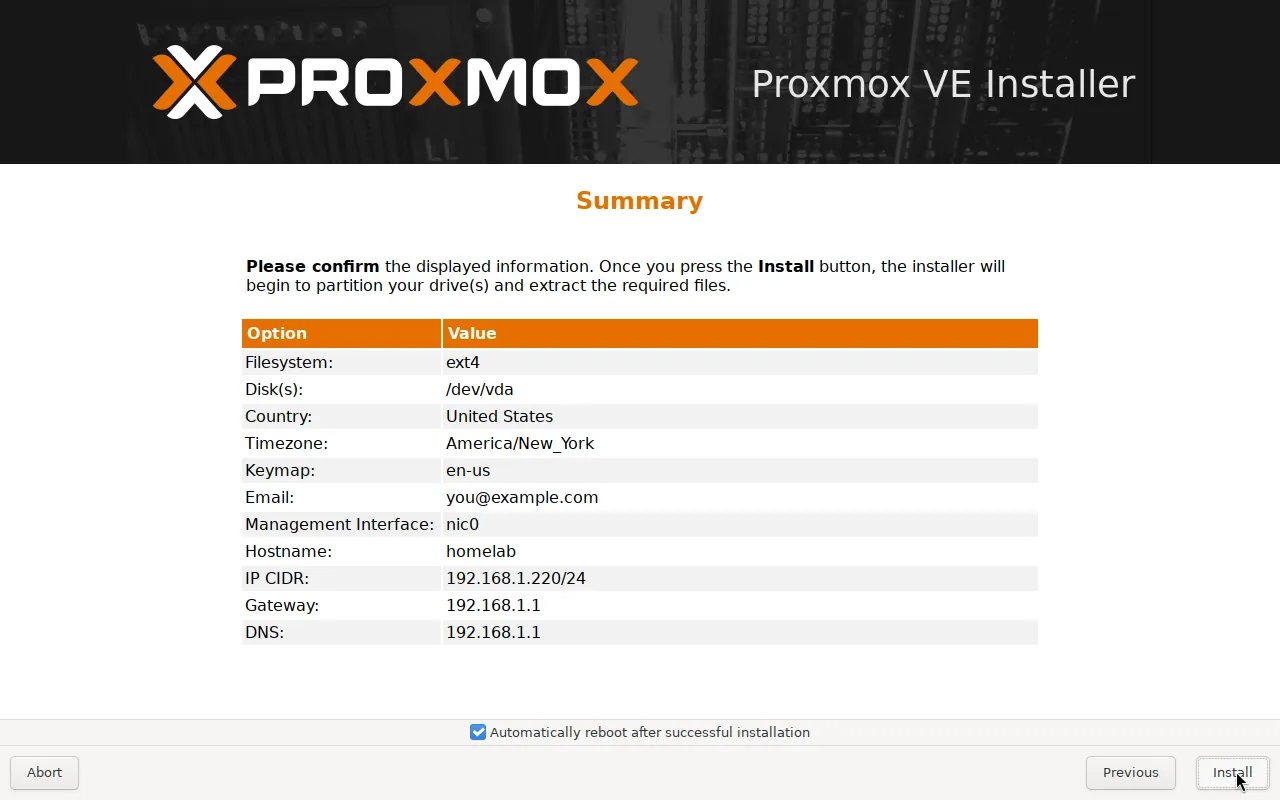
Summary. Check the disk and the IP one more time. Select Install.
The last screen before the disk is written.
Notice — set your timezone
Region/City is a placeholder for your own zone, for example America/New_York or Europe/London. Pick it from the list in the installer. You can need the exact spelling of a zone later. In that case, list every valid name on the host. There is no button for this list. You type one command:
⌨ Type this on the Proxmox host (homelab)
timedatectl list-timezones # print every valid zone name
These are the values on the network screen. Every later chapter uses them:
Proxmox VE installer — Management Network Configuration
enp1s0 — (your wired port, already selected)
homelab.lan
192.168.1.220/24
192.168.1.1
192.168.1.1
This screen decides the server's permanent address — the one every chapter types.PreviousNext
The installer's network screen with this manual's example values. Translate to your own network per Ch. 3 — and write the address you chose inside the front cover.
Notice — the static IP is set here
You typed 192.168.1.220 on the network screen. So the server starts at this fixed address from its first start. You do not need to find the address and change it later. The rest of the manual assumes that the server is at 192.168.1.220.
Let the install run. It takes a few minutes.
The installer says that it restarts the server. Pull the USB stick out. If the stick stays in, the server starts the installer again.
6.5
FIRST START: WEB PAGE AND REPOSITORY FIX
The server now runs without a screen. You can unplug the monitor and the keyboard. From here on, you manage it from the browser of your PC.
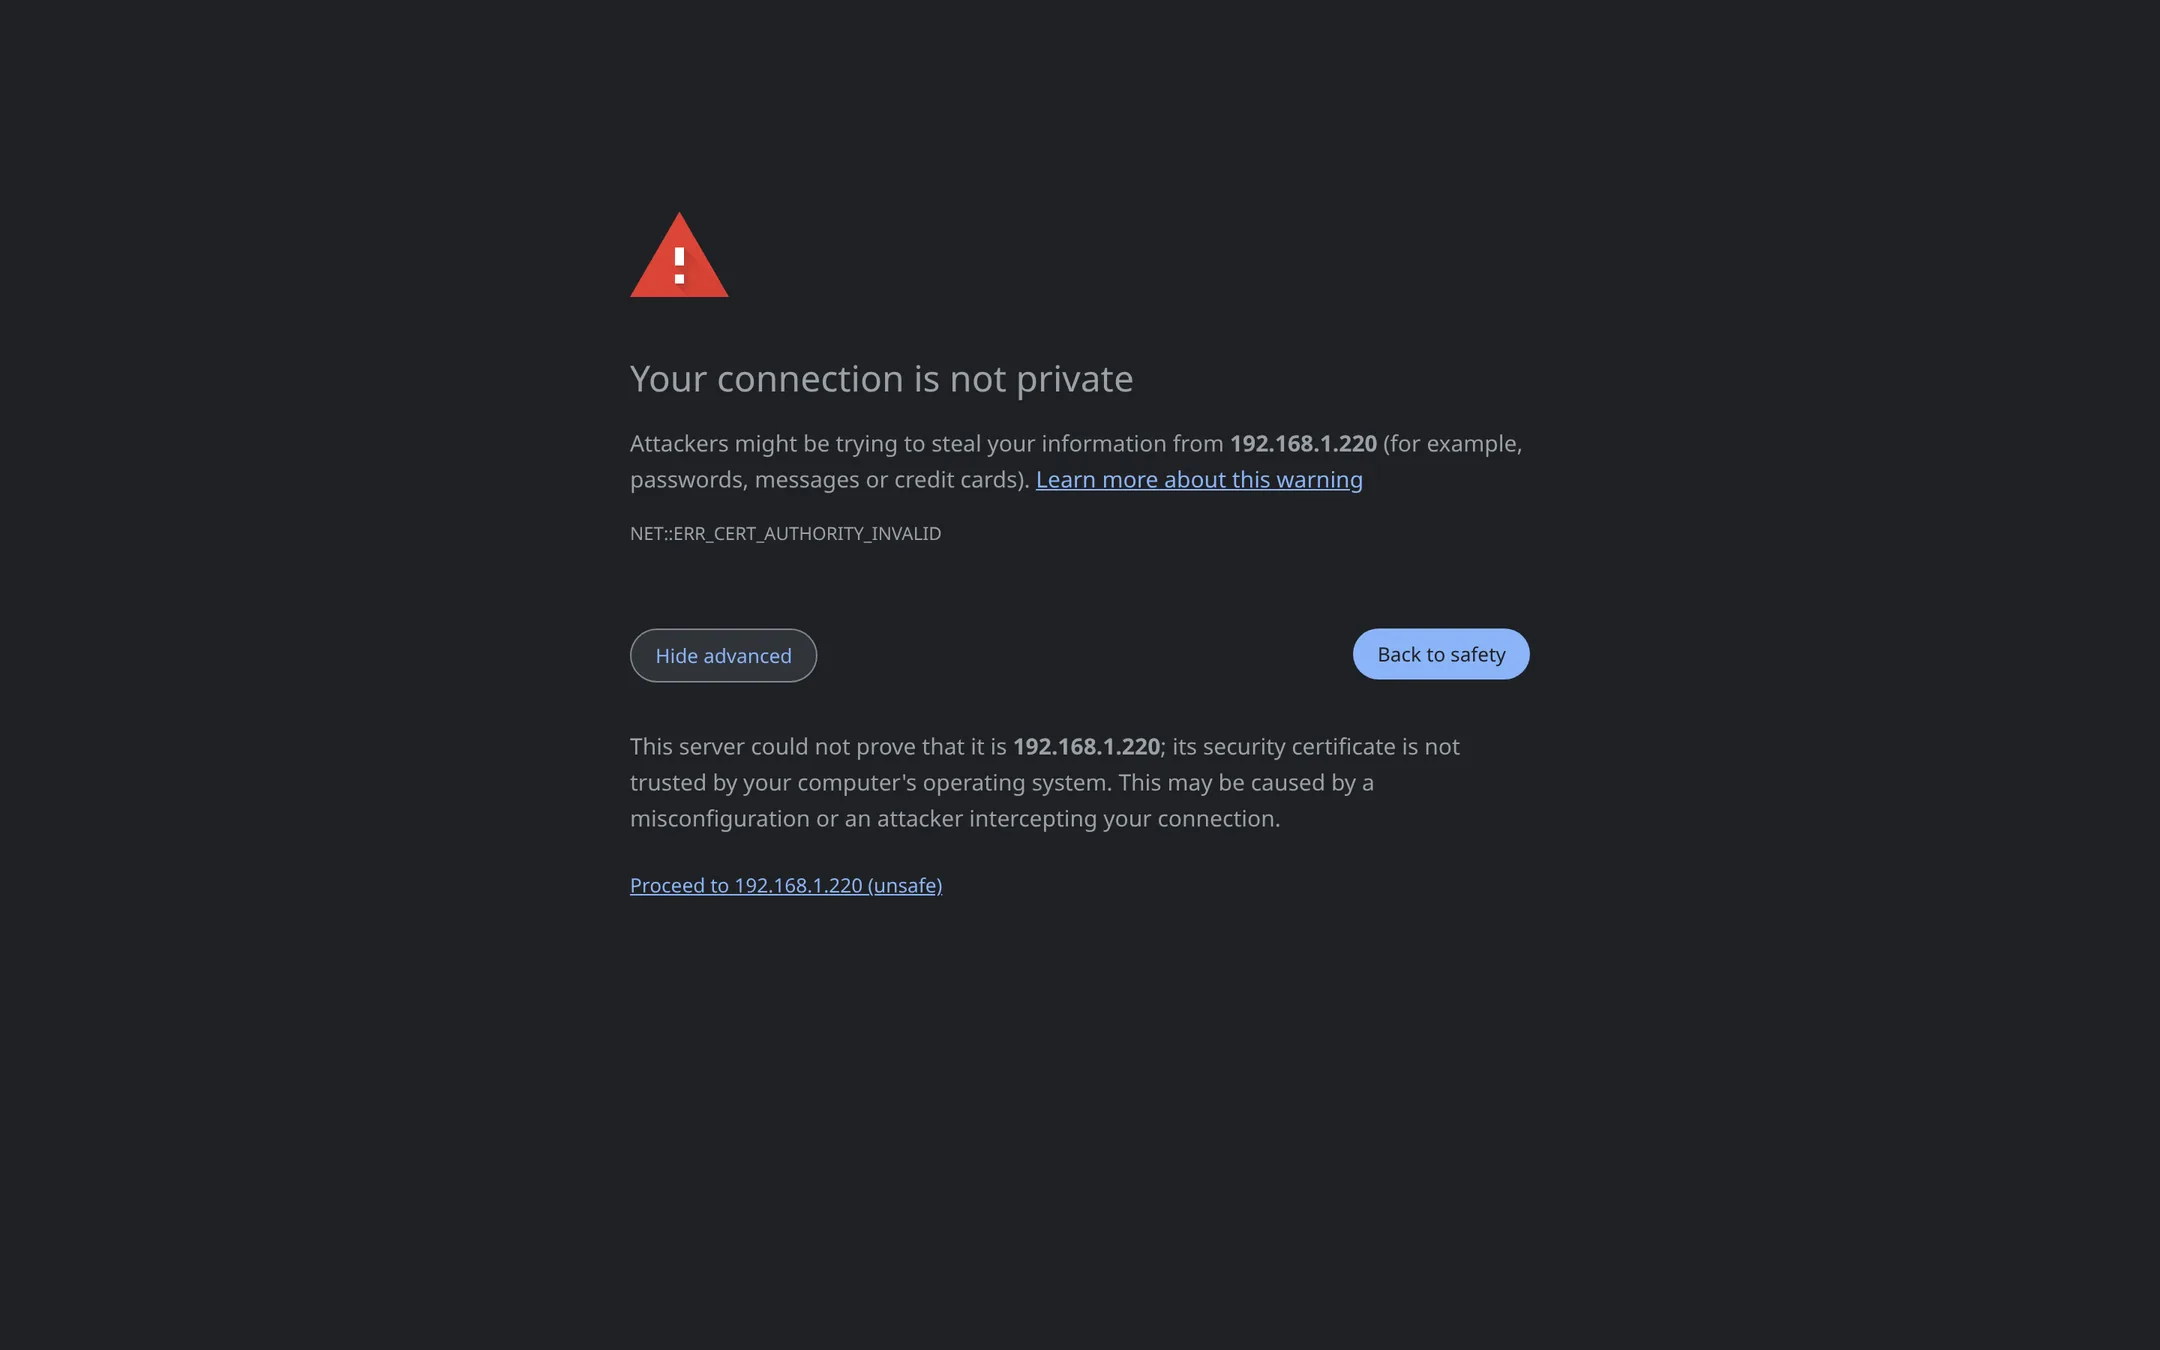
On your PC, open https://192.168.1.220:8006.
The browser shows a "connection is not private" warning. This is the own certificate of Proxmox. It is not a real problem. Select Advanced. Then continue to the address.
Each browser uses different words. The Advanced link always hides the "proceed" option.
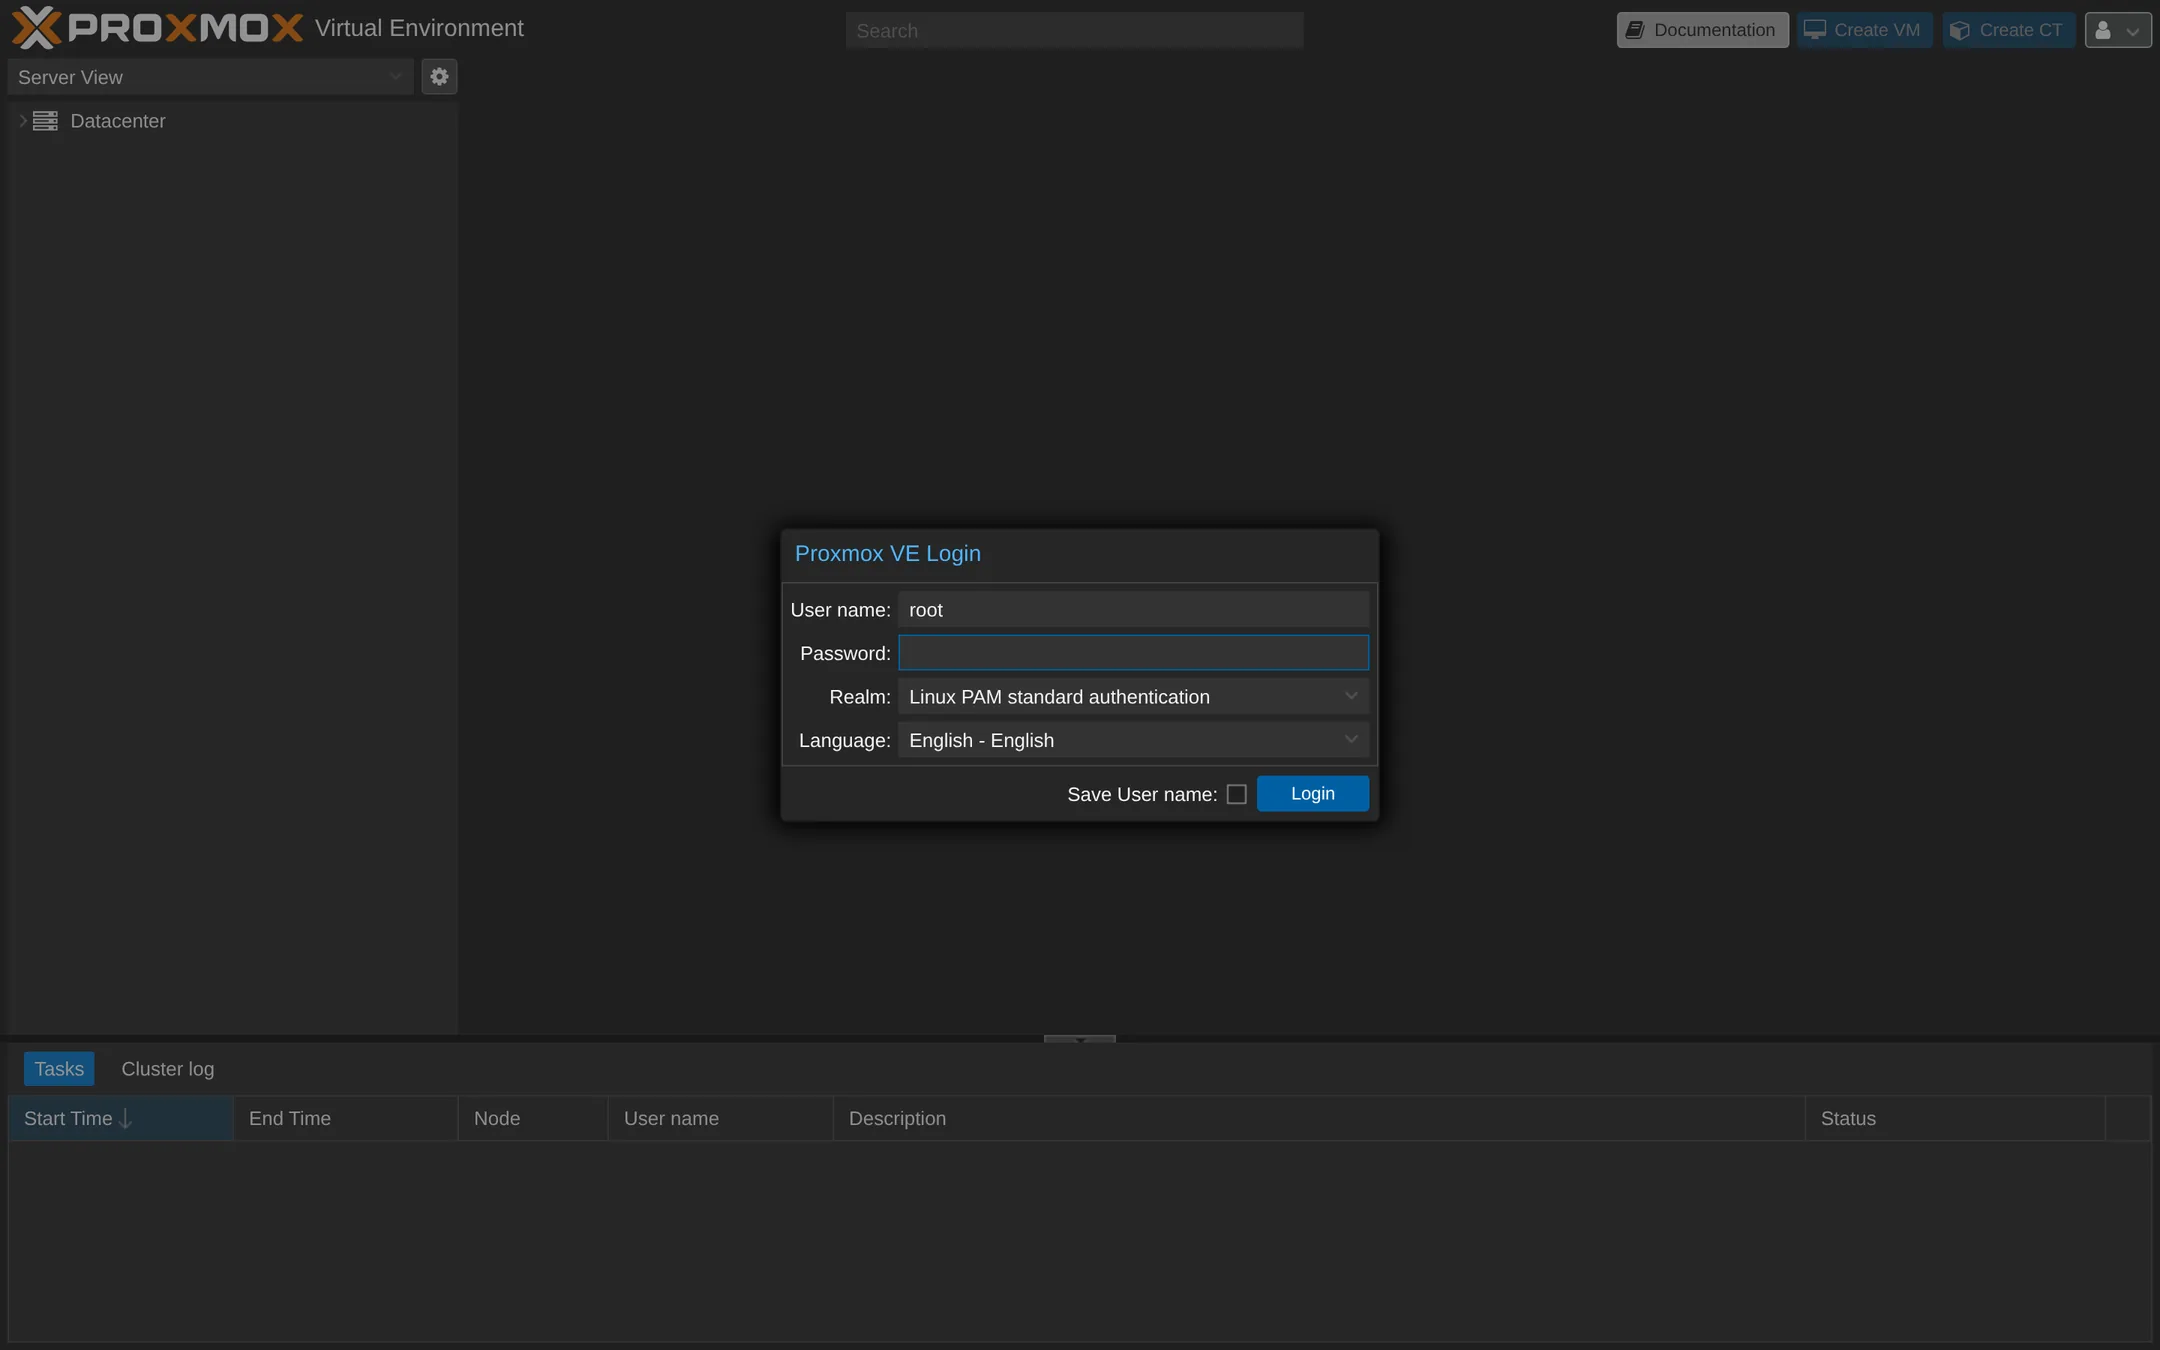
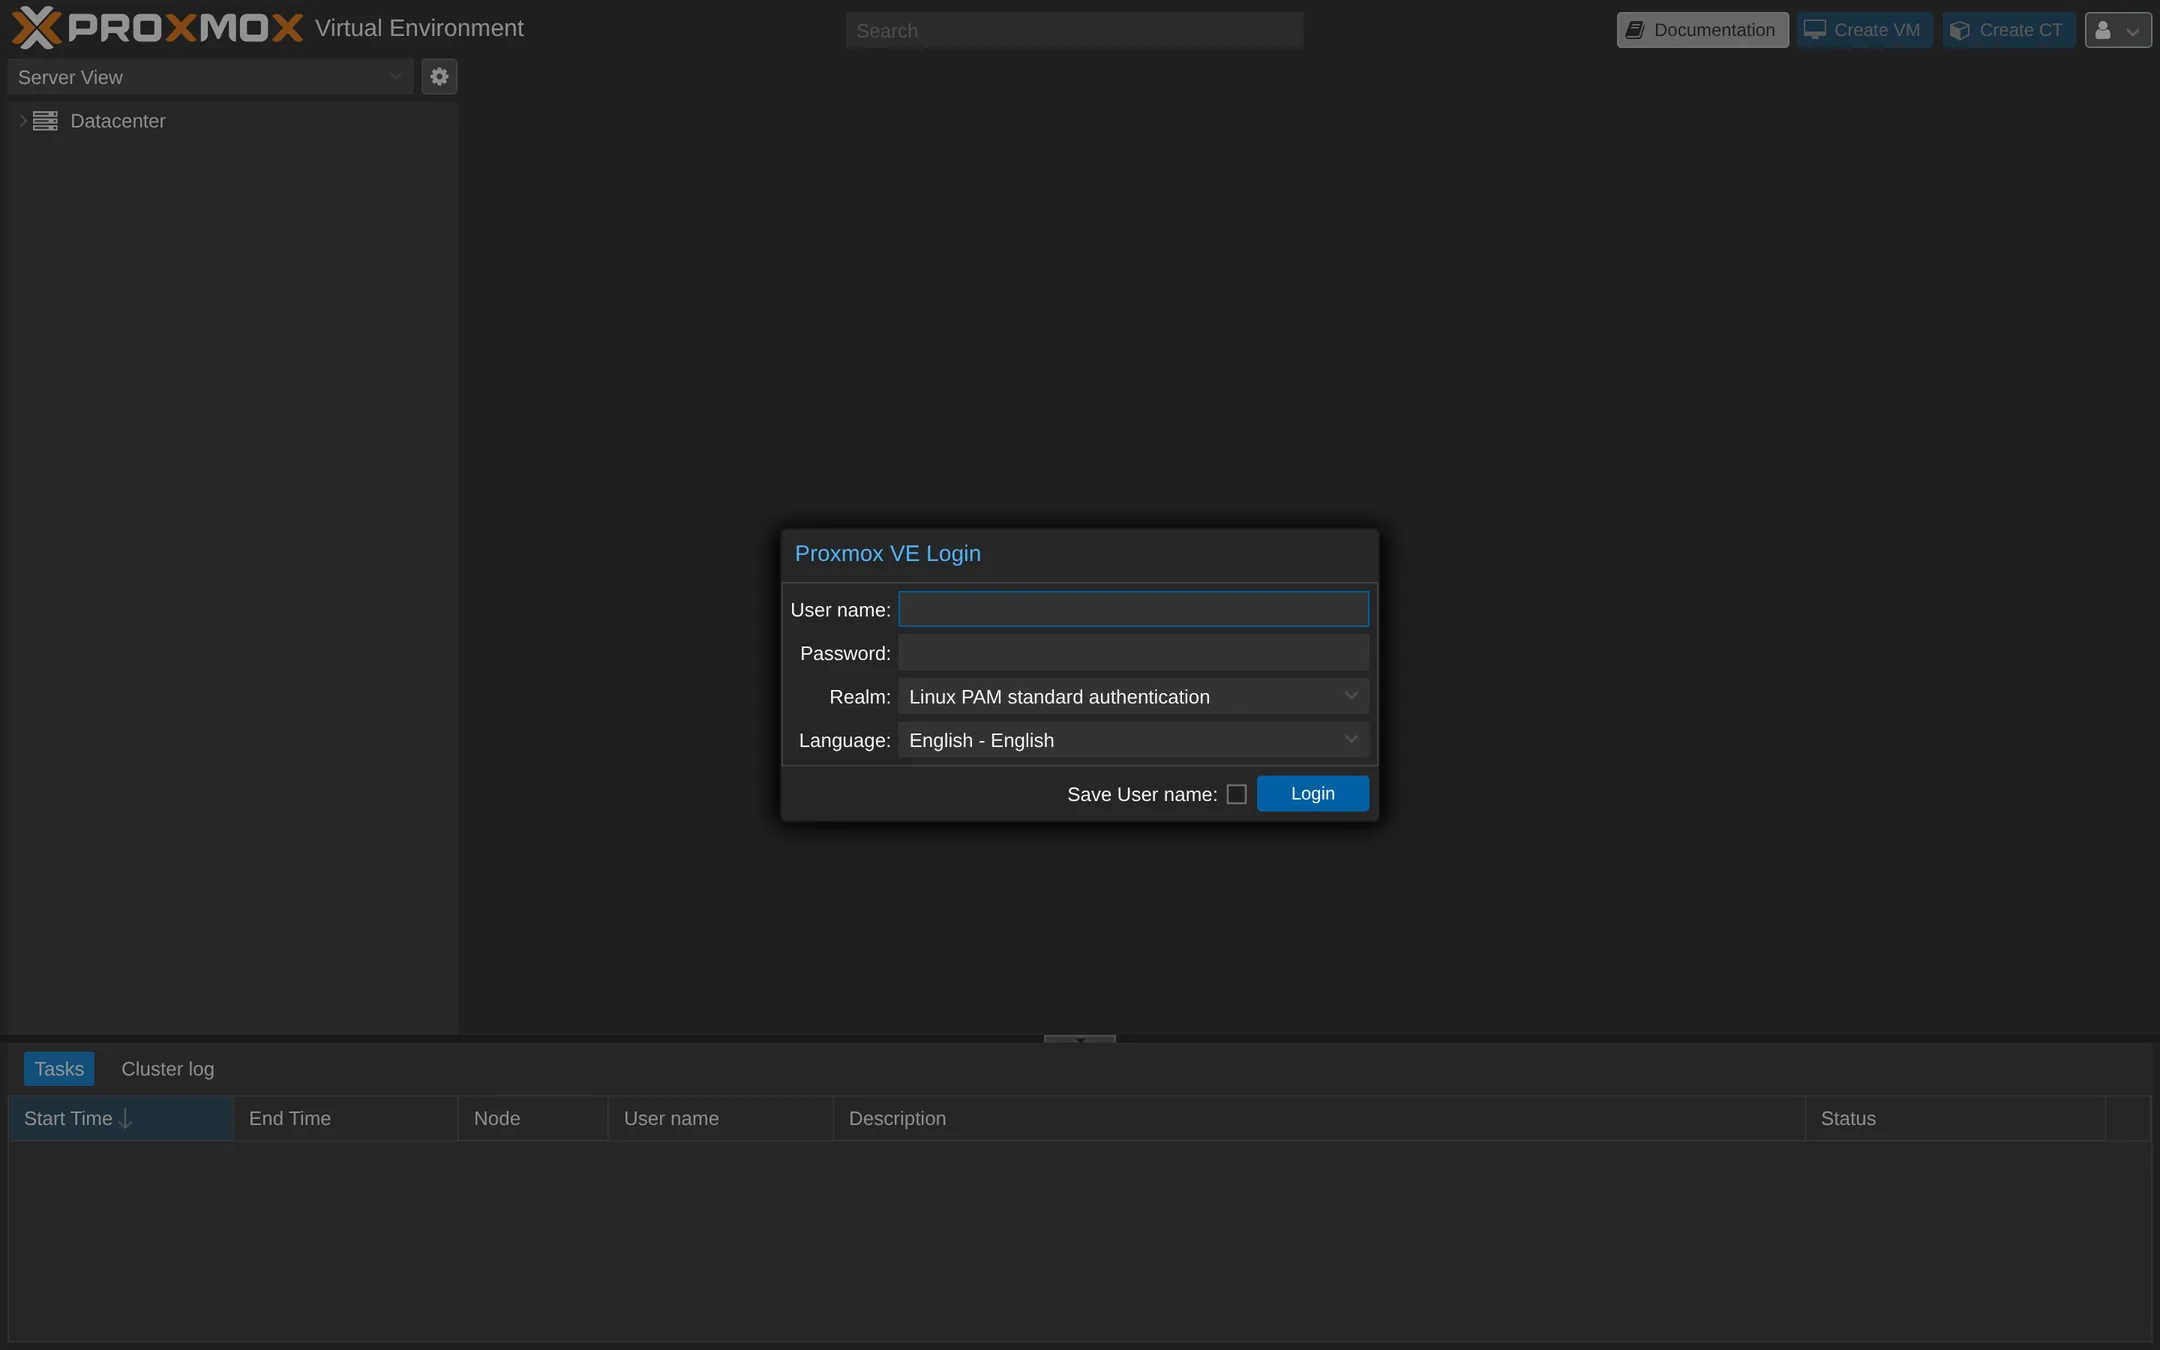
Log in as root. Use the password that you set in the installer.
User name root, realm "Linux PAM standard authentication".
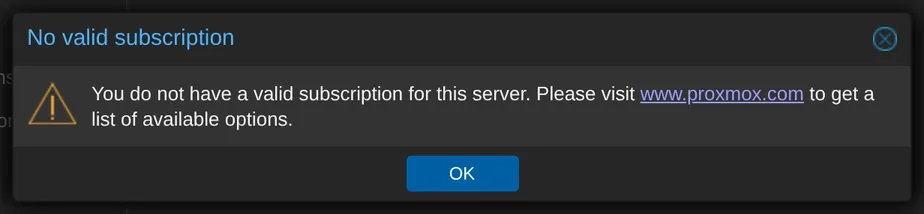
A window says "No valid subscription". This is normal for the free version. Select OK.
This window comes back at each login. It changes nothing.
Notice — you just did something real
A hypervisor now runs on your own hardware. You look at its control panel from another machine. Most people never get this far. The hard part is behind you. The rest of the manual is easier than this chapter.
What it is & why you would want it
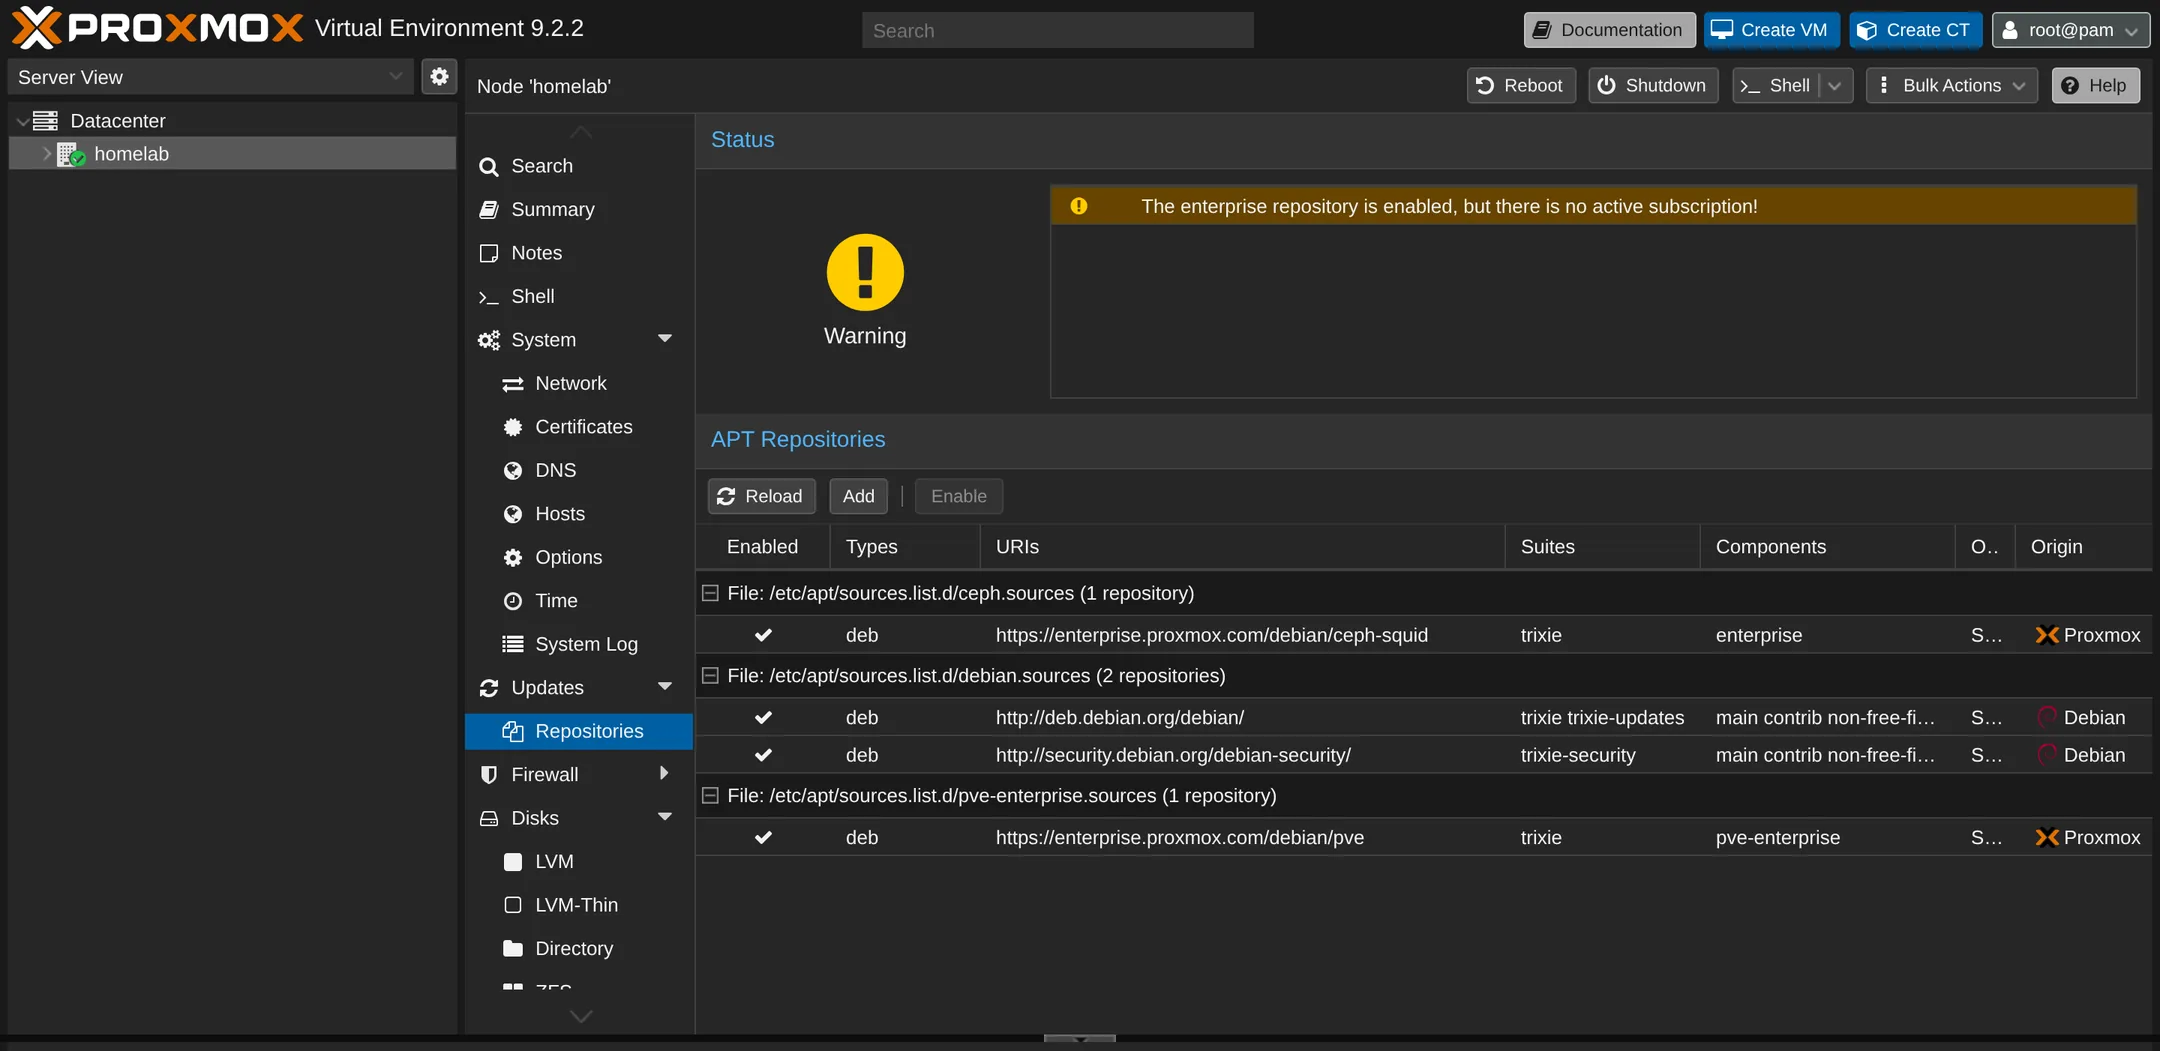
A new install points its updater to the paid enterprise servers of Proxmox. Without a subscription, updates fail with 401 errors. The fix is a one-time change to the free No-Subscription repository. It gives the same updates. You do this one time, right after the install.
You do the whole fix with buttons in the web page:
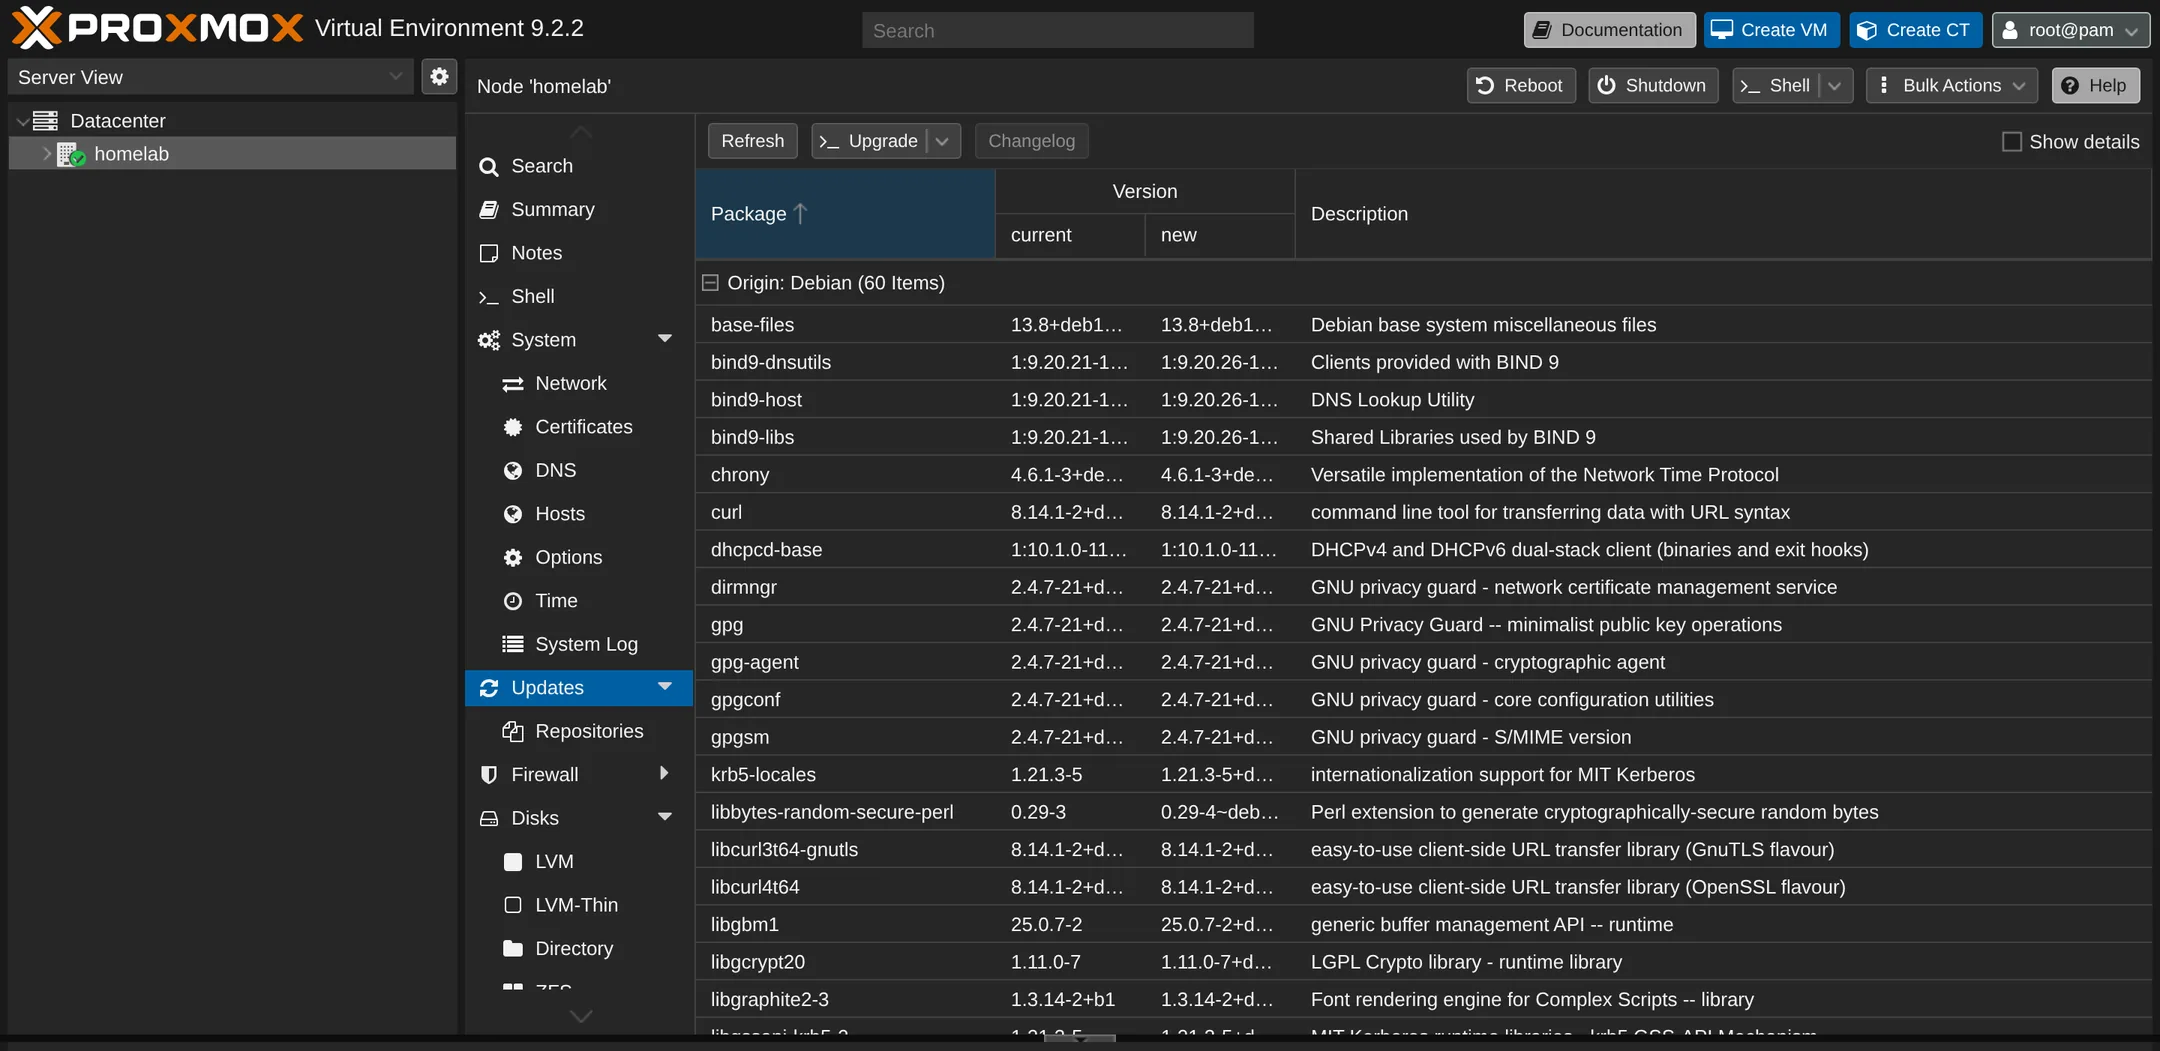
Go to homelab → Updates → Repositories. The panel lists each package source that the server uses.
The enterprise rows fail without a subscription.
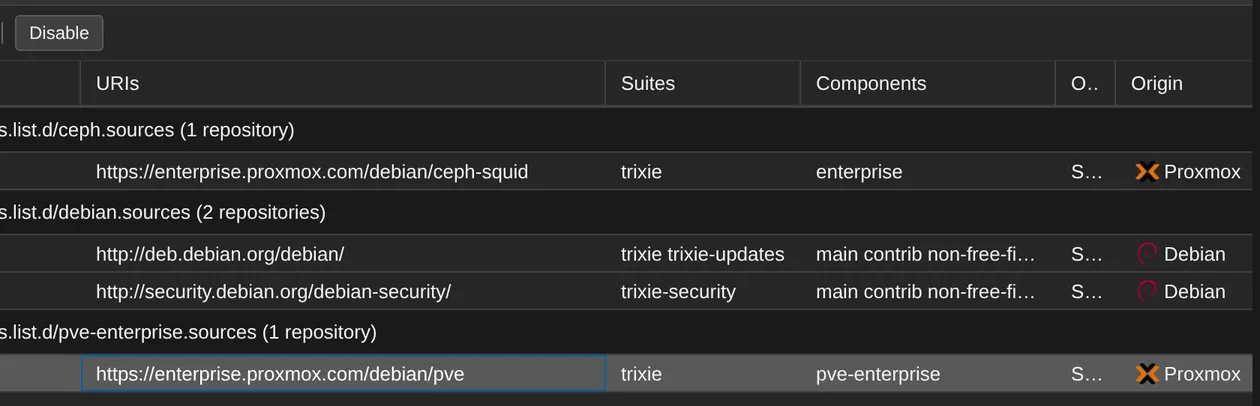
Select the pve-enterprise row. Select Disable. Proxmox marks that repository as disabled in its settings file. You do not need to touch the file. The list can also show a ceph enterprise row. Select it and disable it in the same way.
Select the row first. The button acts on the selected row.
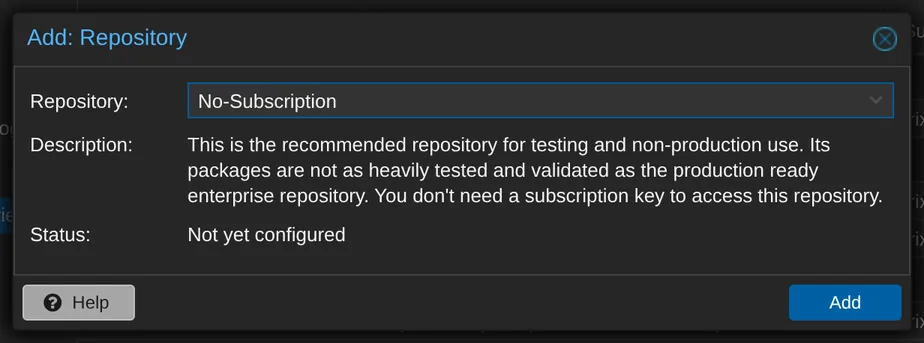
Select Add. Pick No-Subscription from the list of known repositories. Select Add.
The list offers only the own repositories of Proxmox. You cannot type one wrong.
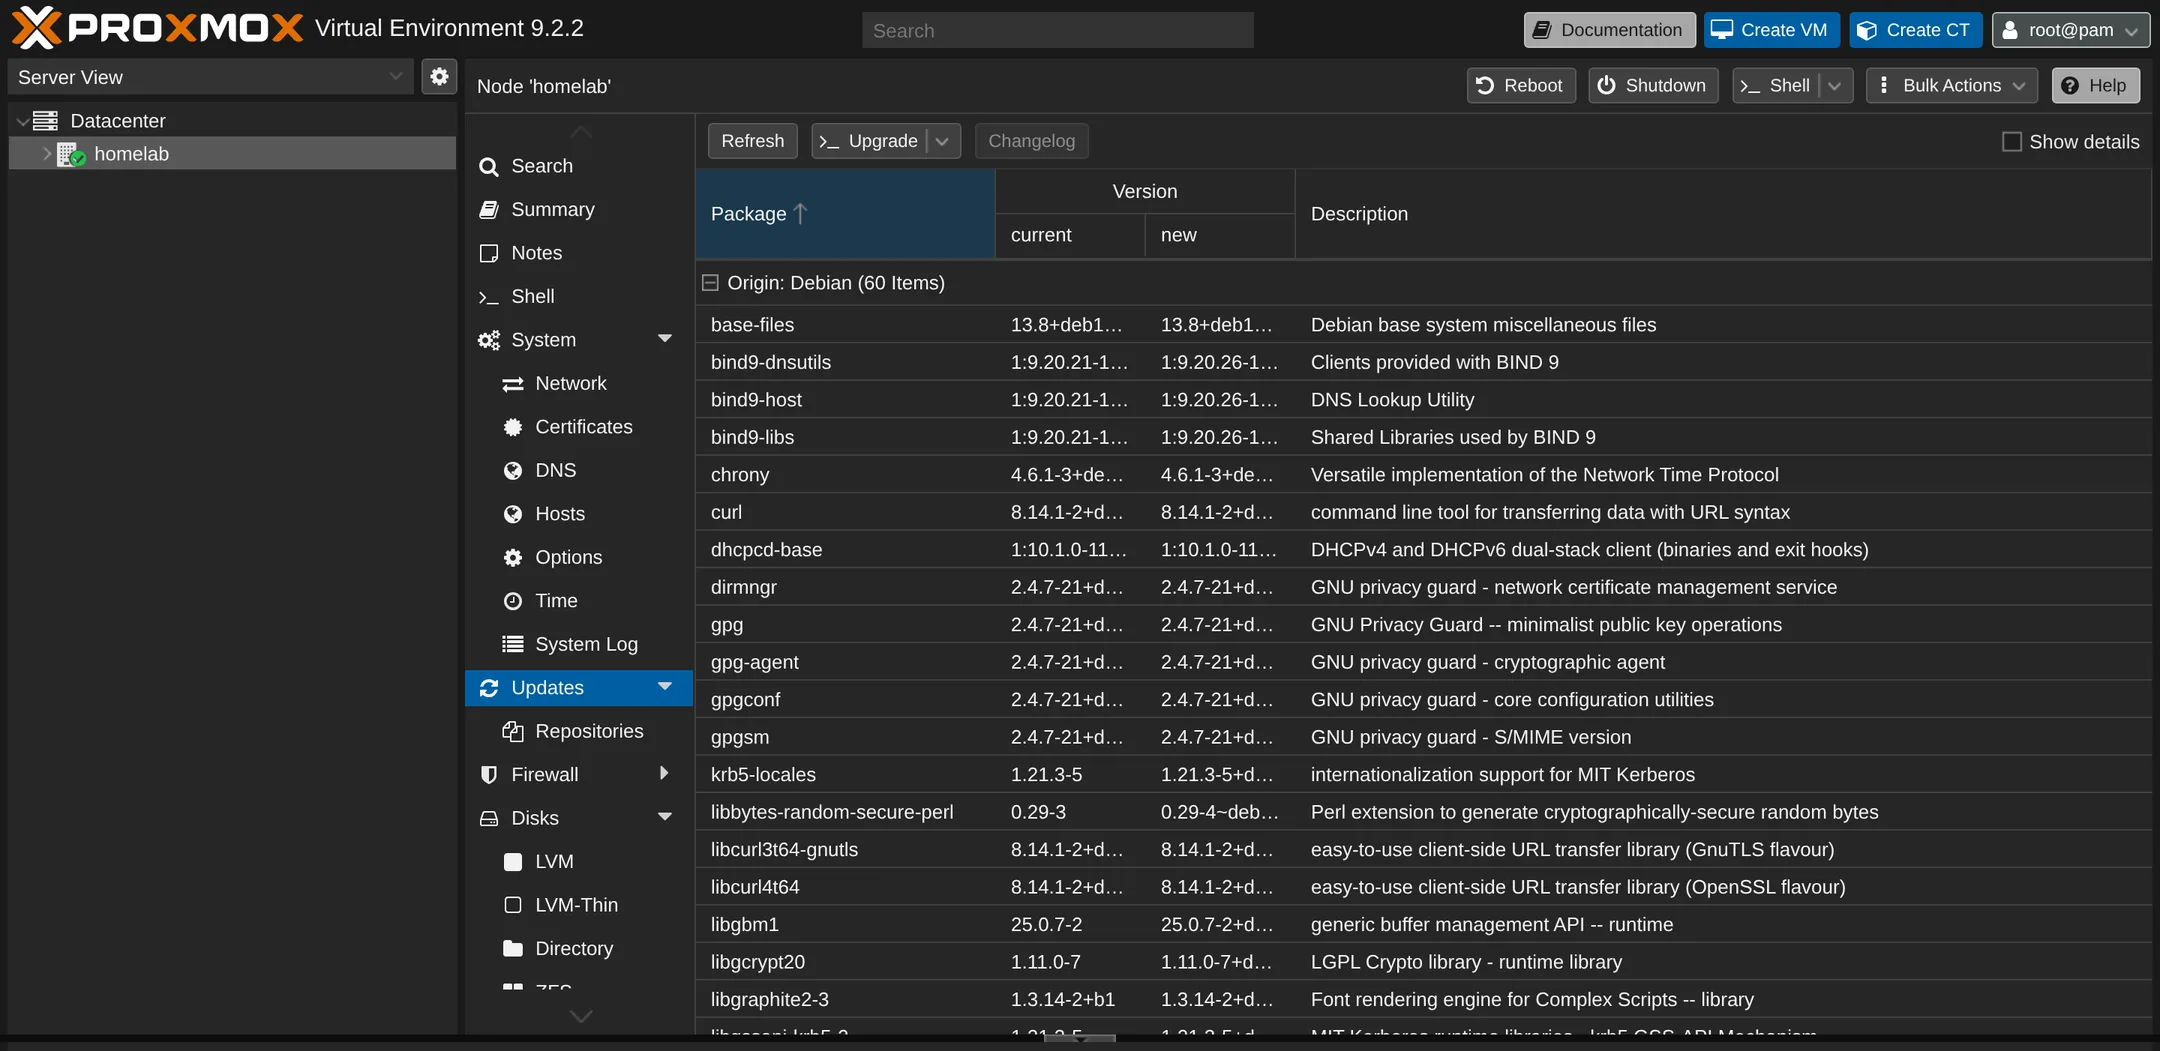
Go to homelab → Updates. Select Refresh. A small task window opens. It shows the package lists as they download. Close it when it ends.
Refresh is the button for apt update.
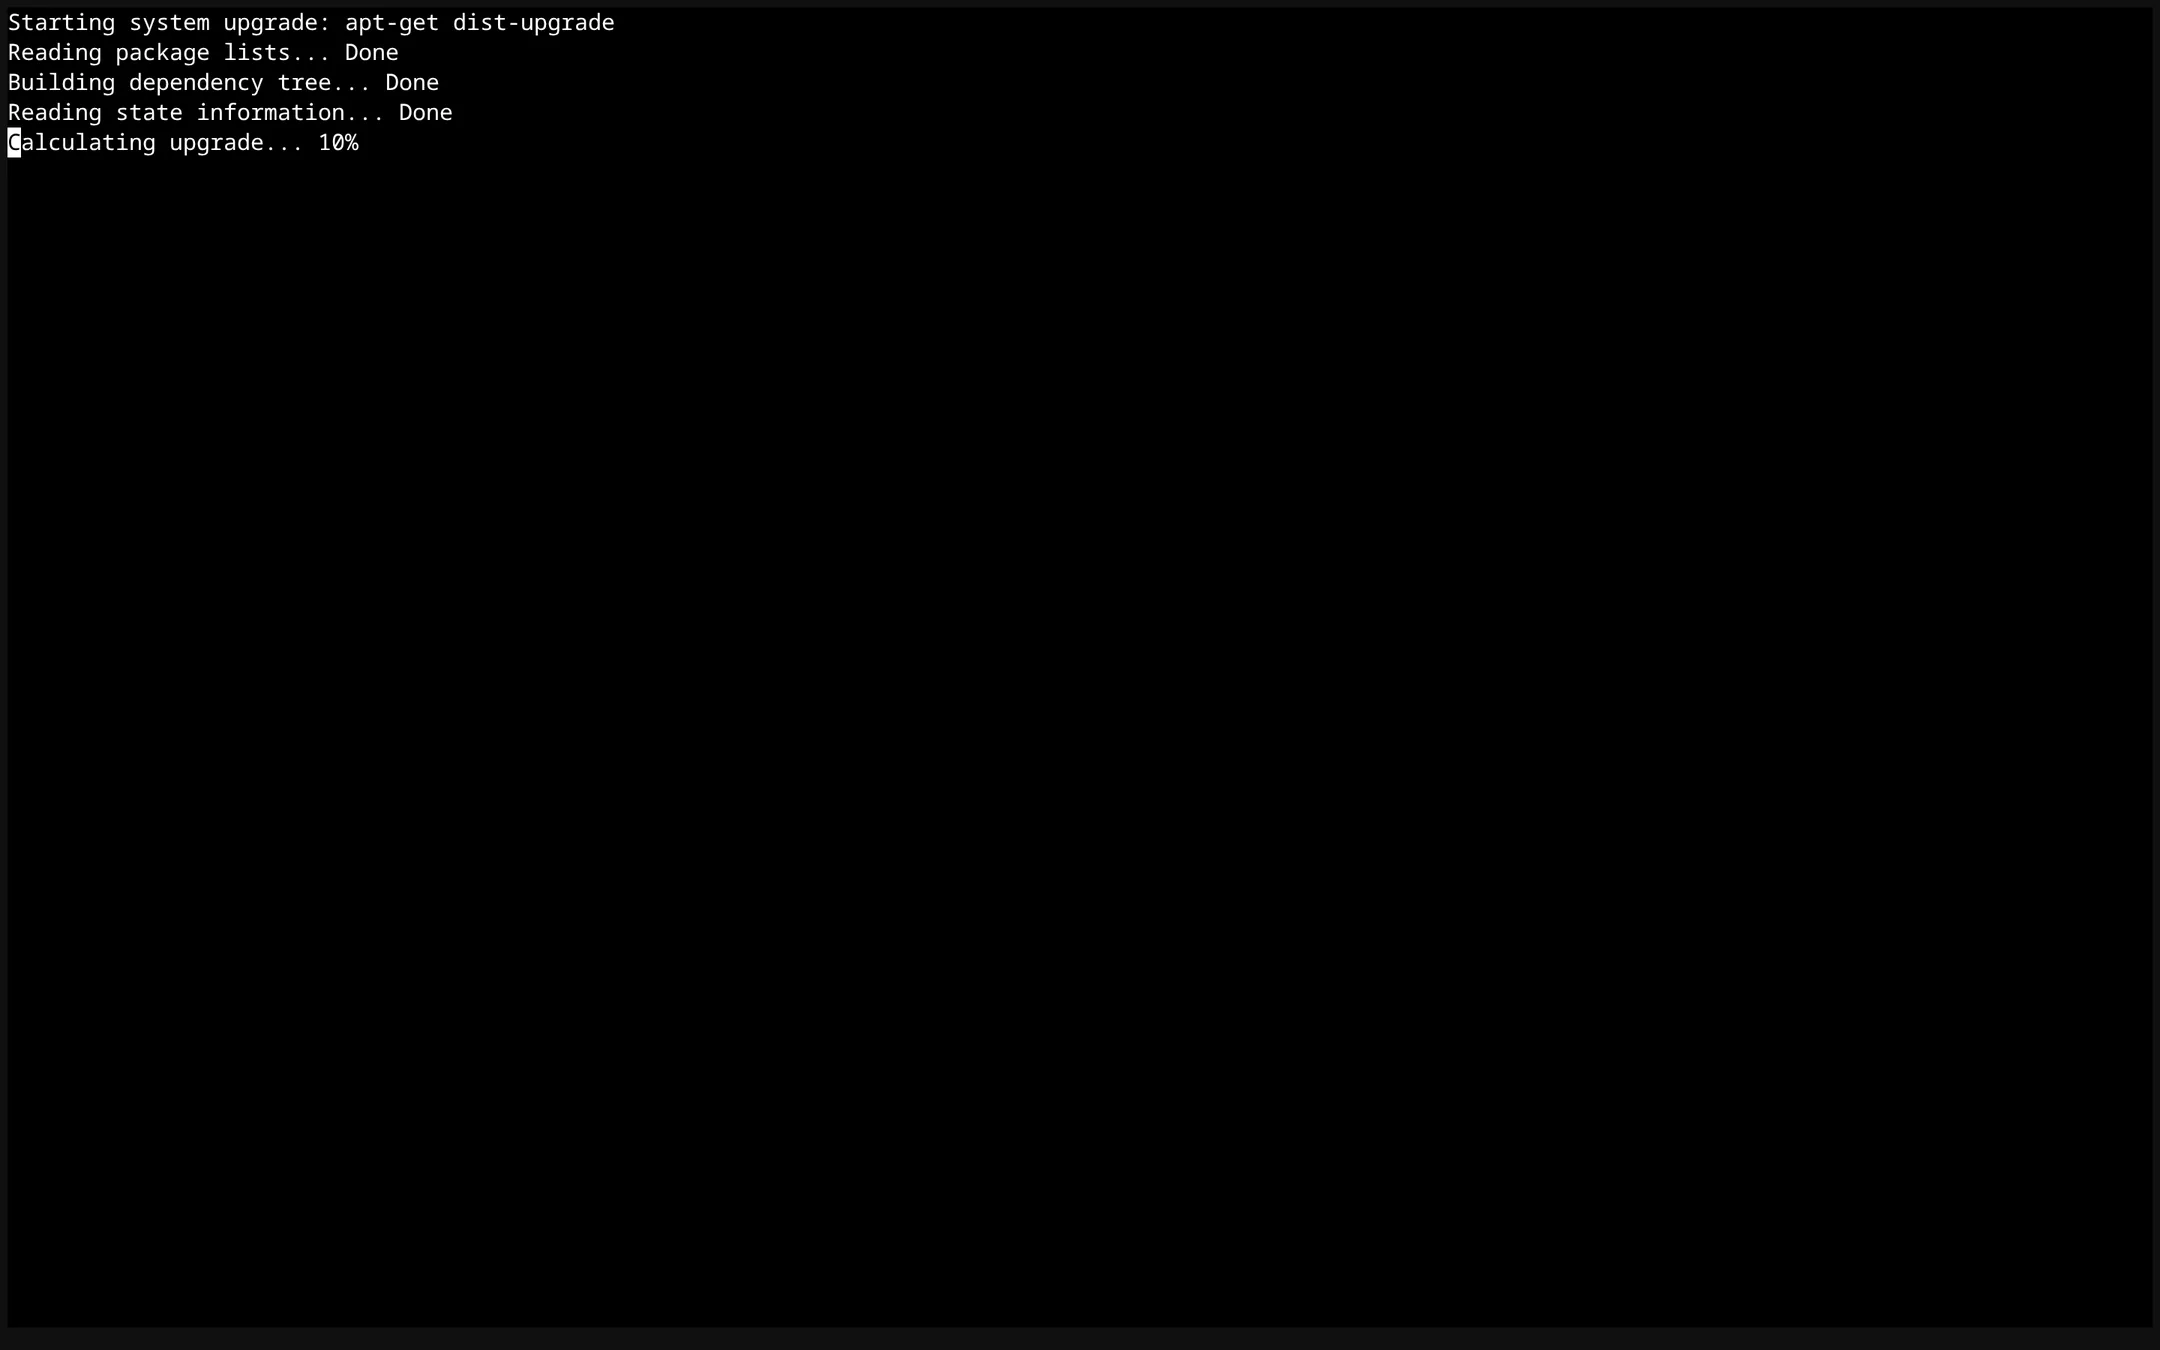
Select Upgrade. It opens a new browser tab and starts at once. You do not need to confirm. Watch the output until it stops and the prompt comes back. Close the tab.
The upgrade runs in a terminal in its own tab. You only read it.
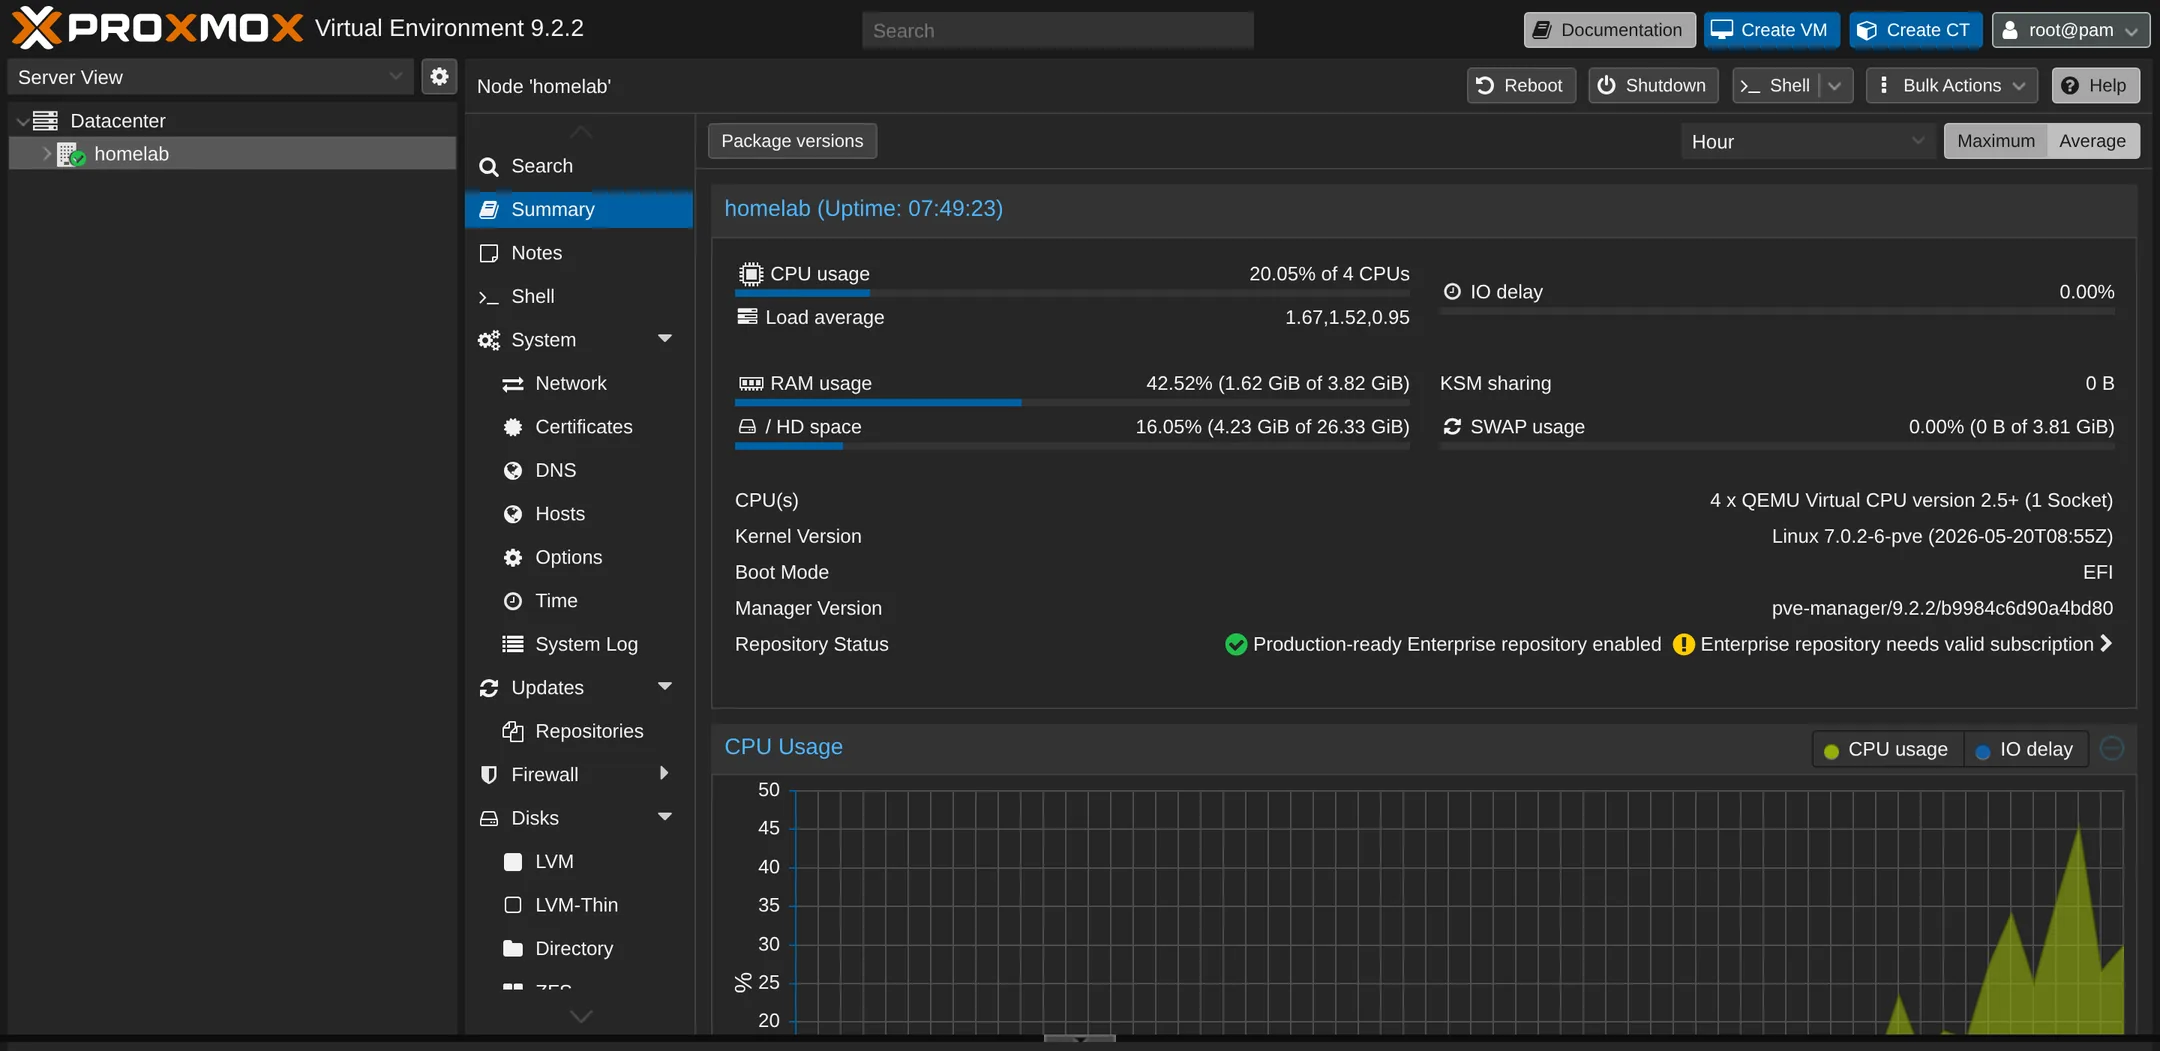
One last step finishes the job. A new kernel starts only after a restart. The Updates panel has no restart button. But the summary page of the node has one. Go to homelab → Summary. Select Reboot in the top right corner. You can also type the command. Open homelab → Shell and run:
⌨ Type this on the Proxmox host (homelab)
reboot # the host comes back in about a minute
Prefer the terminal? — the same repository fix as commands
Open homelab → Shell in the web page (or use SSH later). Run:
⌨ Type this on the Proxmox host (homelab)
for f in pve-enterprise ceph; do                                       # turn OFF the paid repos
  file=/etc/apt/sources.list.d/$f.sources
  [ -f "$file" ] && ! grep -q '^Enabled:' "$file" && printf 'Enabled: no\n' >> "$file"
done
cat > /etc/apt/sources.list.d/proxmox.sources <<'EOF'
Types: deb
URIs: http://download.proxmox.com/debian/pve
Suites: trixie
Components: pve-no-subscription
Signed-By: /usr/share/keyrings/proxmox-archive-keyring.gpg
EOF
apt update && apt full-upgrade -y
reboot
Explanation of each part
for f in pve-enterprise ceph; do … done
Runs the lines inside the loop two times. The first time $f is pve-enterprise. The second time it is ceph.
Turns off the paid repository. It adds the line Enabled: no to the end of the file. It does this only if the file exists, and only if the file has no Enabled: line yet. The file stays valid, and apt keeps working. The ceph file can be missing on your machine. In that case, the loop skips it. The manual never installs Ceph.
cat > …proxmox.sources <<'EOF' … EOF
Writes a new repository file from the lines between the two EOF markers. The quotes around 'EOF' mean: paste the lines as they are, and expand nothing.
Types / URIs / Suites / Components / Signed-By
This block turns on the free pve-no-subscription update channel. The last line, Signed-By, points to a key file that comes with Proxmox. apt checks it before it trusts anything from this source.
apt update && apt full-upgrade -y
Refreshes the package lists. The upgrade of all packages starts only if that step works (&&). The -y means that it does not ask questions.
reboot
Restarts the host. A newer kernel, if one arrived, then starts.
6.6
FINISH
Check that the web page still loads at https://192.168.1.220:8006 after the upgrade and the restart.
Keep the root password and the address 192.168.1.220 in a safe place. You use both all the time.
Set up a login without a password from your PC. Then you can type ssh root@192.168.1.220 and no password is asked. See Ch. 9 · SSH & the terminal.
These problems happen before the web page works, or because it does not work. So they have no buttons. You type at the console of the server. Plug the monitor and the keyboard in again.
The boot-menu key does nothing, and the old system starts. You tapped too late, or "Fast Boot" skips the prompt. Turn the machine off. Tap the key again and again from the moment that you press the power button. It still fails? Open the BIOS setup (usually F2 or DEL). Put the USB stick first in the boot order. This is a temporary change.
The Management Network screen shows no usable network card. The machine has only Wi-Fi. The installer of Proxmox offers only wired ports. Wi-Fi is not supported as the link of the server. Turn the machine off. Connect it to the router with a cable. Or use one of the two fixes from Ch. 2 · What you need: a powerline adapter, or a USB-to-Ethernet adapter of about $15. Plug it in and restart the installer, so that it shows.
The installer sees no disk. The SATA mode must be AHCI. Open the BIOS setup. Find Storage → SATA Operation. The name can differ for each maker. Select AHCI.
After the restart, the installer appears again. The USB stick is still plugged in. Remove it. Restart.
https://192.168.1.220:8006 does not load. Plug the monitor and the keyboard in again. Log in at the console as root. Run ip a. The bridge has no address, or a different address? Then you chose the wrong network card, or you mistyped the IP on the network screen. The simplest fix for a beginner is to run the installer again. Type the Management Network screen again with care. This erases the disk again, but the install takes only a few minutes. The command prints the address that you expected? Then the server is fine. The problem is between the server and your PC. Check that you typed https:// and not http://. Check that you typed :8006. Check that your PC is on the same network. Do not install again for this. It takes 45 minutes and changes nothing.
apt update prints a 401 for pve-enterprise. You skipped the repository fix, or you did not finish it. Open homelab → Updates → Repositories again. Each enterprise row must show as disabled. A No-Subscription row must be in the list.
The web page loads sometimes and not at other times, days or weeks later. Another device on the network got the address of the server. The DHCP pool of the router includes 192.168.1.220 or another fixed address of this manual. Open the admin page of the router. Shrink the DHCP pool so that it ends below .200. Or move the server to an address outside the pool. See the notice about the DHCP range above, before the Management Network step.
6.8
REFERENCE CARD
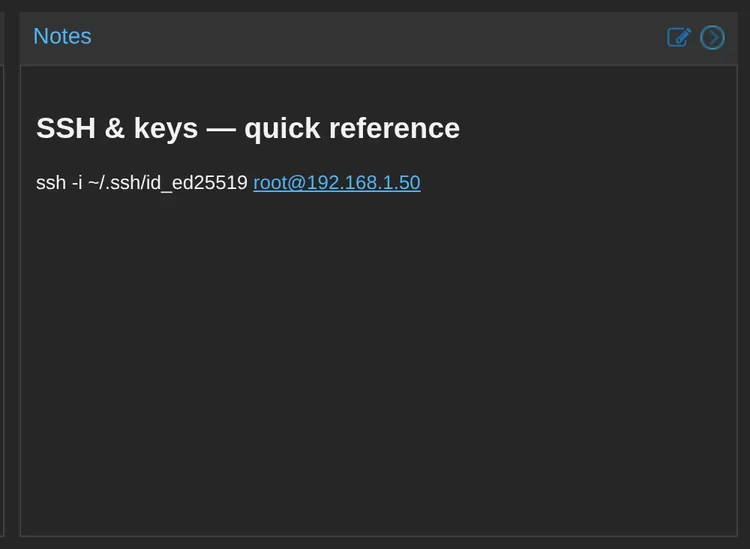
Paste this into homelab → Notes, the Notes panel of the node. The essentials for the host then stay with it. You type these commands. The host has no button for a health check or a log view. A restart of the host stops each container and each VM at the same time. Do it when nobody uses the lab.
📋 Reference — paste into the node's Notes in Proxmox (not a shell command)
## Proxmox VE host — homelab
dashboard https://192.168.1.220:8006 · docs https://pve.proxmox.com/pve-docs/

```sh
# is the web UI running?
systemctl status pveproxy
curl -fsSk https://localhost:8006 >/dev/null && echo OK   # quick health check
# logs (last 50)
journalctl -u pveproxy --no-pager -n 50
# restart the web UI (stop / start / restart)
systemctl stop pveproxy
systemctl start pveproxy
systemctl restart pveproxy
# is there an update? (refresh the package lists)
apt update
# update the host, then reboot (stops every CT and VM — pick a quiet time)
apt update && apt full-upgrade -y && reboot
```
Part B · Build the server
7The build order
Read this one time. It is the map for the whole manual: one rule, six steps that repeat, three places where a command can run, and the order in which you build.
In this chapter
Before you start
This chapter needs the items below. You came here directly? Do them first. Each item takes a short time. Nothing on this page works without them.
Proxmox is installed and works at https://192.168.1.220:8006. You can log in as root. See Ch. 6 · Install Proxmox. At your first visit, the browser shows a certificate warning. Select Advanced. Then select Proceed.
You know where the host shell is. In the Proxmox page, select homelab in the left tree. Then select >_ Shell. You type each command of this page there, unless a step says otherwise. This is the server itself. It is not a container and it is not your own PC.
You know your own network numbers. Where this chapter shows 192.168.1.x, use your own numbers. The rule is in Ch. 3 · How to read this manual.
This chapter builds no container. Another chapter built each container that it mentions.
7.1
THE ONE RULE — ONE SERVICE, ONE CONTAINER
Proxmox is the operating system of the server (homelab, at 192.168.1.220). Its job is to run small, separate machines on top of one physical box. This manual uses one kind of small machine: the LXC container, or CT for short. Ch. 8 · Containers vs virtual machines explains why.
This is the rule for the whole manual: one service, one container. Each app that you install gets its own container. Nothing is shared. This can look like a waste. It is the opposite. Each app is alone in its own box. So you can start it, stop it, snapshot it, back it up, or break it. Nothing else is affected.
Because of this rule, almost every build in this manual follows the same six steps:
Turn on nesting and keyctl. These two settings let the container run Docker inside itself. Nesting is one box in the wizard. Keyctl is one command on the host, after the wizard. Ch. 10 · The container wizard
Install Docker. This is one command inside the new container. Each app chapter shows that command in its own build block. Ch. 10 · The container wizard explains how to create the container. It does not install Docker.
Run the app. Usually this is one docker run command.
Set it up. Open the app in a browser. Complete its first-run wizard.
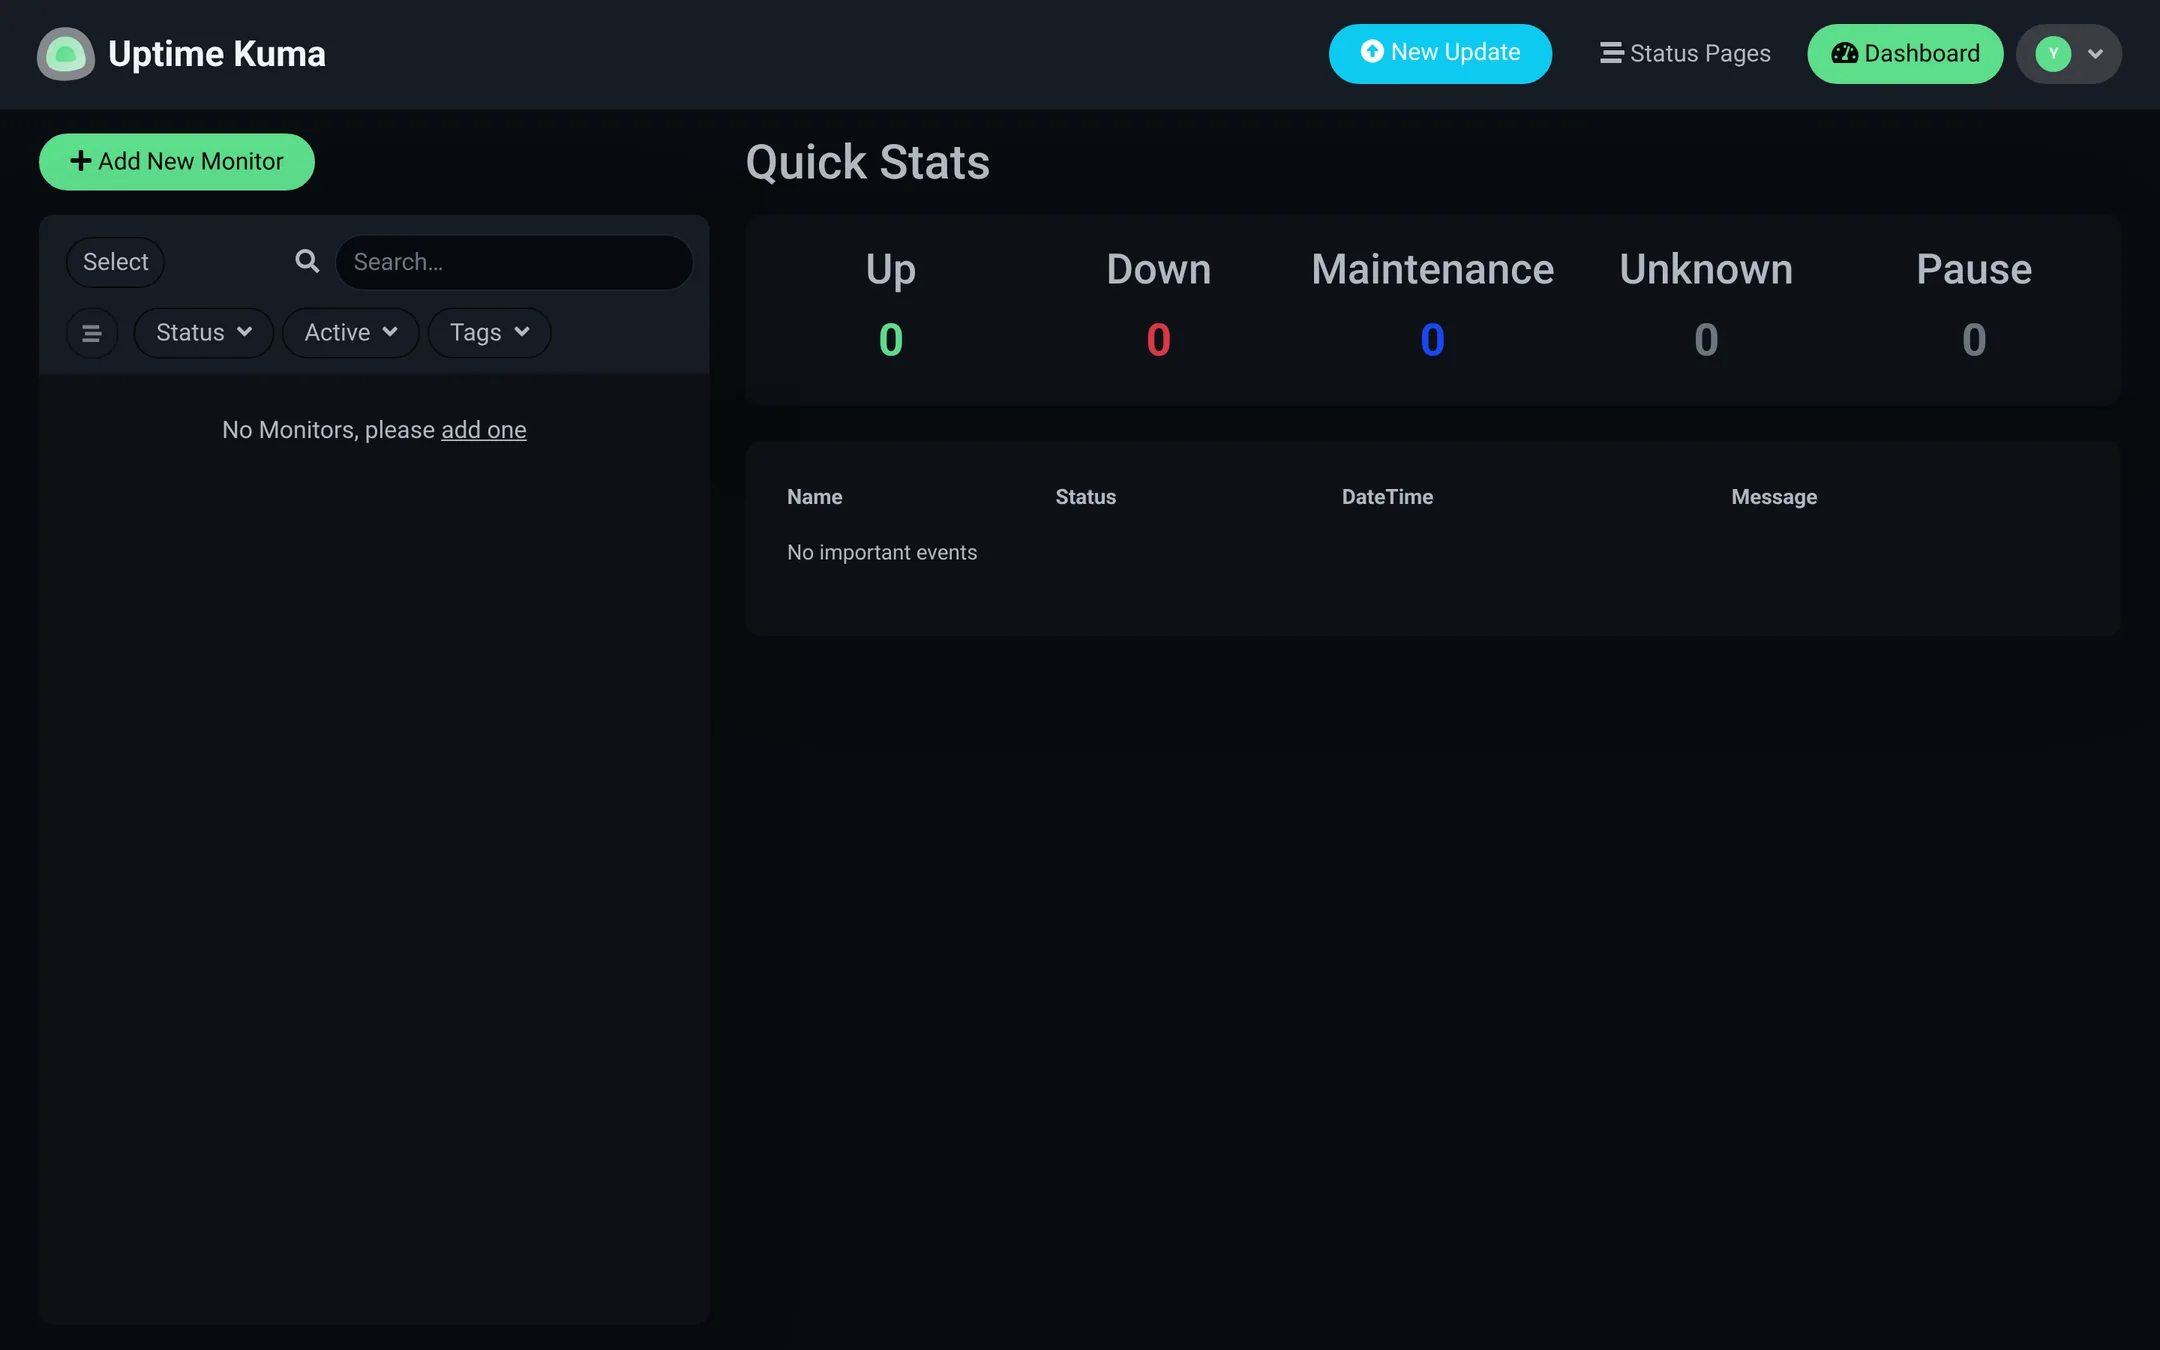
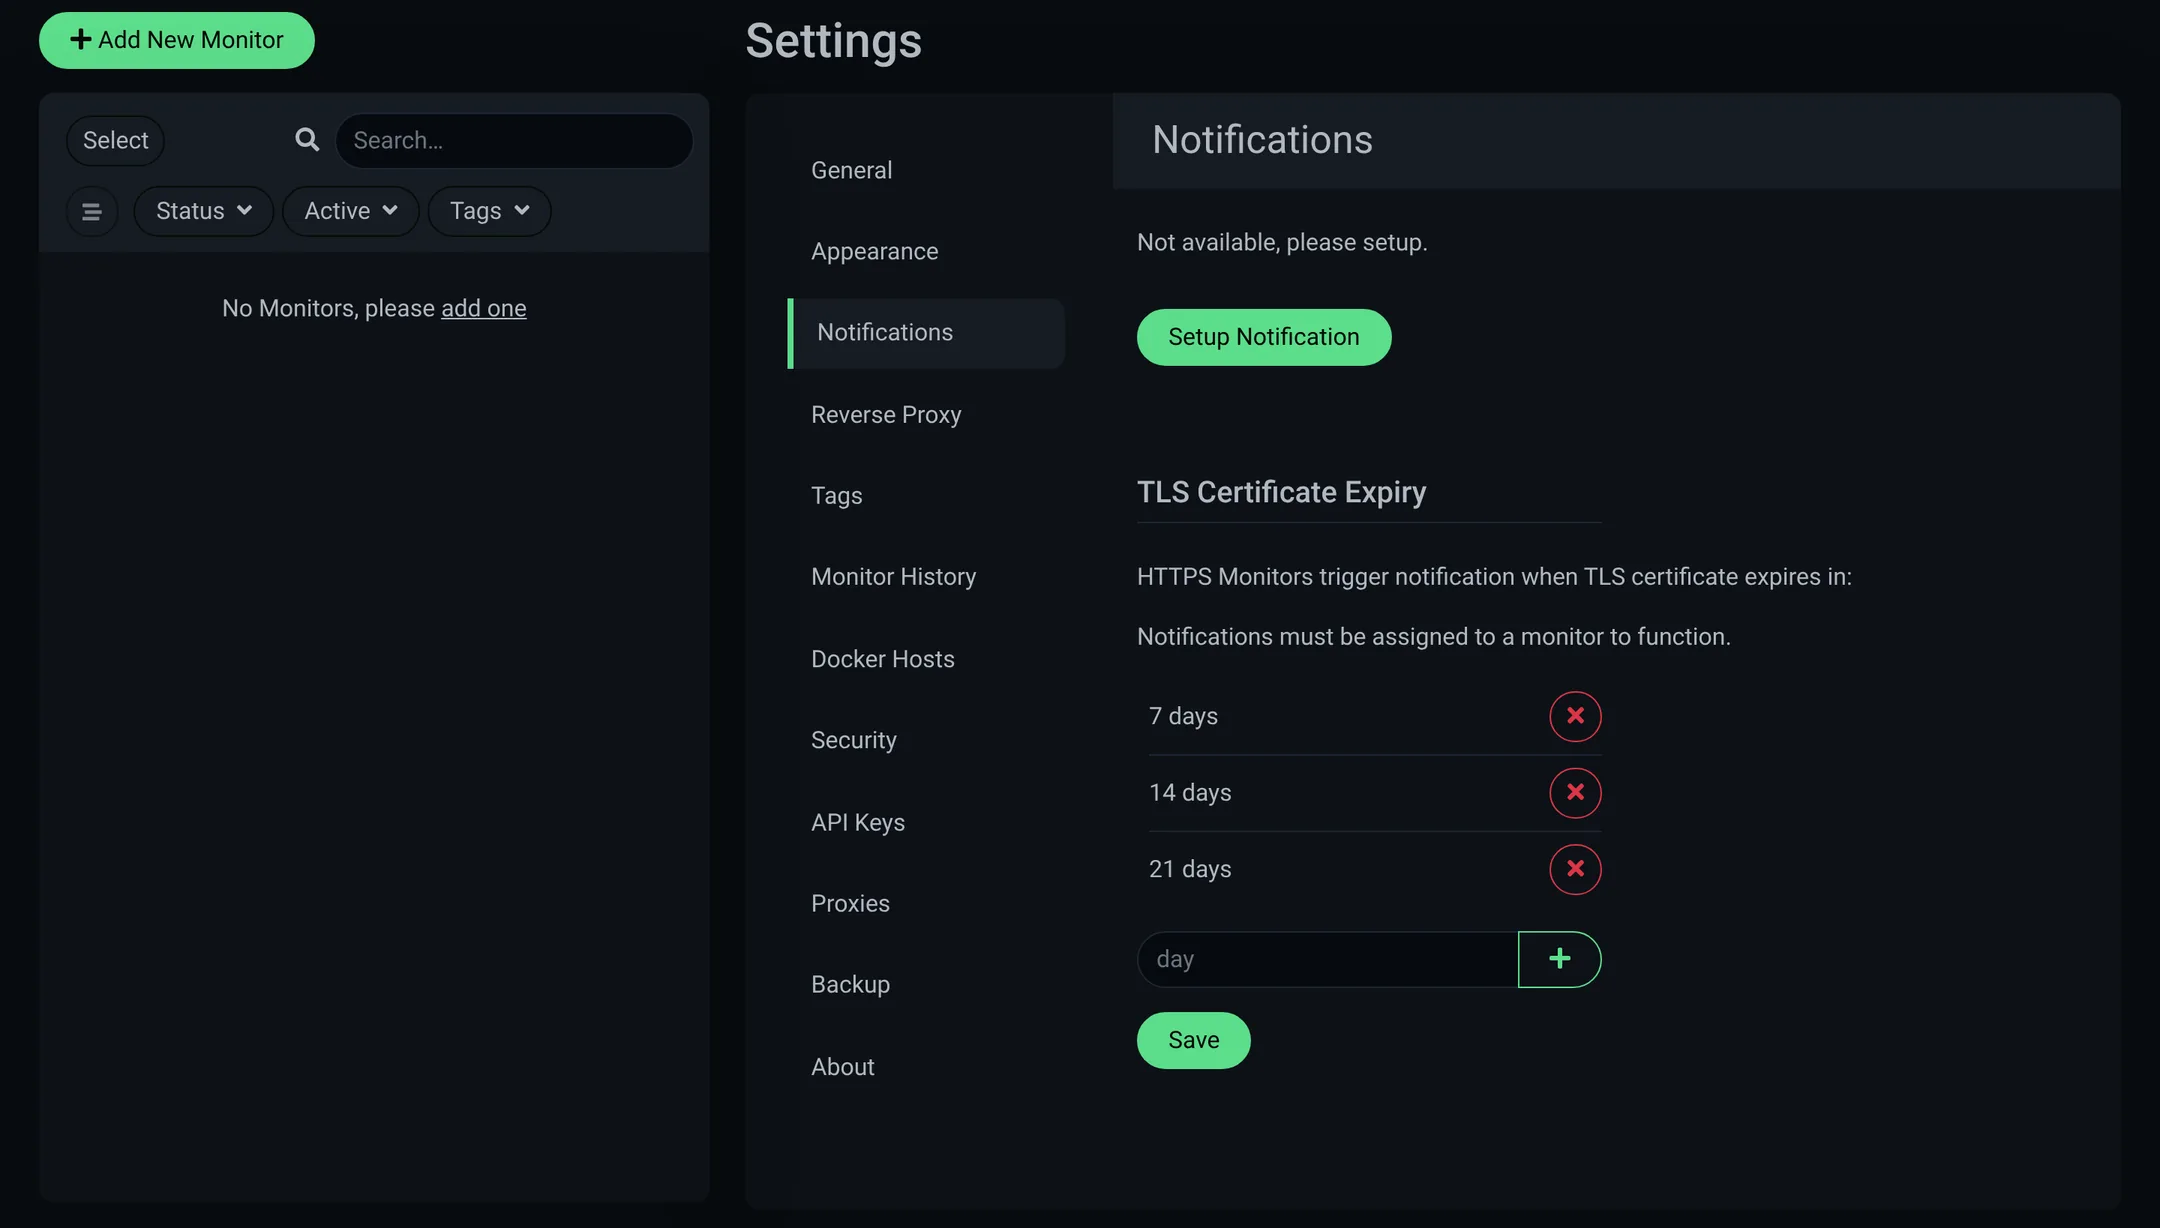
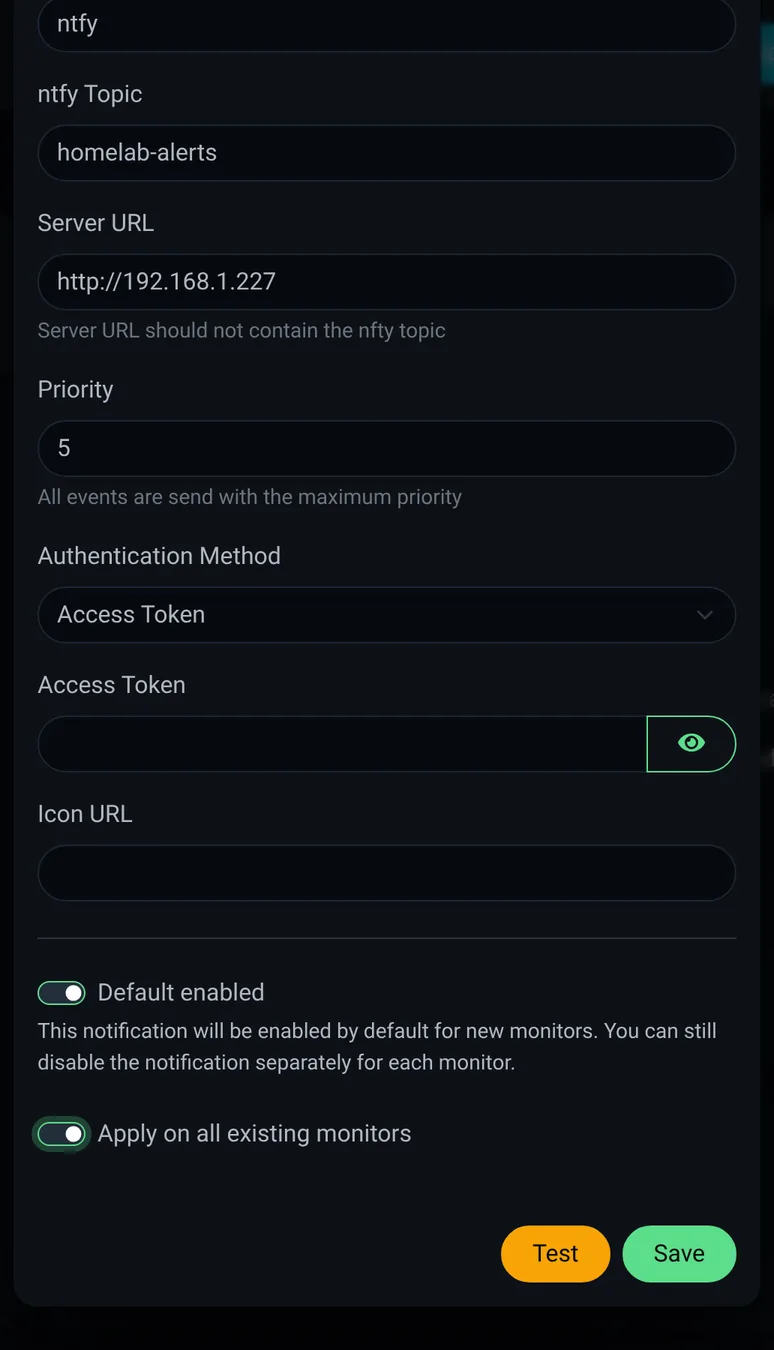
Watch it. Add the app to Uptime Kuma as a new monitor. Kuma then checks it and warns you if it goes down. Open the notification settings of that monitor. Turn on your ntfy alert. The same warning then also goes to your phone. Ch. 13 · ntfyCh. 14 · Uptime Kuma
Learn these six steps one time. Each app chapter is then a variation of them. The app chapters explain only what is different for that app.
Notice — CT numbers are names, not an order
Each container has an ID number. Uptime Kuma is CT 100. AdGuard is CT 102. These numbers are only fixed names. The manual can then point to the same box each time. They are not the order in which you build. Uptime Kuma is CT 100, but you can build an app of Part D with a higher number long before you touch it. Follow the build order in section 3 below. Do not follow the ID numbers.
7.2
WHERE EACH COMMAND RUNS
The most common beginner mistake is to type a command in the wrong place. A command runs in one of three places. Each command block in this manual has a small badge (⌨) with the place. The badge is before the command. Learn the three places now.
You open two of the three places with the mouse, in the Proxmox web page. Open the web page first. You type nothing yet.
These steps assume that Proxmox is installed on the server, and that you set a root password during the install. You did not do this yet? Ch. 6 · Install Proxmox explains it. Come back here after it.
Open https://192.168.1.220:8006 in the browser of your PC. The browser shows a warning that the connection is not private. This is normal. It is the own certificate of Proxmox. Ch. 6 · Install Proxmox (section "First start") explains the warning.
Log in as the user root. Use the password that you set during the install.
You are told to type commands in two places. You reach the first place now. The second place does not exist yet. This is expected.
The host — do this now. In the left tree, click homelab. Then click >_ Shell at the top right. The prompt is root@homelab:~#. It asks for no password. You are already logged in to Proxmox. You use this place most.
Inside a container — read this now, do it later. From the same host Shell, you enter a container with pct enter and its number, for example pct enter 106. The command exit brings you back to the host. Do not try it yet. You did not build a container, so there is nothing to enter. The command pct enter 106 shows an error now. The error is correct. You did nothing wrong. Your first container is Ch. 13 · ntfy. The build order in the next section starts there, not with Uptime Kuma. Come back to pct enter after that container exists.
Notice — read now, do later
You cannot do the second step yet. It needs a container. You build your first container in Ch. 13 · ntfy. The build order in the next section starts there. Read it now, so that you know that it exists. Come back after that chapter. Nothing breaks if you wait.
Keep the host Shell open in a tab while you work. It is the door to both places. The >_ Console button of the container is not that door. It opens the login: prompt of the container. Containers that you build with Ch. 10 · The container wizard have no root password. So no login works there.
Node homelab selected → >_ Shell at the top right. This is the one button that you need.CT 100 selected → >_ Console at the top right. It opens a login: prompt, not a shell. Use pct enter 100 instead.
The three places where a command can run
Place
What it means
The host
The Proxmox machine itself: homelab, at 192.168.1.220. Open it with homelab → >_ Shell. The prompt is root@homelab:~#. Everything about the containers, the disks, and the storage happens here.
Inside a container
A shell inside the own box of one app. Open it from the host Shell with pct enter 100. No password is needed. Most app guides mean this place. (The >_ Console button of a CT is a login: prompt. It is not this shell.) The terminal is not the only door. A container can have SSH. Then you can also see and edit its files with a graphical SFTP file manager from your PC. Ch. 12 · After every build + common Proxmox tasks, section "Move a file to or from the server", shows how.
Your PC
Your own laptop or desktop. It is a completely separate machine. You use it only when a guide says "on your PC", for example to make an SSH key. It cannot see the disks or the containers of the server.
Compare the badge of a command block with the shell that you are in. Do this before you press Enter. A command can fail with not found or not a block device. In that case, you are almost always in the wrong place.
Prefer the terminal? — reach the same two shells by typing
These two ways have no buttons. The first replaces the >_ Shell button. You type it in a terminal on your PC. You do not open the web page. The second is the same pct enter line as above. Both lead to the same two places. The web page is easiest at first. ssh is faster when you are used to it. Ch. 9 · SSH & the terminal teaches SSH from the start.
⌨ Type this on your PC to reach the host
Before you run anything on this page: every 192.168.1.x address below is this manual's example network. If your own network uses different numbers, substitute yours as you type — the rule is in Ch. 3 · How to read this manual. A command that runs with the wrong address usually succeeds and leaves you unreachable.
Opens a terminal on the host over the network, from your PC. root is the user. 192.168.1.220 is the server. This is the typed version of the >_ Shell button.
pct enter 100
Goes from the host into container 100. pct is the Proxmox tool for containers. It runs only on the host. Type exit to come back to root@homelab:~#.
7.3
THE BUILD ORDER
Do not work down the sidebar. Build in this order. Each layer gives you something that the next layer needs.
Install Proxmox. This is the server itself: each installer screen and the first login settings. Everything else needs it first. Ch. 6 · Install Proxmox
Learn the foundation skills (the rest of Part B). Do these chapters in order before your first app:
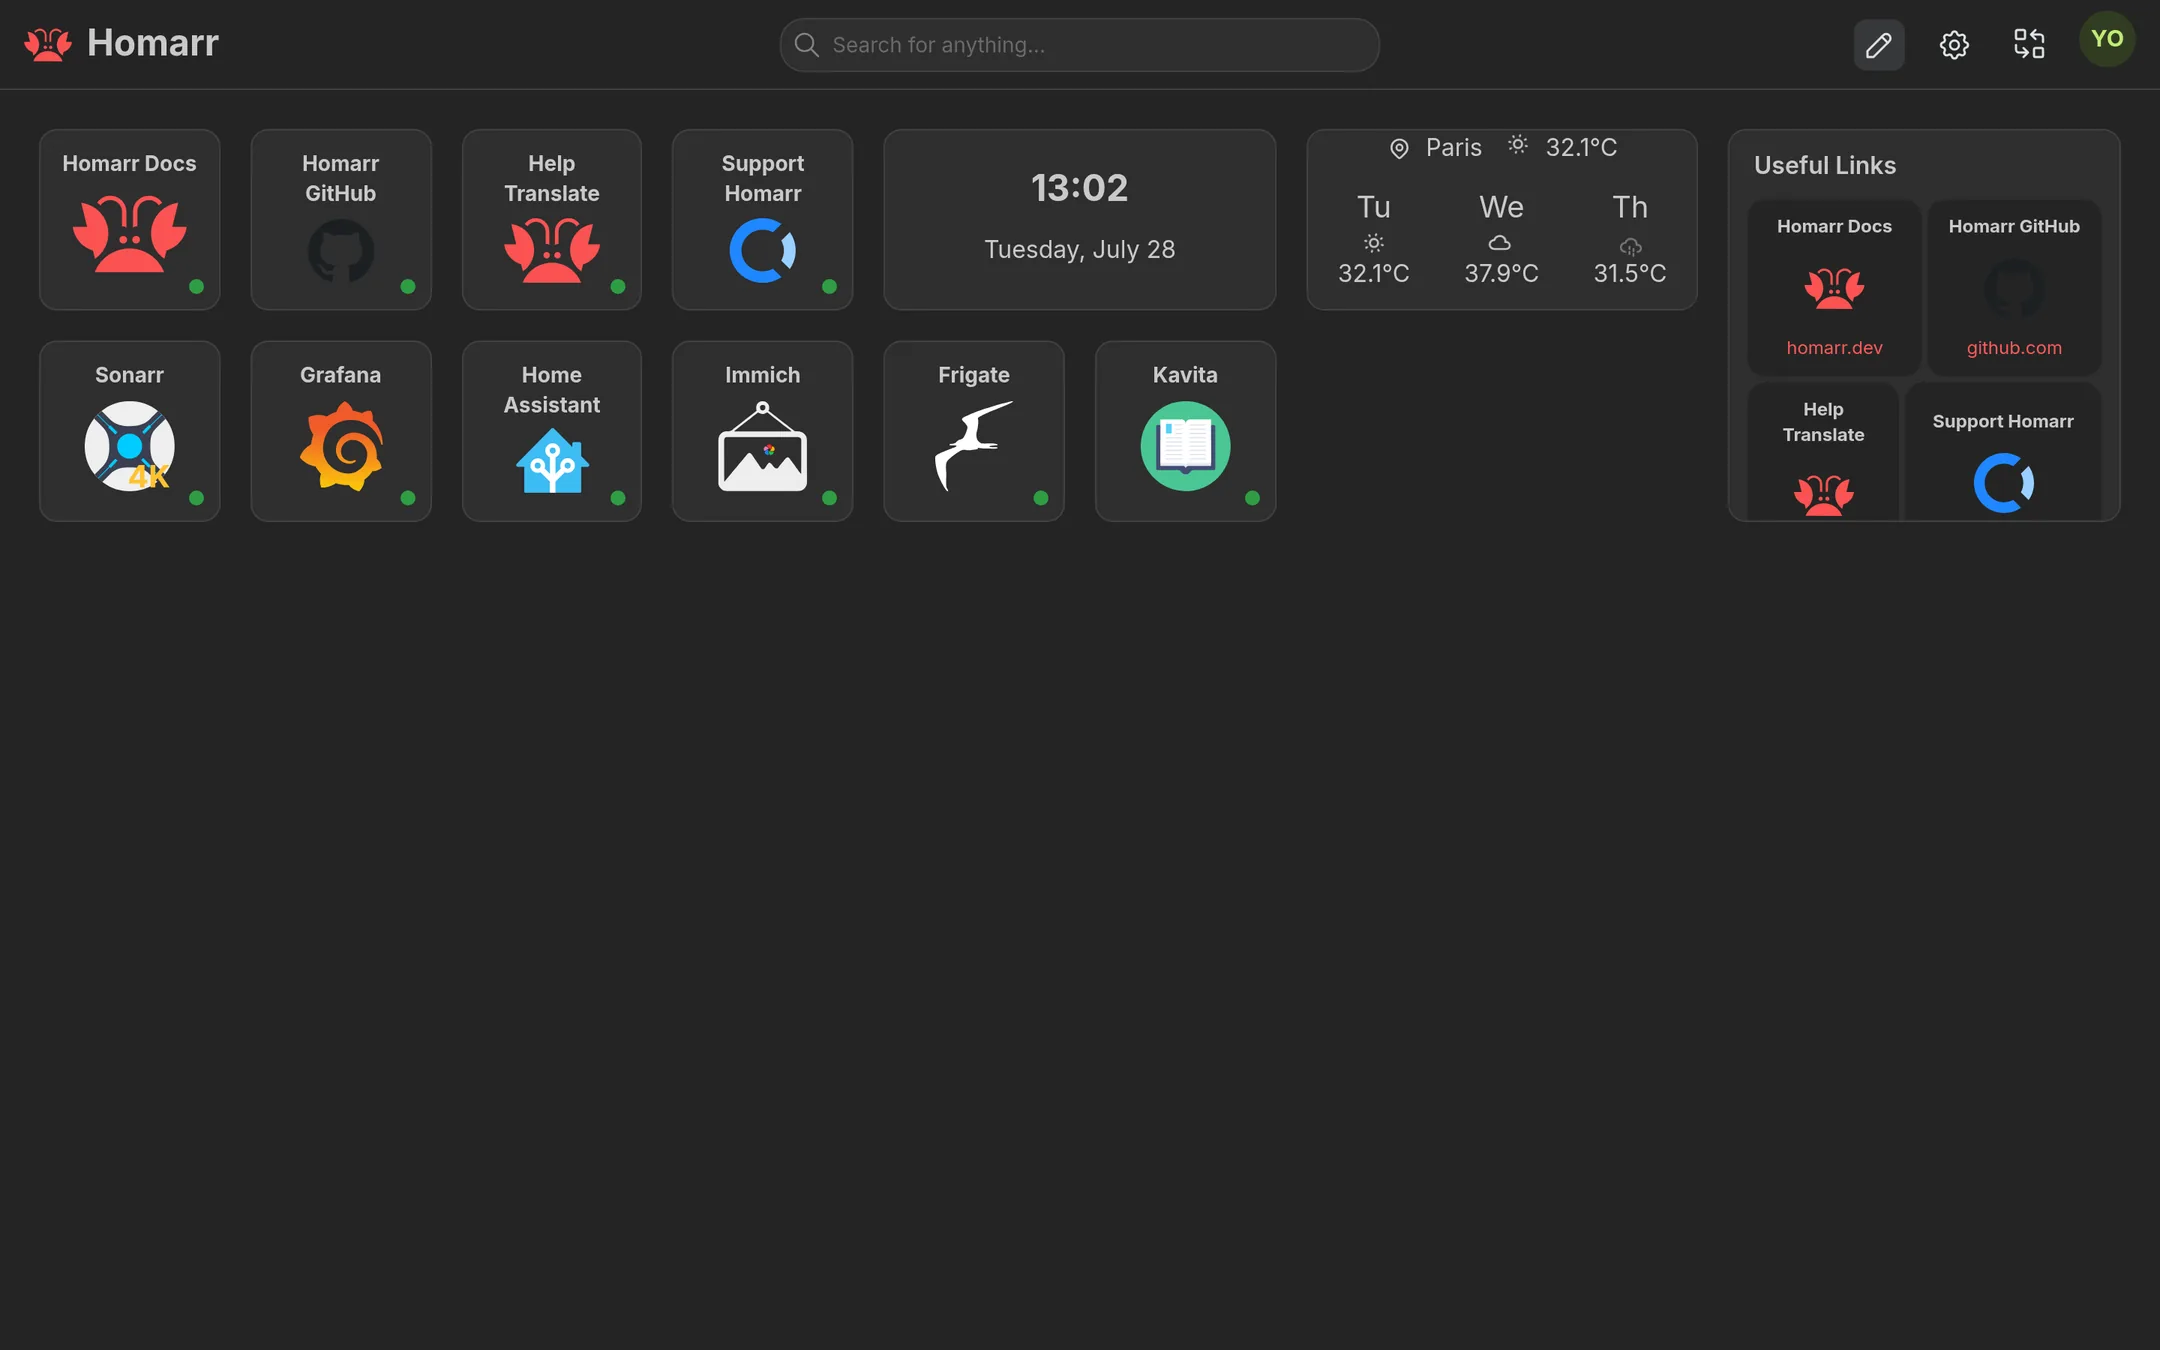
Build the essential six (Part C), in this order: ntfy Ch. 13 · ntfy, then Uptime Kuma Ch. 14 · Uptime Kuma, then AdGuard Home Ch. 16 · AdGuard Home, then Nginx Proxy Manager Ch. 17 · Nginx Proxy Manager, then Homarr Ch. 18 · Homarr dashboard. Finish with remote access: Tailscale Ch. 19 · Remote access: Tailscale. Beszel Ch. 15 · Beszel is the one optional chapter in Part C. It fits right after Kuma. Build it if you want live resource graphs. Skip it if you run one machine and never check its load. The big win of the whole house comes in the AdGuard chapter. Ads disappear on each device, and you install no software on any of them.
Turn on backups before you build anything that you would miss. The last chapter of Part C Ch. 20 · Backups before apps takes about fifteen minutes of clicking. You make one weekly job that covers each container on the server. You also do one restore, to prove with your own hands that it works. Do it here, between the base services and the apps. In Part D, the server starts to hold things that exist nowhere else.
Then anything you like. The six services and the backup job are in place. Now choose freely from the app catalog (Part D), media and personal cloud (Part E), or game servers (Part F). These parts do not depend on each other. Build them in the order that you like.
Notice — media and cloud need shared storage first
Do you go to Part E (media and personal cloud)? Start with its shared-storage chapter Ch. 40 · Shared storage first before the apps. They all read and write the same media folder. Everything else in Parts D and F works alone.
Part B · Build the server
8Containers vs virtual machines
A container is a light slice of the server. It starts in about a second. A virtual machine is a whole simulated computer. Almost everything that you build here is a container.
In this chapter
Proxmox gives you two ways to run a service on the server. This page explains the difference in plain words. It also explains the one rule that confuses most beginners: what "one container per app" really means. There is nothing to click or type here. It is background reading only. You can relax before the next chapter, where you build again.
8.1
Container or virtual machine
Each computer runs a kernel. The kernel is the program that talks to the hardware (the CPU, the memory, the disk) for all other programs. An LXC container shares the Linux kernel of the Proxmox host. It separates one slice of it. Think of roommates who share one kitchen. It is fast to set up. But everyone must cook the same kind of food, and for a container this means Linux only. A container starts in about a second. It adds very little load. So you can run many of them on the mini-PC at the same time. It shares the kernel of the host, so an LXC can run only Linux.
A virtual machine (VM) acts like a new, separate computer. It is built from nothing each time that it starts. It has its own kernel inside. Think of a whole new kitchen, not a shared one. A VM needs more memory and disk space. It starts more slowly. But it is the only way to run a different operating system. Examples are HAOS of Home Assistant (see Ch. 37 · Home Assistant (preview)) or a Windows system. In this manual, almost everything is an LXC container. A VM appears only where a chapter says so.
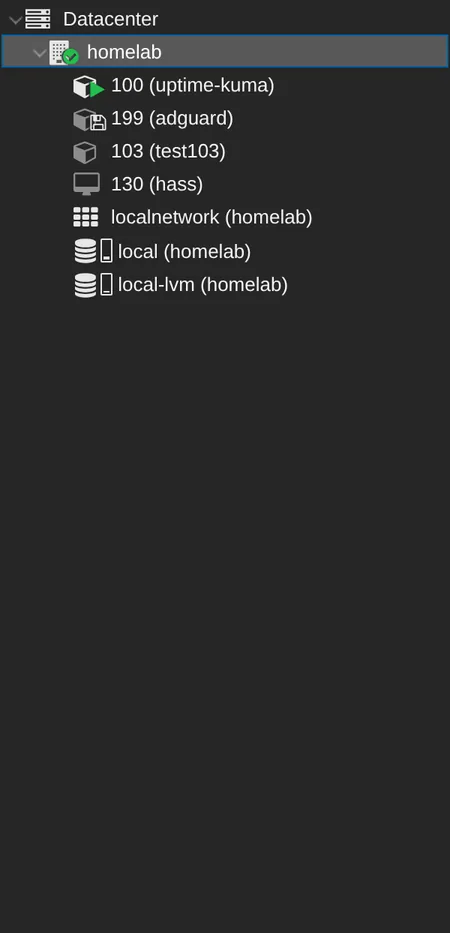
A sample node tree from a server that already has containers and VMs. It is not your own screen. Your tree is still empty now. A container row and a VM row are side by side. Each has its own icon. The icon shows you the difference at a glance.
There is also a middle case that you often meet: an LXC that runs Docker inside it. This is still one container that you manage. But it holds one or more small Docker apps. The table on the right compares all three.
You never choose between them yourself. Each chapter creates the right kind for its app. When you know the difference, the steps are easier to read.
The three kinds of box that you meet
Aspect
LXC container
Virtual machine
Docker inside an LXC
What it is
Shares the Linux kernel of the host. Separates one slice of it.
Simulates a whole computer, with its own kernel.
One LXC that also runs Docker for small app bundles.
Speed and cost
Starts in about a second. Very little load.
Needs more RAM and disk. Starts in tens of seconds.
As light as its LXC, plus a few seconds for Docker to start.
Runs a different OS?
No. Linux only, with the same kernel as the host.
Yes. This is the reason to choose one (HAOS, Windows).
No. It is still Linux.
Where in this manual
Almost every chapter.
Only where a chapter says so, such as Home Assistant OS.
Each app that comes as one or more Docker images.
8.2
What "one container per app" really means
The rule of this manual is one container per app. Each service gets its own box. A problem in one box never touches another. Two details confuse people about this rule. Read both now.
Some apps need a helper
Some apps need a database or a search engine that runs next to them. Examples are Paperless, Karakeep, Penpot, and later Immich. For these apps, "one LXC per app" means that you run the small bundle of the app with Docker Composeinside its one container. It is still one container that you manage. But it is not one single program. These guides give you a compose file. This is a text file that lists the app and its helper in one place. Docker reads the file and starts both together.
Notice — compose is still "one container per app"
A compose file looks like several containers. But they all live inside the one LXC that you built for that app. They start and stop together. They count as one service. You still manage one box. See Ch. 30 · Paperless-ngx, Ch. 31 · Karakeep, Ch. 28 · Penpot, and Ch. 52 · Immich when you reach them. Ch. 53 · Nextcloud is a similar case. Its master container starts the helpers itself.
The media stack is the exception
The media apps, such as Radarr, qBittorrent, and their relatives, must all read and write the same filesystem. Suppose each app keeps its own copy. Then each movie is stored two times or more, and the 500 GB SSD fills quickly. So, before you build any of them, you make one shared storage folder on the host. You mount it into each of their containers. To mount means that one host folder also shows up inside each container. Ch. 40 · Shared storage first shows exactly how.
Notice — build shared storage before the media apps
Do not start Radarr (see Ch. 43 · Radarr) or qBittorrent (see Ch. 42 · qBittorrent) until the shared folder exists. The Ch. 40 · Shared storage first chapter makes it one time at /srv/media on the host. It also shows how each media container mounts it. Then every app sees the same files in the same place.
Part B · Build the server
9SSH & the terminal
You make one SSH key on your PC and install it one time. Then you log in to the server and to each container without a password. After that, you learn the one docker run line that every app chapter uses.
In this chapter
Before you start
This chapter needs the items below. You came here directly? Do them first. Each item takes a short time. Nothing on this page works without them.
Proxmox is installed and works at https://192.168.1.220:8006. You can log in as root. See Ch. 6 · Install Proxmox. At your first visit, the browser shows a certificate warning. Select Advanced. Then select Proceed.
You know where the host shell is. In the Proxmox page, select homelab in the left tree. Then select >_ Shell. You type each command of this page there, unless a step says otherwise. This is the server itself. It is not a container and it is not your own PC.
You know your own network numbers. Where this chapter shows 192.168.1.x, use your own numbers. The rule is in Ch. 3 · How to read this manual.
This chapter builds no container. Another chapter built each container that it mentions.
SSH is how you talk to your server and its containers from your own PC, in a normal terminal window. You do not use a password. You use a key. A key is a pair of files that you make one time on your PC. The private half never leaves your PC. You give the public half to each container. After that, you log in with no password.
9.1
MAKE YOUR KEY ON YOUR PC
This part has no buttons. Proxmox is not involved yet. You make the key in a terminal window on your own PC.
Do this one time, on your own PC. Do not do it on the server. It makes two files in a hidden .ssh folder in your home folder. One is the private key id_ed25519. It stays secret. The other is the public key id_ed25519.pub. You give it out.
Open a terminal on your PC. On Windows 11, press the Start key and type PowerShell. Open the app that appears. The SSH client is already in Windows. You install nothing. On a Mac or on Linux, open the Terminal app.
Run the ssh-keygen command. Change the label after -C to a text that reminds you which PC this is.
Press Enter three times. The first time accepts the default file location. The next two times leave the passphrase empty.
Print your public key with the line for your system.
Select the whole printed line. It is one long line. It starts with ssh-ed25519. The terminal printed this text, so there is no Copy button. Drag the mouse across the line to highlight it.
Copy the line. On Windows, press Ctrl+C while the text is highlighted, or right-click the selection. Windows Terminal and PowerShell do not copy when you release the mouse, unless you turned that on yourself. On a Mac, press Cmd+C. On Linux, press Ctrl+Shift+C. On Linux, plain Ctrl+C in a terminal means cancel the running command. It does not copy.
Paste the line into a text editor and check it. It must be one line without a break, and it must start with ssh-ed25519. A line break in the middle breaks the key, and nothing tells you.
⌨ Type this on your PC
Before you run anything on this page: every 192.168.1.x address below is this manual's example network. If your own network uses different numbers, substitute yours as you type — the rule is in Ch. 3 · How to read this manual. A command that runs with the wrong address usually succeeds and leaves you unreachable.
ssh-keygen -t ed25519 -C "you@your-pc"
⌨ Type this on your PC — one line, for your system
cat ~/.ssh/id_ed25519.pub                            # Mac or Linux
Get-Content $env:USERPROFILE\.ssh\id_ed25519.pub    # Windows PowerShell
Explanation of each part
ssh-keygen
The built-in tool that makes an SSH key pair. It is part of Windows 11, macOS, and Linux. You download nothing.
-t ed25519
The key type. ed25519 is a modern signature method. It is fast, short, and secure. Use it, not the older rsa.
-C "you@your-pc"
A comment at the end of the public key. It is only a label for you. It helps you tell your keys apart later. It does not change the security.
id_ed25519 (no extension)
The private key. This is the secret half. It never leaves your PC. You never paste it anywhere.
id_ed25519.pub
The public key. This half is safe to share. It is the one line that you copy and install on each container.
Notice — what the placeholder means in other chapters
From here on, each chapter writes the key as ssh-ed25519 AAAA…your-key-here you@your-pc. This is a stand-in for the exact line that you just printed. It is your own public key from ~/.ssh/id_ed25519.pub. In the next chapter, you paste this public key in the SSH public key field of the wizard each time that you create a container (Ch. 10 · The container wizard). In other places where you see it, for example an authorized_keys line below, paste your real .pub line instead.
Warning — never share the private key
Copy only the file that ends in .pub. The other file, id_ed25519 with no extension, is the private key. Anyone who gets it can log in as you. Never paste it into a container, a chat, or your Proxmox Notes.
9.2
PUT YOUR KEY ON THE SERVER
Do this one time, now, for the Proxmox host itself. Ch. 6 · Install Proxmox told you to set up a login without a password to 192.168.1.220. This is that step. Later chapters assume that it is done. Containers are different. The wizard installs the key for you when you create each container (Ch. 10 · The container wizard).
This part has no buttons. You type in the same terminal on your PC. You need the root password of the server. This is the password that you set during the Proxmox install. This is the last time that you type it.
On a Mac or on Linux, run ssh-copy-id. Type the root password of the server one time when it asks.
On Windows, PowerShell has no ssh-copy-id. Run the second command instead. It sends your public key over SSH and adds it to authorized_keys on the server. Type the root password one time when it asks.
This is your first connection to the server? You see a question about a fingerprint. Answer yes. It is a normal one-time check. It is not a warning. A notice later in this chapter shows what it looks like and why.
Check that it worked. Run ssh root@192.168.1.220. You get the root@homelab:~# prompt. No password is asked.
The server still asks for a password? Then the key did not arrive. Run the command for your system again. Read the output for an error. A wrong root password and a typing mistake in the address are the two usual causes.
Logs in with the password one last time. It adds your public key to ~/.ssh/authorized_keys on the server, with the strict permissions that SSH needs. It is part of Mac and Linux. It never sends your private key.
type …\id_ed25519.pub
The PowerShell version of cat. It prints your public key file. Here, it sends the text into the next command.
| ssh root@192.168.1.220 "…"
Sends that printed line into a command that runs on the server. The command makes ~/.ssh, adds the key to authorized_keys, and sets strict permissions on both. This is ssh-copy-id done by hand.
tr -d '\r'
Removes hidden carriage-return characters from the line. PowerShell ends each line with the Windows line ending (CRLF), and a stray carriage return at the end of a key line can make the server reject the key. This part removes it. It does no harm if there is none.
>> ~/.ssh/authorized_keys
Adds to the end of the file. It uses two arrows. One arrow (>) overwrites the file and deletes each key that is already there.
9.3
SSH IN, NOT THE WEB CONSOLE
Use the Console of the Proxmox web page for one paste only: to install your key. The console damages long pastes. After that, switch to SSH from your PC for everything else. You repeat this pattern in each app chapter: SSH into a new container, then install Docker. You have no container yet. You build the first one in the next chapter. So your first real use of this pattern is in Part C.
Notice — the wizard usually installs the key for you
In the next chapter, you paste this public key in the SSH public key field of the wizard each time that you create a container (Ch. 10 · The container wizard). That container then trusts you from the start. You skip the paste by hand below. You go straight to ssh root@…. The paste by hand is the fallback. Use it for a container that you built without a key, or any time that you need to add a key later.
Notice — read now, do later
You cannot do the rest of this section yet. Each step below needs a container. You build your first container in Ch. 10 · The container wizard. Until then, the left tree of Proxmox has no container in it. There is nothing to click. Do not look for one. Read the steps, so that you know that they exist. Come back when that container runs. Nothing breaks if you wait.
First check which kind of container you built. You built it with a key? This is the default of the wizard. Then it already trusts you. Skip to the pct enter step below. You never need the console paste. You built it with a password instead? Keep reading. Install the key by hand below. Opening the console is the one step here that has a button.
In the Proxmox web page, click the container in the left tree.
Click >_ Console at the top right of the page of the container.
The >_ Console button is at the top right when the container is selected in the left tree.
Log in as root with the password of the container. You left the password empty when you built it? This is the default of the manual. Then no login works here. Close this console tab. Use the next step.
Read the ID number of the container in the left tree. It shows before the name, for example 100. Click homelab in the same tree. Click >_ Shell at the top right. This opens a shell on the host. You are already logged in. Run pct enter <ID> with that number. It takes you into the container as root. No password is needed. Then type the command below. Ch. 7 · The build order explains pct enter and the host shell.
The console has no buttons. From here, you type the commands.
In the command on the right, replace the placeholder with your real .pub line.
Paste the command in the console. It makes the .ssh folder. It writes your public key into authorized_keys. It sets the strict permissions that SSH needs.
Close the console tab.
On your PC, run ssh root@192.168.1.xxx. Replace xxx with the own IP of the container. You find the IP on the Summary tab of the container in the Proxmox web page. You are in, with no password.
⌨ Type this inside the container (web console, one time)
Makes the hidden .ssh folder in the home folder. Login keys are kept there. The -p flag means: show no error if the folder exists, and make missing parent folders too.
chmod 700 ~/.ssh
Locks the folder. Only the owner can open it, list it, or write to it. SSH refuses to use the folder without this permission.
echo '…' > ~/.ssh/authorized_keys
Writes one line, a public key, into a new file named authorized_keys. It overwrites all that is already in the file. This file lists the public keys that can log in without a password.
ssh-ed25519 AAAA…
The public key itself. ssh-ed25519 is the key type. The long text is the key data. you@your-pc is the label that shows whose key it is. Your real .pub line goes here.
chmod 600 ~/.ssh/authorized_keys
Restricts the file. Only the owner can read or write it. Not even group members can. SSH does not trust the file without this strict permission.
Notice — the first login asks a yes or no question
The first time that you use SSH to a machine, you see The authenticity of host … can't be established … Are you sure you want to continue connecting (yes/no)?. Type yes and press Enter. This is normal. It records the fingerprint of the container, so that later logins are silent. You can get Permission denied (publickey) instead. Then the key did not work. Check that you used the real IP of the container. Check that you pasted your own.pub line in authorized_keys. The placeholder text AAAA…your-key-here does not work.
Install Docker in the container
You can now use SSH to enter the container. Install Docker in it. Each app chapter needs Docker. The basic command is always the same.
This part has no buttons. Type the commands over SSH, or in the shell of the container from the host (pct enter <ID>).
Run the install command. It installs Docker and curl. curl is the small tool that the reference cards use to check an app. A new Debian container has neither.
Check that Docker runs with docker ps. Success shows almost nothing. You see one row with column headings (CONTAINER ID, IMAGE, …) and no rows below it. This is correct. You did not start an app yet.
You must NOT see command not found or Cannot connect to the Docker daemon. Each of them means that the install did not finish. Run the apt line again before you install any app.
Refreshes the package list. Then it installs Docker and curl without questions (-y). A new Debian container has no curl. The app chapters use it for health checks. The && means that the install starts only if the refresh works.
docker ps
Lists the containers that Docker runs now. The list is empty now. This proves that the Docker service answers.
Notice — multi-part apps add Compose
docker.io and curl are all that most app chapters need. A few multi-part apps run several containers at the same time with Docker Compose. Examples are Immich, Paperless, authentik, and Grafana. Those chapters add the docker-compose package of Debian to the line above (apt install -y docker.io docker-compose curl) and say so there. Use the own docker-compose package of Debian. On Debian 13, it installs Compose v2. Then both docker compose (with a space) and docker-compose (with a hyphen) work. Do not copy the name docker-compose-plugin from other guides. That package exists only in the own repository of Docker Inc. It is not in Debian. The command apt install docker-compose-plugin fails here with an error.
9.4
ANATOMY OF docker run
Almost each app chapter is one docker run line. The lines differ only in the image name and the numbers. The shape is always the same. Learn it one time here. The app chapters point back to this section.
Docker has no buttons in Proxmox. You type these lines over SSH, or in the shell of the container from the host (pct enter <ID>).
Read the example on the right from left to right. First the command. Then a series of flags. The image name is last. These are the flags that you meet in each chapter.
-d — run in the background.
--name — a friendly name to use later.
--restart=unless-stopped — start the app again after a crash or a restart.
-v host:container — a volume. The data of the app is outside the image. The image is the ready-made app package that Docker downloads and runs. So updates never delete the data.
-p outside:inside — the port map. This is how you reach the web page of the app.
Makes and starts a new container. It is a separate, packaged copy of an app with all that it needs to run.
-d
Detached mode. The container runs in the background. It does not take over your terminal.
--name app
Gives the container the friendly name app. You use this name later, not a random ID.
--restart=unless-stopped
Starts the container again if it crashes or if the server restarts. It does not start again if you stopped it yourself.
-v /opt/app:/data
Links the folder /opt/app in the container of your server to the folder /data inside the app. The data of the app stays, also if you delete the container and run it again.
-p 8080:80
Sends port 8080 on the outside to port 80 inside. You then reach the app at http://your-ip:8080.
author/image
The name of the image, a ready-made app package, to download and run. The format is publisher/appname.
An update of an app always has the same three steps: pull the new image, remove the old container, and run it again with the same command. The three lines below do this, one line for each step. Do not act on this sentence alone. Use the listing. The data is in the volume, not in the container. So it stays unchanged.
⌨ Type this inside the container — the update pattern
docker pull author/image        # 1. get the new version
docker rm -f app                # 2. remove the old container
docker run -d --name app …      # 3. re-run with the SAME command; the volume keeps your data
9.5
REFERENCE CARD
Paste this card in the Proxmox Notes of any container that you reach by SSH. The key locations and the login and file-copy commands then stay one click away. The Notes panel is part of the web page. You type no commands.
Copy the card on the right.
In the Proxmox web page, click the container in the left tree.
Open the Summary tab.
Click the pencil icon next to the header of the Notes panel.
Paste the card in the editor. Click OK.
The Notes panel of the container is on its Summary tab. The card stays with the container. It is there the next time that you open Proxmox.
Paste into Proxmox Notes
## SSH & keys — quick reference
private key `~/.ssh/id_ed25519` (secret) · public key `~/.ssh/id_ed25519.pub` (share) · on Windows both live in `%USERPROFILE%\.ssh\`

```sh
# make a key — once, on your PC
ssh-keygen -t ed25519 -C "you@your-pc"

# print your public key to copy
cat ~/.ssh/id_ed25519.pub                            # Mac or Linux
Get-Content $env:USERPROFILE\.ssh\id_ed25519.pub     # Windows PowerShell

# install your key on the server — once, from your PC
ssh-copy-id root@192.168.1.220                       # Mac or Linux
type $env:USERPROFILE\.ssh\id_ed25519.pub | ssh root@192.168.1.220 "mkdir -p ~/.ssh && chmod 700 ~/.ssh && tr -d '\r' >> ~/.ssh/authorized_keys && chmod 600 ~/.ssh/authorized_keys"   # Windows PowerShell

# log in — no password once your key is installed
ssh root@192.168.1.220                               # the server
ssh root@192.168.1.xxx                               # a container

# copy files over SSH (scp)
scp ./file root@192.168.1.xxx:/root/                 # PC -> container
scp root@192.168.1.xxx:/root/file ./                 # container -> PC

# install your key on a container by hand (in its web console)
mkdir -p ~/.ssh && chmod 700 ~/.ssh && echo 'ssh-ed25519 AAAA…your-key-here you@your-pc' > ~/.ssh/authorized_keys && chmod 600 ~/.ssh/authorized_keys
```
Part B · Build the server
10The container wizard
Every app in this manual starts in the same Create CT wizard. Learn its eight tabs here, one time. Each later chapter then lists only the few values that change.
This chapter needs the items below. You came here directly? Do them first. Each item takes a short time. Nothing on this page works without them.
Proxmox is installed and works at https://192.168.1.220:8006. You can log in as root. See Ch. 6 · Install Proxmox. At your first visit, the browser shows a certificate warning. Select Advanced. Then select Proceed.
You know where the host shell is. In the Proxmox page, select homelab in the left tree. Then select >_ Shell. You type each command of this page there, unless a step says otherwise. This is the server itself. It is not a container and it is not your own PC.
You know your own network numbers. Where this chapter shows 192.168.1.x, use your own numbers. The rule is in Ch. 3 · How to read this manual.
This chapter builds no container. Another chapter built each container that it mentions.
A container is a small, separate Linux system on your server. You build one container for each service. In Proxmox, you build it with the Create CT wizard. The wizard opens from the blue button at the top right of the page https://192.168.1.220:8006. The wizard has eight tabs: General, Template, Disks, CPU, Memory, Network, DNS, and Confirm. Select Next to move through them. Then select Finish.
This chapter explains each tab one time. The app chapters do not repeat the explanations. They list only the values that differ, such as the container's ID number and its fixed address. Each app chapter points back to this chapter for the meaning of every field. If you do not know what a container is, read Ch. 8 · Containers vs virtual machines first. If Proxmox is not installed, start at Ch. 6 · Install Proxmox.
Create: LXC Container✕
GeneralTemplateDisksCPUMemoryNetworkDNSConfirm
homelab102
adguard☑
(leave empty)
ssh-ed25519 AAAA…your-key-here you@your-pc
⛭ HelpAdvanced ☐Next
The Create CT wizard's General tab, filled with this manual's example values. Every app chapter lists its own entries for each tab — fields not listed stay at their defaults.
10.1
ONE-TIME PREREQUISITE — DOWNLOAD AN OS IMAGE
On a new install, the wizard's Template list is empty. A container needs an operating-system image to start from. Download one Debian image. Every container in this manual uses it, so you do this one time for the whole server. You use only buttons.
In the left tree, select homelab. Then select the storage local.
Storage local on node homelab. Its content list includes Container template. This is why the images live here.
In the storage menu, select CT Templates.
The CT Templates view. The Templates button opens the download list. Each image you download appears in the table below it.
Select the Templates button.
Type debian-13 in the Search box.
The Templates dialog, filtered to debian-13. You need the row debian-13-standard. Its description is Debian 13 Trixie (standard).
Select the debian-13-standard row.
Select Download at the bottom right.
Wait until the download task shows OK. The image now appears in the wizard's Template list.
The task row at the bottom of the page. Status OK means the image is on the server.
Do this one time only. The image stays in the local storage. Each new container uses the same image. Repeat the download only if you rebuild the server.
Prefer the terminal? — the same download in three lines
Three commands on the host download the same image. Use them when you build containers from a script.
⌨ Type this on the Proxmox host (homelab)
Before you run anything on this page: every 192.168.1.x address below is this manual's example network. If your own network uses different numbers, substitute yours as you type — the rule is in Ch. 3 · How to read this manual. A command that runs with the wrong address usually succeeds and leaves you unreachable.
pveam update                                # refresh the template list
TMPL=$(pveam available --section system | awk '/debian-13-standard/{print $2}' | tail -1)
pveam download local "$TMPL"                # once per server; harmless to re-run
pveam update
Refreshes the list of images you can download. Run it once, so the newest Debian 13 image shows in the list.
TMPL=$(pveam available --section system | awk … | tail -1)
Asks Proxmox for the list of images. Picks the newest Debian 13 image. Stores its exact file name in a variable named TMPL. You never type a version number that can become old.
pveam download local "$TMPL"
Downloads that image into the local storage. You need to do this one time for each server. If you run it again, it does no harm.
10.2
WORK THROUGH THE EIGHT TABS
In the left tree, select homelab. Then select the blue Create CT button at the top right. Use Next to go through the tabs in order. Leave each field that this chapter does not list at its default value. The defaults are correct for this manual.
The blue Create CT button. It is in the top bar of the page, next to Create VM.
Warning — do not build a practice container here
This chapter is the reference for the wizard. It is not a build step. The screenshots show CT 102 and the name adguard. This is the real container that Ch. 16 · AdGuard Home builds later. These numbers are not examples to reuse.
Suppose you finish the wizard now "for practice". CT 102 then exists. When Ch. 16 · AdGuard Home tells you to create it, the wizard refuses, because the ID is taken. You can pick the next free number, but then AdGuard has a different address. Other chapters (Ch. 17 · Nginx Proxy Manager, Ch. 61 · LanCache and more) have the old address written in their steps. Nothing shows an error. The steps just point at nothing.
Read this chapter now. Do not select Finish on a container of your own. Come back here each time an app chapter says "create the container". At that point you select Finish, and you use the numbers from that chapter, not 102 and adguard. You already made CT 102 by mistake? Delete it first. Select it in the left tree. Stop it. Then select More → Remove. Build it again when Ch. 16 · AdGuard Home tells you to.
GENERAL
Keep Node at homelab.
Type the CT ID that the app chapter gives you, for example 102. Do not keep the number that the wizard suggests.
Type the Hostname, for example adguard.
Keep Unprivileged container ticked.
Leave Password and Confirm password empty.
Paste your public key into SSH public key(s). This is the line from ~/.ssh/id_ed25519.pub. You made the key in Ch. 9 · SSH & the terminal. You have no key yet? Make one first. That chapter exists for this step.
The General tab. The key goes in the box on the right. The password boxes stay empty.
The same tab has the Nesting box that Docker needs. Proxmox ticks it for you. Leave it ticked. The wizard has no keyctl box. Docker needs keyctl too. You set it after the wizard, with one command (see the section "The host command every build needs").
Unprivileged container and Nesting, both ticked by default. The Advanced box at the bottom of the dialog only adds a Tags field. You do not need it.
TEMPLATE
Select the storage local.
Select the debian-13-standard image that you downloaded.
The Template tab. The list shows only images that you already downloaded to that storage.
DISKS
Select the storage local-lvm.
Set Disk size (GiB) to the number that the chapter gives, often 6.
The Disks tab. The size is a maximum. It is not a reservation. See the table below.
CPU
Set Cores to the number that the chapter gives, often 1.
The CPU tab. One core is enough for most single services.
MEMORY
Set Memory (MiB) to the number that the chapter gives, for example 1024.
Leave Swap (MiB) at its default value.
The Memory tab. This is also a maximum. Unused RAM stays available for the other containers.
NETWORK
For IPv4, select Static. Do not select DHCP.
In IPv4/CIDR, type the fixed address, for example 192.168.1.223/24.
In Gateway (IPv4), type your own router's address. On this manual's example network, it is 192.168.1.1. On your network, it can be 10.0.0.1 or another address. Use the address that you wrote down in Ch. 4 · Networking in 10 minutes. Do not copy the address printed here.
Leave the IPv6 fields at their defaults.
The Network tab. Bridge stays vmbr0. This is the network port of the server.
DNS
Leave DNS domain empty. The grey words "use host settings" show that the field is empty. This is correct.
In DNS servers, type your own router's address. Use the same address that you typed in Gateway. Do not copy 192.168.1.1 unless it is your router.
The DNS tab. The two fields do two different jobs. Read the notice below before you fill them.
CONFIRM
Read the summary. Each line shows one setting that you chose.
Make sure that Start after created is unticked. It is unticked by default. Do not click it "to make sure". A click ticks it. One host command comes next, before the first start of the container.
Select Finish.
The Confirm tab. Check net0, nameserver and rootfs here. A typing mistake is faster to fix now than after the build.
The table below says what each field does. The app chapters give only the values.
Wizard reference — Create CT, tab by tab
Tab → Field
What it does
General → Node
The physical server that runs the container. You have one server. Select homelab and change nothing.
General → CT ID
The permanent ID number of the container. Each app chapter gives you a number. Use that number, so your numbering matches the manual.
General → Hostname
The name that the container uses for itself. Proxmox shows it next to the ID in the tree.
General → Unprivileged container
Keep this box ticked. The root user in the container is then not the root user on the host. This is the safer setting. Every guide uses it.
General → Nesting
Ticked by default. It lets a container run containers of its own. This is what Docker does. Leave it ticked for every build in this manual.
General → Password / SSH public key
The wizard needs one or the other. Keep the password empty. Paste your public key in the SSH field. The key looks like ssh-ed25519 AAAA…your-key-here you@your-pc. It lets you log in from your PC without a password. The container trusts you from the first start.
Template → Storage, Template
The operating system that the container starts from. Use the storage local and the debian-13-standard image.
Disks → Storage, Disk size
The disk of the container. The size is a maximum, not a reservation. The storage local-lvm grows as needed, so a container uses only the space that it writes. This disk holds the operating system and the app. It does not hold bulk media.
CPU → Cores
The number of CPU cores that the container can use. These cores are shared with all other containers. They are not reserved. One core is enough for most single services.
Memory → Memory (MiB), Swap
The RAM limit of the container. It is a maximum, not a reservation. Unused RAM stays available for the other containers. Leave Swap at its default. Your server has 16 GB of RAM in total. Watch the total as you add services. Use Ch. 14 · Uptime Kuma to watch it. Do not run every heavy app at the same time.
Network → IPv4
Select Static, not DHCP. A fixed address means that you and the other services always find the container at the same place.
DNS → DNS domain
Keep this field empty. It holds a search suffix, for example lan. It is not an address. Do not type your router's address here. An empty field uses the setting of the host. This is correct.
DNS → DNS servers
Always type your own router's address here. An empty field causes name-lookup failures after you install Ch. 19 · Remote access: Tailscale. See the notice below.
Confirm
Shows all your choices. Start after created stays unticked. One host command comes before the first start.
Notice — the two DNS mistakes to avoid
New containers fail most often on the DNS tab. Avoid these two mistakes.
Keep DNS domain empty. It is a name suffix. It is not an address.
Always put your own router's address in DNS servers. 192.168.1.1 is only this manual's example.
Suppose you leave DNS servers empty. The container then copies the DNS setting of the host. After you install Ch. 19 · Remote access: Tailscale, that setting is 100.100.100.100. A container cannot reach that address. Then every name lookup fails, also apt update. The error is "cannot resolve host". Type the router's address now to prevent this.
10.3
THE HOST COMMAND EVERY BUILD NEEDS
Docker needs two permission switches on the container: nesting and keyctl. Keyctl lets Docker manage its own login keys. Without it, Docker refuses to start. The wizard ticks nesting for you. The wizard has no keyctl box. The wizard also has no timezone field, so a new container uses UTC. Its logs then show a time that is hours away from your local time.
One command on the host sets nesting, keyctl, and the timezone together. The command also sets "start the container when the server starts". The container's Options tab has boxes for some of these settings. The one command is faster, and it is the same for every chapter. This part has no buttons. Every app chapter that uses Docker runs this command after the wizard and before the first start.
Finish the wizard. Leave Start after created unticked.
In the web page, select homelab → >_ Shell. A black terminal opens in the browser. This is the terminal of the server. It is a different door from the container's own >_ Console button (see below).
Run the command next to this list. Replace 102 with the ID of your container.
Expect no output. A new prompt means the command worked. Any text that shows is an error. Read it.
⌨ Type this on the Proxmox host (homelab)
pct set 102 --features nesting=1,keyctl=1 --onboot 1 --timezone host
Explanation of each part
pct set 102 --features nesting=1,keyctl=1
Turns on the two features that let Docker run: nesting and keyctl. Without them, Docker does not start and shows keyring or overlay errors. This is the most frequent problem in these guides. Replace 102 with the ID of your container.
--onboot 1
Starts the container when the server starts. Without it, a power failure keeps the service down until you start it by hand.
--timezone host
Gives the container the same timezone as the Proxmox host. Its logs and scheduled jobs then match your local clock. Without it, a new container stays on UTC.
The first start uses buttons again.
In the left tree, select the new container, for example 102 (adguard).
Select Start in the toolbar at the top right. The status changes to running.
Do not use the container's >_ Console button yet. It opens a login: prompt. You left the password empty, so you cannot log in there.
Select homelab → >_ Shell. This is the terminal of the server.
Run pct enter 102. Use the ID of your container. You are now inside the container as root. No password is needed. Every later chapter means this when it says "in the container".
Run apt update inside the container. The package lists download. This proves that your DNS entry is correct. The error "Temporary failure resolving deb.debian.org" means that DNS is wrong. Fix it now. See WHEN IT GOES WRONG below.
Notice — make the Console usable (optional)
The >_ Console button of the container works only when root has a password. To set one, run pct enter 102 on the host. Then run passwd and type a password two times. The Console then accepts root and that password. Nothing else in this manual needs it. pct enter and your SSH key do every job.
Prefer the terminal? — start and enter the container with two commands
Both steps have a command. You do not need to leave the host shell. Run them after the pct set line.
⌨ Type this on the Proxmox host (homelab)
pct start 102
pct enter 102                      # now INSIDE the container
pct start 102
Starts the container. It does the same as the Start button.
pct enter 102
Opens a root shell inside the container. It needs no password and no SSH. Type exit to go back to the host.
Notice — set your timezone
--timezone host gives the container the timezone of the Proxmox host. A Docker app inside the container can still log in UTC. In that case, its own docker run command needs one more flag, for example -e TZ=Region/City. The app chapter gives you that command. To see every valid name, run timedatectl list-timezones. The flag changes only the time in logs and schedules. It does not delete anything. To change it on an app that already runs, change that line and make the app's container again. See Ch. 12 · After every build + common Proxmox tasks, section "Change a setting on a Docker app". A wrong zone makes clocks and schedules look odd. Nothing breaks.
Notice — a container without Docker skips this
A few services in this manual run on the container without Docker. Those chapters say so. They skip the keyctl feature. If you are not sure, run the command above. The extra features are not used, and they do no harm. See Ch. 12 · After every build + common Proxmox tasks for the checklist that follows every build.
10.4
THE ONE-COMMAND ROUTE
You can skip the wizard. One pct create command makes the container with every setting from the eight tabs and from the host command. Each app chapter shows the real command for its own container, in a box named "Prefer the terminal?". This section explains the parts of that command one time. The app chapters point here.
Warning — this block is a pattern, not a command to run
The block below uses the numbers of CT 102 as an example. Do not run it. Each app chapter gives you the command with its own numbers.
⌨ Pattern only — do not type this on the Proxmox host (homelab)
Asks Proxmox for the list of images. Picks the newest Debian 13 image. Keeps its exact file name in a variable named TMPL. You never type a version number that can become old.
pveam download local "$TMPL"
Downloads that image into the local storage. You need it one time for each server. If you run it again when the image is there, it does no harm.
pct create 102 local:vztmpl/"$TMPL"
Makes the container with ID 102 from that image. The ID is the permanent number of the container in Proxmox.
--hostname adguard
The name that the container uses for itself. Proxmox shows it next to the ID.
--cores 1 --memory 1024
Gives the container 1 CPU core and 1024 MB of RAM. These are maximums, not reservations. Unused RAM stays available for the other containers.
--rootfs local-lvm:6
Gives the container a disk of 6 GiB on the SSD. The size is a maximum, not a reservation. The storage grows as needed, so the container uses only the space that it writes. The disk holds the operating system and the app. It does not hold bulk media.
--net0 name=eth0,bridge=vmbr0,ip=…/24,gw=…
Gives the container one network card on the main bridge of the host. It has a fixed address and uses your router as the gateway. A fixed address means that you and the other services always find the container at the same place.
--nameserver 192.168.1.1
Always sets DNS to your router. If you leave it out, the container copies the DNS of the host. After you install Ch. 19 · Remote access: Tailscale, that DNS is 100.100.100.100, and name lookups fail in the container.
--features nesting=1,keyctl=1
Lets Docker run in the container. Without them, Docker does not start. Leave this flag out for a chapter that runs no Docker.
--unprivileged 1
The root user in the container is not the root user on the host. This is the safer setting. Every guide uses it.
--onboot 1
Starts the container when the server starts. Without it, a power failure keeps the service down until you start it by hand.
--timezone host
Gives the container the timezone of the Proxmox host. Without it, a new container uses UTC.
pct start 102
Starts the container.
pct enter 102
Opens a root shell inside the container. It needs no password and no SSH. Every step after this one runs in the container. Type exit to go back to the host.
10.5
WHEN IT GOES WRONG
The Next button on the General tab is grey and does nothing. The wizard needs a password or an SSH public key before it lets you continue. It does not say this. Paste your public key into SSH public key(s) (made in Ch. 9 · SSH & the terminal). Next then works. You have no key yet? Make one. That chapter comes first for this reason.
The Template list is empty. You skipped the one-time image download, or the image went to a different storage. Select homelab → local → CT Templates. Check for a row debian-13-standard. If it is not there, repeat the first section.
Finish fails with "CT 102 already exists" or "volume already exists". That number belongs to an old or half-built container. Use the next free number. Or select the old container and remove it first: More → Remove.
Finish fails with a 500 error or "no space left on device". The SSD pool is full. Select homelab → local-lvm → Summary to check. Delete a container that you do not use, or old snapshots. Then run the wizard again.
The container starts, but apt update shows "Temporary failure resolving deb.debian.org". The DNS servers field is empty or wrong. Select CT → DNS → Edit. Set DNS servers to 192.168.1.1. Then run pct reboot 102 on the host and try again.
The container runs, but its address does not answer. Run pct config 102 on the host to read the address. The usual cause is a typing mistake in IPv4/CIDR or a missing /24. The second cause is an address that another device already uses. To test, stop the container and ping that address from your PC. If anything answers, the address is taken. Pick another one.
10.6
REFERENCE CARD
These template commands run on the host, not in a container. They have no buttons. Type them in homelab → >_ Shell when you need them. Paste the card into homelab → Notes, so the download and clean-up lines stay near.
📋 Reference — paste into the host's Notes in Proxmox (not a shell command)
## OS templates — Proxmox host (homelab)
docs https://pve.proxmox.com/pve-docs/pveam.1.html

```sh
# refresh the downloadable template list
pveam update
# which Debian 13 images exist?
pveam available --section system | grep debian-13
# what is already downloaded on this server?
pveam list local
# download the newest Debian 13 image (once per server)
TMPL=$(pveam available --section system | awk '/debian-13-standard/{print $2}' | tail -1)
pveam download local "$TMPL"
# remove a template you no longer need — list first, then remove that exact name
pveam list local
pveam remove <full-NAME-from-the-list-above>   # paste the whole local:vztmpl/… name as printed
```
Part B · Build the server
11Security basics
The five habits in the safety rules are promises. This chapter shows the technical practice behind each one: keep secrets in a locked file, turn on every login, use one front door, and pin your updates.
In this chapter
Before you start
This chapter needs the items below. You came here directly? Do them first. Each item takes a short time. Nothing on this page works without them.
Proxmox is installed and works at https://192.168.1.220:8006. You can log in as root. See Ch. 6 · Install Proxmox. At your first visit, the browser shows a certificate warning. Select Advanced. Then select Proceed.
You know where the host shell is. In the Proxmox page, select homelab in the left tree. Then select >_ Shell. You type each command of this page there, unless a step says otherwise. This is the server itself. It is not a container and it is not your own PC.
You know your own network numbers. Where this chapter shows 192.168.1.x, use your own numbers. The rule is in Ch. 3 · How to read this manual.
This chapter builds no container. Another chapter built each container that it mentions.
Read this one time. The service guides point back here and do not repeat it. This is not too much caution. Your home network also has an IoT camera, a smart TV, and the PCs of other people. So "it is only on the LAN" does not mean "it is safe". Ch. 5 · Safety rules & passwords gives the five habits as rules. This page shows how to do them.
11.1
SECRETS AND ADDRESSES — THE WORDS
A web address such as http://192.168.1.225 is not a secret. A port such as :8080 is also not a secret. They show only where a service is. You can keep them in your Notes. A secret (the general word is credential) is anything that proves that you may enter. If someone copies it, that person has your access.
Password — you know it. You type it.
API key or token — a long random text that one service uses to talk to another service by itself (Homarr → AdGuard). It works like a password, but for machines.
Admin token — for example, the master key of Vaultwarden for its /admin page (see Ch. 22 · Vaultwarden).
Database password — Immich, Paperless, and Penpot each run a database with its own password.
Environment variable (env var) — a setting that you give to a container when it starts. You write it as -e NAME=value. Secrets often travel this way.
.env file (env-file) — a plain file with lines of NAME=value. You point the container at it. You do not type the secrets on the command line.
plaintext — text that is not encrypted and that a person can read. The problem is a secret in plaintext, where it can leak.
Notice — where secrets come from
You invent some secrets. Make a strong one with openssl rand -base64 32. The app makes and shows some secrets one time, on its first run. Copy them then. An example is an API key under Settings. You set some secrets before the first start as an env var. An example is ADMIN_TOKEN of Vaultwarden.
11.2
HANDLE A SECRET SAFELY
Avoid this one mistake: a secret pasted in the Notes of Proxmox, or typed as -e TOKEN=... on the command line. Both leave the value in plaintext, where it is easy to read. It is readable in Notes, in the history of your shell, in the output of docker inspect, and in backups that are not encrypted. (The command docker inspect prints the full start settings of a container. It shows each -e line.) Instead, keep the secret in a locked env-file and load that file.
The four steps below stay in the shell. One line has to invent a random secret. The last line is the docker run that starts the app. Neither line has a button. Open the shell of the container: select homelab → >_ Shell. Then run pct enter <ID>. <ID> is the number of that container. Proxmox shows it next to the container in the left tree. It is also on the spec plate at the top of the chapter of the app. Type these commands.
Notice — read now, do later
You cannot do this step yet. It needs a running app container, and you did not build one yet. Read it to know the pattern. Come back and use it with your first real app, ntfy, in Ch. 13 · ntfy. Nothing breaks if you wait.
Make a folder for the app under /opt.
Make a strong random token. Write it in an .env file.
Lock the file, so that only root can read it.
Start the container with --env-file. Do not use -e TOKEN=....
Later, you can read or change that value. This job has a mouse way. Open the folder /opt/app with a graphical file manager over SFTP. Ch. 12 · After every build + common Proxmox tasks, section “Move a file to or from the server”, shows how. Edit .env there like any text file. Know one catch first. Docker copies the contents of the file into the app only when the container is created. A saved change does nothing by itself. After the change, make the container of the app again. The exact five steps are in Ch. 12 · After every build + common Proxmox tasks, section “Change a setting on a Docker app”. Your data folders are not touched.
⌨ Type this inside the container
Before you run anything on this page: every 192.168.1.x address below is this manual's example network. If your own network uses different numbers, substitute yours as you type — the rule is in Ch. 3 · How to read this manual. A command that runs with the wrong address usually succeeds and leaves you unreachable.
mkdir -p /opt/app
printf 'ADMIN_TOKEN=%s\n' "$(openssl rand -base64 48)" > /opt/app/.env
chmod 600 /opt/app/.env          # 600 = only the owner (root) can read this file
docker run -d --name app --env-file /opt/app/.env  <the rest of the app's own run line>   # load secrets from the file, not the command line
Then, in the Notes of Proxmox, write only the address and the command. Where a secret goes, write a pointer, not the value: ADMIN_TOKEN=<in /opt/app/.env>. You lose nothing that you need. The address stays. Only the key moves to the locked file.
Notice — the quote trap in env-files
An env-file is not a shell script. Docker reads each line as NAME=value. It takes the value exactly, up to the end of the line. So do not put quotes around values. The line ADMIN_TOKEN="abc" stores the quote marks as part of the token. Then the login fails. Write one NAME=value on each line. Use no quotes and no spaces around =. The openssl output above is safe. Base64 has no spaces, so it needs no quotes.
Explanation of each part
mkdir -p /opt/app
Makes the folder /opt/app. This is a common Linux place for apps from other makers. The -p flag makes missing parent folders too. It shows no error if the folder exists.
Makes 48 bytes of secure random data with openssl. It changes them to text (base64). It writes one line: ADMIN_TOKEN=<random value>. This is a strong random secret.
> /opt/app/.env
Saves the line in a file named .env. Apps look in a file with this name for secret settings. It overwrites all earlier content of the file.
chmod 600 /opt/app/.env
Restricts the file. Only its owner (root) can read it or write to it. No other user in the container can see the token.
docker run -d --name app --env-file /opt/app/.env ...
Starts the container in the background. --env-file loads each variable of that .env file (such as ADMIN_TOKEN) into the environment of the container. The app can use the secret, and nobody types it in plain sight. Ch. 9 · SSH & the terminal, section "Anatomy of docker run", explains the other flags.
11.3
TURN ON THE LOGIN — AT ONCE
Many self-hosted apps come with authentication turned off. Others leave the setup page open to everyone until you finish it. So, when a service starts, make its admin account and set its login first, before anything else. On a flat home network, "I will set the password later" leaves a window that anyone can walk through. A guide says "set auth"? Treat it as required. This is the practical version of the rule about a separate password for each service in Ch. 5 · Safety rules & passwords.
An app that you never opened before still follows the same four moves:
Open the address of the app in your browser as soon as the container answers. The address is on the spec plate at the top of the chapter of that app.
The first screen can offer to make an account: "sign up", "create admin", or "first user". Fill it in now, not after dinner. Until you do, that screen is open to everyone on your network.
Choose a long password that you use nowhere else. Put it at once in your password manager. Ch. 22 · Vaultwarden builds one on this server.
The app can also take you to its dashboard with no login at all. Then open its Settings and look for Users, Authentication, or Security. Switch the login on before you put anything of your own in the app.
One test shows that it worked. Sign out. Reload the page. The app lets you in without any question? Then the login is not on yet.
11.4
RUN CONTAINERS UNPRIVILEGED
Each container in this manual is created unprivileged. The box stays ticked in the wizard (see Ch. 10 · The container wizard). This maps the root user of the container to a harmless user without root rights on the host. If an attacker breaks out of a container, the attacker does not get root over your whole server. It costs nothing. It is the biggest reason why a broken app stays a broken app and does not become a broken server. Leave the box ticked. Every guide here depends on it.
11.5
ONE FRONT DOOR, THEN CLOSE THE SIDE DOORS
You build Nginx Proxy Manager (CT 103, see Ch. 17 · Nginx Proxy Manager), so that services get real names and HTTPS. But a reverse proxy protects you only if it is the only way in. If not, the raw IP:port stays open next to it. Use NPM to reach sensitive dashboards. Or make them Tailscale-only (see Ch. 19 · Remote access: Tailscale).
This manual does not turn on the Proxmox firewall on purpose. On a home network, it is mostly one more way to lock yourself out of the web page. Each service here already has its own login. This is why "turn on the login at once", above, is a rule and not a suggestion. So assume that anything on your network can still reach the raw IP:port of a container. Treat the login of each app as the real lock. Do not treat the network as the lock.
You want to close the side doors anyway? The switch is at Datacenter → Firewall. Know first what the Proxmox documentation says. When you turn the firewall on, Proxmox still allows the web page (port 8006), SSH (port 22), and the console from the local network of the server. So a PC on the same network does not lose access. A PC on another network does lose access. For example, a PC that you reach through a VPN is on another network. Everything else that you did not allow is refused. This includes your own browser, if it is not on the local network. The safe order is to write the rules that keep your way in first. Turn the firewall on after that.
Start by finding the address of your own PC on the network. The rules will let this address through. On Windows, open Command Prompt and type ipconfig. Read the IPv4 Address line. It looks like 192.168.1.42. On a Mac, it is in System Settings → Network → Wi-Fi → Details. On a Linux desktop, type ip a in a terminal. The list of connected devices in your router also shows the same number.
In the Proxmox tree, select Datacenter. Then select Firewall. You see the rule list. The firewall is still off. This is what you want while you write rules.
Select Add. Set Direction to in. Set Action to ACCEPT. Set Protocol to tcp. Set Source to the address of your PC from above. Set Dest. port to 8006. This is the port of the Proxmox web page. Select Add.
Do it again for SSH. Use the same fields and the same source. Set Dest. port to 22.
Check the rule list. It must show both lines, and the Enable box of each line must be ticked. A rule that is in the list but not enabled does nothing.
Now turn the firewall on. Go to Datacenter → Firewall → Options. Select the Firewall row. Select Edit. Tick Yes. Confirm.
Test it in the same minute, from the same PC. Reload https://192.168.1.220:8006. The page answers? Then you are still in, and the rules work.
Notice — you are locked out anyway?
The web page can stop answering after step 5. Nothing is broken, and no data is at risk. The server only does not let your browser talk to it. Plug a keyboard and a monitor into the server. Log in as root at the text prompt. Type nano /etc/pve/firewall/cluster.fw. Find the line enable: 1. Change the 1 to 0. Save and exit with Ctrl+O, Enter, Ctrl+X. This is the same switch as the tick box. The web page answers again at once.
None of this means that you open a port to the internet. The rule "no port forwarding" in Ch. 5 · Safety rules & passwords stays. For the SSH side door in particular, Ch. 73 · fail2ban bans an address after many failed logins. A guessing attack then gives up early.
11.6
UPDATES — PIN, AND PREFER NOTIFY OVER AUTO
Suppose you pull :latest automatically and without watching. One bad image from the maker can then break a service overnight. Pin the image versions where you can. Set the updater to monitor-only for anything that holds data. A monitor-only updater sends you a message, and you apply the update by hand. Update automatically only the disposable stateless containers. These are containers that hold no data of their own. You can wipe one and start it again, and you lose nothing that you would miss. Ch. 72 · Update notifications has the full setup, including a monitor-only updater that notifies you. The monthly update habit is rule three in Ch. 5 · Safety rules & passwords.
11.7
CAP THE LOGS
By default, the logs of each container grow without a limit. This manual builds about 50 containers. Together, their logs slowly fill the SSD. Set a cap one time, on the Docker service inside each container. The logs of each app then rotate. They do not pile up.
These three lines also stay in the shell. The last line restarts Docker itself, and no window offers that. Open the shell of the container: select homelab → >_ Shell. Then run pct enter <ID> with the number of that container. Type the lines.
Make the configuration folder of Docker.
Write a configuration that caps each log at 10 MB and keeps 3 rotated files.
Restart Docker, so that it reads the new setting.
Where you use this: paste these three lines into each container right after apt update && apt install -y docker.io curl. Do this before the docker run of the app. This is the only moment when it costs nothing. You forgot it on an earlier container? Run the three lines now. Then make the container of that app again, so that it starts with the new cap. The exact five steps are in Ch. 12 · After every build + common Proxmox tasks, section “Change a setting on a Docker app”. You paste back the same docker run command from the chapter of the app. Do not change it. An app that already runs keeps its old setting, without a cap, until you make it again. Your data is in the folders that you linked in. So making the container again costs you nothing. The routine after each build in Ch. 12 · After every build + common Proxmox tasks does not list this step, and nothing later reminds you. You must run these three lines yourself, each time, right after you install Docker.
Notice — read now, do later
Do not run the block on the right yet. It belongs inside an app container that already has Docker. You did not build one yet at this point in the manual. Suppose you run it here. The last line then fails with Unit docker.service not found, because this shell has no Docker. That error is correct. Nothing is broken. Come back to these three lines when an app chapter tells you to. Do it right after its apt install -y docker.io step.
⌨ Type this inside the container
mkdir -p /etc/docker
echo '{ "log-driver":"json-file", "log-opts":{"max-size":"10m","max-file":"3"} }' > /etc/docker/daemon.json
systemctl restart docker          # logs now cap at 10m x 3 files per container
Explanation of each part
mkdir -p /etc/docker
Makes the configuration folder of Docker for the whole system, if it does not exist.
Writes the main settings file of Docker. It tells Docker to store the logs of each container as JSON files. It caps each log at 10 MB and keeps only 3 rotated files. This stops container logs from filling your disk slowly over time.
systemctl restart docker
Restarts the Docker background service, so that it reads the new settings file. Containers that already run keep their old log settings until you make them again.
Part B · Build the server
12After every build + common Proxmox tasks
A short routine to run after every build. Then a point-and-click reference for the Proxmox jobs that you repeat most.
This chapter needs the items below. You came here directly? Do them first. Each item takes a short time. Nothing on this page works without them.
Proxmox is installed and works at https://192.168.1.220:8006. You can log in as root. See Ch. 6 · Install Proxmox. At your first visit, the browser shows a certificate warning. Select Advanced. Then select Proceed.
You know where the host shell is. In the Proxmox page, select homelab in the left tree. Then select >_ Shell. You type each command of this page there, unless a step says otherwise. This is the server itself. It is not a container and it is not your own PC.
You know your own network numbers. Where this chapter shows 192.168.1.x, use your own numbers. The rule is in Ch. 3 · How to read this manual.
The folder /srv/backups exists. It is registered in Proxmox as a storage named backups. You make it when you add a drive: Ch. 65 · Add an external drive for an external drive, Ch. 66 · Add an internal drive for an internal drive. Ch. 64 · Backups done right (3-2-1)uses this folder, but it does not make it. You added no drive yet? Then you must register the storage yourself first.
This chapter builds no container. Another chapter built each container that it mentions.
12.1
AFTER EVERY BUILD
Every guide in this manual ends the same way. When an app answers in the browser, run this short routine before you continue. It takes two minutes. It protects you from a container that dies quietly while nobody watches.
Select the container in the left tree. Open its Summary tab. Find the Notes panel. Select the pencil icon. Paste in the reference card of the guide. It has the address of the app and its few upkeep commands. The notes stay with the container. Next time that you need them, they are one click away. They are not lost in a browser tab.
The Notes panel of a container is inside its Summary tab. It is not a tab of its own.
Add an Uptime Kuma monitor that checks the app on a timer. You then catch a failure when it happens. Ch. 14 · Uptime Kuma shows how. Do this only when those chapters exist on your server. This page is the routine for every build. In the first builds, you do not have Ch. 14 · Uptime Kuma or Ch. 18 · Homarr dashboard yet. The build order builds them later in Part C. Skip each step whose app you did not build yet. Come back to it later. The app that you just built works without these steps.
Attach your ntfy notification to that monitor. The alert then reaches your phone. It is not only a red dot on a page that you do not look at. You set up ntfy first, in Ch. 13 · ntfy. So each monitor that you add from now on can send to it at once.
Add a tile for the app on your dashboard. You then have one page with links to everything. Ch. 18 · Homarr dashboard explains this.
Take a snapshot now that the container works (section below). It is your one-click undo for the next risky change.
Notice — build in order
Work down the sidebar in the order that the manual gives. This order handles the dependencies for you. Each container is ready before another one needs it. Ch. 7 · The build order explains the order.
12.2
OPEN A TERMINAL
Notice — where all of this happens
You do each task on this page in the Proxmox web page at https://192.168.1.220:8006. Log in as root. Use the password that you set when you installed Proxmox in Ch. 6 · Install Proxmox. You do most daily jobs with the mouse, not with the keyboard. This is why other guides link here and do not repeat the steps.
To get a terminal on the host itself: select homelab in the tree. Select >_ Shell at the top right.
Node homelab selected → >_ Shell at the top right.
To get a terminal inside a container: in that host Shell, run pct enter 101. Use the ID of the container. It puts you inside as root. No password is needed. Type exit to go back to the host.
Container selected → >_ Console at the top right. It opens a login: prompt, not a shell. Use pct enter instead.
The host Shell needs no password. You are already logged in to Proxmox. pct enter needs none too. Only opening the Shell is a button. What you type in it is still a command line. This manual shows you each line. Ch. 10 · The container wizard explains how to give the Console a password, if you ever want it. Nothing here needs it.
12.3
START, STOP, OR RESTART A CONTAINER
Select the container in the tree. Use the buttons at the top right.
Start starts it.
Start boots the container.
Shutdown is a graceful stop. It asks the services inside to close first. Always try it before Stop.
Shutdown asks the container to close down cleanly.
Shutdown → the arrow → Stop is a hard, forced stop. Use it only if Shutdown does not finish. The same small arrow also has Reboot. It stops and starts in one click.
The arrow next to Shutdown has Reboot and Stop.
Prefer the terminal? — the same task from the host Shell
⌨ Type this on the Proxmox host (homelab)
Before you run anything on this page: every 192.168.1.x address below is this manual's example network. If your own network uses different numbers, substitute yours as you type — the rule is in Ch. 3 · How to read this manual. A command that runs with the wrong address usually succeeds and leaves you unreachable.
A snapshot is a saved state. You can go back to it if a change goes wrong. Take one before you change anything important.
Select the container in the tree. Then select Snapshots in its middle menu.
The Snapshots tab. It is empty until you take the first snapshot.
Select Take Snapshot. Type a Name, for example before-update. You can add a Description. Select Take Snapshot again to confirm.
Only two fields: Name and Description. A container snapshot has no option for the memory state. That option is for virtual machines.
To go back: select the snapshot in the list. Select Rollback. The container goes back to that exact moment. You lose each change that you made after the snapshot.
Select the row first. Rollback acts on the selected snapshot.
Clean up later: select an old snapshot. Select Remove. Snapshots make the disk grow over time. Do not keep dozens of them.
Remove deletes the selected snapshot. It does not delete the container.
Notice — a snapshot covers the container, not your mounted folders
A snapshot saves the own disk of the container. A host folder that is bind-mounted into the container is not part of it. One example is the shared media folder at /data. A rollback does not change that folder. This is usually what you want. But do not expect a snapshot to undo changes to shared media.
Prefer the terminal? — snapshots from the host Shell
⌨ Type this on the Proxmox host (homelab)
pct snapshot 101 before-update # take itpct rollback 101 before-update # go back to itpct delsnapshot 101 before-update # remove it
Warning — snapshots are not backups
Snapshots are on the same SSD as the container. If that disk dies, the snapshots die with it. Use them for "undo in the next hour". Set up real backups on another disk. Ch. 64 · Backups done right (3-2-1) teaches this the right way.
12.5
GIVE A CONTAINER MORE DISK, CPU, OR MEMORY
Select the container. Then select Resources. All the limits are in this one panel.
Resources shows the Root Disk, the Cores, and the Memory of this container.
More disk: select the Root Disk row → Volume Action → Resize. In Size Increment (GiB), type how many GiB to add. Do not type the new total. Select Resize disk. A disk can only grow. It can never shrink.
The field asks for the amount to add. Type 8. The disk then grows by 8 GiB.
More CPU: select the Cores row → Edit → set the number → OK. It takes effect live.
Cores is the most CPU that this container can use at one time.
More memory: select the Memory row → Edit → set the MiB → OK. It takes effect live. The same dialog has Swap. Leave Swap as it is.
Memory and Swap share one dialog. 4096 MiB is 4 GiB.
Prefer the terminal? — the same task from the host Shell
⌨ Type this on the Proxmox host (homelab)
pct resize 101 rootfs +8G # add 8 GiB of diskpct set 101 -cores 4 # set the CPU-core ceilingpct set 101 -memory 4096 # set the memory ceiling, in MiB
In the left tree, select the backup storage. Then select its Backups tab.
Each backup that the job wrote, newest first. The date is in the file name. The name of the container is in the Notes column.
Select the backup that you want. The names have the date. Select Restore.
In the dialog, set Storage to local-lvm. This is where the disk of the container lives. If you moved container disks to a real drive, use that drive. Check the CT number. Keep the same number to overwrite the container. Type a free number to restore it next to the old one.
Set Privilege Level. It is a row of three choices. It is not a tick box. A privileged container can reach the host machine more directly. This is a bigger security risk if that container is ever attacked. So From Backup is the safe default. It keeps the setting that the container already had. Use it in almost every case. Unprivileged and Privileged force one or the other. Pick one of them only if a guide tells you to.
The Restore dialog, opened from the Backups tab of the storage. You can edit the CT field here. Restore from the own Backup tab of the container always overwrites it in place.
Select Restore and confirm. It restores to the same ID? Then it replaces the current container.
Notice — two doors, and one of them cannot change the number
A container that still exists has its own Backup tab. Restore from there always restores in place. The CT number is shown, but you cannot change it. Start from the Backups tab of the storage instead (the steps above). The number is then a field that you can change. This is also the only door left when the container is already deleted.
Warning — restore to the same CT ID wipes it first
You are not sure? Restore to a spare ID, for example 999. Look at it before you delete the original.
12.7
ADD A DRIVE AS STORAGE
Notice — you get a second drive in Part G
The build in this manual runs on one 500 GB SSD. You do not need this task until your libraries are too big for it. Then you add a real drive in Ch. 65 · Add an external drive or Ch. 66 · Add an internal drive. The two methods below are here, so that the steps are ready when you need them.
Method A — a blank whole disk, in one action. This is the quickest way to turn a blank disk into usable Proxmox storage. One wizard formats the disk, mounts it, registers it, and sets the safety flag is_mountpoint for you. This flag stops Proxmox from writing to the wrong place if the drive is ever unplugged. You type no command.
Select homelab in the tree. Then select Disks. The panel lists each drive in the server with its size and its use.
Read the device name (/dev/sda) and the size here before you touch anything.
The disk shows an old filesystem? Select its row. Select Wipe Disk. Confirm. This erases the disk.
The confirmation names the disk. Read that name. It is your last check.
A later step says that the disk has no partition table? Select the row. Select Initialize Disk with GPT. It acts at once, with no dialog. The button is grey when the disk already has a table.
GPT is the partition table itself. It is an empty label that the next wizard writes into.
Under Disks, open Directory. Select Create: Directory. Pick the Disk, for example /dev/sda. Set Filesystem to ext4. Give it a Name, for example storage. Leave Add Storage ticked. Select Create.
Four fields. The Disk list offers only drives that Proxmox sees as free.
Done. It appears as a storage with that name at /mnt/pve/<name>. It is mounted automatically at each start. At first, it allows every content type. To limit it, go to Datacenter → Storage. Select it. Select Edit. Open the Content list. It is a dropdown with tick boxes. Tick what the drive can hold. Untick the rest.
Content is one dropdown with tick boxes inside it. It is not a row of boxes on the dialog.
Warning — Wipe Disk does not protect you
The button stays active even when the disk is mounted or in use. The dialog only asks you to confirm. Nothing stops you from erasing the wrong drive. Compare the device name in the dialog with the Disks list before you confirm.
Method B — a drive that is already formatted and mounted. Use this after the command-line steps in Ch. 65 · Add an external drive, or to register an existing mount again.
Go to Datacenter → Storage → Add → Directory.
Set ID to a short name, for example backups. Set Directory to the mount path, for example /srv/backups.
One dialog covers steps 2 to 4: ID and Directory here, Content below them, Add at the bottom. It only registers a path. It does not format anything.
Open Content. Tick what the drive can hold. For a backup drive, tick only Backup. For a data drive, tick Disk image and Container.
Select Add.
One safety flag, is_mountpoint, has no field in this dialog. In this Proxmox version, the web page cannot finish the job. This one line in the host >_ Shell sets it.
⌨ Type this on the Proxmox host (homelab)
pvesm set backups --is_mountpoint 1
The flag makes Proxmox refuse to write when the drive is not mounted. Without it, Proxmox fills the SSD in silence with copies that protect nothing.
12.8
MOVE YOUR BACKUP JOB TO THE DRIVE
Notice — one job for all containers, upgraded — never two
You already have a weekly backup job for all containers from Ch. 20 · Backups before apps. It writes to the SSD. Now a real drive exists. Move that same job to it and keep more history. Do not make a second job for all containers. Two such jobs double the write load and the disk use, and give no extra safety. Ch. 64 · Backups done right (3-2-1) adds the copy outside the house that survives a house fire.
Go to Datacenter → Backup. Select the row of your weekly job. Select Edit. The dialog opens on its General tab.
Change Storage from local to your backup drive, for example backups. Only a storage that allows the Backup content type is in this list. This is why the drive section above came first. Leave Schedule and Selection mode as you set them in Ch. 20 · Backups before apps: weekly, all guests.
Set Mode to Snapshot. It backs up without a stop of the container. Set Compression to ZSTD. It compresses well and does not make the backup much slower. Leave the other options in that dropdown alone. Both fields are on the same General tab.
Storage, Schedule, Mode, Compression, and the list of guests are all on General.
Open the Retention tab. Raise Keep Last from 2 to 5. The drive has room that the SSD did not have. Keep Keep all backups unticked. Select OK.
Without a retention rule, the drive fills up and the job starts to fail.
Run it one time now against its new home. Select the job. Select Run now. Watch it under Datacenter → Backup or in the Task History of the container. The job list has no result column. The task log is where you read the result.
Never trust a backup job that you did not watch finish one time.
12.9
MOVE A FILE TO OR FROM THE SERVER
Sooner or later a chapter asks you to put a file on the server. It can be a document for Paperless, a video for Fireshare, or a world save for a game server. This is the one method that works for all of them. It needs no terminal. Each container speaks SSH. A graphical file manager can open an SSH location like a normal folder. You drag files in and out, the same way as with a USB stick.
Find the address of the container. It is on the spec plate at the top of the chapter of the app, for example 192.168.1.229.
On Windows: install WinSCP (free). Select New Site. Keep the protocol SFTP. Type the address of the container as Host name. Type root as user name. Select Advanced → SSH → Authentication. Point Private key file at the key that you made in Ch. 9 · SSH & the terminal. WinSCP offers to convert it. Accept. Save. Select Login.
On a Mac: Finder cannot open SFTP locations. Install Cyberduck (free). Select Open Connection. Set the type to SFTP (SSH File Transfer Protocol). Type the address of the container as Server. Type root as user name. Under SSH Private Key, choose the key that you made in Ch. 9 · SSH & the terminal. Select Connect.
On a Linux desktop: you install nothing. In the file manager, press Ctrl+L. Type sftp://root@192.168.1.229. The address of the container comes after the @. Bookmark it (“Add to Places”). The next time is one click.
A window opens with the folders of the container. Drag files in. Drag files out. Double-click to edit. The chapter that sent you here tells you the exact folder where the file must go.
The same method reaches the Proxmox host itself. This is the machine homelab. It is not a container. Some chapters send you here for that. The steps above are the same. Only the address differs. Use root@192.168.1.220 and not the IP of a container. Use the same key that you installed for the host in Ch. 9 · SSH & the terminal.
Notice — no key on this computer?
The connection uses the SSH key that you pasted in the wizard. The computer that you use has no key? Give the container a password, one time. Open its shell from the host (homelab → >_ Shell, then pct enter 101, with the number of your container). Type passwd. Type a new password two times. Then log in over SFTP with the user root and that password. Use a real password. Anyone on your Wi-Fi can reach this login. This is the rule from Ch. 5 · Safety rules & passwords.
Notice — the app cannot see the file that you copied?
Files that you upload belong to the user root. Some apps run as another user that cannot read them. An app ignores a file that you just placed? This is almost always the reason. The chapters where this matters give you the exact one-line fix (a chown command) where you need it.
12.10
CHANGE A SETTING ON A DOCKER APP
Many apps in this manual take their settings as extra lines in the docker run command that made them. These lines look like -e NAME=value. Each line is one setting that you give to the app when it starts. One catch surprises everyone one time: to change a setting, you delete the container of the app and create it again with the changed command. A plain restart does not apply a changed -e line.
This sounds destructive. It is not. Your data is not inside the part that you delete. Look at the docker run command of the app. The lines that start with -v plug real folders of the container disk into the app. When you delete the container of the app, those folders stay. The new app finds everything where it was.
Open the chapter of the app. Find its docker run command. Copy it to a place where you can edit it. Make your change: add or edit the -e line that you need.
Open the shell of the container: homelab → >_ Shell. Then run pct enter 101 (the number of your container).
Stop the running app and remove it. Then run your edited command.
⌨ Type this inside the CT — then paste your edited docker run command
docker stop appname            # the app's name — the --name part of its docker run command
docker rm appname              # removes the old container; your data folders stay
Paste your edited docker run command from step 1. Run it.
Check that it came back. docker ps lists it. After a moment, the web page of the app answers again. It is not in the list? Run docker logs appname --tail 50 to see why it did not start. Ch. 70 · When it breaks: troubleshooting has more.
Notice — some apps rewrite their settings file at each start
A few apps (the Palworld server is the main one) make their settings file new from those -e lines each time that they start. If you edit that file with the file explorer, the change does not stay. The next start overwrites it. Each chapter says which method applies to its app. A chapter says “recreate the container”? It means exactly the five steps above.
12.11
REFERENCE CARD
This card has the tasks of this page, for the days when you prefer to type and not click. The node has a Notes field, like a container. But it is in a different place. Select homelab in the Proxmox tree. Then select Notes. It is a tab of its own in the menu of the node. Select Edit. Paste this in. The commands that you repeat most are then always one click away. Each command runs in the host >_ Shell. Replace 101 with the container that you work on.
Node Notes is a tab of its own. The Notes of a container are inside its Summary tab.📋 Reference — paste into the node's Notes in Proxmox (not a shell command)
## Common Proxmox tasks — node homelab
dashboard https://192.168.1.220:8006 · docs https://pve.proxmox.com/pve-docs/

```sh
# start / stop / reboot a container (on the host Shell)
pct start 101
pct shutdown 101       # graceful
pct stop 101           # hard stop, only if shutdown hangs
pct reboot 101         # stop then start
# snapshot before a risky change, roll back, then tidy up
pct snapshot 101 before-update
pct rollback 101 before-update
pct delsnapshot 101 before-update
# give a container more disk / CPU / memory
pct resize 101 rootfs +8G     # add 8 GiB of disk (grow only)
pct set 101 -cores 4          # CPU-core ceiling
pct set 101 -memory 4096      # memory ceiling, in MiB
# register an already-mounted drive as storage, then flag it safe
pvesm set backups --is_mountpoint 1
```
Part C · The essential six & backups
13ntfy
Any script or service sends a one-line message. ntfy pushes it to your phone through the ntfy app.
This chapter needs the items below. You came here directly? Do them first. Each item takes a short time. Nothing on this page works without them.
Proxmox is installed and works at https://192.168.1.220:8006. You can log in as root. See Ch. 6 · Install Proxmox. At your first visit, the browser shows a certificate warning. Select Advanced. Then select Proceed. The warning is normal. Proxmox makes its own certificate.
The Debian 13 image is downloaded. You do this one time. See Ch. 10 · The container wizard. Without the image, the Template list in the wizard is empty.
You have an SSH key from your PC (Ch. 9 · SSH & the terminal). Or you type a password in the two password boxes of the wizard. The wizard needs one of the two. The Next button stays grey until you give one.
You know your own network numbers. Where this chapter shows 192.168.1.x, use your own numbers. The rule is in Ch. 3 · How to read this manual. The address of this chapter must be outside the range that your router gives out by itself (the DHCP pool, often .100–.200, but yours can differ). An address inside the pool can go to a phone later. Two devices on one address break name lookups, and the cause is hard to find.
Commands marked HOST run on the server. In the Proxmox page, select homelab in the left tree. Then select >_ Shell. Commands marked CT run inside the container of this chapter. The chapter shows you how to get there.
The wizard does not work?Next is grey: you gave no password and no key. Give one of the two. The Template list is empty: the Debian image is not downloaded. Download it first. Each tab is explained in Ch. 10 · The container wizard.
Welcome to Part C, the essential six. These services turn a bare Proxmox box into a homelab that you really run. Part C has eight chapters: six essential ones, one optional one (Beszel, the resource monitor), and a short backup chapter at the end. You do the backup chapter before you start Part D. The first essential service makes each later service useful. It is the alert channel to your phone. Build ntfy first. Each service that you build after it can then send its notifications through it. This is a private alert channel on your own server. It replaces a service of another company, such as Discord.
13.1
CREATE THE CONTAINER
Do this task with the mouse in the Proxmox web page. You type nothing. You prefer the command line? The Prefer the terminal? box below does the same task with one pct create command.
Open https://192.168.1.220:8006.
Click homelab in the left tree.
Click the blue Create CT button at the top right.
Fill in the tabs as the wizard reference shows. Leave each field that is not listed at its default value.
Keep Start after created unticked.
General tab — CT ID 106, hostname ntfy, Unprivileged container ticked.
Wizard reference — Create CT 106
Tab → Field
Entry
General → Node
Select homelab.
General → CT ID
Type 106. Do not keep the number that the wizard suggests.
General → Hostname
Type ntfy.
General → Unprivileged container
Keep this box ticked.
General → Nesting
Keep this box ticked. It is ticked by default. The wizard has no box for keyctl, which Docker also needs. The host command after Finish sets it. It is the first line of the next listing.
General → Password / SSH public key
Keep the password empty. Paste your public key in the SSH field: ssh-ed25519 AAAA…your-key-here you@your-pc. With the key, you can run ssh root@192.168.1.227 from your PC. The command pct enter 106 on the host needs no password.
Template → Storage, Template
Select local. Then select debian-13-standard.
Disks → Storage, Disk size
Select local-lvm. Set 6 GiB.
CPU → Cores
Set 1 core.
Memory → Memory (MiB)
Set 1024. Keep Swap at its default.
Network → IPv4
Select Static. Set IPv4/CIDR to 192.168.1.227/24. Set Gateway to 192.168.1.1. Keep IPv6 at its default.
DNS → DNS domain
Keep this field empty. Do not type 192.168.1.1 here.
DNS → DNS servers
Always type 192.168.1.1. Never keep this field empty.
Confirm
Read the summary. Keep Start after created unticked. Select Finish.
The wizard has no box for three settings: the Docker permission keyctl, the timezone, and start at boot. The first command below sets all three. Run these 3 commands on the host. They set the missing settings, start the container, and open its shell. Each part is explained in Ch. 10 · The container wizard, section "The host command every build needs".
⌨ Type this on the Proxmox host (homelab)
Before you run anything on this page: every 192.168.1.x address below is this manual's example network. If your own network uses different numbers, substitute yours as you type — the rule is in Ch. 3 · How to read this manual. A command that runs with the wrong address usually succeeds and leaves you unreachable.
pct set 106 --features nesting=1,keyctl=1 --onboot 1 --timezone host
pct start 106
pct enter 106                          # now INSIDE CT 106 — the rest of this page runs here
Notice — set your timezone
The commands above use --timezone host. A Docker container that still logs in UTC needs -e TZ=Region/City. Replace Region/City with your own zone, for example America/New_York. To see the exact spelling, run timedatectl list-timezones.
Prefer the terminal? — the same task with one pct create command
⌨ Type this on the Proxmox host (homelab)
TMPL=$(pveam available --section system | awk '/debian-13-standard/{print $2}' | tail -1)
pveam download local "$TMPL"          # once per host; harmless to re-run
pct create 106 local:vztmpl/"$TMPL" \
  --hostname ntfy --cores 1 --memory 1024 --rootfs local-lvm:6 \
  --net0 name=eth0,bridge=vmbr0,ip=192.168.1.227/24,gw=192.168.1.1 \
  --nameserver 192.168.1.1 --features nesting=1,keyctl=1 --unprivileged 1 --onboot 1 --timezone host
pct start 106
pct enter 106                      # you are now INSIDE CT 106 — everything below runs here
Each command after this point runs IN CT 106, not on homelab. You open the shell of the container in one of two ways. Run pct enter 106 on the host (first open homelab → >_ Shell). Or run ssh root@192.168.1.227 from your PC. (The >_ Console button of the container shows a login: prompt. The containers of this manual cannot answer it. Skip it.) Only the pct and pveam commands go back to the host. Each guide marks those commands where you use them.
13.2
BUILD
This part has no buttons. These commands run inside CT 106. In the host Shell (homelab → >_ Shell), run pct enter 106. You are already inside from the step above? Then continue. Run each command inside CT 106. Do not run these commands on the Proxmox host or on your PC. Docker does not start? See the entry about Docker in WHEN IT GOES WRONG below.
The >_ Console button of the CT opens a login: prompt, not a shell. Use pct enter 106 from homelab → >_ Shell.
⌨ Type this inside CT 106
apt update && apt install -y docker.io curl
docker run -d --name ntfy --restart=unless-stopped -p 80:80 \
  -v /opt/ntfy:/var/cache/ntfy -e NTFY_BASE_URL=http://192.168.1.227 \
  -e NTFY_CACHE_FILE=/var/cache/ntfy/cache.db \
  -e NTFY_AUTH_FILE=/var/cache/ntfy/auth.db -e NTFY_AUTH_DEFAULT_ACCESS=deny-all \
  binwiederhier/ntfy serve
# stop here — the next three commands are interactive or need a value you do not have yet
Notice — the next commands stop and ask you things
Do not paste these as one block. The first command asks you to type a password and waits. It swallows anything that you pasted after it. Run them one at a time.
⌨ One at a time — the first asks for a password
docker exec -it ntfy ntfy user add --role=admin you
⌨ Then this — it prints a token that starts with tk_
docker exec -it ntfy ntfy token add you
Notice — copy the token before the next line
That command printed a long token. It starts with tk_. Select it and copy it now. The next command writes it to a file exactly as you type it. Suppose you paste the line below without a change. Then you save the six characters tk_... and not your token. Each later alert fails with a 403. Nothing on your phone tells you.
⌨ Replace tk_YOUR-TOKEN with the token that was just printed
The Docker install line and the flags -d, --name, --restart, -v, and -p are explained in Ch. 9 · SSH & the terminal, sections "Install Docker in the container" and "Anatomy of docker run". These parts are specific to ntfy:
-p 80:80
Sends port 80 of the container to port 80 of the app. This is the web page and the API of ntfy.
-v /opt/ntfy:/var/cache/ntfy
Links a host folder for the cache and the database files of the app. They stay after a restart.
-e NTFY_BASE_URL=http://192.168.1.227
Tells the app the web address where it can be reached. ntfy uses this address when it builds links in notifications.
-e NTFY_CACHE_FILE=/var/cache/ntfy/cache.db
Sets the file path, inside the container, where sent messages are cached.
-e NTFY_AUTH_FILE=/var/cache/ntfy/auth.db
Sets the file path where user accounts and permissions are stored.
-e NTFY_AUTH_DEFAULT_ACCESS=deny-all
A security setting. By default, nobody can read or write topics without explicit access. This locks the server.
binwiederhier/ntfy serve
The image to run: ntfy, a simple push-notification server. The word 'serve' tells it to start the server.
docker exec -it ntfy ntfy user add --role=admin you
Runs a command inside the running 'ntfy' container. It makes a user named 'you' with admin rights. The -it flags keep the session interactive, so it can ask for a password.
docker exec -it ntfy ntfy token add you
Makes an access token inside the container. A token is a long-lived replacement for a password. It is for the user 'you'. Apps and scripts use this token to log in.
Writes the token to a file named .env. It is in the same folder that holds the cache and the auth database of the container. It then locks the file for the owner only. Later chapters and scripts look for the token here. /opt/ntfy is a normal folder. You prefer to see or edit .env with a mouse? Open this folder over SFTP. Ch. 12 · After every build + common Proxmox tasks, section “Move a file to or from the server”, shows how.
The steps below are for Android. Apple delivers push messages only through its own APNs service. So a self-hosted server cannot reach an iPhone by itself, and no notification ever arrives. Before you continue, make the container again with one extra flag. You do not need to build that line yourself. It is below, ready to paste, with the flag already in it. Run it inside CT 106. Your accounts and token stay in /opt/ntfy.
The added line is the last -e. It lets your server hand the push message to ntfy.sh. This is the only route that Apple accepts. All other flags are the same as in your first build.
Install the ntfy app (author: Philipp Heckel) from the Play Store, or from the App Store on an iPhone.
Set your server as the default server. In the app, go to ⚙ Settings → General → Default server. Enter http://192.168.1.227. Type the http:// part.
Store your login. Go to Settings → General → Manage users → Add. Enter the server http://192.168.1.227. Enter the user name and the password from ntfy user add (user name you, unless you chose another). The tk_… token is NOT for the phone. The token is for scripts and for the test curl below.
Subscribe. On the main screen, tap +. Enter the topic homelab-alerts. The default server is already selected. It is not selected? Tick Use another server and enter the address. Tap Subscribe.
Keep delivery reliable (Android only). A self-hosted server cannot use the push service of Google. So the app keeps a small permanent connection. The quiet “Subscription service” notification is normal. Do not remove it. Then go to Android Settings → Apps → ntfy → Battery and select Unrestricted. Without this, the battery manager delays alerts by hours. Away from home, it works when Tailscale is on.
Test it. The Build step already installed curl in CT 106. The shell shows curl: command not found? Then run apt install -y curl. Then replace tk_... with the real tk_... text that ntfy token add printed. To print it again at any time, run docker exec -it ntfy ntfy token list.
192.168.1.227 is an address on your home network. Your phone gets push messages only while it is on your home Wi-Fi. It also gets them when it is connected back to the homelab over Ch. 19 · Remote access: Tailscale or a VPN. It does not get them on mobile data away from home.
Notice — use it everywhere
Later chapters use the same address and token to reach your phone. Ch. 72 · Update notifications builds Watchtower, the update watcher. It sends its daily “update available” messages here. You can use the same curl pattern from above in any other script that you write, for example a backup script or a health check that runs on a schedule. Point it at http://192.168.1.227/homelab-alerts and send the token. Use it in place of a Discord webhook.
13.4
NEXT: CONNECT IT TO UPTIME KUMA
Ch. 14 · Uptime Kuma is the next chapter. It watches each service. It must know where to send an alert when a service goes down. This ntfy server is that alert channel. You cannot set it up from here. The dashboard of Kuma does not exist yet. The Kuma chapter shows the whole notification dialog with screenshots, at the point where it works.
Take three values to that chapter: Topichomelab-alerts, Server URLhttp://192.168.1.227, and the tk_… token that ntfy token add printed. This is the step that the build chapter of each app means when it says “attach your ntfy notification” in its after-build checklist (Ch. 12 · After every build + common Proxmox tasks).
Notice — the token, not the phone login
Kuma is a script. It is not the phone app. So it logs in with the tk_…token, not with the login that the app stores. A server with deny-all rejects Kuma without a token with HTTP 403. Then no down-alert ever leaves. To print the token again, run docker exec -it ntfy ntfy token list.
13.5
WHEN IT GOES WRONG
docker run stops with Error response from daemon: … Bind for 0.0.0.0:80 failed: port is already allocated. Another program already uses port 80 in this CT. Pick a free host port. Change -p 80:80 to -p 8080:80. Change the base URL to match: -e NTFY_BASE_URL=http://192.168.1.227:8080. Then add the server in the app, and in the curl tests, as http://192.168.1.227:8080.
The phone app shows a warning icon with Not authorized (401/403). Or a curl test returns HTTP 403 or a JSON error, and no notification arrives. The server uses deny-all, so it blocks anonymous access. In the app, tap the server entry. Sign in as user you with the password that you set. For curl, always send the token (-H "Authorization: Bearer tk_...") or basic auth (-u you:YOURPASSWORD).
curl runs without an error, but nothing reaches the phone, and docker logs ntfy shows a 401. The request had the literal text tk_....tk_... is only a placeholder. List your real token with docker exec -it ntfy ntfy token list. It starts with tk_ and has about 30 more characters. Paste that exact text in the Authorization: Bearer header. You lost it? Make a new one with docker exec -it ntfy ntfy token add you.
Notifications arrive at first. Then they stop after the phone was idle for a while. Android puts the app to sleep. Keep the persistent 'instant delivery' notification of ntfy turned on. Set Android Settings → Apps → ntfy → Battery to Unrestricted. Self-hosted servers send over a direct connection, not over Google Firebase. So the app must be allowed to run in the background.
13.6
A download step fails with Temporary failure resolving deb.debian.org, or with another "cannot resolve" message. The container has no working DNS server. It cannot change a name into an address. This is not a typing mistake. It does not fix itself. In the Proxmox page, select this container in the left tree. Open DNS. Select Edit. Type your router address in DNS servers (192.168.1.1 here; use your own). Then run pct reboot 106 in the host shell. Run the failed step again.
A command fails. You do not know if you are on the server or in the container. Read the prompt. In the container, it ends with the name of the container. On the server, it shows root@homelab. The prompt still shows root@homelab after pct enter? Then the command did not work. Type exit. Run the pct enter line again. Check the prompt before you paste anything else. You can paste a build block on the server by mistake. It seems to work. It installs without an error, and the app even answers. But the app is on the server, and it must not be there.
How to see that it happened, and how to undo it. The app does not open at the container address (192.168.1.227). It does open at the server address (192.168.1.220) on the same port. Then the app is on the host. To remove it, run docker rm -f ntfy in the host shell. Then run pct enter 106. Check that the prompt changed. Paste the build block again. You lose nothing in the container, because nothing was built there. The first command can show Error: No such container. This is good. It means that the app was never on the host. Do not paste the build block again. Look for another cause.
The page does not open. The browser spins, or says it cannot connect. Do these checks in order, in the host shell. 1. Is the container running? Run pct status 106. It must say running. If it does not, run pct start 106. 2. Is the container at the address that you typed? Run pct config 106 | grep net0. It shows the real address. A wrong digit in the wizard puts the container at another address, and nothing warns you. 3. Does the app run in the container? Run pct enter 106. Then run docker ps. An empty list means that the app did not start. Run docker ps -a to see that it stopped. Run docker logs to see why. 4. Does the app answer in the container? Run curl -I http://localhost followed by the port of the app. You get a reply here, but nothing from your PC? Then the address or your own network is the problem. The app is fine. Your browser reaches 192.168.1.227 but not the port? Then the app is down. It reaches neither? Then the container is down.
Docker does not start, or you see Cannot connect to the Docker daemon, a keyring error, or an overlay error. This is the most common failure in these guides. It means that the two container features are off. A later pct set --features can switch them off, also when you set them before. Run this in the host shell, not in the container: pct set 106 --features nesting=1,keyctl=1. Then run pct reboot 106. Then run the failed step again. Type both settings on one line. If you send only one setting, it replaces the pair and switches the other one off.
REFERENCE CARD
Paste this in the Notes of the container in Proxmox (106 → Summary → Notes). It is a reference. It is not a shell command. Before you ever run the update line on this card, compare it with the docker run you actually used at install. The card is a snapshot of the standard build: if you added anything of your own — a device, an extra -e setting, a second folder — it is not on the card, and re-running the card's line drops it. The container comes back up looking healthy with your setting gone.
📋 Reference — paste into this container's Notes in Proxmox (not a shell command)
## ntfy — CT 106
dashboard http://192.168.1.227 · topic homelab-alerts · token in /opt/ntfy/.env · docs https://docs.ntfy.sh/

```sh
# is it running?
docker ps --filter name=ntfy
curl -fsS http://localhost/v1/health >/dev/null && echo OK   # quick health check
# send a test push (replace tk_... with your real token)
curl -H "Authorization: Bearer tk_..." -d "test" http://192.168.1.227/homelab-alerts
# see / rotate tokens
docker exec -it ntfy ntfy token list
# logs (last 50)
docker logs ntfy --tail 50
# stop / start / restart
docker stop ntfy
docker start ntfy
docker restart ntfy
# is there an update? ("Image is up to date" = no)
docker pull binwiederhier/ntfy
# iPhone? the run line below also needs -e NTFY_UPSTREAM_BASE_URL=https://ntfy.sh
# update (accounts + token survive in /opt/ntfy)
docker pull binwiederhier/ntfy && docker rm -f ntfy && docker run -d --name ntfy --restart=unless-stopped -p 80:80 -v /opt/ntfy:/var/cache/ntfy -e NTFY_BASE_URL=http://192.168.1.227 -e NTFY_CACHE_FILE=/var/cache/ntfy/cache.db -e NTFY_AUTH_FILE=/var/cache/ntfy/auth.db -e NTFY_AUTH_DEFAULT_ACCESS=deny-all binwiederhier/ntfy serve
```
Explanation of each part
## ntfy — CT 106
A note with the web address, the default topic name, the place where the access token is stored, and the official docs.
docker ps --filter name=ntfy
Shows if the ntfy container is up. An empty result means that it is stopped.
curl -fsS http://localhost/v1/health >/dev/null && echo OK
Asks the health endpoint of the server if it is alive. It prints OK when the service answers. The health endpoint is public. It works also with deny-all.
The full update: pull the new image, remove the old container, and make it again with the exact same options. Your accounts, tokens, and cache are in /opt/ntfy. They stay.
Part C · The essential six & backups
14Uptime Kuma
Uptime Kuma checks each service one time every minute. It sends a message to your phone the moment one goes down. Build it early. It is how you notice that a later service breaks.
This chapter needs the items below. You came here directly? Do them first. Each item takes a short time. Nothing on this page works without them.
Proxmox is installed and works at https://192.168.1.220:8006. You can log in as root. See Ch. 6 · Install Proxmox. At your first visit, the browser shows a certificate warning. Select Advanced. Then select Proceed. The warning is normal. Proxmox makes its own certificate.
The Debian 13 image is downloaded. You do this one time. See Ch. 10 · The container wizard. Without the image, the Template list in the wizard is empty.
You have an SSH key from your PC (Ch. 9 · SSH & the terminal). Or you type a password in the two password boxes of the wizard. The wizard needs one of the two. The Next button stays grey until you give one.
You know your own network numbers. Where this chapter shows 192.168.1.x, use your own numbers. The rule is in Ch. 3 · How to read this manual. The address of this chapter must be outside the range that your router gives out by itself (the DHCP pool, often .100–.200, but yours can differ). An address inside the pool can go to a phone later. Two devices on one address break name lookups, and the cause is hard to find.
You built Ch. 13 · ntfy already. The steps below use that chapter: a container, an address, a key, or a job that must exist. You cannot finish this chapter without it.
Optional — Ch. 13 · ntfy. This chapter can send you notifications, but only if that chapter is already running. All other steps work without it.
Commands marked HOST run on the server. In the Proxmox page, select homelab in the left tree. Then select >_ Shell. Commands marked CT run inside the container of this chapter. The chapter shows you how to get there.
The wizard does not work?Next is grey: you gave no password and no key. Give one of the two. The Template list is empty: the Debian image is not downloaded. Download it first. Each tab is explained in Ch. 10 · The container wizard.
Uptime Kuma is a status and monitoring dashboard. It checks each service every minute. It alerts you, through ntfy or a Discord webhook, the moment one goes down.
Notice — where these commands run
Run the shell commands inside CT 100. Do not run them on the Proxmox host (the server, 192.168.1.220) or on your PC. You open a shell inside CT 100 in one of two ways. In the Proxmox web page, open homelab → >_ Shell and run pct enter 100. It needs no password. Or run ssh root@192.168.1.221 from your PC. Only the pct command (it manages containers) and the pveam command (the tool for app templates) go back to the host. Each is marked where you use it.
The >_ Console button of the CT opens a login: prompt, not a shell. A container built here has no root password. Use pct enter 100 instead.
14.1
CREATE THE CONTAINER
Do this task with the mouse in the Proxmox web page. You type nothing. You prefer the command line? The box below does the same task with one pct create command.
Open https://192.168.1.220:8006.
Click homelab in the left tree.
Click the blue Create CT button at the top right.
Fill in each tab as the reference shows. Leave each field that is not listed at its default value.
General tab, filled in for CT 100 / kuma.
Keep Start after created unticked. One command on the host comes next. It is in the box after the table.
Wizard reference — Create CT 100
Tab → Field
Entry
General → Node
Select homelab.
General → CT ID
Type 100. Do not keep the number that the wizard suggests.
General → Hostname
Type kuma.
General → Unprivileged container
Keep this box ticked.
General → Nesting
Keep this box ticked. It is ticked by default. The wizard has no box for keyctl, which Docker also needs. The host command after Finish sets it. It is the first line of the next listing.
General → Password / SSH public key
Keep the password empty. Paste your public key in the SSH field: ssh-ed25519 AAAA…your-key-here you@your-pc. With the key, you can run ssh root@192.168.1.221 from your PC. The command pct enter 100 on the host needs no password.
Template → Storage, Template
Select local. Then select debian-13-standard.
Disks → Storage, Disk size
Select local-lvm. Set 6 GiB.
CPU → Cores
Set 1 core.
Memory → Memory (MiB)
Set 1024. Keep Swap at its default.
Network → IPv4
Select Static. Set IPv4/CIDR to 192.168.1.221/24. Set Gateway to 192.168.1.1. Keep IPv6 at its default.
DNS → DNS domain
Keep this field empty. Do not type 192.168.1.1 here.
DNS → DNS servers
Always type 192.168.1.1. Never keep this field empty.
Confirm
Read the summary. Keep Start after created unticked. Select Finish.
The wizard has no box for three settings: the Docker permission keyctl, the timezone, and start at boot. The first command below sets all three. Run these 3 commands on the host. They set the missing settings, start the container, and open its shell. Each part is explained in Ch. 10 · The container wizard, section "The host command every build needs".
⌨ Type this on the Proxmox host (homelab)
Before you run anything on this page: every 192.168.1.x address below is this manual's example network. If your own network uses different numbers, substitute yours as you type — the rule is in Ch. 3 · How to read this manual. A command that runs with the wrong address usually succeeds and leaves you unreachable.
pct set 100 --features nesting=1,keyctl=1 --onboot 1 --timezone host
pct start 100
pct enter 100                          # now INSIDE CT 100 — the rest of this page runs here
Notice — set your timezone
--timezone host gives the container the timezone of the Proxmox host. A Docker container inside the LXC keeps its own timezone, separate from the CT around it. Its output stays in UTC? Then also add a timezone flag to docker run, for example -e TZ=America/New_York. To see every valid name, run timedatectl list-timezones. A wrong zone only makes clocks and schedules look odd. Nothing breaks.
Prefer the terminal? — the same task with one pct create command
⌨ Type this on the Proxmox host (homelab)
TMPL=$(pveam available --section system | awk '/debian-13-standard/{print $2}' | tail -1)
pveam download local "$TMPL"          # once per host; harmless to re-run
pct create 100 local:vztmpl/"$TMPL" \
  --hostname kuma --cores 1 --memory 1024 --rootfs local-lvm:6 \
  --net0 name=eth0,bridge=vmbr0,ip=192.168.1.221/24,gw=192.168.1.1 \
  --nameserver 192.168.1.1 --features nesting=1,keyctl=1 --unprivileged 1 --onboot 1 --timezone host
pct start 100
pct enter 100                      # you are now INSIDE CT 100 — everything below runs here
This part has no buttons. You type commands inside CT 100. You are already there from pct enter 100 above. (You closed that shell? Open homelab → >_ Shell and run pct enter 100 again.) Install Docker. Then start Uptime Kuma in one Docker container.
Install the Docker engine.
Start Uptime Kuma. It is pinned to the stable v2 line. Its data is in a host folder that stays after updates.
The docker run command prints an error and does not start? See the entry about Docker in WHEN IT GOES WRONG below.
Explanation of each part
The Docker install line and the flags -d, --name, --restart, -v, and -p are explained in Ch. 9 · SSH & the terminal, sections "Install Docker in the container" and "Anatomy of docker run". These parts are specific to Uptime Kuma:
-p 3001:3001
Sends port 3001 of the container to port 3001 of the app. You open the web dashboard on this port.
-v /opt/uptime-kuma:/app/data
Links the host folder /opt/uptime-kuma to /app/data in the container. The data of the app stays, also if you delete the container and make it again.
louislam/uptime-kuma:2
The Docker image to run: Uptime Kuma by louislam. It is pinned to major version 2, the current stable line. It has its own database in the /app/data volume. Your monitors and history stay after updates. You set everything else in its web page.
14.3
ADD YOUR MONITORS — IN THE WEB PAGE OF KUMA
When you made the container, Kuma started. The purpose of Kuma is the monitors. You add them with the mouse. Open http://192.168.1.221:3001. Use the IP of the CT, 192.168.1.221. Do not use the host, 192.168.1.220. At the first visit, it asks you to make an admin user name and password.
First visit to http://192.168.1.221:3001. Make the admin account.
Do that. You then see an empty dashboard. This empty dashboard is your first self-hosted app. A container that you built now serves its own web page on your network.
The empty dashboard, before any monitor exists.
First, set up a notification (one time) — the default habit
This manual builds one habit: attach a notification to every monitor. A down-alert then reaches your phone as a push message. Set it up one time here. Tick it for every monitor. You then never miss an outage. You built Ch. 13 · ntfy in the previous chapter. Its server already runs. Point Kuma straight at it.
Go to Settings → Notifications → Setup Notification.
Settings → Notifications → Setup Notification.
Set Notification Type to ntfy.
Set Server URL to http://192.168.1.227 (your ntfy server). Set Topic to homelab-alerts. This is the exact topic that this manual uses everywhere.
Set Authentication Method to Access Token. Paste the tk_… token from ntfy. The server uses deny-all, so it needs the token. You lost the token? Open a shell in CT 106 (see the "where these commands run" notice in Ch. 13 · ntfy). Run docker exec -it ntfy ntfy token list. This runs a command inside the running ntfy container and lists its tokens. Copy the tk_… line that it prints.
The dialog has two priority fields: Priority and Priority for DOWN-events. Both are already 5, the highest value. Leave both at 5. An outage then reaches your phone as an urgent push message.
Notification Type is ntfy. Server, topic, and token are filled in.
Give it a name. Click Test. A push message arrives on your phone in a few seconds. None arrives? Check the token first.
Tick Default enabled and Apply on all existing monitors. This makes each future monitor alert your phone by itself. This is the whole point of the habit.
Tick Default enabled and Apply on all existing monitors before you save.
Click Save.
Kuma now pushes to your phone through ntfy each time that a service goes down or comes back. You already subscribed the ntfy phone app to the topic homelab-alerts in the previous chapter. So each homelab alert arrives there.
Prefer Discord? — set up a webhook instead, or add both
A Discord webhook works in the same way. You can also add both notifications. Each monitor then alerts both.
Go to Settings → Notifications → Setup Notification.
Set Notification Type to Discord.
Paste the webhook URL of your Discord channel.
Notification Type is Discord. The webhook URL is pasted.
Give it a name.
Tick Default enabled and Apply on all existing monitors.
Click Save.
Kuma now sends a message to your Discord channel each time that a service goes down or comes back.
Notice — where the webhook URL comes from
In Discord, open the channel. Then select Edit Channel → Integrations → Webhooks → New Webhook → Copy Webhook URL. This is the text that you paste into Kuma.
Add a monitor
Click the green Add New Monitor button (top left). These are the fields that matter:
Monitor Type — the KIND of check (see the table below).
Friendly Name — the label on your dashboard. Example: Proxmox (homelab).
The address — a URL for an HTTP check. A Hostname and a Port for the other types.
Heartbeat Interval — how often to check. 60 seconds is a good value. Use 20 seconds for a service that is important to you.
Under Notifications, tick your ntfy notification (or Discord). This monitor then really alerts your phone. Make this tick a habit for each monitor that you add.
Tick your ntfy notification under Notifications.
Add New Monitor, filled in for the Proxmox HTTP(s) check.
Then click Save. Kuma starts the check at once. The tile turns green when the target answers.
The Proxmox tile is green on the dashboard after Save.
The monitor types that you use
Monitor types
Type
Checks
Your example
Ping
A machine is alive on the network.
Your PC — Hostname 192.168.1.50 (your PC, example).
HTTP(s)
A web page or dashboard is up.
Proxmox — URL https://192.168.1.220:8006. Tick Ignore TLS/SSL error (the certificate is self-signed).
TCP Port
A service that is not a web page is listening.
Any app, by Hostname and Port.
GameDig
A game server that answers queries, and its player count.
Minecraft (see Ch. 58 · Minecraft server) — Game Minecraft, the host, and the query port. The query must be on in the server settings. Palworld does not work with GameDig. Use Ping for Palworld. See the notice below. Add a game monitor only after you built that game server in Part F. Before that, the tile turns red when you save it, and it stays red. That teaches you to ignore red tiles.
Docker Container
A Docker container is running.
Not part of this chapter. It first needs a Docker Host in Settings → Docker Hosts. Use HTTP(s) or Ping instead, as in the starter set below.
Notice — Palworld cannot be monitored with GameDig
In our test, a GameDig monitor for the Palworld dedicated server (see Ch. 57 · Palworld dedicated server) showed "Down" for each host and port that we entered. The port did not reply to a direct query. Monitor Palworld with a Ping on 192.168.1.222 instead. GameDig works for games that support queries. Minecraft is one of them. With the query turned on, GameDig checks the QUERY port, not the join port.
A good starter set for this homelab
Add these five to start. They answer three questions: is the server up, is the game up, and are the remote services up.
A good starter set
Friendly name
Type
Address
Proxmox (homelab)
HTTP(s)
https://192.168.1.220:8006 (Ignore TLS)
Palworld
Ping
192.168.1.222 — GameDig does not work for Palworld. Add this one only after you built Palworld.
Your PC
Ping
192.168.1.50 (your PC, example)
A public site you host
HTTP(s)
Your public URL.
A service on your PC
HTTP(s)
http://192.168.1.50:8888 (your PC, example)
Notice — add a monitor for each new container
When you build more containers, add a monitor for each one. Use an HTTP(s) check on its dashboard URL, or a Ping on its IP. This is the main benefit. You get one dashboard that turns red and sends a push message to your phone the moment a service that you built stops answering.
14.4
WHEN IT GOES WRONG
You forgot the admin password of Uptime Kuma, and you are locked out of http://192.168.1.221:3001. Inside CT 100, run docker exec -it uptime-kuma npm run reset-password. This opens an interactive prompt inside the running container. Follow the prompts to set a new password. You lose no data. This is the official recovery command of Uptime Kuma.
The 'Test' button of Discord or ntfy works, but real down-alerts never arrive. You made the notification, but you did not attach it to any monitor. Edit each monitor. Tick its box under Notifications. Or, when you make the notification, turn on 'Default enabled' and 'Apply on all existing monitors'.
http://192.168.1.221:3001 does not load right after you start the container. At the first start, Uptime Kuma builds its database. This takes about 30 to 60 seconds. Wait. Then run docker logs uptime-kuma --tail 50. Look for a line about listening on port 3001. Make sure that you use the IP of the CT, 192.168.1.221, and not the host, 192.168.1.220.
A GameDig monitor for Palworld shows 'Down', but the server runs. In our test, GameDig could not read Palworld. Monitor Palworld with a Ping on its IP. Minecraft supports queries. For Minecraft, turn the query on and use the query port.
14.5
A download step fails with Temporary failure resolving deb.debian.org, or with another "cannot resolve" message. The container has no working DNS server. It cannot change a name into an address. This is not a typing mistake. It does not fix itself. In the Proxmox page, select this container in the left tree. Open DNS. Select Edit. Type your router address in DNS servers (192.168.1.1 here; use your own). Then run pct reboot 100 in the host shell. Run the failed step again.
A command fails. You do not know if you are on the server or in the container. Read the prompt. In the container, it ends with the name of the container. On the server, it shows root@homelab. The prompt still shows root@homelab after pct enter? Then the command did not work. Type exit. Run the pct enter line again. Check the prompt before you paste anything else. You can paste a build block on the server by mistake. It seems to work. It installs without an error, and the app even answers. But the app is on the server, and it must not be there.
How to see that it happened, and how to undo it. The app does not open at the container address (192.168.1.221). It does open at the server address (192.168.1.220) on the same port. Then the app is on the host. To remove it, run docker rm -f uptime-kuma in the host shell. Then run pct enter 100. Check that the prompt changed. Paste the build block again. You lose nothing in the container, because nothing was built there. The first command can show Error: No such container. This is good. It means that the app was never on the host. Do not paste the build block again. Look for another cause.
The page does not open. The browser spins, or says it cannot connect. Do these checks in order, in the host shell. 1. Is the container running? Run pct status 100. It must say running. If it does not, run pct start 100. 2. Is the container at the address that you typed? Run pct config 100 | grep net0. It shows the real address. A wrong digit in the wizard puts the container at another address, and nothing warns you. 3. Does the app run in the container? Run pct enter 100. Then run docker ps. An empty list means that the app did not start. Run docker ps -a to see that it stopped. Run docker logs to see why. 4. Does the app answer in the container? Run curl -I http://localhost followed by the port of the app. You get a reply here, but nothing from your PC? Then the address or your own network is the problem. The app is fine. Your browser reaches 192.168.1.221 but not the port? Then the app is down. It reaches neither? Then the container is down.
Docker does not start, or you see Cannot connect to the Docker daemon, a keyring error, or an overlay error. This is the most common failure in these guides. It means that the two container features are off. A later pct set --features can switch them off, also when you set them before. Run this in the host shell, not in the container: pct set 100 --features nesting=1,keyctl=1. Then run pct reboot 100. Then run the failed step again. Type both settings on one line. If you send only one setting, it replaces the pair and switches the other one off.
REFERENCE CARD
Paste this in 100 → Summary → Notes. The essentials then stay with the container. Before you ever run the update line on this card, compare it with the docker run you actually used at install. The card is a snapshot of the standard build: if you added anything of your own — a device, an extra -e setting, a second folder — it is not on the card, and re-running the card's line drops it. The container comes back up looking healthy with your setting gone.
📋 Reference — paste into this container's Notes in Proxmox (not a shell command)
## Uptime Kuma — CT 100
dashboard http://192.168.1.221:3001 · docs https://github.com/louislam/uptime-kuma/wiki

```sh
# is it running?
docker ps --filter name=uptime-kuma
curl -fsS http://localhost:3001 >/dev/null && echo OK   # quick health check
# logs (last 50)
docker logs uptime-kuma --tail 50
# stop / start / restart
docker stop uptime-kuma
docker start uptime-kuma
docker restart uptime-kuma
# is there an update? ("Image is up to date" = no)
docker pull louislam/uptime-kuma:2
# update (settings survive in /opt/uptime-kuma)
docker pull louislam/uptime-kuma:2 && docker rm -f uptime-kuma && docker run -d --name uptime-kuma --restart=unless-stopped -p 3001:3001 -v /opt/uptime-kuma:/app/data louislam/uptime-kuma:2
```
Part C · The essential six & backups
15Beszel
Kuma tells you if a service is up. Beszel tells you how hard each machine works. It shows live graphs of CPU, memory, disk, and network, with weeks of history, on one small dashboard.
This chapter needs the items below. You came here directly? Do them first. Each item takes a short time. Nothing on this page works without them.
Proxmox is installed and works at https://192.168.1.220:8006. You can log in as root. See Ch. 6 · Install Proxmox. At your first visit, the browser shows a certificate warning. Select Advanced. Then select Proceed. The warning is normal. Proxmox makes its own certificate.
The Debian 13 image is downloaded. You do this one time. See Ch. 10 · The container wizard. Without the image, the Template list in the wizard is empty.
You have an SSH key from your PC (Ch. 9 · SSH & the terminal). Or you type a password in the two password boxes of the wizard. The wizard needs one of the two. The Next button stays grey until you give one.
You know your own network numbers. Where this chapter shows 192.168.1.x, use your own numbers. The rule is in Ch. 3 · How to read this manual. The address of this chapter must be outside the range that your router gives out by itself (the DHCP pool, often .100–.200, but yours can differ). An address inside the pool can go to a phone later. Two devices on one address break name lookups, and the cause is hard to find.
You built Ch. 14 · Uptime Kuma already. The steps below use that chapter: a container, an address, a key, or a job that must exist. You cannot finish this chapter without it.
Commands marked HOST run on the server. In the Proxmox page, select homelab in the left tree. Then select >_ Shell. Commands marked CT run inside the container of this chapter. The chapter shows you how to get there.
Notice — optional but recommended
Beszel is the one optional chapter in Part C. Skip it only if you run one machine and never check its load. You run more than one machine, or several containers? Then install it. It is very small. It helps you catch a full disk or a runaway process before it stops a service.
15.1
INSTALL THE HUB
Beszel has two parts. The hub is the dashboard and its database. An agent is one small program on each machine that you want to watch. Run the hub inside CT 100. This is the same container as Ch. 14 · Uptime Kuma. It sits next to Kuma and uses almost nothing.
This is the one planned exception to the rule one service, one container of this manual (Ch. 7 · The build order). These two small monitoring tools use almost no CPU or memory, so they share one box. Each other service in this manual still gets its own container.
This part has no buttons. These commands run inside CT 100. In the host Shell (homelab → >_ Shell), run pct enter 100. You are still inside from the previous section? Then continue.
On the Proxmox host, go into the container. Type pct enter 100.
CT 100 already has Docker and curl from the Ch. 14 · Uptime Kuma chapter. The hub command below uses them as they are. You start in an empty CT 100? Run apt update && apt install -y docker.io curl first.
Run the hub command on the right. It stores its data in /opt/beszel. It serves the dashboard on port 8090.
⌨ Type this inside CT 100
Before you run anything on this page: every 192.168.1.x address below is this manual's example network. If your own network uses different numbers, substitute yours as you type — the rule is in Ch. 3 · How to read this manual. A command that runs with the wrong address usually succeeds and leaves you unreachable.
Each agent reads the stats of its host. It sends them to the hub. Start with the machine that already has Docker: CT 100, the box where the hub runs. Its agent mounts the Docker socket. This is a special file that Docker uses to answer the question "which containers run now?". So the agent also draws a graph for each container on the box.
Open the hub at http://192.168.1.221:8090.
Make the admin account at the first visit.
Click Add System. Open the Docker tab. The hub prints the exact beszel-agent command, with the key and the token already filled in.
Inside CT 100, paste that docker run command as it is. It reports the stats of the container itself. Through the mounted Docker socket, it also reports each container that runs on it.
Next, add the whole server, the Proxmox host, in the section below. That uses the native agent of Beszel, because the manual does not install Docker on the hypervisor.
Notice — adding your PC is optional
You can also watch your own PC. But only if it already runs Docker Desktop. Paste the same docker run line there. The manual never installs Docker on your PC. You do not have Docker Desktop? Then use the native agent installer of Beszel for your operating system (the Binary tab in Add System), exactly as the server host does below.
First visit to the hub. Make the admin account.Add System → Docker tab. The key, the token, and the hub URL are already filled in.
Prefer the terminal? — same task, one pasted command
⌨ Type this inside CT 100
# copy the EXACT line the hub's "Add System" box gives you — it fills in# KEY, TOKEN and HUB_URL. Roughly the shape:
docker run -d --name beszel-agent --restart=unless-stopped --network host \
-v /var/run/docker.sock:/var/run/docker.sock:ro \
-e KEY="<the key the hub shows>" \
-e TOKEN="<the token the hub shows>" \
-e HUB_URL="http://192.168.1.221:8090" \
-e LISTEN=45876 henrygd/beszel-agent:latest
15.3
ADD THE SERVER HOST
Do not install Docker on the hypervisor. Use the binary agent of Beszel on the Proxmox host instead.
In the Proxmox web page at https://192.168.1.220:8006, click the node homelab in the left tree. Then click >_ Shell. This opens a shell on the host itself, in the browser.
In the hub, open Add System. Click the Binary tab. Copy the whole line. It already has your key and token.
root is the account with full rights on a machine. The shell of the Proxmox host already logs you in as root. So you never type sudo here. Paste the line and run it.
It asks if you want automatic daily updates. Type y and press Enter.
Prefer the terminal? — SSH instead of the web Shell
You can also reach the host with ssh root@192.168.1.220. Use it in place of the web >_ Shell. It is the same shell. The command below is the same.
homelab → Shell. It opens a terminal on the host, in the browser.Add System → Binary tab. The install command has the key, the token, and the URL filled in.
Notice — this step has no buttons
Proxmox has no button to run a downloaded script. Paste the command that the hub gave you into the Shell that you just opened.
The dashboard and the database. They are stored in /opt/beszel. You run exactly one hub.
henrygd/beszel-agent (an agent)
A very small collector. It reads the stats of its host and sends them to the hub over the network. It uses the key and the token that the hub gave it. --network host lets it see the real machine, not only the container.
HUB_URL
The address of the hub. The agent makes an outgoing connection to this address. So the hub does not need to reach into the agent machine.
:latest
Both images use the :latest tag. They are not fixed to one version. To update later, run docker pull henrygd/beszel:latest. Do the same for henrygd/beszel-agent:latest. Then remove and make each container again: docker rm -f beszel (or beszel-agent). Then run its docker run command again from above.
15.4
HOW TO USE IT — THE BASICS
Read the graphs. Then let alerts watch the machines for you.
Open http://192.168.1.221:8090. Sign in with the admin account. The front page is a table of all machines with live CPU, memory, and disk numbers.
Click the name of a system to open its full dashboard. You see graphs for CPU, memory, disk, network, and temperature. The agent can see Docker? Then it also shows a graph for each container.
Use the time-range picker at the top. It goes from the last hour to the last 30 days. It shows if a load is a short spike or the new normal.
Go back to the systems table. Click the bell icon on a row. Turn on Status to get a message when the machine goes down. Set limits for values such as CPU or disk. Each alert has one slider for the percentage and one slider for the minutes that it must stay above it.
To copy the same limits to every machine, pick All Systems in the bell dialog. Tick Overwrite existing alerts.
Add a channel under Settings → Notifications. Beszel sends alerts to URLs of a standard format. It supports email and many services, also ntfy. For your ntfy server, type the URL below in the URL box. Replace tk_YOUR-TOKEN with your real token (see Ch. 13 · ntfy). Keep the colon before the token. Keep ?scheme=http, because your server uses plain HTTP, and Beszel uses HTTPS if you leave it out. Then press Test URL and check that the message arrives on your phone. An alert channel that you did not test is the same as no alert channel. Without a channel, alerts show only inside the dashboard.
⌨ Type this in the URL box of Beszel (Settings → Notifications)
Notice — a different token format, if the first one fails
The Beszel documentation gives a second format for the case that the first one does not work: generic+http://192.168.1.227/homelab-alerts?@authorization=Bearer+tk_YOUR-TOKEN. Try it if Test URL reports a failure. The email option also works.
The front page. Each machine, with live CPU, memory, and disk numbers.The full dashboard of one machine.Time-range picker. From the last hour to the last 30 days.The bell dialog. A Status switch and sliders for percentage and minutes.All Systems and Overwrite existing alerts. One action, every machine.Settings → Notifications. Email or a URL, so alerts leave the dashboard.
15.5
WHEN IT GOES WRONG
An added machine stays grey or red and never turns green (the agent is "not connecting"). With the commands of this chapter, the agent makes an outgoing connection to the hub. It uses HUB_URL. Check that the agent machine can reach the hub address, and that the TOKEN is the one that the hub shows. The old SSH method works the other way. There, the hub connects to port 45876 on the agent machine, and that port must be open.
Prefer the terminal? — test reachability, and open the port for the SSH method
From the agent machine, test the hub with curl -I http://192.168.1.221:8090. For the SSH method on a Linux agent with ufw, run sudo ufw allow 45876/tcp. With firewalld, run sudo firewall-cmd --permanent --add-port=45876/tcp && sudo firewall-cmd --reload. To test a port from inside CT 100, run nc -vz followed by the address and the port, for example nc -vz 192.168.1.50 45876. Use the own IP of the agent. 192.168.1.50 is your PC (example). Do not use telnet. The Debian template of this manual does not include it, and you only get command not found. The system stays grey after that? Do not look through the network settings by hand. Make the agent again with the exact command that the Add System screen of the hub shows you now. Remove the old one first: docker rm -f beszel-agent. Then paste the fresh docker run command from the hub.
The agent process runs, but the system does not connect after you filled in its details by hand in "Add System". In the Add System dialog, the Host / IP field must be the address of the agent machine. This is your PC (example) 192.168.1.50 or the Proxmox host 192.168.1.220. It is not the hub itself, 192.168.1.221. Leave the Port field at 45876. This is the LISTEN value of the agent.
The machine connects and shows CPU and RAM, but its Docker containers panel is empty. The agent needs read access to the Docker socket. Check that its docker run has -v /var/run/docker.sock:/var/run/docker.sock:ro.
Prefer the terminal? — make the agent again with the socket mounted
You started it without that line? Make it again. Run docker rm -f beszel-agent. Then run the full agent command again, with the mount in it.
Disk use shows 0% or an obviously wrong number. This is common for the binary agent on the host or inside a container. Tell the agent which device is the root disk. Run df -h / (or lsblk). Note the device, for example /dev/sda2.
Prefer the terminal? — set the FILESYSTEM variable
For the binary agent on the host, open its service file with nano /etc/systemd/system/beszel-agent.service. You need no sudo. The Proxmox host shell already logs you in as root. Arrow down into the [Service] block. Type a new line: Environment="FILESYSTEM=/dev/sda2". Save and exit (Ctrl-O, Enter, Ctrl-X). You prefer a graphical editor? Open the same file over SFTP instead. See Ch. 12 · After every build + common Proxmox tasks, section "Move a file to or from the server". Then go back to the terminal for the last command. It has no button: systemctl daemon-reload && systemctl restart beszel-agent. For a Docker agent, add -e FILESYSTEM=/dev/sda2. Make the container again in the same way as above.
The page http://192.168.1.221:8090 shows nothing, or does not load. Check that the hub container is up inside CT 100. docker ps must list beszel. It is not there? Read docker logs beszel --tail 50. Open the page from a device on the same 192.168.1.x network (or over Ch. 19 · Remote access: Tailscale). Make sure that you typed http:// and not https://. The hub serves plain HTTP on port 8090 by default.
15.6
A download step fails with Temporary failure resolving deb.debian.org, or with another "cannot resolve" message. The container has no working DNS server. It cannot change a name into an address. This is not a typing mistake. It does not fix itself. In the Proxmox page, select this container in the left tree. Open DNS. Select Edit. Type your router address in DNS servers (192.168.1.1 here; use your own). Then run pct reboot 100 in the host shell. Run the failed step again.
A command fails. You do not know if you are on the server or in the container. Read the prompt. In the container, it ends with the name of the container. On the server, it shows root@homelab. The prompt still shows root@homelab after pct enter? Then the command did not work. Type exit. Run the pct enter line again. Check the prompt before you paste anything else. You can paste a build block on the server by mistake. It seems to work. It installs without an error, and the app even answers. But the app is on the server, and it must not be there.
How to see that it happened, and how to undo it. The app does not open at the container address (192.168.1.221). It does open at the server address (192.168.1.220) on the same port. Then the app is on the host. To remove it, run docker rm -f beszel in the host shell. Then run pct enter 100. Check that the prompt changed. Paste the build block again. You lose nothing in the container, because nothing was built there. The first command can show Error: No such container. This is good. It means that the app was never on the host. Do not paste the build block again. Look for another cause.
The page does not open. The browser spins, or says it cannot connect. Do these checks in order, in the host shell. 1. Is the container running? Run pct status 100. It must say running. If it does not, run pct start 100. 2. Is the container at the address that you typed? Run pct config 100 | grep net0. It shows the real address. A wrong digit in the wizard puts the container at another address, and nothing warns you. 3. Does the app run in the container? Run pct enter 100. Then run docker ps. An empty list means that the app did not start. Run docker ps -a to see that it stopped. Run docker logs to see why. 4. Does the app answer in the container? Run curl -I http://localhost followed by the port of the app. You get a reply here, but nothing from your PC? Then the address or your own network is the problem. The app is fine. Your browser reaches 192.168.1.221 but not the port? Then the app is down. It reaches neither? Then the container is down.
Docker does not start, or you see Cannot connect to the Docker daemon, a keyring error, or an overlay error. This is the most common failure in these guides. It means that the two container features are off. A later pct set --features can switch them off, also when you set them before. Run this in the host shell, not in the container: pct set 100 --features nesting=1,keyctl=1. Then run pct reboot 100. Then run the failed step again. Type both settings on one line. If you send only one setting, it replaces the pair and switches the other one off.
REFERENCE CARD
Paste this in Proxmox under 100 → Summary → Notes. It is a note for your future self. It is not a shell command. The hub is a Docker container. The agent of the server is a normal installed program. You start and stop it with systemctl. Before you ever run the update line on this card, compare it with the docker run you actually used at install. The card is a snapshot of the standard build: if you added anything of your own — a device, an extra -e setting, a second folder — it is not on the card, and re-running the card's line drops it. The container comes back up looking healthy with your setting gone.
📋 Reference — paste into CT 100's Notes in Proxmox (not a shell command)
## Beszel — hub (Docker, CT 100) + agents
dashboard http://192.168.1.221:8090 · docs https://beszel.dev/guide/getting-started

```sh
# --- HUB: Docker container inside CT 100 ---
# is it running?
docker ps --filter name=beszel
curl -fsS http://localhost:8090 >/dev/null && echo OK   # quick health check
# logs (last 50)
docker logs beszel --tail 50
# stop / start / restart
docker stop beszel
docker start beszel
docker restart beszel
# is there an update? ("Image is up to date" = no)
docker pull henrygd/beszel:latest
# update (data survives in /opt/beszel)
docker pull henrygd/beszel:latest && docker rm -f beszel && docker run -d --name beszel --restart=unless-stopped -p 8090:8090 -v /opt/beszel:/beszel_data henrygd/beszel:latest

# --- AGENT on the server: native binary (systemd) ---
systemctl status beszel-agent
journalctl -u beszel-agent -n 50 --no-pager
systemctl restart beszel-agent
# update (daily auto-update was enabled at install; to force one now)
/opt/beszel-agent/beszel-agent update && systemctl restart beszel-agent

# --- AGENT in a Docker container (your PC, or CT 100 itself) ---
docker restart beszel-agent
docker logs beszel-agent --tail 50
```
Part C · The essential six & backups
16AdGuard Home
AdGuard blocks ads and trackers for the whole house through DNS. You set it up one time. Then every phone, laptop, and TV gets the benefit.
This chapter needs the items below. You came here directly? Do them first. Each item takes a short time. Nothing on this page works without them.
Proxmox is installed and works at https://192.168.1.220:8006. You can log in as root. See Ch. 6 · Install Proxmox. At your first visit, the browser shows a certificate warning. Select Advanced. Then select Proceed. The warning is normal. Proxmox makes its own certificate.
The Debian 13 image is downloaded. You do this one time. See Ch. 10 · The container wizard. Without the image, the Template list in the wizard is empty.
You have an SSH key from your PC (Ch. 9 · SSH & the terminal). Or you type a password in the two password boxes of the wizard. The wizard needs one of the two. The Next button stays grey until you give one.
You know your own network numbers. Where this chapter shows 192.168.1.x, use your own numbers. The rule is in Ch. 3 · How to read this manual. The address of this chapter must be outside the range that your router gives out by itself (the DHCP pool, often .100–.200, but yours can differ). An address inside the pool can go to a phone later. Two devices on one address break name lookups, and the cause is hard to find.
Commands marked HOST run on the server. In the Proxmox page, select homelab in the left tree. Then select >_ Shell. Commands marked CT run inside the container of this chapter. The chapter shows you how to get there.
The wizard does not work?Next is grey: you gave no password and no key. Give one of the two. The Template list is empty: the Debian image is not downloaded. Download it first. Each tab is explained in Ch. 10 · The container wizard.
AdGuard Home answers the DNS lookups of each device in the house. It returns nothing for the domains of ads and trackers. So ads do not load on any device, also not on phones and the smart TV. You install no software on those devices.
16.1
CREATE THE CONTAINER
You do this task with the mouse, in the Proxmox web page. You type nothing. You prefer the command line? The box below does the same task with one pct create command.
On your PC, open https://192.168.1.220:8006.
Click homelab in the left tree.
Click the blue Create CT button at the top right.
Fill in the tabs as the table shows. Keep each field that is not listed at its default value.
General tab, filled in for CT 102: CT ID 102, hostname adguard, address 192.168.1.223/24.
Wizard reference — Create CT 102
Tab → Field
Entry
General → Node
Select homelab.
General → CT ID
Type 102. Do not keep the number that the wizard suggests.
General → Hostname
Type adguard.
General → Unprivileged container
Keep this box ticked.
General → Nesting
Keep this box ticked. It is ticked by default. The wizard has no box for keyctl, which Docker also needs. The host command after Finish sets it. It is the first line of the next listing.
General → Password / SSH public key
Keep the password empty. Paste your public key in the SSH field: ssh-ed25519 AAAA…your-key-here you@your-pc. With the key, you can run ssh root@192.168.1.223 from your PC. The command pct enter 102 on the host needs no password.
Template → Storage, Template
Select local. Then select debian-13-standard.
Disks → Storage, Disk size
Select local-lvm. Set 6 GiB.
CPU → Cores
Set 1 core.
Memory → Memory (MiB)
Set 1024. Keep Swap at its default.
Network → IPv4
Select Static. Set IPv4/CIDR to 192.168.1.223/24. Set Gateway to 192.168.1.1. Keep IPv6 at its default.
DNS → DNS domain
Keep this field empty. Do not type 192.168.1.1 here.
DNS → DNS servers
Always type 192.168.1.1. Never keep this field empty.
Confirm
Read the summary. Keep Start after created unticked. Select Finish.
The wizard has no box for three settings: the Docker permission keyctl, the timezone, and start at boot. The first command below sets all three. Run these 3 commands on the host. They set the missing settings, start the container, and open its shell. Each part is explained in Ch. 10 · The container wizard, section "The host command every build needs".
⌨ Type this on the Proxmox host (homelab)
Before you run anything on this page: every 192.168.1.x address below is this manual's example network. If your own network uses different numbers, substitute yours as you type — the rule is in Ch. 3 · How to read this manual. A command that runs with the wrong address usually succeeds and leaves you unreachable.
pct set 102 --features nesting=1,keyctl=1 --onboot 1 --timezone host
pct start 102
pct enter 102                          # now INSIDE CT 102 — the rest of this page runs here
Notice — set your timezone
The option --timezone host copies the timezone of the server into the container. Your server itself is still on UTC? Then set it one time with timedatectl set-timezone Region/City. Region/City is a placeholder. Replace it with your own zone name, for example America/New_York or Europe/Berlin. If you type it as it is, it is not a real zone, and the command fails. To see every valid name, run timedatectl list-timezones on the server. Without the correct timezone, logs, scheduled jobs, and file names with dates are wrong by some hours.
Prefer the terminal? — the same task with one pct create command
⌨ Type this on the Proxmox host (homelab)
TMPL=$(pveam available --section system | awk '/debian-13-standard/{print $2}' | tail -1)
pveam download local "$TMPL"          # once per host; harmless to re-run
pct create 102 local:vztmpl/"$TMPL" \
  --hostname adguard --cores 1 --memory 1024 --rootfs local-lvm:6 \
  --net0 name=eth0,bridge=vmbr0,ip=192.168.1.223/24,gw=192.168.1.1 \
  --nameserver 192.168.1.1 --features nesting=1,keyctl=1 --unprivileged 1 --onboot 1 --timezone host
pct start 102
pct enter 102                      # you are now INSIDE CT 102 — everything below runs here
This part has no buttons. These commands run inside CT 102. In the host Shell (homelab → >_ Shell), run pct enter 102. You are still inside from the previous section? Then continue. Opening the host Shell is the one step with the mouse. You type everything after it.
The >_ Console button of the CT opens a login: prompt, not a shell. Use pct enter 102 from homelab → >_ Shell.
Notice — where these commands run
Everything below runs inside CT 102. It does not run on the server or on your PC. You open that shell in one of two ways. Run pct enter 102 on the server (first homelab → >_ Shell). Or run ssh root@192.168.1.223 from your PC. (The >_ Console button of the container shows a login: prompt. The containers of this manual cannot answer it. Skip it.) Only the pct and pveam commands go back to the server. Each guide marks those commands where you use them.
Open a root shell inside the container. The easiest way is pct enter 102 on the server (192.168.1.220).
Check that port 53 is free. AdGuard needs port 53 for DNS. The command ss -lntup | grep ':53 ' prints nothing? Then the port is free. Go to the next step. It prints a line with systemd-resolved? Then run the second block below. A new Debian 13 container has no systemd-resolved, so you usually skip it.
The two -v volumes keep your settings and filter data after updates. The run command opens three ports:
-p 53:53/tcp -p 53:53/udp — port 53, the DNS port. It is open on both protocols, because DNS uses both.
-p 3000:3000/tcp — the one-time setup wizard.
-p 80:80/tcp — the dashboard that you use after the wizard.
Explanation of each part
The Docker install line and the flags -d, --name, --restart, -v, and -p are explained in Ch. 9 · SSH & the terminal, sections "Install Docker in the container" and "Anatomy of docker run". These parts are specific to AdGuard:
ss -lntup | grep ':53 '
Lists the programs that listen on a network port. The grep keeps only lines with port 53. No line means that nothing holds the port.
systemctl disable --now systemd-resolved
Turns off the DNS helper of Debian and stops it from starting at boot. It uses port 53, which AdGuard needs. Most containers do not have it.
rm -f /etc/resolv.conf
Deletes the file that tells this machine which DNS server to use. It asks no question (-f), also if the file is missing.
echo "nameserver 192.168.1.1" > /etc/resolv.conf
Makes that file again with one line. It sends the own lookups of the container to your router, for the time being, so that the system can still look up names.
-v /opt/adguard/work:/opt/adguardhome/work
Links the host folder for working data to the container. Logs and statistics stay.
-v /opt/adguard/conf:/opt/adguardhome/conf
Links the host folder for settings to the container. Settings stay after you make the container again.
-p 53:53/tcp -p 53:53/udp
Sends port 53 (the standard DNS port) on both TCP and UDP. The container can then be the DNS server of the network.
-p 80:80/tcp
Sends port 80 (the standard web port). This is the main dashboard of AdGuard after the first-run wizard.
-p 3000:3000/tcp
Sends port 3000. This is the port of the one-time first-run wizard. You use it only once. After the setup, the dashboard is on port 80, not on 3000.
adguard/adguardhome
The Docker image to run: AdGuard Home, a DNS server for the whole network that blocks ads and trackers.
16.3
SET UP AND POINT THE HOUSE AT IT
Open http://192.168.1.223:3000 to start the first-run wizard.
Set the admin web interface to port 80. Set DNS to port 53.
First-run wizard: admin web interface port 80, DNS server port 53.
Make your admin login on the next step of the wizard.
Make the admin user name and password.
When the wizard ends, the dashboard moves to http://192.168.1.223. It no longer uses :3000.
The dashboard after the wizard ends: DNS queries and blocked items for the whole house.
Add a blocklist. Go to Filters → DNS blocklists → Add blocklist → Choose from the list. Tick the box next to OISD Blocklist Big. This is the exact text in the list. Then click the Save button at the bottom of that box. The tick alone changes nothing. You close the box in another way? Then the choice is lost, and nothing tells you.
Check that it worked. The DNS blocklists page now shows a row OISD Blocklist Big, with a rule count next to it. The count is a big number, not zero. No row, or a count of zero, means that the Save did not happen. Do step 5 again. Later, devices use AdGuard. Then the figure Blocked by filters on the Dashboard goes above zero. This is the second proof that blocking works.
Choose from the list. Tick OISD Blocklist Big. Click Save at the bottom of the box. Save is what stores it.
Set the resolver under Settings → DNS settings. Set the Upstream DNS servers to https://dns.cloudflare.com/dns-query. Click Apply.
Upstream DNS servers set to https://dns.cloudflare.com/dns-query. Then Apply.
Warning — critical infrastructure
You save the router change in the next step. After that, each device in the house depends on this container for DNS. It stops? Then each device shows "no internet" until you restart it (docker restart adguardhome). Make the change at a quiet time. Keep the bypass for the router, in the troubleshooting section below, in mind.
On the admin page of your router (192.168.1.1), find the DHCP or LAN settings. The field is usually named “DNS server”. Set the DNS server that the router gives to devices to 192.168.1.223. Keep a second DNS empty. The router does not save with an empty field? Then enter 192.168.1.223 again. Do not enter a public DNS there. If you do, devices bypass AdGuard. Save the change. You never opened the admin page of your router? Type the gateway address that you wrote down in Ch. 6 · Install Proxmox in a browser on any machine at home. It is the same number, for example 192.168.1.1. It asks for a user name and a password. Nobody changed them? Then they are on a sticker on the router, usually under it. Often the user is admin, with a password that is unique for your router. The sticker is gone? The support page of your internet provider lists the default for your model. You are not locked out. This page is on your own network. It is not on the internet.
Router admin — 192.168.1.1✕
StatusLAN SetupWirelessFirewallAdmin
☑ Enabled24 h
192.168.1.10 – 192.168.1.199
Manual ▾192.168.1.223
(keep empty)
Every router brand words this differently — look for “DHCP”, “LAN”, or “DNS” settings.Save changes
A typical router's LAN/DHCP page. The one change that turns on house-wide ad-blocking: DNS server 1 = your AdGuard container. Do not add a public DNS as server 2 — devices would bypass AdGuard through it.
Your router does not allow this change? Then set 192.168.1.223 as the DNS on each device by hand. On Windows: Settings → Network & Internet → your connection → Edit DNS. On an iPhone: Settings → Wi-Fi → (i) next to your network → Configure DNS → Manual. On Android: do not use Private DNS. That box accepts only a host name, not an address. Open the Wi-Fi network, edit it, and open Advanced options → IP settings. Set it to Static. Fill in the address, the gateway, and put 192.168.1.223 in DNS 1. The menu names are a little different on each Android version.
Devices use AdGuard only after they connect to Wi-Fi again, or after you restart them.
16.4
HOW TO USE IT — THE BASICS
AdGuard Home blocks ads by itself. Use these steps for the usual tasks.
Open http://192.168.1.223. Log in with the account from the setup wizard.
Read the Dashboard: the total DNS queries, the percentage Blocked by filters, the top domains, and the top clients.
A site does not work? Open the Query Log in the top menu. Search for the name of the site. Blocked entries are red.
Query Log: blocked lookups are red.
Let that site through. There is no Unblock button on the row. Do not look for one. At the right end of the red row, click the ⋮ control (three dots, one above the other). A small menu opens. Choose Unblock. Do not choose Unblock for this client only. That is a different item. It affects only one device. Then reload the page on the device.
Unblock a domain from its Query Log entry. The choice is in the ⋮ menu at the end of the row.
Block a domain. Find it in the Query Log and click Block. Or add a rule such as ||example.com^ under Filters → Custom filtering rules.
Custom filtering rules: one rule on each line. Then Apply.
Pause all blocking for a short time. Click Disable protection on the Dashboard. Select a duration. Protection starts again by itself.
Disable protection, with a selector for the duration.
Notice — where the rules go
Each click on Block or Unblock makes a rule under Filters → Custom filtering rules. Delete a rule there if you change your mind.
16.5
WHEN IT GOES WRONG
The container does not start, or docker logs adguardhome shows listen tcp 0.0.0.0:53: bind: address already in use (also seen as error while creating listener: cannot listen on 53). Another program on the host already holds DNS port 53. Run ss -lntup | grep ':53 ' to see which program it is. It is usually systemd-resolved, the DNS helper of Debian. Free the port and make the container again. Run systemctl disable --now systemd-resolved; rm -f /etc/resolv.conf; echo "nameserver 192.168.1.1" > /etc/resolv.conf; docker rm -f adguardhome. Then run the docker run … command again.
After the setup wizard, the browser cannot reach the dashboard at http://192.168.1.223:3000 any more (connection refused or timed out). This is expected. Port 3000 is only the one-time wizard. You set the admin interface to port 80, so the dashboard moved. Open http://192.168.1.223 (no :3000). Your login is the one that you made in the wizard.
The DNS of the router is set to 192.168.1.223, but ads still show, and the Query Log stays empty for that device. The device still uses its old DNS. Restart it, or turn Wi-Fi off and on, to renew the DHCP lease. Ads stay in a browser? Turn off the setting “Secure DNS” or “DNS over HTTPS” of the browser (Chrome: Settings → Privacy and security → Security; Firefox: Settings → Privacy & Security → DNS over HTTPS). It bypasses AdGuard. You know that it works when the lookups of the device show in the Query Log of AdGuard.
The whole house loses internet (nothing resolves) after you point the router at AdGuard. Sites fail with “server not found”. The house now depends on this container. If it is down, or if its upstream is not set, all DNS fails. Restart it with docker restart adguardhome. Then check docker logs adguardhome --tail 50. Make sure that an Upstream DNS server (https://dns.cloudflare.com/dns-query) is set under Settings → DNS settings. For an emergency bypass, set the DNS of the router back to 192.168.1.1 or 1.1.1.1 for the time being, until AdGuard works again.
16.6
A download step fails with Temporary failure resolving deb.debian.org, or with another "cannot resolve" message. The container has no working DNS server. It cannot change a name into an address. This is not a typing mistake. It does not fix itself. In the Proxmox page, select this container in the left tree. Open DNS. Select Edit. Type your router address in DNS servers (192.168.1.1 here; use your own). Then run pct reboot 102 in the host shell. Run the failed step again.
A command fails. You do not know if you are on the server or in the container. Read the prompt. In the container, it ends with the name of the container. On the server, it shows root@homelab. The prompt still shows root@homelab after pct enter? Then the command did not work. Type exit. Run the pct enter line again. Check the prompt before you paste anything else. You can paste a build block on the server by mistake. It seems to work. It installs without an error, and the app even answers. But the app is on the server, and it must not be there.
How to see that it happened, and how to undo it. The app does not open at the container address (192.168.1.223). It does open at the server address (192.168.1.220) on the same port. Then the app is on the host. To remove it, run docker rm -f adguardhome in the host shell. Then run pct enter 102. Check that the prompt changed. Paste the build block again. You lose nothing in the container, because nothing was built there. The first command can show Error: No such container. This is good. It means that the app was never on the host. Do not paste the build block again. Look for another cause.
The page does not open. The browser spins, or says it cannot connect. Do these checks in order, in the host shell. 1. Is the container running? Run pct status 102. It must say running. If it does not, run pct start 102. 2. Is the container at the address that you typed? Run pct config 102 | grep net0. It shows the real address. A wrong digit in the wizard puts the container at another address, and nothing warns you. 3. Does the app run in the container? Run pct enter 102. Then run docker ps. An empty list means that the app did not start. Run docker ps -a to see that it stopped. Run docker logs to see why. 4. Does the app answer in the container? Run curl -I http://localhost followed by the port of the app. You get a reply here, but nothing from your PC? Then the address or your own network is the problem. The app is fine. Your browser reaches 192.168.1.223 but not the port? Then the app is down. It reaches neither? Then the container is down.
Docker does not start, or you see Cannot connect to the Docker daemon, a keyring error, or an overlay error. This is the most common failure in these guides. It means that the two container features are off. A later pct set --features can switch them off, also when you set them before. Run this in the host shell, not in the container: pct set 102 --features nesting=1,keyctl=1. Then run pct reboot 102. Then run the failed step again. Type both settings on one line. If you send only one setting, it replaces the pair and switches the other one off.
REFERENCE CARD
Paste this in Proxmox under 102 → Summary → Notes. It is a note for your future self. It is not a shell command. Before you ever run the update line on this card, compare it with the docker run you actually used at install. The card is a snapshot of the standard build: if you added anything of your own — a device, an extra -e setting, a second folder — it is not on the card, and re-running the card's line drops it. The container comes back up looking healthy with your setting gone.
📋 Reference — paste into this container's Notes in Proxmox (not a shell command)
## AdGuard Home — CT 102
dashboard http://192.168.1.223 · DNS 192.168.1.223 · docs https://github.com/AdguardTeam/AdGuardHome/wiki
```sh
# is it running?
docker ps --filter name=adguardhome
curl -fsS http://localhost:80 >/dev/null && echo OK # dashboard health (port 80, after setup)
nslookup google.com 192.168.1.223 # is DNS answering? (if 'command not found': apt install -y dnsutils)# logs (last 50)
docker logs adguardhome --tail 50
# stop / start / restart (restart fixes a DNS outage fast)
docker stop adguardhome
docker start adguardhome
docker restart adguardhome
# is there an update? ("Image is up to date" = no)
docker pull adguard/adguardhome
# update (settings survive in /opt/adguard)
docker pull adguard/adguardhome && docker rm -f adguardhome && docker run -d --name adguardhome \
--restart=unless-stopped -v /opt/adguard/work:/opt/adguardhome/work -v /opt/adguard/conf:/opt/adguardhome/conf \
-p 53:53/tcp -p 53:53/udp -p 80:80/tcp -p 3000:3000/tcp adguard/adguardhome
```
Explanation of each part
## AdGuard Home — CT 102 · dashboard … · DNS … · docs …
A comment (it does not run). It notes which container this is, its dashboard and DNS addresses, and the link to the official documentation. The Notes field of Proxmox shows it as Markdown.
docker ps --filter name=adguardhome
Lists the running container. You see at a glance that it is up. An empty result means that it is stopped.
curl -fsS http://localhost:80 >/dev/null && echo OK
Asks the dashboard for a page from inside the container. It prints OK only if the dashboard answers. Port 80 answers after you finish the first-run wizard.
nslookup google.com 192.168.1.223
Tests DNS. It asks the AdGuard server at 192.168.1.223 to look up google.com. This shows that it answers queries.
docker logs adguardhome --tail 50
Shows the recent output of the container, limited to the last 50 lines. Use it for troubleshooting.
docker stop / start / restart adguardhome
Stops, starts, or does both in a row for the adguardhome container. A restart is the fast fix for a DNS outage, or to apply a changed setting.
docker pull adguard/adguardhome
Downloads the newest AdGuard Home image from Docker Hub.
docker rm -f adguardhome
Deletes the existing container by force (-f, also if it runs), so that a new one can be made from the updated image. The linked folders keep the data safe.
docker run -d --name adguardhome … adguard/adguardhome
Makes the container again in the same way as before: in the background, with automatic restart, with the same linked folders and ports. It now uses the image that you just pulled. This is the standard way to update a Docker container.
Part C · The essential six & backups
17Nginx Proxy Manager
A reverse proxy lets you type a short name such as kuma.home and not a long string of numbers.
This chapter needs the items below. You came here directly? Do them first. Each item takes a short time. Nothing on this page works without them.
Proxmox is installed and works at https://192.168.1.220:8006. You can log in as root. See Ch. 6 · Install Proxmox. At your first visit, the browser shows a certificate warning. Select Advanced. Then select Proceed. The warning is normal. Proxmox makes its own certificate.
The Debian 13 image is downloaded. You do this one time. See Ch. 10 · The container wizard. Without the image, the Template list in the wizard is empty.
You have an SSH key from your PC (Ch. 9 · SSH & the terminal). Or you type a password in the two password boxes of the wizard. The wizard needs one of the two. The Next button stays grey until you give one.
You know your own network numbers. Where this chapter shows 192.168.1.x, use your own numbers. The rule is in Ch. 3 · How to read this manual. The address of this chapter must be outside the range that your router gives out by itself (the DHCP pool, often .100–.200, but yours can differ). An address inside the pool can go to a phone later. Two devices on one address break name lookups, and the cause is hard to find.
You built Ch. 16 · AdGuard Home and Ch. 14 · Uptime Kuma already. The steps below use those chapters: a container, an address, a key, or a job that must exist. You cannot finish this chapter without them.
Commands marked HOST run on the server. In the Proxmox page, select homelab in the left tree. Then select >_ Shell. Commands marked CT run inside the container of this chapter. The chapter shows you how to get there.
The wizard does not work?Next is grey: you gave no password and no key. Give one of the two. The Template list is empty: the Debian image is not downloaded. Download it first. Each tab is explained in Ch. 10 · The container wizard.
Nginx Proxy Manager is a reverse proxy. It is one container that sits in front of all your services. It takes each request for a clean name, such as kuma.home. It forwards the request to the real 192.168.1.xxx:port behind it. It can add HTTPS on the way. The picture below shows one request going through it.
One request, start to finish: the browser asks the phonebook (AdGuard) where kuma.home lives, gets NPM's address, NPM forwards to the real container and port, and the answer travels back wearing the HTTPS padlock. Every proxy host you add is one more row in NPM's forwarding table.
17.1
CREATE THE CONTAINER
Do this task with the mouse in the Proxmox web page. You type nothing yet. You prefer the command line? The box below the table does the same task with one pct create command.
Open https://192.168.1.220:8006.
Click homelab in the left tree.
Click the blue Create CT button at the top right.
Fill in each tab as the reference shows. Leave each field that is not listed at its default value.
Create CT wizard — General tab, filled in for CT 103 / npm.
Wizard reference — Create CT 103
Tab → Field
Entry
General → Node
Select homelab.
General → CT ID
Type 103. Do not keep the number that the wizard suggests.
General → Hostname
Type npm.
General → Unprivileged container
Keep this box ticked.
General → Nesting
Keep this box ticked. It is ticked by default. The wizard has no box for keyctl, which Docker also needs. The host command after Finish sets it. It is the first line of the next listing.
General → Password / SSH public key
Keep the password empty. Paste your public key in the SSH field: ssh-ed25519 AAAA…your-key-here you@your-pc. With the key, you can run ssh root@192.168.1.224 from your PC. The command pct enter 103 on the host needs no password.
Template → Storage, Template
Select local. Then select debian-13-standard.
Disks → Storage, Disk size
Select local-lvm. Set 6 GiB.
CPU → Cores
Set 1 core.
Memory → Memory (MiB)
Set 1024. Keep Swap at its default.
Network → IPv4
Select Static. Set IPv4/CIDR to 192.168.1.224/24. Set Gateway to 192.168.1.1. Keep IPv6 at its default.
DNS → DNS domain
Keep this field empty. Do not type 192.168.1.1 here.
DNS → DNS servers
Always type 192.168.1.1. Never keep this field empty.
Confirm
Read the summary. Keep Start after created unticked. Select Finish.
The wizard has no box for three settings: the Docker permission keyctl, the timezone, and start at boot. The first command below sets all three. Run these 3 commands on the host. They set the missing settings, start the container, and open its shell. Each part is explained in Ch. 10 · The container wizard, section "The host command every build needs".
⌨ Type this on the Proxmox host (homelab)
Before you run anything on this page: every 192.168.1.x address below is this manual's example network. If your own network uses different numbers, substitute yours as you type — the rule is in Ch. 3 · How to read this manual. A command that runs with the wrong address usually succeeds and leaves you unreachable.
pct set 103 --features nesting=1,keyctl=1 --onboot 1 --timezone host
pct start 103
pct enter 103                          # now INSIDE CT 103 — the rest of this page runs here
Notice — set your timezone
--timezone host copies the timezone of the server into the container. To see the valid zone names, run timedatectl list-timezones on the host. Pick your Region/City, for example America/New_York. A Docker container inside the LXC keeps its own clock. Its logs stay in UTC? Then add -e TZ=Region/City to its docker run line.
Prefer the terminal? — the same task with one pct create command
⌨ Type this on the Proxmox host (homelab)
TMPL=$(pveam available --section system | awk '/debian-13-standard/{print $2}' | tail -1)
pveam download local "$TMPL"          # once per host; harmless to re-run
pct create 103 local:vztmpl/"$TMPL" \
  --hostname npm --cores 1 --memory 1024 --rootfs local-lvm:6 \
  --net0 name=eth0,bridge=vmbr0,ip=192.168.1.224/24,gw=192.168.1.1 \
  --nameserver 192.168.1.1 --features nesting=1,keyctl=1 --unprivileged 1 --onboot 1 --timezone host
pct start 103
pct enter 103                      # you are now INSIDE CT 103 — everything below runs here
This part has no buttons. You type commands in the shell of the container. Docker, its images, and its volumes have no equivalent in the Proxmox web page. The web page manages only the container that holds them.
Notice — each command below runs inside CT 103
When the container exists, you type the rest of this page in the shell of the container. You do not type it on homelab (192.168.1.220). You open that shell in one of two ways. Run pct enter 103 in homelab → >_ Shell. Or run ssh root@192.168.1.224 from your PC, with the key that the wizard installed. The >_ Console button of the container is a login: prompt, not a shell. It needs a root password, and the wizard left it empty. Give root a password if you want to use it (Ch. 10 · The container wizard). Only the pct and pveam commands go back to the host. Each guide names those commands where you use them.
Open homelab → >_ Shell. Run pct enter 103. This puts you inside the container as root, with no password.
Type the commands on the right in that container shell.
The >_ Console button of the container, top right. It opens a login: prompt.
⌨ Type this inside CT 103
apt update && apt install -y docker.io curl   # installs Docker + curl for the health check below
docker run -d --name npm --restart=unless-stopped -p 80:80 -p 443:443 -p 81:81 \
  -v /opt/npm/data:/data -v /opt/npm/letsencrypt:/etc/letsencrypt jc21/nginx-proxy-manager:latest
Explanation of each part
The Docker install line and the flags -d, --name, --restart, -v, and -p are explained in Ch. 9 · SSH & the terminal, sections "Install Docker in the container" and "Anatomy of docker run". These parts are specific to NPM:
-p 80:80
Sends port 80 of the host to port 80 inside the container. Port 80 carries plain web traffic (HTTP).
-p 443:443
Sends port 443 of the host to port 443 inside the container. Port 443 carries secure web traffic (HTTPS).
-p 81:81
Sends port 81 of the host to port 81 inside the container. Port 81 is the admin web page of this application.
-v /opt/npm/data:/data
Links the host folder /opt/npm/data to /data in the container. The settings and the database of the application stay when the container restarts.
-v /opt/npm/letsencrypt:/etc/letsencrypt
Links a host folder that stores the SSL certificates. The certificates are not lost if you make the container again.
jc21/nginx-proxy-manager:latest
The image to run: Nginx Proxy Manager. It sends web traffic to your other services and manages HTTPS certificates. The tag :latest means the newest published version.
17.3
SET UP
At the first visit, NPM shows a one-time Setup screen. It asks you to make your own admin account. (You run an older image and get a login page instead? Sign in with the default admin@example.com and changeme. Then change both at once under the user menu.) In both cases, you end with your own admin login.
Open http://192.168.1.224:81. The admin page does not load in the first minute after docker run? Wait 1 to 2 minutes. NPM builds its database at the first start, before the admin page is available.
Type your full name, the email address that you want to log in with, and a password. Send the form to make your own admin account.
First visit at http://192.168.1.224:81 — the Setup screen.
To add a proxy host, go to Hosts → Proxy Hosts → Add Proxy Host.
Hosts → Proxy Hosts — the Add Proxy Host button.
Fill in the four boxes. Set Domain Names to kuma.home. Set Scheme to http. Set Forward Hostname / IP to 192.168.1.221. Set Forward Port to 3001. This is what kuma.home → 192.168.1.221:3001 means. The Domain Names box turns each name into a small tag. After you type kuma.home, press Enter, so that it becomes a tag. Do this before you go to the next box. You skip it? Then the box still shows the text, but it did not save it, and Save fails or ignores it. Uptime Kuma (Ch. 14 · Uptime Kuma) already runs from earlier in Part C. So it is a safe one to practise on.
Click Save.
Add Proxy Host — Domain Names, Scheme, Forward Hostname, and Forward Port filled in for Uptime Kuma.
Make the name resolvable. You do this one time for ALL .home names. In AdGuard (http://192.168.1.223, see Ch. 16 · AdGuard Home), go to Filters → DNS rewrites. Click Add DNS rewrite. In the top box (domain or wildcard), type *.home. In the bottom box (the answer), type 192.168.1.224. Click Save. This one wildcard rule sends each current and future something.home name to NPM. You do not come back here for each service.
AdGuard Home — Filters → DNS rewrites → Add DNS rewrite, with the wildcard domain and the answer address filled in.
Open http://kuma.home in a browser. You see the Uptime Kuma dashboard answer, exactly as if you typed http://192.168.1.221:3001. When it loads, the proxy host and the DNS rewrite both work.
Add each other service in the same way. Use one proxy host for each row of the table below. For a service that you build later, the steps are the same. For example, Ch. 22 · Vaultwarden becomes vault.home → 192.168.1.225:8000. You add it when its container exists.
⌨ Test the rewrite from your PC
nslookup anything.home 192.168.1.223 # must answer 192.168.1.224
nslookup is part of Windows and macOS. On a Linux PC, first install it with sudo apt install -y dnsutils (Debian or Ubuntu). A common mistake is to type the IP in both boxes. The top box takes the name.
Notice — each app asks you to log in once more at its .home name
This is normal. The browser stores logins for each address. kuma.home is a different address from 192.168.1.221:3001. So the old session does not move over. Log in one time at the .home name. Select “remember me” or “keep me signed in” where the app offers it. From then on, use the .home names, and bookmark them. An app asks again at each visit? Then the browser removes cookies when it closes (check its cookie settings), or you are in a private window. Ch. 23 · authentik adds one login for all applications later.
17.4
FORWARD PORTS: EVERY SERVICE IN THIS MANUAL
This is the rule: the Forward Hostname and the Forward Port in NPM are exactly the IP and the port of the dashboard URL of the service. You can open it in a browser tab? Then NPM forwards to that pair. This table collects all of them. It is generated from the guides.
Forward targets — one proxy host per row
Service
CT
Forward Hostname
Forward Port
Beszel
CT 100
192.168.1.221
8090
Uptime Kuma
CT 100
192.168.1.221
3001
AdGuard
CT 102
192.168.1.223
80
NPM
CT 103
192.168.1.224
81
Vaultwarden
CT 104
192.168.1.225
8000
Homarr
CT 105
192.168.1.226
7575
ntfy
CT 106
192.168.1.227
80
Syncthing
CT 107
192.168.1.228
8384
Actual Budget
CT 108
192.168.1.229
5006
FreshRSS
CT 109
192.168.1.230
8081
Mealie
CT 110
192.168.1.231
9000
Penpot
CT 111
192.168.1.232
9001
n8n
CT 112
192.168.1.233
5678
Paperless-ngx
CT 113
192.168.1.234
8000
Karakeep
CT 114
192.168.1.235
3000
Kavita
CT 115
192.168.1.236
5000
Suwayomi
CT 116
192.168.1.237
4567
Frigate
CT 117
192.168.1.238
5001
Prowlarr
CT 118
192.168.1.239
9696
qBittorrent
CT 119
192.168.1.240
8080
Radarr
CT 120
192.168.1.241
7878
Sonarr
CT 121
192.168.1.242
8989
Bazarr
CT 122
192.168.1.243
6767
Jellyseerr
CT 123
192.168.1.244
5055
Jellyfin
CT 124
192.168.1.245
8096
Scrutiny
CT 125
192.168.1.246
8080
Immich
CT 127
192.168.1.248
2283
Nextcloud AIO
CT 128
192.168.1.249
8080
Music
CT 129
192.168.1.250
4533
Home Assistant
VM 130
192.168.1.251
8123
Lidarr
CT 131
192.168.1.252
8686
WatchYourLAN
CT 132
192.168.1.253
8840
Dockge
CT 133
192.168.1.254
5001
authentik
CT 134
192.168.1.210
9000
Gitea
CT 135
192.168.1.211
3000
Grafana
CT 136
192.168.1.212
3000
Speedtest Tracker
CT 137
192.168.1.213
8080
Pelican
CT 139
192.168.1.215
80
Excalidraw
CT 140
192.168.1.216
5000
DrawIO
CT 141
192.168.1.217
8080
Fireshare
CT 142
192.168.1.218
8080
RomM
CT 143
192.168.1.219
8080
Pingvin Share
CT 144
192.168.1.200
3000
Faircamp
CT 145
192.168.1.201
8080
Filebrowser
CT 146
192.168.1.202
8080
Notice — not in the table, on purpose
The game servers (Palworld, Minecraft, Project Zomboid, and Valheim) and LanCache are not websites. Their traffic is UDP or raw TCP. NPM does not stand in front of them. Players use the IP and the port directly. A port looks wrong? Run docker ps in that CT. The left number of a mapping such as 0.0.0.0:8090->8090 is the port for NPM.
Notice — a proxy host for Proxmox itself needs two extra settings
To reach proxmox.home, set Scheme to https, not http. Proxmox speaks only HTTPS on port 8006. Set Forward to 192.168.1.220, port 8006. Turn Websockets Support ON in the same dialog. Without it, the page loads, but each console or Shell window is a black screen. Proxmox uses its own certificate that nobody verified. NPM accepts it, so you see no extra warning here. Note: the connection of the browser to NPM is plain http. So the root login crosses your network without encryption. This is acceptable on a trusted home network. You do not accept it? Use the direct address https://192.168.1.220:8006, or wait for the real-domain certificate step below.
Proxy Host → Details tab — the Websockets Support switch.
Notice — about the HTTPS certificate
Let's Encrypt cannot give you a real, trusted certificate for a made-up .home name, because it is not a real domain. The Vaultwarden browser extension and the phone apps must trust the certificate. For that, use a real subdomain that you own. For example, use vault.yourdomain.com as the proxy host. Rewrite it to 192.168.1.224 on your network (split-horizon). Then ask for a certificate with DNS Challenge → Cloudflare, if the DNS of your domain is at Cloudflare. If not, pick the DNS provider that holds your domain from the same list. A pure *.home setup needs no domain. But then you must tell each phone and laptop by hand to trust the own certificate of NPM. This is a separate chore for many devices, and this manual does not cover it. Choose the route that suits you.
Proxy Host → SSL tab → Request a new certificate → Use a DNS Challenge → Cloudflare.
17.5
WHEN IT GOES WRONG
Right after docker run, http://192.168.1.224:81 shows “connection refused”, a blank page, or 502 Bad Gateway. This is normal at the very first start. NPM makes keys and builds its database. This takes 1 to 2 minutes. Wait, then reload. Watch the progress with docker logs npm --tail 50 inside CT 103. Reload when it stops logging start-up activity. Make sure that you use port 81 (admin), not port 80.
The request for a Let's Encrypt certificate for a .home name fails (“Internal Error”, the HTTP challenge times out, or “DNS problem: NXDOMAIN”). Let's Encrypt cannot give a trusted certificate for a made-up internal name such as vault.home. Leave those LAN-only hosts on plain HTTP. Or use a real domain that you own, for example vault.yourdomain.com. Then ask for the certificate with SSL → Request a new certificate → Use a DNS Challenge → Cloudflare. Paste a Cloudflare API token.
On the current image, a request for a certificate with a DNS challenge (Cloudflare or another provider) fails. The error is about a missing or broken certbot DNS plugin. A recent NPM update changed how it talks to Cloudflare and other DNS providers to ask for certificates. Follow the official page https://nginxproxymanager.com/certbot/ and enter your plugin credentials again. The error stays? Try again after docker restart npm.
A proxied app loads, but live features break (real-time sync in Vaultwarden, or 502 Bad Gateway on the proxy host). Edit the Proxy Host. Open the Details tab. Turn on Websockets Support. Also check that the Scheme (http or https) and the Forward Port are exactly how that container is exposed on its host IP. If not, the proxy returns 502.
Each something.home address suddenly refuses to connect, but the services still work. NPM itself is down or restarts. Each .home name goes through it. So when it is not reachable, each proxied name fails at the same time, although nothing is wrong with the service behind it. Confirm it with docker ps --filter name=npm in CT 103. It is not in the list? Run docker start npm (or docker restart npm). While you wait, reach each service directly at its raw IP and port from the table above. That path never depends on NPM.
17.6
A download step fails with Temporary failure resolving deb.debian.org, or with another "cannot resolve" message. The container has no working DNS server. It cannot change a name into an address. This is not a typing mistake. It does not fix itself. In the Proxmox page, select this container in the left tree. Open DNS. Select Edit. Type your router address in DNS servers (192.168.1.1 here; use your own). Then run pct reboot 103 in the host shell. Run the failed step again.
A command fails. You do not know if you are on the server or in the container. Read the prompt. In the container, it ends with the name of the container. On the server, it shows root@homelab. The prompt still shows root@homelab after pct enter? Then the command did not work. Type exit. Run the pct enter line again. Check the prompt before you paste anything else. You can paste a build block on the server by mistake. It seems to work. It installs without an error, and the app even answers. But the app is on the server, and it must not be there.
How to see that it happened, and how to undo it. The app does not open at the container address (192.168.1.224). It does open at the server address (192.168.1.220) on the same port. Then the app is on the host. To remove it, run docker rm -f npm in the host shell. Then run pct enter 103. Check that the prompt changed. Paste the build block again. You lose nothing in the container, because nothing was built there. The first command can show Error: No such container. This is good. It means that the app was never on the host. Do not paste the build block again. Look for another cause.
The page does not open. The browser spins, or says it cannot connect. Do these checks in order, in the host shell. 1. Is the container running? Run pct status 103. It must say running. If it does not, run pct start 103. 2. Is the container at the address that you typed? Run pct config 103 | grep net0. It shows the real address. A wrong digit in the wizard puts the container at another address, and nothing warns you. 3. Does the app run in the container? Run pct enter 103. Then run docker ps. An empty list means that the app did not start. Run docker ps -a to see that it stopped. Run docker logs to see why. 4. Does the app answer in the container? Run curl -I http://localhost followed by the port of the app. You get a reply here, but nothing from your PC? Then the address or your own network is the problem. The app is fine. Your browser reaches 192.168.1.224 but not the port? Then the app is down. It reaches neither? Then the container is down.
Docker does not start, or you see Cannot connect to the Docker daemon, a keyring error, or an overlay error. This is the most common failure in these guides. It means that the two container features are off. A later pct set --features can switch them off, also when you set them before. Run this in the host shell, not in the container: pct set 103 --features nesting=1,keyctl=1. Then run pct reboot 103. Then run the failed step again. Type both settings on one line. If you send only one setting, it replaces the pair and switches the other one off.
REFERENCE CARD
Paste this in 103 → Summary → Notes in Proxmox. The key facts and the update steps then stay with the container. Before you ever run the update line on this card, compare it with the docker run you actually used at install. The card is a snapshot of the standard build: if you added anything of your own — a device, an extra -e setting, a second folder — it is not on the card, and re-running the card's line drops it. The container comes back up looking healthy with your setting gone.
📋 Reference — paste into this container's Notes in Proxmox (not a shell command)
## NPM — CT 103
dashboard http://192.168.1.224:81 (proxies serve :80/:443) · docs https://nginxproxymanager.com/guide/

```sh
# is it running?
docker ps --filter name=npm
curl -fsS http://localhost:81 >/dev/null && echo OK   # quick health check
# names resolve via AdGuard rewrite: *.home -> 192.168.1.224
# logs (last 50)
docker logs npm --tail 50
# stop / start / restart
docker stop npm
docker start npm
docker restart npm
# is there an update? ("Image is up to date" = no)
docker pull jc21/nginx-proxy-manager:latest
# update (settings survive in /opt/npm)
docker pull jc21/nginx-proxy-manager:latest && docker rm -f npm && docker run -d --name npm \
  --restart=unless-stopped -p 80:80 -p 443:443 -p 81:81 \
  -v /opt/npm/data:/data -v /opt/npm/letsencrypt:/etc/letsencrypt jc21/nginx-proxy-manager:latest
```
Explanation of each part
# comment lines
Notes that the shell ignores. They remind you where the admin panel is and how internal domain names resolve.
docker ps --filter name=npm
Lists the container only if it runs. An empty result means that it is stopped, or that it was never made.
curl -fsS http://localhost:81 >/dev/null && echo OK
Gets the admin page from inside the container. It prints OK only if it answers. This is a fast way to see that the service is alive, without a browser.
docker logs npm --tail 50
Shows the recent output of the container. --tail 50 limits it to the last 50 lines, for troubleshooting.
Stop halts the container. Start runs it again. Restart does both in one step. Use restart after a configuration change, or if the container does not work well.
docker pull jc21/nginx-proxy-manager:latest
Downloads the newest version of the image from the internet before you make the container again.
docker rm -f npm
Removes the existing npm container by force, also if it runs, so that a new one can take its place. The linked data folders are not affected.
docker run -d --name npm … (rest)
Makes the container again with the same settings as before. It now uses the image that you just pulled. This is the standard way to update the application.
Part C · The essential six & backups
18Homarr dashboard
One page that you arrange by drag and drop. It links each service and shows the live status of each one. It is the main entry point to your homelab.
This chapter needs the items below. You came here directly? Do them first. Each item takes a short time. Nothing on this page works without them.
Proxmox is installed and works at https://192.168.1.220:8006. You can log in as root. See Ch. 6 · Install Proxmox. At your first visit, the browser shows a certificate warning. Select Advanced. Then select Proceed. The warning is normal. Proxmox makes its own certificate.
The Debian 13 image is downloaded. You do this one time. See Ch. 10 · The container wizard. Without the image, the Template list in the wizard is empty.
You have an SSH key from your PC (Ch. 9 · SSH & the terminal). Or you type a password in the two password boxes of the wizard. The wizard needs one of the two. The Next button stays grey until you give one.
You know your own network numbers. Where this chapter shows 192.168.1.x, use your own numbers. The rule is in Ch. 3 · How to read this manual. The address of this chapter must be outside the range that your router gives out by itself (the DHCP pool, often .100–.200, but yours can differ). An address inside the pool can go to a phone later. Two devices on one address break name lookups, and the cause is hard to find.
Commands marked HOST run on the server. In the Proxmox page, select homelab in the left tree. Then select >_ Shell. Commands marked CT run inside the container of this chapter. The chapter shows you how to get there.
The wizard does not work?Next is grey: you gave no password and no key. Give one of the two. The Template list is empty: the Debian image is not downloaded. Download it first. Each tab is explained in Ch. 10 · The container wizard.
Homarr is a start page for your home server. It links each service on one page. It shows live-status widgets: if each service is up or down, the download queue, and the DNS block percentage. You open one page and click through to your services. You do not need to remember many addresses.
Homarr: a start page that links each service and shows live status.
18.1
CREATE THE CONTAINER
Do this task with the mouse in the Proxmox web page.
Open https://192.168.1.220:8006.
Click homelab in the left tree.
Click the blue Create CT button at the top right.
Fill in the General tab: the CT ID, the hostname, and the rest, as the reference shows.
Fill in the other tabs as the reference shows. Use Next to move between tabs. Leave each field that is not listed at its default.
General tab, filled in for CT 105 / homarr.
Wizard reference — Create CT 105
Tab → Field
Entry
General → Node
Select homelab.
General → CT ID
Type 105. Do not keep the number that the wizard suggests.
General → Hostname
Type homarr.
General → Unprivileged container
Keep this box ticked.
General → Nesting
Keep this box ticked. It is ticked by default. The wizard has no box for keyctl, which Docker also needs. The host command after Finish sets it. It is the first line of the next listing.
General → Password / SSH public key
Keep the password empty. Paste your public key in the SSH field: ssh-ed25519 AAAA…your-key-here you@your-pc. With the key, you can run ssh root@192.168.1.226 from your PC. The command pct enter 105 on the host needs no password.
Template → Storage, Template
Select local. Then select debian-13-standard.
Disks → Storage, Disk size
Select local-lvm. Set 6 GiB.
CPU → Cores
Set 1 core.
Memory → Memory (MiB)
Set 1024. Keep Swap at its default.
Network → IPv4
Select Static. Set IPv4/CIDR to 192.168.1.226/24. Set Gateway to 192.168.1.1. Keep IPv6 at its default.
DNS → DNS domain
Keep this field empty. Do not type 192.168.1.1 here.
DNS → DNS servers
Always type 192.168.1.1. Never keep this field empty.
Confirm
Read the summary. Keep Start after created unticked. Select Finish.
The wizard has no box for three settings: the Docker permission keyctl, the timezone, and start at boot. The first command below sets all three. Run these 3 commands on the host. They set the missing settings, start the container, and open its shell. Each part is explained in Ch. 10 · The container wizard, section "The host command every build needs".
⌨ Type this on the Proxmox host (homelab)
Before you run anything on this page: every 192.168.1.x address below is this manual's example network. If your own network uses different numbers, substitute yours as you type — the rule is in Ch. 3 · How to read this manual. A command that runs with the wrong address usually succeeds and leaves you unreachable.
pct set 105 --features nesting=1,keyctl=1 --onboot 1 --timezone host
pct start 105
pct enter 105                          # now INSIDE CT 105 — the rest of this page runs here
Notice — set your timezone
A new container uses UTC unless you set it. --timezone host copies the zone of the server into the container. To set the zone of the server first, list the valid names. Pick your Region/City. Then apply it with timedatectl set-timezone Region/City:
⌨ On the Proxmox host (homelab)
timedatectl list-timezones
Prefer the terminal? — the same task with one pct create command
⌨ Type this on the Proxmox host (homelab)
TMPL=$(pveam available --section system | awk '/debian-13-standard/{print $2}' | tail -1)
pveam download local "$TMPL"          # once per host; harmless to re-run
pct create 105 local:vztmpl/"$TMPL" \
  --hostname homarr --cores 1 --memory 1024 --rootfs local-lvm:6 \
  --net0 name=eth0,bridge=vmbr0,ip=192.168.1.226/24,gw=192.168.1.1 \
  --nameserver 192.168.1.1 --features nesting=1,keyctl=1 --unprivileged 1 --onboot 1 --timezone host
pct start 105
pct enter 105                      # you are now INSIDE CT 105 — everything below runs here
After the container exists, type the rest of this chapter in the shell of the container. Do not type it on the host. You open that shell in one of two ways. Run pct enter 105 on the host (first homelab → >_ Shell). Or run ssh root@192.168.1.226 from your PC. (The >_ Console button of the container shows a login: prompt. The containers of this manual cannot answer it. Skip it.) Only the pct commands go back to the host. Do not run the build commands on the Proxmox host (the server, 192.168.1.220) or on your PC.
The >_ Console button of the CT opens a login: prompt, not a shell. Use pct enter 105 from homelab → >_ Shell.
This part has no buttons. These commands run inside CT 105. In the host Shell (homelab → >_ Shell), run pct enter 105. You are still inside from the previous section? Then continue.
Run each command inside CT 105. Install Docker. Make an encryption key. Then start Homarr.
The last command prints a long random key. Copy that value into a notes app or a password manager at once, before you close the shell. It is the only copy. Suppose you lose it. Then the settings that Homarr saved with it cannot be read again.
Open http://192.168.1.226:7575.
Make your admin account at once. Until you do, the setup page is open to everyone on your network.
Add a tile for each service (see the next section).
The Docker install line and the flags -d, --name, --restart, -v, and -p are explained in Ch. 9 · SSH & the terminal, sections "Install Docker in the container" and "Anatomy of docker run". These parts are specific to Homarr:
KEY=$(openssl rand -hex 32)
Makes a random 32-byte value as hexadecimal text. It stores it in the shell variable KEY. You use this value as the encryption secret.
-v /opt/homarr:/appdata
Links a host folder into the container. The settings of the dashboard stay after a restart.
-e SECRET_ENCRYPTION_KEY="$KEY"
Gives the random key from above to the container. Homarr uses it to encrypt the secrets and credentials that it stores.
-p 7575:7575
Sends host port 7575 to port 7575 of the container. This port serves the web page of the dashboard.
ghcr.io/homarr-labs/homarr:latest
The container image of Homarr. Docker pulls it from the container registry of GitHub (ghcr.io).
echo "SAVE: $KEY"
Prints the key that you made. Copy it and save it in a safe place. You need this key again if you ever make the container again.
Notice — this command does not mount the Docker socket
Many guides add -v /var/run/docker.sock:/var/run/docker.sock to this command. That line gives Homarr full control over the Docker of this container. This manual leaves it out on purpose. The live-status widgets do not need it. Each widget reaches its service over your network. It uses the address of the service and the credentials that you add later in the settings of Homarr. The socket only powers the optional Docker widget. In this homelab, that widget can see only the containers inside CT 105. That is only Homarr itself, because each other service runs in its own separate CT with its own Docker. So the socket gives you almost nothing, and it adds a risk. You want the Docker widget anyway? Add the line to the docker run command. Keep CT 105 trusted and locked, and never use it for anything else.
Notice — what a Homarr that is attacked can do to AdGuard, Radarr, and Sonarr
Know the real risk before you connect these services. Ch. 43 · Radarr and Ch. 44 · Sonarr each give out exactly one API key. That key has full read and write access. There is no read-only version. Ch. 16 · AdGuard Home has no API key at all. The AdGuard integration of Homarr logs in with your admin user name and password. So a Homarr container that is attacked can read and change any of these three. It can rewrite the DNS filtering rules, and it can delete or add media. It does not only show their status. Treat Homarr itself as a container that is sensitive and locked for admins. Never expose it to the WAN. Keep it on your home network or behind Ch. 19 · Remote access: Tailscale. Give it a strong, unique login of its own.
openssl rand -hex 32 makes the SECRET_ENCRYPTION_KEY that Homarr uses to encrypt the API keys that you give it. This key must stay the same. If it changes, Homarr cannot decrypt those keys after a restart. This is why you save the printed value.
18.3
SET IT UP
A new Homarr page is empty. Make a board. Register each service as an “app”. Then place tiles on the grid. You do all of this in the own web page of Homarr.
Open http://192.168.1.226:7575. What you see depends on whether you already made the admin account in the BUILD section above. You never opened this page? Then Homarr runs a one-time onboarding. Select Start from scratch. Continue with step 2. You already made the account? Then the onboarding is finished and gone, and you get a plain login page. This is expected. Nothing is broken. Sign in with that user name and password. Then go to step 3.
First visit: onboarding, Start from scratch.
You are still in the onboarding? Make the admin account with a user name and a password. Keep the other settings at their defaults.
Onboarding: make the admin account.
Go to Manage → Boards. Click New board. Give it a name, for example home.
Manage → Boards → New board.
Go to Manage → Apps. Click New app. Enter a name. Type the name of the service in the icon search to pick an icon. Homarr has thousands. Enter the URL that you use in the browser, for example http://192.168.1.226:PORT. You forgot the port of a service? The chapter of that service has it. Do not use localhost.
Manage → Apps → New app: name, icon, and URL.
Click Open board. Click Edit mode in the header of the board. Click Add item. Select App.
Board edit mode → Add item → App.
The new tile is empty. Open its menu with the three dots. Select Edit item. Choose your app.
Empty tile → Edit item → choose the app.
Drag a tile to move it. Use the small arrow in the bottom right corner to change its size.
Resize handle, bottom right corner of a tile.
Click Exit edit mode. This button saves your layout.
Exit edit mode saves the layout.
Notice — read now, do later
You cannot do the next two steps for each service yet. They need Radarr and Sonarr, which you build in Ch. 43 · Radarr and Ch. 44 · Sonarr. Read them, so that you know that they exist. Come back after those chapters and add each integration then. Nothing breaks if you wait. A board with plain link tiles and no live-status widgets works well. You can do one integration today: AdGuard Home. You built it in Ch. 16 · AdGuard Home. Manage is always there. Coming back later costs you the same few clicks. This works only if you built AdGuard. It comes earlier in Part C, so a reader who works in order has it. You skipped that chapter? Then use any app that you did build. Test connection fails against a service that does not exist. That failure looks exactly like a wrong API key. It sends you to look for the wrong problem.
For live-status widgets (the Ch. 43 · Radarr queue, the Ch. 16 · AdGuard Home block percentage), first go to Manage → Integrations. Select the type of integration. Then fill in what that service asks for. Radarr and Sonarr ask for a URL and an API key. AdGuard Home asks for a URL and your AdGuard admin user name and password. There is no read-only option for any of the three. Click Test connection and create.
Manage → Integrations: type, URL, API key, Test connection and create.
Open the board in edit mode again. Use Add item to place the widget that fits the integration. Select your integration in the options of the widget.
Add item → the widget that fits the new integration.
Notice — no screen exists only in the onboarding
Each screen of the wizard (integrations, apps, settings) is also available later under Manage. You can add or correct items at any time.
18.4
WHEN IT GOES WRONG
The container starts, then stops at once or restarts again and again. Soon it is gone from docker ps. — The SECRET_ENCRYPTION_KEY is missing, or it is not a valid hex string of 64 characters. Check the reason with docker logs homarr. Run openssl rand -hex 32 to get a new value of 64 characters. Save it. Then make the container again in the same way as in the next item. Run docker rm -f homarr. Then run docker run again, with everything the same except -e SECRET_ENCRYPTION_KEY="thatvalue", which holds your new value.
After an update or after you made the container again, you are logged out, boards look empty, or each integration shows a decrypt error. — You made the container again with a different SECRET_ENCRYPTION_KEY. So Homarr cannot decrypt the saved settings. Run docker rm -f homarr. Then run docker run again with the exact key that you saved earlier. It is the value that echo "SAVE: $KEY" printed. The key is really lost? Then you cannot recover the encrypted data. You must set up the integrations again.
The Docker widget is empty, or it lists only one container named ‘homarr’. Your other services never appear. — This is expected. This manual does not mount the Docker socket. Even with the socket, Homarr sees only the own Docker of CT 105. Each other service runs in a separate CT. Do not use the Docker widget for them. Add each service under Manage → Integrations. Use its address on your network (for example http://192.168.1.226:PORT) and its API key or admin login. These integrations drive the live-status widgets.
A tile shows a service as ‘offline’, but it opens correctly in your own browser. — The health check of Homarr runs from inside CT 105, on the server side. It does not run from your PC. Give the tile the exact URL that CT 105 can reach: the IP on your network and the correct port, the correct scheme (http or https), and never localhost. Inside the container, localhost means Homarr itself.
18.5
A command fails. You do not know if you are on the server or in the container. Read the prompt. In the container, it ends with the name of the container. On the server, it shows root@homelab. The prompt still shows root@homelab after pct enter? Then the command did not work. Type exit. Run the pct enter line again. Check the prompt before you paste anything else. You can paste a build block on the server by mistake. It seems to work. It installs without an error, and the app even answers. But the app is on the server, and it must not be there.
How to see that it happened, and how to undo it. The app does not open at the container address (192.168.1.226). It does open at the server address (192.168.1.220) on the same port. Then the app is on the host. To remove it, run docker rm -f homarr in the host shell. Then run pct enter 105. Check that the prompt changed. Paste the build block again. You lose nothing in the container, because nothing was built there. The first command can show Error: No such container. This is good. It means that the app was never on the host. Do not paste the build block again. Look for another cause.
The page does not open. The browser spins, or says it cannot connect. Do these checks in order, in the host shell. 1. Is the container running? Run pct status 105. It must say running. If it does not, run pct start 105. 2. Is the container at the address that you typed? Run pct config 105 | grep net0. It shows the real address. A wrong digit in the wizard puts the container at another address, and nothing warns you. 3. Does the app run in the container? Run pct enter 105. Then run docker ps. An empty list means that the app did not start. Run docker ps -a to see that it stopped. Run docker logs to see why. 4. Does the app answer in the container? Run curl -I http://localhost followed by the port of the app. You get a reply here, but nothing from your PC? Then the address or your own network is the problem. The app is fine. Your browser reaches 192.168.1.226 but not the port? Then the app is down. It reaches neither? Then the container is down.
Docker does not start, or you see Cannot connect to the Docker daemon, a keyring error, or an overlay error. This is the most common failure in these guides. It means that the two container features are off. A later pct set --features can switch them off, also when you set them before. Run this in the host shell, not in the container: pct set 105 --features nesting=1,keyctl=1. Then run pct reboot 105. Then run the failed step again. Type both settings on one line. If you send only one setting, it replaces the pair and switches the other one off.
REFERENCE CARD
Paste this in the Notes of the container in Proxmox: 105 → Summary → Notes. It is a reference. It is not a shell command. Before you ever run the update line on this card, compare it with the docker run you actually used at install. The card is a snapshot of the standard build: if you added anything of your own — a device, an extra -e setting, a second folder — it is not on the card, and re-running the card's line drops it. The container comes back up looking healthy with your setting gone.
📋 Reference — paste into this container’s Notes in Proxmox (not a shell command)
## Homarr — CT 105
dashboard http://192.168.1.226:7575 · docs https://homarr.dev/docs/getting-started/

```sh
# is it running?
docker ps --filter name=homarr
curl -fsS http://localhost:7575 >/dev/null && echo OK   # quick health check
# logs (last 50)
docker logs homarr --tail 50
# stop / start / restart
docker stop homarr
docker start homarr
docker restart homarr
# is there an update? ("Image is up to date" = no)
docker pull ghcr.io/homarr-labs/homarr:latest
# update (settings survive in /opt/homarr; reuse the SAME saved key)
docker pull ghcr.io/homarr-labs/homarr:latest && docker rm -f homarr && docker run -d --name homarr \
  --restart=unless-stopped -v /opt/homarr:/appdata \
  -e SECRET_ENCRYPTION_KEY="YOUR_SAVED_KEY" -p 7575:7575 ghcr.io/homarr-labs/homarr:latest
```
Explanation of each part
# Homarr — CT 105
A note with the web address of the Homarr dashboard and a link to the official docs.
docker ps --filter name=homarr
Lists the container if it runs. An empty result means that it is stopped or that it crashed.
curl -fsS http://localhost:7575 >/dev/null && echo OK
Asks the dashboard for its front page from inside the container. It prints OK when it answers. This needs the curl that you installed with Docker.
docker logs homarr --tail 50
Shows the last 50 lines of the log of the container. Use it for troubleshooting.
“Local: http://…:3000” and the Redis “Memory overcommit” line in that log
Normal, at each start. Port 3000, and port 3001 of the WebSocket, are internal ports of Homarr inside the container. You cannot reach them from outside. The Redis memory-overcommit line is a routine notice about its internal cache. It is not an error. The dashboard is at the port that you mapped, 7575, whatever these two lines say.
docker stop / start / restart homarr
Stops, starts, or restarts the container. Restart is stop and then start in one step.
docker pull ghcr.io/homarr-labs/homarr:latest
Checks for a newer image, and downloads it. “Image is up to date” means that you already run the newest one.
docker rm -f homarr
Removes the existing container by force, so that you can make it again with the new image.
docker run -d --name homarr … -e SECRET_ENCRYPTION_KEY="YOUR_SAVED_KEY" …
Makes the container again with the updated image. You must paste the same encryption key that you saved earlier in place of YOUR_SAVED_KEY. The key does not match? Then Homarr cannot decrypt the settings that it encrypted before.
Part C · The essential six & backups
19Remote access: Tailscale
Tailscale builds a private, encrypted mesh between your devices. You reach the server, which has no screen, and everything on it from anywhere. You open no ports on your router.
This chapter needs the items below. You came here directly? Do them first. Each item takes a short time. Nothing on this page works without them.
Proxmox is installed and works at https://192.168.1.220:8006. You can log in as root. See Ch. 6 · Install Proxmox. At your first visit, the browser shows a certificate warning. Select Advanced. Then select Proceed.
You know where the host shell is. In the Proxmox page, select homelab in the left tree. Then select >_ Shell. You type each command of this page there, unless a step says otherwise. This is the server itself. It is not a container and it is not your own PC.
You know your own network numbers. Where this chapter shows 192.168.1.x, use your own numbers. The rule is in Ch. 3 · How to read this manual.
This chapter builds no container. Another chapter built each container that it mentions.
The server (192.168.1.220) has no monitor. You control it from your PC or phone. At home, you reach it by its IP address. From outside the house, you need a secure tunnel. Tailscale builds a private encrypted mesh between your devices. It uses WireGuard, the encryption technology under it. It needs no port forwarding on the router. Set up Tailscale before you build the apps of Part D. Then everything that you build after it is reachable from outside.
The magic trick, honestly drawn: Tailscale never opens your router. Your signed-in devices form their own private encrypted network on top of the internet — to everyone else, your house looks exactly as closed as before.
19.1
INSTALL TAILSCALE ON THE HOST
The server has no monitor and no browser. Tailscale has no panel in the Proxmox web page. You install it by typing two commands in the shell of the server (SSH, or the >_ Shell of Proxmox). Then you finish the sign-in from a device that has a screen.
First, make the account. Tailscale is a hosted service that connects your devices. It has a free Personal plan. When we checked in 2026, it allowed up to 6 users and had no limit that matters for your own devices. You need no credit card. There is no separate Tailscale password. You sign in with an account that you already have (Google, Microsoft, GitHub, or Apple). Each device that you add must use that same account. If not, it joins a different private network and cannot see the server.
Notice — this is the own website of Tailscale
The menu names on login.tailscale.com can change between visits. This manual does not control that page. A label further on is not where we say? Look under the DNS or Machines settings of the account for the nearest match.
On the server, install Tailscale and start it.
Copy the printed URL into the browser of your PC or phone. The server has no screen.
Sign in. The server joins your tailnet. This is the name for your private group of Tailscale devices. It gets an address that starts with 100., such as 100.x.y.z.
Install the Tailscale app on your PC or phone. Sign in with the same account. You join the mesh.
You are already signed in. So turn off key expiry now. In the admin console, open Machines → homelab → ⋮ → Disable key expiry. Device keys expire after about six months by default. On a server without a screen, this means that remote access stops one day, with no warning, and you have no screen to fix it.
⌨ Type this on the server
Before you run anything on this page: every 192.168.1.x address below is this manual's example network. If your own network uses different numbers, substitute yours as you type — the rule is in Ch. 3 · How to read this manual. A command that runs with the wrong address usually succeeds and leaves you unreachable.
curl -fsSL https://tailscale.com/install.sh | sh
tailscale up
# copy the printed URL into your PC/phone browser (the server has no screen), sign in — the server joins your tailnet with a 100.x.y.z address
Explanation of each part
curl -fsSL https://tailscale.com/install.sh | sh
Downloads the official install script of Tailscale and runs it at once. -f fails without output on server errors. It does not print an error page. -s hides the progress bar. -L follows redirects.
tailscale up
Connects this machine to your private Tailscale network, a VPN mesh. The first time that you run it, it prints a login link.
You can now reach Proxmox at https://100.x.y.z:8006, and use SSH, from any device on your tailnet, from anywhere.
19.2
REACH THE WHOLE LAN — SUBNET ROUTER
A subnet router is one Tailscale machine that shares its whole local network with the rest of your tailnet. You do not need to install Tailscale in each container. You turn the server into a subnet router. Then the 192.168.1.x address of each container is reachable from your remote devices. Three things make this work, in this order. First, you turn on packet forwarding. This is the setting on the server that lets one machine pass traffic on to others. Second, you advertise the LAN route. This tells Tailscale which network to share. Third, you approve that route in the admin console. This is a safety check. A device cannot start to route your traffic without your yes. The first two steps use commands only. No panel of Proxmox or Tailscale does them for you.
On the server, turn on IPv4 and IPv6 packet forwarding. This is a kernel setting that only root can change. You do not open it in a file manager. It is one line that you type in the shell. There is no panel for it.
Advertise the LAN route.
Approve the route in the admin console. Open the Machines page. Click the server. Open Subnets → Edit. Tick 192.168.1.0/24. Click Save.
⌨ Type this on the server
echo 'net.ipv4.ip_forward=1' | tee /etc/sysctl.d/99-tailscale.conf && echo 'net.ipv6.conf.all.forwarding=1' | tee -a /etc/sysctl.d/99-tailscale.conf && sysctl -p /etc/sysctl.d/99-tailscale.conf
tailscale set --advertise-routes=192.168.1.0/24
# then approve the route: https://login.tailscale.com/admin/machines → click the server → Subnets → Edit → tick 192.168.1.0/24 → Save
Explanation of each part
echo 'net.ipv4.ip_forward=1' | tee … && echo 'net.ipv6.conf.all.forwarding=1' | tee -a …
Writes the two kernel settings into a new sysctl file. They let this machine pass network packets from one interface to another. It needs this to work as a router. One setting is for IPv4. One is for IPv6. Tailscale needs both on. IPv6 forwarding is off? Then Tailscale prints a warning, and subnet routing or exit-node routing can fail. The first tee makes the file and shows the line on the screen. The second, tee -a, adds to the file. It does not overwrite it.
sysctl -p /etc/sysctl.d/99-tailscale.conf
Applies the settings at once, without a restart.
tailscale set --advertise-routes=192.168.1.0/24
Announces that this machine can route traffic to your whole home network. 192.168.1.0/24 means all addresses from 192.168.1.0 to 192.168.1.255. This makes the machine a gateway. Other Tailscale devices can then reach devices at home. tailscale set changes only this one setting. It keeps all other settings.
How it works — nothing opens on the router
tailscale up logs the machine in to your private mesh. It gives it a stable address that starts with 100.. This address works from anywhere. It opens no ports on the router (192.168.1.1). It uses outgoing connections and NAT traversal. --advertise-routes makes the server a subnet router. One install then shows the whole home network to your remote devices. This needs IP forwarding, and approval of the route in the console.
Notice — optional exit node
tailscale set --advertise-exit-node lets your phone send all its traffic through your home. This is useful on a public Wi-Fi that you do not trust. Approve it in the console too. An exit node also needs the IP-forwarding step above (the two sysctl lines). Run them first. If not, Tailscale warns that IP forwarding is off, and no traffic goes through the server.
Use tailscale set to change one setting. You can also use tailscale up with flags. But tailscale up forgets each flag that you do not repeat. Each tailscale up command must list all the flags that are already on. If you drop one, Tailscale returns an error and tells you to add --reset.
19.3
REACH YOUR .home NAMES FROM ANYWHERE
This step needs Ch. 17 · Nginx Proxy Manager, with its wildcard DNS rule. You entered that rule in the AdGuard web page. It sends each .home name to NPM. One more setting then makes each .home name work on each tailnet device, at home and away:
Open the DNS page of the admin console. Click Nameservers. Click Add nameserver. Click Custom.
Set the nameserver to 192.168.1.223 (AdGuard). Turn on Restrict to domain (“Split DNS”). Set the domain to home. Click Save.
On the phone, turn the Tailscale app ON. Android: also check Settings → Network & Internet → Private DNS. The value must be Automatic. A custom provider bypasses AdGuard, and .home names stop to resolve on Wi-Fi. iPhone: there is no such setting. Skip this step. Go to the notice below.
Notice — what split DNS does
Only the *.home lookups go to AdGuard, through the subnet router. All other DNS stays local to the place of the device. The name kuma.home then works in the same way at home and on mobile data. AdGuard filters those lookups. On phones, type addresses as http://…. Some mobile browsers force https and show a connection error or a blank page. This happens because .home names do not serve https. That happens to you? Type http:// by hand right before the address. Do not let the browser complete it. Or try a different browser app.
Notice — you are done when
Turn off Wi-Fi on your phone, so that it uses mobile data. Keep the Tailscale app connected. Open https://100.x.y.z:8006. This is your tailnet address of Proxmox, from tailscale ip -4. Or open any .home dashboard. It loads? Then you reached the server from outside.
That is only half of the test. The point of this chapter is to reach the things behind the server. A subnet route can fail while the server itself answers well. So test one more thing. From the same phone, still on mobile data, open the address of a container, such as http://192.168.1.223. The server loads, but the container does not? Then the subnet route is advertised, but it is not active. There are two causes. Both are quick to fix:
You did not approve the route. Open the admin console of Tailscale. Find this machine. Look for a Subnets or Route settings entry that waits for approval. Enable it.
The setting did not take. Run tailscale status on the server. It lists the routes that the server really offers. Your subnet is not in it? Run the tailscale set --advertise-routes=… line from the section "Reach the whole LAN" again.
Each service that you build from here depends on that second check, not on the first.
19.4
WHEN IT GOES WRONG
You approved the subnet, and you can ping the 100.x address of the server. But devices of the LAN at 192.168.1.x do not open.
The device that you connect from must also accept the advertised routes. On a Linux PC, run tailscale up --accept-routes. On the Tailscale app for iPhone, Android, or Windows, turn on “Use Tailscale subnets” in its settings. On mobile, this setting is usually on when the route is approved.
tailscale up prints “Warning: IP forwarding is disabled, subnet routes / exit node won't work”. Or traffic does not route.
IP forwarding is not on. Run echo 'net.ipv4.ip_forward=1' | tee /etc/sysctl.d/99-tailscale.conf && echo 'net.ipv6.conf.all.forwarding=1' | tee -a /etc/sysctl.d/99-tailscale.conf && sysctl -p /etc/sysctl.d/99-tailscale.conf. Then run your tailscale set … command again.
The route shows in the admin console, but it stays grey or says “awaiting approval”. Remote devices cannot reach the LAN.
You advertised the route, but you did not approve it. Open the machines page of the admin console. Click the server. Open its Subnets section. Click Edit. Tick 192.168.1.0/24. Click Save.
You run tailscale up again, and it fails with “these settings would be changed… re-run with the missing flags or add --reset”.
Tailscale keeps the flags of your last run. List each flag that you use, each time. For example: tailscale up --advertise-routes=192.168.1.0/24 --advertise-exit-node. Or use tailscale set to change one setting. Or add --reset, to set the settings that you do not list back to their defaults.
You do not know the 100.x address of the server. Or https://100.x.y.z:8006 does not load.
Run tailscale ip -4 on the server. It prints its tailnet address. Make sure that the Tailscale app on your laptop or phone is connected with the same account. Use https:// and port 8006. Then accept the warning of the browser about the certificate that Proxmox made itself.
All worked for months. Now nothing at home is reachable, and the admin console lists the server as Expired.
The device key expired. You must sign in again from the machine itself. Open homelab → >_ Shell on your home network (or plug in a screen). Run tailscale up. Open the printed URL. Sign in. Then turn off key expiry for that machine in the console, so that it cannot happen again.
19.5
REFERENCE CARD
📋 Reference — paste into the host's Notes in Proxmox (not a shell command)
## Tailscale — on the HOST
dashboard https://login.tailscale.com/admin/machines · docs https://tailscale.com/kb
```sh
# is it running?
systemctl status tailscaled
tailscale status # who's on the mesh + connection type
tailscale ip -4 # this machine's tailnet address# logs (last 50)
journalctl -u tailscaled -n 50 --no-pager
# stop / start / restart
systemctl stop tailscaled
systemctl start tailscaled
systemctl restart tailscaled
# is there an update? (prints "up to date" or installs the new build)
tailscale update
# change one setting without touching the others
tailscale set --advertise-routes=192.168.1.0/24
tailscale set --advertise-exit-node
```
Part C · The essential six & backups
20Backups before apps
A quarter of an hour with the mouse gives you a weekly backup of every container and one restore that you tested. It takes five minutes to switch the job on. It takes ten minutes to watch it run once and to prove that a restore works. Do it now, before you build anything that you would miss.
Time req.
~15 min
In this chapter
Before you start
This chapter needs the items below. You came here directly? Do them first. Each item takes a short time. Nothing on this page works without them.
Proxmox is installed and works at https://192.168.1.220:8006. You can log in as root. See Ch. 6 · Install Proxmox. At your first visit, the browser shows a certificate warning. Select Advanced. Then select Proceed.
You know where the host shell is. In the Proxmox page, select homelab in the left tree. Then select >_ Shell. You type each command of this page there, unless a step says otherwise. This is the server itself. It is not a container and it is not your own PC.
You know your own network numbers. Where this chapter shows 192.168.1.x, use your own numbers. The rule is in Ch. 3 · How to read this manual.
This chapter builds no container. Another chapter built each container that it mentions.
The six essential services are built. You have alerts, monitoring, ad blocking, a proxy, a dashboard, and remote access. In Part D, the server starts to hold things: your password vault, your budget, your scanned documents, your photos. This chapter closes Part C. It is the gate between the two parts. Proxmox already has a complete backup engine. You install nothing and you type nothing. You switch it on. You run it one time. You prove that one restore works. Then you go and build. Skipping it costs you nothing today. It costs you everything on the day that the SSD dies with the only copy of something.
Notice — this is the safety net, not the strategy
What you build here is one copy, on the same SSD as the original. It protects you from mistakes: a deleted container, a bad upgrade, a setting that you cannot undo. It does not protect you if the disk itself dies, because both copies go at the same time. The real method is three copies, two kinds of media, and one copy in another place. It is in Ch. 64 · Backups done right (3-2-1) in Part G. That chapter adds a second drive and a copy in another place. Build this one now anyway. It takes a quarter of an hour. It covers the failure that you are much more likely to cause than to suffer.
20.1
MAKE THE WEEKLY JOB
This task uses only the web page. The job is at the Datacenter level. It is not on one container. One job covers each guest on the server. A guest is the word of Proxmox for each container or virtual machine that it runs. It also covers the containers that you did not build yet.
Open https://192.168.1.220:8006 and log in.
Click Datacenter at the very top of the left tree. It is above homelab.
Click Backup in the middle column.
Click Add. A dialog with the title Create: Backup Job opens on its General tab.
Fill in the General tab exactly as the reference on the right says.
General tab — node homelab, storage local, schedule sun 03:00, selection mode All, mode Snapshot, compression ZSTD. The guest list below is grey, with all rows ticked. It says Selected (5). These are the five containers that Part C built.
Click the Retention tab. Set Keep Last to 2. Leave each other keep field empty.
Retention tab — Keep Last2. Two weeks of history for each container. The SSD never fills up.
Click Create. The job appears in the Backup table with the date of its next run. It runs by itself from now on.
Leave the Notifications, Note Template, and Advanced tabs alone. Their defaults are right for one server. Notifications follow the setup that the server already uses. The Note Template already holds {{guestname}}. Proxmox replaces this placeholder with the real name of each container when it writes the note. This is why each archive shows the hostname of its container in the Notes column of the Backups list.
Backup job reference — Datacenter → Backup → Add
Tab → Field
Entry
General → Node
Select homelab. The field opens a small grid with one row, because you have one server.
General → Storage
Select local. On a new Proxmox install, it is the only storage that can hold backups. So it is usually the only entry in the list. It is on the same SSD as your containers. This is the honest limit of this chapter. Part G fixes it.
General → Schedule
Type sun 03:00. This means each Sunday at 3 a.m., in the timezone of the server (the one that you chose during the Proxmox install). The field is free text. It uses the same day and time format as the other schedules in this manual. Its dropdown offers ready examples.
General → Selection mode
Select All. The guest list at the bottom of the tab turns grey with all rows ticked. It says Selected (n). This is correct. Each container and VM of the node is included, now and always. A container that you build in Part D is backed up on the first Sunday after you build it. You do not edit this job.
General → Mode
Select Snapshot. The container stays up. Proxmox freezes it for a moment, takes a snapshot on the storage, and archives that. A container that is stopped is backed up in the same way.
General → Compression
Select ZSTD (fast and good). This is the full label in the dropdown. It is the default. It uses many threads and makes the archives much smaller.
General → Enable
Leave the box ticked. If you untick it, the job is saved but never runs. This is useful later, if you want to keep the job and not delete it.
General → Job Comment
Type weekly — all guests. It is only a label. But it is the label that you see in the Backup table, and in Part G when you come back to edit this job. If you leave it empty, the row has no name.
Retention → Keep Last
Type 2. After each run, Proxmox keeps the two newest archives for each container and deletes the older ones. So the job can never fill the SSD in silence. Two is small on purpose, for a safety net on the same disk. Part G raises it when the backups are on their own drive.
Notice — a job is not a backup until it has run
A saved job proves nothing. It has a schedule and a date for its next run. The Backup table has no column with the result of a job. The result of a run appears only in the task log at the bottom of the screen. This is why the next section runs the job by hand. You do not wait until Sunday.
Prefer the terminal? — the same backup, by hand
Make the job in the web page. This is what the web page is for. Know these two commands anyway. One runs the same backup now. The other shows you the job that the web page wrote.
⌨ Type this on the Proxmox host (homelab)
Before you run anything on this page: every 192.168.1.x address below is this manual's example network. If your own network uses different numbers, substitute yours as you type — the rule is in Ch. 3 · How to read this manual. A command that runs with the wrong address usually succeeds and leaves you unreachable.
vzdump --all --mode snapshot --storage local --compress zstd # back up every guest, right nowcat /etc/pve/jobs.cfg # the scheduled job, as the GUI saved it
vzdump --all
Runs the backup engine on each container and VM of this node. This is the same set that the All selection mode of your job covers. Replace --all with a CT ID (vzdump 100) for one guest.
--mode snapshot
Freezes the guest for a short time and archives a snapshot of the storage. A container that runs keeps working. This is the Snapshot mode of the dialog.
--storage local
Writes the archive to the storage named local. It keeps its dumps in /var/lib/vz/dump/.
--compress zstd
Compresses the archive with zstd. This makes the .tar.zst files that you see in the Backups list.
cat /etc/pve/jobs.cfg
Prints the file with the scheduled jobs. Your new job is in it, as a vzdump: block. It has the schedule, the storage, the mode, and prune-backups keep-last=2 that you set. This confirms that the dialog saved what you meant.
20.2
RUN IT ONCE, NOW
Do not wait until Sunday to find out if the job works. Run it by hand. Watch it finish.
Stay in Datacenter → Backup. Click the row of your job to select it.
Click Run now in the toolbar above the table. It stays grey until you select a row, so do step 1 first. A Confirm box asks Start the selected backup job now?. Click Yes.
The Run now button, in the toolbar above the Backup table.
A Task viewer window opens and shows the log. Leave it open and let it run. It writes one archive for each guest, in the order of the IDs. A small container takes about a minute.
A finished backup log. Each guest makes this same block: creating vzdump archive …, the size of the archive, Finished Backup of VM <id>. The run ends with the line that matters: TASK OK. The log of vzdump says VM also for containers. So VM 100 here is your CT 100. You do not read the wrong log. (This log is from Backup now for one container. A run of the whole job repeats the block for each guest before that last line.)
Close the Task viewer.
Check that the files exist. Click homelab → local → Backups in the left tree.
homelab → local → Backups — one vzdump-lxc-<id>-<date>.tar.zst for each container, for each run. After the second Sunday, you see two of each, and no more. This is Keep Last 2 at work. The date is in the file name. The Notes column repeats the hostname of the container.
You now have a real archive of each container that you built in Part C. Note how big they are. A small container compresses to a few hundred megabytes. So all of Part C costs well under one gigabyte for each run, times the two runs that you keep. This is comfortable on a 500 GB SSD. It is also a good reason not to raise Keep Last until the backups are on their own drive.
One more button is good to know. The own Backup tab of a container has Backup now. It runs the same engine for that one guest. Use it before you change something risky in a container. You get a new archive in thirty seconds. You do not wait for Sunday.
Notice — “Snapshot” still pauses a container for a second
Snapshot mode is the option without downtime. But for a container, it is not exactly zero. Proxmox freezes the container for the short time that it needs to make the snapshot. Then it starts the container again and archives the snapshot in its own time. A monitor that watches that container can record one failed check at 3 a.m. This is the job at work. It is not a fault. Ch. 14 · Uptime Kuma pings you each Sunday night? This is why.
Notice — a stopped container says backup mode: stop
You read the log for a container that was off. You see status = stopped, then backup mode: stop, although the job says Snapshot. Nothing is wrong. A container that is already down has nothing to freeze. So Proxmox archives it directly. The archive is exactly as good.
Notice — the log is the only status
The results of backups are in the Tasks panel at the bottom of the Proxmox window. They are not in the Backup table. Double-click any vzdump row there to open its full log again, days later. A run can have a problem on one guest and succeed on the others. It then ends in TASK ERROR or a warning, although most archives were written. So read the log, not only the color.
The closing lines of the log also say that the result was notified via target mail-to-root. Proxmox sends the result to a mailbox on the server itself. Nobody opens it, and this manual never changes that. So here is the plain fact: nothing pushes a warning to you when a backup fails. Your phone alerts watch if apps are up (Ch. 14 · Uptime Kuma sends through Ch. 13 · ntfy). None of them watches this job. The only way to find a failed run is to look at it. This look is one line of the monthly routine in Ch. 71 · Monthly maintenance: “Verify backups ran”. Open this same Tasks panel. Check that the newest vzdump row has a green tick and a recent date. Until you do that check, a broken job stays quiet.
20.3
THE RESTORE DRILL — ONCE, TODAY
A backup that you never restored is not a backup. It is a hope. A job can write archives, report success, and still make useless files. For example, a file is cut off, a storage was full, or the container was already broken. You find out at the worst moment, unless you find out now. This drill takes about five minutes. It never overwrites anything. You restore into a new ID, and you delete it when you are done. It needs one precaution. It is step 6. A restored container is a copy of the original, byte for byte. This includes its network address. So you give the copy its own address before you switch it on. Do that step, and the live container does not notice anything. Skip it, and you knock the original off the network for as long as the drill takes.
Warning — restore into a NEW id, and know which door you used
A restore can erase a container. The door that you start from decides if that is even possible. You start from the Backups list of the storage. This drill uses this door. You type the target number yourself. Proxmox refuses each number that is already taken (This CT ID is already in use). So you cannot overwrite a live container by accident. You start from the ownBackup tab of a container? Then the dialog has the title Overwrite Restore. The number is fixed to that container. When you confirm, it warns that this will permanently erase current CT data. It does, and you cannot undo it. Use a number that you never used, such as 199. The IDs in this manual run from 100 to 148. Each number from 190 up is free.
Click homelab → local → Backups in the left tree. It is the same list that you checked at the end of the last section. Start from the list of the storage, not from a container. This is the door that lets you choose the target ID.
The list is empty? Then the job did not run yet. It runs on its schedule. A job that you made five minutes ago has made nothing. The whole toolbar stays grey until a row exists. Do not wait until Sunday to learn if backups work. Select the job row on the Backup screen. Click Run now. Wait until the task window says TASK OK. Then come back here. There is now an archive. Then click the smallest archive in the list. The list shows the container name of each archive in the Notes column. It also shows its Date and its Size. Click the Size column header to sort by size. A small container restores in about a minute. The drill proves the mechanism, not the container. The smallest archive can be AdGuard or the proxy. This is fine. Step 6 keeps the copy out of the way of the original.
One archive row is picked, and the whole toolbar woke up: Restore, Show Configuration, Edit Notes, Remove. With no row selected, each of them is grey.
Click Restore.
The Restore: CT dialog, opened from the Backups list of the storage. The file name of the archive is at the top. Check that it is the one that you meant before you go on.
The dialog opens half filled. Storage already says local-lvm. CT already has the next free number. Replace that number with 199. Leave each other field as it is. The reference on the right explains each one.
Click Restore. Wait until the task viewer shows TASK OK. CT 199 appears in the left tree. It has the hostname of the original, for example 199 (uptime-kuma) or the container that you picked. This is expected. It is a copy, with its name.
Give the copy its own address, before you start it. The restore also copied the network settings of the original: the same MAC address and the same static IP. Two machines on one address take turns to drop off the network. One of them is a container that you rely on. Fix it in three steps:
Select 199 in the left tree. Click Network.
Double-click the net0 row. This opens Edit: Network Device (veth).
Replace IPv4/CIDR with an address that nothing else uses: 192.168.1.209/24. Click OK. (You can also switch IPv4 to DHCP. The router then gives the copy a spare address.)
Leave Gateway (IPv4) and everything else alone.
Now select 199. Click Start. Wait until its status says running.
This is the whole test. It restored, and it starts. You want to go one step further? Open homelab → >_ Shell. Run pct enter 199 to look inside the restored copy.
Click Shutdown on CT 199. Wait until it is stopped.
CT 199 is stopped. Click More → Remove. A Confirm window asks you to type the number again: Please enter the ID to confirm (199). This is because it erases the container for good. Type 199. Click Remove.
Toolbar of CT 199 — More → Remove. Remove stays grey until the container is stopped.
You overwrote nothing that you rely on. Because 199 had its own address, nothing that you rely on dropped off the network. You now know, and you do not only hope, that your backups restore.
Read-only. It shows the archive that you selected: vzdump-lxc-102-2026_07_29-22_08_56.tar.zst in the picture. The container ID and the time are in the name. Check that it is the one that you meant before you go on.
CT
Type 199 over the number that is already there. Proxmox fills in the next free ID. This is not what you want for a drill. You can edit this number only because you opened Restore from the Backups list of the storage. You open it from the own Backup tab of a container? Then the same dialog shows the number in grey, and it always restores in place. See Ch. 12 · After every build + common Proxmox tasks.
Storage
Leave it on local-lvm. It is already selected, because container disks live there on this machine. local holds the archives, not the running disks.
Privilege Level
Leave it on From Backup. It is a choice of three. The default uses what the original container was. This is what a drill must test.
Unique
Leave it unticked for the drill. If you tick it, the restored copy gets a new MAC address, and the Override Settings boxes (hostname, memory, cores) become active. This is useful when you want a second copy of a container that still runs, on purpose. It is not a replacement for step 6. It makes a new MAC address only. It never changes the IP address that is stored in the config of the container. So the copy still collides on the network until you edit net0 yourself.
Start after restore
Leave it unticked. This one matters. The copy must not start until you gave it its own address (step 6). If you start it by hand in step 7, you also see it start.
Add to HA
Leave it unticked. High availability is for a cluster of several servers. You have one.
Bandwidth Limit
Leave it empty. It slows the reading of the archive. This matters on network storage. It does not matter on a local SSD.
Warning — the copy is a twin, address and all
A restored container keeps the MAC address and the static IP of the original. You start it as it is while the original runs. Then two machines claim one address. The network switch jumps between them. The original goes in and out of reach for as long as the copy is up. This is not only in theory. The drill tells you to pick the smallest archive. On a Part C server, this is often AdGuard. So the whole house would lose DNS in the middle of the drill, with no clear cause. If you tick Unique, it does not save you. It changes the MAC, not the IP. Step 6 is the fix. It is not optional. Deleting 199 at the end is the other half.
Notice — put the next drill on the calendar
One drill is enough to prove the mechanism. A repeat catches problems that grow with time. Add a repeating reminder: every 3 months, “homelab: restore one backup”. Use the calendar that you really read. Ch. 64 · Backups done right (3-2-1) and the maintenance routine both assume that you kept this habit.
20.4
WHAT THIS COVERS — AND WHAT IT DOES NOT
Covered from now on
Each container on the server, each week, also the ones that you build later.
The whole disk of each container: the OS, Docker, the app, and the small databases inside it. Examples are the filters of AdGuard, a vault, an .env file, and the layout of a dashboard.
Two weeks of history for each container. Old ones are deleted automatically.
A restore path that you ran one time with your own hands.
Fire, flood, theft. Each copy is in one room until the copy in another place of Part G exists.
A message when a run fails. There is no alert. There is no push message and no email that you would read. You check it yourself, one time each month, in the Tasks panel. This is the step “Verify backups ran” of Ch. 71 · Monthly maintenance.
Bulk data in host folders. Later parts attach host folders to containers as bind mounts. A bind mount is a folder on the own disk of the server. It is plugged into a container, and it is not stored inside it. You use it for photos and media. vzdump skips these folders on purpose. The file-level layer of Ch. 64 · Backups done right (3-2-1) covers them. Nothing that you built in Part C uses one.
Notice — in Part G you edit this job, you do not add a second one
Ch. 64 · Backups done right (3-2-1) sets up the real strategy. It works on this job: Datacenter → Backup, select the row, Edit. Then point Storage at the backup area of the new drive. Raise Keep Last. Two jobs for all containers on one server mean two sets of archives with the same retention rules in conflict. They also double the disk use. They give no extra safety. Use one job. Edit it as the server grows.
20.5
WHEN IT GOES WRONG
The run ends in TASK ERROR: job errors, but most of the archives were written.
The job is fine. One guest is broken. All means all. A container whose disk is missing fails its own archive and marks the whole task as failed. Examples are a creation that did not finish, or a disk that you deleted by hand. Scroll the log for the line ERROR: Backup of VM <id> failed. It names the guest and the reason (for example no such logical volume pve/vm-105-disk-0). The summary line near the end then says INFO: Backup job finished with errors and not finished successfully. Each other guest still shows Finished Backup of VM <id>. Their archives are really in homelab → local → Backups. Fix or delete the broken container. Do not touch the job.
Run now is grey, or a click does nothing.
You did not select a job row. Run now, Edit, and Remove all start disabled. They wake up only when you click a row in the table. A disabled button of Proxmox swallows clicks in silence. It does not complain. Click the row of the job first. Then click the button.
The Storage dropdown in the backup job dialog is empty, or it does not list the storage that you want.
A storage can hold backups only if its content types include Backup. On a new install, only local has it. local-lvm, where the container disks live, cannot hold archives. Add it under Datacenter → Storage → Edit → Content. Or use local, as this chapter does.
The CT field turns red: This CT ID is already in use.
Something already has that number. It is usually a container from an earlier drill. Pick another free number, such as 198. Or clean up the old one first. Select it in the tree. Stop it. Then More → Remove. The dialog does not let you go on while the number is taken. This is the guard that you want.
Remove is grey in the More menu, and you cannot delete CT 199.
Proxmox refuses to destroy a container that runs. Click Shutdown. Wait until the status says stopped. Remove then works. A stuck container does not shut down? Use Stop. It is a throw-away container, so a hard stop costs nothing.
The backup finishes, but the SSD fills up.
Check Keep Last on the job. With no retention, Proxmox keeps each archive for ever. 2 is the value of this chapter. You can also delete old archives by hand from homelab → local → Backups. Select a row. Click Remove.
20.6
REFERENCE CARD
Paste this in the own Notes panel of the server: homelab → Notes → Edit. The node has its own Notes tab in the menu on the left. Containers show their notes on the Summary tab. The card is then on screen when you need it.
📋 Reference — paste into the host's Notes in Proxmox (renders as Markdown; not a shell command)
## Backups — the weekly safety net
job: Datacenter → Backup · `sun 03:00` · storage `local` · All guests · Snapshot · Keep Last 2
docs https://pve.proxmox.com/wiki/Backup_and_Restore

```sh
# did it run? (archives 'local' holds, newest first)
ls -lht /var/lib/vz/dump/ | head
cat /etc/pve/jobs.cfg                  # the scheduled job as saved
# run the same backup right now
vzdump --all --mode snapshot --storage local --compress zstd
vzdump 100 --mode snapshot --storage local --compress zstd   # one guest only
# RESTORE — always into a NEW, unused id (never over a live container)
# list the archives first and copy a REAL filename — DATE below is a placeholder, not a name
ls /var/lib/vz/dump/vzdump-lxc-100-*.tar.zst
pct restore 199 /var/lib/vz/dump/vzdump-lxc-100-DATE.tar.zst --storage local-lvm
# the copy inherits the original's MAC + IP — re-address it BEFORE starting it
pct set 199 -net0 name=eth0,bridge=vmbr0,ip=dhcp
pct start 199
pct stop 199
pct destroy 199
```

Same-SSD copy only: guards against mistakes, NOT a dead disk.
Real 3-2-1 (second drive + off-site) is the Backups-done-right chapter in Part G — EDIT this job there, do not add a second one.
Test one restore every 3 months.
Part D · The app catalog
21Choosing your apps
The catalog is a menu. It is not a checklist. Read this page. Pick a few apps that solve a problem that you really have. Skip the rest. You can always come back.
In this chapter
21.1
A MENU, NOT A CHECKLIST
Part D has seventeen apps. This number frightens people. They think that they must build all seventeen. You do not. A healthy homelab runs five to eight apps. These are the apps that replace a service that you paid for, or a habit that annoyed you. The other nine or ten stay on the menu until the day that you really want them.
So read this part like a menu, not like a to-do list. Each app in it is optional, works alone, and is safe to skip. Each app earns its container by answering one question: what does it give me that I do not have already? An app does not answer that for you today? Close the chapter and go on. You do no harm. Nothing later in the manual depends on it.
The rest of this page gives you three tools to pick well. A decision table compares each app of Part D with what it replaces and how hard it is. A RAM budget tells you how many apps you can run at the same time. Three ready starter menus give you a short list, if you prefer a list to building your own.
21.2
THE DECISION TABLE
The table lists each app of Part D, easy first and involved last. Scan the "Replaces" column for a paid service or a habit that you want to drop. Check the "Get it if" line to confirm that it fits. Read "Difficulty" with honesty before you give an evening to an app. The RAM column is the limit that you set in the container wizard. The next section explains what that number really costs you. One row is different. The number for authentik has (floor). This means a minimum that the app needs only to run. It is not a limit that it can grow into. Give it less, and it breaks. It does not only run tighter.
you design interfaces or graphics and want an open Figma that you control. Its chapter starts the CT at 2048 MB. It expects you to raise it to 4096 MB when you use it for real work.
you have IP cameras and want live object detection with alerts. Note: the build in Ch. 38 · Frigate — optional, needs a camera does not record all the time. It starts with recording turned off. The footage stays on the SD card of the camera. Pick it for detection and notifications, not as a video recorder. You turn recording on yourself afterwards. It needs much more disk than this manual plans.
you run many apps and want one login for all of them. Build this after you have several.
Notice — "involved" means an evening, not danger
The difficulty here is about your time and attention. It is not about risk. An easy app is a container and a first-run wizard. You finish it in the coffee break that the spec plate promises. A moderate app adds one setup step, such as a helper service or a configuration file to fill in. But you tend nothing afterwards. An involved app has several parts, more decisions, or ongoing care. Ch. 23 · authentik becomes the front door to your other apps. If you set it up wrongly, you lock yourself out of them until you fix it. Ch. 37 · Home Assistant (preview) is less an install than a hobby. Nothing here can hurt the server. Each app is its own container that you can delete and forget.
21.3
YOUR RAM BUDGET
The machine has 16 GB of RAM. After Parts B and C, you have about 13 GB of real free space for Part D and later. Part B and C are Proxmox itself, the essential six, and remote access. The backup job uses no RAM. This is enough for a comfortable homelab. It is not enough for all seventeen apps at the same time. RAM is the one resource that you must budget.
This is a worked example: a stack of four apps to "own your data", added up by its caps:
Five gigabytes of limits out of your thirteen. In practice, this stack idles near 2 GB, because the caps are the worst case. You can run this stack and still have room for several more apps. The heavy apps fill the budget fast. The container of Ch. 28 · Penpot starts at 2 GB. Plan to raise it to 4 GB when you use it for real. Ch. 37 · Home Assistant (preview) has a cap of 4 GB. Ch. 52 · Immich in Part E has a cap of 8 GB alone. Run one or two of those. Do not run all of them.
Notice — the two rules for adding apps
Watch Beszel. Add one app at a time. Beszel Ch. 15 · Beszel shows the real RAM use of the whole machine. Build an app. Use it for one day. Look at Beszel. The machine is still comfortably under its total? Then add the next app. Free RAM gets thin? Stop. You found the limit of this machine. It is a real limit: nothing later in this manual adds RAM. Part G covers backups, extra disks, and disk health. That is more space. It is not more memory. To go past a RAM limit, you buy and fit more RAM, or you run fewer apps at the same time. If you add apps one at a time, you also know exactly which app to look at when something goes wrong.
21.4
THREE STARTER MENUS
You prefer a short list to building your own? Pick one of these. Each one is a small, coherent set that solves one kind of problem. Build it. Live with it. Add from the table above when you know what you miss.
The privacy starter
Take your passwords, your files, and your photos back from the cloud. This is the menu to "delete three subscriptions".
Vaultwarden — your own password vault. It syncs to each browser and phone. Ch. 22 · Vaultwarden
Syncthing — your files mirrored between devices, no Dropbox. Ch. 24 · Syncthing
Immich — a self-hosted Google Photos, with automatic backup from the phone. This app is in Part E Ch. 52 · Immich, because it is heavy. It has a cap of 8 GB and wants shared storage. Build it after the two lighter apps above are settled.
Notice — start with the two light ones
Vaultwarden and Syncthing are both easy, with 1 GB each. The pair takes one evening. Vaultwarden has one prerequisite. A plain web address without encryption is not good enough. Its browser extensions and phone apps do not connect to it. Its chapter sets up the fix, a proper locked address (HTTPS), step by step. It is free over Ch. 19 · Remote access: Tailscale, or it costs about $10 each year with a domain, using Ch. 17 · Nginx Proxy Manager. Immich is the reward that you build when you are comfortable. It is the heaviest app that most people run. Give it room. Read its chapter in Part E in full.
The get-organized starter
Turn the pile of paper, links, and half-remembered recipes into something that you can search. This is the menu to "tidy my life".
Paperless-ngx — scan your mail and PDFs. It reads them with OCR, so that you can search the text. Ch. 30 · Paperless-ngx
Karakeep — each link that you save, kept and searchable by its full text. Ch. 31 · Karakeep
Mealie — your recipes in one place, imported from any cooking site. Ch. 27 · Mealie
Two apps have a cap of 2 GB. One has a cap of 1 GB. That is 5 GB of limits, well inside your budget.
Notice — Paperless is the moderate one
Mealie is easy. Start there for a quick win. Karakeep and Paperless are moderate. Read the chapter of Paperless before you point a scanner at it. Then its filing folders are set up the way that you want from the first day.
The tinkerer starter
You are here for the hobby, not only for the use. This is the menu to "give me projects".
Gitea — private git repositories at home for your code and configuration. Ch. 32 · Gitea
n8n — connect your apps with "when this happens, do that" automations. Ch. 29 · n8n
Home Assistant has a cap of 4 GB. It is a project that you grow into. Build the two lighter tools first. Then give it the room that it wants.
Notice — Home Assistant is a runway, not a stop
Gitea and n8n are moderate, with 1 GB each. Home Assistant is involved. Plan to tend it over weeks. You do not finish it in one sitting. It is the app that people mean when they say that the homelab became a hobby.
Whichever menu you pick, the routine is the same each time. Build the container. Run the app. Then do the routine after each build Ch. 12 · After every build + common Proxmox tasks. The full checklist of that chapter has five quick steps: a Notes card, a health monitor, an alert, a dashboard tile, and a snapshot. Then look at Beszel Ch. 15 · Beszel. Decide if you add the next app.
Part D · The app catalog
22Vaultwarden
Use the Bitwarden apps and browser extensions with your own server. Each random, unique password then lives in an encrypted vault that you host. You reach it only over HTTPS.
This chapter needs the items below. You came here directly? Do them first. Each item takes a short time. Nothing on this page works without them.
Proxmox is installed and works at https://192.168.1.220:8006. You can log in as root. See Ch. 6 · Install Proxmox. At your first visit, the browser shows a certificate warning. Select Advanced. Then select Proceed. The warning is normal. Proxmox makes its own certificate.
The Debian 13 image is downloaded. You do this one time. See Ch. 10 · The container wizard. Without the image, the Template list in the wizard is empty.
You have an SSH key from your PC (Ch. 9 · SSH & the terminal). Or you type a password in the two password boxes of the wizard. The wizard needs one of the two. The Next button stays grey until you give one.
You know your own network numbers. Where this chapter shows 192.168.1.x, use your own numbers. The rule is in Ch. 3 · How to read this manual. The address of this chapter must be outside the range that your router gives out by itself (the DHCP pool, often .100–.200, but yours can differ). An address inside the pool can go to a phone later. Two devices on one address break name lookups, and the cause is hard to find.
Commands marked HOST run on the server. In the Proxmox page, select homelab in the left tree. Then select >_ Shell. Commands marked CT run inside the container of this chapter. The chapter shows you how to get there.
The wizard does not work?Next is grey: you gave no password and no key. Give one of the two. The Template list is empty: the Debian image is not downloaded. Download it first. Each tab is explained in Ch. 10 · The container wizard.
Vaultwarden runs the Bitwarden apps and browser extensions against your own server. It does not use the Bitwarden cloud. It serves the same web vault, the same phone app, and the same browser extension. The encrypted vault only stays on your hardware. One rule shapes the whole setup: the web vault needs HTTPS and refuses a plain http:// address. It needs HTTPS with a certificate that your devices trust. A made-up name such as vault.home can never have one. SET UP OVER HTTPS below gives you two ways to get a real certificate. One way is free, with Ch. 19 · Remote access: Tailscale. The other way is a domain that you own, with Ch. 17 · Nginx Proxy Manager. Read that section before you make your account.
The Bitwarden web vault. Vaultwarden serves this same page from your own server.
Notice — HTTPS is not optional here
This is the plain rule. A browser lets a web page encrypt passwords only when the page came over https://. The same is true for http://localhost, which means that the same machine that you sit at serves the page. On a plain http:// address, the browser switches that ability off. The web vault of Vaultwarden encrypts inside your browser. So on plain http://, it cannot work. The official Vaultwarden documentation says the same. (The browser feature is the Web Crypto API. The rule of https:// or localhost is a secure context. You need these names only if you search for the error.) So http://192.168.1.225:8000 is good only to check that the login page loads. You cannot make an account there. First give Vaultwarden a real HTTPS name. SET UP OVER HTTPS below shows two ways to get a trusted certificate: Ch. 19 · Remote access: Tailscale (free, no domain) or a domain that you own with Ch. 17 · Nginx Proxy Manager. The phone app also needs a certificate that it trusts. So use HTTPS for the extension and the phone app too.
22.1
CREATE THE CONTAINER
You do this task with the mouse, in the Proxmox web page. You type nothing. You prefer the command line? The box below the table does the same task with one pct create command.
On your PC, open https://192.168.1.220:8006.
The Proxmox VE login page.
Click homelab in the left tree.
Node homelab is selected in the left tree.
Click the blue Create CT button at the top right.
The Create CT button.
Fill in the tabs as the table shows. Keep each field that is not listed at its default value.
General tab: CT ID 104, hostname vaultwarden.
Wizard reference — Create CT 104
Tab → Field
Entry
General → Node
Select homelab.
General → CT ID
Type 104. Do not keep the number that the wizard suggests.
General → Hostname
Type vaultwarden.
General → Unprivileged container
Keep this box ticked.
General → Nesting
Keep this box ticked. It is ticked by default. The wizard has no box for keyctl, which Docker also needs. The host command after Finish sets it. It is the first line of the next listing.
General → Password / SSH public key
Keep the password empty. Paste your public key in the SSH field: ssh-ed25519 AAAA…your-key-here you@your-pc. With the key, you can run ssh root@192.168.1.225 from your PC. The command pct enter 104 on the host needs no password.
Template → Storage, Template
Select local. Then select debian-13-standard.
Disks → Storage, Disk size
Select local-lvm. Set 6 GiB.
CPU → Cores
Set 1 core.
Memory → Memory (MiB)
Set 1024. Keep Swap at its default.
Network → IPv4
Select Static. Set IPv4/CIDR to 192.168.1.225/24. Set Gateway to 192.168.1.1. Keep IPv6 at its default.
DNS → DNS domain
Keep this field empty. Do not type 192.168.1.1 here.
DNS → DNS servers
Always type 192.168.1.1. Never keep this field empty.
Confirm
Read the summary. Keep Start after created unticked. Select Finish.
The wizard has no box for three settings: the Docker permission keyctl, the timezone, and start at boot. The first command below sets all three. Run these 3 commands on the host. They set the missing settings, start the container, and open its shell. Each part is explained in Ch. 10 · The container wizard, section "The host command every build needs".
⌨ Type this on the Proxmox host (homelab)
Before you run anything on this page: every 192.168.1.x address below is this manual's example network. If your own network uses different numbers, substitute yours as you type — the rule is in Ch. 3 · How to read this manual. A command that runs with the wrong address usually succeeds and leaves you unreachable.
pct set 104 --features nesting=1,keyctl=1 --onboot 1 --timezone host
pct start 104
pct enter 104                          # now INSIDE CT 104 — the rest of this page runs here
Notice — set your timezone
The option --timezone host copies the timezone of the server into the container. Your server itself is still on UTC? Then set it one time with timedatectl set-timezone Region/City. Run timedatectl list-timezones to find the exact name, for example America/New_York. Without the correct timezone, logs, scheduled jobs, and file names with dates are wrong by some hours.
Prefer the terminal? — the same task with one pct create command
⌨ Type this on the Proxmox host (homelab)
TMPL=$(pveam available --section system | awk '/debian-13-standard/{print $2}' | tail -1)
pveam download local "$TMPL"          # once per host; harmless to re-run
pct create 104 local:vztmpl/"$TMPL" \
  --hostname vaultwarden --cores 1 --memory 1024 --rootfs local-lvm:6 \
  --net0 name=eth0,bridge=vmbr0,ip=192.168.1.225/24,gw=192.168.1.1 \
  --nameserver 192.168.1.1 --features nesting=1,keyctl=1 --unprivileged 1 --onboot 1 --timezone host
pct start 104
pct enter 104                      # you are now INSIDE CT 104 — everything below runs here
This part has no buttons. You type commands inside CT 104. You are already there from pct enter 104 above. (You closed that shell? Open homelab → >_ Shell and run pct enter 104 again.)
The >_ Console button of the CT opens a login: prompt, not a shell. Use pct enter 104 from homelab → >_ Shell.
Notice — where these commands run
Everything in this section runs inside CT 104. It does not run on the server or on your PC. You open that shell in one of two ways. Run pct enter 104 on the server. Opening homelab → >_ Shell is the only step with the mouse. The shell itself is not a GUI. Or run ssh root@192.168.1.225 from your PC. (The >_ Console button of the container shows a login: prompt. The containers of this manual cannot answer it. Skip it.) Only the pct and pveam commands go back to the server. Each guide marks those commands where you use them.
Install Docker (first line).
Make the data folder. Write a random admin token in a locked .env file. The secret then never lands on the command line (the next three lines).
Start Vaultwarden (the docker run block).
⌨ Type this inside CT 104
apt update && apt install -y docker.io curl   # curl is used by the health check in the reference card
mkdir -p /opt/vaultwarden
printf 'ADMIN_TOKEN=%s\n' "$(openssl rand -base64 48)" > /opt/vaultwarden/.env   # secret into a locked file, not the command line
chmod 600 /opt/vaultwarden/.env
docker run -d --name vaultwarden --restart=unless-stopped -v /opt/vaultwarden:/data \
  --env-file /opt/vaultwarden/.env \
  -e DOMAIN=http://192.168.1.225:8000 -e SIGNUPS_ALLOWED=true \
  -p 8000:80 vaultwarden/server:latest
In short: the ADMIN_TOKEN is a key that nobody can guess. It opens the /admin panel of Vaultwarden. The command writes it straight into an env-file with chmod 600 (/opt/vaultwarden/.env). It loads it with --env-file. So the secret never shows on the command line or in the history of the shell (see Ch. 11 · Security basics). DOMAIN must match how you reach the app. Right now, that is the plain IP address. The next section gives it a real HTTPS name and makes the container again with it. SIGNUPS_ALLOWED=true lets you register the first account. You set it to false right after. -p 8000:80 sends host port 8000 to the internal port 80 of the container. This is the address that the HTTPS route of your choice points at.
Explanation of each part
The Docker install line and the flags -d, --name, --restart, -v, and -p are explained in Ch. 9 · SSH & the terminal, sections "Install Docker in the container" and "Anatomy of docker run". These parts are specific to Vaultwarden:
mkdir -p /opt/vaultwarden
Makes the folder that holds the data of the app. The -p flag also makes missing parent folders. It shows no error if the folder exists.
Makes a random 48-byte secret with openssl rand -base64 48. It writes it in the .env file as the line ADMIN_TOKEN=…. This is the login token for the admin panel.
chmod 600 /opt/vaultwarden/.env
Restricts the file. Only its owner can read it or write to it. This protects the secret token.
-v /opt/vaultwarden:/data
Links the host data folder into the container. The database of the password vault stays when the container restarts or when you make it again.
--env-file /opt/vaultwarden/.env
Loads environment variables from that file into the container. This includes the ADMIN_TOKEN that you made above.
-e DOMAIN=http://192.168.1.225:8000
Tells the app its own web address. Links, cookies, and two-factor logins then work correctly. It must match how you really reach the app. At install time, that is the plain IP address. You set the final HTTPS name in the next section.
-e SIGNUPS_ALLOWED=true
Allows new user accounts. Turn it on only for a short time, to make the first account. Then set it to false.
-p 8000:80
Sends host port 8000 to the internal port 80 of the container. You reach the app at port 8000. The HTTPS route of the next section sends traffic to it.
vaultwarden/server:latest
The Docker image to run: Vaultwarden, a light, self-hosted password server that works with the Bitwarden apps.
22.3
SET UP OVER HTTPS
Open http://192.168.1.225:8000. The Bitwarden login page appears. This only confirms that the container runs. Do not make an account here. On a plain http:// IP address, the browser does not switch on the vault encryption. Create Account then gives an error. First give it HTTPS. Then register.
Warning — pick a way to a trusted certificate before you register
Let's Encrypt gives certificates only for real, public domain names. So a made-up vault.home can never have one. A certificate that you sign yourself is worse than none here. The Bitwarden phone app refuses it. The vault would then work in your browser and never on your phone. Two ways end in a certificate that each device already trusts. Route A is free and needs no domain. Route B costs about $10 each year and gives you a name that you keep. Do one of them. Then make the account.
Route A — a free Tailscale certificate (no domain needed)
Tailscale gives a real certificate that everyone trusts for the .ts.net name of each machine on your tailnet. It serves the app on that name. The address of Vaultwarden becomes https://vaultwarden.your-tailnet.ts.net. The browser extension and the phone app accept it, at home and away. Install Ch. 19 · Remote access: Tailscale first.
In the admin console of Tailscale, open DNS → HTTPS Certificates. Click Enable. It asks you to turn on MagicDNS first? Accept. MagicDNS gives each machine on your tailnet a short name and not a bare number. It is safe to turn it on. The same page shows the name of your tailnet, for example tail1a2b3.ts.net.
Tailscale needs a virtual network adapter. This is a network card that is made in software. Tailscale sends its encrypted traffic through it. A container does not get one by default, so Tailscale refuses to start. Run these two commands on the server. They give that adapter to CT 104 and restart the container, so that the adapter appears. (Its technical name is the TUN device, /dev/net/tun.)
⌨ Type this on the Proxmox host (homelab)
pct set 104 --dev0 /dev/net/tun   # the tunnel device Tailscale needs
pct reboot 104                    # the device appears only after a restart
Go back inside CT 104 with pct enter 104 on the server. Install Tailscale. Sign in. Publish port 8000 over HTTPS.
⌨ Type this inside CT 104
curl -fsSL https://tailscale.com/install.sh | sh
tailscale up                 # open the printed URL on your PC or phone and sign in
tailscale serve --bg 8000    # serves this container's port 8000 over HTTPS
tailscale serve status       # prints the exact https://vaultwarden.….ts.net address — write it down
Make the container again, so that DOMAIN matches that address. Replace your-tailnet with the name from step 1. The command deletes the container of the app and builds a new one from the same image. Your vault data in /opt/vaultwarden is not touched. It lives in that folder on the disk of the container, not inside the part that you delete. (This is the standard pattern of Ch. 12 · After every build + common Proxmox tasks, section “Change a setting on a Docker app”. The steps are already done for you.)
⌨ Type this inside CT 104
Only devices that are signed in to your tailnet can open that address. This is the point. The vault is never open to the internet. It works in the same way on home Wi-Fi and on mobile data. Install the Tailscale app on each phone and PC that uses the vault. Keep it connected. A guest device on your network without Tailscale sees only http://192.168.1.225:8000. It cannot open a vault.
Route B — a domain that you own (about $10 each year)
Buy any cheap domain. Keep its DNS records at a provider that Ch. 17 · Nginx Proxy Manager can talk to. DNS records are the entries that change a name into an address. Cloudflare is the worked example. Let's Encrypt gives a certificate for a name only when you proved that you own it. NPM proves it by writing a short one-off record in the DNS of your domain. Let's Encrypt reads that record back and is satisfied. That proof is a DNS challenge. This is why you open no router port and need no public website. The address becomes https://vault.yourdomain.com. Each device on your network trusts it, and you install no extra software.
Buy the domain from a registrar. This is a company that sells domain names, such as Cloudflare, Porkbun, or Namecheap. Any cheap name works. Nobody but you types it.
Point the domain at your DNS provider. Each domain names two or three nameservers. These are the machines that answer questions about it. Your DNS provider tells you which names to use. A free Cloudflare account prints them when you add the domain. Paste them in the nameserver field of the registrar. It is usually a Nameservers or DNS page in its control panel. Save. The change takes from a few minutes to a few hours.
Make an API token at your DNS provider. It is a long password. It lets a program change your DNS records, instead of you clicking in the web page. At Cloudflare, it is on the My Profile → API Tokens page (dash.cloudflare.com/profile/api-tokens). Select Create Token. Use the Edit zone DNS template for your domain. Copy the token to a safe place. It is shown one time. NPM uses it to write the challenge record for you.
In Ch. 17 · Nginx Proxy Manager, add a proxy host for vault.yourdomain.com. It forwards to 192.168.1.225, port 8000.
Open the SSL tab of that host. Select Request a new certificate → Use a DNS Challenge. Choose your provider. Paste the API token. Tick Force SSL. NPM gets the certificate and renews it by itself.
In the AdGuard web page, add a DNS rewrite under Filters → DNS rewrites. (Ch. 17 · Nginx Proxy Manager shows this screen in full. Ch. 16 · AdGuard Home sets up AdGuard but does not cover rewrites.) A rewrite is a rule that says: “when a device here asks for this name, answer with this address”. Send vault.yourdomain.com to 192.168.1.224 (NPM). The name is then answered inside your house. It does not go out to the internet. Away from home, add that domain as a second split-DNS entry in the Tailscale admin console. A split-DNS entry tells Tailscale: “for names that end in this one domain, ask this DNS server. Leave every other name alone.” It is the same setting that Ch. 19 · Remote access: Tailscale sets up in its section “Reach your .home names from anywhere” for the home names. Open that page again. Add a second entry next to the first.
Make the container again, so that DOMAIN matches the new address. As on Route A, this deletes the container of the app and builds a new one. Your vault data in /opt/vaultwarden is not touched.
⌨ Type this inside CT 104
From here on, your HTTPS address means the address that your route made: https://vaultwarden.your-tailnet.ts.net (Route A) or https://vault.yourdomain.com (Route B).
Open your HTTPS address. Select Create Account.
The Create Account form, reached over HTTPS.
Use a strong master password. You cannot get it back. There is no reset link.
Add the accounts of your family in the same way.
Lock the server. Make the container again with SIGNUPS_ALLOWED=false. (The update command in the reference card already sets this, next to your DOMAIN.) Then nobody else can register.
In the Bitwarden browser extension or phone app, set Settings → Server URL to exactly your HTTPS address, character for character. It is the same value as DOMAIN. Do this before you log in.
Warning — back this up before anything else
This is your most important container. You lose /opt/vaultwarden? Then you lose all passwords at once. There is no reset link. A password vault is the first thing that belongs in a real backup routine. Set one up in Ch. 64 · Backups done right (3-2-1). Until then, make a copy by hand before each risky change. Use the tar line in the reference card below. Keep the copy in a place that is not this server.
22.4
HOW TO USE IT — THE BASICS
The web vault stores the passwords. The browser extension is the tool for daily use.
Open your HTTPS address. Log in with your master password. The vault view shows all your items.
Click New. Select Login. Enter a Name, for example Netflix. Enter the Username and the Password. Enter the address of the site in the website/URI field. The extension uses it to find the correct login. Click Save.
The New → Login dialog.
You have no password yet? Click the generate icon (circular arrows) in the password field. Vaultwarden makes a strong random password. You never need to know your passwords.
The generate-password icon inside the field.
For daily use, do not open the web vault. Open the login page of a site. Click the Bitwarden icon in the toolbar of the browser. Click the matching login (or its Fill button). The extension fills in the form.
You make an account on a new site? Add the login in the popup of the extension (New → Login). The extension enters the address of the site for you.
Notice — move your old passwords in one step
Export the saved passwords from your browser. Chrome and Firefox export them as a CSV file. In the web vault, go to Tools → Import data. Select the format that matches your file. Import it. Then turn off the password storage in the browser. All new passwords then go to Vaultwarden.
22.5
WHEN IT GOES WRONG
You click "Create Account" (or you try to log in) on the web vault and nothing happens. Or a vague error appears, such as "An error has occurred". The console of the browser mentions crypto.subtle or says that Web Crypto is undefined. You opened Vaultwarden through the plain http://192.168.1.225:8000 IP address. Reach it over HTTPS. Use the plain IP only to check that the login page loads. Then finish Route A or Route B in SET UP OVER HTTPS. Open the HTTPS address that it gives you. Make the account there. Browsers turn on the vault encryption only on https:// (or http://localhost). They never turn it on for a plain http:// IP.
docker logs vaultwarden shows a WARNING that the ADMIN_TOKEN is not an Argon2 PHC string. It recommends that you hash the token. This is a recommendation. It is not an error. The plain token still logs in to /admin. To remove the warning, make a hashed token. Run docker run --rm -it vaultwarden/server /vaultwarden hash. Enter a password two times. Paste the whole $argon2id$… string in /opt/vaultwarden/.env as the line ADMIN_TOKEN=…. It replaces the random value that is already on that line. The notice below shows two ways to open that file. In an env-file, the $ signs stay literal. Paste the string exactly as it was printed. Add no quote marks and no backslashes around it. (At a shell prompt, a $ means “put the value of a variable here”. So a string like this normally needs those extra characters around it. That is what “quoting and escaping” means. Inside this file, it does not.) Then make the container again. A restart is not enough. Run docker rm -f vaultwarden. Then paste the original docker run block again. An --env-file is read one time, when the container is created. So docker restart brings back the OLD token, and everything looks fine. Your vault is in /opt/vaultwarden on the host. It stays.
Notice — how to edit /opt/vaultwarden/.env
In a window, with no terminal: open the file over SFTP with your file manager, as Ch. 12 · After every build + common Proxmox tasks describes in the section “Move a file to or from the server”. Connect to 192.168.1.225. Open the folder /opt/vaultwarden. A name that starts with a dot is hidden. Turn on “show hidden files”. In WinSCP, use Options → Preferences → Panels → Show hidden files. In Linux file managers, press Ctrl+H. If not, the .env file does not appear. Double-click it. Edit the line ADMIN_TOKEN=. Save.
In the terminal: inside CT 104, run nano /opt/vaultwarden/.env. Nano is a plain text editor that runs in the shell. Edit the line. Press Ctrl+O, then Enter to save. Press Ctrl+X to leave. The container says “command not found”? Install it first with apt install -y nano.
The Bitwarden browser extension or phone app cannot connect, or it says that the server is not reachable. The phone app can reject the certificate even when the address opens well in a browser. In the app, open Settings. Set the Server URL to exactly your HTTPS address. It must match the DOMAIN value. The mobile app needs a certificate that it trusts, with the full chain. It rejects a certificate that you signed yourself. This is why this chapter offers only the two routes above. On Route A, check that the phone has the Tailscale app, and that it is connected. That address resolves nowhere else. On Route B, check that the name reaches NPM on the network that the phone uses (the AdGuard rewrite at home, the Tailscale split-DNS entry away from home).
The docker run command fails at once with "port is already allocated" or "address already in use". Another container already publishes host port 8000. List what runs with docker ps to find it. Then stop that container, or give Vaultwarden another published port. For example, change -p 8000:80 to -p 8001:80. Then point your HTTPS route at the new port too. On Route A, use tailscale serve --bg 8001. On Route B, use the proxy host in Ch. 17 · Nginx Proxy Manager. It forwards to 192.168.1.225 port 8001. The internal port (80) never changes.
You open your HTTPS address, but you cannot register. "Create Account" is missing, or a message says that registration is not allowed.SIGNUPS_ALLOWED must be true while you register. You already made the container again with SIGNUPS_ALLOWED=false? Then you have two choices. You can make it again, one more time, with SIGNUPS_ALLOWED=true (the original install command). Make your accounts. Set it back to false. Or log in to /admin on that same address with your ADMIN_TOKEN. Use Invite User to add accounts while signups stay off.
The Invite User button of the /admin panel.
22.6
A download step fails with Temporary failure resolving deb.debian.org, or with another "cannot resolve" message. The container has no working DNS server. It cannot change a name into an address. This is not a typing mistake. It does not fix itself. In the Proxmox page, select this container in the left tree. Open DNS. Select Edit. Type your router address in DNS servers (192.168.1.1 here; use your own). Then run pct reboot 104 in the host shell. Run the failed step again.
A command fails. You do not know if you are on the server or in the container. Read the prompt. In the container, it ends with the name of the container. On the server, it shows root@homelab. The prompt still shows root@homelab after pct enter? Then the command did not work. Type exit. Run the pct enter line again. Check the prompt before you paste anything else. You can paste a build block on the server by mistake. It seems to work. It installs without an error, and the app even answers. But the app is on the server, and it must not be there.
How to see that it happened, and how to undo it. The app does not open at the container address (192.168.1.225). It does open at the server address (192.168.1.220) on the same port. Then the app is on the host. To remove it, run docker rm -f vaultwarden in the host shell. Then run pct enter 104. Check that the prompt changed. Paste the build block again. You lose nothing in the container, because nothing was built there. The first command can show Error: No such container. This is good. It means that the app was never on the host. Do not paste the build block again. Look for another cause.
The page does not open. The browser spins, or says it cannot connect. Do these checks in order, in the host shell. 1. Is the container running? Run pct status 104. It must say running. If it does not, run pct start 104. 2. Is the container at the address that you typed? Run pct config 104 | grep net0. It shows the real address. A wrong digit in the wizard puts the container at another address, and nothing warns you. 3. Does the app run in the container? Run pct enter 104. Then run docker ps. An empty list means that the app did not start. Run docker ps -a to see that it stopped. Run docker logs to see why. 4. Does the app answer in the container? Run curl -I http://localhost followed by the port of the app. You get a reply here, but nothing from your PC? Then the address or your own network is the problem. The app is fine. Your browser reaches 192.168.1.225 but not the port? Then the app is down. It reaches neither? Then the container is down.
Docker does not start, or you see Cannot connect to the Docker daemon, a keyring error, or an overlay error. This is the most common failure in these guides. It means that the two container features are off. A later pct set --features can switch them off, also when you set them before. Run this in the host shell, not in the container: pct set 104 --features nesting=1,keyctl=1. Then run pct reboot 104. Then run the failed step again. Type both settings on one line. If you send only one setting, it replaces the pair and switches the other one off.
REFERENCE CARD
Paste this in Proxmox under 104 → Summary → Notes. It is a note for your future self. It is not a shell command. Before you ever run the update line on this card, compare it with the docker run you actually used at install. The card is a snapshot of the standard build: if you added anything of your own — a device, an extra -e setting, a second folder — it is not on the card, and re-running the card's line drops it. The container comes back up looking healthy with your setting gone.
📋 Reference — paste into this container's Notes in Proxmox (not a shell command)
## Vaultwarden — CT 104
dashboard https://vaultwarden.your-tailnet.ts.net <- replace with YOUR https address (http://192.168.1.225:8000 only to test) · admin /admin · docs https://github.com/dani-garcia/vaultwarden/wiki
```sh
# is it running?
docker ps --filter name=vaultwarden
curl -fsS http://localhost:8000 >/dev/null && echo OK # quick health check
tailscale serve status # Route A only: is the HTTPS front door still published?# logs (last 50)
docker logs vaultwarden --tail 50
# stop / start / restart
docker stop vaultwarden
docker start vaultwarden
docker restart vaultwarden
# manual password backup (do before any risky change):
tar czf /root/vaultwarden-$(date +%F).tar.gz -C /opt vaultwarden
# is there an update? ("Image is up to date" = no)
docker pull vaultwarden/server:latest
# update (data safe in /opt/vaultwarden):# snapshot the container first (see the after-every-build ritual) — instant rollback if the update misbehaves
docker pull vaultwarden/server:latest && docker rm -f vaultwarden && docker run -d --name vaultwarden \
--restart=unless-stopped -v /opt/vaultwarden:/data --env-file /opt/vaultwarden/.env \
-e DOMAIN=https://vaultwarden.your-tailnet.ts.net -e SIGNUPS_ALLOWED=false -p 8000:80 vaultwarden/server:latest
# ^ keep DOMAIN identical to the address you actually use — a wrong value breaks logins and 2FA# ADMIN_TOKEN lives in /opt/vaultwarden/.env (chmod 600) — never pasted here
```
A heading (it does not run). It notes which container this is, its web address, the path of the admin panel, and the official documentation. The ```sh fence below it marks the commands as a shell block when Proxmox shows the note as Markdown.
docker ps --filter name=vaultwarden
Lists the container if it runs. It shows only this one. An empty result means that it is stopped.
curl -fsS http://localhost:8000 >/dev/null && echo OK
Asks the app for its login page from inside the container. It prints OK if the app answers. This is a quick check that the service is up, before you look further.
tailscale serve status
Route A only. Prints the HTTPS address that this container publishes and the port behind it. An empty result means that the front door is gone. Run tailscale serve --bg 8000 again.
docker logs vaultwarden --tail 50
Shows the last 50 lines of the output of the container. Use it for troubleshooting.
docker stop / start / restart vaultwarden
Stops the container, starts it again, or does both in one step. Use restart, for example, after a change of the configuration.
tar czf /root/vaultwarden-$(date +%F).tar.gz -C /opt vaultwarden
Makes a compressed backup archive of the vaultwarden data folder. $(date +%F) puts today's date (YYYY-MM-DD) in the file name. -C /opt makes the archive store paths relative to /opt.
docker pull vaultwarden/server:latest
Downloads the newest version of the Vaultwarden image.
docker rm -f vaultwarden
Removes the running container by force, so that you can make it again with the new image. The linked data folder is not affected.
docker run -d --name vaultwarden … -e SIGNUPS_ALLOWED=false …
Makes the container again with the updated image. This time, signups are off, because the accounts already exist. This is the standard way to update a Docker container. Edit DOMAIN in this line to your own HTTPS address before you paste the card in Notes.
# ADMIN_TOKEN lives in … never pasted here
A reminder that the secret token stays only in the local .env file. This guide never shows it or shares it.
Part D · The app catalog
23authentik
One login for each app. You host your own single sign-on. You then put a password page in front of services that have none of their own.
This chapter needs the items below. You came here directly? Do them first. Each item takes a short time. Nothing on this page works without them.
Proxmox is installed and works at https://192.168.1.220:8006. You can log in as root. See Ch. 6 · Install Proxmox. At your first visit, the browser shows a certificate warning. Select Advanced. Then select Proceed. The warning is normal. Proxmox makes its own certificate.
The Debian 13 image is downloaded. You do this one time. See Ch. 10 · The container wizard. Without the image, the Template list in the wizard is empty.
You have an SSH key from your PC (Ch. 9 · SSH & the terminal). Or you type a password in the two password boxes of the wizard. The wizard needs one of the two. The Next button stays grey until you give one.
You know your own network numbers. Where this chapter shows 192.168.1.x, use your own numbers. The rule is in Ch. 3 · How to read this manual. The address of this chapter must be outside the range that your router gives out by itself (the DHCP pool, often .100–.200, but yours can differ). An address inside the pool can go to a phone later. Two devices on one address break name lookups, and the cause is hard to find.
You built Ch. 17 · Nginx Proxy Manager already. The steps below use that chapter: a container, an address, a key, or a job that must exist. You cannot finish this chapter without it.
Commands marked HOST run on the server. In the Proxmox page, select homelab in the left tree. Then select >_ Shell. Commands marked CT run inside the container of this chapter. The chapter shows you how to get there.
The wizard does not work?Next is grey: you gave no password and no key. Give one of the two. The Template list is empty: the Debian image is not downloaded. Download it first. Each tab is explained in Ch. 10 · The container wizard.
authentik is an identity provider. You log in to authentik one time. It then gives you access to your other web applications. This is a single sign-on system (SSO). It can also put a password page in front of an app that has none of its own. It uses the forward-auth feature of Ch. 17 · Nginx Proxy Manager for this. Your login is checked before the request reaches that app.
Notice — an advanced chapter that you can skip
This is single sign-on. It is worth the effort only in the right situation. Several people use several services. Or you want to force a login in front of an app that comes without one. You are the only user and you have a few apps? Then skip this chapter for now. The normal login of each app is enough. Come back when you want one account to open everything.
Notice — where these commands run
Everything in the command boxes below happens inside CT 134. It does not happen on the Proxmox host (the server, 192.168.1.220) or on your PC. You open the container shell in one of two ways. In the Proxmox web page, open homelab → >_ Shell and run pct enter 134. It needs no password. Or run ssh root@192.168.1.210 from your PC. Only the pct and pveam commands go back to the host. Each is marked where you use it. Opening the host Shell is a click with the mouse. What you type inside it is not.
The >_ Console button of the CT opens a login: prompt, not a shell. Use pct enter 134 from homelab → >_ Shell.
23.1
CREATE THE CONTAINER
Do this task with the mouse in the Proxmox web page. You type nothing yet. You prefer the command line? The box below does the same task with one pct create command.
Open https://192.168.1.220:8006.
Click homelab in the left tree.
Click the blue Create CT button at the top right.
Fill in each tab as the reference shows. Leave each field that is not listed at its default value.
Step 1 — the Proxmox VE login screen at https://192.168.1.220:8006.Step 2 — node homelab is selected in the left tree.Step 3 — the Create CT button.Step 4 — Create CT wizard, General tab, filled in for CT 134 / authentik.
Wizard reference — Create CT 134
Tab → Field
Entry
General → Node
Select homelab.
General → CT ID
Type 134. Do not keep the number that the wizard suggests.
General → Hostname
Type authentik.
General → Unprivileged container
Keep this box ticked.
General → Nesting
Keep this box ticked. It is ticked by default. The wizard has no box for keyctl, which Docker also needs. The host command after Finish sets it. It is the first line of the next listing.
General → Password / SSH public key
Keep the password empty. Paste your public key in the SSH field: ssh-ed25519 AAAA…your-key-here you@your-pc. With the key, you can run ssh root@192.168.1.210 from your PC. The command pct enter 134 on the host needs no password.
Template → Storage, Template
Select local. Then select debian-13-standard.
Disks → Storage, Disk size
Select local-lvm. Set 15 GiB.
CPU → Cores
Set 2 cores.
Memory → Memory (MiB)
Set 2048. Keep Swap at its default.
Network → IPv4
Select Static. Set IPv4/CIDR to 192.168.1.210/24. Set Gateway to 192.168.1.1. Keep IPv6 at its default.
DNS → DNS domain
Keep this field empty. Do not type 192.168.1.1 here.
DNS → DNS servers
Always type 192.168.1.1. Never keep this field empty.
Confirm
Read the summary. Keep Start after created unticked. Select Finish.
The wizard has no box for three settings: the Docker permission keyctl, the timezone, and start at boot. The first command below sets all three. Run these 3 commands on the host. They set the missing settings, start the container, and open its shell. Each part is explained in Ch. 10 · The container wizard, section "The host command every build needs".
⌨ Type this on the Proxmox host (homelab)
Before you run anything on this page: every 192.168.1.x address below is this manual's example network. If your own network uses different numbers, substitute yours as you type — the rule is in Ch. 3 · How to read this manual. A command that runs with the wrong address usually succeeds and leaves you unreachable.
pct set 134 --features nesting=1,keyctl=1 --onboot 1 --timezone host
pct start 134
pct enter 134                          # now INSIDE CT 134 — the rest of this page runs here
Notice — set your timezone
--timezone host copies the timezone of the server into the container. To see the valid zone names, run timedatectl list-timezones on the host. Pick your Region/City, for example America/New_York. A Docker container inside the LXC keeps its own clock. Its logs stay in UTC? Then set the timezone in the compose file. Inside CT 134, run nano /opt/authentik/docker-compose.yml. Nano is a text editor in the terminal. It fills the whole screen. Move with the arrow keys. There is no mouse. Find the environment: block under the server service and under the worker service. An environment block is a list of settings that the program reads at start. Add a line TZ: Region/City to each block. Save and close with Ctrl+O, Enter, then Ctrl+X. You prefer a mouse? Ch. 12 · After every build + common Proxmox tasks, section “Move a file to or from the server”, shows how to open the same file from your own PC. Then run docker compose up -d again inside CT 134. Compose reads the file new each time that it starts the containers. So the change stays.
Prefer the terminal? — the same task with one pct create command
⌨ Type this on the Proxmox host (homelab)
TMPL=$(pveam available --section system | awk '/debian-13-standard/{print $2}' | tail -1)
pveam download local "$TMPL"          # once per host; harmless to re-run
pct create 134 local:vztmpl/"$TMPL" \
  --hostname authentik --cores 2 --memory 2048 --rootfs local-lvm:15 \
  --net0 name=eth0,bridge=vmbr0,ip=192.168.1.210/24,gw=192.168.1.1 \
  --nameserver 192.168.1.1 --features nesting=1,keyctl=1 --unprivileged 1 --onboot 1 --timezone host
pct start 134
pct enter 134                      # you are now INSIDE CT 134 — everything below runs here
This part has no buttons. You type commands inside CT 134. You are already there from pct enter 134 above. (You closed that shell? Open homelab → >_ Shell and run pct enter 134 again.) authentik comes as a Docker Compose bundle. Download its official compose file. Make two secrets in a locked env-file. Start the stack. Run each command below inside CT 134.
⌨ Type this inside CT 134
apt update && apt install -y docker.io docker-compose curl
mkdir -p /opt/authentik && cd /opt/authentik
curl -o docker-compose.yml https://goauthentik.io/docker-compose.yml
{ echo "PG_PASS=$(openssl rand -base64 36 | tr -d '\n')"; echo "AUTHENTIK_SECRET_KEY=$(openssl rand -base64 60 | tr -d '\n')"; } > .env
chmod 600 .env                       # secrets into a locked env-file, not the command line
docker compose up -d
Explanation of each part
The Docker install line is explained in Ch. 9 · SSH & the terminal, section "Install Docker in the container". The locked env-file is explained in Ch. 11 · Security basics. These parts are specific to authentik:
apt install -y docker.io docker-compose curl
Installs three programs. Docker runs applications in containers. Docker Compose manages setups with several containers. curl downloads files from the web. The -y flag confirms the install by itself. On Debian 13, the package docker-compose is Compose v2, which authentik needs.
mkdir -p /opt/authentik && cd /opt/authentik
Makes a folder for the files of the application. The -p flag stops an error if the folder exists. The command then goes into that folder.
Downloads the official setup file of authentik. It saves it here as docker-compose.yml. This one file defines the whole stack: the server, the worker, and PostgreSQL. It fixes the version number. So it is also the file that you download again to upgrade.
{ echo …; echo …; } > .env
Makes two random secret values. It writes them in a hidden configuration file named .env. Docker Compose reads this file to set the database password and the crypto key.
openssl rand -base64 36
Makes a random string of 36 bytes, shown as base64 text, to use as a strong password.
tr -d '\n'
Removes stray newline characters from the random text. The whole secret then stays on one line.
chmod 600 .env
Restricts the permissions of the .env file. Only its owner can read it or write to it. No other user of the system can read the passwords in it.
docker compose up -d
Reads docker-compose.yml. It starts all containers of the application in the background. The -d flag means detached mode. The containers keep running after you close the terminal.
Notice — this is a heavy bundle
authentik runs three containers: a server, a worker, and PostgreSQL. This is the whole stack. Current authentik moved its caching to Postgres. It no longer needs Redis. Its own documentation asks for at least 2 CPU cores and 2 GB of RAM. So the 2048 MB of the CT is the floor. It is not extra room. This machine has 16 GB of RAM in total. Run a few heavy apps at the same time, not all of them. Watch the limit in Ch. 15 · Beszel as you add other services.
23.3
FIRST-RUN SETUP
At its very first start, authentik builds its database. This takes two to five minutes. The setup page shows an error or does not load until it finishes. Wait. Then reload.
Wait two to five minutes after you first run docker compose up -d.
Open http://192.168.1.210:9000/if/flow/initial-setup/. This page makes the admin account, akadmin, and its password. It shows an error? Wait longer. Reload.
Set a strong password for akadmin. Finish the setup flow.
Watch the first start finish with the log command on the right. Migration lines scroll past. Then they stop. The next line names the web server that starts. It says "Starting web server" or it shows a listening port. This is your signal that it is done. Press Ctrl+C to stop watching. Watching the log has no equivalent with the mouse. It is the one command in this step.
Step 2 — the initial-setup flow at :9000/if/flow/initial-setup/ makes the akadmin account.
⌨ Type this inside CT 134
cd /opt/authentik
docker compose logs -f server   # migration lines scroll on first boot; Ctrl+C to exit
23.4
PUT YOUR APPS BEHIND SSO
You do the daily work in the Admin interface. There, you register each app that must be behind the SSO login. The steps below put an app that has no login of its own behind authentik. Ch. 47 · Jellyseerr is one example. They use forward-auth in Ch. 17 · Nginx Proxy Manager.
Open http://192.168.1.210:9000. Sign in as akadmin with the password from the first-run page. Click Admin interface at the top right. The page of tiles changes to the admin sidebar.
Go to Applications → Applications. Click Create with Provider. Give the application the name of the app, for example Jellyseerr. Select Proxy Provider as the type of provider.
The app has no login of its own? Select Forward auth (single application). Set External host to the address that you use in the browser for that app. This is the name of the reverse proxy that you gave it in the "Add Proxy Host" step of Ch. 17 · Nginx Proxy Manager (for example jellyseerr.home). It is not the raw IP and port of the container.
Go to Applications → Outposts. Edit authentik Embedded Outpost. Add your new application to the list of selected applications. Forward auth does not work before this step.
In Ch. 17 · Nginx Proxy Manager, edit the proxy host of that app. Paste the forward-auth nginx block in the Advanced tab. This manual does not print that nginx block. Forward auth needs a snippet that is different for each authentik version. An old snippet locks you out of the app that it protects, in silence. It does not fail with a loud error. Take the block from the own docs of authentik for your installed version. The page of the Proxy Provider has the exact block to paste. The docs link at the top of this page goes there. Paste it in the Advanced tab of the proxy host in Ch. 17 · Nginx Proxy Manager. Then test the app again in a private browser window. Do this before you close the old window. You then still have a way back in if the block is wrong.
For daily use, open http://192.168.1.210:9000. The page My applications shows one tile for each connected app. You sign in one time for all of them.
To add a person, go to Directory → Users. Click Create.
Step 1 — the Admin interface button on the page of tiles opens the admin sidebar.Steps 2–3 — Create with Provider, Proxy Provider selected, Forward auth (single application) with its External host field.Step 4 — the Embedded Outpost editor, with the new application added to the list of selected applications.Step 6 — My applications, the page that you use each day when an app is connected.Step 7 — Directory → Users → Create adds a person.
Notice — move one app at a time
Put one app with low risk behind forward auth first. Make sure that the login step works. Only then move the other apps. A bad auth chain locks you out of each app behind it at the same time.
23.5
WHEN IT GOES WRONG
The setup page at http://192.168.1.210:9000/if/flow/initial-setup/ shows an error, a blank page, or "not found" right after you start the containers. authentik still builds its database at the first start. This usually takes one to five minutes. Wait. Then reload. Watch it finish with cd /opt/authentik && docker compose logs -f server. The migration lines stop scrolling and it settles? Then reload the page. (Press Ctrl+C to leave the log view.)
docker compose up -d fails at once with a message such as "database password required" or "secret key required". The .env file is missing or empty. So PG_PASS and AUTHENTIK_SECRET_KEY are not set. Run cd /opt/authentik && cat .env. You must see two lines. You do not? Run the command that makes the secrets, from the install block, again. Then run docker compose up -d again.
You forgot the akadmin password. Or the initial-setup page says that the setup is already done, and you cannot log in. The setup flow works only one time. Make a one-time recovery link in the terminal: cd /opt/authentik && docker compose run --rm server create_recovery_key 10 akadmin. The number 10 is the validity of the link, as in the official docs of authentik. The command prints a URL. Open it in your browser. Set a new password.
You ran the update commands, but the version on the authentik dashboard never changes. The version is fixed inside docker-compose.yml. So docker compose pull alone cannot upgrade it. Download the file again first: cd /opt/authentik && curl -o docker-compose.yml https://goauthentik.io/docker-compose.yml. Then run docker compose pull && docker compose up -d. Upgrade one major version at a time. Never skip versions.
The server or worker container restarts again and again. The logs show "password authentication failed for user authentik". This happens when you changed PG_PASS in .env after the database volume was already made. They no longer match. On a new install with no real data yet, wipe it and make it again with the command in the warning below.
Warning — down -v deletes the database
To fix a PG_PASS that does not match, on a brand-new install, run cd /opt/authentik && docker compose down -v && docker compose up -d. The -v flag deletes the database volume. Each user, application, and setting goes with it. Do this only before you set up anything real.
23.6
A download step fails with Temporary failure resolving deb.debian.org, or with another "cannot resolve" message. The container has no working DNS server. It cannot change a name into an address. This is not a typing mistake. It does not fix itself. In the Proxmox page, select this container in the left tree. Open DNS. Select Edit. Type your router address in DNS servers (192.168.1.1 here; use your own). Then run pct reboot 134 in the host shell. Run the failed step again.
A command fails. You do not know if you are on the server or in the container. Read the prompt. In the container, it ends with the name of the container. On the server, it shows root@homelab. The prompt still shows root@homelab after pct enter? Then the command did not work. Type exit. Run the pct enter line again. Check the prompt before you paste anything else. You can paste a build block on the server by mistake. It seems to work. It installs without an error, and the app even answers. But the app is on the server, and it must not be there.
How to see that it happened, and how to undo it. The app does not open at the container address (192.168.1.210). It does open at the server address (192.168.1.220) on the same port. Then the app is on the host. To remove it, run cd /opt/authentik && docker compose down (this app is a Compose stack — several containers at once, so there is no single name to remove) in the host shell. Then run pct enter 134. Check that the prompt changed. Paste the build block again. You lose nothing in the container, because nothing was built there. The first command can show Error: No such container. This is good. It means that the app was never on the host. Do not paste the build block again. Look for another cause.
The page does not open. The browser spins, or says it cannot connect. Do these checks in order, in the host shell. 1. Is the container running? Run pct status 134. It must say running. If it does not, run pct start 134. 2. Is the container at the address that you typed? Run pct config 134 | grep net0. It shows the real address. A wrong digit in the wizard puts the container at another address, and nothing warns you. 3. Does the app run in the container? Run pct enter 134. Then run docker ps. An empty list means that the app did not start. Run docker ps -a to see that it stopped. Run docker logs to see why. 4. Does the app answer in the container? Run curl -I http://localhost followed by the port of the app. You get a reply here, but nothing from your PC? Then the address or your own network is the problem. The app is fine. Your browser reaches 192.168.1.210 but not the port? Then the app is down. It reaches neither? Then the container is down.
Docker does not start, or you see Cannot connect to the Docker daemon, a keyring error, or an overlay error. This is the most common failure in these guides. It means that the two container features are off. A later pct set --features can switch them off, also when you set them before. Run this in the host shell, not in the container: pct set 134 --features nesting=1,keyctl=1. Then run pct reboot 134. Then run the failed step again. Type both settings on one line. If you send only one setting, it replaces the pair and switches the other one off.
REFERENCE CARD
Paste this in 134 → Summary → Notes. The essentials then stay with the container.
📋 Reference — paste into this container's Notes in Proxmox (not a shell command)
## authentik — CT 134
dashboard http://192.168.1.210:9000 · docs https://docs.goauthentik.io · secrets in /opt/authentik/.env
```sh
# is it running? (server, worker and postgresql — three containers)
cd /opt/authentik && docker compose ps
curl -fsS http://localhost:9000 >/dev/null && echo OK # quick health check# logs (last 50)
cd /opt/authentik && docker compose logs --tail 50
# stop / start / restart
cd /opt/authentik && docker compose stop
cd /opt/authentik && docker compose start
cd /opt/authentik && docker compose restart
# is there an update? (the version is PINNED inside the compose file, so re-fetch it first)
cd /opt/authentik && curl -o docker-compose.yml https://goauthentik.io/docker-compose.yml && docker compose pull
# update — one major version at a time (users and settings survive in the database volume + .env)# snapshot the container first (see the after-every-build ritual) — instant rollback if the update misbehaves
cd /opt/authentik && curl -o docker-compose.yml https://goauthentik.io/docker-compose.yml && docker compose pull && docker compose up -d
```
Part D · The app catalog
24Syncthing
Syncthing keeps chosen folders the same on your phone, your PC, and the computers of the people that you share with. It needs no cloud account and no central server. Your homelab is only one more peer that is always on.
This chapter needs the items below. You came here directly? Do them first. Each item takes a short time. Nothing on this page works without them.
Proxmox is installed and works at https://192.168.1.220:8006. You can log in as root. See Ch. 6 · Install Proxmox. At your first visit, the browser shows a certificate warning. Select Advanced. Then select Proceed. The warning is normal. Proxmox makes its own certificate.
The Debian 13 image is downloaded. You do this one time. See Ch. 10 · The container wizard. Without the image, the Template list in the wizard is empty.
You have an SSH key from your PC (Ch. 9 · SSH & the terminal). Or you type a password in the two password boxes of the wizard. The wizard needs one of the two. The Next button stays grey until you give one.
You know your own network numbers. Where this chapter shows 192.168.1.x, use your own numbers. The rule is in Ch. 3 · How to read this manual. The address of this chapter must be outside the range that your router gives out by itself (the DHCP pool, often .100–.200, but yours can differ). An address inside the pool can go to a phone later. Two devices on one address break name lookups, and the cause is hard to find.
Commands marked HOST run on the server. In the Proxmox page, select homelab in the left tree. Then select >_ Shell. Commands marked CT run inside the container of this chapter. The chapter shows you how to get there.
The wizard does not work?Next is grey: you gave no password and no key. Give one of the two. The Template list is empty: the Debian image is not downloaded. Download it first. Each tab is explained in Ch. 10 · The container wizard.
Syncthing syncs folders from device to device. It uses no central server. Each device connects directly to the others, and the connection is encrypted. The homelab runs a node that is always on. So your chosen folders stay in sync also when the other devices are off.
24.1
CREATE THE CONTAINER
You do this task with the mouse, in the Proxmox web page. You type nothing yet. You prefer the command line? The box below does the same task with one pct create command.
On your PC, open https://192.168.1.220:8006.
The Proxmox VE login page.
Click homelab in the left tree.
Node homelab is selected in the left tree.
Click the blue Create CT button at the top right.
The Create CT button.
Fill in each tab as the reference shows. Leave each field that is not listed at its default value.
General tab: CT ID 107, hostname syncthing.
Wizard reference — Create CT 107
Tab → Field
Entry
General → Node
Select homelab.
General → CT ID
Type 107. Do not keep the number that the wizard suggests.
General → Hostname
Type syncthing.
General → Unprivileged container
Keep this box ticked.
General → Nesting
Keep this box ticked. It is ticked by default. The wizard has no box for keyctl, which Docker also needs. The host command after Finish sets it. It is the first line of the next listing.
General → Password / SSH public key
Keep the password empty. Paste your public key in the SSH field: ssh-ed25519 AAAA…your-key-here you@your-pc. With the key, you can run ssh root@192.168.1.228 from your PC. The command pct enter 107 on the host needs no password.
Template → Storage, Template
Select local. Then select debian-13-standard.
Disks → Storage, Disk size
Select local-lvm. Set 6 GiB.
CPU → Cores
Set 1 core.
Memory → Memory (MiB)
Set 1024. Keep Swap at its default.
Network → IPv4
Select Static. Set IPv4/CIDR to 192.168.1.228/24. Set Gateway to 192.168.1.1. Keep IPv6 at its default.
DNS → DNS domain
Keep this field empty. Do not type 192.168.1.1 here.
DNS → DNS servers
Always type 192.168.1.1. Never keep this field empty.
Confirm
Read the summary. Keep Start after created unticked. Select Finish.
The wizard has no box for three settings: the Docker permission keyctl, the timezone, and start at boot. The first command below sets all three. Run these 3 commands on the host. They set the missing settings, start the container, and open its shell. Each part is explained in Ch. 10 · The container wizard, section "The host command every build needs".
⌨ Type this on the Proxmox host (homelab)
Before you run anything on this page: every 192.168.1.x address below is this manual's example network. If your own network uses different numbers, substitute yours as you type — the rule is in Ch. 3 · How to read this manual. A command that runs with the wrong address usually succeeds and leaves you unreachable.
pct set 107 --features nesting=1,keyctl=1 --onboot 1 --timezone host
pct start 107
pct enter 107                          # now INSIDE CT 107 — the rest of this page runs here
Notice — set your timezone
--timezone host copies the timezone of the server into the container. Without it, a new container uses UTC. Its logs and scheduled jobs are then wrong by some hours. To see the valid zone names, run timedatectl list-timezones on the host. Pick your Region/City, for example America/New_York. A Docker container inside the LXC keeps its own clock. Its output stays in UTC? Then also add -e TZ=Region/City to its docker run line. You meet docker run, the command that starts a Docker container, in the next section. For now, only remember this for when you get there.
Prefer the terminal? — the same task with one pct create command
⌨ Type this on the Proxmox host (homelab)
TMPL=$(pveam available --section system | awk '/debian-13-standard/{print $2}' | tail -1)
pveam download local "$TMPL"          # once per host; harmless to re-run
pct create 107 local:vztmpl/"$TMPL" \
  --hostname syncthing --cores 1 --memory 1024 --rootfs local-lvm:6 \
  --net0 name=eth0,bridge=vmbr0,ip=192.168.1.228/24,gw=192.168.1.1 \
  --nameserver 192.168.1.1 --features nesting=1,keyctl=1 --unprivileged 1 --onboot 1 --timezone host
pct start 107
pct enter 107                      # you are now INSIDE CT 107 — everything below runs here
This part has no buttons. You type commands inside CT 107. You are already there from pct enter 107 above. (You closed that shell? Open homelab → >_ Shell and run pct enter 107 again.) Opening the host Shell is the one step with the mouse. You type everything after it.
The >_ Console button of the CT opens a login: prompt, not a shell. Use pct enter 107 from homelab → >_ Shell.
Notice — where these commands run
Everything below runs inside CT 107. It does not run on the Proxmox host (the server, 192.168.1.220) or on your PC. You open that shell in one of two ways. Run pct enter 107 on the host (first homelab → >_ Shell). Or run ssh root@192.168.1.228 from your PC. (The >_ Console button of the container shows a login: prompt. The containers of this manual cannot answer it. Skip it.) Only the pct and pveam commands go back to the host. Each is marked where you use it.
Install Docker. Then start Syncthing in one Docker container. Its configuration and its synced data are in host folders that stay after updates.
Install the Docker engine.
Start Syncthing. It publishes its web page (8384), its sync port (22000, TCP and UDP), and its discovery port (21027/UDP).
Syncthing has no "server" role. Your homelab is only one peer among your devices, and it is always on. So folders stay in sync also when the other devices are off.
The web page is then at http://192.168.1.228:8384.
The docker run command prints an error and does not start? See the entry about Docker in WHEN IT GOES WRONG below.
Explanation of each part
The Docker install line and the flags -d, --name, --restart, -v, and -p are explained in Ch. 9 · SSH & the terminal, sections "Install Docker in the container" and "Anatomy of docker run". These parts are specific to Syncthing:
--hostname homelab-sync
Sets the internal network name of the container. Syncthing uses this name to tell devices apart.
-p 8384:8384
Publishes port 8384, the web control panel of Syncthing. You can then reach it from a browser.
-p 22000:22000/tcp -p 22000:22000/udp
Publishes port 22000 for TCP and UDP. Syncthing uses this port to send files between devices.
-p 21027:21027/udp
Publishes a UDP port for discovery on the local network. Syncthing uses it to find other Syncthing devices on the same network.
-e PUID=1000 -e PGID=1000
Sets the user ID and the group ID that the app runs as. The synced files then belong to a normal user (ID 1000), not to root. The permissions stay correct.
Links two host folders into the container. One holds the settings of Syncthing (config). The other holds the synced files (data). Both stay if the container is removed.
lscr.io/linuxserver/syncthing
The container image to use. It is a ready-made Syncthing package from the LinuxServer.io project.
24.3
SET A LOGIN FIRST
Warning — the web page has no login until you add one
The web page of the container listens on every address of the network (0.0.0.0:8384). This means that each device on your network can reach it, not only your PC. So anyone on your network can open it and change the sync settings. Set a user name and a password before you do anything else. Recent Syncthing versions make a random password at the first start. They do not use a blank one. They print it one time in the log. The page asks you to log in? Read the password from the log. Inside the container, run docker logs syncthing 2>&1 | grep -i -A2 "password". The password is on that line. Change it at once in Actions → Settings → GUI, because a password in a log is not a secret. You find nothing? Then your build is older than that change. The page opens with no login at all.
Open http://192.168.1.228:8384.
Go to Actions → Settings → GUI.
Set a GUI Authentication User and a Password.
Actions → Settings → GUI: set the User and Password fields.
Click Save.
The Syncthing developers say that a login is a must for a container that is exposed like this.
24.4
HOW TO USE IT
Syncthing does not use accounts. Devices pair with long Device IDs. Then you share folders between paired devices.
Open http://192.168.1.228:8384. Log in with the GUI user name and the password that you set above.
Click Actions → Show ID at the top right. The screen shows a long Device ID and a QR code. Keep this page open.
Actions → Show ID: the Device ID and its QR code.
Install Syncthing on the other device (a phone or your PC). Where to get it:
Windows and macOS: a desktop build from syncthing.net/downloads. On Windows, a tray wrapper makes it easier. The original SyncTrayzor is abandoned. A revived fork exists. Check that it is still active before you use it.
Linux desktop:sudo apt install syncthing.
Android: the official Android app was retired in December 2024. Community forks exist, and their status changes. Read the forum thread "Current status of Syncthing on Android" at forum.syncthing.net. Pick the app that the community recommends now.
iPhone: there is no official client. Möbius Sync is a paid app from another maker that works as a Syncthing client. iOS limits work in the background, so it syncs less than the other platforms. You can also use Ch. 53 · Nextcloud or Ch. 36 · Pingvin Share for that device.
Open its page. Click Add Remote Device at the bottom right. Paste the Device ID of the homelab. Give the device a name. Click Save. On a phone, you can scan the QR code instead.
Add Remote Device, on the second device.
Go back to http://192.168.1.228:8384. A message shows that the new device wants to connect. Click Add Device. Click Save. The device shows Connected under Remote Devices.
Click Add Folder. Set a Folder Label, for example Sync. Set a Folder Path under /data, for example /data/sync. Open the Sharing tab. Select the devices that must receive the folder. Click Save.
Add Folder: Folder Label, Folder Path, and the device boxes of the Sharing tab.
A New Folder message shows on each selected device. Click Add. Choose a place for the folder on that device. Click Save.
Put a file in the folder on one device. It appears on the others. The folder says Up to Date when each device has the same files. It says Syncing with a percentage during a transfer.
The folder card when each device matches.
Warning — never point Syncthing at a folder that another app manages
Give Syncthing its own folder, such as /data/sync. Do not point it at a folder that another app owns and manages. Examples are the photo library of Immich (Ch. 52 · Immich), the files of Nextcloud (Ch. 53 · Nextcloud), or the media library. Those apps write their own layout. A two-way sync fights with them. It can damage their database. It can delete files on each device when the app reorganizes. Sync copies into a Syncthing folder. Let each managed app keep its own.
Notice — Syncthing also syncs deletions
You delete a file on one device? Syncthing deletes it on all devices. For important folders, open Edit → File Versioning on the folder. Select Simple File Versioning. Changed and deleted files then go to a hidden .stversions folder on the other devices. They do not vanish.
24.5
WHEN IT GOES WRONG
A synced folder shows 'Out of Sync', or a 'permission denied' error appears, and files are never written to /data on the homelab. The host folder belongs to root. But Syncthing runs as user 1000 (PUID). This part has no buttons. An SFTP file manager can copy and rename files. But it usually cannot change the owner of a file to any user ID. So fix the owner inside CT 107. Run chown -R 1000:1000 /opt/syncthing. Then run docker restart syncthing.
The web page at http://192.168.1.228:8384 does not load, or the browser shows a security error. The LinuxServer image serves plain HTTP, not HTTPS. Make sure that the address starts with http://, not https://. It still does not load? Wait about 30 seconds for the first start. Then check that it runs with docker ps and docker logs syncthing --tail 50.
Two devices stay 'Disconnected', or one shows the other as never connecting, although both run. Each side must add the Device ID of the other side and accept it. On each device, open Actions → Show ID and copy the ID. On the other device, use Add Remote Device with that exact ID. Then share the folder from one side. Accept the 'New Folder' message on the other side. The IDs are long. They are not case-sensitive. But they are easy to mistype. Check them exactly.
Sync with the PC of someone else, across the internet, is very slow or stuck at 'Syncing'. The connection fell back to the public relay servers of Syncthing, because a direct connection cannot be made. Port forwarding tells your router to send traffic on a given port straight to this server. The exact menu is different for each router. The shape is the same. Open the admin page of your router in a browser (often 192.168.1.1). Log in. Find a section named Port Forwarding or Virtual Server. Add a rule that sends TCP and UDP port 22000 to 192.168.1.228. Ask the other person to forward port 22000 on their router too, if possible. Keep Global Discovery on, under Actions → Settings → Connections. Direct connections are much faster than relays.
24.6
A download step fails with Temporary failure resolving deb.debian.org, or with another "cannot resolve" message. The container has no working DNS server. It cannot change a name into an address. This is not a typing mistake. It does not fix itself. In the Proxmox page, select this container in the left tree. Open DNS. Select Edit. Type your router address in DNS servers (192.168.1.1 here; use your own). Then run pct reboot 107 in the host shell. Run the failed step again.
A command fails. You do not know if you are on the server or in the container. Read the prompt. In the container, it ends with the name of the container. On the server, it shows root@homelab. The prompt still shows root@homelab after pct enter? Then the command did not work. Type exit. Run the pct enter line again. Check the prompt before you paste anything else. You can paste a build block on the server by mistake. It seems to work. It installs without an error, and the app even answers. But the app is on the server, and it must not be there.
How to see that it happened, and how to undo it. The app does not open at the container address (192.168.1.228). It does open at the server address (192.168.1.220) on the same port. Then the app is on the host. To remove it, run docker rm -f syncthing in the host shell. Then run pct enter 107. Check that the prompt changed. Paste the build block again. You lose nothing in the container, because nothing was built there. The first command can show Error: No such container. This is good. It means that the app was never on the host. Do not paste the build block again. Look for another cause.
The page does not open. The browser spins, or says it cannot connect. Do these checks in order, in the host shell. 1. Is the container running? Run pct status 107. It must say running. If it does not, run pct start 107. 2. Is the container at the address that you typed? Run pct config 107 | grep net0. It shows the real address. A wrong digit in the wizard puts the container at another address, and nothing warns you. 3. Does the app run in the container? Run pct enter 107. Then run docker ps. An empty list means that the app did not start. Run docker ps -a to see that it stopped. Run docker logs to see why. 4. Does the app answer in the container? Run curl -I http://localhost followed by the port of the app. You get a reply here, but nothing from your PC? Then the address or your own network is the problem. The app is fine. Your browser reaches 192.168.1.228 but not the port? Then the app is down. It reaches neither? Then the container is down.
Docker does not start, or you see Cannot connect to the Docker daemon, a keyring error, or an overlay error. This is the most common failure in these guides. It means that the two container features are off. A later pct set --features can switch them off, also when you set them before. Run this in the host shell, not in the container: pct set 107 --features nesting=1,keyctl=1. Then run pct reboot 107. Then run the failed step again. Type both settings on one line. If you send only one setting, it replaces the pair and switches the other one off.
REFERENCE CARD
Paste this in 107 → Summary → Notes. The essentials then stay with the container. Before you ever run the update line on this card, compare it with the docker run you actually used at install. The card is a snapshot of the standard build: if you added anything of your own — a device, an extra -e setting, a second folder — it is not on the card, and re-running the card's line drops it. The container comes back up looking healthy with your setting gone.
📋 Reference — paste into this container's Notes in Proxmox (not a shell command)
## Syncthing — CT 107
dashboard http://192.168.1.228:8384 · docs https://docs.syncthing.net/
```sh
# is it running?
docker ps --filter name=syncthing
curl -fsS http://localhost:8384 >/dev/null && echo OK # quick health check# logs (last 50)
docker logs syncthing --tail 50
# stop / start / restart
docker stop syncthing
docker start syncthing
docker restart syncthing
# this node's Device ID is under Actions -> Show ID in the web UI# is there an update? ("Image is up to date" = no)
docker pull lscr.io/linuxserver/syncthing
# update (settings + synced data survive in /opt/syncthing)
docker pull lscr.io/linuxserver/syncthing && docker rm -f syncthing && docker run -d --name syncthing --restart=unless-stopped --hostname homelab-sync -p 8384:8384 -p 22000:22000/tcp -p 22000:22000/udp -p 21027:21027/udp -e PUID=1000 -e PGID=1000 -v /opt/syncthing/config:/config -v /opt/syncthing/data:/data lscr.io/linuxserver/syncthing
```
Part D · The app catalog
25Actual Budget
Give each dollar a task. This is private, local envelope budgeting that never leaves your own hardware.
This chapter needs the items below. You came here directly? Do them first. Each item takes a short time. Nothing on this page works without them.
Proxmox is installed and works at https://192.168.1.220:8006. You can log in as root. See Ch. 6 · Install Proxmox. At your first visit, the browser shows a certificate warning. Select Advanced. Then select Proceed. The warning is normal. Proxmox makes its own certificate.
The Debian 13 image is downloaded. You do this one time. See Ch. 10 · The container wizard. Without the image, the Template list in the wizard is empty.
You have an SSH key from your PC (Ch. 9 · SSH & the terminal). Or you type a password in the two password boxes of the wizard. The wizard needs one of the two. The Next button stays grey until you give one.
You know your own network numbers. Where this chapter shows 192.168.1.x, use your own numbers. The rule is in Ch. 3 · How to read this manual. The address of this chapter must be outside the range that your router gives out by itself (the DHCP pool, often .100–.200, but yours can differ). An address inside the pool can go to a phone later. Two devices on one address break name lookups, and the cause is hard to find.
Commands marked HOST run on the server. In the Proxmox page, select homelab in the left tree. Then select >_ Shell. Commands marked CT run inside the container of this chapter. The chapter shows you how to get there.
The wizard does not work?Next is grey: you gave no password and no key. Give one of the two. The Template list is empty: the Debian image is not downloaded. Download it first. Each tab is explained in Ch. 10 · The container wizard.
Warning — Actual does not run on plain http
Actual needs a browser feature called SharedArrayBuffer. A browser turns this feature on only for pages that came over HTTPS (or from localhost). The official Actual documentation says: "Actual must be served over HTTPS for SharedArrayBuffer to be enabled", and "Actual will not be able to run unless your server meets these conditions." So the plain address http://192.168.1.229:5006 does not work for daily use. The section SET UP OVER HTTPS below gives you the same two routes as the Vaultwarden chapter. Do one of them before your first run.
25.1
CREATE THE CONTAINER
You do this task with the mouse in the Proxmox web page. You type nothing. You prefer the command line? The box below the table does the same task with one pct create command.
Open https://192.168.1.220:8006.
The Proxmox VE login page.
Click homelab in the left tree.
Node homelab is selected in the left tree.
Click the blue Create CT button at the top right.
The Create CT button.
Fill in the tabs as the wizard reference shows. Leave each field that is not listed at its default value.
General tab: CT ID 108, hostname actual.
Wizard reference — Create CT 108
Tab → Field
Entry
General → Node
Select homelab.
General → CT ID
Type 108. Do not keep the number that the wizard suggests.
General → Hostname
Type actual.
General → Unprivileged container
Keep this box ticked.
General → Nesting
Keep this box ticked. It is ticked by default. The wizard has no box for keyctl, which Docker also needs. The host command after Finish sets it. It is the first line of the next listing.
General → Password / SSH public key
Keep the password empty. Paste your public key in the SSH field: ssh-ed25519 AAAA…your-key-here you@your-pc. With the key, you can run ssh root@192.168.1.229 from your PC. The command pct enter 108 on the host needs no password.
Template → Storage, Template
Select local. Then select debian-13-standard.
Disks → Storage, Disk size
Select local-lvm. Set 6 GiB.
CPU → Cores
Set 1 core.
Memory → Memory (MiB)
Set 1024. Keep Swap at its default.
Network → IPv4
Select Static. Set IPv4/CIDR to 192.168.1.229/24. Set Gateway to 192.168.1.1. Keep IPv6 at its default.
DNS → DNS domain
Keep this field empty. Do not type 192.168.1.1 here.
DNS → DNS servers
Always type 192.168.1.1. Never keep this field empty.
Confirm
Read the summary. Keep Start after created unticked. Select Finish.
The wizard has no box for three settings: the Docker permission keyctl, the timezone, and start at boot. The first command below sets all three. Run these 3 commands on the host. They set the missing settings, start the container, and open its shell. Each part is explained in Ch. 10 · The container wizard, section "The host command every build needs".
⌨ Type this on the Proxmox host (homelab)
Before you run anything on this page: every 192.168.1.x address below is this manual's example network. If your own network uses different numbers, substitute yours as you type — the rule is in Ch. 3 · How to read this manual. A command that runs with the wrong address usually succeeds and leaves you unreachable.
pct set 108 --features nesting=1,keyctl=1 --onboot 1 --timezone host
pct start 108
pct enter 108                          # now INSIDE CT 108 — the rest of this page runs here
Notice — set your timezone
The option --timezone host makes the container follow the clock of the host. Run timedatectl list-timezones to see every valid name. It prints a long list that you can scroll. Use the arrow keys to move through it. Press q to go back to the prompt. Pick the line that matches your city, for example America/New_York or Europe/Berlin. A wrong zone only makes clocks and schedules look odd. Nothing breaks.
Prefer the terminal? — the same task with one pct create command
⌨ Type this on the Proxmox host (homelab)
TMPL=$(pveam available --section system | awk '/debian-13-standard/{print $2}' | tail -1)
pveam download local "$TMPL"          # once per host; harmless to re-run
pct create 108 local:vztmpl/"$TMPL" \
  --hostname actual --cores 1 --memory 1024 --rootfs local-lvm:6 \
  --net0 name=eth0,bridge=vmbr0,ip=192.168.1.229/24,gw=192.168.1.1 \
  --nameserver 192.168.1.1 --features nesting=1,keyctl=1 --unprivileged 1 --onboot 1 --timezone host
pct start 108
pct enter 108                      # you are now INSIDE CT 108 — everything below runs here
This part has no buttons. You type commands inside CT 108. You are already there from pct enter 108 above. (You closed that shell? Open homelab → >_ Shell and run pct enter 108 again.) Opening the host Shell is the one step with the mouse. You type everything after it.
Notice — where these commands run
Each command in this section runs inside CT 108. It does not run on the host. You open that shell in one of two ways. Both are equal. Open homelab → >_ Shell in the Proxmox web page and run pct enter 108. It needs no password. Or run ssh root@192.168.1.229 from your PC. Only the pct command runs on the host itself. It enters or manages the container from the outside.
Type these commands inside CT 108. Do not type them on the Proxmox host (the server at 192.168.1.220) or on your PC.
Open the Proxmox web page at https://192.168.1.220:8006.
Open homelab → >_ Shell and run pct enter 108. It puts you inside the container as root, with no password. You can also run ssh root@192.168.1.229 from any computer.
The >_ Console button of the CT, top right, opens a login: prompt. It does not open a shell. Use pct enter.
Check that the shell prompt shows the name of CT 108 before you continue. It looks like root@actual:~#.
Docker later says command not found, or the container does not start right after the install? Run systemctl enable --now docker. enable makes Docker start by itself from now on. --now also starts it at once. Then try the docker run line again.
⌨ Type this inside CT 108
apt update && apt install -y docker.io curl
docker run -d --name actual --restart=unless-stopped -p 5006:5006 \
  -v /opt/actual:/data actualbudget/actual-server:latest
Explanation of each part
The Docker install line and the flags -d, --name, --restart, -v, and -p are explained in Ch. 9 · SSH & the terminal, sections "Install Docker in the container" and "Anatomy of docker run". These parts are specific to Actual:
-p 5006:5006
Opens port 5006, so that you can reach the Actual Budget web app from your browser.
-v /opt/actual:/data
Links a folder on the CT to the data folder of the container. Your budget data then stays also if you delete the container. Back up this folder. It holds your finances.
actualbudget/actual-server:latest
The container image to run: the official Actual Budget server, in its most recent published version.
25.3
SET UP OVER HTTPS
Pick one route. Both give a certificate that your devices trust. Ch. 22 · Vaultwarden, section "Set up over HTTPS", explains each step in full with its reasons. This section gives the values for Actual.
Route A — a free Tailscale certificate (no domain needed)
On the Proxmox host, give CT 108 the tunnel device that Tailscale needs. Then restart the container.
Inside CT 108, install Tailscale. Sign in. Publish port 5006 over HTTPS.
Write down the address that tailscale serve status prints. It looks like https://actual.your-tailnet.ts.net. This is your HTTPS address.
⌨ Type this on the Proxmox host (homelab)
pct set 108 --dev0 /dev/net/tun   # the tunnel device Tailscale needs
pct reboot 108                    # the device appears only after a restart
⌨ Type this inside CT 108
curl -fsSL https://tailscale.com/install.sh | sh
tailscale up                 # open the printed URL on your PC or phone and sign in
tailscale serve --bg 5006    # serves this container's port 5006 over HTTPS
tailscale serve status       # prints the exact https://actual.….ts.net address — write it down
Only devices that are signed in to your tailnet can open this address. Install the Tailscale app on each phone and PC that uses Actual.
Route B — a domain that you own (about $10 each year)
Follow steps 1 to 3 of Route B in Ch. 22 · Vaultwarden: buy a domain, point it at your DNS provider, and make an API token.
In Ch. 17 · Nginx Proxy Manager, add a proxy host for actual.yourdomain.com. It forwards to 192.168.1.229, port 5006.
Open the SSL tab of that host. Select Request a new certificate → Use a DNS Challenge. Choose your provider. Paste the API token. Tick Force SSL.
In the AdGuard web page, add a DNS rewrite for actual.yourdomain.com to 192.168.1.224. Add the domain as a split-DNS entry in the Tailscale admin console for use away from home. Ch. 22 · Vaultwarden, Route B, step 6, explains both.
Your HTTPS address is https://actual.yourdomain.com.
The Actual container needs no change for either route. It has no setting for its own address.
25.4
FIRST RUN
The server runs, and it has an HTTPS address. Open the web app and secure it.
On any computer or phone, open your HTTPS address in a web browser. A plain http:// address does not work, as the warning at the top of this chapter says.
Set a server password. You type it each time, so write it down.
Back up the folder /opt/actual. It holds two subfolders. server-files holds your password. user-files holds your budget. You can copy this folder to your PC with a file window. You do not need a terminal. Ch. 12 · After every build + common Proxmox tasks, section “Move a file to or from the server”, shows the whole way. It shows which program to install (WinSCP on Windows, Cyberduck on a Mac, the file manager on Linux). It gives the address to connect to (sftp://root@192.168.1.229, this container and not the server). It also says what to do if the server refuses your key.
25.5
USE IT — BUILD YOUR FIRST BUDGET
Open your HTTPS address. Log in with the server password that you set. At the first visit, the files screen shows. Click Create new file. Give the budget a name.
Files screen, first visit — Create new file.
Add an account. Click + Add account at the bottom of the left sidebar. Select Create a local account. Give it a name, for example Checking. Enter the current balance. Do not set the off-budget option for usual accounts.
The + Add account dialog.
Record a purchase. Click the account in the sidebar. Then click Add New at the top of the register. Fill in Payee, Category, and the amount. Type a new name in a dropdown. Actual can make it at once.
The register of the account, the Add New row.
Set the budget. Open Budget in the sidebar. Click the Budgeted cell of a category. Type the amount that you plan to spend this month. The To Budget number at the top goes down. Continue until it reaches zero.
The Budget page: rows of categories and the To Budget total.
Each day, enter transactions when money moves. Watch the Balance column of each category. A red negative balance means that this category is overspent. Lower the Budgeted amount of another category. Raise this one.
Notice — phones work too
Open the same HTTPS address in the browser of the phone and log in. You edit the same budget. Enter a purchase while you are in the store. This keeps the budget correct.
25.6
WHEN IT GOES WRONG
The page opens, but it shows an error about SharedArrayBuffer, or it never finishes loading.
You opened Actual over plain http://. Actual runs only over HTTPS. Use the address of Route A or Route B in SET UP OVER HTTPS. Plain http://192.168.1.229:5006 is useful only to check that the container answers.
You forgot the server password and cannot log in.
Do not delete any file to fix this. Actual stores your password, scrambled, in a file named account.sqlite in the data folder. That same file also lists each budget that the server knows. Deleting it would clear the password, and the server would forget your budget too. Use the reset script that Actual ships for this. Run these steps inside CT 108. First run docker exec -it actual /bin/sh. This opens a shell inside the running container. Then run node /app/src/scripts/reset-password.js. Follow its prompt to set a new password. Type exit to leave that shell. Open your HTTPS address again. Log in with the new password. Your budget file is still registered. You add nothing again.
The web app works on your computer, but the phone cannot connect.
On Route A, check that the phone has the Tailscale app, and that it is connected. The .ts.net address resolves nowhere else. On Route B, check that the name reaches NPM on the network that the phone uses. At home, this is the AdGuard rewrite. Away from home, this is the split-DNS entry of Tailscale.
Right after the install, docker: command not found, or the container fails to start with a cgroup or permission error.
First start the Docker service inside CT 108. Run systemctl enable --now docker. Then run the docker run line again. See also the entry about Docker at the end of this section.
The browser shows "This site can't be reached" at your HTTPS address.
The container is not running, or the HTTPS front door is missing. Inside CT 108, run docker ps. actual is not in the list? Run docker logs actual --tail 50 to see why it stopped. Then run docker restart actual. On Route A, also run tailscale serve status. An empty result means that you must run tailscale serve --bg 5006 again.
25.7
A download step fails with Temporary failure resolving deb.debian.org, or with another "cannot resolve" message. The container has no working DNS server. It cannot change a name into an address. This is not a typing mistake. It does not fix itself. In the Proxmox page, select this container in the left tree. Open DNS. Select Edit. Type your router address in DNS servers (192.168.1.1 here; use your own). Then run pct reboot 108 in the host shell. Run the failed step again.
A command fails. You do not know if you are on the server or in the container. Read the prompt. In the container, it ends with the name of the container. On the server, it shows root@homelab. The prompt still shows root@homelab after pct enter? Then the command did not work. Type exit. Run the pct enter line again. Check the prompt before you paste anything else. You can paste a build block on the server by mistake. It seems to work. It installs without an error, and the app even answers. But the app is on the server, and it must not be there.
How to see that it happened, and how to undo it. The app does not open at the container address (192.168.1.229). It does open at the server address (192.168.1.220) on the same port. Then the app is on the host. To remove it, run docker rm -f actual in the host shell. Then run pct enter 108. Check that the prompt changed. Paste the build block again. You lose nothing in the container, because nothing was built there. The first command can show Error: No such container. This is good. It means that the app was never on the host. Do not paste the build block again. Look for another cause.
The page does not open. The browser spins, or says it cannot connect. Do these checks in order, in the host shell. 1. Is the container running? Run pct status 108. It must say running. If it does not, run pct start 108. 2. Is the container at the address that you typed? Run pct config 108 | grep net0. It shows the real address. A wrong digit in the wizard puts the container at another address, and nothing warns you. 3. Does the app run in the container? Run pct enter 108. Then run docker ps. An empty list means that the app did not start. Run docker ps -a to see that it stopped. Run docker logs to see why. 4. Does the app answer in the container? Run curl -I http://localhost followed by the port of the app. You get a reply here, but nothing from your PC? Then the address or your own network is the problem. The app is fine. Your browser reaches 192.168.1.229 but not the port? Then the app is down. It reaches neither? Then the container is down.
Docker does not start, or you see Cannot connect to the Docker daemon, a keyring error, or an overlay error. This is the most common failure in these guides. It means that the two container features are off. A later pct set --features can switch them off, also when you set them before. Run this in the host shell, not in the container: pct set 108 --features nesting=1,keyctl=1. Then run pct reboot 108. Then run the failed step again. Type both settings on one line. If you send only one setting, it replaces the pair and switches the other one off.
REFERENCE CARD
Paste this in 108 → Summary → Notes in Proxmox. The essentials then stay with the container. Before you ever run the update line on this card, compare it with the docker run you actually used at install. The card is a snapshot of the standard build: if you added anything of your own — a device, an extra -e setting, a second folder — it is not on the card, and re-running the card's line drops it. The container comes back up looking healthy with your setting gone.
📋 Reference — paste into this container's Notes in Proxmox (not a shell command)
## Actual Budget — CT 108
dashboard https://actual.your-tailnet.ts.net <- replace with YOUR https address (http://192.168.1.229:5006 only to test) · docs https://actualbudget.org/docs/
```sh
# is it running?
docker ps --filter name=actual
curl -fsS http://localhost:5006 >/dev/null && echo OK # quick health check
tailscale serve status # Route A only: is the HTTPS front door still published?# logs (last 50)
docker logs actual --tail 50
# stop / start / restart
docker stop actual
docker start actual
docker restart actual
# is there an update? ("Image is up to date" = no)
docker pull actualbudget/actual-server:latest
# update (budget safe in /opt/actual)
docker pull actualbudget/actual-server:latest && docker rm -f actual && docker run -d --name actual \
--restart=unless-stopped -p 5006:5006 -v /opt/actual:/data actualbudget/actual-server:latest
```
Explanation of each part
docker ps --filter name=actual
Lists the container if it runs. An empty result means that it is stopped. Check the logs next.
curl -fsS http://localhost:5006 >/dev/null && echo OK
Asks the app for its web page from inside the container. It prints OK only when the server answers. This is a fast proof that Actual is up.
tailscale serve status
Route A only. Prints the HTTPS address that this container publishes. An empty result means that the front door is gone. Run tailscale serve --bg 5006 again.
docker stop actual · docker start actual · docker restart actual
Stops, starts, or restarts the container, for example to apply a fix or to recover from a crash.
docker logs actual --tail 50
Shows the last 50 lines of the log of the app, for troubleshooting.
docker pull actualbudget/actual-server:latest
Downloads the newest version of the Actual Budget container image.
docker rm -f actual
Removes the old container by force. It stops the container first, so that you can replace it.
docker run … actualbudget/actual-server:latest
Makes the container again from the new image. It uses the same settings as the original: background mode, automatic restart, web port 5006, and the same data folder. Your budget data stays.
Part D · The app catalog
26FreshRSS
FreshRSS pulls new posts from sites, blogs, YouTube channels, and subreddits into your own feed, in time order. It has no algorithm and no ads.
This chapter needs the items below. You came here directly? Do them first. Each item takes a short time. Nothing on this page works without them.
Proxmox is installed and works at https://192.168.1.220:8006. You can log in as root. See Ch. 6 · Install Proxmox. At your first visit, the browser shows a certificate warning. Select Advanced. Then select Proceed. The warning is normal. Proxmox makes its own certificate.
The Debian 13 image is downloaded. You do this one time. See Ch. 10 · The container wizard. Without the image, the Template list in the wizard is empty.
You have an SSH key from your PC (Ch. 9 · SSH & the terminal). Or you type a password in the two password boxes of the wizard. The wizard needs one of the two. The Next button stays grey until you give one.
You know your own network numbers. Where this chapter shows 192.168.1.x, use your own numbers. The rule is in Ch. 3 · How to read this manual. The address of this chapter must be outside the range that your router gives out by itself (the DHCP pool, often .100–.200, but yours can differ). An address inside the pool can go to a phone later. Two devices on one address break name lookups, and the cause is hard to find.
Commands marked HOST run on the server. In the Proxmox page, select homelab in the left tree. Then select >_ Shell. Commands marked CT run inside the container of this chapter. The chapter shows you how to get there.
The wizard does not work?Next is grey: you gave no password and no key. Give one of the two. The Template list is empty: the Debian image is not downloaded. Download it first. Each tab is explained in Ch. 10 · The container wizard.
26.1
CREATE THE CONTAINER
You do this task with the mouse in the Proxmox web page. You type nothing. You prefer the command line? The box below does the same task with one pct create command.
Open https://192.168.1.220:8006.
The Proxmox VE login screen.
Click homelab in the left tree.
Select the node.
Click the blue Create CT button at the top right.
The Create CT button.
Fill in the tabs as the table on the right shows.
General tab — CT ID 109, hostname freshrss.
Wizard reference — Create CT 109
Tab → Field
Entry
General → Node
Select homelab.
General → CT ID
Type 109. Do not keep the number that the wizard suggests.
General → Hostname
Type freshrss.
General → Unprivileged container
Keep this box ticked.
General → Nesting
Keep this box ticked. It is ticked by default. The wizard has no box for keyctl, which Docker also needs. The host command after Finish sets it. It is the first line of the next listing.
General → Password / SSH public key
Keep the password empty. Paste your public key in the SSH field: ssh-ed25519 AAAA…your-key-here you@your-pc. With the key, you can run ssh root@192.168.1.230 from your PC. The command pct enter 109 on the host needs no password.
Template → Storage, Template
Select local. Then select debian-13-standard.
Disks → Storage, Disk size
Select local-lvm. Set 6 GiB.
CPU → Cores
Set 1 core.
Memory → Memory (MiB)
Set 1024. Keep Swap at its default.
Network → IPv4
Select Static. Set IPv4/CIDR to 192.168.1.230/24. Set Gateway to 192.168.1.1. Keep IPv6 at its default.
DNS → DNS domain
Keep this field empty. Do not type 192.168.1.1 here.
DNS → DNS servers
Always type 192.168.1.1. Never keep this field empty.
Confirm
Read the summary. Keep Start after created unticked. Select Finish.
The wizard has no box for three settings: the Docker permission keyctl, the timezone, and start at boot. The first command below sets all three. Run these 3 commands on the host. They set the missing settings, start the container, and open its shell. Each part is explained in Ch. 10 · The container wizard, section "The host command every build needs".
⌨ Type this on the Proxmox host (homelab)
Before you run anything on this page: every 192.168.1.x address below is this manual's example network. If your own network uses different numbers, substitute yours as you type — the rule is in Ch. 3 · How to read this manual. A command that runs with the wrong address usually succeeds and leaves you unreachable.
pct set 109 --features nesting=1,keyctl=1 --onboot 1 --timezone host
pct start 109
pct enter 109                          # now INSIDE CT 109 — the rest of this page runs here
Prefer the terminal? — the same task with one pct create command
⌨ Type this on the Proxmox host (homelab)
TMPL=$(pveam available --section system | awk '/debian-13-standard/{print $2}' | tail -1)
pveam download local "$TMPL"          # once per host; harmless to re-run
pct create 109 local:vztmpl/"$TMPL" \
  --hostname freshrss --cores 1 --memory 1024 --rootfs local-lvm:6 \
  --net0 name=eth0,bridge=vmbr0,ip=192.168.1.230/24,gw=192.168.1.1 \
  --nameserver 192.168.1.1 --features nesting=1,keyctl=1 --unprivileged 1 --onboot 1 --timezone host
pct start 109
pct enter 109                      # you are now INSIDE CT 109 — everything below runs here
This part has no buttons. You type commands inside CT 109. You are already there from pct enter 109 above. (You closed that shell? Open homelab → >_ Shell and run pct enter 109 again.) Opening the host Shell is the one step with the mouse.
The >_ Console button of the CT opens a login: prompt, not a shell. Use pct enter 109 from homelab → >_ Shell.
Notice — two ways to reach the same shell
pct enter 109 on the host (first homelab → >_ Shell) needs no password. ssh root@192.168.1.230 from your PC opens the same shell. It uses the SSH key that you pasted in the General tab of the wizard when you made the container. The password field there was empty, so there is no password to type. (The >_ Console button of the container shows a login: prompt. The containers of this manual cannot answer it. Skip it.) Everything below runs inside CT 109. Only the pct and pveam commands of the previous section run on the host.
Install Docker. Then start FreshRSS from the LinuxServer.io image. The app listens on port 80 inside the container. The command on the right publishes it on port 8081.
Notice — set your timezone
Replace Region/City with your own zone, for example Europe/Paris or America/New_York. To list the valid values, run timedatectl list-timezones. Without it, feed times show in UTC.
The Docker install line and the flags -d, --name, --restart, -v, and -p are explained in Ch. 9 · SSH & the terminal, sections "Install Docker in the container" and "Anatomy of docker run". These parts are specific to FreshRSS:
-p 8081:80
Makes the internal web server of the app (port 80) reachable on your network at port 8081.
-e PUID=1000 -e PGID=1000
Tells the container which user ID and group ID own its files. This is the same PUID, PGID, and TZ pattern as Ch. 24 · Syncthing.
-e TZ=Region/City
Sets the timezone of the container. Dates and times that it shows then match your local time.
-v /opt/freshrss:/config
Links a host folder to the config folder of the container. Your account, your feeds, and the read and unread state stay after restarts. You can browse or back up this folder with a file manager over SFTP, in the same way as in Ch. 12 · After every build + common Proxmox tasks, section "Move a file to or from the server". Connect to the IP of the CT. Look in /opt/freshrss.
lscr.io/linuxserver/freshrss
The container image to use: a ready-made FreshRSS package from the LinuxServer.io project.
26.3
FIRST-RUN SETUP
Open http://192.168.1.230:8081.
Run the wizard. SQLite is fine. Make your login.
The database step of the install wizard, with SQLite selected. The own setup page of FreshRSS is light only. The rest of the app follows the theme of your device.
Select Subscribe. Paste the feed URLs of sites. A YouTube channel or a subreddit also works: https://www.youtube.com/feeds/videos.xml?channel_id=CHANNEL_ID and https://www.reddit.com/r/SUBREDDIT.rss.
Subscribe dialog — the Feed URL field and the category picker.
To find a YouTube CHANNEL_ID: open the channel. Right-click the page. Select View page source. Search for channelId. It is the value that starts with UC.
Notice — Reddit feeds often fail
Reddit blocks the IPs of data centers and the default user agents of feed readers. So a Reddit feed can return an error or never load. Open the settings of that feed. Set a browser User-Agent, such as Mozilla/5.0. It still fails? Remove the feed.
26.4
HOW TO USE IT
After the setup wizard, you do three tasks: add feeds, read the stream, and star the articles that you want to keep.
Open http://192.168.1.230:8081. Log in with the account from the setup wizard.
To add a feed, click the + button next to Subscription management. Put the feed address in the Feed URL field. Pick a category if you want one. New feeds go to Uncategorized. The address of a normal homepage usually works too. FreshRSS finds the feed by itself.
Click Main stream in the sidebar. This view shows all unread articles from all feeds, newest first. Click a title to open the article in place. Click the globe icon to open the original page on the site.
Main stream — all unread articles, newest first.
Click the envelope icon to set an article to read or unread. Click Mark as read to clear the whole view. The unread counters in the sidebar show where the new articles are.
Click the star icon to make an article a favourite. You find these in the Favourites view. FreshRSS deletes old read articles from time to time, to save space. The schedule is under Configuration → Archiving. It never deletes favourites. So star everything that you want to keep.
Feeds refresh by themselves in the background. Click Actualize at the top to fetch at once.
Notice — the gear in the sidebar is where everything is
Move the pointer over a feed or a category in the sidebar. A gear icon appears. Click it to open the own settings of that feed, its statistics, Actualize, and Mark as read. Set the browser User-Agent for a blocked Reddit feed there too.
Move the pointer over a feed to see its gear icon. It opens the settings of that feed, including the User-Agent override.
26.5
WHEN IT GOES WRONG
A Reddit feed shows an error or never loads new posts (Reddit returns 403 or 429). Reddit blocks the IPs of data centers and the default user agents of feed readers. Open that feed in FreshRSS. Go to its settings. Under the HTTP or advanced options of the feed, set a browser User-Agent such as Mozilla/5.0. It still fails? Remove the Reddit feed.
The setup wizard says that the data or cache folder is not writable, or FreshRSS cannot save its configuration. The host folder does not belong to the user ID that the container runs as. This is the PUID number from the docker run command, 1000. Inside CT 109, run chown -R 1000:1000 /opt/freshrss. Then run docker restart freshrss. Reload the wizard in your browser.
You paste the web address of a site under Subscribe. It says "no feed found" and the feed is not added. You pasted the normal web page, not its feed. Look on the site for an RSS or Atom link. It is often at /feed, /rss, or /atom.xml. Paste that. Or paste the homepage of the site and let FreshRSS find the feed by itself. For YouTube, use the videos.xml?channel_id= URL shown above.
26.6
A download step fails with Temporary failure resolving deb.debian.org, or with another "cannot resolve" message. The container has no working DNS server. It cannot change a name into an address. This is not a typing mistake. It does not fix itself. In the Proxmox page, select this container in the left tree. Open DNS. Select Edit. Type your router address in DNS servers (192.168.1.1 here; use your own). Then run pct reboot 109 in the host shell. Run the failed step again.
A command fails. You do not know if you are on the server or in the container. Read the prompt. In the container, it ends with the name of the container. On the server, it shows root@homelab. The prompt still shows root@homelab after pct enter? Then the command did not work. Type exit. Run the pct enter line again. Check the prompt before you paste anything else. You can paste a build block on the server by mistake. It seems to work. It installs without an error, and the app even answers. But the app is on the server, and it must not be there.
How to see that it happened, and how to undo it. The app does not open at the container address (192.168.1.230). It does open at the server address (192.168.1.220) on the same port. Then the app is on the host. To remove it, run docker rm -f freshrss in the host shell. Then run pct enter 109. Check that the prompt changed. Paste the build block again. You lose nothing in the container, because nothing was built there. The first command can show Error: No such container. This is good. It means that the app was never on the host. Do not paste the build block again. Look for another cause.
The page does not open. The browser spins, or says it cannot connect. Do these checks in order, in the host shell. 1. Is the container running? Run pct status 109. It must say running. If it does not, run pct start 109. 2. Is the container at the address that you typed? Run pct config 109 | grep net0. It shows the real address. A wrong digit in the wizard puts the container at another address, and nothing warns you. 3. Does the app run in the container? Run pct enter 109. Then run docker ps. An empty list means that the app did not start. Run docker ps -a to see that it stopped. Run docker logs to see why. 4. Does the app answer in the container? Run curl -I http://localhost followed by the port of the app. You get a reply here, but nothing from your PC? Then the address or your own network is the problem. The app is fine. Your browser reaches 192.168.1.230 but not the port? Then the app is down. It reaches neither? Then the container is down.
Docker does not start, or you see Cannot connect to the Docker daemon, a keyring error, or an overlay error. This is the most common failure in these guides. It means that the two container features are off. A later pct set --features can switch them off, also when you set them before. Run this in the host shell, not in the container: pct set 109 --features nesting=1,keyctl=1. Then run pct reboot 109. Then run the failed step again. Type both settings on one line. If you send only one setting, it replaces the pair and switches the other one off.
REFERENCE CARD
Paste this in the Notes of the container: click 109 in the Proxmox tree. Then select Summary → Notes. Before you ever run the update line on this card, compare it with the docker run you actually used at install. The card is a snapshot of the standard build: if you added anything of your own — a device, an extra -e setting, a second folder — it is not on the card, and re-running the card's line drops it. The container comes back up looking healthy with your setting gone. The update line below still says TZ=Region/City. That is a placeholder, not a real timezone: run it unchanged and the app comes back on UTC while looking perfectly healthy, so every schedule and timestamp silently shifts. Put your own zone in before you use this card — the same one you set at install.
📋 Reference — paste into this container's Notes in Proxmox (not a shell command)
## FreshRSS — CT 109
dashboard http://192.168.1.230:8081 · docs https://docs.linuxserver.io/images/docker-freshrss/
```sh
# is it running?
docker ps --filter name=freshrss
curl -fsS http://localhost:8081 >/dev/null && echo OK # quick health check# logs (last 50)
docker logs freshrss --tail 50
# stop / start / restart
docker stop freshrss
docker start freshrss
docker restart freshrss
# is there an update? ("Image is up to date" = no)
docker pull lscr.io/linuxserver/freshrss
# update (settings survive in /opt/freshrss)
docker pull lscr.io/linuxserver/freshrss && docker rm -f freshrss && docker run -d --name freshrss --restart=unless-stopped -p 8081:80 -e PUID=1000 -e PGID=1000 -e TZ=Region/City -v /opt/freshrss:/config lscr.io/linuxserver/freshrss
```
Part D · The app catalog
27Mealie
Save recipes, plan meals, and make shopping lists automatically. It all runs on your own server, not in a company cloud.
This chapter needs the items below. You came here directly? Do them first. Each item takes a short time. Nothing on this page works without them.
Proxmox is installed and works at https://192.168.1.220:8006. You can log in as root. See Ch. 6 · Install Proxmox. At your first visit, the browser shows a certificate warning. Select Advanced. Then select Proceed. The warning is normal. Proxmox makes its own certificate.
The Debian 13 image is downloaded. You do this one time. See Ch. 10 · The container wizard. Without the image, the Template list in the wizard is empty.
You have an SSH key from your PC (Ch. 9 · SSH & the terminal). Or you type a password in the two password boxes of the wizard. The wizard needs one of the two. The Next button stays grey until you give one.
You know your own network numbers. Where this chapter shows 192.168.1.x, use your own numbers. The rule is in Ch. 3 · How to read this manual. The address of this chapter must be outside the range that your router gives out by itself (the DHCP pool, often .100–.200, but yours can differ). An address inside the pool can go to a phone later. Two devices on one address break name lookups, and the cause is hard to find.
Commands marked HOST run on the server. In the Proxmox page, select homelab in the left tree. Then select >_ Shell. Commands marked CT run inside the container of this chapter. The chapter shows you how to get there.
The wizard does not work?Next is grey: you gave no password and no key. Give one of the two. The Template list is empty: the Debian image is not downloaded. Download it first. Each tab is explained in Ch. 10 · The container wizard.
Mealie imports recipes in three ways. The first way is a website URL. It removes the blog text around the recipe. The second way is a photo of a written recipe. The third way is a video URL, for cooking videos on YouTube or Instagram. The import of a website URL works with no setup. The photo and the video need an AI provider. See the last part of the install steps.
27.1
CREATE THE CONTAINER
You do this task with the mouse in the Proxmox web page. You type nothing, except the one command that is named below.
Open https://192.168.1.220:8006.
The Proxmox VE login page.
Click homelab in the left tree.
Node homelab is selected in the left tree.
Click the blue Create CT button at the top right.
The Create CT button.
Fill in the tabs as the table below shows.
Create CT wizard, General tab, filled in for CT 110.
Wizard reference — Create CT 110
Tab → Field
Entry
General → Node
Select homelab.
General → CT ID
Type 110. Do not keep the number that the wizard suggests.
General → Hostname
Type mealie.
General → Unprivileged container
Keep this box ticked.
General → Nesting
Keep this box ticked. It is ticked by default. The wizard has no box for keyctl, which Docker also needs. The host command after Finish sets it. It is the first line of the next listing.
General → Password / SSH public key
Keep the password empty. Paste your public key in the SSH field: ssh-ed25519 AAAA…your-key-here you@your-pc. With the key, you can run ssh root@192.168.1.231 from your PC. The command pct enter 110 on the host needs no password.
Template → Storage, Template
Select local. Then select debian-13-standard.
Disks → Storage, Disk size
Select local-lvm. Set 6 GiB.
CPU → Cores
Set 1 core.
Memory → Memory (MiB)
Set 1024. Keep Swap at its default.
Network → IPv4
Select Static. Set IPv4/CIDR to 192.168.1.231/24. Set Gateway to 192.168.1.1. Keep IPv6 at its default.
DNS → DNS domain
Keep this field empty. Do not type 192.168.1.1 here.
DNS → DNS servers
Always type 192.168.1.1. Never keep this field empty.
Confirm
Read the summary. Keep Start after created unticked. Select Finish.
The wizard has no box for three settings: the Docker permission keyctl, the timezone, and start at boot. The first command below sets all three. Run these 3 commands on the host. They set the missing settings, start the container, and open its shell. Each part is explained in Ch. 10 · The container wizard, section "The host command every build needs".
⌨ Type this on the Proxmox host (homelab)
Before you run anything on this page: every 192.168.1.x address below is this manual's example network. If your own network uses different numbers, substitute yours as you type — the rule is in Ch. 3 · How to read this manual. A command that runs with the wrong address usually succeeds and leaves you unreachable.
pct set 110 --features nesting=1,keyctl=1 --onboot 1 --timezone host
pct start 110
pct enter 110                          # now INSIDE CT 110 — the rest of this page runs here
Prefer the terminal? — the same task with one pct create command
⌨ Type this on the Proxmox host (homelab)
TMPL=$(pveam available --section system | awk '/debian-13-standard/{print $2}' | tail -1)
pveam download local "$TMPL"          # once per host; harmless to re-run
pct create 110 local:vztmpl/"$TMPL" \
  --hostname mealie --cores 1 --memory 1024 --rootfs local-lvm:6 \
  --net0 name=eth0,bridge=vmbr0,ip=192.168.1.231/24,gw=192.168.1.1 \
  --nameserver 192.168.1.1 --features nesting=1,keyctl=1 --unprivileged 1 --onboot 1 --timezone host
pct start 110
pct enter 110                      # you are now INSIDE CT 110 — everything below runs here
After the container exists, you type the rest of this page in the shell of the container. You do not type it on homelab. You open that shell in one of two ways. Run pct enter 110 on the host (first homelab → >_ Shell). Or run ssh root@192.168.1.231 from your PC. (The >_ Console button of the container shows a login: prompt. The containers of this manual cannot answer it. The wizard gave this container an SSH key and no root password. So there is no password to type there. Skip it. You do not miss anything.) Only the pct and pveam commands go back to the host. Each guide marks those commands where you use them.
The >_ Console button of the CT opens a login: prompt, not a shell. Use pct enter 110 from homelab → >_ Shell.
This part has no buttons. These commands run inside CT 110. In the host Shell (homelab → >_ Shell), run pct enter 110. You are still inside from the method that you used above (pct enter 110 or ssh root@192.168.1.231)? Then continue. Do not run them on the Proxmox host (192.168.1.220) or on your PC. Docker and Mealie run only inside the container.
Replace Region/City with your own zone, for example Europe/Paris or America/Chicago. Run timedatectl list-timezones to see every valid name. This keeps the times that Mealie shows in step with your clock. A wrong zone only makes clocks and schedules look odd. Nothing breaks.
Explanation of each part
The Docker install line and the flags -d, --name, --restart, -v, and -p are explained in Ch. 9 · SSH & the terminal, sections "Install Docker in the container" and "Anatomy of docker run". These parts are specific to Mealie:
-p 9000:9000
Makes the web page of the application reachable on port 9000 from your browser.
-e ALLOW_SIGNUP=false
Turns off public sign-up. Only accounts that you make by hand can log in.
-e TZ=Region/City
Sets the time zone of the container. The dates and times that Mealie shows then match your local time.
-e BASE_URL=http://192.168.1.231:9000
Tells the application at which address it is reached. Mealie uses it for notifications and for the callback address of single sign-on.
-v /opt/mealie:/app/data
Links a folder on the host to the data folder of the container. Your recipes and settings stay also if the container is removed.
ghcr.io/mealie-recipes/mealie:latest
The image to run: the official Mealie application, in its latest published version. It is on the container registry of GitHub (ghcr.io).
The container is CT 110/mealie: 6 GiB disk, 1 CPU, 1024 MB RAM, 192.168.1.231/24. Finish the first-run setup in the browser. This part uses a web page, like any other website.
Open http://192.168.1.231:9000. There is no sign-up screen, because you turned it off with ALLOW_SIGNUP=false.
The login screen. No sign-up button.
Warning — change the default login now
Mealie comes with a fixed public account (changeme@example.com and MyPassword). It is in the own documentation of Mealie. So anyone on your network who knows it can log in until you change it. Log in one time with it. Then open the user menu → Profile at once. Set a new email and a new password before you add any recipes.
Log in with the built-in admin account of Mealie: email changeme@example.com, password MyPassword.
At once after you log in, open the user menu in the top right corner. Go to Profile. Change that email and password.
Profile page — change the default email and password here.
Use Create → Import and paste a recipe URL. The import of a website URL needs no key.
Import screen — paste a recipe URL.
Photo import and video import do nothing until you set up an AI provider. An AI provider is an outside service that reads the photo, or the video, and writes back the ingredients and the steps. Mealie has no AI of its own. To set it up is a small job of its own. It has its own steps directly below. Everything else in Mealie works without it.
Optional — switch on photo import and video import. The current Mealie sets up AI in its web page, in the group settings. You do not add a setting to the docker run command. The Mealie documentation says: "To set up AI providers, visit your group settings." Mealie works with OpenAI, the company behind ChatGPT. It also works with any service that has an OpenAI-compatible API. Here we use OpenAI. You need two things from OpenAI: an API key and a few dollars of credit. An API key is a long secret string. It tells OpenAI that a request is yours, so that the charge goes to your account. Skip this whole part if you only paste website links. Nothing else in the chapter depends on it.
Make an OpenAI account. Open https://platform.openai.com in your browser. Sign up, or sign in if you already use ChatGPT. This is the site of OpenAI for developers. It is not the chat page of ChatGPT. The key exists only here.
Put about $5 of credit on the account, under Settings → Billing. The Mealie documentation says that the free tier of OpenAI is not capable enough for Mealie. A $5 deposit moves your account to Tier 1 for good, and the documentation says that this is enough for Mealie. It is credit that you spend. It is not a monthly subscription. One recipe import costs a small part of a cent.
Make the key, under API keys in the left sidebar. Select Create new secret key. Name it mealie. Confirm. The key is a long string that starts with sk-. OpenAI shows it one time and never again. Copy it now. Keep it in a private place. You lose it? Delete that key on the same page and make another. Nothing breaks.
In Mealie, open the group settings. Add a provider with your API key. Mealie needs three kinds of provider for the full set of features:
A default provider. It turns on the AI features at all. The Mealie documentation gives gpt-5 as an example of a model.
A provider that can recognize images. It is needed to make a recipe from a photo. gpt-5 can do it.
A provider that can transcribe audio. It is needed to make a recipe from a video. The documentation gives whisper-1 as an example.
One model can serve more than one feature. For most people, it is enough to choose an OpenAI model and give the OpenAI API key. The names of the menu items in the group settings can change with the version. Use the Mealie documentation page "AI Integration" (https://docs.mealie.io) if a label differs from this text.
Try it. Open Create → Import with AI. This page makes a recipe from a link, from pasted text, from photos, or from a mix of them. Give it a link to a video, or upload a photo of a recipe. The first AI import takes several seconds. This wait is OpenAI that thinks. It is not your server that struggles.
27.3
HOW TO USE IT
Do all daily tasks in the web page at http://192.168.1.231:9000. The sequence is: import recipes, put them in the meal plan, shop with the list.
Log in with your admin account. The default changeme@example.com and MyPassword are still active? Change them now under the user menu at the top right → Profile.
Add your first recipe. Click Create → Import. Paste the URL of a recipe page. Confirm. Mealie saves only the ingredients and the steps.
Plan the week. Open Meal Planner in the left sidebar. Select a day. Add an entry: a saved recipe, a note, or the random-recipe button. You can also open a recipe, open its ⋮ menu, and select Add to Plan.
Meal Planner — add an entry to a day.
Make the shopping list. Open Shopping Lists in the sidebar. Make a list named Groceries. Open a recipe. Open its ⋮ menu. Select Add to List. Mealie adds all ingredients and merges duplicates across recipes.
Shopping Lists — ingredients added from the ⋮ menu of a recipe.
In the store, open the same address in the browser of your phone. Mark each item as you take it. The list stays in sync on all devices.
Notice — the phone is the most useful client
Mealie is a Progressive Web App. Open http://192.168.1.231:9000 in the browser of the phone. Use Add to Home Screen to get an app icon. The address works only at home or through Ch. 19 · Remote access: Tailscale. Build the list before you leave the house. The open tab keeps it visible.
27.4
WHEN IT GOES WRONG
The login page has no 'Sign up' or 'Register' button. This is expected, because you set ALLOW_SIGNUP=false. Log in with the built-in admin account changeme@example.com and MyPassword. Then change the email and the password under the user menu at the top right → Profile. Add more users later through invites in the settings, not through public sign-up.
Right after docker run, the page shows 'connection refused', keeps loading, or is blank. The first start takes about 30 to 90 seconds. Mealie downloads language data and builds its database. Wait. Then reload. Watch the progress with docker logs -f mealie (press Ctrl+C to stop watching). Mealie is ready when it reports that it serves on port 9000.
Photo import or video-URL import does nothing, or the recipe comes in blank. These features need an AI provider. They never work on a new install. INSTALL MEALIE above has the whole fix as numbered steps, under “switch on photo import and video import”. Make an OpenAI account. Put about $5 of credit on it. Make an API key. Then add the provider in the group settings of Mealie. A video import also needs a provider that can transcribe audio. The import of a website URL keeps working with no key.
Website-URL import fails with 'no recipe found' or brings in an empty recipe. That site does not publish recipe data in a form that a machine can read. You set up an AI provider? Then Mealie falls back to reading the page with AI. If not, try a different recipe site. Or take a screenshot and use photo import. Photo import needs the AI provider.
docker run fails with 'port is already allocated' or 'address already in use'. Another container or service already holds port 9000 on this container. This container is new, so this is rare. If it happens, run docker ps. Read the PORTS column for 9000. The last column, NAMES, gives the name of that container. You do not need it any more? Stop it with docker stop thatname (use the name that you just read). Run the command of Mealie again. docker ps lists nothing on port 9000? Then the holder is another program on this container, not a Docker container. Do not look for it. Give Mealie another port. Change -p 9000:9000 to -p 9001:9000. Set BASE_URL to match. Open http://192.168.1.231:9001.
27.5
A download step fails with Temporary failure resolving deb.debian.org, or with another "cannot resolve" message. The container has no working DNS server. It cannot change a name into an address. This is not a typing mistake. It does not fix itself. In the Proxmox page, select this container in the left tree. Open DNS. Select Edit. Type your router address in DNS servers (192.168.1.1 here; use your own). Then run pct reboot 110 in the host shell. Run the failed step again.
A command fails. You do not know if you are on the server or in the container. Read the prompt. In the container, it ends with the name of the container. On the server, it shows root@homelab. The prompt still shows root@homelab after pct enter? Then the command did not work. Type exit. Run the pct enter line again. Check the prompt before you paste anything else. You can paste a build block on the server by mistake. It seems to work. It installs without an error, and the app even answers. But the app is on the server, and it must not be there.
How to see that it happened, and how to undo it. The app does not open at the container address (192.168.1.231). It does open at the server address (192.168.1.220) on the same port. Then the app is on the host. To remove it, run docker rm -f mealie in the host shell. Then run pct enter 110. Check that the prompt changed. Paste the build block again. You lose nothing in the container, because nothing was built there. The first command can show Error: No such container. This is good. It means that the app was never on the host. Do not paste the build block again. Look for another cause.
The page does not open. The browser spins, or says it cannot connect. Do these checks in order, in the host shell. 1. Is the container running? Run pct status 110. It must say running. If it does not, run pct start 110. 2. Is the container at the address that you typed? Run pct config 110 | grep net0. It shows the real address. A wrong digit in the wizard puts the container at another address, and nothing warns you. 3. Does the app run in the container? Run pct enter 110. Then run docker ps. An empty list means that the app did not start. Run docker ps -a to see that it stopped. Run docker logs to see why. 4. Does the app answer in the container? Run curl -I http://localhost followed by the port of the app. You get a reply here, but nothing from your PC? Then the address or your own network is the problem. The app is fine. Your browser reaches 192.168.1.231 but not the port? Then the app is down. It reaches neither? Then the container is down.
Docker does not start, or you see Cannot connect to the Docker daemon, a keyring error, or an overlay error. This is the most common failure in these guides. It means that the two container features are off. A later pct set --features can switch them off, also when you set them before. Run this in the host shell, not in the container: pct set 110 --features nesting=1,keyctl=1. Then run pct reboot 110. Then run the failed step again. Type both settings on one line. If you send only one setting, it replaces the pair and switches the other one off.
REFERENCE CARD
Paste this in 110 → Summary → Notes in Proxmox. The address and the common commands are then always at hand. Before you ever run the update line on this card, compare it with the docker run you actually used at install. The card is a snapshot of the standard build: if you added anything of your own — a device, an extra -e setting, a second folder — it is not on the card, and re-running the card's line drops it. The container comes back up looking healthy with your setting gone. The update line below still says TZ=Region/City. That is a placeholder, not a real timezone: run it unchanged and the app comes back on UTC while looking perfectly healthy, so every schedule and timestamp silently shifts. Put your own zone in before you use this card — the same one you set at install.
📋 Reference — paste into this container's Notes in Proxmox (not a shell command)
## Mealie — CT 110
dashboard http://192.168.1.231:9000 · docs https://docs.mealie.io
```sh
# is it running?
docker ps --filter name=mealie
curl -fsS http://localhost:9000 >/dev/null && echo OK # quick health check# logs (last 50)
docker logs mealie --tail 50
# stop / start / restart
docker stop mealie
docker start mealie
docker restart mealie
# is there an update? ("Image is up to date" = no)
docker pull ghcr.io/mealie-recipes/mealie:latest
# update (recipes + settings survive in /opt/mealie)
docker pull ghcr.io/mealie-recipes/mealie:latest && docker rm -f mealie && \
docker run -d --name mealie --restart=unless-stopped -p 9000:9000 \
-e ALLOW_SIGNUP=false -e TZ=Region/City -e BASE_URL=http://192.168.1.231:9000 \
-v /opt/mealie:/app/data ghcr.io/mealie-recipes/mealie:latest
```
Part D · The app catalog
28Penpot
This is Figma that you host yourself. You get real UI and UX design, components, prototypes, and editing by several people at once. It runs as a compose bundle inside one container.
This chapter needs the items below. You came here directly? Do them first. Each item takes a short time. Nothing on this page works without them.
Proxmox is installed and works at https://192.168.1.220:8006. You can log in as root. See Ch. 6 · Install Proxmox. At your first visit, the browser shows a certificate warning. Select Advanced. Then select Proceed. The warning is normal. Proxmox makes its own certificate.
The Debian 13 image is downloaded. You do this one time. See Ch. 10 · The container wizard. Without the image, the Template list in the wizard is empty.
You have an SSH key from your PC (Ch. 9 · SSH & the terminal). Or you type a password in the two password boxes of the wizard. The wizard needs one of the two. The Next button stays grey until you give one.
You know your own network numbers. Where this chapter shows 192.168.1.x, use your own numbers. The rule is in Ch. 3 · How to read this manual. The address of this chapter must be outside the range that your router gives out by itself (the DHCP pool, often .100–.200, but yours can differ). An address inside the pool can go to a phone later. Two devices on one address break name lookups, and the cause is hard to find.
Commands marked HOST run on the server. In the Proxmox page, select homelab in the left tree. Then select >_ Shell. Commands marked CT run inside the container of this chapter. The chapter shows you how to get there.
The wizard does not work?Next is grey: you gave no password and no key. Give one of the two. The Template list is empty: the Debian image is not downloaded. Download it first. Each tab is explained in Ch. 10 · The container wizard.
28.1
CREATE THE CONTAINER
Do this task with the mouse in the Proxmox web page. You type nothing yet.
Open https://192.168.1.220:8006.
The Proxmox VE login page.
Click homelab in the left tree.
The left tree shows node homelab selected.
Click the blue Create CT button at the top right.
The Create CT button is at the top right.
Fill in each tab as the reference shows. Leave each field that is not listed at its default value.
The General tab shows CT ID 111 and hostname penpot.
Wizard reference — Create CT 111
Tab → Field
Entry
General → Node
Select homelab.
General → CT ID
Type 111. Do not keep the number that the wizard suggests.
General → Hostname
Type penpot.
General → Unprivileged container
Keep this box ticked.
General → Nesting
Keep this box ticked. It is ticked by default. The wizard has no box for keyctl, which Docker also needs. The host command after Finish sets it. It is the first line of the next listing.
General → Password / SSH public key
Keep the password empty. Paste your public key in the SSH field: ssh-ed25519 AAAA…your-key-here you@your-pc. With the key, you can run ssh root@192.168.1.232 from your PC. The command pct enter 111 on the host needs no password.
Template → Storage, Template
Select local. Then select debian-13-standard.
Disks → Storage, Disk size
Select local-lvm. Set 10 GiB.
CPU → Cores
Set 2 cores.
Memory → Memory (MiB)
Set 2048. Keep Swap at its default.
Network → IPv4
Select Static. Set IPv4/CIDR to 192.168.1.232/24. Set Gateway to 192.168.1.1. Keep IPv6 at its default.
DNS → DNS domain
Keep this field empty. Do not type 192.168.1.1 here.
DNS → DNS servers
Always type 192.168.1.1. Never keep this field empty.
Confirm
Read the summary. Keep Start after created unticked. Select Finish.
The wizard has no box for three settings: the Docker permission keyctl, the timezone, and start at boot. The first command below sets all three. Run these 3 commands on the host. They set the missing settings, start the container, and open its shell. Each part is explained in Ch. 10 · The container wizard, section "The host command every build needs".
⌨ Type this on the Proxmox host (homelab)
Before you run anything on this page: every 192.168.1.x address below is this manual's example network. If your own network uses different numbers, substitute yours as you type — the rule is in Ch. 3 · How to read this manual. A command that runs with the wrong address usually succeeds and leaves you unreachable.
pct set 111 --features nesting=1,keyctl=1 --onboot 1 --timezone host
pct start 111
pct enter 111                          # now INSIDE CT 111 — the rest of this page runs here
Notice — set your timezone
--timezone host copies the timezone of the server into the container. To see the valid zone names, run timedatectl list-timezones on the host. Pick your Region/City, for example America/New_York. A wrong zone only makes clocks and schedules look odd. Nothing breaks.
Prefer the terminal? — the same task with one pct create command
⌨ Type this on the Proxmox host (homelab)
TMPL=$(pveam available --section system | awk '/debian-13-standard/{print $2}' | tail -1)
pveam download local "$TMPL"          # once per host; harmless to re-run
pct create 111 local:vztmpl/"$TMPL" \
  --hostname penpot --cores 2 --memory 2048 --rootfs local-lvm:10 \
  --net0 name=eth0,bridge=vmbr0,ip=192.168.1.232/24,gw=192.168.1.1 \
  --nameserver 192.168.1.1 --features nesting=1,keyctl=1 --unprivileged 1 --onboot 1 --timezone host
pct start 111
pct enter 111                      # you are now INSIDE CT 111 — everything below runs here
When the container exists, you type the rest of this page in the shell of the container. You do not type it on homelab (192.168.1.220). You open that shell in one of two ways. Run pct enter 111 on the host (first homelab → >_ Shell). Or run ssh root@192.168.1.232 from your PC. (The >_ Console button of the container shows a login: prompt. The containers of this manual cannot answer it. Skip it.) Only the pct and pveam commands go back to the host. Each guide names those commands where you use them.
The >_ Console button of the CT opens a login: prompt, not a shell. Use pct enter 111 from homelab → >_ Shell.
Everything from here on has no buttons. You type commands inside CT 111. You are already there from pct enter 111 above. (You closed that shell? Open homelab → >_ Shell and run pct enter 111 again.)
Penpot is several services. So you do not run one docker run command. You install Docker. You download the official compose file of Penpot. You edit two lines. Then you start everything together. Download the compose file first. Then make the edits that are described below. Do not run up -d yet.
Open a shell inside CT 111. From your PC, run ssh root@192.168.1.232.
SSH refuses to connect? Run pct enter 111 in the shell of the Proxmox host instead.
Run the commands on the right. They install Docker and download the official compose file of Penpot. It sets up several small programs that together make Penpot.
Edit the two lines that are described below. Then start the bundle.
⌨ Type this inside CT 111
apt update && apt install -y docker.io docker-compose curl nano
mkdir -p /opt/penpot && cd /opt/penpot
curl -o docker-compose.yaml \
  https://raw.githubusercontent.com/penpot/penpot/main/docker/images/docker-compose.yaml
# open the file and make the two edits below — do NOT run 'up -d' yet
Notice — the next command opens an editor
Do not paste this one together with the block above. Type it alone. Press Enter:
⌨ Inside the container — type this by itself
nano docker-compose.yaml
This opens the file docker-compose.yaml that you just downloaded. It opens in nano, a text editor that runs in the terminal. It fills the whole terminal. Nothing that you paste afterwards goes to the shell until you save and close it. To save and close, press Ctrl+O, Enter, then Ctrl+X.
Inside nano, use the arrow keys to move. There is no mouse. You prefer a graphical editor? Open the same file over SFTP. See Ch. 12 · After every build + common Proxmox tasks, section "Move a file to or from the server". Open /opt/penpot/docker-compose.yaml in a text editor. Save it. Then come back here for the start command. Make these two changes:
Near the top of the file, find the line PENPOT_PUBLIC_URI: http://localhost:9001. Change the localhost part, so that it reads PENPOT_PUBLIC_URI: http://192.168.1.232:9001. Keep the colon and the one space after it. Do not delete them, or the file stops working. This address must match the address that you type in your browser. If not, logins and images fail without an error message.
Further down, find PENPOT_SECRET_KEY: change-this-insecure-key. Replace change-this-insecure-key with a long random string of your own. Use 40 or more letters and numbers, with no spaces. This secret stops other people from faking a login as you. Do not keep the default value.
Leave these two things as they are:
The line of the frontend port, 9001:8080. Do not change it to :80. Penpot listens on port 8080 inside the container.
The line PENPOT_FLAGS. It has disable-email-verification and disable-secure-session-cookies. The Penpot documentation says that you need the second flag when you serve Penpot on an address other than localhost without HTTPS. This is your case. Do not remove either flag.
Save the file and close nano with Ctrl+O, Enter, then Ctrl+X. Then start everything with the command below.
⌨ Type this inside CT 111
cd /opt/penpot && docker compose -p penpot up -d
Then open http://192.168.1.232:9001. Register the first account. The first registered account is the owner. This setup is more involved than the other guides in this manual.
Notice — plan 2 to 4 GB for this container
2048 MB runs Penpot for light use by one person. The Java backend of Penpot is the heaviest of its seven containers. For real daily use, with several boards, more than one editor at a time, and larger files, you often need the full 4096 MB. Penpot runs very slowly? Or docker compose -p penpot ps shows a container that is stuck in restart? Then memory is almost always the cause. Shut down the CT, or leave it running. Raise the memory to 4096 MB in 111 → Resources. Then start it or restart it. When you plan a stack that has Penpot, count it as 4 GB, not 2 GB.
Resources tab, the Memory row raised to 4096 MB.
Notice — you have 16 GB of RAM in total
Penpot is one of the heaviest apps in this manual. On a machine with 16 GB, you run a few heavy apps at the same time, not all of them. Penpot, Immich, Nextcloud, a Home Assistant VM, and LanCache each want a large part. Watch the memory of the host in Ch. 15 · Beszel. It runs short? Stop a heavy container that you do not use. Do not starve all of them.
Explanation of each part
The flags of docker run are explained in Ch. 9 · SSH & the terminal, section "Anatomy of docker run". Penpot uses Docker Compose, so these parts differ:
Refreshes the package list. Then it installs Docker, Docker Compose for setups with several containers, curl to download files, and nano, a simple text editor for the one configuration edit. On Debian 13, docker-compose is Compose v2 (see Ch. 9 · SSH & the terminal).
mkdir -p /opt/penpot && cd /opt/penpot
Makes a folder for the files of this app. Then it goes into it.
Downloads the official setup file of Penpot from GitHub. It saves it as docker-compose.yaml.
nano docker-compose.yaml
Opens that file in the editor. You make the two edits above before you start anything.
docker compose -p penpot up -d
Starts all containers of Penpot in the background. -p penpot gives this group of containers the project name 'penpot'. Docker then keeps them apart from other apps.
28.3
HOW TO USE IT: THE BASICS
Penpot is a design tool like Figma. Projects hold files. Files hold boards. Several users can work in each file at the same time.
Open http://192.168.1.232:9001. Log in. The first registered account is the owner.
The login page registers the first account as the owner.
In the dashboard, click + New project. Give the project a name. A project is a folder for design files. For a quick test, use Drafts.
The dashboard has a + New project button.
Click the + in the project to make a file. The file opens in the Workspace.
Draw a Board first. Press B. A board is one screen of your design. Select a preset size (phone, desktop) in the right sidebar. Then use the toolbar: rectangle R, ellipse E, text T.
Workspace — you draw a Board (key B). The size preset is in the right sidebar.
To make the design interactive, turn Prototype mode on in the right sidebar. Select an element. Drag a connection to a different board. Press the play button at the top right to test it.
Prototype mode — you drag a connection between boards.
To work with another person, use Share / Invite at the top right. You see the cursor of each user in the file.
The Share / Invite button, at the top right of the Workspace.
28.4
WHEN IT GOES WRONG
You can reach the login page at http://192.168.1.232:9001, but you sign in and return to the login screen. Or images and thumbnails never load. PENPOT_PUBLIC_URI does not match the address in your browser. It is still set to the default http://localhost:9001. Run nano /opt/penpot/docker-compose.yaml. Set the line to PENPOT_PUBLIC_URI: http://192.168.1.232:9001. Save (Ctrl+O, Enter, Ctrl+X). Then run cd /opt/penpot && docker compose -p penpot up -d to make the containers again. Your designs and the database are not touched. They live outside the containers. The same sign-in problem can also come from a missing disable-secure-session-cookies in the PENPOT_FLAGS line. Check that this flag is there.
You make the first account. It seems to work. Then Penpot asks you to verify your email, and no email arrives. The default configuration of Penpot turns off email verification. So the first account works at once. Make sure that the PENPOT_FLAGS line still has disable-email-verification. It is there by default. Do not remove it. Verification is on and you have no real mail server? Open the built-in mail viewer of Penpot at http://192.168.1.232:1080 (the 'mailcatch' helper container). Click the confirmation link there.
cd /opt/penpot && docker compose -p penpot ps shows penpot-backend stuck on 'restarting', and Penpot never finishes loading. Find the reason with cd /opt/penpot && docker compose -p penpot logs -f penpot-backend. The container is killed for memory? Then you see the word OOMKilled in the output of the logs. In that case, raise the RAM of the CT to 4096 MB under 111 → Resources. Restart it. The error is a database connection error? Wait a minute. Postgres must finish its first-run setup. Then run docker compose -p penpot restart penpot-backend.
docker compose -p penpot up -d fails with an error such as 'failed to bind host port … 0.0.0.0:9001: address already in use'. Something else already uses port 9001. Edit /opt/penpot/docker-compose.yaml. Change the - 9001:8080 line of the frontend to a free host port, such as - 9011:8080. Change the PENPOT_PUBLIC_URI line to the same port (for example http://192.168.1.232:9011). Save. Run docker compose -p penpot up -d again. Open the new port in your browser.
28.5
A download step fails with Temporary failure resolving deb.debian.org, or with another "cannot resolve" message. The container has no working DNS server. It cannot change a name into an address. This is not a typing mistake. It does not fix itself. In the Proxmox page, select this container in the left tree. Open DNS. Select Edit. Type your router address in DNS servers (192.168.1.1 here; use your own). Then run pct reboot 111 in the host shell. Run the failed step again.
A command fails. You do not know if you are on the server or in the container. Read the prompt. In the container, it ends with the name of the container. On the server, it shows root@homelab. The prompt still shows root@homelab after pct enter? Then the command did not work. Type exit. Run the pct enter line again. Check the prompt before you paste anything else. You can paste a build block on the server by mistake. It seems to work. It installs without an error, and the app even answers. But the app is on the server, and it must not be there.
How to see that it happened, and how to undo it. The app does not open at the container address (192.168.1.232). It does open at the server address (192.168.1.220) on the same port. Then the app is on the host. To remove it, run docker rm -f penpot in the host shell. Then run pct enter 111. Check that the prompt changed. Paste the build block again. You lose nothing in the container, because nothing was built there. The first command can show Error: No such container. This is good. It means that the app was never on the host. Do not paste the build block again. Look for another cause.
The page does not open. The browser spins, or says it cannot connect. Do these checks in order, in the host shell. 1. Is the container running? Run pct status 111. It must say running. If it does not, run pct start 111. 2. Is the container at the address that you typed? Run pct config 111 | grep net0. It shows the real address. A wrong digit in the wizard puts the container at another address, and nothing warns you. 3. Does the app run in the container? Run pct enter 111. Then run docker ps. An empty list means that the app did not start. Run docker ps -a to see that it stopped. Run docker logs to see why. 4. Does the app answer in the container? Run curl -I http://localhost followed by the port of the app. You get a reply here, but nothing from your PC? Then the address or your own network is the problem. The app is fine. Your browser reaches 192.168.1.232 but not the port? Then the app is down. It reaches neither? Then the container is down.
Docker does not start, or you see Cannot connect to the Docker daemon, a keyring error, or an overlay error. This is the most common failure in these guides. It means that the two container features are off. A later pct set --features can switch them off, also when you set them before. Run this in the host shell, not in the container: pct set 111 --features nesting=1,keyctl=1. Then run pct reboot 111. Then run the failed step again. Type both settings on one line. If you send only one setting, it replaces the pair and switches the other one off.
REFERENCE CARD
Paste this in 111 → Summary → Notes in Proxmox. The key facts and the update steps then stay with the container.
📋 Reference — paste into this container's Notes in Proxmox (not a shell command)
## Penpot — CT 111
dashboard http://192.168.1.232:9001 · docs https://help.penpot.app/
```sh
# is it running?
cd /opt/penpot && docker compose -p penpot ps
curl -fsS http://localhost:9001 >/dev/null && echo OK # quick health check# logs (last 50)
cd /opt/penpot && docker compose -p penpot logs --tail 50
# stop / start / restart
cd /opt/penpot && docker compose -p penpot stop
cd /opt/penpot && docker compose -p penpot start
cd /opt/penpot && docker compose -p penpot restart
# is there an update? ("up to date" = no)
cd /opt/penpot && docker compose -p penpot pull
# update (files & database survive in the named volumes)# snapshot the container first (see the after-every-build ritual) — instant rollback if the update misbehaves
cd /opt/penpot && docker compose -p penpot pull && docker compose -p penpot up -d
```
Explanation of each part
cd /opt/penpot
Goes into the folder with the docker-compose.yaml file of Penpot. The next docker commands then act on this app.
docker compose
The tool of Docker for an app with several containers that is defined in a docker-compose.yaml file.
-p penpot
Sets the project name to penpot. Docker groups these containers together. It keeps them apart from the containers of other apps.
ps
Lists the containers of this app. It shows if each one runs. Penpot is seven containers: frontend, backend, mcp, exporter, Postgres, Valkey, and a small helper for mail preview named mailcatch. Expect one more row than you may guess.
curl -fsS http://localhost:9001
Asks the frontend for its page from inside the container. It answers? The command prints OK. Nothing listens? It prints nothing. This is a fast way to confirm that Penpot is up.
logs --tail 50
Shows the last 50 lines of the log output of the app. Use it to see why a container does not start.
stop / start / restart
Stops the containers of the app, starts them again, or does both in one step. Use restart if something is stuck, or after a change of the configuration.
pull
Downloads the newest version of the container images from the internet. It does not install them yet.
up -d
Starts or makes the containers again with the current images. It runs them in the background. -d means detached. The terminal stays free.
Part D · The app catalog
29n8n
You build “when X happens, do Y” flows by dragging boxes. A trigger connects to actions. You write no code. This is the glue between your services, for example “new file in Syncthing → ntfy me” or “RSS keyword → save to Karakeep”.
This chapter needs the items below. You came here directly? Do them first. Each item takes a short time. Nothing on this page works without them.
Proxmox is installed and works at https://192.168.1.220:8006. You can log in as root. See Ch. 6 · Install Proxmox. At your first visit, the browser shows a certificate warning. Select Advanced. Then select Proceed. The warning is normal. Proxmox makes its own certificate.
The Debian 13 image is downloaded. You do this one time. See Ch. 10 · The container wizard. Without the image, the Template list in the wizard is empty.
You have an SSH key from your PC (Ch. 9 · SSH & the terminal). Or you type a password in the two password boxes of the wizard. The wizard needs one of the two. The Next button stays grey until you give one.
You know your own network numbers. Where this chapter shows 192.168.1.x, use your own numbers. The rule is in Ch. 3 · How to read this manual. The address of this chapter must be outside the range that your router gives out by itself (the DHCP pool, often .100–.200, but yours can differ). An address inside the pool can go to a phone later. Two devices on one address break name lookups, and the cause is hard to find.
Optional — Ch. 13 · ntfy. This chapter can send you notifications, but only if that chapter is already running. All other steps work without it.
Commands marked HOST run on the server. In the Proxmox page, select homelab in the left tree. Then select >_ Shell. Commands marked CT run inside the container of this chapter. The chapter shows you how to get there.
The wizard does not work?Next is grey: you gave no password and no key. Give one of the two. The Template list is empty: the Debian image is not downloaded. Download it first. Each tab is explained in Ch. 10 · The container wizard.
29.1
CREATE THE CONTAINER
Do this task with the mouse in the Proxmox web page. You type nothing yet.
Open https://192.168.1.220:8006.
The Proxmox VE login page.
Click homelab in the left tree.
Node homelab is selected in the left tree.
Click the blue Create CT button at the top right.
The Create CT button, at the top right of the node view.
Fill in each tab as the reference shows. Leave each field that is not listed at its default value.
General tab: CT ID 112, hostname n8n.
Wizard reference — Create CT 112
Tab → Field
Entry
General → Node
Select homelab.
General → CT ID
Type 112. Do not keep the number that the wizard suggests.
General → Hostname
Type n8n.
General → Unprivileged container
Keep this box ticked.
General → Nesting
Keep this box ticked. It is ticked by default. The wizard has no box for keyctl, which Docker also needs. The host command after Finish sets it. It is the first line of the next listing.
General → Password / SSH public key
Keep the password empty. Paste your public key in the SSH field: ssh-ed25519 AAAA…your-key-here you@your-pc. With the key, you can run ssh root@192.168.1.233 from your PC. The command pct enter 112 on the host needs no password.
Template → Storage, Template
Select local. Then select debian-13-standard.
Disks → Storage, Disk size
Select local-lvm. Set 6 GiB.
CPU → Cores
Set 1 core.
Memory → Memory (MiB)
Set 1024. Keep Swap at its default.
Network → IPv4
Select Static. Set IPv4/CIDR to 192.168.1.233/24. Set Gateway to 192.168.1.1. Keep IPv6 at its default.
DNS → DNS domain
Keep this field empty. Do not type 192.168.1.1 here.
DNS → DNS servers
Always type 192.168.1.1. Never keep this field empty.
Confirm
Read the summary. Keep Start after created unticked. Select Finish.
The wizard has no box for three settings: the Docker permission keyctl, the timezone, and start at boot. The first command below sets all three. Run these 3 commands on the host. They set the missing settings, start the container, and open its shell. Each part is explained in Ch. 10 · The container wizard, section "The host command every build needs".
⌨ Type this on the Proxmox host (homelab)
Before you run anything on this page: every 192.168.1.x address below is this manual's example network. If your own network uses different numbers, substitute yours as you type — the rule is in Ch. 3 · How to read this manual. A command that runs with the wrong address usually succeeds and leaves you unreachable.
pct set 112 --features nesting=1,keyctl=1 --onboot 1 --timezone host
pct start 112
pct enter 112                          # now INSIDE CT 112 — the rest of this page runs here
Notice — set your timezone, in two places
--timezone host copies the timezone of the server into the container. To see the valid zone names, run timedatectl list-timezones on the host. Pick your Region/City, for example America/New_York. The LXC container and the Docker container inside it each keep their own timezone. Setting one does not set the other. This is why the docker run line below has two more flags. -e TZ=Region/City sets the clock of the Docker container. -e GENERIC_TIMEZONE=Region/City sets the timezone that n8n uses for schedules. Region/City is a placeholder, not a real zone. Replace both with your own zone, for example Europe/Paris. If the value is not valid, n8n uses its default zone. Each schedule that you built then shifts, and nothing tells you.
Prefer the terminal? — the same task with one pct create command
⌨ Type this on the Proxmox host (homelab)
TMPL=$(pveam available --section system | awk '/debian-13-standard/{print $2}' | tail -1)
pveam download local "$TMPL"          # once per host; harmless to re-run
pct create 112 local:vztmpl/"$TMPL" \
  --hostname n8n --cores 1 --memory 1024 --rootfs local-lvm:6 \
  --net0 name=eth0,bridge=vmbr0,ip=192.168.1.233/24,gw=192.168.1.1 \
  --nameserver 192.168.1.1 --features nesting=1,keyctl=1 --unprivileged 1 --onboot 1 --timezone host
pct start 112
pct enter 112                      # you are now INSIDE CT 112 — everything below runs here
This part has no buttons. You type commands inside CT 112. You ran pct enter 112 in the box above? Then you are already in that shell. Continue below. If not, open homelab → >_ Shell and run pct enter 112 now.
Notice — each command below runs inside CT 112
When the container exists, you type the rest of this page in the shell of the container. You do not type it on homelab (192.168.1.220) or on your PC. You open that shell in one of two ways. Run pct enter 112 on the host (first homelab → >_ Shell). Or run ssh root@192.168.1.233 from your PC. (The >_ Console button of the container shows a login: prompt. The containers of this manual cannot answer it. Skip it.) Only the pct and pveam commands go back to the host. Each guide names those commands where you use them.
The >_ Console button of the CT opens a login: prompt, not a shell. Use pct enter 112 from homelab → >_ Shell.
Open a shell inside CT 112. From your PC, run ssh root@192.168.1.233.
SSH refuses to connect? Run pct enter 112 in the shell of the Proxmox host instead.
Type the commands on the right in that container shell.
Replace Region/City with your own timezone before you run the block.
⌨ Type this inside CT 112
apt update && apt install -y docker.io curl   # curl runs the health check in the reference card
mkdir -p /opt/n8n && chown 1000:1000 /opt/n8n   # n8n runs as user 1000; its data folder must be owned by 1000 or n8n exits with "permission denied"
docker run -d --name n8n --restart=unless-stopped -p 5678:5678 \
  -e N8N_HOST=192.168.1.233 -e N8N_SECURE_COOKIE=false \
  -e GENERIC_TIMEZONE=Region/City -e TZ=Region/City \
  -v /opt/n8n:/home/node/.n8n docker.n8n.io/n8nio/n8n
Explanation of each part
The Docker install line and the flags -d, --name, --restart, -v, and -p are explained in Ch. 9 · SSH & the terminal, sections "Install Docker in the container" and "Anatomy of docker run". These parts are specific to n8n:
mkdir -p /opt/n8n && chown 1000:1000 /opt/n8n
Makes the data folder of n8n on the host. It gives it to user ID 1000. This is the user without root rights that n8n runs as inside the container. You skip this step? Then n8n cannot write its database, and it does not start.
-p 5678:5678
Sends port 5678 of the host to port 5678 inside the container. This is how you reach the web page of n8n.
-e N8N_HOST=192.168.1.233
Sets an environment variable. It tells n8n at which network address it is reached.
-e N8N_SECURE_COOKIE=false
Tells n8n not to require HTTPS for its login cookie, because this install is plain HTTP on the local network. Remove this flag when n8n is behind NPM with HTTPS.
-e GENERIC_TIMEZONE=Region/City
Sets the timezone that n8n uses for schedules and for the times in its page. The Schedule and Cron triggers read this value. You leave it out? Then n8n uses America/New_York.
-e TZ=Region/City
Sets the timezone of the operating system in the container. It is used for log times and for shell commands such as date. Alone, it does not set the timezone of the Schedule node. GENERIC_TIMEZONE above controls that.
-v /opt/n8n:/home/node/.n8n
Saves the data of n8n, its workflows and credentials, in the folder /opt/n8n on the host. It stays when the container restarts or is made again.
docker.n8n.io/n8nio/n8n
The image to run: the official ready-made application package of n8n.
Warning — n8n is a target of high value
It stores the credentials of everything that it automates. It can run any code through the Code or Execute-Command nodes. A break-in here reaches everything that it touches. N8N_SECURE_COOKIE=false above is convenient. But it means that the login cookie crosses your network in the clear. Know this before you open the login page. When NPM is up, put n8n behind it with HTTPS. Remove that flag. See Ch. 17 · Nginx Proxy Manager. Keep n8n away from your most sensitive logins. Do not store bank or Vaultwarden credentials in it.
29.3
SET UP: YOUR FIRST FLOW
Recap of the specification: CT 112/n8n, 6 GiB disk, 1 CPU, 1024 MB RAM, 192.168.1.233/24. At the first visit, n8n asks you to make the owner account. There is no default login.
Open http://192.168.1.233:5678. Type your name, your email, and a password to make the owner account.
The owner account form at the first visit.
Click New Workflow.
Click the + button on the canvas to add the first node.
Type Schedule Trigger in the search box that opens. Click it.
Open the Interval field of the node. Choose Hours. The flow then runs one time each hour.
A Schedule Trigger node on the canvas.
Click the + button again to add a second node. Type HTTP Request in the search box. Click it.
In the URL field, paste the address of your ntfy topic (see Ch. 13 · ntfy). The address has this shape:http://192.168.1.227/homelab-alerts. It is the address of your ntfy container, a slash, and the topic name that you chose. You did not build Ch. 13 · ntfy? Do that chapter first. There is no other endpoint here. Without one, this example cannot run at all.
Open the Method dropdown. Set it to POST. POST means “send this data to that address”. It is how the node delivers your message.
In the Body field, type the message text that you want the notification to show.
Give it your ntfy token, or nothing ever arrives. Your ntfy server (Ch. 13 · ntfy) refuses everyone without a token. n8n does not know the token yet. Turn on Send Headers. Add one header. The name is Authorization. The value is Bearer tk_YOUR-TOKEN. Use the same tk_… token that you made in that chapter, in place of tk_YOUR-TOKEN. Put the word Bearer and a space before it. You miss this? Then each message is refused with 403. n8n shows the flow as fired. Your phone stays silent. Nothing tells you why.
The HTTP Request node, set to POST to an ntfy topic.
Prove it now. Do not wait an hour. With the flow open, click Test workflow. Each node must turn green. The notification must reach your phone in a few seconds. A red HTTP Request node means that the call failed. The header is only one of the possible reasons. Open the node and read the error. 401 or 403 means the header or the token. Fix those. A connection that is refused, a timeout, or a DNS error means that nothing answered at that URL at all. The address is wrong, or the service that it points at was never built. Check the URL against the chapter that builds that service before you touch the header. Run the test again. Only when a test message really arrives does it work.
Click Activate. You built a “ping me each hour” automation. Each flow has this shape: a trigger, then one or more nodes.
The Activate switch, at the top right of the workflow editor.
29.4
WHEN IT GOES WRONG
The container never comes up. docker ps shows it restarting. docker logs n8n shows “EACCES: permission denied” that points at /home/node/.n8n, or it cannot open the config or database file. The data folder on the host belongs to root. But n8n runs as user 1000 inside the container. Stop it. Fix the owner. Then make it again. Run docker rm -f n8n. Then run chown -R 1000:1000 /opt/n8n. Then run the original docker run command again.
You reach http://192.168.1.233:5678, but the setup page is blocked with a message about a “secure cookie”, and n8n refuses to let you sign in. n8n demands HTTPS for its session cookie by default. Open it over plain http:// at the IP address, not https://. Check that the container was started with -e N8N_SECURE_COOKIE=false. You removed that flag? Add it back and make the container again: docker rm -f n8n, then run the docker run command again.
You pull a new image or make the container again. Then all saved credentials show as “could not be decrypted”, or n8n asks you to make the owner account again, as if it were new. The encryption key and the database of n8n are in /home/node/.n8n. It is linked to /opt/n8n on the host. This happens when that folder was emptied, or when the volume link changed. Never delete /opt/n8n. Always keep the exact link -v /opt/n8n:/home/node/.n8n. Copy the whole /opt/n8n folder to another drive with the file manager from time to time. A lost or emptied folder is then not a lost workflow. The key is really gone? Then you must enter the affected credentials again.
A Schedule or Cron trigger runs at the wrong time, or the times of the executions in the page look wrong by your timezone. The scheduler of n8n uses GENERIC_TIMEZONE. Its default is America/New_York. Add -e GENERIC_TIMEZONE=Region/City (and -e TZ=Region/City for logs) to the docker run command. Then make the container again: docker rm -f n8n and run it again.
29.5
A download step fails with Temporary failure resolving deb.debian.org, or with another "cannot resolve" message. The container has no working DNS server. It cannot change a name into an address. This is not a typing mistake. It does not fix itself. In the Proxmox page, select this container in the left tree. Open DNS. Select Edit. Type your router address in DNS servers (192.168.1.1 here; use your own). Then run pct reboot 112 in the host shell. Run the failed step again.
A command fails. You do not know if you are on the server or in the container. Read the prompt. In the container, it ends with the name of the container. On the server, it shows root@homelab. The prompt still shows root@homelab after pct enter? Then the command did not work. Type exit. Run the pct enter line again. Check the prompt before you paste anything else. You can paste a build block on the server by mistake. It seems to work. It installs without an error, and the app even answers. But the app is on the server, and it must not be there.
How to see that it happened, and how to undo it. The app does not open at the container address (192.168.1.233). It does open at the server address (192.168.1.220) on the same port. Then the app is on the host. To remove it, run docker rm -f n8n in the host shell. Then run pct enter 112. Check that the prompt changed. Paste the build block again. You lose nothing in the container, because nothing was built there. The first command can show Error: No such container. This is good. It means that the app was never on the host. Do not paste the build block again. Look for another cause.
The page does not open. The browser spins, or says it cannot connect. Do these checks in order, in the host shell. 1. Is the container running? Run pct status 112. It must say running. If it does not, run pct start 112. 2. Is the container at the address that you typed? Run pct config 112 | grep net0. It shows the real address. A wrong digit in the wizard puts the container at another address, and nothing warns you. 3. Does the app run in the container? Run pct enter 112. Then run docker ps. An empty list means that the app did not start. Run docker ps -a to see that it stopped. Run docker logs to see why. 4. Does the app answer in the container? Run curl -I http://localhost followed by the port of the app. You get a reply here, but nothing from your PC? Then the address or your own network is the problem. The app is fine. Your browser reaches 192.168.1.233 but not the port? Then the app is down. It reaches neither? Then the container is down.
Docker does not start, or you see Cannot connect to the Docker daemon, a keyring error, or an overlay error. This is the most common failure in these guides. It means that the two container features are off. A later pct set --features can switch them off, also when you set them before. Run this in the host shell, not in the container: pct set 112 --features nesting=1,keyctl=1. Then run pct reboot 112. Then run the failed step again. Type both settings on one line. If you send only one setting, it replaces the pair and switches the other one off.
REFERENCE CARD
Paste this in 112 → Summary → Notes in Proxmox. The key facts and the update steps then stay with the container. Before you ever run the update line on this card, compare it with the docker run you actually used at install. The card is a snapshot of the standard build: if you added anything of your own — a device, an extra -e setting, a second folder — it is not on the card, and re-running the card's line drops it. The container comes back up looking healthy with your setting gone. The update line below still says TZ=Region/City. That is a placeholder, not a real timezone: run it unchanged and the app comes back on UTC while looking perfectly healthy, so every schedule and timestamp silently shifts. Put your own zone in before you use this card — the same one you set at install.
📋 Reference — paste into this container's Notes in Proxmox (not a shell command)
## n8n — CT 112
dashboard http://192.168.1.233:5678 · docs https://docs.n8n.io/hosting/ · data in /opt/n8n (back it up)
```sh
# is it running?
docker ps --filter name=n8n
curl -fsS http://localhost:5678 >/dev/null && echo OK # quick health check# logs (last 50)
docker logs n8n --tail 50
# stop / start / restart
docker stop n8n
docker start n8n
docker restart n8n
# is there an update? ("Image is up to date" = no)
docker pull docker.n8n.io/n8nio/n8n
# update (workflows + credentials survive in /opt/n8n)
docker pull docker.n8n.io/n8nio/n8n && docker rm -f n8n && docker run -d --name n8n --restart=unless-stopped -p 5678:5678 \
-e N8N_HOST=192.168.1.233 -e N8N_SECURE_COOKIE=false \
-e GENERIC_TIMEZONE=Region/City -e TZ=Region/City \
-v /opt/n8n:/home/node/.n8n docker.n8n.io/n8nio/n8n
```
Explanation of each part
docker ps --filter name=n8n
Lists the n8n container if it runs. An empty result means that it is stopped or that it crashed. Check the logs next.
curl -fsS http://localhost:5678 >/dev/null && echo OK
Asks n8n for its web page. It prints OK only if it answers. A silent failure means that n8n is not up yet.
docker logs n8n --tail 50
Shows the recent output of the container. --tail 50 limits it to the last 50 lines, for troubleshooting.
docker stop / start / restart n8n
Stops, starts, or restarts the container. Use restart after a change, or if the container does not work well.
docker pull docker.n8n.io/n8nio/n8n
Downloads the newest version of the image from the registry of n8n. Run it alone first to see if an update exists. “Image is up to date” means none.
docker pull … && docker rm -f n8n && docker run …
The full update. It pulls the new image. It removes the old container by force. Then it makes it again with the exact original run line. Your data folder /opt/n8n is not touched. So workflows and credentials stay.
Part D · The app catalog
30Paperless-ngx
Give it any bill, receipt, or PDF. Paperless-ngx reads the text, adds tags, and makes each document searchable by its full text. It is a permanent filing cabinet that works offline.
This chapter needs the items below. You came here directly? Do them first. Each item takes a short time. Nothing on this page works without them.
Proxmox is installed and works at https://192.168.1.220:8006. You can log in as root. See Ch. 6 · Install Proxmox. At your first visit, the browser shows a certificate warning. Select Advanced. Then select Proceed. The warning is normal. Proxmox makes its own certificate.
The Debian 13 image is downloaded. You do this one time. See Ch. 10 · The container wizard. Without the image, the Template list in the wizard is empty.
You have an SSH key from your PC (Ch. 9 · SSH & the terminal). Or you type a password in the two password boxes of the wizard. The wizard needs one of the two. The Next button stays grey until you give one.
You know your own network numbers. Where this chapter shows 192.168.1.x, use your own numbers. The rule is in Ch. 3 · How to read this manual. The address of this chapter must be outside the range that your router gives out by itself (the DHCP pool, often .100–.200, but yours can differ). An address inside the pool can go to a phone later. Two devices on one address break name lookups, and the cause is hard to find.
Commands marked HOST run on the server. In the Proxmox page, select homelab in the left tree. Then select >_ Shell. Commands marked CT run inside the container of this chapter. The chapter shows you how to get there.
The wizard does not work?Next is grey: you gave no password and no key. Give one of the two. The Template list is empty: the Debian image is not downloaded. Download it first. Each tab is explained in Ch. 10 · The container wizard.
Paperless-ngx: scanned documents, changed to text with OCR and searchable by full text.
30.1
CREATE THE CONTAINER
You do this task with the mouse, in the Proxmox web page. You type nothing. You prefer the command line? The box below does the same task with one pct create command.
Open https://192.168.1.220:8006.
The Proxmox VE login page.
Click homelab in the left tree.
Node homelab is selected in the left tree.
Click the blue Create CT button at the top right.
The Create CT button.
Fill in the tabs as the table below shows. Leave each field that is not listed at its default.
General tab: CT ID 113, hostname paperless.
Use Next to move between the tabs.
Wizard reference — Create CT 113
Tab → Field
Entry
General → Node
Select homelab.
General → CT ID
Type 113. Do not keep the number that the wizard suggests.
General → Hostname
Type paperless.
General → Unprivileged container
Keep this box ticked.
General → Nesting
Keep this box ticked. It is ticked by default. The wizard has no box for keyctl, which Docker also needs. The host command after Finish sets it. It is the first line of the next listing.
General → Password / SSH public key
Keep the password empty. Paste your public key in the SSH field: ssh-ed25519 AAAA…your-key-here you@your-pc. With the key, you can run ssh root@192.168.1.234 from your PC. The command pct enter 113 on the host needs no password.
Template → Storage, Template
Select local. Then select debian-13-standard.
Disks → Storage, Disk size
Select local-lvm. Set 12 GiB.
CPU → Cores
Set 2 cores.
Memory → Memory (MiB)
Set 2048. Keep Swap at its default.
Network → IPv4
Select Static. Set IPv4/CIDR to 192.168.1.234/24. Set Gateway to 192.168.1.1. Keep IPv6 at its default.
DNS → DNS domain
Keep this field empty. Do not type 192.168.1.1 here.
DNS → DNS servers
Always type 192.168.1.1. Never keep this field empty.
Confirm
Read the summary. Keep Start after created unticked. Select Finish.
The wizard has no box for three settings: the Docker permission keyctl, the timezone, and start at boot. The first command below sets all three. Run these 3 commands on the host. They set the missing settings, start the container, and open its shell. Each part is explained in Ch. 10 · The container wizard, section "The host command every build needs".
⌨ Type this on the Proxmox host (homelab)
Before you run anything on this page: every 192.168.1.x address below is this manual's example network. If your own network uses different numbers, substitute yours as you type — the rule is in Ch. 3 · How to read this manual. A command that runs with the wrong address usually succeeds and leaves you unreachable.
pct set 113 --features nesting=1,keyctl=1 --onboot 1 --timezone host
pct start 113
pct enter 113                          # now INSIDE CT 113 — the rest of this page runs here
Prefer the terminal? — the same task with one pct create command
⌨ Type this on the Proxmox host (homelab)
TMPL=$(pveam available --section system | awk '/debian-13-standard/{print $2}' | tail -1)
pveam download local "$TMPL"          # once per host; harmless to re-run
pct create 113 local:vztmpl/"$TMPL" \
  --hostname paperless --cores 2 --memory 2048 --rootfs local-lvm:12 \
  --net0 name=eth0,bridge=vmbr0,ip=192.168.1.234/24,gw=192.168.1.1 \
  --nameserver 192.168.1.1 --features nesting=1,keyctl=1 --unprivileged 1 --onboot 1 --timezone host
pct start 113
pct enter 113                      # you are now INSIDE CT 113 — everything below runs here
This part has no buttons. You type commands inside CT 113. You are already there from pct enter 113 above. (You closed that shell? Open homelab → >_ Shell and run pct enter 113 again.)
The >_ Console button of the CT opens a login: prompt, not a shell. Use pct enter 113 from homelab → >_ Shell.
Notice — each command below runs IN CT 113
After the container exists, you type the rest of this page in the shell of the container. You open that shell in one of two ways. Run pct enter 113 on the host. Opening homelab → >_ Shell is the only step with the mouse. The shell itself is not a GUI. Or run ssh root@192.168.1.234 from your PC. (The >_ Console button of the container shows a login: prompt. The containers of this manual cannot answer it. Skip it.) Only the pct and pveam commands go back to the host. Each guide names those commands where you use them.
30.2
INSTALL PAPERLESS-NGX
Install Docker and Docker Compose. Docker Compose is the tool that starts a whole group of containers together. Then run the official Paperless setup script. The script downloads each program of the group. The webserver draws the pages that you see in your browser. Redis is a small helper. It keeps the queue of jobs that wait to be done. Postgres is the database. It stores what Paperless knows about each document. Two more helpers, Gotenberg and Tika, are added only if you turn on support for Office documents. They are the parts that read Word and Excel files.
⌨ Type this inside CT 113
apt update && apt install -y docker.io docker-compose curl wget
systemctl enable --now docker                 # make sure the Docker service is running
useradd -m -s /bin/bash -G docker paperless   # the installer refuses to run as root — make a normal user for it
mkdir -p /opt/paperless && chown paperless /opt/paperless
su - paperless -c 'cd /opt/paperless && bash -c "$(curl -L https://raw.githubusercontent.com/paperless-ngx/paperless-ngx/main/install-paperless-ngx.sh)"'
# runs the installer as the 'paperless' user from /opt/paperless and asks ~11 questions — answers below
Explanation of each part
The Docker install line is explained in Ch. 9 · SSH & the terminal, section "Install Docker in the container". These parts are specific to Paperless:
apt install -y docker.io docker-compose curl wget
Installs Docker, Docker Compose (the tool for several containers), and two download tools: curl and wget. The install script itself uses wget inside, so you need both tools. On Debian 13, the package docker-compose is Compose v2. It gives you both the command docker-compose and the command docker compose.
systemctl enable --now docker
Starts the Docker service now. It also makes Docker start by itself at each boot.
useradd -m -s /bin/bash -G docker paperless
Makes a normal user named paperless, without root rights. It adds it to the docker group, so that it can run containers. The official installer refuses to run as root. Inside an LXC container, you start as root.
Makes the folder that holds the files of Paperless-ngx. The -p flag stops an error if the folder exists. The command then gives the folder to the paperless user.
su - paperless -c 'cd /opt/paperless && …'
Switches to the paperless user. Goes into /opt/paperless. Downloads the official install script from GitHub as that user. Then runs the script in interactive mode. The question "Target folder" of the script has the current folder as its default. So if you run the script from /opt/paperless, all files stay in that folder. The script asks the questions below. Then it builds and starts the application.
Installer prompts and the values to enter
URL
Press Enter to leave this empty. You reach the application by its IP address. Fill in this field only if you plan to use a domain name.
Port [8000]
Press Enter to accept 8000.
Current time zone
The installer finds the time zone by itself. Press Enter to accept it. The time zone is wrong? Type your own, for example Region/City.
Database backend [postgres]
Press Enter to keep Postgres.
Enable Apache Tika? [no]
Press Enter for no. This is fine for PDF and receipt files. Type yes only if you also want to index Word, Excel, or LibreOffice files. That option adds the helper containers Gotenberg and Tika.
OCR language [eng]
Type the language of your documents. For bills in French, type fra. Type fra+eng for both languages.
User ID / Group ID
Press Enter for both.
Target folder
Type /opt/paperless. The folder then matches the management commands that are shown further below.
Consume / Media / Data / Database folder
Press Enter for each prompt. Docker manages these folders.
Paperless username
Type an admin user name, for example admin.
Paperless password
Type a password. You must type it two times. This password is your login.
Email
Press Enter. Paperless does not use this field, so a placeholder is fine.
"Press any key to install."
Press Enter. The installer now downloads the images and starts the application. This takes a few minutes.
Notice — this step takes a long time and looks stuck
Paperless pulls several large images. So minutes with no output are normal. Do not press Ctrl+C. Two signs tell slow from broken. The terminal prints download percentages, also slowly? Then it works. It printed nothing at all for more than about ten minutes, or it shows a name-resolution error? Then stop. Fix DNS first (WHEN IT GOES WRONG at the end of this chapter covers it). Then run the installer again. It reuses the images that it already has.
Notice — set your timezone
Wherever a guide shows Region/City, replace it with your own timezone in Area/City form, for example Europe/Paris. To list the exact spellings that your system accepts, run this command:
⌨ Type this inside CT 113
timedatectl list-timezones
Paperless-ngx is a bundle: a webserver, a Redis broker, and a Postgres database. It can also have the containers Gotenberg and Tika, which read Office files. The script install-paperless-ngx.sh writes a docker-compose.yml file in the target folder that you chose, here /opt/paperless. The script connects the containers together. It asks the setup questions above: port, time zone, database, OCR language, folders, admin user name, and password. Then it pulls the images and starts the whole set. From then on, each command that checks, stops, starts, or updates the application runs from that folder. The reference card at the end of this chapter has all of them, ready to copy.
30.3
USE IT — THE BASICS
Paperless has one procedure: add a document, let the OCR run, add labels, then find the document with search.
Open http://192.168.1.234:8000. Log in with the admin name and the password from the installer questions.
Drag a PDF, or a phone photo of a bill, onto the upload box on the Dashboard. There is a second way in, for a pile of files at once. Anything that you copy into the folder /opt/paperless/consume inside CT 113 is imported by itself. No web page is involved. To copy a file from your PC to the server, you use a file explorer. You do not type. Ch. 12 · After every build + common Proxmox tasks, section “Move a file to or from the server”, connects the file manager of your PC to the container. The folder that you drop into is /opt/paperless/consume. One catch: files that you copy in this way belong to the user root. Paperless may refuse to read them. The last section of this chapter, When it goes wrong, has the one-line fix.
Wait about one minute for the OCR. Open Documents in the left sidebar. Your file is in the list. Its text is extracted.
Click the document. Set the Correspondent. This is the sender, for example your power company. Set the Document type, for example Invoice. Add one or two Tags. Click Save. Type a new name to make the label at once.
The detail view of a document: set Correspondent, Document type, and Tags. Then Save.
Use the search bar at the top to find documents. The search reads the full OCR text. So power 2025 finds the bill, also when the file name is scan_0042.pdf.
The search bar returns matches from the full OCR text.
30.4
WHEN IT GOES WRONG
The installer stops at once with "Do not run this script as root." This happens when you run the start script from the root shell of the LXC container. The official script refuses to run as root. Make a normal user in the docker group. Run the script as that user: useradd -m -s /bin/bash -G docker paperless, then su - paperless -c 'bash -c "$(curl -L https://raw.githubusercontent.com/paperless-ngx/paperless-ngx/main/install-paperless-ngx.sh)"'. The commands above already do this.
The script stops with "wget executable not found" or "docker compose plugin not found." The script needs wget to download files. It needs the compose plugin. Install the missing programs. Then run the script again: apt install -y wget docker.io docker-compose and systemctl enable --now docker.
Files that you drop in the consume folder do not import, and nothing appears in the web page. Paperless-ngx watches the folder with inotify. inotify fails in silence on some bind mounts and network mounts. Tell Paperless to check the folder on a timer instead. Each setting of this kind is in one plain text file, /opt/paperless/docker-compose.env, one setting on each line. There are two ways to edit it. Both end in the same way:
In the shell of the container (you are inside CT 113): type nano /opt/paperless/docker-compose.env. Go down to the bottom with the arrow keys. Type the new line PAPERLESS_CONSUMER_POLLING=30. Save and close with Ctrl+O, Enter, Ctrl+X.
With the mouse instead: open the same file over SFTP. Edit it in your usual text editor. The steps to connect are in Ch. 12 · After every build + common Proxmox tasks, section “Move a file to or from the server”. The file is /opt/paperless/docker-compose.env. Add the same line at the end. Save.
Then, back in the shell of the container, run cd /opt/paperless && docker compose up -d. This starts the set again with the new setting. Your documents and settings stay where they are. Remember this file and these two ways to edit it. The next two fixes use them again.
Still nothing imports? Check who owns the files that you dropped in. Run ls -l /opt/paperless/consume. Each line ends with the file name. The third column is the name of the owner. Files that you copied in over SFTP show root. Paperless cannot read those. It runs as the User ID that the installer offered you at its User ID prompt. This is the paperless user that you made a few steps earlier. Give the files to it with chown paperless /opt/paperless/consume/*.
The OCR text is garbled, or a search for accented words finds nothing. This happens when the OCR language stays at English (eng). Set the correct language in the same settings file as in the fix above, /opt/paperless/docker-compose.env. Edit it in the same two ways: with nano in the shell of the container, or over SFTP with the mouse. Add the line PAPERLESS_OCR_LANGUAGE=fra (or fra+eng). Change it if it is already there. Then run cd /opt/paperless && docker compose up -d in the shell of the container. The common language packs are already in the image. This changes only documents that you import after the change. OCR runs one time, at the import, and its text is stored. So everything that is already in Paperless keeps the old, wrong text, and the same search keeps failing. To fix what is already there, run OCR again from inside the container: cd /opt/paperless && docker compose exec webserver document_archiver --overwrite. On a big library, this takes a long time and uses the whole CPU. Start it when you do not need the machine.
The page shows "Bad Request (400)" or a CSRF error. This often happens after you add a domain or a reverse proxy. This error means that Paperless-ngx does not know which address serves it. Tell it. In the same settings file, /opt/paperless/docker-compose.env, add the line PAPERLESS_URL=http://192.168.1.234:8000. Open the file with nano or over SFTP, exactly as in the two fixes above. The application is behind a proxy or a domain (see Ch. 17 · Nginx Proxy Manager)? Then also add PAPERLESS_CSRF_TRUSTED_ORIGINS=https://your.domain. Then run cd /opt/paperless && docker compose up -d.
30.5
A download step fails with Temporary failure resolving deb.debian.org, or with another "cannot resolve" message. The container has no working DNS server. It cannot change a name into an address. This is not a typing mistake. It does not fix itself. In the Proxmox page, select this container in the left tree. Open DNS. Select Edit. Type your router address in DNS servers (192.168.1.1 here; use your own). Then run pct reboot 113 in the host shell. Run the failed step again.
A command fails. You do not know if you are on the server or in the container. Read the prompt. In the container, it ends with the name of the container. On the server, it shows root@homelab. The prompt still shows root@homelab after pct enter? Then the command did not work. Type exit. Run the pct enter line again. Check the prompt before you paste anything else. You can paste a build block on the server by mistake. It seems to work. It installs without an error, and the app even answers. But the app is on the server, and it must not be there.
How to see that it happened, and how to undo it. The app does not open at the container address (192.168.1.234). It does open at the server address (192.168.1.220) on the same port. Then the app is on the host. To remove it, run cd /opt/paperless && docker compose down (this app is a Compose stack — several containers at once, so there is no single name to remove) in the host shell. Then run pct enter 113. Check that the prompt changed. Paste the build block again. You lose nothing in the container, because nothing was built there. The first command can show Error: No such container. This is good. It means that the app was never on the host. Do not paste the build block again. Look for another cause.
The page does not open. The browser spins, or says it cannot connect. Do these checks in order, in the host shell. 1. Is the container running? Run pct status 113. It must say running. If it does not, run pct start 113. 2. Is the container at the address that you typed? Run pct config 113 | grep net0. It shows the real address. A wrong digit in the wizard puts the container at another address, and nothing warns you. 3. Does the app run in the container? Run pct enter 113. Then run docker ps. An empty list means that the app did not start. Run docker ps -a to see that it stopped. Run docker logs to see why. 4. Does the app answer in the container? Run curl -I http://localhost followed by the port of the app. You get a reply here, but nothing from your PC? Then the address or your own network is the problem. The app is fine. Your browser reaches 192.168.1.234 but not the port? Then the app is down. It reaches neither? Then the container is down.
Docker does not start, or you see Cannot connect to the Docker daemon, a keyring error, or an overlay error. This is the most common failure in these guides. It means that the two container features are off. A later pct set --features can switch them off, also when you set them before. Run this in the host shell, not in the container: pct set 113 --features nesting=1,keyctl=1. Then run pct reboot 113. Then run the failed step again. Type both settings on one line. If you send only one setting, it replaces the pair and switches the other one off.
REFERENCE CARD
Paste this in the Notes of the container, so that the management commands are always at hand. Click 113 → Summary → Notes and paste. It is a reference. It is not a shell command.
📋 Reference — paste into this container's Notes in Proxmox (not a shell command)
## Paperless-ngx — CT 113
dashboard http://192.168.1.234:8000 · docs https://docs.paperless-ngx.com/
```sh
# is it running?
cd /opt/paperless && docker compose ps
curl -fsS http://localhost:8000 >/dev/null && echo OK # quick health check# logs (last 50, webserver only)
cd /opt/paperless && docker compose logs --tail 50 webserver
# stop / start / restart
cd /opt/paperless && docker compose stop
cd /opt/paperless && docker compose start
cd /opt/paperless && docker compose restart
# is there an update? ("Image is up to date" for each = no)
cd /opt/paperless && docker compose pull
# update (settings and documents survive in /opt/paperless)# snapshot the container first (see the after-every-build ritual) — instant rollback if the update misbehaves
cd /opt/paperless && docker compose pull && docker compose up -d
```
(the Update notifications chapter adds automatic pings)
Explanation of each part
cd /opt/paperless
Goes into the folder with the docker-compose configuration of Paperless-ngx. Each command in the card runs from this folder, so each line goes into it first.
docker compose ps
Lists the containers of the application. It shows if each one runs.
curl -fsS http://localhost:8000 >/dev/null && echo OK
Asks the web page for a page. It prints OK only when it answers. This is a quick check that the webserver is up, not only the container.
docker compose logs --tail 50 webserver
Prints the last 50 log lines of the webserver container only. This container serves the web page. Leave out the word webserver to see all containers. Add -f to follow the log live.
docker compose stop / start / restart
Stops, starts, or restarts the whole set of the application. Use restart after you change a setting in docker-compose.env.
docker compose pull
Checks for newer images. It changes nothing that runs. Each line says "Image is up to date"? Then there is no update.
docker compose pull && docker compose up -d
Downloads the latest container images. Then it restarts the application to use them. Your settings and documents stay, because they are in the folders under /opt/paperless. The application runs in the background.
Part D · The app catalog
31Karakeep
Karakeep is a bookmark manager and a read-later app that you host yourself. It saves a full copy of each page, adds tags with AI, and makes everything searchable.
This chapter needs the items below. You came here directly? Do them first. Each item takes a short time. Nothing on this page works without them.
Proxmox is installed and works at https://192.168.1.220:8006. You can log in as root. See Ch. 6 · Install Proxmox. At your first visit, the browser shows a certificate warning. Select Advanced. Then select Proceed. The warning is normal. Proxmox makes its own certificate.
The Debian 13 image is downloaded. You do this one time. See Ch. 10 · The container wizard. Without the image, the Template list in the wizard is empty.
You have an SSH key from your PC (Ch. 9 · SSH & the terminal). Or you type a password in the two password boxes of the wizard. The wizard needs one of the two. The Next button stays grey until you give one.
You know your own network numbers. Where this chapter shows 192.168.1.x, use your own numbers. The rule is in Ch. 3 · How to read this manual. The address of this chapter must be outside the range that your router gives out by itself (the DHCP pool, often .100–.200, but yours can differ). An address inside the pool can go to a phone later. Two devices on one address break name lookups, and the cause is hard to find.
Commands marked HOST run on the server. In the Proxmox page, select homelab in the left tree. Then select >_ Shell. Commands marked CT run inside the container of this chapter. The chapter shows you how to get there.
The wizard does not work?Next is grey: you gave no password and no key. Give one of the two. The Template list is empty: the Debian image is not downloaded. Download it first. Each tab is explained in Ch. 10 · The container wizard.
Notice — paywalls
Karakeep saves what your browser can already see. Free articles, and articles that you are logged in to, are kept for ever, without ads. Karakeep does not unlock content behind a hard paywall.
31.1
CREATE THE CONTAINER
You do this task with the mouse in the Proxmox web page. You type nothing, except for one setting that the wizard cannot reach. You prefer the command line? The box below does the whole task with one pct create command.
Open https://192.168.1.220:8006.
The Proxmox VE login page.
Click homelab in the left tree.
Select the node in the left tree.
Click the blue Create CT button at the top right.
The Create CT button.
Fill in each tab as the reference below shows. Leave each field that is not listed at its default value.
General tab — CT ID 114, hostname karakeep.
Read the summary. Click Finish.
Wizard reference — Create CT 114
Tab → Field
Entry
General → Node
Select homelab.
General → CT ID
Type 114. Do not keep the number that the wizard suggests.
General → Hostname
Type karakeep.
General → Unprivileged container
Keep this box ticked.
General → Nesting
Keep this box ticked. It is ticked by default. The wizard has no box for keyctl, which Docker also needs. The host command after Finish sets it. It is the first line of the next listing.
General → Password / SSH public key
Keep the password empty. Paste your public key in the SSH field: ssh-ed25519 AAAA…your-key-here you@your-pc. With the key, you can run ssh root@192.168.1.235 from your PC. The command pct enter 114 on the host needs no password.
Template → Storage, Template
Select local. Then select debian-13-standard.
Disks → Storage, Disk size
Select local-lvm. Set 12 GiB.
CPU → Cores
Set 2 cores.
Memory → Memory (MiB)
Set 2048. Keep Swap at its default.
Network → IPv4
Select Static. Set IPv4/CIDR to 192.168.1.235/24. Set Gateway to 192.168.1.1. Keep IPv6 at its default.
DNS → DNS domain
Keep this field empty. Do not type 192.168.1.1 here.
DNS → DNS servers
Always type 192.168.1.1. Never keep this field empty.
Confirm
Read the summary. Keep Start after created unticked. Select Finish.
The wizard has no box for three settings: the Docker permission keyctl, the timezone, and start at boot. The first command below sets all three. Run these 3 commands on the host. They set the missing settings, start the container, and open its shell. Each part is explained in Ch. 10 · The container wizard, section "The host command every build needs".
⌨ Type this on the Proxmox host (homelab)
Before you run anything on this page: every 192.168.1.x address below is this manual's example network. If your own network uses different numbers, substitute yours as you type — the rule is in Ch. 3 · How to read this manual. A command that runs with the wrong address usually succeeds and leaves you unreachable.
pct set 114 --features nesting=1,keyctl=1 --onboot 1 --timezone host
pct start 114
pct enter 114                          # now INSIDE CT 114 — the rest of this page runs here
Prefer the terminal? — the same task with one pct create command
⌨ Type this on the Proxmox host (homelab)
TMPL=$(pveam available --section system | awk '/debian-13-standard/{print $2}' | tail -1)
pveam download local "$TMPL"          # once per host; harmless to re-run
pct create 114 local:vztmpl/"$TMPL" \
  --hostname karakeep --cores 2 --memory 2048 --rootfs local-lvm:12 \
  --net0 name=eth0,bridge=vmbr0,ip=192.168.1.235/24,gw=192.168.1.1 \
  --nameserver 192.168.1.1 --features nesting=1,keyctl=1 --unprivileged 1 --onboot 1 --timezone host
pct start 114
pct enter 114                      # you are now INSIDE CT 114 — everything below runs here
Wherever you see Region/City, put your own zone, for example Europe/Paris or America/New_York. To list the exact spelling, run timedatectl list-timezones.
31.2
INSTALL KARAKEEP
This part has no buttons. You type commands inside CT 114. You are already there from pct enter 114 above. (You closed that shell? Open homelab → >_ Shell and run pct enter 114 again.)
The >_ Console button of the CT opens a login: prompt, not a shell. Use pct enter 114 from homelab → >_ Shell.
Notice — which machine
Each command in this section runs inside CT 114. It does not run on the Proxmox host. Open its shell first. In the shell of the host (homelab → >_ Shell), run pct enter 114. Or run ssh root@192.168.1.235 from your PC. (The >_ Console button of the container shows a login: prompt. The containers of this manual cannot answer it. Skip it.) The prompt must say root@karakeep before you paste any command. Only the pct and pveam commands ever run on the host.
Install Docker and Docker Compose. Then install the compose bundle of Karakeep. It has the app, the Meilisearch search engine, and a headless Chrome that archives each link. In this section, you edit .env and docker-compose.yml with nano in the terminal. You prefer the mouse? Connect to CT 114 with an SFTP file browser (WinSCP on Windows, Cyberduck on a Mac, the file manager on Linux), as Ch. 12 · After every build + common Proxmox tasks, section "Move a file to or from the server", describes. Edit the same files there. In both cases, run docker compose up -d afterwards, so that the change takes effect.
⌨ Type this inside CT 114
apt update && apt install -y docker.io docker-compose curl nano
mkdir -p /opt/karakeep && cd /opt/karakeep
curl -o docker-compose.yml https://raw.githubusercontent.com/karakeep-app/karakeep/main/docker/docker-compose.yml
curl -o .env https://raw.githubusercontent.com/karakeep-app/karakeep/main/docker/.env.sample
openssl rand -base64 36 # prints your NEXTAUTH_SECRET — keep this line
openssl rand -base64 36 | tr -dc 'A-Za-z0-9' # prints your MEILI_MASTER_KEY (letters + digits only) — keep this line# copy both printed lines somewhere before you go on — do NOT run 'up -d' yet
Notice — the next command opens an editor
The block above stops on purpose. You start the stack now? Then it starts with the placeholder secrets of the sample file. It reports success, and it breaks at the login later. Nothing links the two events. Open the settings file first. Type this command alone:
⌨ Inside the container — type this by itself
nano .env
This opens the .env file that you downloaded a moment ago. It fills the whole terminal. Nothing that you paste afterwards reaches the shell until you save and close. Replace the placeholder text [generate with …] on these lines:
NEXTAUTH_SECRET= — paste your first openssl line.
MEILI_MASTER_KEY= — paste your second openssl line.
NEXTAUTH_URL=http://192.168.1.235:3000 — change localhost to the own address of this container. If you leave localhost, the login breaks when you open Karakeep by IP.
Save and close with Ctrl+O, Enter, then Ctrl+X. Now start the stack:
⌨ Inside the container — after you save the file
docker compose up -d
Explanation of each part
The Docker install line is explained in Ch. 9 · SSH & the terminal, section "Install Docker in the container". The locked secrets are explained in Ch. 11 · Security basics. These parts are specific to Karakeep:
apt install -y docker.io docker-compose curl nano
Installs Docker, Docker Compose, curl (a download tool), and nano (a text editor). You use nano to edit the .env file. On Debian 13, docker-compose is Compose v2.
mkdir -p /opt/karakeep && cd /opt/karakeep
Makes the folder that holds the configuration files of Karakeep. Goes into it.
Downloads the official docker-compose file of Karakeep. Saves it as docker-compose.yml. The -o flag sets the name of the output file.
curl -o .env https://…/.env.sample
Downloads the sample settings file of Karakeep. Saves it as .env. Docker Compose reads this file for configuration values, such as ports and secrets.
openssl rand -base64 36 (two times)
Makes two long random passwords. The first line becomes NEXTAUTH_SECRET. It signs your login sessions. The second command adds | tr -dc 'A-Za-z0-9'. This keeps only letters and digits. That line becomes MEILI_MASTER_KEY. It locks the search engine inside the bundle. The sample file of Karakeep asks for the search key in the form of letters and digits only. This avoids a rare problem with the characters + and / when you copy and paste. Copy each printed line into the matching line in .env.
nano .env
Opens the .env settings file in a text editor. Paste the two secrets. Change NEXTAUTH_URL to the IP address of this container. Save with Ctrl+O, then Enter. Leave with Ctrl+X.
docker compose up -d
Starts the containers of Karakeep in the background. It uses the configuration files that you downloaded.
Karakeep is a bundle: the app, a Meilisearch search engine, and a headless Chrome browser. Chrome visits and archives each link. In .env, you set two random secrets. NEXTAUTH_SECRET signs your login sessions. MEILI_MASTER_KEY protects the search engine. Both come from openssl rand -base64 36. The command docker compose up -d starts all three parts together. The Meilisearch part is the built-in full-text index. You need no separate search tool.
Open http://192.168.1.235:3000. Make an account. Install the browser extension or the phone app to save items. Optional: for better auto-tagging, add an OpenAI key. This means that you edit .env on the server again, in the same way as NEXTAUTH_SECRET above. The exact line to add is in "When it goes wrong" below, under AI auto-tagging.
31.3
USE IT: THE BASICS
Karakeep collects links and notes. Save an item from the input box, or from your browser and phone. The crawler archives the page. You find it again with search, tags, and lists.
Open http://192.168.1.235:3000. Click Sign Up. Make your account. The first user who signs up becomes the administrator by itself.
Sign up — the first account becomes the administrator.
Paste a URL in the input box at the top of the home page. Press Enter. Karakeep gets the title, a screenshot, and a saved copy in the background. You added an AI key? Then it also adds tags by itself. Type plain text in the same box to save a note. You can also drop images or PDF files into the box.
Paste a link in the input box of the home page.
Click a bookmark to open it. Add tags. Click the star to mark a favourite. Use archive to hide an item that you read from the home view. Archived items stay searchable.
Bookmark detail — tags, favourite star, archive.
Click the + next to Lists in the left sidebar to make a list, for example a reading queue or a project. Add bookmarks to the list from the menu of each bookmark.
Make a list from the left sidebar.
Use the search bar at the top. The search is full-text. It finds words inside the saved pages, not only in titles.
Full-text search across saved pages.
Install the browser extension for Chrome or Firefox, and the phone app. Go to Settings → API Keys. Make a key. Enter the server address http://192.168.1.235:3000 and that key in each extension and app.
Make an API key for the extension or the phone app.
Notice — keep the home view empty
Archive each item after you read it or use it. You lose nothing, because search still finds archived items. The home page then shows only the items that need your attention.
Notice — big imports need more room
You import many bookmarks at the same time, for example an export from Pocket or Raindrop. The headless-Chrome archiver can then use more than 3 GB for a single page that it processes. This is far above the 2048 MB of this CT. A bulk import crashes or stops in the middle? Raise the memory of this container to 4096 MB for the import (114 → Resources). Lower it again afterwards.
31.4
WHEN IT GOES WRONG
Bookmarks stay as "pending" or "crawling" and never get a title, a screenshot, or a saved copy. The Chrome container that archives is not reachable. Check that it runs with cd /opt/karakeep && docker compose ps and docker compose logs chrome. Check that the web service still has BROWSER_WEB_URL: http://chrome:9222 in docker-compose.yml. Open it with cd /opt/karakeep && nano docker-compose.yml to check. Restart with docker compose up -d. The line "Chrome Failed to Read DnsConfig" in the chrome logs is harmless. Ignore it.
Sign-in fails, or it keeps sending you back to the login page or to localhost. NEXTAUTH_URL is still set to localhost. Run cd /opt/karakeep && nano .env. Set NEXTAUTH_URL=http://192.168.1.235:3000. Use the exact address that you type in the browser, with no slash at the end. Save the file. Run docker compose up -d again, so that the change takes effect.
Search returns nothing. Or after an update of Meilisearch, the logs say "Your database version (x.x.x) is incompatible with your current engine version". Meilisearch does not open a database that another version wrote. Use the official procedure. Run cd /opt/karakeep && docker compose stop meilisearch. Then delete the old index folder: docker run --rm -v karakeep_meilisearch:/d alpine rm -rf /d/data.ms. This borrows alpine, a tiny throw-away Linux image. It only reaches inside the storage of the search engine to delete its index folder. --rm throws that borrowed container away right after. -v karakeep_meilisearch:/d plugs the real storage of Meilisearch in at the path /d, so that the command can reach it. rm -rf /d/data.ms deletes only that index folder. The index can be built again. Your bookmarks are elsewhere, and they are not touched. Then run docker compose up -d. Last, log in as admin. Go to Admin Settings → Background Jobs → Reindex All Bookmarks to build the search index again.
The app never opens, and docker compose up -d ends with "Bind for 0.0.0.0:3000 failed: port is already allocated". Another program in this container already uses port 3000. Find it with ss -ltnp | grep :3000. This lists the programs that listen on network ports, and keeps only port 3000. Then stop that program. Or open cd /opt/karakeep && nano docker-compose.yml. Change the ports line of the web service from 3000:3000 to a free host port, such as 3001:3000. Run docker compose up -d again. You change the port? Then use the new number in NEXTAUTH_URL and in the address that you open.
AI auto-tagging never adds any tags. Auto-tagging stays off until you give it an AI key. Run cd /opt/karakeep && nano .env. Add a line OPENAI_API_KEY=<your-key>. Save the file. Run docker compose up -d. Watch it work with docker compose logs -f web. The -f flag keeps the log open and live, so new lines keep appearing. Press Ctrl+C to stop watching. This step is optional. It costs money at OpenAI. Karakeep runs well without it.
31.5
A download step fails with Temporary failure resolving deb.debian.org, or with another "cannot resolve" message. The container has no working DNS server. It cannot change a name into an address. This is not a typing mistake. It does not fix itself. In the Proxmox page, select this container in the left tree. Open DNS. Select Edit. Type your router address in DNS servers (192.168.1.1 here; use your own). Then run pct reboot 114 in the host shell. Run the failed step again.
A command fails. You do not know if you are on the server or in the container. Read the prompt. In the container, it ends with the name of the container. On the server, it shows root@homelab. The prompt still shows root@homelab after pct enter? Then the command did not work. Type exit. Run the pct enter line again. Check the prompt before you paste anything else. You can paste a build block on the server by mistake. It seems to work. It installs without an error, and the app even answers. But the app is on the server, and it must not be there.
How to see that it happened, and how to undo it. The app does not open at the container address (192.168.1.235). It does open at the server address (192.168.1.220) on the same port. Then the app is on the host. To remove it, run cd /opt/karakeep && docker compose down (this app is a Compose stack — several containers at once, so there is no single name to remove) in the host shell. Then run pct enter 114. Check that the prompt changed. Paste the build block again. You lose nothing in the container, because nothing was built there. The first command can show Error: No such container. This is good. It means that the app was never on the host. Do not paste the build block again. Look for another cause.
The page does not open. The browser spins, or says it cannot connect. Do these checks in order, in the host shell. 1. Is the container running? Run pct status 114. It must say running. If it does not, run pct start 114. 2. Is the container at the address that you typed? Run pct config 114 | grep net0. It shows the real address. A wrong digit in the wizard puts the container at another address, and nothing warns you. 3. Does the app run in the container? Run pct enter 114. Then run docker ps. An empty list means that the app did not start. Run docker ps -a to see that it stopped. Run docker logs to see why. 4. Does the app answer in the container? Run curl -I http://localhost followed by the port of the app. You get a reply here, but nothing from your PC? Then the address or your own network is the problem. The app is fine. Your browser reaches 192.168.1.235 but not the port? Then the app is down. It reaches neither? Then the container is down.
Docker does not start, or you see Cannot connect to the Docker daemon, a keyring error, or an overlay error. This is the most common failure in these guides. It means that the two container features are off. A later pct set --features can switch them off, also when you set them before. Run this in the host shell, not in the container: pct set 114 --features nesting=1,keyctl=1. Then run pct reboot 114. Then run the failed step again. Type both settings on one line. If you send only one setting, it replaces the pair and switches the other one off.
REFERENCE CARD
Paste this in the Notes of the container in Proxmox at 114 → Summary → Notes. The address and the daily commands are then always at hand.
📋 Reference — paste into this container's Notes in Proxmox (not a shell command)
## Karakeep — CT 114
dashboard http://192.168.1.235:3000 · docs https://docs.karakeep.app/
```sh
# is it running?
cd /opt/karakeep && docker compose ps
curl -fsS http://localhost:3000 >/dev/null && echo OK # quick health check# logs (last 50)
cd /opt/karakeep && docker compose logs --tail 50
# stop / start / restart — run the one you need
cd /opt/karakeep && docker compose stop
cd /opt/karakeep && docker compose start
cd /opt/karakeep && docker compose restart
# is there an update? (nothing new to pull = you are current)
cd /opt/karakeep && docker compose pull
# update (bookmarks + settings survive in the data and meilisearch volumes)
cd /opt/karakeep && docker compose pull && docker compose up -d
```
Explanation of each part
cd /opt/karakeep
Goes into the folder with the docker-compose configuration of Karakeep. Each compose command must run from here.
docker compose ps
Lists the three containers of the app and their status.
curl -fsS http://localhost:3000 >/dev/null && echo OK
Asks the site for its home page. It prints OK only if it answers. This is a fast check that the web part is up, without a browser.
docker compose logs --tail 50
Prints the last 50 log lines of all three containers. This is the first place to look when something goes wrong.
docker compose stop / start / restart
Stops, starts, or restarts the containers of the app. Use restart after a change of settings. Use stop and start to free the memory of the container for a while.
docker compose pull
Checks the registry for newer images. It downloads them if there are any. It does not change the running app by itself.
docker compose pull && docker compose up -d
Downloads the newest images. Then it restarts the app in the background with them. Your bookmarks and settings stay, because they are in the data and meilisearch volumes, not in the containers.
Part D · The app catalog
32Gitea
A light home for your git repositories that you host yourself. It holds code, configs, and notes. You own the data. You do not depend on GitHub.
This chapter needs the items below. You came here directly? Do them first. Each item takes a short time. Nothing on this page works without them.
Proxmox is installed and works at https://192.168.1.220:8006. You can log in as root. See Ch. 6 · Install Proxmox. At your first visit, the browser shows a certificate warning. Select Advanced. Then select Proceed. The warning is normal. Proxmox makes its own certificate.
The Debian 13 image is downloaded. You do this one time. See Ch. 10 · The container wizard. Without the image, the Template list in the wizard is empty.
You have an SSH key from your PC (Ch. 9 · SSH & the terminal). Or you type a password in the two password boxes of the wizard. The wizard needs one of the two. The Next button stays grey until you give one.
You know your own network numbers. Where this chapter shows 192.168.1.x, use your own numbers. The rule is in Ch. 3 · How to read this manual. The address of this chapter must be outside the range that your router gives out by itself (the DHCP pool, often .100–.200, but yours can differ). An address inside the pool can go to a phone later. Two devices on one address break name lookups, and the cause is hard to find.
Commands marked HOST run on the server. In the Proxmox page, select homelab in the left tree. Then select >_ Shell. Commands marked CT run inside the container of this chapter. The chapter shows you how to get there.
The wizard does not work?Next is grey: you gave no password and no key. Give one of the two. The Template list is empty: the Debian image is not downloaded. Download it first. Each tab is explained in Ch. 10 · The container wizard.
Notice — which machine
Each command in this chapter runs inside CT 135 (the Gitea container). It does not run on the Proxmox host homelab (192.168.1.220). It does not run on your PC. Only the pct commands go back to the host. Each one is labelled where you use it.
32.1
CREATE THE CONTAINER
Make the container with the mouse in the Proxmox web page.
Open https://192.168.1.220:8006.
The Proxmox login page.
Click homelab in the left tree.
Node homelab is selected in the left tree.
Click the blue Create CT button at the top right.
The Create CT button.
Fill in each tab as the reference shows. Use Next to move between the tabs.
General tab: CT ID 135, hostname gitea.
On the Confirm tab, read the summary. Click Finish.
Wizard reference — Create CT 135
Tab → Field
Entry
General → Node
Select homelab.
General → CT ID
Type 135. Do not keep the number that the wizard suggests.
General → Hostname
Type gitea.
General → Unprivileged container
Keep this box ticked.
General → Nesting
Keep this box ticked. It is ticked by default. The wizard has no box for keyctl, which Docker also needs. The host command after Finish sets it. It is the first line of the next listing.
General → Password / SSH public key
Keep the password empty. Paste your public key in the SSH field: ssh-ed25519 AAAA…your-key-here you@your-pc. With the key, you can run ssh root@192.168.1.211 from your PC. The command pct enter 135 on the host needs no password.
Template → Storage, Template
Select local. Then select debian-13-standard.
Disks → Storage, Disk size
Select local-lvm. Set 8 GiB.
CPU → Cores
Set 1 core.
Memory → Memory (MiB)
Set 1024. Keep Swap at its default.
Network → IPv4
Select Static. Set IPv4/CIDR to 192.168.1.211/24. Set Gateway to 192.168.1.1. Keep IPv6 at its default.
DNS → DNS domain
Keep this field empty. Do not type 192.168.1.1 here.
DNS → DNS servers
Always type 192.168.1.1. Never keep this field empty.
Confirm
Read the summary. Keep Start after created unticked. Select Finish.
The wizard has no box for three settings: the Docker permission keyctl, the timezone, and start at boot. The first command below sets all three. Run these 3 commands on the host. They set the missing settings, start the container, and open its shell. Each part is explained in Ch. 10 · The container wizard, section "The host command every build needs".
⌨ Type this on the Proxmox host (homelab)
Before you run anything on this page: every 192.168.1.x address below is this manual's example network. If your own network uses different numbers, substitute yours as you type — the rule is in Ch. 3 · How to read this manual. A command that runs with the wrong address usually succeeds and leaves you unreachable.
pct set 135 --features nesting=1,keyctl=1 --onboot 1 --timezone host
pct start 135
pct enter 135                          # now INSIDE CT 135 — the rest of this page runs here
Prefer the terminal? — the same task with one pct create command
⌨ Type this on the Proxmox host (homelab)
TMPL=$(pveam available --section system | awk '/debian-13-standard/{print $2}' | tail -1)
pveam download local "$TMPL"          # once per host; harmless to re-run
pct create 135 local:vztmpl/"$TMPL" \
  --hostname gitea --cores 1 --memory 1024 --rootfs local-lvm:8 \
  --net0 name=eth0,bridge=vmbr0,ip=192.168.1.211/24,gw=192.168.1.1 \
  --nameserver 192.168.1.1 --features nesting=1,keyctl=1 --unprivileged 1 --onboot 1 --timezone host
pct start 135
pct enter 135                      # you are now INSIDE CT 135 — everything below runs here
Replace Region/City with your own zone, for example America/New_York. To list the valid names, run timedatectl list-timezones.
32.2
INSTALL GITEA
Notice — open the shell of the container
You open a shell in CT 135 in one of two ways. Run pct enter 135 on the host (first homelab → >_ Shell). Or run ssh root@192.168.1.211 from your PC. (The >_ Console button of the container shows a login: prompt. The containers of this manual cannot answer it. Skip it.)
The >_ Console button of the CT opens a login: prompt, not a shell. Use pct enter 135 from homelab → >_ Shell.
This part has no buttons. These commands run inside CT 135. In the shell of the host (homelab → >_ Shell), run pct enter 135. You are still inside from the section before? Then continue.
Install Docker. Then run Gitea as a single container. SQLite keeps everything in one folder. A personal instance needs no separate database server.
The Docker install line and the flags -d, --name, --restart, -v, and -p are explained in Ch. 9 · SSH & the terminal, sections "Install Docker in the container" and "Anatomy of docker run". These parts are specific to Gitea:
apt install -y docker.io curl
Installs Docker and curl. The reference card uses curl for its health check. A new container does not have it.
-e USER_UID=1000 -e USER_GID=1000
Tells Gitea to own its internal files as the Linux user ID and group ID 1000. File permissions then match.
-e GITEA__database__DB_TYPE=sqlite3
Sets Gitea to use SQLite. SQLite is a database in one file. It replaces a separate database server. It suits a small setup with one user.
SSH_PORT makes Gitea show port 2222 in its SSH clone links. SSH_LISTEN_PORT keeps it on port 22 inside the container. This matches the link -p 2222:22. You miss one of them? Then the clone button shows port 22, and cloning over SSH fails.
-p 3000:3000
Opens port 3000 on CT 135 and sends it to the web page of Gitea.
-p 2222:22
Opens port 2222 on CT 135 and sends it to port 22 of the container. Git over SSH then uses port 2222. It does not clash with the own SSH login of the CT on port 22.
-v /opt/gitea:/data
Stores the repositories and the data of Gitea in /opt/gitea on CT 135. The data stays when you make the container again.
gitea/gitea:latest
The image to run: the official app package of Gitea, with the "latest" stable tag.
32.3
RUN THE FIRST-TIME SETUP
Open http://192.168.1.211:3000 to run the installer. SQLite is fine for one person.
Change both Server Domain and Gitea Base URL to 192.168.1.211. You leave them at the default localhost? Then the clone links that Gitea shows point at localhost. They break on each other machine. Make the admin account on the same page. The first user that you register becomes the site administrator by itself.
The first-run installer: Server Domain, Gitea Base URL, and the admin account fields.
Git over SSH uses port 2222 here. It does not clash with the own SSH login of the CT on port 22. You cannot clone yet. Gitea first needs the SSH key of your PC. You add it in the next section. After that, clone with git clone ssh://git@192.168.1.211:2222/you/repo.git.
32.4
USE IT: THE BASICS
Gitea works like a private GitHub. Make an empty repository in the web page. Then push code into it from your PC.
Open http://192.168.1.211:3000. Sign in with the admin account from the installer.
Add your SSH key, so that pushes need no password. Click your avatar at the top right. Go to Settings → SSH / GPG Keys. Click Add Key. Paste the public key of your PC. It is the same ssh-ed25519 … line from ~/.ssh/id_ed25519.pub on your PC that you copied in when you first set up the CT. Save.
Settings → SSH / GPG Keys → Add Key.That file does not exist on your PC? Make one first. Nothing in this chapter makes it. In a terminal on your own machine, run ssh-keygen -t ed25519. Press Enter at each prompt. Then print the key with cat ~/.ssh/id_ed25519.pub. (On Windows, the same commands work in PowerShell.) Paste that whole line here. Ch. 9 · SSH & the terminal explains this in full. You skip it? Then each push asks for a password. This is annoying, but it does not break anything.
Make your first repository. Click the + button in the top bar. Select New Repository. Enter a name. Tick Make Repository Private. Leave Initialize Repository unticked if you push an existing project into it.
The New Repository dialog, with Make Repository Private ticked.
Gitea then shows a page of ready commands. Find Pushing an existing repository from the command line. Copy the lines. Run them in your project folder on your PC. The remote address is ssh://git@192.168.1.211:2222/you/repo.git.
The ready push commands on the page of a new repository.The first push asks a question:The authenticity of host … can't be established. Are you sure you want to continue connecting (yes/no)? Type yes and press Enter. You press Enter alone, or type no? Then the connection closes, and the push stops with Host key verification failed. This is your own server on your own network. The question comes one time for each machine.
The commands fail with “git: command not found”? Your PC does not have Git yet. Gitea runs on the server. git is the program that you run on your own machine. Nothing in this manual installed it for you. Get it from git-scm.com/downloads. Windows and macOS have an installer there. On a Debian or Ubuntu desktop, run sudo apt install git. Close and open your terminal again. Then run git --version. A version number means that it is ready. Go back to the commands above.
Refresh the page of the repository. Your files, commit history, and branches are all there. Click a file to read it. Click the pencil icon to edit it in the browser.
Daily use does not change. Run git push from your PC as usual. Use the website to read code and history. Use Issues to keep to-do notes for each project.
32.5
WHEN IT GOES WRONG
Docker does not start inside CT 135.docker run fails with "Cannot connect to the Docker daemon", or the daemon never starts. Docker needs the two features nesting and keyctl on the container. They let Docker run other containers inside CT 135. Check them on the Proxmox host with pct config 135 | grep features. The line must show keyctl=1,nesting=1. It does not? Run pct set 135 --features nesting=1,keyctl=1, then pct reboot 135. Go back inside with pct enter 135. Run the apt and docker commands again.
The gitea container keeps restarting, and docker logs gitea shows "permission denied" on /data. Gitea runs as UID/GID 1000 inside the container. So the data folder must belong to the same ID. Inside CT 135, run chown -R 1000:1000 /opt/gitea, then docker restart gitea.
The SSH clone URL shows port 22, and git clone hangs or is refused. CT 135 sends port 2222 to port 22 of the container. So Gitea must show 2222. Check that -e GITEA__server__SSH_PORT=2222 and -e GITEA__server__SSH_LISTEN_PORT=22 are in your docker run command. Make the container again: run docker rm -f gitea. Then paste the same docker run command from Install Gitea above (or from the reference card) again. Or clone by hand with git clone ssh://git@192.168.1.211:2222/you/repo.git.
HTTP clone links and login redirects point to localhost:3000, and they do not work from another machine. You left the Gitea Base URL and Server Domain of the installer at localhost. Fix them in the web page under Site Administration. Or add -e GITEA__server__ROOT_URL=http://192.168.1.211:3000/ and -e GITEA__server__DOMAIN=192.168.1.211 to the docker run command from Install Gitea above (or from the reference card). Then run docker rm -f gitea and paste that new command again.
32.6
A download step fails with Temporary failure resolving deb.debian.org, or with another "cannot resolve" message. The container has no working DNS server. It cannot change a name into an address. This is not a typing mistake. It does not fix itself. In the Proxmox page, select this container in the left tree. Open DNS. Select Edit. Type your router address in DNS servers (192.168.1.1 here; use your own). Then run pct reboot 135 in the host shell. Run the failed step again.
A command fails. You do not know if you are on the server or in the container. Read the prompt. In the container, it ends with the name of the container. On the server, it shows root@homelab. The prompt still shows root@homelab after pct enter? Then the command did not work. Type exit. Run the pct enter line again. Check the prompt before you paste anything else. You can paste a build block on the server by mistake. It seems to work. It installs without an error, and the app even answers. But the app is on the server, and it must not be there.
How to see that it happened, and how to undo it. The app does not open at the container address (192.168.1.211). It does open at the server address (192.168.1.220) on the same port. Then the app is on the host. To remove it, run docker rm -f gitea in the host shell. Then run pct enter 135. Check that the prompt changed. Paste the build block again. You lose nothing in the container, because nothing was built there. The first command can show Error: No such container. This is good. It means that the app was never on the host. Do not paste the build block again. Look for another cause.
The page does not open. The browser spins, or says it cannot connect. Do these checks in order, in the host shell. 1. Is the container running? Run pct status 135. It must say running. If it does not, run pct start 135. 2. Is the container at the address that you typed? Run pct config 135 | grep net0. It shows the real address. A wrong digit in the wizard puts the container at another address, and nothing warns you. 3. Does the app run in the container? Run pct enter 135. Then run docker ps. An empty list means that the app did not start. Run docker ps -a to see that it stopped. Run docker logs to see why. 4. Does the app answer in the container? Run curl -I http://localhost followed by the port of the app. You get a reply here, but nothing from your PC? Then the address or your own network is the problem. The app is fine. Your browser reaches 192.168.1.211 but not the port? Then the app is down. It reaches neither? Then the container is down.
Docker does not start, or you see Cannot connect to the Docker daemon, a keyring error, or an overlay error. This is the most common failure in these guides. It means that the two container features are off. A later pct set --features can switch them off, also when you set them before. Run this in the host shell, not in the container: pct set 135 --features nesting=1,keyctl=1. Then run pct reboot 135. Then run the failed step again. Type both settings on one line. If you send only one setting, it replaces the pair and switches the other one off.
REFERENCE CARD
Paste this in the Notes of the container in Proxmox. Click 135 → Summary → Notes. It is a reference. It is not a shell command. Before you ever run the update line on this card, compare it with the docker run you actually used at install. The card is a snapshot of the standard build: if you added anything of your own — a device, an extra -e setting, a second folder — it is not on the card, and re-running the card's line drops it. The container comes back up looking healthy with your setting gone.
📋 Reference — paste into this container's Notes in Proxmox (not a shell command)
## Gitea — CT 135
dashboard http://192.168.1.211:3000 · git-SSH on :2222 · data in /opt/gitea · docs https://docs.gitea.com/
```sh
# is it running?
docker ps --filter name=gitea
curl -fsS http://localhost:3000 >/dev/null && echo OK # quick health check# logs (last 50)
docker logs gitea --tail 50
# stop / start / restart
docker stop gitea
docker start gitea
docker restart gitea
# is there an update? ("Image is up to date" = no)
docker pull gitea/gitea:latest
# update (repos + settings survive in /opt/gitea)
docker pull gitea/gitea:latest && docker rm -f gitea && docker run -d --name gitea --restart=unless-stopped \
-e USER_UID=1000 -e USER_GID=1000 -e GITEA__database__DB_TYPE=sqlite3 \
-e GITEA__server__SSH_PORT=2222 -e GITEA__server__SSH_LISTEN_PORT=22 \
-p 3000:3000 -p 2222:22 -v /opt/gitea:/data gitea/gitea:latest
```
Part D · The app catalog
33Excalidraw
A fast whiteboard in a sketch style. Use it for diagrams, wireframes, and quick sketches of ideas. It is your own instance, not excalidraw.com.
This chapter needs the items below. You came here directly? Do them first. Each item takes a short time. Nothing on this page works without them.
Proxmox is installed and works at https://192.168.1.220:8006. You can log in as root. See Ch. 6 · Install Proxmox. At your first visit, the browser shows a certificate warning. Select Advanced. Then select Proceed. The warning is normal. Proxmox makes its own certificate.
The Debian 13 image is downloaded. You do this one time. See Ch. 10 · The container wizard. Without the image, the Template list in the wizard is empty.
You have an SSH key from your PC (Ch. 9 · SSH & the terminal). Or you type a password in the two password boxes of the wizard. The wizard needs one of the two. The Next button stays grey until you give one.
You know your own network numbers. Where this chapter shows 192.168.1.x, use your own numbers. The rule is in Ch. 3 · How to read this manual. The address of this chapter must be outside the range that your router gives out by itself (the DHCP pool, often .100–.200, but yours can differ). An address inside the pool can go to a phone later. Two devices on one address break name lookups, and the cause is hard to find.
Commands marked HOST run on the server. In the Proxmox page, select homelab in the left tree. Then select >_ Shell. Commands marked CT run inside the container of this chapter. The chapter shows you how to get there.
The wizard does not work?Next is grey: you gave no password and no key. Give one of the two. The Template list is empty: the Debian image is not downloaded. Download it first. Each tab is explained in Ch. 10 · The container wizard.
Excalidraw is a whiteboard with a hand-drawn style that runs in your browser. You draw boxes, arrows, and text, for example a network plan, a room layout, or a wireframe. You export each board to PNG or SVG. Host your own instance for privacy and for use without internet.
Notice — where these commands run
Run the shell commands inside CT 140. Do not run them on the Proxmox host (the server, 192.168.1.220) or on your PC. You open that shell in one of two ways. Run pct enter 140 on the host (first homelab → >_ Shell). Or run ssh root@192.168.1.216 from your PC. (The >_ Console button of the container shows a login: prompt. The containers of this manual cannot answer it. Skip it.) A few commands start with pct or pveam. You type those on the Proxmox host itself, not inside CT 140. Each one below says which. CT 140 does not exist yet? Make it first with the section below.
33.1
CREATE THE CONTAINER
Do this task with the mouse in the Proxmox web page. Almost nothing needs typing.
Open https://192.168.1.220:8006.
The Proxmox VE login page.
Click homelab in the left tree.
Node "homelab" is selected in the left tree.
Click the blue Create CT button at the top right.
The Create CT button.
Fill in each tab as the reference shows. Leave each field that is not listed at its default value.
General tab — CT ID 140, hostname excalidraw.
Keep Start after created unticked. Click Finish.
Wizard reference — Create CT 140
Tab → Field
Entry
General → Node
Select homelab.
General → CT ID
Type 140. Do not keep the number that the wizard suggests.
General → Hostname
Type excalidraw.
General → Unprivileged container
Keep this box ticked.
General → Nesting
Keep this box ticked. It is ticked by default. The wizard has no box for keyctl, which Docker also needs. The host command after Finish sets it. It is the first line of the next listing.
General → Password / SSH public key
Keep the password empty. Paste your public key in the SSH field: ssh-ed25519 AAAA…your-key-here you@your-pc. With the key, you can run ssh root@192.168.1.216 from your PC. The command pct enter 140 on the host needs no password.
Template → Storage, Template
Select local. Then select debian-13-standard.
Disks → Storage, Disk size
Select local-lvm. Set 6 GiB.
CPU → Cores
Set 1 core.
Memory → Memory (MiB)
Set 1024. Keep Swap at its default.
Network → IPv4
Select Static. Set IPv4/CIDR to 192.168.1.216/24. Set Gateway to 192.168.1.1. Keep IPv6 at its default.
DNS → DNS domain
Keep this field empty. Do not type 192.168.1.1 here.
DNS → DNS servers
Always type 192.168.1.1. Never keep this field empty.
Confirm
Read the summary. Keep Start after created unticked. Select Finish.
The wizard has no box for three settings: the Docker permission keyctl, the timezone, and start at boot. The first command below sets all three. Run these 3 commands on the host. They set the missing settings, start the container, and open its shell. Each part is explained in Ch. 10 · The container wizard, section "The host command every build needs".
⌨ Type this on the Proxmox host (homelab)
Before you run anything on this page: every 192.168.1.x address below is this manual's example network. If your own network uses different numbers, substitute yours as you type — the rule is in Ch. 3 · How to read this manual. A command that runs with the wrong address usually succeeds and leaves you unreachable.
pct set 140 --features nesting=1,keyctl=1 --onboot 1 --timezone host
pct start 140
pct enter 140                          # now INSIDE CT 140 — the rest of this page runs here
Notice — set your timezone
--timezone host tells the container to use the same time zone as the Proxmox host. Without it, a new container uses UTC, the world reference clock. Each line of its logs and each scheduled job then shows a time that is hours away from your local time. To see each valid zone name, run timedatectl list-timezones on the host. A wrong zone only makes clocks and schedules look odd. Nothing breaks.
Prefer the terminal? — the same task with one pct create command
⌨ Type this on the Proxmox host (homelab)
TMPL=$(pveam available --section system | awk '/debian-13-standard/{print $2}' | tail -1)
pveam download local "$TMPL"          # once per host; harmless to re-run
pct create 140 local:vztmpl/"$TMPL" \
  --hostname excalidraw --cores 1 --memory 1024 --rootfs local-lvm:6 \
  --net0 name=eth0,bridge=vmbr0,ip=192.168.1.216/24,gw=192.168.1.1 \
  --nameserver 192.168.1.1 --features nesting=1,keyctl=1 --unprivileged 1 --onboot 1 --timezone host
pct start 140
pct enter 140                      # you are now INSIDE CT 140 — everything below runs here
This part has no buttons. These commands run inside CT 140. In the shell of the host (homelab → >_ Shell), run pct enter 140. You are still inside from the section before? Then continue.
The >_ Console button of the CT opens a login: prompt, not a shell. Use pct enter 140 from homelab → >_ Shell.
Inside that shell, install Docker. Then start the Excalidraw container.
The Docker install line and the flags -d, --name, --restart, and -p are explained in Ch. 9 · SSH & the terminal, sections "Install Docker in the container" and "Anatomy of docker run". These parts are specific to Excalidraw:
-p 5000:80
Sends port 5000 of the host to port 80 inside the container. Port 80 is the standard web port. You reach Excalidraw on port 5000.
excalidraw/excalidraw:latest
The container image to run: the official whiteboard app of Excalidraw. The image has no numbered tags. It has only a rolling latest. So you get the newest build each time that you pull.
Check that it runs: docker ps shows excalidraw with the status Up. The first start can take a minute or two while the image downloads. The page does not answer yet? Wait and refresh before you change anything.
CT 140/excalidraw: 6 GiB disk, 1 vCPU, 1024 MB RAM, IP 192.168.1.216/24. Open http://192.168.1.216:5000 and start to draw. You need no login.
excalidraw/excalidraw is the drawing app itself. It hands the app to your browser on port 80 inside the container. You reach it on port 5000. It is only the client. All drawing happens in your browser. The container serves nothing else. So there is nothing to back up on the server.
Warning — shared links leave your network
The plain self-hosted client keeps your canvas in the browser (local storage). It lets you export to .excalidraw, PNG, or SVG files. Nothing that you draw is stored on your server. But live collaboration and the Share button do work by default. They send your board through the public cloud of Excalidraw (oss-collab.excalidraw.com / json.excalidraw.com). So a shared link is not private. It leaves your network. Save exports in a folder of Ch. 53 · Nextcloud or Ch. 24 · Syncthing to keep them synced. Fully private collaboration on your own server is possible. But you must run a second program. You must also build your own copy of the Excalidraw app with the address of that program inside it. That is a job for a developer, and this manual does not cover it. Treat the Share button as public. Pass boards around as exported files instead.
33.3
USE IT — THE BASICS
There is no account and no configuration. The whole app is the canvas.
Open http://192.168.1.216:5000. The toolbar at the top holds the tools: Rectangle, Ellipse, Arrow, Line, Draw, Text, Eraser. The tooltip of each tool shows its keyboard shortcut.
The Excalidraw toolbar and a blank canvas.
Select a tool. Drag on the canvas to draw. Select a shape to show the panel on the left. There you set the stroke colour, the background, the fill style, and the line width.
Select a shape to open its style panel on the left.
Double-click a shape to type a label in it. Draw an Arrow from one shape to a second shape. The arrow stays attached when you move the shapes.
Hold Space and drag to pan. Press Ctrl and scroll to zoom.
To save: open the hamburger menu at the top left. Click Save to…. This downloads the board as a .excalidraw file. Boards stay only in this browser. So export each important board. Keep the files in your Nextcloud or Syncthing folder.
Hamburger menu → Save to….
To open a saved board, use menu → Open. To make a picture for another person, use Export image… (PNG or SVG).
Click the Library button at the right end of the toolbar. It holds ready-made shape packs (flowchart symbols, wireframe kits). The items that you add stay available on all future boards.
The Library button — ready-made shape packs.
33.4
WHEN IT GOES WRONG
docker run fails with Cannot connect to the Docker daemon at unix:///var/run/docker.sock, or the container refuses to start. Docker does not run inside the LXC. The container needs the features nesting and keyctl. Check them on the Proxmox HOST (not inside CT 140) with pct config 140 | grep features. The line must show keyctl=1,nesting=1. It does not? Run pct set 140 --features nesting=1,keyctl=1. Then restart the container with pct reboot 140, so that the new permissions take effect. Run pct enter 140 again. Start it with docker start excalidraw, or run the full docker run command again.
Your drawings are gone. You opened Excalidraw in another browser or on another computer, or you cleared the browsing data, and the canvas is blank. Excalidraw saves boards only in the browser where you drew them (local storage). It never saves them on the server. So there is nothing to recover. To avoid this, save each important drawing. Use the hamburger menu (top left) → Save to…. It writes a .excalidraw file. Keep it in your Nextcloud or Syncthing folder. Or use Export image for a PNG or SVG.
You clicked Share or Live collaboration. You expected it to stay on your own server. But the link that it makes is an excalidraw.com URL. By default, the self-hosted app sends collaboration and share links through the PUBLIC servers of Excalidraw. So those boards leave your network. That is fine for you? Use it as it is. It is not? Send exported files instead. Collaboration on your own server is a job for a developer. This manual does not cover it. The warning box in the install section explains this.
docker run fails with bind: address already in use or port is already allocated. Another service in this container already uses port 5000 of the host. Find it with docker ps. An older excalidraw container is the usual cause. Remove it with docker rm -f excalidraw. (-f means force. It deletes the container even while it runs.) Then run the command again. Or pick a free port. Change -p 5000:80 to, for example, -p 5050:80. Then open http://192.168.1.216:5050.
You update the container (docker pull and run again). Then the page is blank or still shows the old version. Excalidraw keeps a copy of itself inside your browser. It opens fast and works offline because of this. After an update, you must tell your browser to throw that old copy away. Hard-refresh the tab with Ctrl+Shift+R (Cmd+Shift+R on a Mac). Or clear the data of this site in the browser. Then load http://192.168.1.216:5000 again.
33.5
A download step fails with Temporary failure resolving deb.debian.org, or with another "cannot resolve" message. The container has no working DNS server. It cannot change a name into an address. This is not a typing mistake. It does not fix itself. In the Proxmox page, select this container in the left tree. Open DNS. Select Edit. Type your router address in DNS servers (192.168.1.1 here; use your own). Then run pct reboot 140 in the host shell. Run the failed step again.
A command fails. You do not know if you are on the server or in the container. Read the prompt. In the container, it ends with the name of the container. On the server, it shows root@homelab. The prompt still shows root@homelab after pct enter? Then the command did not work. Type exit. Run the pct enter line again. Check the prompt before you paste anything else. You can paste a build block on the server by mistake. It seems to work. It installs without an error, and the app even answers. But the app is on the server, and it must not be there.
How to see that it happened, and how to undo it. The app does not open at the container address (192.168.1.216). It does open at the server address (192.168.1.220) on the same port. Then the app is on the host. To remove it, run docker rm -f excalidraw in the host shell. Then run pct enter 140. Check that the prompt changed. Paste the build block again. You lose nothing in the container, because nothing was built there. The first command can show Error: No such container. This is good. It means that the app was never on the host. Do not paste the build block again. Look for another cause.
The page does not open. The browser spins, or says it cannot connect. Do these checks in order, in the host shell. 1. Is the container running? Run pct status 140. It must say running. If it does not, run pct start 140. 2. Is the container at the address that you typed? Run pct config 140 | grep net0. It shows the real address. A wrong digit in the wizard puts the container at another address, and nothing warns you. 3. Does the app run in the container? Run pct enter 140. Then run docker ps. An empty list means that the app did not start. Run docker ps -a to see that it stopped. Run docker logs to see why. 4. Does the app answer in the container? Run curl -I http://localhost followed by the port of the app. You get a reply here, but nothing from your PC? Then the address or your own network is the problem. The app is fine. Your browser reaches 192.168.1.216 but not the port? Then the app is down. It reaches neither? Then the container is down.
Docker does not start, or you see Cannot connect to the Docker daemon, a keyring error, or an overlay error. This is the most common failure in these guides. It means that the two container features are off. A later pct set --features can switch them off, also when you set them before. Run this in the host shell, not in the container: pct set 140 --features nesting=1,keyctl=1. Then run pct reboot 140. Then run the failed step again. Type both settings on one line. If you send only one setting, it replaces the pair and switches the other one off.
REFERENCE CARD
Paste this in 140 → Summary → Notes. The key facts then stay with the container. Before you ever run the update line on this card, compare it with the docker run you actually used at install. The card is a snapshot of the standard build: if you added anything of your own — a device, an extra -e setting, a second folder — it is not on the card, and re-running the card's line drops it. The container comes back up looking healthy with your setting gone.
📋 Reference — paste into this container's Notes in Proxmox (not a shell command)
## Excalidraw — CT 140
dashboard http://192.168.1.216:5000 · docs https://github.com/excalidraw/excalidraw
drawings save in-browser / export to file — nothing to back up on the server
```sh
# is it running?
docker ps --filter name=excalidraw
curl -fsS http://localhost:5000 >/dev/null && echo OK # quick health check# logs (last 50)
docker logs excalidraw --tail 50
# stop / start / restart
docker stop excalidraw
docker start excalidraw
docker restart excalidraw
# is there an update? ("Image is up to date" = no)
docker pull excalidraw/excalidraw:latest
# update (no settings on the server — every board lives in your browser)
docker pull excalidraw/excalidraw:latest && docker rm -f excalidraw && docker run -d --name excalidraw --restart=unless-stopped -p 5000:80 excalidraw/excalidraw:latest
```
Part D · The app catalog
34DrawIO
Flowcharts and network diagrams that you host yourself. This is the precise draw.io editor on your own server, with no cloud.
This chapter needs the items below. You came here directly? Do them first. Each item takes a short time. Nothing on this page works without them.
Proxmox is installed and works at https://192.168.1.220:8006. You can log in as root. See Ch. 6 · Install Proxmox. At your first visit, the browser shows a certificate warning. Select Advanced. Then select Proceed. The warning is normal. Proxmox makes its own certificate.
The Debian 13 image is downloaded. You do this one time. See Ch. 10 · The container wizard. Without the image, the Template list in the wizard is empty.
You have an SSH key from your PC (Ch. 9 · SSH & the terminal). Or you type a password in the two password boxes of the wizard. The wizard needs one of the two. The Next button stays grey until you give one.
You know your own network numbers. Where this chapter shows 192.168.1.x, use your own numbers. The rule is in Ch. 3 · How to read this manual. The address of this chapter must be outside the range that your router gives out by itself (the DHCP pool, often .100–.200, but yours can differ). An address inside the pool can go to a phone later. Two devices on one address break name lookups, and the cause is hard to find.
Commands marked HOST run on the server. In the Proxmox page, select homelab in the left tree. Then select >_ Shell. Commands marked CT run inside the container of this chapter. The chapter shows you how to get there.
The wizard does not work?Next is grey: you gave no password and no key. Give one of the two. The Template list is empty: the Debian image is not downloaded. Download it first. Each tab is explained in Ch. 10 · The container wizard.
Run the commands in this chapter inside the shell of CT 141. Open the shell of the container with pct enter 141 from homelab → >_ Shell. Or connect over SSH to 192.168.1.217. Ch. 9 · SSH & the terminal sets up the passwordless root login that this needs. Do not run them on the Proxmox host (homelab, 192.168.1.220) itself. CT 141 does not exist yet? Make it first. Its specification is in the wizard below.
34.1
CREATE THE CONTAINER
You do this task with the mouse, in the Proxmox web page. You type nothing. You prefer the command line? The box below does the same task with one pct create command.
Open https://192.168.1.220:8006.
The Proxmox login page.
Click homelab in the left tree.
Select the node homelab in the left tree.
Click the blue Create CT button at the top right.
The Create CT button, at the top right of the node view.
Fill in the tabs as the wizard reference shows. Use Next to move between the tabs. Keep each field that is not listed at its default value.
General tab for CT 141: CT ID 141, hostname drawio.
Wizard reference — Create CT 141
Tab → Field
Entry
General → Node
Select homelab.
General → CT ID
Type 141. Do not keep the number that the wizard suggests.
General → Hostname
Type drawio.
General → Unprivileged container
Keep this box ticked.
General → Nesting
Keep this box ticked. It is ticked by default. The wizard has no box for keyctl, which Docker also needs. The host command after Finish sets it. It is the first line of the next listing.
General → Password / SSH public key
Keep the password empty. Paste your public key in the SSH field: ssh-ed25519 AAAA…your-key-here you@your-pc. With the key, you can run ssh root@192.168.1.217 from your PC. The command pct enter 141 on the host needs no password.
Template → Storage, Template
Select local. Then select debian-13-standard.
Disks → Storage, Disk size
Select local-lvm. Set 6 GiB.
CPU → Cores
Set 1 core.
Memory → Memory (MiB)
Set 1024. Keep Swap at its default.
Network → IPv4
Select Static. Set IPv4/CIDR to 192.168.1.217/24. Set Gateway to 192.168.1.1. Keep IPv6 at its default.
DNS → DNS domain
Keep this field empty. Do not type 192.168.1.1 here.
DNS → DNS servers
Always type 192.168.1.1. Never keep this field empty.
Confirm
Read the summary. Keep Start after created unticked. Select Finish.
The wizard has no box for three settings: the Docker permission keyctl, the timezone, and start at boot. The first command below sets all three. Run these 3 commands on the host. They set the missing settings, start the container, and open its shell. Each part is explained in Ch. 10 · The container wizard, section "The host command every build needs".
⌨ Type this on the Proxmox host (homelab)
Before you run anything on this page: every 192.168.1.x address below is this manual's example network. If your own network uses different numbers, substitute yours as you type — the rule is in Ch. 3 · How to read this manual. A command that runs with the wrong address usually succeeds and leaves you unreachable.
pct set 141 --features nesting=1,keyctl=1 --onboot 1 --timezone host
pct start 141
pct enter 141                          # now INSIDE CT 141 — the rest of this page runs here
Notice — set your timezone
--timezone host makes the container follow the timezone of the Proxmox host. Without it, a new container uses UTC. Its logs and scheduled jobs then show a time that is hours away from your local time. To see the valid names, run timedatectl list-timezones. To set the zone of the host, run timedatectl set-timezone Region/City.
Prefer the terminal? — the same task with one pct create command
⌨ Type this on the Proxmox host (homelab)
TMPL=$(pveam available --section system | awk '/debian-13-standard/{print $2}' | tail -1)
pveam download local "$TMPL"          # once per host; harmless to re-run
pct create 141 local:vztmpl/"$TMPL" \
  --hostname drawio --cores 1 --memory 1024 --rootfs local-lvm:6 \
  --net0 name=eth0,bridge=vmbr0,ip=192.168.1.217/24,gw=192.168.1.1 \
  --nameserver 192.168.1.1 --features nesting=1,keyctl=1 --unprivileged 1 --onboot 1 --timezone host
pct start 141
pct enter 141                      # you are now INSIDE CT 141 — everything below runs here
This part has no buttons. These commands run inside CT 141. In the shell of the host (homelab → >_ Shell), run pct enter 141. You are still inside from the section before? Then continue. Opening the shell of the host is the one step with the mouse. You type everything after it.
The >_ Console button of the CT opens a login: prompt, not a shell. Use pct enter 141 from homelab → >_ Shell.
Notice — where these commands run
You open that shell in one of two ways. Run pct enter 141 on the host (first homelab → >_ Shell). Or run ssh root@192.168.1.217 from your PC. (The >_ Console button of the container shows a login: prompt. The containers of this manual cannot answer it. Skip it.) Only the pct commands go back to the host. Each one is flagged where you use it.
Install Docker. Then run the draw.io image. It listens on port 8080 for plain HTTP and on 8443 for HTTPS.
The Docker install line and the flags -d, --name, --restart, and -p are explained in Ch. 9 · SSH & the terminal, sections "Install Docker in the container" and "Anatomy of docker run". These parts are specific to draw.io:
apt install -y docker.io curl
Installs Docker and curl, a small command that fetches a URL. A new container has neither. The reference card at the end uses curl for a health check in one line.
-p 8080:8080
Sends port 8080 of the host to port 8080 inside the container. You can then reach the app in a browser.
-p 8443:8443
The same for port 8443. This is the HTTPS (encrypted) version of the web page of the app.
jgraph/drawio
The container image to run: the ready-made draw.io diagram app, downloaded from Docker Hub.
Notice — Docker does not start
docker run fails with "Cannot connect to the Docker daemon", or with an iptables or permission error? Check the features of the container. On the Proxmox host (not inside the CT), run pct config 141 | grep features. The line must show keyctl=1,nesting=1. It does not? Run pct set 141 --features nesting=1,keyctl=1. Then run pct reboot 141. Then run the docker run command again.
Check that it runs: docker ps --filter name=drawio shows drawio with the status Up. The first start can take a minute or two while Docker downloads the image. The page does not answer yet? Wait and refresh before you change anything.
Open http://192.168.1.217:8080.
When it asks where to save, pick Device. This downloads the .drawio file to the computer that you browse from. It does not save it to the server.
The picker also offers GitHub, Google Drive, and OneDrive. Skip all three. They need OAuth credentials that a self-hosted draw.io does not have. A click on them gives an error, not a login. Use Device (your own computer). Or use a folder that Ch. 24 · Syncthing or Ch. 53 · Nextcloud syncs. Those need no credentials, and they keep versions just as well.
The first screen: Save diagrams to: Device, GitHub, Google Drive, or OneDrive.
Notice — nothing is stored on the server
jgraph/drawio runs the draw.io editor on its own built-in web server. It uses port 8080 for HTTP and 8443 for HTTPS. Diagrams are not stored on the server. You save them to a file or to linked storage. There is nothing to back up except the container itself.
34.4
USE IT — THE BASICS
DrawIO has no accounts. The server does not store diagrams. Each diagram is a file on the computer that runs the browser.
Open http://192.168.1.217:8080. Select Device on the Save diagrams to: screen. Then click Create New Diagram.
Type a file name. Select a template or Blank Diagram. Click Create.
Pick a template, or Blank Diagram. Then click Create.
Drag shapes from the left panel onto the canvas. Use the search box at the top of the panel to find more shapes, for example server or router. You can also double-click the empty canvas to add a shape.
To connect two shapes, move the pointer to the edge of a shape until blue arrows appear. Drag from the edge to the other shape. Double-click a shape or an arrow to type a label.
Use the Format panel on the right to change styles. It has the tabs Style, Text, and Arrange.
Select a shape. Then edit it in the Format panel: Style, Text, Arrange.
Select File → Save or press Ctrl+S. With Device storage, the browser downloads the .drawio file. To edit it again, select File → Open from → Device. Choose that file.
To make an image, select File → Export as → PNG. Tick Include a copy of my diagram. You can then open and edit that PNG again later.
File → Export as → PNG, with Include a copy of my diagram ticked.
Notice — the .drawio file is the diagram
The container keeps no copy. Keep the files in a folder that has a backup. A folder that Ch. 24 · Syncthing syncs is a good place. You can then open the same diagram from each device.
34.5
WHEN IT GOES WRONG
After you install Docker, docker run fails. The error is "Cannot connect to the Docker daemon", an iptables or nftables failure, or an overlay or permission error. The container never starts. Docker inside an unprivileged Proxmox LXC needs the nesting feature. (An unprivileged container cannot do everything that the host can. This is for safety.) The nesting feature lets one container run Docker containers inside it. On the Proxmox host (not inside the CT), check with pct config 141 | grep features. The line must show keyctl=1,nesting=1. It does not? Run pct set 141 --features nesting=1,keyctl=1, then pct reboot 141. Back inside the CT, the daemon is still down? Run systemctl enable --now docker. Then run the docker run command again.
The first draw.io screen is a "Save diagrams to:" picker. A click on Google Drive, GitHub, or OneDrive shows an error, a blank popup, or sends you to diagrams.net. Those cloud options need OAuth app credentials. A plain self-hosted instance does not have them. This manual does not set them up. Click Device to save a local .drawio file. Keep the file in a folder that already has a backup. To hide the cloud buttons completely, open the editor at http://192.168.1.217:8080/?offline=1 instead.
You open https://192.168.1.217:8443, and the browser shows a warning such as "Your connection is not private" or "self-signed certificate". This is the HTTPS certificate that the container makes by itself. It signs itself. This is expected. Use the plain http://192.168.1.217:8080 address instead. This is the better choice on your LAN. Or, on the warning page, click Advanced, then Proceed, to accept the certificate.
docker run reports "port is already allocated" or "bind: address already in use" for 8080. Another app on that CT already uses port 8080. Publish draw.io on a different host port. Remove the old container. Then run the same command with new port numbers:
The editor loads, but copy and paste between diagrams does not work. Or a warning about an insecure (http) connection appears. Browsers limit access to the clipboard over plain HTTP. This does not affect normal editing. You need full clipboard support? Use HTTPS at https://192.168.1.217:8443. Accept the self-signed certificate one time.
34.6
A download step fails with Temporary failure resolving deb.debian.org, or with another "cannot resolve" message. The container has no working DNS server. It cannot change a name into an address. This is not a typing mistake. It does not fix itself. In the Proxmox page, select this container in the left tree. Open DNS. Select Edit. Type your router address in DNS servers (192.168.1.1 here; use your own). Then run pct reboot 141 in the host shell. Run the failed step again.
A command fails. You do not know if you are on the server or in the container. Read the prompt. In the container, it ends with the name of the container. On the server, it shows root@homelab. The prompt still shows root@homelab after pct enter? Then the command did not work. Type exit. Run the pct enter line again. Check the prompt before you paste anything else. You can paste a build block on the server by mistake. It seems to work. It installs without an error, and the app even answers. But the app is on the server, and it must not be there.
How to see that it happened, and how to undo it. The app does not open at the container address (192.168.1.217). It does open at the server address (192.168.1.220) on the same port. Then the app is on the host. To remove it, run docker rm -f drawio in the host shell. Then run pct enter 141. Check that the prompt changed. Paste the build block again. You lose nothing in the container, because nothing was built there. The first command can show Error: No such container. This is good. It means that the app was never on the host. Do not paste the build block again. Look for another cause.
The page does not open. The browser spins, or says it cannot connect. Do these checks in order, in the host shell. 1. Is the container running? Run pct status 141. It must say running. If it does not, run pct start 141. 2. Is the container at the address that you typed? Run pct config 141 | grep net0. It shows the real address. A wrong digit in the wizard puts the container at another address, and nothing warns you. 3. Does the app run in the container? Run pct enter 141. Then run docker ps. An empty list means that the app did not start. Run docker ps -a to see that it stopped. Run docker logs to see why. 4. Does the app answer in the container? Run curl -I http://localhost followed by the port of the app. You get a reply here, but nothing from your PC? Then the address or your own network is the problem. The app is fine. Your browser reaches 192.168.1.217 but not the port? Then the app is down. It reaches neither? Then the container is down.
Docker does not start, or you see Cannot connect to the Docker daemon, a keyring error, or an overlay error. This is the most common failure in these guides. It means that the two container features are off. A later pct set --features can switch them off, also when you set them before. Run this in the host shell, not in the container: pct set 141 --features nesting=1,keyctl=1. Then run pct reboot 141. Then run the failed step again. Type both settings on one line. If you send only one setting, it replaces the pair and switches the other one off.
REFERENCE CARD
Paste this in 141 → Summary → Notes in Proxmox. It is a note. It is not a shell command. Before you ever run the update line on this card, compare it with the docker run you actually used at install. The card is a snapshot of the standard build: if you added anything of your own — a device, an extra -e setting, a second folder — it is not on the card, and re-running the card's line drops it. The container comes back up looking healthy with your setting gone.
📋 Reference — paste into this container's Notes in Proxmox (not a shell command)
## DrawIO — CT 141
dashboard http://192.168.1.217:8080 · docs https://www.drawio.com/docs/
diagrams save to a file or linked storage — nothing is stored on the server
```sh
# is it running?
docker ps --filter name=drawio
curl -fsS http://localhost:8080 >/dev/null && echo OK # quick health check# logs (last 50)
docker logs drawio --tail 50
# stop / start / restart
docker stop drawio
docker start drawio
docker restart drawio
# is there an update? ("Image is up to date" = no)
docker pull jgraph/drawio
# update (no settings to lose — diagrams live on your PC, not here)
docker pull jgraph/drawio && docker rm -f drawio && docker run -d --name drawio --restart=unless-stopped -p 8080:8080 -p 8443:8443 jgraph/drawio
```
Part D · The app catalog
35Filebrowser
Point Filebrowser at a folder. You get a web page for it, like Google Drive. You browse, upload, preview audio and images, and share single files from any device.
This chapter needs the items below. You came here directly? Do them first. Each item takes a short time. Nothing on this page works without them.
Proxmox is installed and works at https://192.168.1.220:8006. You can log in as root. See Ch. 6 · Install Proxmox. At your first visit, the browser shows a certificate warning. Select Advanced. Then select Proceed. The warning is normal. Proxmox makes its own certificate.
The Debian 13 image is downloaded. You do this one time. See Ch. 10 · The container wizard. Without the image, the Template list in the wizard is empty.
You have an SSH key from your PC (Ch. 9 · SSH & the terminal). Or you type a password in the two password boxes of the wizard. The wizard needs one of the two. The Next button stays grey until you give one.
You know your own network numbers. Where this chapter shows 192.168.1.x, use your own numbers. The rule is in Ch. 3 · How to read this manual. The address of this chapter must be outside the range that your router gives out by itself (the DHCP pool, often .100–.200, but yours can differ). An address inside the pool can go to a phone later. Two devices on one address break name lookups, and the cause is hard to find.
The shared media folder exists. It is /srv/media. You make it one time in Ch. 40 · Shared storage first. This chapter keeps its data there, not on the small SSD. Build that chapter first. Without the folder, the data goes to the small system SSD. The mount exists to prevent this.
Commands marked HOST run on the server. In the Proxmox page, select homelab in the left tree. Then select >_ Shell. Commands marked CT run inside the container of this chapter. The chapter shows you how to get there.
The wizard does not work?Next is grey: you gave no password and no key. Give one of the two. The Template list is empty: the Debian image is not downloaded. Download it first. Each tab is explained in Ch. 10 · The container wizard.
Filebrowser serves one folder, for example your shared media library, over a small web page. You open it in any browser, also on a phone. You upload files, view pictures, play audio, and make share links. It runs as one small container.
The main file list of Filebrowser after login.
35.1
CREATE THE CONTAINER
Do this task with the mouse, in the Proxmox web page. You type nothing yet. You prefer the command line? The box below does the same task with one pct create command.
Open https://192.168.1.220:8006.
The Proxmox VE login page.
Click homelab in the left tree.
Node homelab is selected in the left tree.
Click the blue Create CT button at the top right.
The Create CT button.
Fill in each tab as the reference shows. Leave each field that is not listed at its default value.
General tab: CT ID 146, hostname filebrowser.
Keep Start after created unticked. Click Finish.
Wizard reference — Create CT 146
Tab → Field
Entry
General → Node
Select homelab.
General → CT ID
Type 146. Do not keep the number that the wizard suggests.
General → Hostname
Type filebrowser.
General → Unprivileged container
Keep this box ticked.
General → Nesting
Keep this box ticked. It is ticked by default. The wizard has no box for keyctl, which Docker also needs. The host command after Finish sets it. It is the first line of the next listing.
General → Password / SSH public key
Keep the password empty. Paste your public key in the SSH field: ssh-ed25519 AAAA…your-key-here you@your-pc. With the key, you can run ssh root@192.168.1.202 from your PC. The command pct enter 146 on the host needs no password.
Template → Storage, Template
Select local. Then select debian-13-standard.
Disks → Storage, Disk size
Select local-lvm. Set 6 GiB.
CPU → Cores
Set 1 core.
Memory → Memory (MiB)
Set 1024. Keep Swap at its default.
Network → IPv4
Select Static. Set IPv4/CIDR to 192.168.1.202/24. Set Gateway to 192.168.1.1. Keep IPv6 at its default.
DNS → DNS domain
Keep this field empty. Do not type 192.168.1.1 here.
DNS → DNS servers
Always type 192.168.1.1. Never keep this field empty.
Confirm
Read the summary. Keep Start after created unticked. Select Finish.
The wizard has no box for three settings: the Docker permission keyctl, the timezone, and start at boot. The first command below sets all three. Run these 4 commands on the host. They set the missing settings, start the container, and open its shell. Each part is explained in Ch. 10 · The container wizard, section "The host command every build needs".
⌨ Type this on the Proxmox host (homelab)
Before you run anything on this page: every 192.168.1.x address below is this manual's example network. If your own network uses different numbers, substitute yours as you type — the rule is in Ch. 3 · How to read this manual. A command that runs with the wrong address usually succeeds and leaves you unreachable.
pct set 146 --features nesting=1,keyctl=1 --onboot 1 --timezone host
pct set 146 -mp0 /srv/media,mp=/data   # bind /srv/media in as /data
pct start 146
pct enter 146                          # now INSIDE CT 146 — the rest of this page runs here
Notice — the folder that you serve is /srv/media
/srv/media is the one shared media folder on the host. You make it one time in Ch. 40 · Shared storage first. The option -mp0 /srv/media,mp=/data makes it appear as /data inside CT 146. So Filebrowser serves your real library, not a copy. Later you add a real drive (Ch. 65 · Add an external drive). You then move /srv/media onto it, and the container keeps working. It knows the folder only by this mount point. It does not know which physical drive is under it.
Notice — set your timezone
--timezone host copies the timezone of the server into the container. To see the valid zone names, run timedatectl list-timezones on the host. Pick your Region/City, for example America/New_York. The Docker container that you build below runs inside this LXC. It keeps its own separate clock. Its logs show UTC? Then add -e TZ=Region/City to the docker run command in the next section before you run it the first time. When it already runs, you must stop it and make it again. You cannot change a running container.
Prefer the terminal? — the same task with one pct create command
⌨ Type this on the Proxmox host (homelab)
TMPL=$(pveam available --section system | awk '/debian-13-standard/{print $2}' | tail -1)
pveam download local "$TMPL"          # once per host; harmless to re-run
pct create 146 local:vztmpl/"$TMPL" \
  --hostname filebrowser --cores 1 --memory 1024 --rootfs local-lvm:6 \
  --net0 name=eth0,bridge=vmbr0,ip=192.168.1.202/24,gw=192.168.1.1 \
  --nameserver 192.168.1.1 --features nesting=1,keyctl=1 --unprivileged 1 --onboot 1 --timezone host \
  -mp0 /srv/media,mp=/data
pct start 146
pct enter 146                      # you are now INSIDE CT 146 — everything below runs here
Shows the host folder /srv/media inside the container at /data. The container reads and writes the shared data in place.
35.2
BUILD FILEBROWSER
This part has no buttons. You type commands inside CT 146. You are already there from pct enter 146 above. (You closed that shell? Open homelab → >_ Shell and run pct enter 146 again.)
The >_ Console button of the CT opens a login: prompt, not a shell. Use pct enter 146 from homelab → >_ Shell.
Notice — each command below runs IN CT 146
After the container exists, you type the rest of this page in the shell of the container. You open that shell in one of two ways. Run pct enter 146 on the host. Opening homelab → >_ Shell is the only step with the mouse. The shell itself is not a GUI. Or run ssh root@192.168.1.202 from your PC. That address is the own IP of CT 146 on your home network. The Proxmox tab 146 → Summary shows it for any container, in case yours got a different one. (The >_ Console button of the container shows a login: prompt. The containers of this manual cannot answer it. Skip it.) Only the pct and pveam commands go back to the host. Each one is marked where you use it.
Install Docker. Then start Filebrowser, pointed at the shared library at /data.
The Docker install line and the flags -d, --name, --restart, -v, and -p are explained in Ch. 9 · SSH & the terminal, sections "Install Docker in the container" and "Anatomy of docker run". These parts are specific to Filebrowser:
-p 8080:80
Opens the web page on port 8080. Filebrowser listens on port 80 inside the container. You reach it at http://<IP of this CT>:8080.
-v /data:/srv
The folder that Filebrowser shows. /srv is its root inside the image. /data is your shared library, from the mount point above. You want to serve only a part of it? Point this at a subfolder of /data.
-v /opt/filebrowser/database:/database
The database of users and settings. Filebrowser makes it by itself at the first run. It stays on the SSD.
-v /opt/filebrowser/config:/config
The settings.json file. Filebrowser makes it by itself.
filebrowser/filebrowser:latest
The app image.
35.3
FIRST RUN: GET THE ADMIN PASSWORD
This part has no buttons either. You read the password from the log of the container, still inside CT 146.
Filebrowser makes a random admin password at the first start. It prints it in the log only ONE time. Read the password right away:
⌨ Type this inside CT 146
docker logs filebrowser 2>&1 | grep -i password # the one-time admin password# blank output means one of TWO things — run docker ps first:# filebrowser NOT listed = it never started; read the full log for why# filebrowser IS listed = the line scrolled past; re-read with head -40
From here on, you are back in the browser. Open http://192.168.1.202:8080 and log in.
Log in as admin with the password from the log.
Change the password at once in Settings → User Management.
35.4
WHEN IT GOES WRONG
You missed the random admin password. It shows only one time. But you do not need it to recover. Inside CT 146, run docker exec filebrowser filebrowser users update admin --password NEWPASSWORD. Use your own password in place of NEWPASSWORD. Then log in with it. This keeps each other account, permission, and share link.
Last resort: the database itself is damaged, and the command above fails too. This wipes everything: each account, permission, and share link, not only the password. Inside CT 146, run docker rm -f filebrowser && rm -rf /opt/filebrowser/database/*. Run the docker run command again. Then check docker logs again.
The app shows “Permission denied”, or you cannot upload or edit files. The served folder must be writable by the internal user account of the container. For this image, it is always the number UID 1000. There is no button for this. The fix only changes who owns the folder. It does not change any of your files. Do not run chown on all of /data from inside the CT. It would also change folders that other apps need, for example the photos of Immich. Fix it from the host with the command in Ch. 40 · Shared storage first, section "When it goes wrong". It lists only the subfolders of the media stack.
The file list is empty. The folder that is linked to /srv is really empty, or the mount point is wrong. Check that the library is visible with ls /data inside CT 146.
A download step fails with Temporary failure resolving deb.debian.org, or with another "cannot resolve" message. The container has no working DNS server. It cannot change a name into an address. This is not a typing mistake. It does not fix itself. In the Proxmox page, select this container in the left tree. Open DNS. Select Edit. Type your router address in DNS servers (192.168.1.1 here; use your own). Then run pct reboot 146 in the host shell. Run the failed step again.
A command fails. You do not know if you are on the server or in the container. Read the prompt. In the container, it ends with the name of the container. On the server, it shows root@homelab. The prompt still shows root@homelab after pct enter? Then the command did not work. Type exit. Run the pct enter line again. Check the prompt before you paste anything else. You can paste a build block on the server by mistake. It seems to work. It installs without an error, and the app even answers. But the app is on the server, and it must not be there.
How to see that it happened, and how to undo it. The app does not open at the container address (192.168.1.202). It does open at the server address (192.168.1.220) on the same port. Then the app is on the host. To remove it, run docker rm -f filebrowser in the host shell. Then run pct enter 146. Check that the prompt changed. Paste the build block again. You lose nothing in the container, because nothing was built there. The first command can show Error: No such container. This is good. It means that the app was never on the host. Do not paste the build block again. Look for another cause.
The page does not open. The browser spins, or says it cannot connect. Do these checks in order, in the host shell. 1. Is the container running? Run pct status 146. It must say running. If it does not, run pct start 146. 2. Is the container at the address that you typed? Run pct config 146 | grep net0. It shows the real address. A wrong digit in the wizard puts the container at another address, and nothing warns you. 3. Does the app run in the container? Run pct enter 146. Then run docker ps. An empty list means that the app did not start. Run docker ps -a to see that it stopped. Run docker logs to see why. 4. Does the app answer in the container? Run curl -I http://localhost followed by the port of the app. You get a reply here, but nothing from your PC? Then the address or your own network is the problem. The app is fine. Your browser reaches 192.168.1.202 but not the port? Then the app is down. It reaches neither? Then the container is down.
Docker does not start, or you see Cannot connect to the Docker daemon, a keyring error, or an overlay error. This is the most common failure in these guides. It means that the two container features are off. A later pct set --features can switch them off, also when you set them before. Run this in the host shell, not in the container: pct set 146 --features nesting=1,keyctl=1. Then run pct reboot 146. Then run the failed step again. Type both settings on one line. If you send only one setting, it replaces the pair and switches the other one off.
HOW TO USE IT: THE BASICS
After login, you see the file list. All actions start from there, with a few toolbar buttons.
Open http://192.168.1.202:8080. Log in as admin with the password from the first start. Change the password at once, as described above.
Click folders to browse. Click a file to see a preview. Images, text, and audio open in the browser. Use the download button to save the file to your device.
To add files, click the upload icon in the top toolbar. You can also drag files from your desktop into the window. Uploads go into the folder that is open.
The upload icon in the top toolbar.
To organize, use New folder and New file in the left sidebar. Select an item to see the buttons rename, copy, move, and delete in the toolbar.
To share, select a file or a folder. Click the Share icon. Set the time that the link stays valid. A password is optional. Copy the link. A person on your LAN can open it without an account.
The Share dialog: expiry time of the link and optional password.
Notice — share links work only where the address works
Each link contains 192.168.1.202. The link opens at home, or over Ch. 19 · Remote access: Tailscale. It does not open from the public internet, because Filebrowser is not exposed.
35.6
REFERENCE CARD
Paste this in 146 → Summary → Notes in Proxmox. The key facts and the update steps then stay with the container. Before you ever run the update line on this card, compare it with the docker run you actually used at install. The card is a snapshot of the standard build: if you added anything of your own — a device, an extra -e setting, a second folder — it is not on the card, and re-running the card's line drops it. The container comes back up looking healthy with your setting gone.
📋 Reference — paste into this container's Notes in Proxmox (not a shell command)
## Filebrowser — CT 146
dashboard http://192.168.1.202:8080 · admin / (from first-boot log) · docs https://filebrowser.org
```sh
# serves: /srv/media (host) -> /data (in CT) -> /srv (in Docker)# is it running?
docker ps --filter name=filebrowser
curl -fsS http://localhost:8080 >/dev/null && echo OK # quick health check# logs (last 50)
docker logs filebrowser --tail 50
# stop / start / restart
docker stop filebrowser
docker start filebrowser
docker restart filebrowser
# is there an update? ("Image is up to date" = no)
docker pull filebrowser/filebrowser:latest
# update (settings survive in /opt/filebrowser; your files in /data are untouched)
docker pull filebrowser/filebrowser:latest && docker rm -f filebrowser && docker run -d --name filebrowser --restart=unless-stopped -p 8080:80 -v /data:/srv -v /opt/filebrowser/database:/database -v /opt/filebrowser/config:/config filebrowser/filebrowser:latest
```
Part D · The app catalog
36Pingvin Share
Your own WeTransfer. Drop a big file, set an expiry, and hand out a link that stops working on the date that you choose. There are no size limits, no ads, and no third company.
This chapter needs the items below. You came here directly? Do them first. Each item takes a short time. Nothing on this page works without them.
Proxmox is installed and works at https://192.168.1.220:8006. You can log in as root. See Ch. 6 · Install Proxmox. At your first visit, the browser shows a certificate warning. Select Advanced. Then select Proceed. The warning is normal. Proxmox makes its own certificate.
The Debian 13 image is downloaded. You do this one time. See Ch. 10 · The container wizard. Without the image, the Template list in the wizard is empty.
You have an SSH key from your PC (Ch. 9 · SSH & the terminal). Or you type a password in the two password boxes of the wizard. The wizard needs one of the two. The Next button stays grey until you give one.
You know your own network numbers. Where this chapter shows 192.168.1.x, use your own numbers. The rule is in Ch. 3 · How to read this manual. The address of this chapter must be outside the range that your router gives out by itself (the DHCP pool, often .100–.200, but yours can differ). An address inside the pool can go to a phone later. Two devices on one address break name lookups, and the cause is hard to find.
The shared media folder exists. It is /srv/media. You make it one time in Ch. 40 · Shared storage first. This chapter keeps its data there, not on the small SSD. Build that chapter first. Without the folder, the data goes to the small system SSD. The mount exists to prevent this.
Commands marked HOST run on the server. In the Proxmox page, select homelab in the left tree. Then select >_ Shell. Commands marked CT run inside the container of this chapter. The chapter shows you how to get there.
The wizard does not work?Next is grey: you gave no password and no key. Give one of the two. The Template list is empty: the Debian image is not downloaded. Download it first. Each tab is explained in Ch. 10 · The container wizard.
Pingvin Share does the same job as WeTransfer, but on your own server. You upload a large file, for example a 4 GB video or an audio project. You get a link. You send the link. The link stops working on the date that you set. One container runs the frontend, the backend, and the SQLite database together. So you need no separate database server.
Notice — this app is a maintained fork
The original project stonith404/pingvin-share was archived in June 2025. It gets no more updates. This chapter runs Pingvin Share X (smp46/pingvin-share-x). It is a fork from the community that is still maintained. It replaces the old app with no other change: the same port, the same settings, the same first-run steps. You already run the old image? Then change it as you change any other setting of a Docker app. Edit the image name in the docker run command to smp46/pingvin-share-x:latest. Then make the container again. The exact five steps are in Ch. 12 · After every build + common Proxmox tasks, section “Change a setting on a Docker app”. Your data folder (the -v paths) stays where it was. So you lose nothing that you uploaded.
Notice — where these commands run
Run the shell commands inside CT 144. Do not run them on the Proxmox host (the server, 192.168.1.220) or on your PC. Open the shell of the container with pct enter 144 on the host (first homelab → >_ Shell). Or run ssh root@192.168.1.200 from your PC. (The >_ Console button of the container shows a login: prompt. The containers of this manual cannot answer it. Skip it.) Only the pct commands go back to the host. Each one is marked where you use it.
36.1
CREATE THE CONTAINER
Open https://192.168.1.220:8006.
Log in with your Proxmox credentials.
Click homelab in the left tree.
Select the node before you make anything on it.
Click the blue Create CT button at the top right.
The wizard opens.
Fill in each tab as the reference shows. Leave each field that is not listed at its default value.
General tab: CT ID 144, hostname pingvin.
Keep Start after created unticked. Click Finish.
Wizard reference — Create CT 144
Tab → Field
Entry
General → Node
Select homelab.
General → CT ID
Type 144. Do not keep the number that the wizard suggests.
General → Hostname
Type pingvin.
General → Unprivileged container
Keep this box ticked.
General → Nesting
Keep this box ticked. It is ticked by default. The wizard has no box for keyctl, which Docker also needs. The host command after Finish sets it. It is the first line of the next listing.
General → Password / SSH public key
Keep the password empty. Paste your public key in the SSH field: ssh-ed25519 AAAA…your-key-here you@your-pc. With the key, you can run ssh root@192.168.1.200 from your PC. The command pct enter 144 on the host needs no password.
Template → Storage, Template
Select local. Then select debian-13-standard.
Disks → Storage, Disk size
Select local-lvm. Set 8 GiB.
CPU → Cores
Set 1 core.
Memory → Memory (MiB)
Set 1024. Keep Swap at its default.
Network → IPv4
Select Static. Set IPv4/CIDR to 192.168.1.200/24. Set Gateway to 192.168.1.1. Keep IPv6 at its default.
DNS → DNS domain
Keep this field empty. Do not type 192.168.1.1 here.
DNS → DNS servers
Always type 192.168.1.1. Never keep this field empty.
Confirm
Read the summary. Keep Start after created unticked. Select Finish.
The wizard has no box for three settings: the Docker permission keyctl, the timezone, and start at boot. The first command below sets all three. Run these 6 commands on the host. They set the missing settings, start the container, and open its shell. Each part is explained in Ch. 10 · The container wizard, section "The host command every build needs".
⌨ Type this on the Proxmox host (homelab)
Before you run anything on this page: every 192.168.1.x address below is this manual's example network. If your own network uses different numbers, substitute yours as you type — the rule is in Ch. 3 · How to read this manual. A command that runs with the wrong address usually succeeds and leaves you unreachable.
pct set 144 --features nesting=1,keyctl=1 --onboot 1 --timezone host
mountpoint -q /srv/media || echo "WARNING: /srv/media is NOT a mounted share — the next line would create it on the system disk. Build the shared-storage chapter first."
mkdir -p /srv/media                    # create the shared store if you have not built that chapter yet
pct set 144 -mp0 /srv/media,mp=/data   # the shared media store appears inside as /data
pct start 144
pct enter 144                          # now INSIDE CT 144 — the rest of this page runs here
Open homelab → >_ Shell and run pct enter 144. This gives you a shell inside the container. The rest of this page runs there.
The >_ Console button of the CT opens a login: prompt, not a shell. Use pct enter 144 from homelab → >_ Shell.
Notice — where the uploads live
The uploads and the database go on the shared media store /srv/media on the host. It is linked into this container as /data. You make /srv/media one time in the shared-storage chapter, Ch. 40 · Shared storage first. You must do that before this chapter, not after. The mkdir command in the container runs inside /data. That folder exists only because the host folder is linked in. /srv/media is missing? Then the mount fails, and nothing on this page works. Big shares fill a 500 GB SSD fast. When you add a real drive, you move /srv/media onto it (see Ch. 65 · Add an external drive). This container does not notice, because it only sees /data.
Notice — set your timezone
--timezone host makes the container match the Proxmox host. Without it, a new container uses UTC. Its logs and the times of the shares are then hours away from your local time. That setting covers CT 144 itself. But Docker keeps its own clock for what runs inside it. The own times of Pingvin still show UTC? Then add another -e line to the docker run command below: -e TZ=Region/City. Run timedatectl list-timezones to see each valid name. A wrong zone only makes clocks and schedules look odd. Nothing breaks.
Prefer the terminal? — the same task with one pct create command
⌨ Type this on the Proxmox host (homelab)
TMPL=$(pveam available --section system | awk '/debian-13-standard/{print $2}' | tail -1)
pveam download local "$TMPL"          # once per host; harmless to re-run
mkdir -p /srv/media                   # create the shared store if you have not built that chapter yet
pct create 144 local:vztmpl/"$TMPL" \
  --hostname pingvin --cores 1 --memory 1024 --rootfs local-lvm:8 \
  --net0 name=eth0,bridge=vmbr0,ip=192.168.1.200/24,gw=192.168.1.1 \
  --nameserver 192.168.1.1 --features nesting=1,keyctl=1 --unprivileged 1 --onboot 1 --timezone host \
  -mp0 /srv/media,mp=/data
pct start 144
pct enter 144                      # you are now INSIDE CT 144 — everything below runs here
Creates the shared media folder on the host if it is not there already. Normally you make it once in the shared-storage chapter; this line means this chapter still works on its own. -p means it does not complain if the folder already exists.
-mp0 /srv/media,mp=/data
Shows the host folder /srv/media inside the container at /data. The container reads and writes the shared data in place.
36.2
INSTALL PINGVIN SHARE
This part has no buttons. You type commands inside CT 144. You are already there from pct enter 144 above. (You closed that shell? Open homelab → >_ Shell and run pct enter 144 again.) Install Docker. Make the upload folder on the shared store. Then start Pingvin Share X in one Docker container.
Install the Docker engine.
Make the data folder under /data (the shared media store). Uploads and the database then do not fill the OS disk. (A file manager over SFTP can also make this folder. See Ch. 12 · After every build + common Proxmox tasks, section “Move a file to or from the server”. But you are already at this shell for the next command. So it is quicker to type it here.)
Start Pingvin Share X on port 3000. Its data is on that folder, so it stays when you update.
⌨ Type this inside CT 144
apt update && apt install -y docker.io curl   # curl drives the health check in this container's Notes card
mkdir -p /data/pingvin/data/images     # uploads + db live on the shared media store, not the OS disk
docker run -d --name pingvin-share --restart=unless-stopped \
  -p 3000:3000 -e TRUST_PROXY=false \
  -v /data/pingvin/data:/opt/app/backend/data \
  -v /data/pingvin/data/images:/opt/app/frontend/public/img \
  smp46/pingvin-share-x:latest
Notice — docker run fails
You see a cgroup, overlay, or permission error? Check the features of CT 144. On the Proxmox host (not inside the CT), run pct config 144 | grep features. The line must show keyctl=1,nesting=1. It does not? Run pct set 144 --features nesting=1,keyctl=1. Then run pct reboot 144. Then run the docker run line again.
Explanation of each part
The Docker install line and the flags -d, --name, --restart, -v, and -p are explained in Ch. 9 · SSH & the terminal, sections "Install Docker in the container" and "Anatomy of docker run". These parts are specific to Pingvin Share:
mkdir -p /data/pingvin/data/images
Makes the upload and image folders under /data. This is the shared media store that was linked in when you made the container. Uploads land here, not on the small OS disk.
-p 3000:3000
Opens the app on port 3000. You reach it at http://<IP of this CT>:3000.
-e TRUST_PROXY=false
Tells Pingvin that it is not yet behind a reverse proxy. Change it to true after you put Nginx Proxy Manager in front of it.
-v /data/pingvin/data:/opt/app/backend/data
The place of the uploads and the SQLite database. They are on the shared media store. So large files do not fill the OS disk.
The app image to download and run: Pingvin Share X, the maintained fork. The image on Docker Hub is smp46/pingvin-share-x (or ghcr.io/smp46/pingvin-share-x).
36.3
FIRST RUN
Open http://192.168.1.200:3000. Use the IP of the CT, 192.168.1.200, not the host 192.168.1.220. The first account that you make becomes the admin.
The first account that you make is the admin account.
In Admin → Settings, set the maximum upload size and the default expiry of links. The app must be reachable from outside the house? Then put it behind Nginx Proxy Manager (see Ch. 17 · Nginx Proxy Manager).
Admin → Settings: maximum upload size, default link expiry, App URL.
36.4
HOW TO USE IT: THE BASICS
To send a large file: upload it, set an expiry, and copy the link. This takes 30 seconds.
Open http://192.168.1.200:3000 and log in. The first account that you made is the admin account.
Click Share. Drag your files into the upload box, or click the box to browse. Click Share to continue. In the dialog, set the expiration, for example 7 days. For sensitive files, also set a password or a limit on visitors.
Drag the file in. Then set an expiry.
Copy the link and send it to the recipient. The recipient needs no account. They open the link and download in the browser.
To see or delete your shares, open My shares in the account menu (top right).
Each share that you sent, with its expiry.
To receive files from someone, make a Reverse share. Click the link icon in the top right corner → Reverse share → Create. Send that link to the person. They upload the files. You collect them from the share that results.
A reverse share lets someone else send files to you.
Notice — links for use outside your network
A link that contains 192.168.1.200 works only on your own network. Pingvin is behind Nginx Proxy Manager with a domain? Then set that domain as the App URL in Admin → Settings. Pingvin builds each link from that address. Each link that you copy then works from anywhere.
36.5
WHEN IT GOES WRONG
Big uploads fail or stop in the middle. Raise the maximum share size in Admin → Settings. Pingvin is behind Nginx Proxy Manager? Then also raise the client_max_body_size of NPM (proxy host → Advanced). If not, uploads stop at about 1 MB.
Share links point to localhost or to the wrong address. Set the App URL in Admin → Settings to the address that people really use. Pingvin builds links from this address.
"Permission denied" when the app saves uploads. The app user must be able to write to the data folder. From inside CT 144, run chown -R 1000:1000 /data/pingvin. -R means recursive. It changes each file inside the folder too. 1000:1000 sets the owner and group to ID 1000. This is the ID that the app runs as inside the container. This makes the folder on the shared store writable.
Behind Nginx Proxy Manager, the login or the redirects loop. Change TRUST_PROXY=false to true in the docker run command. Then make the container of the app again. A plain restart does not pick this up. Docker reads the -e flags only when it makes the container. The exact five steps are in Ch. 12 · After every build + common Proxmox tasks, section “Change a setting on a Docker app”. Your data folders are not touched.
36.6
A download step fails with Temporary failure resolving deb.debian.org, or with another "cannot resolve" message. The container has no working DNS server. It cannot change a name into an address. This is not a typing mistake. It does not fix itself. In the Proxmox page, select this container in the left tree. Open DNS. Select Edit. Type your router address in DNS servers (192.168.1.1 here; use your own). Then run pct reboot 144 in the host shell. Run the failed step again.
A command fails. You do not know if you are on the server or in the container. Read the prompt. In the container, it ends with the name of the container. On the server, it shows root@homelab. The prompt still shows root@homelab after pct enter? Then the command did not work. Type exit. Run the pct enter line again. Check the prompt before you paste anything else. You can paste a build block on the server by mistake. It seems to work. It installs without an error, and the app even answers. But the app is on the server, and it must not be there.
How to see that it happened, and how to undo it. The app does not open at the container address (192.168.1.200). It does open at the server address (192.168.1.220) on the same port. Then the app is on the host. To remove it, run docker rm -f pingvin-share in the host shell. Then run pct enter 144. Check that the prompt changed. Paste the build block again. You lose nothing in the container, because nothing was built there. The first command can show Error: No such container. This is good. It means that the app was never on the host. Do not paste the build block again. Look for another cause.
The page does not open. The browser spins, or says it cannot connect. Do these checks in order, in the host shell. 1. Is the container running? Run pct status 144. It must say running. If it does not, run pct start 144. 2. Is the container at the address that you typed? Run pct config 144 | grep net0. It shows the real address. A wrong digit in the wizard puts the container at another address, and nothing warns you. 3. Does the app run in the container? Run pct enter 144. Then run docker ps. An empty list means that the app did not start. Run docker ps -a to see that it stopped. Run docker logs to see why. 4. Does the app answer in the container? Run curl -I http://localhost followed by the port of the app. You get a reply here, but nothing from your PC? Then the address or your own network is the problem. The app is fine. Your browser reaches 192.168.1.200 but not the port? Then the app is down. It reaches neither? Then the container is down.
Docker does not start, or you see Cannot connect to the Docker daemon, a keyring error, or an overlay error. This is the most common failure in these guides. It means that the two container features are off. A later pct set --features can switch them off, also when you set them before. Run this in the host shell, not in the container: pct set 144 --features nesting=1,keyctl=1. Then run pct reboot 144. Then run the failed step again. Type both settings on one line. If you send only one setting, it replaces the pair and switches the other one off.
REFERENCE CARD
Paste this in 144 → Summary → Notes. The key facts then stay with the container. Before you ever run the update line on this card, compare it with the docker run you actually used at install. The card is a snapshot of the standard build: if you added anything of your own — a device, an extra -e setting, a second folder — it is not on the card, and re-running the card's line drops it. The container comes back up looking healthy with your setting gone.
📋 Reference — paste into this container's Notes in Proxmox (not a shell command)
## Pingvin Share X — CT 144
dashboard http://192.168.1.200:3000 · docs https://smp46.github.io/pingvin-share-x/
first account = admin · uploads + db: /data/pingvin (shared media store /srv/media)
```sh
# is it running?
docker ps --filter name=pingvin-share
curl -fsS http://localhost:3000/api/health >/dev/null && echo OK # quick health check# logs (last 50)
docker logs pingvin-share --tail 50
# stop / start / restart
docker stop pingvin-share
docker start pingvin-share
docker restart pingvin-share
# is there an update? ("Image is up to date" = no)
docker pull smp46/pingvin-share-x:latest
# update (uploads + db survive in /data/pingvin on the shared media store)
docker pull smp46/pingvin-share-x:latest && docker rm -f pingvin-share && docker run -d --name pingvin-share --restart=unless-stopped -p 3000:3000 -e TRUST_PROXY=false -v /data/pingvin/data:/opt/app/backend/data -v /data/pingvin/data/images:/opt/app/frontend/public/img smp46/pingvin-share-x:latest
```
Part D · The app catalog
37Home Assistant (preview)
Home Assistant ties each smart device in your home into private automations that run locally. It is the one app in this manual that you run as a full virtual machine.
This chapter needs the items below. You came here directly? Do them first. Each item takes a short time. Nothing on this page works without them.
Proxmox is installed and works at https://192.168.1.220:8006. You can log in as root. See Ch. 6 · Install Proxmox. At your first visit, the browser shows a certificate warning. Select Advanced. Then select Proceed. The warning is normal. Proxmox makes its own certificate.
This chapter builds a virtual machine, not a container. You do not need the Debian image. The pct commands of this manual do not apply here. You manage a VM with qm. Its menu has no DNS tab.
You prepare nothing for the wizard. The create dialog of a virtual machine asks only for a name, an ID, and a disk image. It has no password field and no SSH-key field. It needs no Debian image.
You know your own network numbers. Where this chapter shows 192.168.1.x, use your own numbers. The rule is in Ch. 3 · How to read this manual. The address of this chapter must be outside the range that your router gives out by itself (the DHCP pool, often .100–.200, but yours can differ). An address inside the pool can go to a phone later. Two devices on one address break name lookups, and the cause is hard to find.
Optional — Ch. 16 · AdGuard Home. This chapter can send you notifications, but only if that chapter is already running. All other steps work without it.
Commands marked HOST run on the server. In the Proxmox page, select homelab in the left tree. Then select >_ Shell. Commands marked CT run inside the container of this chapter. The chapter shows you how to get there.
The wizard does not work?Next is grey: you gave no password and no key. Give one of the two. The Template list is empty: the Debian image is not downloaded. Download it first. Each tab is explained in Ch. 10 · The container wizard.
Notice — this is a preview chapter
Home Assistant pays off when you own several smart devices from different brands. You have only a smart plug or a bulb so far? Then the own app of the vendor is enough. Leave this chapter for later. This chapter shows you how to set up the server and take the first steps. A full smart-home build, with dozens of devices and complex automations, is outside this manual.
37.1
CREATE THE VIRTUAL MACHINE
Each other chapter in this manual builds a container. Home Assistant is the exception. You run it as a virtual machine from the official HAOS (Home Assistant Operating System) image. The VM gives you the full add-on ecosystem and the easy one-click backups. A container install cannot do this.
You build the machine with the mouse, in the Proxmox web page. The wizard has eight tabs: General, OS, System, Disks, CPU, Memory, Network, Confirm. You move through them with Next. Leave each field that is not listed here at its default value.
Warning — this VM needs UEFI firmware, with Secure Boot keys off
On the System tab, set Firmware to OVMF (UEFI). Tick Add EFI Disk. Untick Pre-Enroll keys. HAOS does not boot on the default SeaBIOS of Proxmox. You get only a black screen or a "No bootable device" loop. HAOS also does not boot when the EFI disk has the pre-enrolled Secure Boot keys. This is the most common mistake in this chapter.
OPEN THE WIZARD
On your PC, open https://192.168.1.220:8006 and sign in.
Click homelab in the left tree.
Click the blue Create VM button at the top right.
The Proxmox login page at https://192.168.1.220:8006. The user is root. The realm is Linux PAM.The blue Create VM button. It is in the top bar of the node page, next to Create CT.
GENERAL
Keep Node at homelab.
Type 130 in VM ID. Do not keep the number that the wizard suggests.
Type a Name, for example homeassistant.
The General tab for VM 130 on node homelab. The ID is the permanent number of the machine in Proxmox.
OS
Click the radio button Do not use any media on this tab. HAOS is a finished disk image. It is not an installer. So there is no ISO to select.
SYSTEM
Set Firmware to OVMF (UEFI).
Tick Add EFI Disk.
Store that EFI disk on local-lvm.
Untick Pre-Enroll keys. This box is ticked by default.
The System tab with OVMF (UEFI) selected and Add EFI Disk ticked. Also untick Pre-Enroll keys. Get this tab right, and the rest of the chapter works.
DISKS
The wizard fills this tab with one default disk row already attached. Delete that row before you click Next. Do not add a disk of your own here. The image that you import in the next section becomes the drive of the VM, about 32 GB.
CPU
Set Cores to 2.
The CPU tab. Two cores are enough for Home Assistant and a few add-ons.
MEMORY
Set Memory (MiB) to 4096.
The Memory tab. A VM, unlike a container, holds this number as long as it runs.
Notice — a VM reserves its RAM
A container is different. This VM takes its full 4 GB of RAM when it boots. It holds that RAM while it runs. The memory does not go back to the host. On a machine with 16 GB, this is a real cost. Run a few heavy apps at the same time, not all of them. Watch the memory graph in Ch. 15 · Beszel. Shut this VM down when you do not use it.
NETWORK
Keep the default bridge vmbr0.
Change nothing else. HAOS asks the router for its address by itself.
CONFIRM
Read the summary. Check that the firmware line says OVMF (UEFI).
Keep Start after createdunticked. The machine has no disk yet.
Click Finish.
The Confirm tab. VM 130 now exists. It is off and empty.
37.2
IMPORT THE HOME ASSISTANT IMAGE
DOWNLOAD AND IMPORT — NO BUTTONS
This part has no buttons. Proxmox has no button that imports a downloaded disk image. So you type the commands in the Shell of the host (homelab → >_ Shell). After the import, you go back to the mouse.
On your PC, open https://www.home-assistant.io/installation/linux/. Copy the download link for the Linux / KVM image. It is a .qcow2.xz file.
Click homelab in the left tree. Then click >_ Shell at the top right.
Download the file into the host with wget <the link you copied>. Proxmox has no upload button for a disk image like this one. So the Shell is the only way to put it on the host.
Extract it. Then import it as the disk of VM 130 with the two commands on the right.
Wait for the import to report Successfully imported disk. The disk lands in VM 130 as an Unused Disk.
The version number in the commands changes with each HAOS release. Use the file name of the file that you really downloaded.
⌨ Type this on the Proxmox host (homelab)
Before you run anything on this page: every 192.168.1.x address below is this manual's example network. If your own network uses different numbers, substitute yours as you type — the rule is in Ch. 3 · How to read this manual. A command that runs with the wrong address usually succeeds and leaves you unreachable.
unxz haos_ova-18.3.qcow2.xz          # extract first — if "unxz: command not found", run apt install -y xz-utils
qm importdisk 130 haos_ova-18.3.qcow2 local-lvm   # import it as VM 130's disk
Explanation of each command
unxz haos_ova-18.3.qcow2.xz
Decompresses the downloaded image. The .xz download is a compressed archive. This leaves the plain .qcow2 disk image next to it. You import that plain file. Never import the .xz.
qm importdisk 130 haos_ova-18.3.qcow2 local-lvm
The Proxmox command that turns the downloaded disk image into a real disk for VM 130. It stores the disk on local-lvm. Use your own storage name if it is different. The disk shows as Unused Disk 0 until you attach it in the Hardware tab. Newer versions of Proxmox write the same command as qm disk import 130 haos_ova-18.3.qcow2 local-lvm. Both work.
ATTACH THE DISK AND SET THE BOOT ORDER
Back to the mouse. An imported disk does nothing until you attach it and put it first in the boot order.
Go to VM 130 → Hardware.
Double-click the row Unused Disk 0.
Choose a bus in the dialog. SCSI or SATA both work. Click Add.
The Hardware tab of VM 130. The imported image waits as Unused Disk 0 until you attach it.
Go to VM 130 → Options.
Double-click Boot Order.
Tick the disk that you attached. Drag it to the top of the list. Click OK.
The Boot Order dialog. The attached disk must be ticked and first. If not, the VM starts with nothing to boot.
37.3
FIRST BOOT AND ITS ADDRESS
Select VM 130 in the left tree. Click Start at the top right.
Open VM 130 → Console. For a virtual machine, this console shows the own screen of the machine. It is not a text shell.
Wait 5–10 minutes. The machine finishes its setup in the background. It shows a "Preparing Home Assistant" screen while it works.
Read the address that HAOS prints on that console screen. Your router gives a temporary address by itself. This is called DHCP. It lasts until you reserve a fixed address. So it is not 192.168.1.251 yet.
Open http://homeassistant.local:8123 in a browser on your PC. Or open the address that you just read.
Open VM 130 → Hardware. Find the MAC address on the Network Device row. Copy it. You need it for the next step.
Open the page of your router at 192.168.1.1. Reserve 192.168.1.251 for this machine, so that the address never moves.
Router pages are different for each brand. Look for DHCP, LAN, or Address Reservation. Then bind the MAC address that you copied to 192.168.1.251. The picture below shows the shape of the page that you look for.
Router admin — 192.168.1.1✕
StatusLAN SetupWirelessFirewallAdmin
☑ Enabled24 h
192.168.1.10 – 192.168.1.199
Manual ▾192.168.1.223
(keep empty)
Every router brand words this differently — look for “DHCP”, “LAN”, or “DNS” settings.Save changes
A typical router's LAN/DHCP page. The one change that turns on house-wide ad-blocking: DNS server 1 = your AdGuard container. Do not add a public DNS as server 2 — devices would bypass AdGuard through it.
A reserved address does not move the machine to it. Home Assistant keeps the address that it already has until that lease ends. The router picture on this page shows a 24-hour lease. So it can take a full day before anything changes. Until then, http://192.168.1.251:8123 does not answer. Force it now instead. In Proxmox, select 130 and open Console. Reboot the machine from the own menu of Home Assistant. Or click Shutdown, then Start, in the toolbar. On the way back up, it asks the router for an address. It gets the reserved one. Only then does the dashboard answer at http://192.168.1.251:8123 for good. The next section takes you through the one-time onboarding wizard there.
37.4
WHAT IS DIFFERENT HERE
This is a VM, not a container. So there are no docker commands. You manage the machine itself from the Proxmox page: start it, stop it, and snapshot it there. Everything inside it is done from the own web page of Home Assistant at :8123. This means add-ons, updates, integrations, and backups.
Home Assistant has its own backup feature (Settings → System → Backups). Use it in addition to a Proxmox VM snapshot. In Ch. 64 · Backups done right (3-2-1), you set up real scheduled backups. There, the VM snapshot is what you protect at the Proxmox level.
The firmware rule is worth a repeat. This VM must use OVMF (UEFI) firmware with an EFI disk, and Pre-Enroll keys off. Your containers do not need this. HAOS does.
37.5
FIRST-RUN SETUP
The first start opens a one-time onboarding wizard. This part is all buttons, in the own web page of Home Assistant on port 8123.
Open http://homeassistant.local:8123. Or open http://192.168.1.251:8123 when the reservation is in place.
Wait until the "Preparing Home Assistant" screen is done.
Click Create my smart home.
The welcome screen. It shows one time only, at the first visit.
Enter a name, a user name, and a password. The user name must be in lowercase, with no spaces.
Click Create account.
The owner account form. This account is the administrator.
Warning — this account cannot be recovered
The owner account is the administrator of the whole system. Home Assistant has no email to reset the password. Keep the password in a safe place, ideally in Ch. 22 · Vaultwarden.
Set the location of your home. This sets the time zone, the units, and the currency.
Choose which anonymous data you agree to share. All sharing is off by default.
Click Next, then Finish.
The location form. Home Assistant reads sunrise and sunset from this position. So automations that run at dusk depend on it.
The default dashboard, named Overview, opens.
The Overview dashboard. Home Assistant builds it for you. It adds a card for each device that it knows.
Go to Settings → Devices & Services. Devices that it finds on your home network (the LAN) show as Discovered. One click sets up each one.
A Wi-Fi plug or bulb is not discovered? Click Add Integration. Search for its brand, for example TP-Link Smart Home for TP-Link plugs and bulbs.
For a Wi-Fi camera, click Add Integration. Search for ONVIF. It is a standard that most camera brands support. So it works also without an integration for that brand.
Settings → Devices & Services. Discovered devices are at the top. Add Integration covers the rest.
Go back to Overview. The device now has a card.
Click the card to switch the device on or off.
Open the card to control the brightness and the color.
One device card. A click is the switch. The card itself opens the full controls.
Go to Settings → Automations & scenes.
Click Create automation.
Build a simple first one: turn the light on at sunset. Click Add Trigger. Choose Sun. Then choose Sunset.
Click Add Action. Choose your light device. Then choose Turn on.
Click Save. Give the automation a name.
The automation editor. A trigger, an optional condition, and an action. Sunset is a trigger that the location form already taught it.
37.6
GOING FURTHER
Voice. The built-in "Assist" of Home Assistant plus a Voice Preview Edition puck (about US$59) gives you a private voice assistant that you host yourself. You need no Google Home or Amazon account.
Zigbee. Zigbee is a low-power radio standard. Many battery sensors and bulbs use it instead of Wi-Fi. You add Zigbee devices later with a coordinator stick. This is a small USB radio, about US$20. It plugs into the machine that runs Home Assistant. It talks to those devices. There are two ways to use it:
ZHA, built into Home Assistant. No extra add-ons. This is the simplest path.
Zigbee2MQTT, a separate add-on with more settings and support for more devices. It needs a second add-on that runs next to it. This is Mosquitto, a small program that relays messages (an "MQTT broker"). Zigbee2MQTT uses it to pass device updates to Home Assistant. Install Mosquitto first (Settings → Add-ons → Add-on Store → Mosquitto broker, see When it goes wrong for the full sequence). If not, Zigbee2MQTT does not start.
This is a bigger project than the other guides. Treat it as a weekend of its own, when your core devices work.
37.7
WHEN IT GOES WRONG
VM 130 does not start at all, or it starts but everything inside it is very slow. The BIOS of the host has hardware virtualization turned off. Reboot the physical machine. Enter its BIOS setup. Turn on Intel VT-x (or AMD-V / SVM Mode on AMD boards). The exact name and menu place are different for each motherboard. Proxmox needs this switch to run VMs at real speed. Without it, a VM may refuse to start, or run so slowly that it looks frozen.
VM 130 starts but shows a black screen, "No bootable device", or keeps rebooting. It never reaches Home Assistant. The VM is on the wrong firmware, or its EFI disk has Secure Boot keys. HAOS boots only under UEFI, with Secure Boot keys off. Shut the VM down. Then run one command on the host: qm set 130 --bios ovmf --efidisk0 local-lvm:1,efitype=4m,pre-enrolled-keys=0. The parts of the command: --bios ovmf switches the firmware type to UEFI. --efidisk0 local-lvm:1,... makes the small EFI disk that UEFI needs, 1 GB on the local-lvm storage. efitype=4m picks the modern, larger format of EFI variables. pre-enrolled-keys=0 leaves the Secure Boot keys out. The EFI disk exists already? Then the command replaces it with a new one. Together this is what the System tab of the wizard does for a new machine. Start the VM again. You can also delete VM 130 and run the wizard again with Firmware set to OVMF (UEFI) and Pre-Enroll keys unticked. That costs only the import.
qm importdisk fails, or it imports a tiny or garbage disk that does not boot. You pointed it at the download that is still compressed. Extract it first on the host with unxz haos_ova-18.3.qcow2.xz. Then run qm importdisk 130 haos_ova-18.3.qcow2 local-lvm (use your real storage name if it is not local-lvm).
The import works and the VM exists, but at start it powers on with nothing to boot. The imported disk is still "Unused", or it is not in the boot order. Go to VM 130 → Hardware. Double-click Unused Disk 0 and add it (SCSI or SATA is fine). Then go to VM 130 → Options → Boot Order. Tick that disk. Drag it to the top.
http://192.168.1.251:8123 does not load after the VM boots. HAOS uses DHCP. So it is on a different IP, or the first boot is not finished. Or both. Wait 5–10 minutes. Then open http://homeassistant.local:8123. To find the real IP, open VM 130 → Console. The address is printed on that screen. Then add a DHCP reservation on the router to pin it to 192.168.1.251.
The Zigbee2MQTT add-on installs but does not start, or its logs say that it cannot connect to MQTT. Zigbee2MQTT needs a broker. Install the Mosquitto broker add-on first (Settings → Add-ons → Add-on Store → Mosquitto broker). Start it. Add the Mosquitto integration. Then start Zigbee2MQTT. Or skip MQTT and use the built-in ZHA integration instead.
37.8
REFERENCE CARD
Paste this in VM 130 → Summary → Notes. The key facts then stay with the machine.
📋 Reference — paste into this VM's Notes in Proxmox (not a shell command)
## Home Assistant — VM 130
dashboard http://192.168.1.251:8123 · docs https://www.home-assistant.io/docs/
```sh
# is it running? (on the host)
qm status 130
curl -fsS http://192.168.1.251:8123 >/dev/null && echo OK # quick health check# stop / start / reboot (on the host)
qm stop 130
qm start 130
qm reboot 130
# snapshot the VM first: qm snapshot 130 pre-update (see the after-every-build ritual) — instant rollback if the update misbehaves# is there an update? in-app: Settings -> System -> Updates (no host commands)# update HA, add-ons, Zigbee2MQTT, backups: all done in-app under Settings
```
Part D · The app catalog
38Frigate — optional, needs a camera
A camera dashboard that you host yourself. It pulls the live stream from any RTSP or ONVIF IP camera. It is view-only by default. You can turn on person and car detection on the CPU.
This chapter needs the items below. You came here directly? Do them first. Each item takes a short time. Nothing on this page works without them.
Proxmox is installed and works at https://192.168.1.220:8006. You can log in as root. See Ch. 6 · Install Proxmox. At your first visit, the browser shows a certificate warning. Select Advanced. Then select Proceed. The warning is normal. Proxmox makes its own certificate.
The Debian 13 image is downloaded. You do this one time. See Ch. 10 · The container wizard. Without the image, the Template list in the wizard is empty.
You have an SSH key from your PC (Ch. 9 · SSH & the terminal). Or you type a password in the two password boxes of the wizard. The wizard needs one of the two. The Next button stays grey until you give one.
You know your own network numbers. Where this chapter shows 192.168.1.x, use your own numbers. The rule is in Ch. 3 · How to read this manual. The address of this chapter must be outside the range that your router gives out by itself (the DHCP pool, often .100–.200, but yours can differ). An address inside the pool can go to a phone later. Two devices on one address break name lookups, and the cause is hard to find.
Commands marked HOST run on the server. In the Proxmox page, select homelab in the left tree. Then select >_ Shell. Commands marked CT run inside the container of this chapter. The chapter shows you how to get there.
The wizard does not work?Next is grey: you gave no password and no key. Give one of the two. The Template list is empty: the Debian image is not downloaded. Download it first. Each tab is explained in Ch. 10 · The container wizard.
38.1
CREATE THE CONTAINER
You do this task with the mouse in the Proxmox web page. You type nothing. You prefer the command line for the whole container? The box below does the same task with one pct create command.
Open https://192.168.1.220:8006.
Click homelab in the left tree.
Click the blue Create CT button at the top right.
Fill in the tabs as the reference shows. Leave each field that is not listed at its default value.
The Proxmox login page, at https://192.168.1.220:8006.Select homelab in the left tree.Click Create CT.
Wizard reference — Create CT 117
Tab → Field
Entry
General → Node
Select homelab.
General → CT ID
Type 117. Do not keep the number that the wizard suggests.
General → Hostname
Type frigate.
General → Unprivileged container
Keep this box ticked.
General → Nesting
Keep this box ticked. It is ticked by default. The wizard has no box for keyctl, which Docker also needs. The host command after Finish sets it. It is the first line of the next listing.
General → Password / SSH public key
Keep the password empty. Paste your public key in the SSH field: ssh-ed25519 AAAA…your-key-here you@your-pc. With the key, you can run ssh root@192.168.1.238 from your PC. The command pct enter 117 on the host needs no password.
Template → Storage, Template
Select local. Then select debian-13-standard.
Disks → Storage, Disk size
Select local-lvm. Set 8 GiB.
CPU → Cores
Set 2 cores.
Memory → Memory (MiB)
Set 2048. Keep Swap at its default.
Network → IPv4
Select Static. Set IPv4/CIDR to 192.168.1.238/24. Set Gateway to 192.168.1.1. Keep IPv6 at its default.
DNS → DNS domain
Keep this field empty. Do not type 192.168.1.1 here.
DNS → DNS servers
Always type 192.168.1.1. Never keep this field empty.
Confirm
Read the summary. Keep Start after created unticked. Select Finish.
General tab: CT ID 117, hostname frigate, Unprivileged container ticked.
The wizard has no box for three settings: the Docker permission keyctl, the timezone, and start at boot. The first command below sets all three. Run these 3 commands on the host. They set the missing settings, start the container, and open its shell. Each part is explained in Ch. 10 · The container wizard, section "The host command every build needs".
⌨ Type this on the Proxmox host (homelab)
Before you run anything on this page: every 192.168.1.x address below is this manual's example network. If your own network uses different numbers, substitute yours as you type — the rule is in Ch. 3 · How to read this manual. A command that runs with the wrong address usually succeeds and leaves you unreachable.
pct set 117 --features nesting=1,keyctl=1 --onboot 1 --timezone host
pct start 117
pct enter 117                          # now INSIDE CT 117 — the rest of this page runs here
Open the shell of the container. Opening the host Shell is the one step with the mouse:
Click homelab in the left tree. Then click >_ Shell at the top right.
Run pct enter 117. It puts you inside the container as root, with no password.
The >_ Console button of the CT opens a login: prompt, not a shell. Use pct enter 117 from homelab → >_ Shell.
You are then in the container. The commands in the next sections run there.
Prefer the terminal? — the same task with one pct create command
⌨ Type this on the Proxmox host (homelab)
TMPL=$(pveam available --section system | awk '/debian-13-standard/{print $2}' | tail -1)
pveam download local "$TMPL"          # once per host; harmless to re-run
pct create 117 local:vztmpl/"$TMPL" \
  --hostname frigate --cores 2 --memory 2048 --rootfs local-lvm:8 \
  --net0 name=eth0,bridge=vmbr0,ip=192.168.1.238/24,gw=192.168.1.1 \
  --nameserver 192.168.1.1 --features nesting=1,keyctl=1 --unprivileged 1 --onboot 1 --timezone host
pct start 117
pct enter 117                      # you are now INSIDE CT 117 — everything below runs here
Replace Region/City with your own zone, for example America/New_York. To list the exact names that your system accepts, run timedatectl list-timezones.
Notice — where these commands run
Everything from here runs IN CT 117, not on homelab. After the container exists, you type the rest of the commands in the shell of the container. You open that shell in one of two ways. Run pct enter 117 on the host (first homelab → >_ Shell). Or run ssh root@192.168.1.238 from your PC. (The >_ Console button of the container shows a login: prompt. The containers of this manual cannot answer it. Skip it.) Only the pct command (and pveam, which downloads container templates) go back to the host. Each guide names those commands where you use them.
38.2
SET UP THE CAMERA
Frigate reads the camera over RTSP. This is a plain protocol for video streams that almost every IP camera supports. Two things must be true before Frigate can connect. The camera must offer an RTSP stream. You must know the exact URL of the stream.
Open the app that came with your camera. Make a separate camera account. This is a user name and a password that you use only for local access. It is usually in the Advanced or Security settings of the camera. Do not reuse the login of the cloud or the app.
Turn on the local stream. Brands name it RTSP, ONVIF, or Third-Party Compatibility. Turn it on.
Find the RTSP URL. The format is always rtsp://USER:PASS@CAMERA-IP:554/PATH. The PATH part is different for each brand.
Notice — find the RTSP path of your camera
The path of the stream depends on the brand. Common examples are /stream1, /live, /h264Preview_01_main, or /Streaming/Channels/101. Search for the model of your camera plus “rtsp url”. Or check its manual. Or use a free ONVIF Device Manager. Or open the URL that you guess in VLC → Media → Open Network Stream. Confirm the exact path before you edit the config. Find the IP address of the camera in its app, or in the list of connected devices on your router (192.168.1.1).
38.3
WRITE THE CONFIG AND START FRIGATE
This part has no buttons. You type commands inside CT 117. You are already there from pct enter 117 above. (You closed that shell? Open homelab → >_ Shell and run pct enter 117 again.) Frigate does not start without a config file. Write the config first. Then start Frigate. This is a minimal, view-only configuration. It has no detection and no recording.
⌨ Type this inside CT 117
apt update && apt install -y docker.io curl
mkdir -p /opt/frigate/config
cat > /opt/frigate/config/config.yml <<'YML'
mqtt:
  enabled: false
tls:
  enabled: false        # serve the dashboard over plain http on :8971 (Tailscale / a reverse proxy add the real security)
cameras:
  front_door:
    ffmpeg:
      inputs:
        - path: rtsp://camuser:{FRIGATE_RTSP_PASSWORD}@192.168.1.XX:554/stream1
          roles: [detect]
    detect:
      width: 1280
      height: 720
    record:
      enabled: false        # recording stays on the camera SD card
YML
Edit that file to enter the real details of your camera before you start Frigate.
Open it with nano /opt/frigate/config/config.yml. You get nano: command not found? Run apt install -y nano first.
Change camuser to the user name of the camera account that you made.
Change 192.168.1.XX to the real IP address of the camera.
Change /stream1 to the real RTSP path of your camera if it is different.
Press Ctrl+O, then Enter to save. Press Ctrl+X to exit.
Start Frigate with the command on the right. Replace yourcampass with the password of the same camera account.
You prefer a file window to the terminal?
You can open and edit config.yml from a normal file window instead of nano. See Ch. 12 · After every build + common Proxmox tasks, section “Move a file to or from the server”, for the exact SFTP steps. Connect to 192.168.1.238. Browse to /opt/frigate/config/config.yml. Save the file. Then run docker restart frigate in the shell of the container. Frigate reads the file again only at a restart. It does not notice the edit by itself.
The Docker install line and the flags -d, --name, --restart, -v, -p, and -e are explained in Ch. 9 · SSH & the terminal, sections "Install Docker in the container" and "Anatomy of docker run". These parts are specific to Frigate:
Writes a block of text into a new file named config.yml. This syntax (a heredoc) types the content of a file with many lines directly in the terminal. You do not need a text editor.
mqtt: enabled: false
Turns off the MQTT integration of Frigate. MQTT is a messaging protocol. It sends camera events to other smart-home tools. This setup does not use it.
tls: enabled: false
Turns off the built-in HTTPS of Frigate on the dashboard port. By default, Frigate turns on HTTPS with a self-signed certificate. This makes the plain address http://…:5001 fail to load. With HTTPS off, the dashboard is served over plain http. Tailscale, or a reverse proxy in front, gives the real encryption.
Defines a camera named front_door. It gives the RTSP URL that Frigate uses to pull the live feed from the camera. An RTSP URL is an address for a video stream, with a user name and a password.
roles: [detect]
Tells Frigate to use this video stream for motion and object detection.
detect: width: 1280 / height: 720
Makes the video 1280×720 before detection runs. This saves CPU.
record: enabled: false
Turns off the own video recording and storage of Frigate. The recording stays on the SD card of the camera instead.
--shm-size=256m
Raises the shared memory of the container to 256 MB. Frigate needs this for its video buffers. The small default of Docker makes Frigate crash.
-p 5001:8971
Sends port 5001 of the host to the internal port 8971 of the container. This is the web dashboard of Frigate with a login. Use this port, not the internal port 5000, which has no login. If you map 5000, the feed is open to anyone, even when you set an admin password.
-v /opt/frigate/config:/config
Links the config folder of the host into the container. Frigate then reads the config.yml file that you made.
-v /opt/frigate/media:/media/frigate
Links a folder of the host for the media that Frigate makes, such as thumbnails. The data is not lost when you make the container again. It stays almost empty here, because recording is off.
-e FRIGATE_RTSP_PASSWORD=yourcampass
Passes the RTSP password of the camera into the container as an environment variable. The config file uses this variable. The password is not in plain text in the file.
ghcr.io/blakeblackshear/frigate:stable
The container image to run: the official Frigate image, the stable version, from the GitHub container registry. Frigate is a security-camera recorder that you host yourself.
Wait about one minute for Frigate to finish its start.
Open http://192.168.1.238:5001 in a browser to see the live feed.
This configuration is view-only. No object detection runs.
To turn on person or car detection later: (1) open the config file in the same way as before, nano /opt/frigate/config/config.yml. (2) Add the line enabled: true under the detect: block that is already there. (3) Save and exit (Ctrl+O, Enter, Ctrl+X). (4) Run docker restart frigate. Detection runs on the CPU. So expect much more CPU use.
Warning — turn on the login of Frigate
Recent versions of Frigate turn on authentication by default. At the first start, Frigate prints a one-time admin password in docker logs frigate. Set your own password in the web page. Do not expose :5001 directly on the network. Reach it through Ch. 17 · Nginx Proxy Manager or Ch. 19 · Remote access: Tailscale, like the other services. Never map the internal port 5000. It has no login. It would leave the camera feed open to anyone.
38.4
HOW TO USE IT
In this build, the daily use of Frigate is one page: the live view of your camera. The first visit asks for a login.
Open http://192.168.1.238:5001. Log in as admin. Use the one-time password from docker logs frigate inside CT 117 (see the warning above).
Set your own password at once. Click the gear icon in the sidebar. Open Settings → Users. Edit the admin user.
The home page is the live view. Your camera front_door shows as a tile. Click the tile to open the full-size view. Go back to return to the grid.
To watch on the couch or on your phone, open the same address in a browser on the LAN or through Tailscale. You install no app.
To see the load, click the gear icon and select System metrics. The page shows the CPU use and the frame rate of the camera.
Log in as admin with the one-time password from docker logs frigate.Gear icon → Settings → Users, edit the admin password.Live view: the front_door tile.Click the tile for the full-size stream.Gear icon → System metrics: CPU use and frame rate.
Notice — the other tabs are empty by design
This build is view-only. Detection and recording are off. So Frigate makes no events for the Review and Explore pages. To change this, set detect: enabled: true as shown above. Persons and cars that it detects then appear as events.
38.5
WHEN IT GOES WRONG
The page of the live feed does not open. The browser shows “this site can't provide a secure connection” or “connection is not private”, or the page never loads at http://192.168.1.238:5001. By default, the dashboard port of Frigate (8971) turns on HTTPS with a self-signed certificate. This makes plain http fail. Check that /opt/frigate/config/config.yml has a top-level tls: block with enabled: false. Run docker restart frigate. Use the http:// address, not https://.
The camera tile stays black. Or docker logs frigate --tail 50 shows “Unauthorized”, 401, or “Camera stream … not responding”. This almost always means that you used the cloud or app login of the camera. You need the separate RTSP account on the camera. In the app of your camera, find the setting Camera Account, RTSP, ONVIF, or Third-Party Compatibility. Set a user name and a password. Turn it on. Put that user name in the path: line of the config. Put that password in -e FRIGATE_RTSP_PASSWORD=. Do not use @, :, /, or other special characters in the password. They break the RTSP URL. Then run docker restart frigate. You change the password of the camera? A restart does not pick it up. That value reaches the container as an -e setting when the container is made. So docker restart frigate comes back with the OLD password. You keep getting 401, and you think that you followed the steps. Make the container again instead: docker rm -f frigate. Then paste the original docker run block again, with the new password in it. Your config and media are in the folders of the host. They stay.
Frigate keeps restarting, and the logs show “Bus error”. This often happens after you add more cameras or a higher resolution. The shared memory is too small. Remove the container and start a new one with a larger value. This removes only the container. It does not remove your settings or media. They are in /opt/frigate/config and /opt/frigate/media on the host. (1) Run docker rm -f frigate. (2) Run the docker run command again. Change --shm-size=256m to --shm-size=512m.
You never saw the admin password, or you lost it, and you cannot log in. (1) Open the config file with nano /opt/frigate/config/config.yml. (2) Add a new top-level block next to the mqtt: and tls: blocks. Do not nest it under either. Write auth: on its own line. Under it, indented, write reset_admin_password: true. (3) Save and exit (Ctrl+O, Enter, Ctrl+X). (4) Run docker restart frigate. (5) Read the new one-time password with docker logs frigate | grep -i password. (6) Log in with it. Set your own password under Settings → Users. (7) Open the config file again. Delete the auth: block that you added. Repeat steps 3 and 4. The reset then does not run again at the next restart.
Frigate refuses to start, and docker logs frigate shows a config validation error or “invalid config”. The config.yml file is malformed. The usual causes are a stray TAB (YAML needs spaces), wrong indentation, or a placeholder that you left. Run nano /opt/frigate/config/config.yml. Check that the path: line has the real IP address and the real user name, with 2-space indentation. Save (Ctrl+O, Enter, Ctrl+X). Then run docker restart frigate.
38.6
A download step fails with Temporary failure resolving deb.debian.org, or with another "cannot resolve" message. The container has no working DNS server. It cannot change a name into an address. This is not a typing mistake. It does not fix itself. In the Proxmox page, select this container in the left tree. Open DNS. Select Edit. Type your router address in DNS servers (192.168.1.1 here; use your own). Then run pct reboot 117 in the host shell. Run the failed step again.
A command fails. You do not know if you are on the server or in the container. Read the prompt. In the container, it ends with the name of the container. On the server, it shows root@homelab. The prompt still shows root@homelab after pct enter? Then the command did not work. Type exit. Run the pct enter line again. Check the prompt before you paste anything else. You can paste a build block on the server by mistake. It seems to work. It installs without an error, and the app even answers. But the app is on the server, and it must not be there.
How to see that it happened, and how to undo it. The app does not open at the container address (192.168.1.238). It does open at the server address (192.168.1.220) on the same port. Then the app is on the host. To remove it, run docker rm -f frigate in the host shell. Then run pct enter 117. Check that the prompt changed. Paste the build block again. You lose nothing in the container, because nothing was built there. The first command can show Error: No such container. This is good. It means that the app was never on the host. Do not paste the build block again. Look for another cause.
The page does not open. The browser spins, or says it cannot connect. Do these checks in order, in the host shell. 1. Is the container running? Run pct status 117. It must say running. If it does not, run pct start 117. 2. Is the container at the address that you typed? Run pct config 117 | grep net0. It shows the real address. A wrong digit in the wizard puts the container at another address, and nothing warns you. 3. Does the app run in the container? Run pct enter 117. Then run docker ps. An empty list means that the app did not start. Run docker ps -a to see that it stopped. Run docker logs to see why. 4. Does the app answer in the container? Run curl -I http://localhost followed by the port of the app. You get a reply here, but nothing from your PC? Then the address or your own network is the problem. The app is fine. Your browser reaches 192.168.1.238 but not the port? Then the app is down. It reaches neither? Then the container is down.
Docker does not start, or you see Cannot connect to the Docker daemon, a keyring error, or an overlay error. This is the most common failure in these guides. It means that the two container features are off. A later pct set --features can switch them off, also when you set them before. Run this in the host shell, not in the container: pct set 117 --features nesting=1,keyctl=1. Then run pct reboot 117. Then run the failed step again. Type both settings on one line. If you send only one setting, it replaces the pair and switches the other one off.
REFERENCE CARD
Paste this in 117 → Summary → Notes in Proxmox. The key facts then stay with the container. Before you ever run the update line on this card, compare it with the docker run you actually used at install. The card is a snapshot of the standard build: if you added anything of your own — a device, an extra -e setting, a second folder — it is not on the card, and re-running the card's line drops it. The container comes back up looking healthy with your setting gone.
📋 Reference — paste into this container's Notes in Proxmox (not a shell command)
## Frigate — CT 117
dashboard http://192.168.1.238:5001 · docs https://docs.frigate.video/
```sh
# is it running?
docker ps --filter name=frigate
curl -fsS http://localhost:5001 >/dev/null && echo OK # quick health check# logs (last 50) — camera connection errors show here
docker logs frigate --tail 50
# stop / start / restart
docker stop frigate
docker start frigate
docker restart frigate
# is there an update? ("Image is up to date" = no)
docker pull ghcr.io/blakeblackshear/frigate:stable
# update (settings survive in /opt/frigate/config)
docker pull ghcr.io/blakeblackshear/frigate:stable && docker rm -f frigate && docker run -d --name frigate --restart=unless-stopped --shm-size=256m -p 5001:8971 -v /opt/frigate/config:/config -v /opt/frigate/media:/media/frigate -e FRIGATE_RTSP_PASSWORD=yourcampass ghcr.io/blakeblackshear/frigate:stable
```
Part E · Media & personal cloud
39The pipeline, explained
Seven containers, one conveyor belt. You ask for a film. The stack finds it, downloads it, files it into your library, and plays it. All of this happens by itself. This page shows the whole belt before you build a single part of it.
In this chapter
Before you start
This chapter is for reading, not for building. Nothing here asks you to type anything. But it assumes that you already have:
The shared media folder/srv/media. You make it one time in Ch. 40 · Shared storage first. Each app on this belt reads and writes there. The whole design needs all of them to see the same folder.
One point about names confuses people in all of Part E. The folder is /srv/media on the server. The same folder appears as /data inside each container. Two names, one place. A chapter says /data/movies? It means /srv/media/movies as you see it from the server.
Part E builds a media system. It is not six or seven apps that have nothing to do with each other. Each container is one station on a conveyor belt. The belt carries a film from "I want to watch this" to "it plays on my TV". You touch no download by hand. Read this page first. Then, when you build each container, you already know what it does and what feeds it.
39.1
THE PIPELINE, ONE HOP AT A TIME
Follow a single film through the system. Each app does one job. Then it hands the film to the next app.
You ask Jellyseerr for a film. Jellyseerr is the request page. It looks like Netflix. You search for a title and click Request. Jellyseerr does not download anything itself. It places the order. Ch. 47 · Jellyseerr
Radarr takes the order and goes to look for it. Jellyseerr passes the request to Radarr (to Sonarr for TV shows). The job of Radarr is to find that exact film in good quality. So it asks where it can be found. Ch. 43 · Radarr
Prowlarr answers with your indexers. Prowlarr is the shared address book of the sites that list downloads. Radarr does not keep its own list. It uses the list that Prowlarr manages. So Prowlarr checks each indexer (each site in that address book) for the film. Ch. 41 · Prowlarr
qBittorrent downloads it to /data/torrents. Radarr picks the best result. It hands the download to qBittorrent. qBittorrent gets the file into the shared folder /data/torrents. It also keeps seeding the file. Seeding is a torrent word. It means that your copy is uploaded to other people who download it. This runs in the background, also after your own download is done. The qBittorrent chapter explains how to check a torrent and how to stop it when you no longer want it to upload. Ch. 42 · qBittorrent
Radarr hardlinks it into /data/movies. The download is finished. Radarr renames the file and files it into your library at /data/movies. It does this as a hardlink. A hardlink is a second name for the same data on the disk. So the film is not copied, and it costs no extra space. The original copy in /data/torrents keeps seeding in the background, as before. Ch. 40 · Shared storage first
Jellyfin plays it. Jellyfin watches /data/movies. So the new film appears in your library with its poster and details. It is ready to stream to your TV, laptop, or phone. Ch. 46 · Jellyfin
Bazarr works next to Radarr and Sonarr. It gets subtitles for anything that they add to the library. So the whole belt runs from one click in Jellyseerr to a finished film with subtitles in Jellyfin. Ch. 45 · Bazarr
The pipeline, end to end: a request flows left to right, the download lands in /data/torrents, gets hardlinked into the tidy library, and Jellyfin serves it to every screen in (and out of) the house. Steps 1–4 are the automation — if you already own your media, you only need step 5.
39.2
THE SHORTCUT — YOU ALREADY HAVE MEDIA FILES?
Notice — you do not need the pipeline to watch your own files
You already have a folder of films, shows, or music on a disk? Then you do not have to build the pipeline of seven containers. The pipeline exists to get new media by itself. You do not need it to play media that you already own.
To watch what you already have, do only two chapters:
Then copy your files onto the host (the Proxmox machine itself, not inside a container). Use a file manager over the network. See Ch. 12 · After every build + common Proxmox tasks, section "Move a file to or from the server". Copy them into /srv/media, for example /srv/media/movies and /srv/media/music. Jellyfin then plays them on each device. That is all. You can build the rest of the pipeline later, or never. The pipeline chapters are for the automatic getting of future media. You lose nothing that you own if you skip them.
39.3
BUILD ORDER FOR THE FULL PIPELINE
You want the whole conveyor belt? Build it in this order. Each station is ready before the next one needs it. This is the same principle as in the rest of the manual. Ch. 7 · The build order
Shared storage — the one folder that all the apps share. Build this first. Nothing else works without it. Ch. 40 · Shared storage first
Jellyseerr — the request page. Build it last. It needs a Jellyfin that runs, to sign in against. It needs Radarr and Sonarr to send requests to. Ch. 47 · Jellyseerr
The memory caps of the whole Part add up to thirty-two gigabytes. Your machine has 16 GB in total. So the whole Part does not fit in this machine at one time, and it never will. Pick what you really want. The core pipeline of 7 apps already spends 11 of your 16 GB. This is before anything from Parts B–D is counted. So build that, or only Ch. 46 · Jellyfin with the shortcut above, and stop there unless you have room. Check the free RAM in Ch. 15 · Beszel before you add Nextcloud or Immich on top of a pipeline that runs.
Notice — the end-to-end test comes at the end
Do not try to test the whole belt after each container. Most of it cannot work until each station is in place. The Jellyseerr chapter ends with one full-pipeline check. You request one film in Jellyseerr. You watch it go all the way to Jellyfin. That one test proves each hand-off at once. Ch. 47 · Jellyseerr
Notice — legal use
The reminder to download only media that you own or have the right to download is on the shared-storage page. That is where the stack begins. Read it there before you build. Ch. 40 · Shared storage first
Part E · Media & personal cloud
40Shared storage first
You will put the media apps in separate containers. Before that, give them one shared folder at the same path. It is /data inside each container. A finished download can then join your library without a second copy of the file that uses your disk.
This chapter needs the items below. You came here directly? Do them first. Each item takes a short time. Nothing on this page works without them.
Proxmox is installed and works at https://192.168.1.220:8006. You can log in as root. See Ch. 6 · Install Proxmox. At your first visit, the browser shows a certificate warning. Select Advanced. Then select Proceed.
You know where the host shell is. In the Proxmox page, select homelab in the left tree. Then select >_ Shell. You type each command of this page there, unless a step says otherwise. This is the server itself. It is not a container and it is not your own PC.
You know your own network numbers. Where this chapter shows 192.168.1.x, use your own numbers. The rule is in Ch. 3 · How to read this manual.
This chapter builds no container. Another chapter built each container that it mentions.
This part of the manual is for media that you own or have the right to download. To download or share material with a copyright, without permission, may be illegal where you live. You are responsible for what you run through these apps.
You want each media app (Prowlarr, qBittorrent, Radarr, Sonarr, Bazarr, Jellyfin) in its own container. That is fine. But each app must see one shared folder at the same path. If not, downloads and your library land on different filesystems. Then each movie is copied and stored two times. It is not hardlinked. This page sets up that shared storage. Do it one time. Then build the media containers.
Notice — these commands run on the host
Each command on this page runs on the Proxmox host (the server, 192.168.1.220). It does not run inside a container. It does not run on your PC. Open the host shell in the Proxmox web page at homelab → Shell. That button needs nothing set up. You set up key-based login from your own computer in Ch. 9 · SSH & the terminal? Then ssh root@192.168.1.220 from your PC takes you to the same place.
40.1
CREATE THE SHARED FOLDER
This part has no buttons. A file browser could make these folders for you. But it cannot give them to the special owner that the apps need. That is the second command below, and only the shell can run it. So do both jobs in the host shell. It is two commands from start to end. Open the shell in the GUI first. Then type.
Make the shared tree on the host. It lives at /srv/media on the SSD of the server. The torrents subfolder holds the downloads that are in progress and the downloads that you seed. The folders movies, tv, music, and books hold the finished and sorted library.
Open the host shell (homelab → Shell).
Run the two commands on the right.
Check that the filesystem is ext4. Ownership and hardlinks then work. Run findmnt -no FSTYPE -T /srv/media. It prints ext4 on a standard Proxmox install.
The node homelab → Shell opens a terminal on the host, in the browser.
⌨ Type this on the Proxmox host (homelab)
Before you run anything on this page: every 192.168.1.x address below is this manual's example network. If your own network uses different numbers, substitute yours as you type — the rule is in Ch. 3 · How to read this manual. A command that runs with the wrong address usually succeeds and leaves you unreachable.
# make the shared tree on the server's SSD
mkdir -p /srv/media/{torrents,movies,tv,music,books}
chown -R 101000:101000 /srv/media   # 101000 = PUID 1000 inside an unprivileged CT
Notice — today /srv/media is a plain folder, not a drive
You have only the SSD now. So /srv/media is a normal folder on the system SSD. The command mountpoint /srv/media then prints "is not a mountpoint". This is correct for now. It is not an error. Later, you add a real drive (Ch. 66 · Add an internal drive or Ch. 65 · Add an external drive) and move /srv/media onto it. From that day, run mountpoint /srv/media before the apps write. It must say "is a mountpoint". If it says "is not a mountpoint", the drive is not mounted. The apps then fill the small system SSD without a warning.
Warning — use 101000, not 100000
Each Linux user has a number. The media apps run as user number 1000. But the containers in this manual are unprivileged. This means that their users are not real. A user inside the container is a different user, with a much higher number, on the host. Proxmox adds 100000 to make that change. So the own root of the container (user 0) is host user 100000. The user 1000 of the container is the user that the apps run as. It is host user 100000 + 1000 = 101000. You give the folder from the host. So you use the number of the host: 101000:101000. You give it to 100000 instead? Then qBittorrent and Radarr cannot write. The whole stack breaks without a message at the first download.
Notice — photos of Immich is the one exception
You run Ch. 52 · Immich? It adds its own subfolder /srv/media/photos. Immich runs as the root of the container, not as user 1000. So that folder must stay with the owner 100000:100000, not 101000. The two host numbers once more: 100000 means "the root of the container". 101000 means "the user 1000 of the container". Immich wants the first. Each other app here wants the second. So never run the recursive fix on the whole tree again after photos exists. Run chown only on the subfolders of the media stack. Leave photos alone: chown -R 101000:101000 /srv/media/{torrents,movies,tv,music,books}.
Notice — this lives on your 500 GB SSD for now
A library of movies and TV fills a 500 GB SSD fast. This is expected at this stage. When you add a real drive later, you move /srv/media onto it one time. See Ch. 66 · Add an internal drive and Ch. 65 · Add an external drive. The containers point at /data, not at the physical disk. So they do not notice the move. Everything on this shared drive can be replaced by design. You can download torrents and the media library again. So it needs no backup. Put your real backup effort in Part G.
Makes the shared tree and each listed subfolder with one command. The braces turn into five paths under /srv/media. -p makes the parent folders if they are needed. It does not complain if they exist already.
chown -R 101000:101000 /srv/media
Gives the whole tree to the host UID and GID 101000. This is user 1000 inside an unprivileged container. It is the identity that the apps run as. -R applies it to each file and folder below.
findmnt -no FSTYPE -T /srv/media
Prints the type of the filesystem that holds /srv/media. You want ext4 (or xfs). Both store Linux ownership and support hardlinks. NTFS and exFAT do not.
40.2
BIND-MOUNT IT INTO EACH CONTAINER
This part has no buttons either. The Proxmox GUI has a dialog CT → Resources → Add → Mount Point. But it only makes a new, empty storage volume. It cannot point a container at a folder that exists already on the host. That is exactly what you need here. So type the command in the host shell.
Each media chapter already has this command in its own block after the wizard. This section shows what it does, and how to check it. You make each media container: CT 118 to CT 124, except CT 123 (Jellyseerr, which stores no media). Then you add the bind-mount from the host shell. It shares the host folder /srv/media into the container at /data.
Make the container as its own page describes. Do not add the mount in the wizard.
On the host, run the pct set command on the right, with the own ID of the container.
Restart the container, so that the mount goes live: pct reboot <CTID>.
Check from the host: pct exec <CTID> -- ls /data lists torrents, movies, tv, and the rest.
⌨ Type this on the Proxmox host (homelab)
pct set <CTID> -mp0 /srv/media,mp=/data   # e.g. pct set 118 -mp0 /srv/media,mp=/data
pct reboot <CTID>   # the mount is not live until the CT restarts
Notice — the container has an mp0 already
A container can use mp0 already. For example, you attached other storage to it earlier. Do not reuse that slot. If you reuse it, you detach the old mount. Use the next free slot: -mp1, then -mp2, and so on. To see what is set already, run pct config <CTID>.
Notice — "container is not running"
pct reboot says that the container is not running? You made it, but you did not start it yet. Run pct start <CTID> instead. A first start applies the new mount in the same way.
Explanation of each part
pct set <CTID> -mp0 /srv/media,mp=/data
Adds a mount point to the container with the ID that you give. It shares the host folder /srv/media with the container. There it appears at /data.
pct reboot <CTID>
Restarts that container. The new mount point then takes effect.
Each media page below assumes that /data exists inside the container through this mount. It also assumes that all apps run as the same user, PUID and PGID 1000, so that permissions match. Do this page one time. Then build CT 118 to CT 124, except CT 123 (Jellyseerr, which stores no media).
Set a login on each app. Prowlarr, Radarr, and Sonarr now force a login. The first time that you open one, it makes you create a user name and a password before it does anything. So there is no time when it is open by default. Check that the setting stayed at Settings → General → Authentication → Forms (Login Page). "Authentication Required" must be Enabled. It must not be "Disabled for Local Addresses".
Bazarr is the exception. It has no login until you set one. Open Settings → General → Security. Choose Forms authentication. Set a user name and a password right after the first start. See Ch. 11 · Security basics for why each service needs a login.
qBittorrent is different again. It prints a temporary admin password in the log of its container at start. It makes a new one at each restart until you set your own. Read it. Log in. Then set a permanent password. Its own page, Ch. 42 · qBittorrent, has the details.
40.4
WHEN IT GOES WRONG
The apps cannot download or import. qBittorrent, Radarr, or Sonarr show "permission denied" or "folder is not writable". Nothing lands in /data. The shared folder has the wrong owner. On the host, run chown -R 101000:101000 /srv/media/{torrents,movies,tv,music,books}. List the subfolders of the media stack, so that you do not touch /srv/media/photos. Immich needs it owned by 100000. Use 101000, not 100000. 100000 is the root of the container. But the apps run as PUID and PGID 1000, which is host 101000. Also check that each app really runs as user 1000. PUID and PGID are settings that you pass when you make the container of the app. They appear as -e PUID=1000 -e PGID=1000 in the long docker run command on the own page of each media app. To check one on an app that already runs, first get inside the container of that app. Run pct enter <CTID> from the host Shell. Then run docker inspect <app-name> there. You run it on the host? Then you get docker: command not found. Docker lives inside each app container. It never lives on the Proxmox server itself. The note at the top of this page, "these commands run on the host", does not apply to this one line. It prints nothing, or a number other than 1000? Then change that line and make the container of the app again. The exact five steps are in Ch. 12 · After every build + common Proxmox tasks, section “Change a setting on a Docker app”. Your data folders are not touched.
You add the mount, but /data is empty or missing inside the app. The bind-mount is not live until the container restarts. Run pct reboot <CTID>. Or run pct start <CTID> if it says that the container is not running. Then check from the host: pct exec <CTID> -- ls /data must list torrents and the library folders.
The drive fills up fast, and each movie exists two times. Files are copied, not hardlinked. Downloads and the library must be under the one shared /data mount, for example /data/torrents and /data/movies. Hardlinks cannot cross filesystems. Do not add separate mounts such as /downloads and /movies. In each app, set the Root Folder under /data, for example /data/movies. There is one more trap. Radarr and Sonarr have a setting named remote path mapping (Settings → Download Clients → Remote Path Mappings). It rewrites the folder name that qBittorrent reports into a different one. You do not need it here. Each app already sees the same /data. So leave that list empty. A mapping that points outside /data puts you back to copying.
chown prints "Operation not permitted", or the apps write, but each file is a full copy. The filesystem is NTFS or exFAT. This usually happens when /srv/media was moved onto an external drive that was formatted for Windows. NTFS and exFAT cannot store Linux ownership. They cannot store the hardlinks that the media stack needs. Format that drive again as ext4 or xfs on the Ch. 65 · Add an external drive page. Then do the mkdir and chown commands here again. Formatting erases the drive. So make sure that it is empty first.
The Web UI of qBittorrent does not accept your password, and it seems to change after each restart. qBittorrent prints a new temporary admin password in the log of its container at start. It makes a new one at each restart until you set your own. Read it, for example with pct exec <CTID> -- docker logs qbittorrent 2>&1 | grep -i password. Log in. Then set a permanent user name and password in Options → Web UI. It then stops making new ones.
40.5
REFERENCE CARD
This shared folder lives on the host, not in a container. So paste this in the own Notes of the node. Select the node homelab and open its Notes panel. In some versions of Proxmox, it is a Notes tab of its own. In others, it is a Notes box on the Summary tab. Both hold the same thing. The health checks are then always at hand.
The node homelab → Summary → Notes. Paste the card below. It shows as Markdown.📋 Reference — paste into the host node's Notes in Proxmox (not a shell command)
## Shared media storage — /srv/media on the host
host shell: homelab → Shell · docs https://pve.proxmox.com/wiki/Unprivileged_LXC_containers

```sh
# how much space is left? (a media library fills a 500 GB SSD fast)
df -h /srv/media
# what is in the shared tree?
ls -l /srv/media
# who owns it? must be 101000:101000 (= app user 1000 inside an unprivileged CT)
stat -c '%u:%g  %n' /srv/media
# which container mounts it? (run per CTID; expect: mp0: /srv/media,mp=/data)
pct config 118 | grep '^mp'
# an app shows "permission denied"? re-apply ownership (NOT photos — Immich needs 100000)
chown -R 101000:101000 /srv/media/{torrents,movies,tv,music,books}
# LATER, once /srv/media is a real drive (Part G): confirm it is mounted FIRST.
# An unmounted path silently writes to the empty SSD folder instead of the drive.
mountpoint /srv/media   # "is a mountpoint" = drive mounted; "is not" = not mounted
```
Each command here runs on the Proxmox host. It already has df, ls, stat, mountpoint, and pct. You install nothing. Keep the mountpoint check for later. Today /srv/media is a plain folder on the SSD. When it becomes a mounted drive in Ch. 66 · Add an internal drive or Ch. 65 · Add an external drive, always check that the drive is really mounted before the apps write to it.
Part E · Media & personal cloud
41Prowlarr
Keep all your torrent search sites in one place. The manual calls them indexers. Prowlarr holds that list for you. It copies the list to Radarr and Sonarr by itself. It also copies the settings of your download program, so that those apps know where to send a file. You add a search site one time, in Prowlarr. You never add it again.
This chapter needs the items below. You came here directly? Do them first. Each item takes a short time. Nothing on this page works without them.
Proxmox is installed and works at https://192.168.1.220:8006. You can log in as root. See Ch. 6 · Install Proxmox. At your first visit, the browser shows a certificate warning. Select Advanced. Then select Proceed. The warning is normal. Proxmox makes its own certificate.
The Debian 13 image is downloaded. You do this one time. See Ch. 10 · The container wizard. Without the image, the Template list in the wizard is empty.
You have an SSH key from your PC (Ch. 9 · SSH & the terminal). Or you type a password in the two password boxes of the wizard. The wizard needs one of the two. The Next button stays grey until you give one.
You know your own network numbers. Where this chapter shows 192.168.1.x, use your own numbers. The rule is in Ch. 3 · How to read this manual. The address of this chapter must be outside the range that your router gives out by itself (the DHCP pool, often .100–.200, but yours can differ). An address inside the pool can go to a phone later. Two devices on one address break name lookups, and the cause is hard to find.
The shared media folder exists. It is /srv/media. You make it one time in Ch. 40 · Shared storage first. This chapter keeps its data there, not on the small SSD. Build that chapter first. Without the folder, the data goes to the small system SSD. The mount exists to prevent this.
Commands marked HOST run on the server. In the Proxmox page, select homelab in the left tree. Then select >_ Shell. Commands marked CT run inside the container of this chapter. The chapter shows you how to get there.
The wizard does not work?Next is grey: you gave no password and no key. Give one of the two. The Template list is empty: the Debian image is not downloaded. Download it first. Each tab is explained in Ch. 10 · The container wizard.
41.1
CREATE THE CONTAINER
Prowlarr is an indexer manager. It stores no media of its own. So its own disk stays small. The shared bind-mount /data is where the library grows. Build the shared storage first (see Ch. 40 · Shared storage first). Then make this container. The wizard below, and the command on the host after it, add the bind-mount /data for you.
Do this task with the mouse in the Proxmox web page. You type nothing yet.
Open https://192.168.1.220:8006.
Click homelab in the left tree.
Click the blue Create CT button at the top right.
Fill in each tab as the reference shows. Leave each field that is not listed at its default value.
You prefer the command line? The box below does the same task with one pct create command.
The Proxmox login page at https://192.168.1.220:8006.Node homelab is selected in the left tree.The blue Create CT button, at the top right.
General tab for CT 118: CT ID 118, hostname prowlarr, unprivileged container ticked.
Wizard reference — Create CT 118
Tab → Field
Entry
General → Node
Select homelab.
General → CT ID
Type 118. Do not keep the number that the wizard suggests.
General → Hostname
Type prowlarr.
General → Unprivileged container
Keep this box ticked.
General → Nesting
Keep this box ticked. It is ticked by default. The wizard has no box for keyctl, which Docker also needs. The host command after Finish sets it. It is the first line of the next listing.
General → Password / SSH public key
Keep the password empty. Paste your public key in the SSH field: ssh-ed25519 AAAA…your-key-here you@your-pc. With the key, you can run ssh root@192.168.1.239 from your PC. The command pct enter 118 on the host needs no password.
Template → Storage, Template
Select local. Then select debian-13-standard.
Disks → Storage, Disk size
Select local-lvm. Set 6 GiB.
CPU → Cores
Set 1 core.
Memory → Memory (MiB)
Set 1024. Keep Swap at its default.
Network → IPv4
Select Static. Set IPv4/CIDR to 192.168.1.239/24. Set Gateway to 192.168.1.1. Keep IPv6 at its default.
DNS → DNS domain
Keep this field empty. Do not type 192.168.1.1 here.
DNS → DNS servers
Always type 192.168.1.1. Never keep this field empty.
Confirm
Read the summary. Keep Start after created unticked. Select Finish.
The wizard has no box for three settings: the Docker permission keyctl, the timezone, and start at boot. The first command below sets all three. Run these 4 commands on the host. They set the missing settings, start the container, and open its shell. Each part is explained in Ch. 10 · The container wizard, section "The host command every build needs".
⌨ Type this on the Proxmox host (homelab)
Before you run anything on this page: every 192.168.1.x address below is this manual's example network. If your own network uses different numbers, substitute yours as you type — the rule is in Ch. 3 · How to read this manual. A command that runs with the wrong address usually succeeds and leaves you unreachable.
pct set 118 --features nesting=1,keyctl=1 --onboot 1 --timezone host
pct set 118 -mp0 /srv/media,mp=/data   # bind the shared media folder in as /data
pct start 118
pct enter 118                          # now INSIDE CT 118 — the rest of this page runs here
Notice — set your timezone
--timezone host copies the timezone of the server into the container. The Docker app inside that container keeps its own separate clock. So it needs the zone one more time, on its own line. That is the flag -e TZ=Region/City in the docker run command further down this page. Replace TZ=Region/City with your own zone name, for example America/New_York or Europe/Berlin. To see each valid name, run timedatectl list-timezones on the host. Prowlarr runs already, and its logs or its scheduled indexer syncs still show UTC times? Change that line. Then make the container of the app again. The exact five steps are in Ch. 12 · After every build + common Proxmox tasks, section “Change a setting on a Docker app”. Your data folders are not touched. This includes /opt/prowlarr. So your indexer list stays. A wrong zone only makes clocks and schedules look odd. Nothing breaks.
Notice — /data today, a real drive later
The shared mount /data points at /srv/media on the 500 GB SSD. You made it one time in Ch. 40 · Shared storage first. A media library fills 500 GB fast. When you add a real drive, you move /srv/media onto it (see Ch. 65 · Add an external drive). The containers do not notice, because the path inside them stays /data.
Prefer the terminal? — the same task with one pct create command
⌨ Type this on the Proxmox host (homelab)
TMPL=$(pveam available --section system | awk '/debian-13-standard/{print $2}' | tail -1)
pveam download local "$TMPL"          # once per host; harmless to re-run
pct create 118 local:vztmpl/"$TMPL" \
  --hostname prowlarr --cores 1 --memory 1024 --rootfs local-lvm:6 \
  --net0 name=eth0,bridge=vmbr0,ip=192.168.1.239/24,gw=192.168.1.1 \
  --nameserver 192.168.1.1 --features nesting=1,keyctl=1 --unprivileged 1 --onboot 1 --timezone host \
  -mp0 /srv/media,mp=/data
pct start 118
pct enter 118                      # you are now INSIDE CT 118 — everything below runs here
Bind-mounts the shared media folder /srv/media on the server into the container at /data. The folder itself is created once in Ch. 40 · Shared storage first.
41.2
BUILD
This part has no buttons. The install command of Docker and the run command of the container both go into a shell, not a form. Open a shell inside CT 118 first. Then type the commands below.
In the Proxmox web page, click homelab in the left list. Then click >_ Shell at the top right.
Run pct enter 118. It puts you inside the container as root, with no password. From your own PC, ssh root@192.168.1.239 reaches the same shell.
Type the commands below in that shell.
The >_ Console button of the CT opens a login: prompt, not a shell. Use pct enter 118 from homelab → >_ Shell.
Notice — each command below runs inside CT 118
When the container exists, you type the rest of this page in the shell of the container. You do not type it on homelab (192.168.1.220). Only the pct and pveam commands go back to the host. Each guide names those commands where you use them.
Check that you are inside CT 118, not on the host. Read the prompt. Inside, it ends in the own name of the container (root@prowlarr). On the server, it says root@homelab. It still says root@homelab? Then pct enter did not happen. Type exit. Run it again. Check before you paste anything.
Type the commands on the right in that container shell.
The Docker install line and the flags -d, --name, --restart, -v, -p, and -e are explained in Ch. 9 · SSH & the terminal, sections "Install Docker in the container" and "Anatomy of docker run". These parts are the same in all media apps of Part E, and this chapter is their master:
-p 9696:9696
Sends port 9696 of the host to port 9696 of the container. You can then reach the web page of Prowlarr.
-e PUID=1000 -e PGID=1000
Runs the app as the Linux user and group ID 1000. The files that it makes then belong to a normal user, not to root. Each media app here uses the same pair. So the permissions match on the shared folder.
-e TZ=Region/City
Sets the timezone of the container. Log times and scheduled indexer syncs then use your local time. Change it to your own zone (for example America/New_York or Etc/UTC).
-v /opt/prowlarr:/config
Links a folder of the host to /config. The settings and the list of indexers of Prowlarr then stay when the container restarts.
-v /data:/data
Mounts the shared folder for media and downloads. It is the bind-mount from Ch. 40 · Shared storage first. Each *arr app shares it. So finished downloads hardlink into the library. They are not copied. A hardlink is a second name for the same file on the disk. It appears at once and takes no extra space. There is still only one copy of the bytes.
lscr.io/linuxserver/prowlarr
The image to run: the build of Prowlarr by LinuxServer.io. Prowlarr is an indexer manager that gives search results to other download tools.
41.3
SET UP
Open http://192.168.1.239:9696. At the first start, Prowlarr shows an Authentication Required dialog. Authentication is mandatory in current versions of Prowlarr. Make a user name and a password to continue.
The Authentication Required dialog at the first start. Set a user name and a password here. You cannot skip it.
Add your indexers first (see the next section). Then connect the apps.
Notice — read now, do later
You cannot do the next step yet. It needs Radarr and Sonarr. You build them in Ch. 43 · Radarr and Ch. 44 · Sonarr. Read it now, so that you know it exists. Come back after those chapters. Nothing breaks if you wait. Prowlarr keeps your list of indexers in any case. It copies that list into Radarr and Sonarr when you connect them, whenever that is.
Go to Settings → Apps. Add Radarr and Sonarr, so that Prowlarr syncs indexers to them.
For each app, enter its address with the LAN IP: Radarr http://192.168.1.241:7878, Sonarr http://192.168.1.242:8989 (notlocalhost).
Also enter its API key. You copy it from that app under Settings → General.
Leave the Prowlarr Server field as http://192.168.1.239:9696.
Settings → Apps, adding Radarr: its address, its API key, and the Prowlarr Server field left at the default.
CT 118/prowlarr, 6 GiB, 1 CPU, 1024 MB, 192.168.1.239/24, plus the bind-mount /data.
41.4
HOW TO USE IT: THE BASICS
Set up Prowlarr one time. It sends the indexers to Radarr and Sonarr by itself.
Open http://192.168.1.239:9696 and log in. At the first start, the app asks you to make a user name and a password.
To add an indexer, click Indexers in the left menu. Then click the + button. Type the name of the tracker to filter the list. Public trackers need no account data. Private trackers need the API key or the credentials from your account on that site.
Click Test. Wait for the green check. Click Save. Do this for each tracker.
Radarr and Sonarr exist and are connected under Settings → Apps? (If you did not build them yet, see Ch. 43 · Radarr and Ch. 44 · Sonarr.) Then Prowlarr sends each indexer to them by itself. In those apps, the copies show “(Prowlarr)” after the name. Do not add indexers by hand in those apps.
For daily use, search in Radarr or Sonarr. For one manual search across all indexers, use the Search page in the left menu.
A tracker fails? Its row is red on the Indexers page. Open it and click Test to see the error.
The Indexers page, the + button, and the indexer picker with Test and Save.The Indexers list. A red row means that this tracker fails. Open it and click Test to read the error.
41.5
WHEN IT GOES WRONG
You added indexers in Prowlarr, but they never appear in Radarr or Sonarr, and the Test button in Apps fails. Each app runs in its own container. So localhost cannot reach the others. In Prowlarr, go to Settings → Apps. Open Radarr (or Sonarr). Set 'Prowlarr Server' to http://192.168.1.239:9696 (the LAN IP of Prowlarr, NOT localhost or 127.0.0.1). Set the own URL of the app to the address of its container (Radarr http://192.168.1.241:7878, Sonarr http://192.168.1.242:8989). Paste the API key of that app from its Settings → General. Then click Test → Save.
A public tracker turns red with the error 'Cloudflare protection detected' or a challenge error, and it gives no search results. Some tracker sites are behind Cloudflare. This service shows a "checking your browser" page to block bots. Prowlarr cannot answer that page by itself. It needs a helper that is called FlareSolverr. It is a second, small Docker app. It opens the page in a hidden browser, answers the challenge, and hands the result back. This is a real build of its own. It is not a checkbox. The numbered steps are in the box just below this list. When it runs, go to Settings → Indexers in Prowlarr. Add a 'FlareSolverr' proxy that points at its URL (http://192.168.1.239:8191 if you ran it in this CT, as the box below does). Click Test → Save. Test the indexer again.
You forgot the password, and you are locked out at the login screen of Prowlarr. Authentication is mandatory in current versions of Prowlarr. There is no "forgot password" link. The repair has three moves. You stop the container. You edit one line in a file. You start it again. First stop the container: docker stop prowlarr inside CT 118. Then edit /opt/prowlarr/config.xml. Change <AuthenticationMethod>Forms</AuthenticationMethod> to <AuthenticationMethod>External</AuthenticationMethod>. You do not need a terminal editor for this. You can open the same file with the mouse, in a normal file window over SFTP. See Ch. 12 · After every build + common Proxmox tasks, section “Move a file to or from the server”. Connect to 192.168.1.239 and browse to /opt/prowlarr/config.xml. Prowlarr reads this file when it starts. So the change stays. Then start it: docker start prowlarr. The page now opens with no login. Go to Settings → General → Security. Set a new password. Switch the method back to Forms.
The container keeps restarting, or docker logs prowlarr shows permission-denied errors when it writes to /config. The config folder on the host belongs to root. But the app runs as user 1000. Fix the owner of the folder: chown -R 1000:1000 /opt/prowlarr. Then docker restart prowlarr. How to read that first command: chown means "change owner". -R means "and everything inside this folder too". 1000:1000 is the user and the group number to give it to. It is the same pair as PUID=1000 and PGID=1000 that the container runs as. After that, the app owns its own folder and can write to it.
The Cloudflare helper in full — run FlareSolverr next to Prowlarr
Do this only if a tracker really fails with a Cloudflare or "checking your browser" error. FlareSolverr is a separate app in its own container. So it gets its own name, its own port (8191), and its own image. It keeps no library and no settings folder. This is why there is no -v line here. You want to remove it later? Deleting its container is the whole job.
Open a shell inside CT 118, in the same way as in the build steps above: pct enter 118 from homelab → >_ Shell.
Type the command on the right. It downloads the helper and starts it in the background.
Check that it answered: docker ps --filter name=flaresolverr must list it as Up.
Back in Prowlarr, go to Settings → Indexers. Add a FlareSolverr proxy. Set its URL to http://192.168.1.239:8191. This is the own address of CT 118, because the helper now runs in this same container.
Give the proxy a tag (for example flare). Then open the indexer that fails. Put the same tag on it. Prowlarr then sends that one site through the helper. Click Test, then Save.
docker run -d --name flaresolverr --restart=unless-stopped
Starts a container named flaresolverr in the background. It comes back by itself after a crash or a reboot. The shape is the same as the Prowlarr command earlier in this chapter.
-p 8191:8191
Opens port 8191. This is the port that FlareSolverr listens on. It is the number that you type in the proxy URL of Prowlarr.
-e LOG_LEVEL=info
Sets how much its log says. info is the normal level. debug prints far more. Use it when you look for a problem.
-e TZ=Region/City
Its timezone. The rule is the same as everywhere else on this page: replace Region/City with your own zone name.
ghcr.io/flaresolverr/flaresolverr:latest
The image to run: the own build of the FlareSolverr project, the newest published version. It has a hidden browser inside. So this download is larger than that of Prowlarr. It uses much more memory while it works. Raise the memory of the container before you run it. This chapter sets CT 118 to 1024 MB. Prowlarr plus a Chromium instance does not fit in that. FlareSolverr opens its browser to answer a challenge. The container then hits its limit. The kernel kills a process that it picks, usually Prowlarr itself. The app shows no message. On the host, run pct set 118 -memory 2048 and pct reboot 118 before you add the helper.
41.6
A download step fails with Temporary failure resolving deb.debian.org, or with another "cannot resolve" message. The container has no working DNS server. It cannot change a name into an address. This is not a typing mistake. It does not fix itself. In the Proxmox page, select this container in the left tree. Open DNS. Select Edit. Type your router address in DNS servers (192.168.1.1 here; use your own). Then run pct reboot 118 in the host shell. Run the failed step again.
A command fails. You do not know if you are on the server or in the container. Read the prompt. In the container, it ends with the name of the container. On the server, it shows root@homelab. The prompt still shows root@homelab after pct enter? Then the command did not work. Type exit. Run the pct enter line again. Check the prompt before you paste anything else. You can paste a build block on the server by mistake. It seems to work. It installs without an error, and the app even answers. But the app is on the server, and it must not be there.
How to see that it happened, and how to undo it. The app does not open at the container address (192.168.1.239). It does open at the server address (192.168.1.220) on the same port. Then the app is on the host. To remove it, run docker rm -f prowlarr in the host shell. Then run pct enter 118. Check that the prompt changed. Paste the build block again. You lose nothing in the container, because nothing was built there. The first command can show Error: No such container. This is good. It means that the app was never on the host. Do not paste the build block again. Look for another cause.
The page does not open. The browser spins, or says it cannot connect. Do these checks in order, in the host shell. 1. Is the container running? Run pct status 118. It must say running. If it does not, run pct start 118. 2. Is the container at the address that you typed? Run pct config 118 | grep net0. It shows the real address. A wrong digit in the wizard puts the container at another address, and nothing warns you. 3. Does the app run in the container? Run pct enter 118. Then run docker ps. An empty list means that the app did not start. Run docker ps -a to see that it stopped. Run docker logs to see why. 4. Does the app answer in the container? Run curl -I http://localhost followed by the port of the app. You get a reply here, but nothing from your PC? Then the address or your own network is the problem. The app is fine. Your browser reaches 192.168.1.239 but not the port? Then the app is down. It reaches neither? Then the container is down.
Docker does not start, or you see Cannot connect to the Docker daemon, a keyring error, or an overlay error. This is the most common failure in these guides. It means that the two container features are off. A later pct set --features can switch them off, also when you set them before. Run this in the host shell, not in the container: pct set 118 --features nesting=1,keyctl=1. Then run pct reboot 118. Then run the failed step again. Type both settings on one line. If you send only one setting, it replaces the pair and switches the other one off.
REFERENCE CARD
Paste this in 118 → Summary → Notes in Proxmox. The key facts and the update steps then stay with the container. Before you ever run the update line on this card, compare it with the docker run you actually used at install. The card is a snapshot of the standard build: if you added anything of your own — a device, an extra -e setting, a second folder — it is not on the card, and re-running the card's line drops it. The container comes back up looking healthy with your setting gone. The update line below still says TZ=Region/City. That is a placeholder, not a real timezone: run it unchanged and the app comes back on UTC while looking perfectly healthy, so every schedule and timestamp silently shifts. Put your own zone in before you use this card — the same one you set at install.
The Summary tab of the CT, Notes panel, with the reference card pasted in. Proxmox shows it as Markdown.📋 Reference — paste into this container's Notes in Proxmox (not a shell command)
## Prowlarr — CT 118
dashboard http://192.168.1.239:9696 · docs https://wiki.servarr.com/prowlarr

```sh
# is it running?
docker ps --filter name=prowlarr
curl -fsS http://localhost:9696 >/dev/null && echo OK   # quick health check
# logs (last 50)
docker logs prowlarr --tail 50
# stop / start / restart
docker stop prowlarr
docker start prowlarr
docker restart prowlarr
# is there an update? ("Image is up to date" = no)
docker pull lscr.io/linuxserver/prowlarr
# update (settings survive in /opt/prowlarr)
docker pull lscr.io/linuxserver/prowlarr && docker rm -f prowlarr && docker run -d --name prowlarr --restart=unless-stopped -p 9696:9696 \
  -e PUID=1000 -e PGID=1000 -e TZ=Region/City \
  -v /opt/prowlarr:/config -v /data:/data lscr.io/linuxserver/prowlarr
```
Part E · Media & personal cloud
42qBittorrent
qBittorrent is a BitTorrent client without a screen. It has a control panel on a web page. It keeps downloading into your shared media folder also when your PC is off. The *arr apps then pick up the files from there.
This chapter needs the items below. You came here directly? Do them first. Each item takes a short time. Nothing on this page works without them.
Proxmox is installed and works at https://192.168.1.220:8006. You can log in as root. See Ch. 6 · Install Proxmox. At your first visit, the browser shows a certificate warning. Select Advanced. Then select Proceed. The warning is normal. Proxmox makes its own certificate.
The Debian 13 image is downloaded. You do this one time. See Ch. 10 · The container wizard. Without the image, the Template list in the wizard is empty.
You have an SSH key from your PC (Ch. 9 · SSH & the terminal). Or you type a password in the two password boxes of the wizard. The wizard needs one of the two. The Next button stays grey until you give one.
You know your own network numbers. Where this chapter shows 192.168.1.x, use your own numbers. The rule is in Ch. 3 · How to read this manual. The address of this chapter must be outside the range that your router gives out by itself (the DHCP pool, often .100–.200, but yours can differ). An address inside the pool can go to a phone later. Two devices on one address break name lookups, and the cause is hard to find.
The shared media folder exists. It is /srv/media. You make it one time in Ch. 40 · Shared storage first. This chapter keeps its data there, not on the small SSD. Build that chapter first. Without the folder, the data goes to the small system SSD. The mount exists to prevent this.
Commands marked HOST run on the server. In the Proxmox page, select homelab in the left tree. Then select >_ Shell. Commands marked CT run inside the container of this chapter. The chapter shows you how to get there.
The wizard does not work?Next is grey: you gave no password and no key. Give one of the two. The Template list is empty: the Debian image is not downloaded. Download it first. Each tab is explained in Ch. 10 · The container wizard.
qBittorrent is a BitTorrent download program with a web page as its control panel. It works like the classic uTorrent, but it has no advertisements. You paste a torrent or magnet link into the web page. The server continues the download at all times, also when your PC is off. Finished files land in the shared /data folder. Other apps can read them there: Prowlarr, Sonarr, and Radarr.
Notice — one shared folder is a prerequisite
This guide assumes that the shared media folder already exists inside the container at /data. You made it one time in Ch. 40 · Shared storage first, and it is bind-mounted into each media container. You did not do that page yet? Do it first. Downloads that do not share one /data path with the library get copied. They are not hardlinked. A hardlink is a free, instant copy that takes no extra space. Without it, the file is really duplicated. It fills the disk twice as fast.
Notice — where these commands run
Run the shell commands inside CT 119. Do not run them on the Proxmox host (the server, 192.168.1.220) or on your PC. You open the shell of the container in one of two equal ways. In the Proxmox web page, open homelab → >_ Shell and run pct enter 119. It needs no password. Or run ssh root@192.168.1.240 from your PC. Only the pct and pveam commands go back to the host. Each one is marked where you use it.
42.1
CREATE THE CONTAINER
Do this task with the mouse in the Proxmox web page. You type nothing. You prefer the command line? The box below does the same task with one pct create command.
Open https://192.168.1.220:8006.
Click homelab in the left tree.
Click the blue Create CT button at the top right.
Fill in each tab as the reference shows. Leave each field that is not listed at its default value.
The Create CT wizard, General tab, filled in for CT 119.
Keep Start after created unticked. Click Finish.
Wizard reference — Create CT 119
Tab → Field
Entry
General → Node
Select homelab.
General → CT ID
Type 119. Do not keep the number that the wizard suggests.
General → Hostname
Type qbittorrent.
General → Unprivileged container
Keep this box ticked.
General → Nesting
Keep this box ticked. It is ticked by default. The wizard has no box for keyctl, which Docker also needs. The host command after Finish sets it. It is the first line of the next listing.
General → Password / SSH public key
Keep the password empty. Paste your public key in the SSH field: ssh-ed25519 AAAA…your-key-here you@your-pc. With the key, you can run ssh root@192.168.1.240 from your PC. The command pct enter 119 on the host needs no password.
Template → Storage, Template
Select local. Then select debian-13-standard.
Disks → Storage, Disk size
Select local-lvm. Set 8 GiB.
CPU → Cores
Set 2 cores.
Memory → Memory (MiB)
Set 2048. Keep Swap at its default.
Network → IPv4
Select Static. Set IPv4/CIDR to 192.168.1.240/24. Set Gateway to 192.168.1.1. Keep IPv6 at its default.
DNS → DNS domain
Keep this field empty. Do not type 192.168.1.1 here.
DNS → DNS servers
Always type 192.168.1.1. Never keep this field empty.
Confirm
Read the summary. Keep Start after created unticked. Select Finish.
The wizard has no box for three settings: the Docker permission keyctl, the timezone, and start at boot. The first command below sets all three. Run these 4 commands on the host. They set the missing settings, start the container, and open its shell. Each part is explained in Ch. 10 · The container wizard, section "The host command every build needs".
⌨ Type this on the Proxmox host (homelab)
Before you run anything on this page: every 192.168.1.x address below is this manual's example network. If your own network uses different numbers, substitute yours as you type — the rule is in Ch. 3 · How to read this manual. A command that runs with the wrong address usually succeeds and leaves you unreachable.
pct set 119 --features nesting=1,keyctl=1 --onboot 1 --timezone host
pct set 119 -mp0 /srv/media,mp=/data   # bind the shared media folder in as /data
pct start 119
pct enter 119                          # now INSIDE CT 119 — the rest of this page runs here
Notice — set your timezone
--timezone host makes the container match the Proxmox host. Without it, a new container uses UTC. Its logs and its built-in download scheduler are then hours away from your local time. The Docker container inside the Proxmox container (CT 119) keeps its own timezone. This is why the docker run below also has -e TZ=Region/City. Replace Region/City with your own zone. To list the valid names, run timedatectl list-timezones on the host.
Prefer the terminal? — the same task with one pct create command
⌨ Type this on the Proxmox host (homelab)
TMPL=$(pveam available --section system | awk '/debian-13-standard/{print $2}' | tail -1)
pveam download local "$TMPL"          # once per host; harmless to re-run
pct create 119 local:vztmpl/"$TMPL" \
  --hostname qbittorrent --cores 2 --memory 2048 --rootfs local-lvm:8 \
  --net0 name=eth0,bridge=vmbr0,ip=192.168.1.240/24,gw=192.168.1.1 \
  --nameserver 192.168.1.1 --features nesting=1,keyctl=1 --unprivileged 1 --onboot 1 --timezone host \
  -mp0 /srv/media,mp=/data
pct start 119
pct enter 119                      # you are now INSIDE CT 119 — everything below runs here
Bind-mounts the shared media folder /srv/media on the server into the container at /data. The folder itself is created once in Ch. 40 · Shared storage first.
42.2
INSTALL QBITTORRENT
This part has no buttons. You type commands inside CT 119. You are already there from pct enter 119 above. (You closed that shell? Open homelab → >_ Shell and run pct enter 119 again.) Install Docker. Then start qBittorrent in one Docker container. It follows the same *arr pattern as Prowlarr (see Ch. 41 · Prowlarr). PUID and PGID are the Linux user and group ID numbers that own the downloaded files. There is also a /config folder and the shared /data mount.
Install the Docker engine.
Start qBittorrent. Its settings go on a host folder that stays when you update. The shared media folder is mapped in at /data.
The command above prints an error with cgroup, overlay, or permission denied, and the container does not start? Check the features of CT 119. On the Proxmox host (not inside the CT), run pct config 119 | grep features. The line must show keyctl=1,nesting=1. It does not? Run pct set 119 --features nesting=1,keyctl=1. Then run pct reboot 119. Then run the docker run line again.
Explanation of each part
The Docker install line and the flags -d, --name, --restart, -v, -p, and -e are explained in Ch. 9 · SSH & the terminal. The shared flags PUID, PGID, TZ, /config, and /data are explained in Ch. 41 · Prowlarr. These parts are specific to qBittorrent:
-p 8080:8080
Sends port 8080 of the host to port 8080 of the container. This port serves the web control panel of qBittorrent.
-p 6881:6881 -p 6881:6881/udp
Sends port 6881 for both TCP and UDP. This is the port for the connection to other BitTorrent peers. Other peers need it to connect to you.
-e WEBUI_PORT=8080
Tells qBittorrent inside which port its web page must use. It matches the port that is sent above.
-v /data:/data
Maps the shared media folder into the container at /data. Downloaded torrents land in a shared place. The other media apps (such as Sonarr and Radarr) can also read them there, and hardlink from them. The ownership matches what Ch. 40 · Shared storage first gave to the folder.
lscr.io/linuxserver/qbittorrent
The container image to run: the build of qBittorrent by LinuxServer.io. It is a torrent client with a web page.
42.3
FIRST-RUN SETUP — IN THE WEB PAGE OF QBITTORRENT
The container is CT 119/qbittorrent: 8 GiB disk, 2 CPU, 2048 MB RAM, 192.168.1.240 (the /24 only means "the same network as everything else here"), plus the /data mount. Before you add the first torrent, make the download folder writable. Then set your own login and save path.
Notice — make the download folder writable first
qBittorrent runs as user ID 1000. The shared /data folder belongs to root? Then you get an I/O Error, and torrents stall at 0%. Inside CT 119, make the download folder. Give it to user 1000 before you set the save path. You must do this from the shell. An SFTP file manager such as WinSCP can make the folder. But it cannot give ownership to a specific numeric user ID. Only the chown command does that. You did Ch. 40 · Shared storage first correctly? Then the folder already has the right owner, and this command changes nothing. It is safe to run:
Open http://192.168.1.240:8080. Use the IP of the CT, not the host 192.168.1.220.
Log in with the user name admin and the one-time temporary password that is printed in the log of the container. Get it with the command in the reference card below.
The first time that you open the web page: log in with admin and the temporary password.
Open Settings (gear icon) → Web UI. Set your own user name and password. You skip this step? Then qBittorrent prints a new temporary password at each restart. Your old one stops working.
Settings → Web UI — set a permanent user name and password.
Under Settings → Downloads, set the default save path to /data/torrents.
Settings → Downloads — the default save path.
Under Settings → BitTorrent, set a limit for the seed ratio (for example 2.0). Finished torrents then stop seeding. They do not use too much disk space.
Notice — the 500 GB budget fills fast
Downloads pile up on the one 500 GB SSD. A media library outgrows it quickly. Two habits keep it in check. One is the seed-ratio limit that you just set. Torrents then stop seeding, and you can remove them. The other is to remove finished torrents when the library has hardlinked them. The disk is really full? Add a real drive. See Ch. 65 · Add an external drive.
Notice — no VPN, your choice
These downloads run on your home IP address. You can route them through a VPN instead. This is outside this guide. You want to look into it later? Search for "gluetun". It is the Docker container that people often pair with qBittorrent for that.
42.4
HOW TO USE IT — THE BASICS
The daily loop: add a link. Let the download finish into /data/torrents. Then remove the torrent.
Open http://192.168.1.240:8080. Log in with the user name and password that you set under Settings → Web UI.
Click Add Torrent Link (the link icon in the top toolbar). Paste a magnet link or a torrent URL into the box. Click Download. For a .torrent file, click Add Torrent File and upload it.
Add Torrent Link — paste the magnet, check the save path, click Download.
A dialog with options opens before the download starts. Check that the save path is /data/torrents. Then confirm the dialog.
The torrent appears in the main list with its progress and speeds. Use the left sidebar to filter by state: Downloading, Seeding, Completed.
The main torrent list, with state filters in the left sidebar.
Completed files go to /data/torrents. The other media apps can read them there. The torrent keeps seeding (it uploads to others) until it reaches the seed-ratio limit that you set.
Right-click a torrent for the daily controls. Stop and Start pause it and resume it. Remove takes it off the list. Select the option to delete files only if you also want to delete the downloaded data.
Right-click a torrent for Stop, Start, or Remove.
Notice — "Stop" is the new "Pause"
qBittorrent 5 renamed the buttons Pause and Resume to Stop and Start. Older guides use the old names. The buttons do the same thing. You remove a torrent without the option to delete files? Then the files in /data/torrents stay where they are.
42.5
WHEN IT GOES WRONG
The web page at :8080 rejects your login, or the command for the temporary password prints nothing. The temporary password appears only while it is not set yet. A short log tail can scroll past it. Restart and read the log again. Then log in as user 'admin'. Run docker restart qbittorrent && docker logs qbittorrent 2>&1 | grep -iA1 "temporary password". Then at once set your own user name and password under Settings (gear) → Web UI. It then stops changing.
Torrents are added, but they stall at 0% with an 'I/O Error', and nothing downloads. The container user 1000 cannot write to the shared /data folder. Inside CT 119, run mkdir -p /data/torrents && chown -R 1000:1000 /data/torrents. Then in qBittorrent, set the default save path to /data/torrents. Add the torrent again.
After a power cut or a forced reboot, the web page never loads. docker ps shows the container as Up, but the logs show only the LinuxServer banner and stop. When the power went off, qBittorrent could not remove a leftover file. That file normally tells it "I am already running". So now it refuses to start for real, and Docker keeps restarting it in a silent loop. Delete that leftover file and restart: docker stop qbittorrent && rm -f /opt/qbittorrent/qBittorrent/lockfile && docker start qbittorrent. (That host path is /config/qBittorrent/lockfile inside the container.) You prefer a GUI? Connect with WinSCP or Files to /opt/qbittorrent/qBittorrent/. Delete the file named lockfile. Then restart the container from the Proxmox web page.
The password that you had stops working after the container or the whole CT reboots. You never saved your own credentials. So qBittorrent made a new temporary one at the start. Get the current temporary password with docker logs qbittorrent. Log in as 'admin'. Go to Settings (gear) → Web UI. Set a user name and a password. Click Save at the bottom. It stays fixed after that.
42.6
A download step fails with Temporary failure resolving deb.debian.org, or with another "cannot resolve" message. The container has no working DNS server. It cannot change a name into an address. This is not a typing mistake. It does not fix itself. In the Proxmox page, select this container in the left tree. Open DNS. Select Edit. Type your router address in DNS servers (192.168.1.1 here; use your own). Then run pct reboot 119 in the host shell. Run the failed step again.
A command fails. You do not know if you are on the server or in the container. Read the prompt. In the container, it ends with the name of the container. On the server, it shows root@homelab. The prompt still shows root@homelab after pct enter? Then the command did not work. Type exit. Run the pct enter line again. Check the prompt before you paste anything else. You can paste a build block on the server by mistake. It seems to work. It installs without an error, and the app even answers. But the app is on the server, and it must not be there.
How to see that it happened, and how to undo it. The app does not open at the container address (192.168.1.240). It does open at the server address (192.168.1.220) on the same port. Then the app is on the host. To remove it, run docker rm -f qbittorrent in the host shell. Then run pct enter 119. Check that the prompt changed. Paste the build block again. You lose nothing in the container, because nothing was built there. The first command can show Error: No such container. This is good. It means that the app was never on the host. Do not paste the build block again. Look for another cause.
The page does not open. The browser spins, or says it cannot connect. Do these checks in order, in the host shell. 1. Is the container running? Run pct status 119. It must say running. If it does not, run pct start 119. 2. Is the container at the address that you typed? Run pct config 119 | grep net0. It shows the real address. A wrong digit in the wizard puts the container at another address, and nothing warns you. 3. Does the app run in the container? Run pct enter 119. Then run docker ps. An empty list means that the app did not start. Run docker ps -a to see that it stopped. Run docker logs to see why. 4. Does the app answer in the container? Run curl -I http://localhost followed by the port of the app. You get a reply here, but nothing from your PC? Then the address or your own network is the problem. The app is fine. Your browser reaches 192.168.1.240 but not the port? Then the app is down. It reaches neither? Then the container is down.
Docker does not start, or you see Cannot connect to the Docker daemon, a keyring error, or an overlay error. This is the most common failure in these guides. It means that the two container features are off. A later pct set --features can switch them off, also when you set them before. Run this in the host shell, not in the container: pct set 119 --features nesting=1,keyctl=1. Then run pct reboot 119. Then run the failed step again. Type both settings on one line. If you send only one setting, it replaces the pair and switches the other one off.
REFERENCE CARD
Paste this in 119 → Summary → Notes. The key facts then stay with the container. Before you ever run the update line on this card, compare it with the docker run you actually used at install. The card is a snapshot of the standard build: if you added anything of your own — a device, an extra -e setting, a second folder — it is not on the card, and re-running the card's line drops it. The container comes back up looking healthy with your setting gone. The update line below still says TZ=Region/City. That is a placeholder, not a real timezone: run it unchanged and the app comes back on UTC while looking perfectly healthy, so every schedule and timestamp silently shifts. Put your own zone in before you use this card — the same one you set at install.
📋 Reference — paste into this container's Notes in Proxmox (not a shell command)
## qBittorrent — CT 119
dashboard http://192.168.1.240:8080 · docs https://docs.linuxserver.io/images/docker-qbittorrent/

```sh
# is it running?
docker ps --filter name=qbittorrent
curl -fsS http://localhost:8080 >/dev/null && echo OK   # quick health check
# first-run temp password (admin) — then set your own in the Web UI
docker logs qbittorrent 2>&1 | grep -iA1 "temporary password"
# logs (last 50)
docker logs qbittorrent --tail 50
# stop / start / restart
docker stop qbittorrent
docker start qbittorrent
docker restart qbittorrent
# is there an update? ("Image is up to date" = no)
docker pull lscr.io/linuxserver/qbittorrent
# update (settings survive in /opt/qbittorrent)
docker pull lscr.io/linuxserver/qbittorrent && docker rm -f qbittorrent && docker run -d --name qbittorrent --restart=unless-stopped -p 8080:8080 -p 6881:6881 -p 6881:6881/udp -e PUID=1000 -e PGID=1000 -e TZ=Region/City -e WEBUI_PORT=8080 -v /opt/qbittorrent:/config -v /data:/data lscr.io/linuxserver/qbittorrent
```
Part E · Media & personal cloud
43Radarr
Radarr manages a movie collection for you. You pick a title. It downloads, renames, and files the movie by itself, ready for Jellyfin.
This chapter needs the items below. You came here directly? Do them first. Each item takes a short time. Nothing on this page works without them.
Proxmox is installed and works at https://192.168.1.220:8006. You can log in as root. See Ch. 6 · Install Proxmox. At your first visit, the browser shows a certificate warning. Select Advanced. Then select Proceed. The warning is normal. Proxmox makes its own certificate.
The Debian 13 image is downloaded. You do this one time. See Ch. 10 · The container wizard. Without the image, the Template list in the wizard is empty.
You have an SSH key from your PC (Ch. 9 · SSH & the terminal). Or you type a password in the two password boxes of the wizard. The wizard needs one of the two. The Next button stays grey until you give one.
You know your own network numbers. Where this chapter shows 192.168.1.x, use your own numbers. The rule is in Ch. 3 · How to read this manual. The address of this chapter must be outside the range that your router gives out by itself (the DHCP pool, often .100–.200, but yours can differ). An address inside the pool can go to a phone later. Two devices on one address break name lookups, and the cause is hard to find.
The shared media folder exists. It is /srv/media. You make it one time in Ch. 40 · Shared storage first. This chapter keeps its data there, not on the small SSD. Build that chapter first. Without the folder, the data goes to the small system SSD. The mount exists to prevent this.
You built Ch. 41 · Prowlarr and Ch. 42 · qBittorrent already. The steps below use those chapters: a container, an address, a key, or a job that must exist. You cannot finish this chapter without them.
Commands marked HOST run on the server. In the Proxmox page, select homelab in the left tree. Then select >_ Shell. Commands marked CT run inside the container of this chapter. The chapter shows you how to get there.
The wizard does not work?Next is grey: you gave no password and no key. Give one of the two. The Template list is empty: the Debian image is not downloaded. Download it first. Each tab is explained in Ch. 10 · The container wizard.
Radarr is like a Netflix watchlist, but the movies become files on your own server. You tell Radarr which movies you want. Radarr sends the search to a download client, for example qBittorrent. Radarr does not download the files itself. It only controls the download client. It then renames the files and puts them in the correct folders. Jellyfin shows them with the correct posters.
Notice — shared storage comes first
Radarr, qBittorrent, Prowlarr, and Jellyfin all read and write the same media folder at the same path, /data. That path is the host folder /srv/media, bind-mounted into each media container. This means that the same folder on the server is plugged in at /data inside each one of them. So they all see the same files. Set that up one time in Ch. 40 · Shared storage first before this chapter. This guide assumes that it exists. A container has no mount? Then its downloads and its library land on different filesystems. Each movie is then copied (stored two times). It is not hardlinked.
43.1
CREATE THE CONTAINER
You do this task with the mouse, in the Proxmox web page. You type nothing. You prefer the command line? The box below does the same task with one pct create command.
On your PC, open https://192.168.1.220:8006.
Click homelab in the left tree.
Click the blue Create CT button at the top right.
Fill in the tabs as the table shows. Keep each field that is not listed at its default value.
Click Finish. The wizard cannot add the /data mount. The commands after the table do that.
The General tab of the Create CT wizard, filled in for container 120.
Wizard reference — Create CT 120
Tab → Field
Entry
General → Node
Select homelab.
General → CT ID
Type 120. Do not keep the number that the wizard suggests.
General → Hostname
Type radarr.
General → Unprivileged container
Keep this box ticked.
General → Nesting
Keep this box ticked. It is ticked by default. The wizard has no box for keyctl, which Docker also needs. The host command after Finish sets it. It is the first line of the next listing.
General → Password / SSH public key
Keep the password empty. Paste your public key in the SSH field: ssh-ed25519 AAAA…your-key-here you@your-pc. With the key, you can run ssh root@192.168.1.241 from your PC. The command pct enter 120 on the host needs no password.
Template → Storage, Template
Select local. Then select debian-13-standard.
Disks → Storage, Disk size
Select local-lvm. Set 6 GiB.
CPU → Cores
Set 1 core.
Memory → Memory (MiB)
Set 1024. Keep Swap at its default.
Network → IPv4
Select Static. Set IPv4/CIDR to 192.168.1.241/24. Set Gateway to 192.168.1.1. Keep IPv6 at its default.
DNS → DNS domain
Keep this field empty. Do not type 192.168.1.1 here.
DNS → DNS servers
Always type 192.168.1.1. Never keep this field empty.
Confirm
Read the summary. Keep Start after created unticked. Select Finish.
The wizard has no box for three settings: the Docker permission keyctl, the timezone, and start at boot. The first command below sets all three. Run these 4 commands on the host. They set the missing settings, start the container, and open its shell. Each part is explained in Ch. 10 · The container wizard, section "The host command every build needs".
⌨ Type this on the Proxmox host (homelab)
Before you run anything on this page: every 192.168.1.x address below is this manual's example network. If your own network uses different numbers, substitute yours as you type — the rule is in Ch. 3 · How to read this manual. A command that runs with the wrong address usually succeeds and leaves you unreachable.
pct set 120 --features nesting=1,keyctl=1 --onboot 1 --timezone host
pct set 120 -mp0 /srv/media,mp=/data   # bind the shared media folder in as /data
pct start 120
pct enter 120                          # now INSIDE CT 120 — the rest of this page runs here
Prefer the terminal? — the same task with one pct create command
⌨ Type this on the Proxmox host (homelab)
TMPL=$(pveam available --section system | awk '/debian-13-standard/{print $2}' | tail -1)
pveam download local "$TMPL"          # once per host; harmless to re-run
pct create 120 local:vztmpl/"$TMPL" \
  --hostname radarr --cores 1 --memory 1024 --rootfs local-lvm:6 \
  --net0 name=eth0,bridge=vmbr0,ip=192.168.1.241/24,gw=192.168.1.1 \
  --nameserver 192.168.1.1 --features nesting=1,keyctl=1 --unprivileged 1 --onboot 1 --timezone host \
  -mp0 /srv/media,mp=/data
pct start 120
pct enter 120                      # you are now INSIDE CT 120 — everything below runs here
Shows the host folder /srv/media inside the container at /data. The container reads and writes the shared data in place.
Notice — when a real drive arrives
Your movie library grows fast. A 500 GB SSD fills quickly. A single 1080p film is several GiB. When you add a real drive in Ch. 65 · Add an external drive, you move /srv/media onto it. The bind mount keeps the same /data path. So the containers do not notice the change.
Notice — set your timezone
Where you see TZ=Region/City, replace it with your own zone name, for example America/New_York or Europe/Berlin. To see each valid name, run timedatectl list-timezones. A wrong zone only makes clocks and schedules look odd. Nothing breaks.
43.2
INSTALL RADARR
This part has no buttons. These commands run inside CT 120. In the host Shell (homelab → >_ Shell), run pct enter 120. You are still inside from the section before? Then continue. There are two ways to open that same shell. Run pct enter 120 on the server. Or run ssh root@192.168.1.241 from your PC. (You set up root access over SSH in Ch. 9 · SSH & the terminal.) (The >_ Console button of the container shows a login: prompt. The containers of this manual cannot answer it. Skip it.) All commands below run inside CT 120. They do not run on the server or on your PC.
Install Docker. Then start Radarr as a container. The web page of Radarr then answers on port 7878.
Install the Docker engine.
Start the Radarr container with its config folder and the shared /data mount.
Open http://192.168.1.241:7878 to check that it is up.
The Docker install line and the flags -d, --name, --restart, -v, -p, and -e are explained in Ch. 9 · SSH & the terminal. The shared flags PUID, PGID, TZ, /config, and /data are explained in Ch. 41 · Prowlarr. These parts are specific to Radarr:
-p 7878:7878
Sends port 7878 of the host to port 7878 inside the Docker container. You can then reach the web page of Radarr at that port.
-v /opt/radarr:/config
Links the folder /opt/radarr to /config inside the Docker container. The settings and the database of Radarr then stay, also when the Docker container is deleted.
lscr.io/linuxserver/radarr
The container image to run: the build of Radarr by LinuxServer.io. Radarr is a manager of movie collections. It finds and downloads movies by itself.
43.3
FIRST-RUN SETUP
The container, CT 120 named radarr, uses 6 GiB storage, 1 CPU, 1024 MB memory, the address 192.168.1.241/24, and the shared /data mount. Set up Radarr one time in its web page.
Open http://192.168.1.241:7878. The first load asks for an authentication method. Select Forms (Login Page). Set a user name and a password. Radarr needs this before it opens the page.
The authentication at the first start: Forms (Login Page), with a user name and a password.
Go to Settings → Media Management. Click Add Root Folder. Select /data/movies.
Under Media Management, turn on Show Advanced. This shows Use Hardlinks Instead of Copy. Check that this setting is ON. It is on by default.
Media Management, with Show Advanced on. Hardlinks are on.
Go to Settings → Profiles. This is the tab next to Media Management. Limit the quality profile to 1080p.
The quality profile editor, limited to 1080p.
Under Settings → Media Management, check that the path of the Recycling Bin is empty. It is empty by default. The Recycling Bin is a holding folder. Radarr puts replaced files there instead of deleting them. It is safe when your library is stable. But it wastes disk space that you do not have yet.
Add qBittorrent under Settings → Download Clients. Use host 192.168.1.240 and port 8080. Also enter the user name and the password that you set in Ch. 42 · qBittorrent. Leave the category at its default, radarr. Click Test, then Save.
Add qBittorrent as a download client.
Then register Radarr inside Prowlarr. Indexers do not arrive by themselves. The page Settings → Indexers of Radarr stays empty until Ch. 41 · Prowlarr pushes them in. In Prowlarr, open Settings → Apps. Add Radarr. Fill in three fields. The Prowlarr Server is http://192.168.1.239:9696. The Radarr Server is http://192.168.1.241:7878. The API key of Radarr is in its own Settings → General. Click Test, then Save.
43.4
HOW TO USE IT — THE BASICS
For daily use, Radarr needs one action: select a movie. Radarr searches, downloads, and files the result.
Open http://192.168.1.241:7878. Go to Movies → Add New.
Type the title in the search box. Click the correct match.
Check the panel that appears. Root Folder must be /data/movies. Quality Profile must have the 1080p limit. Tick Start search for missing movie. Click Add Movie.
Add a movie, with the root folder, the quality profile, and start-search set.
Watch the progress in Activity → Queue. Radarr sends the download to qBittorrent. When the download is done, Radarr imports the file into /data/movies with a hardlink. Jellyfin then sees the movie there.
The Activity Queue, with a download in progress.
You can add a movie before its release. Keep the movie monitored. Wanted → Missing shows these movies. Radarr downloads each one by itself when a release is available.
A download is bad or does not continue? Open the page of the movie. Click Interactive Search (the person icon). Select a release by hand.
The results of Interactive Search for a movie release.
Warning — do not move files by hand
Radarr renames files, makes folders, and replaces copies of low quality with better ones. You move files in /data/movies yourself? Then Radarr loses track of them. Use the web page only.
43.5
WHEN IT GOES WRONG
The page at http://192.168.1.241:7878 never loads, and docker ps shows radarr missing or restarting without end. Docker cannot run, because the LXC container does not allow it. On the server, check the features with pct config 120 | grep features. The line must show keyctl=1,nesting=1. It does not? Run pct set 120 --features nesting=1,keyctl=1. (nesting lets the container run containers of its own. keyctl is a security switch that Docker needs.) Then run pct reboot 120. Enter again with pct enter 120. Run the docker run command again.
Downloads never import. The Activity or History of Radarr shows "Permission denied", or files never move into the movie folder. The shared folder does not belong to the ID that Radarr runs as. Do not run chown on all of /data from inside the CT. It would also change folders that other apps need, for example the photos of Immich. Fix it from the host with the command in Ch. 40 · Shared storage first, section "When it goes wrong". It lists only the subfolders of the media stack. Then let Radarr try the import again.
In Settings → Download Clients, the "Test" button for qBittorrent fails with "Unable to connect" or "connection refused". Check that qBittorrent runs, with its web page on. Use Host 192.168.1.240 and Port 8080. Do not use "localhost" or 127.0.0.1. That address points inside the Radarr container, not to the qBittorrent CT. Enter the user name and the password of the qBittorrent web page.
Imports work, but each movie uses disk space two times, or the log says that it copies instead of hardlinking. Hardlinks work only when the downloads and the movie library are on the same mount. Keep both under the single /data mount, for example downloads in /data/torrents and movies in /data/movies. Never split them into separate mounts /movies and /downloads.
43.6
A download step fails with Temporary failure resolving deb.debian.org, or with another "cannot resolve" message. The container has no working DNS server. It cannot change a name into an address. This is not a typing mistake. It does not fix itself. In the Proxmox page, select this container in the left tree. Open DNS. Select Edit. Type your router address in DNS servers (192.168.1.1 here; use your own). Then run pct reboot 120 in the host shell. Run the failed step again.
A command fails. You do not know if you are on the server or in the container. Read the prompt. In the container, it ends with the name of the container. On the server, it shows root@homelab. The prompt still shows root@homelab after pct enter? Then the command did not work. Type exit. Run the pct enter line again. Check the prompt before you paste anything else. You can paste a build block on the server by mistake. It seems to work. It installs without an error, and the app even answers. But the app is on the server, and it must not be there.
How to see that it happened, and how to undo it. The app does not open at the container address (192.168.1.241). It does open at the server address (192.168.1.220) on the same port. Then the app is on the host. To remove it, run docker rm -f radarr in the host shell. Then run pct enter 120. Check that the prompt changed. Paste the build block again. You lose nothing in the container, because nothing was built there. The first command can show Error: No such container. This is good. It means that the app was never on the host. Do not paste the build block again. Look for another cause.
The page does not open. The browser spins, or says it cannot connect. Do these checks in order, in the host shell. 1. Is the container running? Run pct status 120. It must say running. If it does not, run pct start 120. 2. Is the container at the address that you typed? Run pct config 120 | grep net0. It shows the real address. A wrong digit in the wizard puts the container at another address, and nothing warns you. 3. Does the app run in the container? Run pct enter 120. Then run docker ps. An empty list means that the app did not start. Run docker ps -a to see that it stopped. Run docker logs to see why. 4. Does the app answer in the container? Run curl -I http://localhost followed by the port of the app. You get a reply here, but nothing from your PC? Then the address or your own network is the problem. The app is fine. Your browser reaches 192.168.1.241 but not the port? Then the app is down. It reaches neither? Then the container is down.
Docker does not start, or you see Cannot connect to the Docker daemon, a keyring error, or an overlay error. This is the most common failure in these guides. It means that the two container features are off. A later pct set --features can switch them off, also when you set them before. Run this in the host shell, not in the container: pct set 120 --features nesting=1,keyctl=1. Then run pct reboot 120. Then run the failed step again. Type both settings on one line. If you send only one setting, it replaces the pair and switches the other one off.
REFERENCE CARD
Paste this in 120 → Summary → Notes in Proxmox. The key facts then stay next to the container. Before you ever run the update line on this card, compare it with the docker run you actually used at install. The card is a snapshot of the standard build: if you added anything of your own — a device, an extra -e setting, a second folder — it is not on the card, and re-running the card's line drops it. The container comes back up looking healthy with your setting gone. The update line below still says TZ=Region/City. That is a placeholder, not a real timezone: run it unchanged and the app comes back on UTC while looking perfectly healthy, so every schedule and timestamp silently shifts. Put your own zone in before you use this card — the same one you set at install.
📋 Reference — paste into this container's Notes in Proxmox (not a shell command)
## Radarr — CT 120
dashboard http://192.168.1.241:7878 · docs https://docs.linuxserver.io/images/docker-radarr/

```sh
# is it running?
docker ps --filter name=radarr
curl -fsS http://localhost:7878 >/dev/null && echo OK   # quick health check
# logs (last 50)
docker logs radarr --tail 50
# stop / start / restart
docker stop radarr
docker start radarr
docker restart radarr
# is there an update? ("Image is up to date" = no)
docker pull lscr.io/linuxserver/radarr
# update (settings survive in /opt/radarr)
docker pull lscr.io/linuxserver/radarr && docker rm -f radarr && docker run -d --name radarr --restart=unless-stopped -p 7878:7878 -e PUID=1000 -e PGID=1000 -e TZ=Region/City -v /opt/radarr:/config -v /data:/data lscr.io/linuxserver/radarr
```
Part E · Media & personal cloud
44Sonarr
Sonarr is a season-pass DVR for your own server. You name the shows that you follow one time. It finds, downloads, renames, and files each new episode for Jellyfin to play.
This chapter needs the items below. You came here directly? Do them first. Each item takes a short time. Nothing on this page works without them.
Proxmox is installed and works at https://192.168.1.220:8006. You can log in as root. See Ch. 6 · Install Proxmox. At your first visit, the browser shows a certificate warning. Select Advanced. Then select Proceed. The warning is normal. Proxmox makes its own certificate.
The Debian 13 image is downloaded. You do this one time. See Ch. 10 · The container wizard. Without the image, the Template list in the wizard is empty.
You have an SSH key from your PC (Ch. 9 · SSH & the terminal). Or you type a password in the two password boxes of the wizard. The wizard needs one of the two. The Next button stays grey until you give one.
You know your own network numbers. Where this chapter shows 192.168.1.x, use your own numbers. The rule is in Ch. 3 · How to read this manual. The address of this chapter must be outside the range that your router gives out by itself (the DHCP pool, often .100–.200, but yours can differ). An address inside the pool can go to a phone later. Two devices on one address break name lookups, and the cause is hard to find.
The shared media folder exists. It is /srv/media. You make it one time in Ch. 40 · Shared storage first. This chapter keeps its data there, not on the small SSD. Build that chapter first. Without the folder, the data goes to the small system SSD. The mount exists to prevent this.
You built Ch. 41 · Prowlarr and Ch. 42 · qBittorrent already. The steps below use those chapters: a container, an address, a key, or a job that must exist. You cannot finish this chapter without them.
Commands marked HOST run on the server. In the Proxmox page, select homelab in the left tree. Then select >_ Shell. Commands marked CT run inside the container of this chapter. The chapter shows you how to get there.
The wizard does not work?Next is grey: you gave no password and no key. Give one of the two. The Template list is empty: the Debian image is not downloaded. Download it first. Each tab is explained in Ch. 10 · The container wizard.
Sonarr is an automatic manager for TV shows and anime. It is like a season pass of a DVR, or a watchlist of a streaming service, for your own server. You tell it one time which series you follow. It then finds each new episode, downloads it, renames it, and files it correctly. Jellyfin shows the episode with the right artwork. The daily work is almost zero.
Notice — where these commands run
Run each shell command in this chapter inside CT 121. Do not run them on the Proxmox host (the server, 192.168.1.220) or on your PC. You open that shell in one of two ways. Run pct enter 121 on the host (first homelab → >_ Shell). Or run ssh root@192.168.1.242 from your PC. (The >_ Console button of the container shows a login: prompt. The containers of this manual cannot answer it. Skip it.) Only the pct commands go back to the host. Each one is marked where you use it.
44.1
CREATE THE CONTAINER
Do this task with the mouse in the Proxmox web page. You type nothing. You prefer the command line? The box below does the same task with one pct create command.
Open https://192.168.1.220:8006.
Click homelab in the left tree.
Click the blue Create CT button at the top right.
Fill in each tab as the reference shows. Leave each field that is not listed at its default value.
Keep Start after created unticked. Click Finish.
General tab for CT 121: CT ID 121, hostname sonarr.
Wizard reference — Create CT 121
Tab → Field
Entry
General → Node
Select homelab.
General → CT ID
Type 121. Do not keep the number that the wizard suggests.
General → Hostname
Type sonarr.
General → Unprivileged container
Keep this box ticked.
General → Nesting
Keep this box ticked. It is ticked by default. The wizard has no box for keyctl, which Docker also needs. The host command after Finish sets it. It is the first line of the next listing.
General → Password / SSH public key
Keep the password empty. Paste your public key in the SSH field: ssh-ed25519 AAAA…your-key-here you@your-pc. With the key, you can run ssh root@192.168.1.242 from your PC. The command pct enter 121 on the host needs no password.
Template → Storage, Template
Select local. Then select debian-13-standard.
Disks → Storage, Disk size
Select local-lvm. Set 6 GiB.
CPU → Cores
Set 1 core.
Memory → Memory (MiB)
Set 1024. Keep Swap at its default.
Network → IPv4
Select Static. Set IPv4/CIDR to 192.168.1.242/24. Set Gateway to 192.168.1.1. Keep IPv6 at its default.
DNS → DNS domain
Keep this field empty. Do not type 192.168.1.1 here.
DNS → DNS servers
Always type 192.168.1.1. Never keep this field empty.
Confirm
Read the summary. Keep Start after created unticked. Select Finish.
The wizard has no box for three settings: the Docker permission keyctl, the timezone, and start at boot. The first command below sets all three. Run these 4 commands on the host. They set the missing settings, start the container, and open its shell. Each part is explained in Ch. 10 · The container wizard, section "The host command every build needs".
⌨ Type this on the Proxmox host (homelab)
Before you run anything on this page: every 192.168.1.x address below is this manual's example network. If your own network uses different numbers, substitute yours as you type — the rule is in Ch. 3 · How to read this manual. A command that runs with the wrong address usually succeeds and leaves you unreachable.
pct set 121 --features nesting=1,keyctl=1 --onboot 1 --timezone host
pct set 121 -mp0 /srv/media,mp=/data   # bind the shared media folder in as /data
pct start 121
pct enter 121                          # now INSIDE CT 121 — the rest of this page runs here
Notice — the shared media folder
The line -mp0 /srv/media,mp=/data binds the shared media folder of the host into the container as /data. Each media app gets the same /data: Sonarr, Ch. 43 · Radarr, your download client, and Jellyfin. So the move of a finished download into the library is instant. It uses no extra disk space. The whole file is not copied again. The shared-storage chapter (Ch. 40 · Shared storage first) makes /srv/media one time. This chapter only points at it. When you add a real drive later (Ch. 65 · Add an external drive), you move /srv/media onto it. The containers do not notice. The path that they see stays /data.
Notice — set your timezone
--timezone host makes the container match the Proxmox host. Without it, a new container uses UTC. Its logs and scheduled jobs are then hours away from your local time. A Docker container inside the container that you just made keeps its own timezone setting. That is why the docker run below has -e TZ=Region/City. Replace Region/City with your own zone name, for example America/New_York or Europe/Berlin. To list the valid names, run timedatectl list-timezones on the host. A wrong zone only makes clocks and schedules look odd. Nothing breaks.
Prefer the terminal? — the same task with one pct create command
⌨ Type this on the Proxmox host (homelab)
TMPL=$(pveam available --section system | awk '/debian-13-standard/{print $2}' | tail -1)
pveam download local "$TMPL"          # once per host; harmless to re-run
pct create 121 local:vztmpl/"$TMPL" \
  --hostname sonarr --cores 1 --memory 1024 --rootfs local-lvm:6 \
  --net0 name=eth0,bridge=vmbr0,ip=192.168.1.242/24,gw=192.168.1.1 \
  --nameserver 192.168.1.1 --features nesting=1,keyctl=1 --unprivileged 1 --onboot 1 --timezone host \
  -mp0 /srv/media,mp=/data
pct start 121
pct enter 121                      # you are now INSIDE CT 121 — everything below runs here
Shows the host folder /srv/media inside the container at /data. The container reads and writes the shared data in place.
44.2
INSTALL SONARR
These commands run inside CT 121. In the host Shell (homelab → >_ Shell), run pct enter 121. You are still inside from the section before? Then continue. Install Docker. Then start the Sonarr container.
The Docker install line and the flags -d, --name, --restart, -v, -p, and -e are explained in Ch. 9 · SSH & the terminal. The shared flags PUID, PGID, TZ, /config, and /data are explained in Ch. 41 · Prowlarr. These parts are specific to Sonarr:
-p 8989:8989
Sends port 8989 of the host to port 8989 in the container. This opens the web page of Sonarr.
-v /opt/sonarr:/config
Stores the settings and the database of Sonarr on the host at /opt/sonarr. They stay, also when the container is deleted.
-v /data:/data
Gives Sonarr access to the folder /data of the container. This is the shared media mount. It holds TV shows and downloads.
lscr.io/linuxserver/sonarr
The image to run. It is the Sonarr of LinuxServer.io. Sonarr is a manager of TV-show collections. It finds and downloads episodes by itself.
CT 121 / sonarr uses 6 GiB, 1 CPU, 1024 MB, and the address 192.168.1.242/24, plus the /data mount. The setup is the same as Ch. 43 · Radarr. But the root folder is /data/tv instead of the movies folder.
Notice — 500 GB fills fast
A TV library grows fast. The 6 GiB disk of the container holds only Sonarr itself. The episodes land on the shared media folder. On a single 500 GB SSD, that fills within a few seasons. Watch the free space in Beszel. When it runs low, add a real drive. The chapter on that (Ch. 65 · Add an external drive) moves /srv/media onto it. You do not touch a single container.
44.3
WHAT IS UNIQUE HERE
Sonarr follows the same *arr pattern as Radarr. It is the TV partner, with the root folder /data/tv. The one special feature is the Series Type of each series. You add an anime series? Then set its Series Type to Anime. Sonarr then understands anime names, absolute episode numbers, and anime release groups. This single setting is the complete anime solution here. There is no separate stack. Jellyfin plays the files as usual.
44.4
SET IT UP — THE BASICS
First tell Sonarr where TV lives. Then connect your indexers and your download client. Then add shows. Sonarr then gets episodes by itself.
Open http://192.168.1.242:8989. The first load asks for an authentication method. Select Forms (Login Page). Set a user name and a password. Sonarr needs this before it opens the page.
The authentication at the first start: Forms (Login Page), with a user name and a password.
Go to Settings → Media Management. Click Add Root Folder. Select /data/tv.
Add Root Folder: /data/tv.
Register Sonarr inside Prowlarr. You do not add indexers here. The own page Settings → Indexers of Sonarr stays empty on purpose. Ch. 41 · Prowlarr pushes them in. Go to Prowlarr. Open Settings → Apps. Add Sonarr. Fill in three fields. The Prowlarr Server is http://192.168.1.239:9696. The Sonarr Server is http://192.168.1.242:8989. The API key of Sonarr is in its own Settings → General. Click Test, then Save. Come back to Sonarr. Its Indexers page now lists what Prowlarr holds. Prowlarr is not built yet? Do Ch. 41 · Prowlarr first. You cannot finish this chapter without it.
Set your download client, Ch. 42 · qBittorrent, in Settings → Download Clients. Use host 192.168.1.240 and port 8080. Also enter the user name and the password that you set in that chapter. Leave the category at its default, tv-sonarr. Sonarr finds nothing without both the indexers and the download client. Click Test and wait for green before you save. A wrong address, port, or password saves with no complaint. Then it fails without a sign. Searches run, nothing is ever handed to qBittorrent, and no page reports it. Green here is the only proof that this dialog gives.
Go to Series → Add New. Type the title of the show. Select the root folder /data/tv and a quality profile. For anime, set Series Type to Anime. Click Add.
Add New Series: root folder /data/tv, Series Type set for anime titles, then Add.The Series Type dropdown, with Anime selected.
Sonarr downloads monitored episodes when it finds them or when they air. To start a search by hand, open the series and click a magnifying-glass icon. Use Interactive Search to select one specific release. Wanted → Missing shows all episodes that are not on the disk.
Watch the downloads in Activity → Queue. See the next air dates in Calendar. Sonarr renames finished episodes into /data/tv. Ch. 46 · Jellyfin shows them after its next scan.
Activity → Queue and Calendar: downloads in progress and next air dates.
44.5
WHEN IT GOES WRONG
The web page at http://192.168.1.242:8989 does not load for the first minute or two. At the first start, the LinuxServer image builds its config. Give it 30–60 seconds. Check the progress from inside CT 121 with docker logs sonarr --tail 50. Wait until you see the line [ls.io-init] done.. Then refresh the page.
You add the root folder /data/tv, and it says that the folder does not exist, or it shows "Folder is not writable by user abc". The folder must exist. It must belong to the PUID and PGID that you set. A file-explorer tool (see Ch. 12 · After every build + common Proxmox tasks, section "Move a file to or from the server") can make the /data/tv folder for you. But most file-explorer tools cannot change its numeric owner to PUID and PGID 1000. That part needs the shell command. Inside CT 121, run mkdir -p /data/tv && chown -R 1000:1000 /data/tv /opt/sonarr. Then add the root folder again in the web page. Limit the chown to /data/tv. Do not run it on the whole /data mount. /data is the shared media folder that each app uses. You also run Ch. 52 · Immich? Its subfolder /data/photos needs a different owner. A recursive chown of all of /data would break the photo permissions of Immich without a sign.
Downloads finish, but Sonarr never imports them. Episodes stay stuck in Activity → Queue, or the log shows "Permission denied" or "Access to the path is denied". Sonarr and your download client must see the files at the same path. Both must be allowed to write them. Check that each *arr app and your download client were made with the same mount -v /data:/data and the same -e PUID=1000 -e PGID=1000. One is missing? Change that line. Make the container of that app again with the exact steps in Ch. 12 · After every build + common Proxmox tasks, section "Change a setting on a Docker app". Its own data folder is not touched. Then fix the ownership one time with chown -R 1000:1000 /data/tv /data/torrents inside CT 121. Name the subfolders of the media stack. Do not name the whole /data tree. You then never touch /data/photos if you also run Ch. 52 · Immich. That folder needs a different owner.
Keep /config (/opt/sonarr) on the local disk of the container. Never put it on a network share such as NFS or SMB. If you do, the database of Sonarr gives a "database is locked" error and can become corrupt.
Scheduled searches or RSS run at the wrong hour, and the log times look several hours wrong. The container runs in UTC because no timezone was set. If you make it again, your shows, settings, and history are not touched. All of that lives in /opt/sonarr and /data on the host. It is not inside the container. Run this inside CT 121. Use your own zone (from timedatectl list-timezones) in place of Region/City:
⌨ Type this inside CT 121
A download step fails with Temporary failure resolving deb.debian.org, or with another "cannot resolve" message. The container has no working DNS server. It cannot change a name into an address. This is not a typing mistake. It does not fix itself. In the Proxmox page, select this container in the left tree. Open DNS. Select Edit. Type your router address in DNS servers (192.168.1.1 here; use your own). Then run pct reboot 121 in the host shell. Run the failed step again.
A command fails. You do not know if you are on the server or in the container. Read the prompt. In the container, it ends with the name of the container. On the server, it shows root@homelab. The prompt still shows root@homelab after pct enter? Then the command did not work. Type exit. Run the pct enter line again. Check the prompt before you paste anything else. You can paste a build block on the server by mistake. It seems to work. It installs without an error, and the app even answers. But the app is on the server, and it must not be there.
How to see that it happened, and how to undo it. The app does not open at the container address (192.168.1.242). It does open at the server address (192.168.1.220) on the same port. Then the app is on the host. To remove it, run docker rm -f sonarr in the host shell. Then run pct enter 121. Check that the prompt changed. Paste the build block again. You lose nothing in the container, because nothing was built there. The first command can show Error: No such container. This is good. It means that the app was never on the host. Do not paste the build block again. Look for another cause.
The page does not open. The browser spins, or says it cannot connect. Do these checks in order, in the host shell. 1. Is the container running? Run pct status 121. It must say running. If it does not, run pct start 121. 2. Is the container at the address that you typed? Run pct config 121 | grep net0. It shows the real address. A wrong digit in the wizard puts the container at another address, and nothing warns you. 3. Does the app run in the container? Run pct enter 121. Then run docker ps. An empty list means that the app did not start. Run docker ps -a to see that it stopped. Run docker logs to see why. 4. Does the app answer in the container? Run curl -I http://localhost followed by the port of the app. You get a reply here, but nothing from your PC? Then the address or your own network is the problem. The app is fine. Your browser reaches 192.168.1.242 but not the port? Then the app is down. It reaches neither? Then the container is down.
Docker does not start, or you see Cannot connect to the Docker daemon, a keyring error, or an overlay error. This is the most common failure in these guides. It means that the two container features are off. A later pct set --features can switch them off, also when you set them before. Run this in the host shell, not in the container: pct set 121 --features nesting=1,keyctl=1. Then run pct reboot 121. Then run the failed step again. Type both settings on one line. If you send only one setting, it replaces the pair and switches the other one off.
REFERENCE CARD
Paste this in 121 → Summary → Notes in Proxmox. The address and the daily commands then stay next to the container. Before you ever run the update line on this card, compare it with the docker run you actually used at install. The card is a snapshot of the standard build: if you added anything of your own — a device, an extra -e setting, a second folder — it is not on the card, and re-running the card's line drops it. The container comes back up looking healthy with your setting gone. The update line below still says TZ=Region/City. That is a placeholder, not a real timezone: run it unchanged and the app comes back on UTC while looking perfectly healthy, so every schedule and timestamp silently shifts. Put your own zone in before you use this card — the same one you set at install.
📋 Reference — paste into this container's Notes in Proxmox (not a shell command)
## Sonarr — CT 121
dashboard http://192.168.1.242:8989 · docs https://wiki.servarr.com/sonarr

```sh
# is it running?
docker ps --filter name=sonarr
curl -fsS http://localhost:8989 >/dev/null && echo OK   # quick health check
# logs (last 50)
docker logs sonarr --tail 50
# stop / start / restart
docker stop sonarr
docker start sonarr
docker restart sonarr
# is there an update? ("Image is up to date" = no)
docker pull lscr.io/linuxserver/sonarr
# update (settings survive in /opt/sonarr)
docker pull lscr.io/linuxserver/sonarr && docker rm -f sonarr && docker run -d --name sonarr --restart=unless-stopped -p 8989:8989 -e PUID=1000 -e PGID=1000 -e TZ=Region/City -v /opt/sonarr:/config -v /data:/data lscr.io/linuxserver/sonarr
```
Part E · Media & personal cloud
45Bazarr
Bazarr watches the library that Radarr and Sonarr fill. It puts a matching subtitle file next to each video. Jellyfin can then show subtitles in your languages.
This chapter needs the items below. You came here directly? Do them first. Each item takes a short time. Nothing on this page works without them.
Proxmox is installed and works at https://192.168.1.220:8006. You can log in as root. See Ch. 6 · Install Proxmox. At your first visit, the browser shows a certificate warning. Select Advanced. Then select Proceed. The warning is normal. Proxmox makes its own certificate.
The Debian 13 image is downloaded. You do this one time. See Ch. 10 · The container wizard. Without the image, the Template list in the wizard is empty.
You have an SSH key from your PC (Ch. 9 · SSH & the terminal). Or you type a password in the two password boxes of the wizard. The wizard needs one of the two. The Next button stays grey until you give one.
You know your own network numbers. Where this chapter shows 192.168.1.x, use your own numbers. The rule is in Ch. 3 · How to read this manual. The address of this chapter must be outside the range that your router gives out by itself (the DHCP pool, often .100–.200, but yours can differ). An address inside the pool can go to a phone later. Two devices on one address break name lookups, and the cause is hard to find.
The shared media folder exists. It is /srv/media. You make it one time in Ch. 40 · Shared storage first. This chapter keeps its data there, not on the small SSD. Build that chapter first. Without the folder, the data goes to the small system SSD. The mount exists to prevent this.
You built Ch. 43 · Radarr and Ch. 44 · Sonarr already. The steps below use those chapters: a container, an address, a key, or a job that must exist. You cannot finish this chapter without them.
Commands marked HOST run on the server. In the Proxmox page, select homelab in the left tree. Then select >_ Shell. Commands marked CT run inside the container of this chapter. The chapter shows you how to get there.
The wizard does not work?Next is grey: you gave no password and no key. Give one of the two. The Template list is empty: the Debian image is not downloaded. Download it first. Each tab is explained in Ch. 10 · The container wizard.
45.1
CREATE THE CONTAINER
Do this task with the mouse in the Proxmox web page. You type nothing yet.
Open https://192.168.1.220:8006.
Click homelab in the left tree.
Click the blue Create CT button at the top right.
Fill in each tab as the reference shows. Leave each field that is not listed at its default value.
Click Finish. The wizard cannot add the media mount. The commands after the table do that, on the host.
General tab — CT ID 122, hostname bazarr.
Wizard reference — Create CT 122
Tab → Field
Entry
General → Node
Select homelab.
General → CT ID
Type 122. Do not keep the number that the wizard suggests.
General → Hostname
Type bazarr.
General → Unprivileged container
Keep this box ticked.
General → Nesting
Keep this box ticked. It is ticked by default. The wizard has no box for keyctl, which Docker also needs. The host command after Finish sets it. It is the first line of the next listing.
General → Password / SSH public key
Keep the password empty. Paste your public key in the SSH field: ssh-ed25519 AAAA…your-key-here you@your-pc. With the key, you can run ssh root@192.168.1.243 from your PC. The command pct enter 122 on the host needs no password.
Template → Storage, Template
Select local. Then select debian-13-standard.
Disks → Storage, Disk size
Select local-lvm. Set 6 GiB.
CPU → Cores
Set 1 core.
Memory → Memory (MiB)
Set 1024. Keep Swap at its default.
Network → IPv4
Select Static. Set IPv4/CIDR to 192.168.1.243/24. Set Gateway to 192.168.1.1. Keep IPv6 at its default.
DNS → DNS domain
Keep this field empty. Do not type 192.168.1.1 here.
DNS → DNS servers
Always type 192.168.1.1. Never keep this field empty.
Confirm
Read the summary. Keep Start after created unticked. Select Finish.
The wizard has no box for three settings: the Docker permission keyctl, the timezone, and start at boot. The first command below sets all three. Run these 4 commands on the host. They set the missing settings, start the container, and open its shell. Each part is explained in Ch. 10 · The container wizard, section "The host command every build needs".
⌨ Type this on the Proxmox host (homelab)
Before you run anything on this page: every 192.168.1.x address below is this manual's example network. If your own network uses different numbers, substitute yours as you type — the rule is in Ch. 3 · How to read this manual. A command that runs with the wrong address usually succeeds and leaves you unreachable.
pct set 122 --features nesting=1,keyctl=1 --onboot 1 --timezone host
pct set 122 -mp0 /srv/media,mp=/data   # share the media folder into the container as /data
pct start 122
pct enter 122                          # now INSIDE CT 122 — the rest of this page runs here
Prefer the terminal? — the same task with one pct create command
⌨ Type this on the Proxmox host (homelab)
TMPL=$(pveam available --section system | awk '/debian-13-standard/{print $2}' | tail -1)
pveam download local "$TMPL"          # once per host; harmless to re-run
pct create 122 local:vztmpl/"$TMPL" \
  --hostname bazarr --cores 1 --memory 1024 --rootfs local-lvm:6 \
  --net0 name=eth0,bridge=vmbr0,ip=192.168.1.243/24,gw=192.168.1.1 \
  --nameserver 192.168.1.1 --features nesting=1,keyctl=1 --unprivileged 1 --onboot 1 --timezone host \
  -mp0 /srv/media,mp=/data
pct start 122
pct enter 122                      # you are now INSIDE CT 122 — everything below runs here
Shows the host folder /srv/media inside the container at /data. The container reads and writes the shared data in place.
Notice — the shared media folder
/srv/media is the one folder on the host where all your media lives. You make it one time in Ch. 40 · Shared storage first. The line -mp0 /srv/media,mp=/data makes that folder show up inside this container at /data. This is the same path that Radarr and Sonarr already see. So Bazarr writes subtitle files right beside their videos. When you add a real drive later (Ch. 65 · Add an external drive), you move /srv/media onto it. The containers do not notice. The path /data stays the same.
Notice — set your timezone
Where you see TZ=Region/City, replace it with your own zone name, for example America/New_York or Europe/Paris. To see each valid name, run timedatectl list-timezones on the server. A wrong zone only makes clocks and schedules look odd. Nothing breaks. This container also runs --timezone host. It copies the own zone of the server into the LXC. The Docker container inside it keeps a separate clock. This is why you set -e TZ=Region/City too.
45.2
BUILD
This part has no buttons. These commands run inside CT 122. In the host Shell (homelab → >_ Shell), run pct enter 122. You are still inside from the section before? Then continue. Everything below runs inside CT 122, not on homelab (192.168.1.220).
Notice — each command below runs inside CT 122
You open that shell in one of two ways. Run pct enter 122 on the host (first homelab → >_ Shell). Or run ssh root@192.168.1.243 from your PC. (The >_ Console button of the container shows a login: prompt. The containers of this manual cannot answer it. Skip it.) Only a few commands (such as pct) go back to the host. Each guide names those commands where you use them.
Type the two commands on the right in that container shell. First set -e TZ=Region/City to your own zone.
The Docker install line and the flags -d, --name, --restart, -v, -p, and -e are explained in Ch. 9 · SSH & the terminal. The shared flags PUID, PGID, TZ, /config, and /data are explained in Ch. 41 · Prowlarr. These parts are specific to Bazarr:
-p 6767:6767
Sends port 6767 of the host to port 6767 inside the container. Port 6767 is the web page of Bazarr.
-v /opt/bazarr:/config
Stores the settings of Bazarr on the own disk of the container, at /opt/bazarr. They stay when it restarts.
-v /data:/data
Gives Bazarr access to the shared /data folder. These are the media files that it adds subtitles to. This is the mount that you attached with -mp0 in the section before.
lscr.io/linuxserver/bazarr
The image to run: the Bazarr of LinuxServer.io. It finds and downloads subtitles for your movies and TV shows by itself.
45.3
SET UP
This is CT 122/bazarr, 6 GiB, 1 CPU, 1024 MB, at 192.168.1.243/24, with a /data mount. Connect it to Radarr and Sonarr. Choose your languages. Enable a provider.
Open http://192.168.1.243:6767.
In Settings → Sonarr, tick Enabled. Enter the address 192.168.1.242, the port 8989, and the API key of Sonarr. You find the API key in Sonarr itself, under Settings → General → API Key. Press Test. Wait for green before you save. Bazarr gives no other sign. With a wrong address, port, or key, it saves with no complaint. Then it never talks to Sonarr or Radarr. The Series list stays empty. Mass Edit has nothing to select. Nothing anywhere reports an error. Test fails? The API key is the usual cause. Copy it again from the own Settings → General of that app. Check that the address is the LAN address of the container, never localhost.
Settings → Sonarr — Enabled, address, port, API key.
In Settings → Radarr, do the same. Use the address 192.168.1.241, the port 7878, and the API key of Radarr. You find it in the same way, under Settings → General → API Key in Radarr itself.
Settings → Radarr — Enabled, address, port, API key.
In Settings → Languages, make a Languages Profile. Add your languages, for example English and French. A language alone does nothing until a profile exists and is set as the default.
Settings → Languages — make the Languages Profile.
In Settings → Providers, enable at least one subtitle provider. For example, OpenSubtitles.com needs a free account. Podnapisi needs no login. Without a provider, Bazarr never downloads anything.
Settings → Providers — enable OpenSubtitles.com or Podnapisi.
Save. Then restart Bazarr from the menu.
All three apps share the same /data path. So leave Path Mappings empty.
Notice — the shared path is the whole trick
Bazarr can put a subtitle beside a video only if it reaches that video at the exact path that Radarr and Sonarr report. All three containers mount /srv/media as /data. So the paths already match, and Path Mappings stay empty. You see path errors? The shared mount is the first thing to check.
45.4
USE IT: THE BASICS
Bazarr works by itself after the setup. But it watches only items that are added after you set it up. Apply the languages profile to your existing library one time.
Open http://192.168.1.243:6767. Click Series in the left menu.
Click Mass Edit, then Select all. Select the languages profile that you made during the setup. Click Save.
Series → Mass Edit → Select all → assign the Languages Profile.
Do the same steps on the Movies page. Bazarr then searches subtitles for each item that has a profile.
Make future additions automatic. Go to Settings → Languages. Turn on the default-profile option for series and for movies. Save. New items from Sonarr and Radarr then get the profile when they arrive.
Open the Wanted page to check the progress. It lists each episode and movie that still has no subtitles. Click the search button next to an item to try again at once.
Wanted — episodes and movies that still miss subtitles.
An automatic subtitle is bad, for example out of sync or in the wrong language? Open it from the Series or Movies list. Click the subtitle row. Click Delete. Then click Search to pick a better one from the results of the provider.
45.5
WHEN IT GOES WRONG
The install or the start of Docker inside the CT fails, or a command says “Cannot connect to the Docker daemon” or “failed to start”. The LXC needs the container features that Docker uses. On the Proxmox host, check them with pct config 122 | grep features. The line must show keyctl=1,nesting=1. It does not? Run pct set 122 --features nesting=1,keyctl=1. (nesting lets Docker run inside the LXC at all. keyctl lets Docker manage the keyrings of its containers.) Reboot the CT with pct reboot 122. Then run the docker commands again inside CT 122.
The Bazarr page at http://192.168.1.243:6767 opens, but it does not save settings, or it keeps you on the setup screen. Bazarr needs each mandatory field filled before it saves. Go through Settings → General. Set a valid address and port. Fill in each required field and section. Then click Save and run docker restart bazarr.
Bazarr connects to Radarr and Sonarr, but it finds no movies or episodes, or it cannot put subtitles in place (path errors). All three containers must see the media at the same path. Check that Radarr, Sonarr, and Bazarr all use the same mount -v /data:/data, backed by /srv/media. In Bazarr, under Settings → Radarr and Sonarr, leave the path mappings empty when the paths already match. Add a mapping only if the paths really differ.
The logs of Bazarr show “permission denied”, and .srt files never appear next to the videos. The /data folder does not belong to the user that Bazarr runs as (PUID and PGID 1000). Inside CT 122, run the ownership fix only on the folders that Bazarr writes to: chown -R 1000:1000 /data/movies /data/tv. Do not run it on all of /data. That path is the shared media store. A chown of the whole tree takes the photos folder of Ch. 52 · Immich and the files folder of Ch. 53 · Nextcloud with it. Both need different owners. Their uploads then start to fail, and nothing connects the two events.
Everything is connected, but Bazarr reports “no subtitles found” also for common languages. No provider is enabled. Go to Settings → Providers and add at least one. OpenSubtitles.com needs a free account and an API key. Podnapisi needs no login. Then go to Settings → Languages. Choose your languages. Assign a Languages Profile to your shows and movies. Save. Then restart Bazarr.
45.6
A download step fails with Temporary failure resolving deb.debian.org, or with another "cannot resolve" message. The container has no working DNS server. It cannot change a name into an address. This is not a typing mistake. It does not fix itself. In the Proxmox page, select this container in the left tree. Open DNS. Select Edit. Type your router address in DNS servers (192.168.1.1 here; use your own). Then run pct reboot 122 in the host shell. Run the failed step again.
A command fails. You do not know if you are on the server or in the container. Read the prompt. In the container, it ends with the name of the container. On the server, it shows root@homelab. The prompt still shows root@homelab after pct enter? Then the command did not work. Type exit. Run the pct enter line again. Check the prompt before you paste anything else. You can paste a build block on the server by mistake. It seems to work. It installs without an error, and the app even answers. But the app is on the server, and it must not be there.
How to see that it happened, and how to undo it. The app does not open at the container address (192.168.1.243). It does open at the server address (192.168.1.220) on the same port. Then the app is on the host. To remove it, run docker rm -f bazarr in the host shell. Then run pct enter 122. Check that the prompt changed. Paste the build block again. You lose nothing in the container, because nothing was built there. The first command can show Error: No such container. This is good. It means that the app was never on the host. Do not paste the build block again. Look for another cause.
The page does not open. The browser spins, or says it cannot connect. Do these checks in order, in the host shell. 1. Is the container running? Run pct status 122. It must say running. If it does not, run pct start 122. 2. Is the container at the address that you typed? Run pct config 122 | grep net0. It shows the real address. A wrong digit in the wizard puts the container at another address, and nothing warns you. 3. Does the app run in the container? Run pct enter 122. Then run docker ps. An empty list means that the app did not start. Run docker ps -a to see that it stopped. Run docker logs to see why. 4. Does the app answer in the container? Run curl -I http://localhost followed by the port of the app. You get a reply here, but nothing from your PC? Then the address or your own network is the problem. The app is fine. Your browser reaches 192.168.1.243 but not the port? Then the app is down. It reaches neither? Then the container is down.
Docker does not start, or you see Cannot connect to the Docker daemon, a keyring error, or an overlay error. This is the most common failure in these guides. It means that the two container features are off. A later pct set --features can switch them off, also when you set them before. Run this in the host shell, not in the container: pct set 122 --features nesting=1,keyctl=1. Then run pct reboot 122. Then run the failed step again. Type both settings on one line. If you send only one setting, it replaces the pair and switches the other one off.
REFERENCE CARD
Paste this in 122 → Summary → Notes in Proxmox. The key facts and the update steps then stay with the container. Before you ever run the update line on this card, compare it with the docker run you actually used at install. The card is a snapshot of the standard build: if you added anything of your own — a device, an extra -e setting, a second folder — it is not on the card, and re-running the card's line drops it. The container comes back up looking healthy with your setting gone. The update line below still says TZ=Region/City. That is a placeholder, not a real timezone: run it unchanged and the app comes back on UTC while looking perfectly healthy, so every schedule and timestamp silently shifts. Put your own zone in before you use this card — the same one you set at install.
📋 Reference — paste into this container's Notes in Proxmox (not a shell command)
## Bazarr — CT 122
dashboard http://192.168.1.243:6767 · docs https://wiki.bazarr.media/ · subtitles for Radarr + Sonarr · media at /data (/srv/media)

```sh
# is it running?
docker ps --filter name=bazarr
curl -fsS http://localhost:6767 >/dev/null && echo OK   # quick health check
# logs (last 50)
docker logs bazarr --tail 50
# stop / start / restart
docker stop bazarr
docker start bazarr
docker restart bazarr
# is there an update? ("Image is up to date" = no)
docker pull lscr.io/linuxserver/bazarr
# update (settings survive in /opt/bazarr)
docker pull lscr.io/linuxserver/bazarr && docker rm -f bazarr && docker run -d --name bazarr --restart=unless-stopped -p 6767:6767 -e PUID=1000 -e PGID=1000 -e TZ=Region/City -v /opt/bazarr:/config -v /data:/data lscr.io/linuxserver/bazarr
```
Explanation of each part
# comment lines
Notes that the shell ignores. They remind you what each block does.
docker ps --filter name=bazarr
Lists the running container named bazarr. An empty result means that it does not run.
curl -fsS http://localhost:6767 >/dev/null && echo OK
Asks the web page for a page. It prints OK only if it answers. This is a quick way to check that Bazarr is alive without a browser.
docker logs bazarr --tail 50
Shows the recent output of the container. --tail 50 limits it to the last 50 lines, for troubleshooting.
docker stop / start / restart bazarr
Stops, starts, or restarts the container. Use restart after a change of the configuration, or if the container does not work well.
docker pull lscr.io/linuxserver/bazarr
Downloads the newest version of the image. Run it alone to check for an update. “Image is up to date” means that there is nothing new.
docker rm -f bazarr
Removes the existing bazarr container by force, also if it runs. A fresh one can then take its place. The mounted folders /opt/bazarr and /data are not touched.
docker run -d --name bazarr … (rest)
Makes the container again with the same settings as before. It now uses the image that you just pulled. This is the standard way to update the application.
Part E · Media & personal cloud
46Jellyfin
Jellyfin is your own private Netflix. Point it at your media folders. It streams your movies, shows, and music to the TV, the phone, and the browser. It has posters, resume points, and a profile for each person.
This chapter needs the items below. You came here directly? Do them first. Each item takes a short time. Nothing on this page works without them.
Proxmox is installed and works at https://192.168.1.220:8006. You can log in as root. See Ch. 6 · Install Proxmox. At your first visit, the browser shows a certificate warning. Select Advanced. Then select Proceed. The warning is normal. Proxmox makes its own certificate.
The Debian 13 image is downloaded. You do this one time. See Ch. 10 · The container wizard. Without the image, the Template list in the wizard is empty.
You have an SSH key from your PC (Ch. 9 · SSH & the terminal). Or you type a password in the two password boxes of the wizard. The wizard needs one of the two. The Next button stays grey until you give one.
You know your own network numbers. Where this chapter shows 192.168.1.x, use your own numbers. The rule is in Ch. 3 · How to read this manual. The address of this chapter must be outside the range that your router gives out by itself (the DHCP pool, often .100–.200, but yours can differ). An address inside the pool can go to a phone later. Two devices on one address break name lookups, and the cause is hard to find.
The shared media folder exists. It is /srv/media. You make it one time in Ch. 40 · Shared storage first. This chapter keeps its data there, not on the small SSD. Build that chapter first. Without the folder, the data goes to the small system SSD. The mount exists to prevent this.
Commands marked HOST run on the server. In the Proxmox page, select homelab in the left tree. Then select >_ Shell. Commands marked CT run inside the container of this chapter. The chapter shows you how to get there.
The wizard does not work?Next is grey: you gave no password and no key. Give one of the two. The Template list is empty: the Debian image is not downloaded. Download it first. Each tab is explained in Ch. 10 · The container wizard.
Jellyfin is a media server that you host yourself. It reads your folders of video and music. It shows them as a streaming app: posters, descriptions, resume points, and a separate profile for each person. It is a free alternative to Plex, with no paid tier.
Notice — where the commands in this chapter run
The Create CT wizard and the Jellyfin web app run in your browser. The docker run command and the commands for the folders run inside CT 124. They do not run on the Proxmox host (the server, 192.168.1.220) or on your PC. Open the shell of the container from homelab → >_ Shell with pct enter 124. It needs no password. Only the pct commands run on the host. Each one is marked where you use it.
46.1
CREATE THE CONTAINER
Build the container with the mouse in the Proxmox web page.
Open https://192.168.1.220:8006.
Click homelab in the left tree.
Click the blue Create CT button at the top right.
Fill in the General tab as shown.
Fill in the other tabs as the reference shows. Leave each field that is not listed at its default value.
Keep Start after created unticked. Click Finish. The commands after the table add the media mount and a few other settings.
The Create CT wizard, General tab: CT ID 124, hostname jellyfin.
Wizard reference — Create CT 124
Tab → Field
Entry
General → Node
Select homelab.
General → CT ID
Type 124. Do not keep the number that the wizard suggests.
General → Hostname
Type jellyfin.
General → Unprivileged container
Keep this box ticked.
General → Nesting
Keep this box ticked. It is ticked by default. The wizard has no box for keyctl, which Docker also needs. The host command after Finish sets it. It is the first line of the next listing.
General → Password / SSH public key
Keep the password empty. Paste your public key in the SSH field: ssh-ed25519 AAAA…your-key-here you@your-pc. With the key, you can run ssh root@192.168.1.245 from your PC. The command pct enter 124 on the host needs no password.
Template → Storage, Template
Select local. Then select debian-13-standard.
Disks → Storage, Disk size
Select local-lvm. Set 8 GiB.
CPU → Cores
Set 4 cores.
Memory → Memory (MiB)
Set 4096. Keep Swap at its default.
Network → IPv4
Select Static. Set IPv4/CIDR to 192.168.1.245/24. Set Gateway to 192.168.1.1. Keep IPv6 at its default.
DNS → DNS domain
Keep this field empty. Do not type 192.168.1.1 here.
DNS → DNS servers
Always type 192.168.1.1. Never keep this field empty.
Confirm
Read the summary. Keep Start after created unticked. Select Finish.
The wizard has no box for three settings: the Docker permission keyctl, the timezone, and start at boot. The first command below sets all three. Run these 4 commands on the host. They set the missing settings, start the container, and open its shell. Each part is explained in Ch. 10 · The container wizard, section "The host command every build needs".
⌨ Type this on the Proxmox host (homelab)
Before you run anything on this page: every 192.168.1.x address below is this manual's example network. If your own network uses different numbers, substitute yours as you type — the rule is in Ch. 3 · How to read this manual. A command that runs with the wrong address usually succeeds and leaves you unreachable.
pct set 124 --features nesting=1,keyctl=1 --onboot 1 --timezone host
pct set 124 -mp0 /srv/media,mp=/data   # bind the shared media store in as /data
pct start 124
pct enter 124                          # now INSIDE CT 124 — the rest of this page runs here
Notice — the shared media store
The line -mp0 /srv/media,mp=/data binds the host folder /srv/media into the container. There it appears as /data. You make that folder one time. See Ch. 40 · Shared storage first. Each media app shares the same store (the downloader, Radarr, Sonarr, Jellyfin). So they all see the same files. When you add a real drive later (see Ch. 65 · Add an external drive), you move /srv/media onto it. The containers do not notice. The path /data inside them stays the same.
Notice — set your timezone
--timezone host makes the container match the Proxmox host. Without it, a new container uses UTC. Its logs and scheduled library scans are then hours away from your local time. A Docker container inside the container keeps its own separate clock setting. This is why the docker run below also has -e TZ=Region/City. Where you see TZ=Region/City, replace it with your own zone name, for example America/New_York or Europe/Berlin. To see each valid name, run timedatectl list-timezones on the host. A wrong zone only makes clocks and schedules look odd. Nothing breaks.
Prefer the terminal? — the same task with one pct create command
⌨ Type this on the Proxmox host (homelab)
TMPL=$(pveam available --section system | awk '/debian-13-standard/{print $2}' | tail -1)
pveam download local "$TMPL"          # once per host; harmless to re-run
pct create 124 local:vztmpl/"$TMPL" \
  --hostname jellyfin --cores 4 --memory 4096 --rootfs local-lvm:8 \
  --net0 name=eth0,bridge=vmbr0,ip=192.168.1.245/24,gw=192.168.1.1 \
  --nameserver 192.168.1.1 --features nesting=1,keyctl=1 --unprivileged 1 --onboot 1 --timezone host \
  -mp0 /srv/media,mp=/data
pct start 124
pct enter 124                      # you are now INSIDE CT 124 — everything below runs here
Shows the host folder /srv/media inside the container at /data. The container reads and writes the shared data in place.
46.2
INSTALL JELLYFIN
This part has no buttons. You type commands inside CT 124. You are already there from pct enter 124 above. (You closed that shell? Open homelab → >_ Shell and run pct enter 124 again.) Install Docker. Then start Jellyfin in one Docker container. Replace Region/City with your own timezone.
Install the Docker engine.
Start Jellyfin. Its settings go on a host folder that stays when you update. Your media store is mounted at /data.
You see a cgroup or overlay error, or "Cannot connect to the Docker daemon"? Check the features of CT 124. On the Proxmox host (not inside the CT), run pct config 124 | grep features. The line must show keyctl=1,nesting=1. It does not? Run pct set 124 --features nesting=1,keyctl=1. Then run pct reboot 124. Then run the docker run line again.
Explanation of each part
The Docker install line and the flags -d, --name, --restart, -v, -p, and -e are explained in Ch. 9 · SSH & the terminal. The shared flags PUID, PGID, TZ, /config, and /data are explained in Ch. 41 · Prowlarr. These parts are specific to Jellyfin:
-p 8096:8096
Sends port 8096 of the host to port 8096 inside the container. You can then open the web page of Jellyfin in a browser.
-e PUID=1000 -e PGID=1000
Sets the user and group ID that Jellyfin runs as. It then reads and writes files with the correct permissions. These numbers must match the user that owns the files in /data. If not, Jellyfin can see the folder but cannot read the files inside it. You do not have to check this now. A library ends up empty? Then one command fixes the owner. It is written in the section "When it goes wrong" of this chapter.
-v /opt/jellyfin:/config
Keeps the settings, the library database, the artwork, and the transcode cache of Jellyfin on the host, at /opt/jellyfin. They stay if the container is deleted and made again.
-v /data:/data
Gives Jellyfin access to your media files. This is the shared store that you bound in as /data. Jellyfin reads movies and shows from here.
lscr.io/linuxserver/jellyfin
The image to run: the build of Jellyfin by LinuxServer.io. Jellyfin is a free media server that you host yourself. It is like a private Netflix.
46.3
FIRST RUN — THE WIZARD & YOUR LIBRARIES
The creation of the container started Jellyfin. Now set it up in the browser. Open http://192.168.1.245:8096. Use the IP of the CT, 192.168.1.245, not the host 192.168.1.220.
Choose a language. Then make the first user. This account is the administrator. Set a name and a strong password.
The setup wizard: pick a language. Then make the first (admin) user.
It asks you to add a media library. Click Add Media Library. Set Content type to Movies. Give it a display name. Add the folder /data/movies.
The Add Media Library dialog: content type, display name, and folder.
Add a second library: content type Shows, folder /data/tv. You keep music? Add a Music library at /data/music in the same way.
Accept the other defaults (metadata language, remote access). Finish the wizard. Jellyfin scans the folders. It gets posters and descriptions.
Notice — the folders are in the shared store
/data/movies, /data/tv, and /data/music are inside the shared media store that you mounted at /data. The downloader and Radarr and Sonarr write finished files into these same folders (see Ch. 40 · Shared storage first). So titles appear in Jellyfin by themselves. A folder does not exist yet? This part has no buttons. Make it one time inside CT 124 (pct enter 124 from the host shell): mkdir -p /data/movies /data/tv /data/music.
The Jellyfin home screen: a view of your library like Netflix.
What is unique here
This CT gets more cores and RAM (4 CPU, 4096 MB). Jellyfin sometimes has extra work to do while you watch. Most of the time, the app on your TV or phone plays the file just as it is stored on the disk. This is called direct play. The server does almost nothing. The app cannot handle that file? For example, it is an old TV or an unusual video format. Then Jellyfin rebuilds the video, frame by frame, into a format that the app understands, while it plays. That is heavy work for the processor. This is why this container gets a bigger share of it.
Jellyfin needs only read access to /data, the finished library. It does not need the download side. Its metadata, artwork, and temporary video files pile up in /config on the 8 GiB root disk of the CT. That disk fills? Then playback stops, and docker logs jellyfin shows "No space left on device". You grow the disk with the mouse. Select CT 124. Open Resources. Select the Root Disk row. Click Volume Action → Resize. Type how many GiB to add (8 is plenty). The full steps, with pictures, are in Ch. 12 · After every build + common Proxmox tasks, section “Give a container more disk, CPU, or memory”. The same job from the host shell is pct resize 124 rootfs +8G.
Notice — media fills a 500 GB SSD fast
Your media itself lives in /srv/media on the 500 GB SSD. It is shared with each other media app. A modest library of movies and TV fills that quickly. Watch the free space with df -h /srv/media on the host. When it runs low, add a dedicated drive and move the store onto it. See Ch. 65 · Add an external drive. The containers keep using /data. They do not notice the move.
46.4
HOW TO USE IT: THE BASICS
After the wizard and the libraries above, Jellyfin works like a private Netflix. This is the daily routine.
Open http://192.168.1.245:8096. Sign in with the account from the wizard. The home screen shows your libraries, Continue Watching, and Next Up.
Click a library. Click a title. Click the play button. The menu for subtitles and the menu for audio tracks are in the bottom control bar of the player.
The player control bar: the menus for subtitles and audio tracks.
Stop at any time. Jellyfin keeps the position for each account. The title resumes from Continue Watching on each device, including the app on the smart TV.
Make one account for each person. Open ☰ menu → Administration → Dashboard → Users. Click +. Set a name and a password. Each account has its own watch history.
Dashboard → Users → add a new account.
You add new files to /data? Jellyfin finds them in its scheduled scan. To see them at once, go to Dashboard → Libraries and click Scan All Libraries.
Dashboard → Libraries → Scan All Libraries.
A poster or a title is wrong? Open the ⋮ (three-dot) menu of that item. Select Identify. Choose the correct match.
The ⋮ menu of the item → Identify.
Notice — only the wizard account is an administrator
New accounts are viewer accounts. They have no access to the Dashboard. This is right for a household. You can also limit which libraries each person sees. Use the Access tab of that user.
The next chapter adds the request app. Your family uses it to ask for new titles. So you never have to hand out this admin page. See Ch. 47 · Jellyseerr.
Watch on your devices — phones and tablets too, not only the TV
Jellyfin is not only for the TV. It has a free official app on almost every platform: the TV, the phone in your pocket, the tablet, and the browser that you already used. So it takes the place of a Netflix subscription on each screen that you own, not only in the living room. Install the app for your device. Choose Add Server. Enter the full address http://192.168.1.245:8096 (use http, keep the :8096). The device must be on the same 192.168.1.x LAN. To watch away from home, for example on the bus, at work, or on a plane, put Jellyfin behind remote access (see Ch. 19 · Remote access: Tailscale).
On a phone or tablet, the app can do one thing that an app on a smart TV cannot. It downloads titles for offline playback. Before a flight or a commute, open the ⋮ menu on a movie or an episode. Tap Download. It saves to the device and plays with no network. This is like saving a Netflix show for offline. This switch is in the phone app itself, not in a browser. So there is no screenshot for it here. Look for the download icon next to any title. This lets Jellyfin replace a paid streaming subscription on the go, not only at home.
Where to get the app
Device
Where to get it
Smart TV / streaming stick
Search "Jellyfin" in the app store of your TV (Android TV / Google TV, Amazon Fire TV, and others). Install it. Then Add Server with the address above.
Phone / tablet
The official Jellyfin app on the Google Play Store (Android) and the Apple App Store (iPhone and iPad). Both stream on the LAN and download titles for offline viewing. You prefer a fully native feel? Findroid (Android) and Swiftfin (iOS and iPadOS) are free community apps for the same server.
Computer
Any browser at http://192.168.1.245:8096. You install nothing.
46.5
OPTIONAL — HARDWARE TRANSCODING
A client cannot play a file directly, for example an old TV app, a phone on mobile data, or an unusual video format. Then Jellyfin transcodes it. It unpacks the video and packs it again in a format that the app can play, while you watch. The processor alone does this as heavy work. It can stutter on 4K or HEVC files. (HEVC is a newer way to pack video, and it needs more power.) A graphics chip can do the same work far more cheaply.
Notice — this depends on your hardware
Your mini-PC has an Intel processor with a built-in graphics chip? (This is an integrated GPU, or iGPU. Most Intel desktop and mini-PC processors have one.) Then that chip can do the re-encoding instead of the processor. It is faster and much cooler. The Intel name for this feature is Quick Sync, short QSV. Three things must line up:
Let CT 124 see the graphics chip. In Proxmox, select CT 124. Open Resources. Click Add → Device Passthrough. Type the device path /dev/dri. This is the name that Linux gives to the graphics chip. Click Add. Then reboot the container, so that it picks up the device. (Your Proxmox does not show that button? You can do the same job by editing the configuration file of the container by hand. The guide of Jellyfin, linked below, shows that route.)
Let the Jellyfin app inside the container see it too. Add --device /dev/dri:/dev/dri to the docker run command from the install section above. Then make the container of the app again. The exact five steps are in Ch. 12 · After every build + common Proxmox tasks, section “Change a setting on a Docker app”. Your settings and media folders are not touched.
Turn it on in Jellyfin itself: Dashboard → Playback → Transcoding. Set the hardware-acceleration choice to Intel QuickSync (QSV). Save. Then prove that it is really in use. People skip this step. A failed passthrough looks the same as a working one until the server gets very hot. Play a film that needs transcoding. Pick something in 4K, or set the quality of the player down a few steps. Leave it running. On the Dashboard, look at the active stream. It must say Transcoding with a hardware tag. It must not say plain software transcoding. It does not? Then the GPU path failed without a sign. The CPU does each transcode. The machine is then slow and hot, and nothing reports an error.
This is the most fiddly part of the chapter. The details differ from one processor to the next. So read the Intel hardware-acceleration guide of Jellyfin first. Ask for help. Do not guess. None of it is required. Jellyfin works without it.
Your mini-PC has no usable iGPU? (Many AMD or ARM mini-PCs. Or a graphics chip that the three steps above cannot reach.) Do not fight it. Prefer direct play. Keep your files in formats that most clients support (H.264 MP4 or MKV). Pick client apps that play them natively. Jellyfin then never has to transcode. Direct play uses almost no CPU.
46.6
WHEN IT GOES WRONG
The page at http://192.168.1.245:8096 does not load, or a docker command fails with 'Cannot connect to the Docker daemon'. Proxmox containers are locked down by default. This is what "unprivileged" means. Docker needs two features on the container: nesting (running containers inside a container) and keyctl. On the Proxmox HOST, check them with pct config 124 | grep features. The line must show keyctl=1,nesting=1. It does not? Run pct set 124 --features nesting=1,keyctl=1. Then run pct reboot 124. Enter again with pct enter 124. Check that the daemon is up (systemctl start docker). Run the docker run command again. Then check the container with docker ps and docker logs jellyfin --tail 50.
After the wizard, you add /data/movies, but the library stays empty, or it shows 'No items'. This is almost always a problem with permissions or with the path. Inside CT 124, run docker exec jellyfin ls -l /data/movies. It lists nothing? Then the shared store is not mounted into the CT. Check the step pct set 124 -mp0 /srv/media,mp=/data again. Check that files exist under /srv/media on the host. The files ARE listed, but Jellyfin cannot read them? Then the owner is wrong. Do not run chown on all of /data from inside the CT. It would also change folders that other apps need, for example the photos of Immich. Fix it from the host with the command in Ch. 40 · Shared storage first, section "When it goes wrong". It lists only the subfolders of the media stack. Then in Jellyfin, go to Dashboard → Libraries → Scan All Libraries.
The Jellyfin app on your smart TV says 'Unable to connect', or it never finds the server. In the TV app, choose Add Server. Type the full address with the scheme and the port: http://192.168.1.245:8096. Use http (not https). Keep the :8096. The TV and CT 124 must be on the same 192.168.1.x LAN.
A movie does not play, stops at once, or shows 'This client isn't compatible with the media and the server isn't sending a compatible media format'. The file needs live transcoding, and the CPU cannot keep up. Or the codec is not supported. Check it by playing a simple H.264 MP4. That works? Then the problem is transcoding. Enable hardware transcoding if your CPU has an Intel iGPU (the optional section above). Or keep your files in formats that most clients support. They then direct-play them.
46.7
A download step fails with Temporary failure resolving deb.debian.org, or with another "cannot resolve" message. The container has no working DNS server. It cannot change a name into an address. This is not a typing mistake. It does not fix itself. In the Proxmox page, select this container in the left tree. Open DNS. Select Edit. Type your router address in DNS servers (192.168.1.1 here; use your own). Then run pct reboot 124 in the host shell. Run the failed step again.
A command fails. You do not know if you are on the server or in the container. Read the prompt. In the container, it ends with the name of the container. On the server, it shows root@homelab. The prompt still shows root@homelab after pct enter? Then the command did not work. Type exit. Run the pct enter line again. Check the prompt before you paste anything else. You can paste a build block on the server by mistake. It seems to work. It installs without an error, and the app even answers. But the app is on the server, and it must not be there.
How to see that it happened, and how to undo it. The app does not open at the container address (192.168.1.245). It does open at the server address (192.168.1.220) on the same port. Then the app is on the host. To remove it, run docker rm -f jellyfin in the host shell. Then run pct enter 124. Check that the prompt changed. Paste the build block again. You lose nothing in the container, because nothing was built there. The first command can show Error: No such container. This is good. It means that the app was never on the host. Do not paste the build block again. Look for another cause.
The page does not open. The browser spins, or says it cannot connect. Do these checks in order, in the host shell. 1. Is the container running? Run pct status 124. It must say running. If it does not, run pct start 124. 2. Is the container at the address that you typed? Run pct config 124 | grep net0. It shows the real address. A wrong digit in the wizard puts the container at another address, and nothing warns you. 3. Does the app run in the container? Run pct enter 124. Then run docker ps. An empty list means that the app did not start. Run docker ps -a to see that it stopped. Run docker logs to see why. 4. Does the app answer in the container? Run curl -I http://localhost followed by the port of the app. You get a reply here, but nothing from your PC? Then the address or your own network is the problem. The app is fine. Your browser reaches 192.168.1.245 but not the port? Then the app is down. It reaches neither? Then the container is down.
Docker does not start, or you see Cannot connect to the Docker daemon, a keyring error, or an overlay error. This is the most common failure in these guides. It means that the two container features are off. A later pct set --features can switch them off, also when you set them before. Run this in the host shell, not in the container: pct set 124 --features nesting=1,keyctl=1. Then run pct reboot 124. Then run the failed step again. Type both settings on one line. If you send only one setting, it replaces the pair and switches the other one off.
REFERENCE CARD
Paste this in 124 → Summary → Notes. The key facts then stay with the container. Before you ever run the update line on this card, compare it with the docker run you actually used at install. The card is a snapshot of the standard build: if you added anything of your own — a device, an extra -e setting, a second folder — it is not on the card, and re-running the card's line drops it. The container comes back up looking healthy with your setting gone. The update line below still says TZ=Region/City. That is a placeholder, not a real timezone: run it unchanged and the app comes back on UTC while looking perfectly healthy, so every schedule and timestamp silently shifts. Put your own zone in before you use this card — the same one you set at install.
Notice — this line resets your timezone and your GPU
The update command makes the container again. So each flag in it is applied fresh. This includes TZ=Region/City, which is a placeholder, not a real zone. Put your own zone in before you run it. You set up hardware transcoding? Check that the line still has your --device /dev/dri. If you build it again without it, playback falls back to the CPU without a sign.
📋 Reference — paste into this container's Notes in Proxmox (not a shell command)
## Jellyfin — CT 124
dashboard http://192.168.1.245:8096 · docs https://jellyfin.org/docs/
apps: install "Jellyfin" on the TV, the phone, and the tablet (offline downloads on mobile) -> Add Server -> http://192.168.1.245:8096
media store: /srv/media on host -> /data in CT (libraries: /data/movies, /data/tv, /data/music)

```sh
# is it running?
docker ps --filter name=jellyfin
curl -fsS http://localhost:8096 >/dev/null && echo OK   # quick health check
# logs (last 50)
docker logs jellyfin --tail 50
# stop / start / restart
docker stop jellyfin
docker start jellyfin
docker restart jellyfin
# is there an update? ("Image is up to date" = no)
docker pull lscr.io/linuxserver/jellyfin
# update (settings, metadata & artwork survive in /opt/jellyfin)
docker pull lscr.io/linuxserver/jellyfin && docker rm -f jellyfin && docker run -d --name jellyfin --restart=unless-stopped -p 8096:8096 -e PUID=1000 -e PGID=1000 -e TZ=Region/City -v /opt/jellyfin:/config -v /data:/data lscr.io/linuxserver/jellyfin
```
Part E · Media & personal cloud
47Jellyseerr
Jellyseerr, now called Seerr, is a request page for your media server. It looks like Netflix. Family members search for a movie or show and click Request. Radarr and Sonarr get it. It then appears in Jellyfin.
This chapter needs the items below. You came here directly? Do them first. Each item takes a short time. Nothing on this page works without them.
Proxmox is installed and works at https://192.168.1.220:8006. You can log in as root. See Ch. 6 · Install Proxmox. At your first visit, the browser shows a certificate warning. Select Advanced. Then select Proceed. The warning is normal. Proxmox makes its own certificate.
The Debian 13 image is downloaded. You do this one time. See Ch. 10 · The container wizard. Without the image, the Template list in the wizard is empty.
You have an SSH key from your PC (Ch. 9 · SSH & the terminal). Or you type a password in the two password boxes of the wizard. The wizard needs one of the two. The Next button stays grey until you give one.
You know your own network numbers. Where this chapter shows 192.168.1.x, use your own numbers. The rule is in Ch. 3 · How to read this manual. The address of this chapter must be outside the range that your router gives out by itself (the DHCP pool, often .100–.200, but yours can differ). An address inside the pool can go to a phone later. Two devices on one address break name lookups, and the cause is hard to find.
You built Ch. 46 · Jellyfin, Ch. 43 · Radarr and Ch. 44 · Sonarr already. The steps below use those chapters: a container, an address, a key, or a job that must exist. You cannot finish this chapter without them.
Commands marked HOST run on the server. In the Proxmox page, select homelab in the left tree. Then select >_ Shell. Commands marked CT run inside the container of this chapter. The chapter shows you how to get there.
The wizard does not work?Next is grey: you gave no password and no key. Give one of the two. The Template list is empty: the Debian image is not downloaded. Download it first. Each tab is explained in Ch. 10 · The container wizard.
Jellyseerr is a request front end for your media server. It looks like the browse page of Netflix. But a click on a title orders that title. Radarr and Sonarr then download it. It appears in Jellyfin.
Notice — where these commands run
Run the shell commands inside CT 123. Do not run them on the Proxmox host (the server, 192.168.1.220) or on your PC. You open the shell of the container in one of two equal ways. In the Proxmox web page, open homelab → >_ Shell and run pct enter 123. It needs no password. Or run ssh root@192.168.1.244 from your PC, if you set up passwordless key login in Ch. 9 · SSH & the terminal. Only the pct command goes back to the host. It is marked where you use it.
47.1
CREATE THE CONTAINER
Build container 123 in the Create CT wizard.
Open https://192.168.1.220:8006.
Click homelab in the left tree.
Click the blue Create CT button at the top right.
Fill in the General tab as the reference shows.
Fill in the other tabs as the reference shows. Leave each field that is not listed at its default value.
On Confirm, leave Start after created unticked. Click Finish.
General tab for CT 123. Seerr stores no media. So this chapter has no /data mount to add.
Wizard reference — Create CT 123
Tab → Field
Entry
General → Node
Select homelab.
General → CT ID
Type 123. Do not keep the number that the wizard suggests.
General → Hostname
Type jellyseerr.
General → Unprivileged container
Keep this box ticked.
General → Nesting
Keep this box ticked. It is ticked by default. The wizard has no box for keyctl, which Docker also needs. The host command after Finish sets it. It is the first line of the next listing.
General → Password / SSH public key
Keep the password empty. Paste your public key in the SSH field: ssh-ed25519 AAAA…your-key-here you@your-pc. With the key, you can run ssh root@192.168.1.244 from your PC. The command pct enter 123 on the host needs no password.
Template → Storage, Template
Select local. Then select debian-13-standard.
Disks → Storage, Disk size
Select local-lvm. Set 6 GiB.
CPU → Cores
Set 1 core.
Memory → Memory (MiB)
Set 1024. Keep Swap at its default.
Network → IPv4
Select Static. Set IPv4/CIDR to 192.168.1.244/24. Set Gateway to 192.168.1.1. Keep IPv6 at its default.
DNS → DNS domain
Keep this field empty. Do not type 192.168.1.1 here.
DNS → DNS servers
Always type 192.168.1.1. Never keep this field empty.
Confirm
Read the summary. Keep Start after created unticked. Select Finish.
The wizard has no box for three settings: the Docker permission keyctl, the timezone, and start at boot. The first command below sets all three. Run these 3 commands on the host. They set the missing settings, start the container, and open its shell. Each part is explained in Ch. 10 · The container wizard, section "The host command every build needs".
⌨ Type this on the Proxmox host (homelab)
Before you run anything on this page: every 192.168.1.x address below is this manual's example network. If your own network uses different numbers, substitute yours as you type — the rule is in Ch. 3 · How to read this manual. A command that runs with the wrong address usually succeeds and leaves you unreachable.
pct set 123 --features nesting=1,keyctl=1 --onboot 1 --timezone host
pct start 123
pct enter 123                          # now INSIDE CT 123 — the rest of this page runs here
Notice — set your timezone
--timezone host makes the container match the Proxmox host. Without it, a new container uses UTC. Its logs and scheduled jobs are then hours away from your local time. CT 123 is a light container called an LXC. The Docker container that you start inside it is a separate, smaller container. It has its own separate clock. The clock of the LXC does not set the clock of Docker. This is why the docker run below also has -e TZ=Region/City. Where you see TZ=Region/City, replace it with your own zone name, for example America/New_York or Europe/Berlin. To see each valid name, run timedatectl list-timezones. A wrong zone only makes clocks and schedules look odd. Nothing breaks.
Prefer the terminal? — the same task with one pct create command
⌨ Type this on the Proxmox host (homelab)
TMPL=$(pveam available --section system | awk '/debian-13-standard/{print $2}' | tail -1)
pveam download local "$TMPL"          # once per host; harmless to re-run
pct create 123 local:vztmpl/"$TMPL" \
  --hostname jellyseerr --cores 1 --memory 1024 --rootfs local-lvm:6 \
  --net0 name=eth0,bridge=vmbr0,ip=192.168.1.244/24,gw=192.168.1.1 \
  --nameserver 192.168.1.1 --features nesting=1,keyctl=1 --unprivileged 1 --onboot 1 --timezone host
pct start 123
pct enter 123                      # you are now INSIDE CT 123 — everything below runs here
This part has no buttons. You type commands inside CT 123. You are already there from pct enter 123 above. (You closed that shell? Open homelab → >_ Shell and run pct enter 123 again.) Install Docker. Make the config folder with the right owner. Then start Jellyseerr in one Docker container.
Install the Docker engine.
Make /opt/jellyseerr. Give it to user 1000. This is the account that Seerr runs as. You skip this? Then Seerr cannot write its database, and the container restarts in a loop.
Start Seerr. Its config goes on a host folder that stays when you update.
⌨ Type this inside CT 123
apt update && apt install -y docker.io curl   # curl is not in a fresh CT; the Notes card uses it for the health check
mkdir -p /opt/jellyseerr && chown -R 1000:1000 /opt/jellyseerr   # Seerr runs as user 1000 and must own its config folder
docker run -d --name jellyseerr --restart=unless-stopped --init -p 5055:5055 \
  -e TZ=Region/City -v /opt/jellyseerr:/app/config ghcr.io/seerr-team/seerr:latest
Explanation of each part
The Docker install line and the flags -d, --name, --restart, -v, -p, and -e are explained in Ch. 9 · SSH & the terminal. These parts are specific to Seerr:
Makes the config folder. Gives it to user 1000. This is the account that Seerr runs as inside the container. You skip this step? Then Seerr cannot write its database, and the container restarts in a loop.
--init
Runs a small init process inside the container. Seerr then shuts down cleanly and leaves no "zombie" processes.
-p 5055:5055
Opens the web page of Jellyseerr on port 5055.
-v /opt/jellyseerr:/app/config
Keeps the settings and the database of Jellyseerr on the host at /opt/jellyseerr. They stay even if the container is deleted and made again.
ghcr.io/seerr-team/seerr:latest
The image to run: Seerr. It is the continuation of Jellyseerr that is still maintained. In February 2026, the teams of Jellyseerr and Overseerr merged. They renamed the project Seerr. The old image fallenbagel/jellyseerr gets no more updates. Seerr is a tool to manage requests. Users ask in it for movies or shows to be added to your media server. ":latest" means the newest published version. It comes from the GitHub container registry (ghcr.io).
47.3
FIRST RUN — SIGN IN AND CONNECT
Do the one-time connections first: Jellyfin, then Radarr and Sonarr. After that, the daily use is search and request. Open http://192.168.1.244:5055. Use the IP of the CT, not the host 192.168.1.220. The page shows Seerr. The app was renamed from Jellyseerr to Seerr. It is the same tool. The setup wizard starts when you first open it.
Select Jellyfin as the sign-in method. Enter your Jellyfin address. It is the same IP and port that you use to watch (see Ch. 46 · Jellyfin). Enter your Jellyfin user name and password. That account becomes the Seerr admin.
The setup wizard, the step to sign in with Jellyfin.
Enable your Movie and TV libraries. Let the app scan them. Seerr then knows which titles you already have.
The setup wizard, the step to select libraries.
Go to Settings → Services. Click Add Radarr Server. Enter the LAN IP of the Radarr container as the host name. Do not use localhost. It would point back at the own container of Seerr, not at that of Radarr. (See Ch. 43 · Radarr for that IP and where it is set.) Enter the port 7878 and the API key from Settings → General of Radarr. Select a Quality Profile and a Root Folder. Tick Default Server.
Settings → Services, the Add Radarr Server dialog.
Do the same with Add Sonarr Server and the port 8989.
Settings → Services, the Add Sonarr Server dialog.
To request a title, type its name in the search bar at the top. Or use the Discover page. Open the title. Click Request. Requests from an admin are approved by themselves. They go straight to Radarr or Sonarr.
The page of a title with the Request button.
Friends sign in on the same page with their own Jellyfin accounts. The Users page in the sidebar has an import button for your Jellyfin accounts. Requests from friends wait in Requests. There you click Approve or Decline for each one.
The Users page, with the button to import Jellyfin accounts.The Requests page, Approve and Decline on a pending request.
You, and each friend that you invite, now request titles here. The requests flow through the stack.
Notice — no downloads start?
The usual cause is a missing tick for Default Server, a missing Quality Profile, or a missing Root Folder on the Radarr or Sonarr entry. Seerr forwards approved requests only when all three are set. See the list of fixes below.
47.4
WHAT IS UNIQUE HERE
Jellyseerr does not mount /data. It never touches the media files. It only takes requests and hands them to Radarr and Sonarr. So its only volume is its own config folder.
Notice — Seerr skips the shared media mount
Most apps of Part E share the same real folder on the host. In the container, it is called /data. (That host folder, /srv/media, is made one time. See Ch. 40 · Shared storage first.) Seerr is the exception. It stores no media. So its Create CT step has no -mp0 /srv/media,mp=/data line. It needs no bulk storage. When you add a real drive in Part G (see Ch. 65 · Add an external drive) and move /srv/media onto it, Seerr is not affected.
47.5
WHEN IT GOES WRONG
The container does not stay up. docker ps shows jellyseerr that restarts again and again. docker logs jellyseerr says that it cannot open or write its database (permission denied). Docker made /opt/jellyseerr with root as the owner. But Seerr runs as user 1000. Give the config folder to user 1000. Then restart the container: chown -R 1000:1000 /opt/jellyseerr && docker restart jellyseerr. Check that it recovered with docker logs jellyseerr --tail 50.
In the Settings of Seerr, the 'Test' button for Radarr or Sonarr fails or times out, although Radarr and Sonarr work fine on their own. Usually you typed 'localhost' or '127.0.0.1' as the host name. Radarr and Sonarr run in their own containers, not inside Seerr. So 'localhost' points to the wrong place. Use the LAN IP of the other container with its port (Radarr 7878, Sonarr 8989) and the API key of that app. You find it under Settings → General in each.
You approve a request in Seerr, but nothing ever shows up in Radarr or Sonarr. The download never starts. The request stays in the queue. Open Settings → Services. Edit the Radarr server and the Sonarr server. Set a Default Quality Profile and a Default Root Folder. Tick it as the Default Server. Click Save. Seerr forwards requests only after you set a default server, a quality profile, and a root folder.
Right after docker run, you open http://192.168.1.244:5055, and it shows a blank page, 'connection refused', or a 502 for the first half minute. The first start sets up the database. It takes about 20–30 seconds. Watch the progress with docker logs -f jellyseerr. Wait until it reports that it listens on port 5055. Then reload the page.
47.6
A download step fails with Temporary failure resolving deb.debian.org, or with another "cannot resolve" message. The container has no working DNS server. It cannot change a name into an address. This is not a typing mistake. It does not fix itself. In the Proxmox page, select this container in the left tree. Open DNS. Select Edit. Type your router address in DNS servers (192.168.1.1 here; use your own). Then run pct reboot 123 in the host shell. Run the failed step again.
A command fails. You do not know if you are on the server or in the container. Read the prompt. In the container, it ends with the name of the container. On the server, it shows root@homelab. The prompt still shows root@homelab after pct enter? Then the command did not work. Type exit. Run the pct enter line again. Check the prompt before you paste anything else. You can paste a build block on the server by mistake. It seems to work. It installs without an error, and the app even answers. But the app is on the server, and it must not be there.
How to see that it happened, and how to undo it. The app does not open at the container address (192.168.1.244). It does open at the server address (192.168.1.220) on the same port. Then the app is on the host. To remove it, run docker rm -f jellyseerr in the host shell. Then run pct enter 123. Check that the prompt changed. Paste the build block again. You lose nothing in the container, because nothing was built there. The first command can show Error: No such container. This is good. It means that the app was never on the host. Do not paste the build block again. Look for another cause.
The page does not open. The browser spins, or says it cannot connect. Do these checks in order, in the host shell. 1. Is the container running? Run pct status 123. It must say running. If it does not, run pct start 123. 2. Is the container at the address that you typed? Run pct config 123 | grep net0. It shows the real address. A wrong digit in the wizard puts the container at another address, and nothing warns you. 3. Does the app run in the container? Run pct enter 123. Then run docker ps. An empty list means that the app did not start. Run docker ps -a to see that it stopped. Run docker logs to see why. 4. Does the app answer in the container? Run curl -I http://localhost followed by the port of the app. You get a reply here, but nothing from your PC? Then the address or your own network is the problem. The app is fine. Your browser reaches 192.168.1.244 but not the port? Then the app is down. It reaches neither? Then the container is down.
Docker does not start, or you see Cannot connect to the Docker daemon, a keyring error, or an overlay error. This is the most common failure in these guides. It means that the two container features are off. A later pct set --features can switch them off, also when you set them before. Run this in the host shell, not in the container: pct set 123 --features nesting=1,keyctl=1. Then run pct reboot 123. Then run the failed step again. Type both settings on one line. If you send only one setting, it replaces the pair and switches the other one off.
END-TO-END PIPELINE CHECKPOINT
This is the payoff. Each container in Part E exists to serve one motion: a title that someone wants arrives in Jellyfin, and you touch no terminal. The containers are the indexers, the downloader, Radarr and Sonarr, the shared store, and Jellyfin. Trace it one time, from end to end, with a real request. Pick a title that is free to download legally. Night of the Living Dead (1968) is a good test. It entered the public domain on its release. It is widely and legally available. Watch it travel each hop. This proves that the whole stack is wired correctly. It also teaches you where to look on the day a request stalls.
Request it in Seerr. On http://192.168.1.244:5055, search Night of the Living Dead. Open the 1968 result. Click Request. You are the admin. So your own request is approved at once.
It stalls here? The request never leaves "Pending". A request from a friend needs your Approve in Requests. Seerr forwards nothing at all until the Radarr or Sonarr entry has a Default Server, a Quality Profile, and a Root Folder. See When it goes wrong above.
Watch it land in the Radarr queue. Seerr hands the movie to Radarr. Radarr adds it as Wanted and starts to search. Open Radarr at http://192.168.1.241:7878. Look at Movies and Activity → Queue. See Ch. 43 · Radarr. A TV request goes to Sonarr in the same way. See Ch. 44 · Sonarr.
It stalls here? The movie is added, but it never finds a release. Radarr has no working indexer. Check that Prowlarr syncs indexers into Radarr (see Ch. 41 · Prowlarr). Read the error on Activity → Queue and System → Events in Radarr.
See qBittorrent pick up the download. Radarr sends the chosen release to qBittorrent. It downloads it into /data/torrents. Open qBittorrent at http://192.168.1.240:8080. The transfer appears in the list and fills up. See Ch. 42 · qBittorrent.
It stalls here? Nothing appears in qBittorrent. The download-client link of Radarr is wrong. Check the host of qBittorrent, port 8080, and the login in Settings → Download Clients of Radarr. A transfer that is stuck at 0% with no seeds has no source. Let Radarr try another release. Or pick a different public-domain title.
Check that the hardlink lands in /data/movies. The download is done. Radarr imports it. A hardlink is a second name that points at the exact same data that is already on the disk. It is not a copy. So it uses no extra space. Radarr hardlinks the file from /data/torrents into /data/movies, with a clean new name. The torrent keeps seeding from that same data on the disk. There is no second copy. From the host, run ls -l /srv/media/movies. The new folder is there. Or open the folder in WinSCP, Files, or another SFTP file browser and look for it (see Ch. 12 · After every build + common Proxmox tasks, section "Move a file to or from the server"). This one shared store is why the import is instant and costs no extra space. See Ch. 40 · Shared storage first.
It stalls here? The download is done, but it never imports. Or the disk fills twice as fast, because the file was copied. The download folder and the library are not on the one shared /data mount, or the ownership is wrong. Fix the mount and the ownership 101000:101000 on Ch. 40 · Shared storage first.
Play it in Jellyfin. Jellyfin finds the new file in its next library scan. Or force it with Dashboard → Libraries → Scan All Libraries. It gets the poster and shows the movie on the home screen. Press play on any device. See Ch. 46 · Jellyfin. The request that you made in step 1 is now a movie that the whole household can watch. That is the whole pipeline at work.
It stalls here? The file is in /data/movies, but Jellyfin does not show it. Run Dashboard → Libraries → Scan All Libraries. It still cannot read the file? Then fix the ownership with the command in Ch. 40 · Shared storage first, section "When it goes wrong". Also check that Jellyfin runs as PUID and PGID 1000. See Ch. 46 · Jellyfin.
Notice — the whole stack in one sentence
Seerr takes the request → Radarr or Sonarr finds a release → qBittorrent downloads it → the finished file hardlinks into your shared library → Jellyfin plays it. Each app does one job. It hands off to the next. So when something breaks, you know which hop to open first.
47.7
REFERENCE CARD
Paste this in 123 → Summary → Notes. The key facts then stay with the container. Before you ever run the update line on this card, compare it with the docker run you actually used at install. The card is a snapshot of the standard build: if you added anything of your own — a device, an extra -e setting, a second folder — it is not on the card, and re-running the card's line drops it. The container comes back up looking healthy with your setting gone. The update line below still says TZ=Region/City. That is a placeholder, not a real timezone: run it unchanged and the app comes back on UTC while looking perfectly healthy, so every schedule and timestamp silently shifts. Put your own zone in before you use this card — the same one you set at install.
📋 Reference — paste into this container's Notes in Proxmox (not a shell command)
## Jellyseerr (Seerr) — CT 123
dashboard http://192.168.1.244:5055 · docs https://docs.seerr.dev/

```sh
# is it running?
docker ps --filter name=jellyseerr
curl -fsS http://localhost:5055 >/dev/null && echo OK   # quick health check
# logs (last 50)
docker logs jellyseerr --tail 50
# stop / start / restart
docker stop jellyseerr
docker start jellyseerr
docker restart jellyseerr
# is there an update? ("Image is up to date" = no)
docker pull ghcr.io/seerr-team/seerr:latest
# update (settings survive in /opt/jellyseerr)
docker pull ghcr.io/seerr-team/seerr:latest && docker rm -f jellyseerr && docker run -d --name jellyseerr --restart=unless-stopped --init -p 5055:5055 -e TZ=Region/City -v /opt/jellyseerr:/app/config ghcr.io/seerr-team/seerr:latest
```
Part E · Media & personal cloud
48Lidarr
Lidarr is the *arr for music albums. You name an artist one time. It looks for their albums. It hands each download to qBittorrent. It then files the finished album into the shared music library that Funkwhale plays.
This chapter needs the items below. You came here directly? Do them first. Each item takes a short time. Nothing on this page works without them.
Proxmox is installed and works at https://192.168.1.220:8006. You can log in as root. See Ch. 6 · Install Proxmox. At your first visit, the browser shows a certificate warning. Select Advanced. Then select Proceed. The warning is normal. Proxmox makes its own certificate.
The Debian 13 image is downloaded. You do this one time. See Ch. 10 · The container wizard. Without the image, the Template list in the wizard is empty.
You have an SSH key from your PC (Ch. 9 · SSH & the terminal). Or you type a password in the two password boxes of the wizard. The wizard needs one of the two. The Next button stays grey until you give one.
You know your own network numbers. Where this chapter shows 192.168.1.x, use your own numbers. The rule is in Ch. 3 · How to read this manual. The address of this chapter must be outside the range that your router gives out by itself (the DHCP pool, often .100–.200, but yours can differ). An address inside the pool can go to a phone later. Two devices on one address break name lookups, and the cause is hard to find.
The shared media folder exists. It is /srv/media. You make it one time in Ch. 40 · Shared storage first. This chapter keeps its data there, not on the small SSD. Build that chapter first. Without the folder, the data goes to the small system SSD. The mount exists to prevent this.
You built Ch. 41 · Prowlarr and Ch. 42 · qBittorrent already. The steps below use those chapters: a container, an address, a key, or a job that must exist. You cannot finish this chapter without them.
Commands marked HOST run on the server. In the Proxmox page, select homelab in the left tree. Then select >_ Shell. Commands marked CT run inside the container of this chapter. The chapter shows you how to get there.
The wizard does not work?Next is grey: you gave no password and no key. Give one of the two. The Template list is empty: the Debian image is not downloaded. Download it first. Each tab is explained in Ch. 10 · The container wizard.
Lidarr has the same shape as Radarr and Sonarr, but for music albums. Ch. 41 · Prowlarr gives it the list of indexers. These are the torrent search sites that it looks in. Ch. 42 · qBittorrent does the downloading. Lidarr then files the finished music into the shared library. Lidarr gets the music. Ch. 54 · Funkwhalestreams it. Point both apps at the same folder.
Notice — shared storage comes first
Lidarr, qBittorrent, Prowlarr, and Funkwhale all read and write the same media folder at the same path, /data. That path is the host folder /srv/media, bind-mounted into each media container. Set that up one time in Ch. 40 · Shared storage first before this chapter. This guide assumes that it exists. A container has no mount? Then its downloads and its library land on different filesystems. Each album is then copied. It is stored two times. It uses double the space, and it takes as long as the copy needs. It is not hardlinked. A hardlink is a second name for one file. The download and the library entry point at the same bytes on the disk. So to keep both is instant and costs no extra space.
48.1
CREATE THE CONTAINER
Do this task with the mouse in the Proxmox web page. You type nothing. You prefer the command line? The box below does the same task with one pct create command.
Open https://192.168.1.220:8006.
Click homelab in the left tree.
Click the blue Create CT button at the top right.
Fill in each tab as the reference shows. Leave each field that is not listed at its default value.
Keep Start after created unticked. Click Finish.
The General tab of the Create CT wizard, filled in for container 131.
Wizard reference — Create CT 131
Tab → Field
Entry
General → Node
Select homelab.
General → CT ID
Type 131. Do not keep the number that the wizard suggests.
General → Hostname
Type lidarr.
General → Unprivileged container
Keep this box ticked.
General → Nesting
Keep this box ticked. It is ticked by default. The wizard has no box for keyctl, which Docker also needs. The host command after Finish sets it. It is the first line of the next listing.
General → Password / SSH public key
Keep the password empty. Paste your public key in the SSH field: ssh-ed25519 AAAA…your-key-here you@your-pc. With the key, you can run ssh root@192.168.1.252 from your PC. The command pct enter 131 on the host needs no password.
Template → Storage, Template
Select local. Then select debian-13-standard.
Disks → Storage, Disk size
Select local-lvm. Set 6 GiB.
CPU → Cores
Set 1 core.
Memory → Memory (MiB)
Set 1024. Keep Swap at its default.
Network → IPv4
Select Static. Set IPv4/CIDR to 192.168.1.252/24. Set Gateway to 192.168.1.1. Keep IPv6 at its default.
DNS → DNS domain
Keep this field empty. Do not type 192.168.1.1 here.
DNS → DNS servers
Always type 192.168.1.1. Never keep this field empty.
Confirm
Read the summary. Keep Start after created unticked. Select Finish.
The wizard has no box for three settings: the Docker permission keyctl, the timezone, and start at boot. The first command below sets all three. Run these 4 commands on the host. They set the missing settings, start the container, and open its shell. Each part is explained in Ch. 10 · The container wizard, section "The host command every build needs".
⌨ Type this on the Proxmox host (homelab)
Before you run anything on this page: every 192.168.1.x address below is this manual's example network. If your own network uses different numbers, substitute yours as you type — the rule is in Ch. 3 · How to read this manual. A command that runs with the wrong address usually succeeds and leaves you unreachable.
pct set 131 --features nesting=1,keyctl=1 --onboot 1 --timezone host
pct set 131 -mp0 /srv/media,mp=/data   # bind the shared media folder in as /data
pct start 131
pct enter 131                          # now INSIDE CT 131 — the rest of this page runs here
Notice — the shared media folder
The option -mp0 /srv/media,mp=/data bind-mounts the shared media tree of the host into this container at /data. So Lidarr, qBittorrent, and Funkwhale all see the same files at the same path. A finished download can be hardlinked into the library, as the first notice in this chapter explains. It is not copied. You make the folder /srv/media one time in Ch. 40 · Shared storage first. Set that up first. When you add a real drive later (Ch. 65 · Add an external drive), you move /srv/media onto it. The containers do not notice.
Notice — set your timezone
--timezone host makes the container match the Proxmox host. Without it, a new container uses UTC. Its logs and scheduled jobs are then hours away from your local time. The Docker container inside the LXC keeps its own timezone. This is why you also pass -e TZ=Region/City to docker run below. Replace Region/City with your own zone name, for example America/New_York or Europe/Berlin. To list the valid names, run timedatectl list-timezones on the host. A wrong zone only makes clocks and schedules look odd. Nothing breaks.
Prefer the terminal? — the same task with one pct create command
⌨ Type this on the Proxmox host (homelab)
TMPL=$(pveam available --section system | awk '/debian-13-standard/{print $2}' | tail -1)
pveam download local "$TMPL"          # once per host; harmless to re-run
pct create 131 local:vztmpl/"$TMPL" \
  --hostname lidarr --cores 1 --memory 1024 --rootfs local-lvm:6 \
  --net0 name=eth0,bridge=vmbr0,ip=192.168.1.252/24,gw=192.168.1.1 \
  --nameserver 192.168.1.1 --features nesting=1,keyctl=1 --unprivileged 1 --onboot 1 --timezone host \
  -mp0 /srv/media,mp=/data
pct start 131
pct enter 131                      # you are now INSIDE CT 131 — everything below runs here
Shows the host folder /srv/media inside the container at /data. The container reads and writes the shared data in place.
48.2
INSTALL LIDARR
These commands run inside CT 131. In the host Shell (homelab → >_ Shell), run pct enter 131. You are still inside from the section before? Then continue. There are two ways to open that same shell. Run pct enter 131 on the host. It needs no password. It is the simpler path. Or, if you made the SSH key in Ch. 9 · SSH & the terminal, run ssh root@192.168.1.252 from your PC. (The >_ Console button of the container shows a login: prompt. The containers of this manual cannot answer it. Skip it.) All commands below run inside CT 131. They do not run on the host or on your PC.
The Docker install line and the flags -d, --name, --restart, -v, -p, and -e are explained in Ch. 9 · SSH & the terminal. The shared flags PUID, PGID, TZ, /config, and /data are explained in Ch. 41 · Prowlarr. These parts are specific to Lidarr:
-p 8686:8686
Opens the web page of Lidarr on port 8686.
-v /opt/lidarr:/config
Stores the settings and the database of Lidarr on the host at /opt/lidarr. They stay when it restarts and when you update.
-v /data:/data
Gives Lidarr access to the shared /data folder. It holds music and downloads. This is the bind-mount that you set on the container in the section before.
lscr.io/linuxserver/lidarr
The image to run: the Lidarr of LinuxServer.io. It is a manager of music collections. It finds and downloads albums and tracks by itself.
48.3
SET UP LIDARR
This is the one-time setup. Do it one time, in order.
Open http://192.168.1.252:8686 and set up a login. Lidarr forces you to pick this when you first load the page. Later you can go to Settings → General → Security. Set Authentication to Forms (Login Page). Choose a user name and a password.
Settings → General → Security — set a user name and a password.
Go to Settings → Media Management. Click Add Root Folder. Select /data/music.
Media Management — root folder set to /data/music.
Add qBittorrent as the download client at Settings → Download Clients → +. You need the IP address, the WebUI port, and the login of qBittorrent from Ch. 42 · qBittorrent. (The host is 192.168.1.240, the port is 8080.)
Add qBittorrent as a download client.Click Test. Wait for green before you save. A wrong address, port, or password saves with no complaint. Then it fails without a sign. Searches run, nothing is ever handed to qBittorrent, and no page reports it. Green here is the only proof that this dialog gives.
In Ch. 41 · Prowlarr, at Settings → Apps, add Lidarr. Enter the address of Lidarr http://192.168.1.252:8686 and its API key. The API key is a long code that Lidarr makes for itself. Another app can then talk to it without your login password. Copy that code from the own page Settings → General of Lidarr. It is not the user name and the password that you set in step 1. Paste it into Prowlarr. Indexers then sync to Lidarr.
Notice — the Funkwhale pairing
Lidarr saves files to /data/music (host path /srv/media/music). Point the music folder of Ch. 54 · Funkwhale at that same host path. Anything that Lidarr gets becomes streamable at once, with no copying. Funkwhale is not only a browser player. It has phone apps for Android and iOS. They stream your library over the internet. They download albums for offline listening. So the music that Lidarr collects replaces a Spotify or Apple Music subscription on each device that you own, not only at your desk.
Notice — music fills a 500 GB SSD fast
Until you add a real drive, /srv/media lives on the same 500 GB SSD as everything else. A full discography in FLAC is tens of gigabytes for each artist. So a music library grows quickly. Watch the free space in Beszel. When the SSD gets tight, add a drive in Ch. 65 · Add an external drive and move /srv/media onto it. The containers keep using /data. They do not notice the change.
48.4
HOW TO USE IT
The setup above was a one-time job. In daily use, you add an artist, and Lidarr gets the albums.
Open http://192.168.1.252:8686. Go to Library → Add New.
Type the name of the artist. Click the correct result.
On the add panel, set Root Folder to /data/music. Set Monitor to All Albums for the full discography. Keep the default quality profile and metadata profile. Tick Start Search for Missing Albums. Click Add.
Add an artist, with root folder, Monitor All Albums, and Start Search set.
Lidarr then does the work. It sends a search to the Prowlarr indexers. qBittorrent downloads the albums. Lidarr moves the finished albums into /data/music. Funkwhale streams them from the same folder.
To get only one album: add the artist with Monitor set to None. Open the page of the artist. Click the monitor icon (a bookmark) next to the album that you want. Then click the magnifying-glass icon on the same row to search.
Open Activity → Queue to see active downloads. Open Wanted → Missing to see monitored albums that Lidarr has not found yet.
The Activity Queue and the page Wanted → Missing.
48.5
WHEN IT GOES WRONG
Downloads finish in qBittorrent, but Lidarr never imports them. The tracks stay in the download folder, and the album still shows as missing. This is almost always a mismatch of path or permissions. Check that both Lidarr and qBittorrent mount the same shared folder as /data. Check that both run with PUID/PGID 1000. Lidarr then sees the finished file at the same path and can hardlink it. The paths really differ? Then the real fix is to give both containers the same /data mount from Ch. 40 · Shared storage first. A translation is the stopgap. In Lidarr, open Settings → Download Clients → Remote Path Mappings. Click +. Fill in three fields. Host is the address of qBittorrent, 192.168.1.240. Remote Path is the folder that qBittorrent reports (its save path, /data/torrents/ in this manual). Local Path is the same folder as Lidarr sees it. But it is only a translation. Two different real folders still cannot be hardlinked. So files get copied.
A search for an artist returns nothing, or you see errors such as "Unable to communicate with MusicBrainz", or metadata timeouts. Lidarr looks up all data of artists and albums through its own metadata server, api.lidarr.audio. This server is often overloaded. It returns timeouts or 5xx errors. This is an outage on the side of the server. It is not a problem with your setup. Wait a while. Then try again. Confirm the cause with docker logs lidarr --tail 50. You see errors about metadata or timeouts.
"Permission denied" errors appear, or Lidarr cannot make or move files into /data/music. The music folder belongs to a different user than the one that Lidarr runs as. That user is the number 1000 for both user and group. PUID and PGID set it in the docker run line. Open a shell inside CT 131 (homelab → >_ Shell, then pct enter 131). Run chown -R 1000:1000 /data/music. chown changes who owns a file. 1000:1000 is the user and group that Lidarr runs as. -R means "and everything inside that folder too". This one really needs the shell. An SFTP file manager such as WinSCP can copy files and make folders (Ch. 12 · After every build + common Proxmox tasks, section “Move a file to or from the server”). But it cannot give ownership to a specific numeric user ID. Then check that PUID=1000 and PGID=1000 are set in the docker run command.
The docker run command fails with an error that mentions cgroup or overlay, or says "permission denied" or "operation not permitted". Or the Docker service never starts inside CT 131. The container may miss a feature that Docker needs: nesting, which lets this container run containers of its own, or keyctl, a permission for security keys. On the host (192.168.1.220), check them with pct config 131 | grep features. The line must show keyctl=1,nesting=1. It does not? Run pct set 131 --features nesting=1,keyctl=1. This single command turns both on. Then run pct reboot 131. Then run the docker commands again inside CT 131.
48.6
A download step fails with Temporary failure resolving deb.debian.org, or with another "cannot resolve" message. The container has no working DNS server. It cannot change a name into an address. This is not a typing mistake. It does not fix itself. In the Proxmox page, select this container in the left tree. Open DNS. Select Edit. Type your router address in DNS servers (192.168.1.1 here; use your own). Then run pct reboot 131 in the host shell. Run the failed step again.
A command fails. You do not know if you are on the server or in the container. Read the prompt. In the container, it ends with the name of the container. On the server, it shows root@homelab. The prompt still shows root@homelab after pct enter? Then the command did not work. Type exit. Run the pct enter line again. Check the prompt before you paste anything else. You can paste a build block on the server by mistake. It seems to work. It installs without an error, and the app even answers. But the app is on the server, and it must not be there.
How to see that it happened, and how to undo it. The app does not open at the container address (192.168.1.252). It does open at the server address (192.168.1.220) on the same port. Then the app is on the host. To remove it, run docker rm -f lidarr in the host shell. Then run pct enter 131. Check that the prompt changed. Paste the build block again. You lose nothing in the container, because nothing was built there. The first command can show Error: No such container. This is good. It means that the app was never on the host. Do not paste the build block again. Look for another cause.
The page does not open. The browser spins, or says it cannot connect. Do these checks in order, in the host shell. 1. Is the container running? Run pct status 131. It must say running. If it does not, run pct start 131. 2. Is the container at the address that you typed? Run pct config 131 | grep net0. It shows the real address. A wrong digit in the wizard puts the container at another address, and nothing warns you. 3. Does the app run in the container? Run pct enter 131. Then run docker ps. An empty list means that the app did not start. Run docker ps -a to see that it stopped. Run docker logs to see why. 4. Does the app answer in the container? Run curl -I http://localhost followed by the port of the app. You get a reply here, but nothing from your PC? Then the address or your own network is the problem. The app is fine. Your browser reaches 192.168.1.252 but not the port? Then the app is down. It reaches neither? Then the container is down.
Docker does not start, or you see Cannot connect to the Docker daemon, a keyring error, or an overlay error. This is the most common failure in these guides. It means that the two container features are off. A later pct set --features can switch them off, also when you set them before. Run this in the host shell, not in the container: pct set 131 --features nesting=1,keyctl=1. Then run pct reboot 131. Then run the failed step again. Type both settings on one line. If you send only one setting, it replaces the pair and switches the other one off.
REFERENCE CARD
Paste this in 131 → Summary → Notes. The key facts then stay with the container. Before you ever run the update line on this card, compare it with the docker run you actually used at install. The card is a snapshot of the standard build: if you added anything of your own — a device, an extra -e setting, a second folder — it is not on the card, and re-running the card's line drops it. The container comes back up looking healthy with your setting gone. The update line below still says TZ=Region/City. That is a placeholder, not a real timezone: run it unchanged and the app comes back on UTC while looking perfectly healthy, so every schedule and timestamp silently shifts. Put your own zone in before you use this card — the same one you set at install.
Notice — this line resets your timezone
The update command below makes the container again from scratch. So each -e value in it is applied fresh. This includes TZ=Region/City, which is a placeholder, not a real zone. Put your own zone in (for example Europe/Paris) before you run it. If not, the app comes back on UTC, and each schedule shifts without a sign.
📋 Reference — paste into this container's Notes in Proxmox (not a shell command)
## Lidarr — CT 131
dashboard http://192.168.1.252:8686 · docs https://docs.linuxserver.io/images/docker-lidarr/
music -> /data/music (Funkwhale reads the same host path)

```sh
# is it running?
docker ps --filter name=lidarr
curl -fsS http://localhost:8686 >/dev/null && echo OK   # quick health check
# logs (last 50)
docker logs lidarr --tail 50
# stop / start / restart
docker stop lidarr
docker start lidarr
docker restart lidarr
# is there an update? ("Image is up to date" = no)
docker pull lscr.io/linuxserver/lidarr
# update (settings survive in /opt/lidarr)
docker pull lscr.io/linuxserver/lidarr && docker rm -f lidarr && docker run -d --name lidarr --restart=unless-stopped -p 8686:8686 -e PUID=1000 -e PGID=1000 -e TZ=Region/City -v /opt/lidarr:/config -v /data:/data lscr.io/linuxserver/lidarr
```
Part E · Media & personal cloud
49Kavita
One reader for both your e-books and your manga. Read in the browser. Then continue on the phone app. Your progress syncs. You do not need a separate e-reader. This is where you read the manga that Ch. 50 · Suwayomi downloads.
This chapter needs the items below. You came here directly? Do them first. Each item takes a short time. Nothing on this page works without them.
Proxmox is installed and works at https://192.168.1.220:8006. You can log in as root. See Ch. 6 · Install Proxmox. At your first visit, the browser shows a certificate warning. Select Advanced. Then select Proceed. The warning is normal. Proxmox makes its own certificate.
The Debian 13 image is downloaded. You do this one time. See Ch. 10 · The container wizard. Without the image, the Template list in the wizard is empty.
You have an SSH key from your PC (Ch. 9 · SSH & the terminal). Or you type a password in the two password boxes of the wizard. The wizard needs one of the two. The Next button stays grey until you give one.
You know your own network numbers. Where this chapter shows 192.168.1.x, use your own numbers. The rule is in Ch. 3 · How to read this manual. The address of this chapter must be outside the range that your router gives out by itself (the DHCP pool, often .100–.200, but yours can differ). An address inside the pool can go to a phone later. Two devices on one address break name lookups, and the cause is hard to find.
The shared media folder exists. It is /srv/media. You make it one time in Ch. 40 · Shared storage first. This chapter keeps its data there, not on the small SSD. Build that chapter first. Without the folder, the data goes to the small system SSD. The mount exists to prevent this.
Commands marked HOST run on the server. In the Proxmox page, select homelab in the left tree. Then select >_ Shell. Commands marked CT run inside the container of this chapter. The chapter shows you how to get there.
The wizard does not work?Next is grey: you gave no password and no key. Give one of the two. The Template list is empty: the Debian image is not downloaded. Download it first. Each tab is explained in Ch. 10 · The container wizard.
49.1
CREATE THE CONTAINER
You do this task with the mouse in the Proxmox web page. You type nothing. You prefer the command line? The box below does the same task with one pct create command.
Open https://192.168.1.220:8006.
Click homelab in the left tree.
Click the blue Create CT button at the top right.
Fill in the tabs as the reference table shows.
Click Finish. The commands after the table finish the job on the host.
General tab, CT 115: node, CT ID, hostname, and the other wizard fields as the table lists them.
Wizard reference — Create CT 115
Tab → Field
Entry
General → Node
Select homelab.
General → CT ID
Type 115. Do not keep the number that the wizard suggests.
General → Hostname
Type kavita.
General → Unprivileged container
Keep this box ticked.
General → Nesting
Keep this box ticked. It is ticked by default. The wizard has no box for keyctl, which Docker also needs. The host command after Finish sets it. It is the first line of the next listing.
General → Password / SSH public key
Keep the password empty. Paste your public key in the SSH field: ssh-ed25519 AAAA…your-key-here you@your-pc. With the key, you can run ssh root@192.168.1.236 from your PC. The command pct enter 115 on the host needs no password.
Template → Storage, Template
Select local. Then select debian-13-standard.
Disks → Storage, Disk size
Select local-lvm. Set 20 GiB.
CPU → Cores
Set 1 core.
Memory → Memory (MiB)
Set 1024. Keep Swap at its default.
Network → IPv4
Select Static. Set IPv4/CIDR to 192.168.1.236/24. Set Gateway to 192.168.1.1. Keep IPv6 at its default.
DNS → DNS domain
Keep this field empty. Do not type 192.168.1.1 here.
DNS → DNS servers
Always type 192.168.1.1. Never keep this field empty.
Confirm
Read the summary. Keep Start after created unticked. Select Finish.
The wizard has no box for three settings: the Docker permission keyctl, the timezone, and start at boot. The first command below sets all three. Run these 4 commands on the host. They set the missing settings, start the container, and open its shell. Each part is explained in Ch. 10 · The container wizard, section "The host command every build needs".
⌨ Type this on the Proxmox host (homelab)
Before you run anything on this page: every 192.168.1.x address below is this manual's example network. If your own network uses different numbers, substitute yours as you type — the rule is in Ch. 3 · How to read this manual. A command that runs with the wrong address usually succeeds and leaves you unreachable.
pct set 115 --features nesting=1,keyctl=1 --onboot 1 --timezone host
pct set 115 -mp0 /srv/media,mp=/data   # bind the shared media folder in as /data
pct start 115
pct enter 115                          # now INSIDE CT 115 — the rest of this page runs here
Prefer the terminal? — the same task with one pct create command
⌨ Type this on the Proxmox host (homelab)
TMPL=$(pveam available --section system | awk '/debian-13-standard/{print $2}' | tail -1)
pveam download local "$TMPL"          # once per host; harmless to re-run
pct create 115 local:vztmpl/"$TMPL" \
  --hostname kavita --cores 1 --memory 1024 --rootfs local-lvm:20 \
  --net0 name=eth0,bridge=vmbr0,ip=192.168.1.236/24,gw=192.168.1.1 \
  --nameserver 192.168.1.1 --features nesting=1,keyctl=1 --unprivileged 1 --onboot 1 --timezone host \
  -mp0 /srv/media,mp=/data
pct start 115
pct enter 115                      # you are now INSIDE CT 115 — everything below runs here
Shows the host folder /srv/media inside the container at /data. The container reads and writes the shared data in place.
Notice — each command below runs IN CT 115
After the container exists, you type the rest of this page in the shell of the container. You open that shell in one of two ways. Run pct enter 115 on the host (first homelab → >_ Shell). Or run ssh root@192.168.1.236 from your PC, if you set up SSH login in Ch. 9 · SSH & the terminal. (The >_ Console button of the container shows a login: prompt. The containers of this manual cannot answer it. Skip it.) Most of the commands below are typed inside CT 115. But one step later switches back to the Proxmox host, to set up the shared folder, before you go back in. Each command block has a label at the top: Type this on the Proxmox host or Type this inside CT 115. Check that label before you type.
49.2
SET UP THE SHARED FOLDER
Suwayomi downloads manga. Kavita reads the same files. They are separate containers. So they share one folder from the Proxmox host that is bound into both. You make the shared media folder /srv/media one time in Ch. 40 · Shared storage first. That chapter also sets its ownership. Here you add the two subfolders that this reader needs. Then you bind the shared folder into CT 115 as /data.
The dialog Resources → Add → Mount Point in the Proxmox GUI only makes a new volume with its own storage. It cannot bind-mount a folder that exists already on the host. So that step needs the host shell. (You can make the two subfolders below with any SFTP file manager. But you need the shell for the bind mount anyway. So it is faster to type all the commands together.) Type exit to leave CT 115 first. Then type these commands on the host.
⌨ Type this on the Proxmox host (homelab)
mkdir -p /srv/media/manga /srv/media/books
chown -R 101000:101000 /srv/media/manga /srv/media/books   # host uid 101000 = uid 1000 inside an unprivileged CT (the PUID the apps run as)
pct set 115 -mp0 /srv/media,mp=/data                       # bind the shared folder into Kavita as /data
pct reboot 115                                             # restart CT 115 so /data appears inside it (bind mounts don't hot-add)
The block after the wizard table may have added the mount line already. Check first. On the host, run pct config 115 | grep mp0. You see mp0: /srv/media,mp=/data? Then skip the third command. Run the other three. You see nothing? Then run all four.
Explanation of each part
mkdir -p /srv/media/manga /srv/media/books
Makes two folders, manga and books, inside the shared media folder. It also makes any parent folder that is missing.
Changes the owner of the folders, and of everything inside them, to the user and group ID 101000. On the Proxmox host, this ID is the regular user of the container (container UID 1000, the PUID that the apps run as), seen from the host. It is not root. Proxmox shifts the UIDs of containers by +100000 for isolation. So container UID 1000 appears as 101000 on the host. The own root user of the container, UID 0, appears as host UID 100000.
pct set 115 -mp0 /srv/media,mp=/data
This is a Proxmox command. For container 115, it adds a mount point (mp0, the first one). It shares the host folder /srv/media into the container at the path /data. The container can then read and write those files.
pct reboot 115
Restarts container 115. A bind mount that you add to a running container does not appear until the container restarts. This makes the shared /data folder appear inside it before you install Docker.
Notice — this folder moves to a real drive later
Books and manga live on /srv/media. It is on the 500 GB SSD for now. When you add a real drive in Ch. 65 · Add an external drive, you move /srv/media onto it. The containers keep bind-mounting /data. They do not notice. A media library fills a 500 GB SSD faster than you expect. So watch the free space in Beszel. Plan for that drive before the shelf is full.
49.3
INSTALL KAVITA
This part has no buttons. These commands run inside CT 115. In the host Shell (homelab → >_ Shell), run pct enter 115. You are still inside from the section before? Then continue. Install Docker. Then start Kavita:
Where you see TZ=Region/City, replace it with your own zone name, for example America/New_York or Europe/Berlin. To see each valid name, run timedatectl list-timezones on the server. A wrong zone only makes clocks and schedules look odd. Nothing breaks.
Explanation of each part
The Docker install line and the flags -d, --name, --restart, -v, -p, and -e are explained in Ch. 9 · SSH & the terminal. The shared flags PUID, PGID, TZ, /config, and /data are explained in Ch. 41 · Prowlarr. These parts are specific to Kavita:
-p 5000:5000
Sends port 5000 of the host to port 5000 of the container. You can then open the web page of Kavita at that port.
-v /opt/kavita/config:/config
Links the host folder /opt/kavita/config to /config inside the container. The settings of Kavita then stay, also when you delete the container and make it again.
-v /data:/data
Links the shared /data folder, with your books and manga, into the container at the same path. Kavita can then see and index your media files.
lscr.io/linuxserver/kavita
The container image to run: the Kavita build of LinuxServer.io. Kavita is a digital library and reader for books and comics that you host yourself.
Open http://192.168.1.236:5000 in a browser. The next section shows the first login and the daily reading.
pct set 115 -mp0 /srv/media,mp=/data is a Proxmox bind mount. It makes the host folder /srv/media appear inside the container at /data. Suwayomi mounts the same host folder. So a manga file that is downloaded there appears for Kavita at once. The system does not copy files between containers. The separate volume -v /opt/kavita/config keeps the own database and settings of Kavita local to this container.
49.4
USE IT
The shared /data folder is mounted. Do these steps for the first login and for the daily reading.
Open http://192.168.1.236:5000. At the first visit, Kavita asks you to register the admin account. Choose a user name and a password. This login is only for Kavita, not for the container.
The first visit — register the admin account.
The libraries do not exist? Add them now. Go to Server Settings → Libraries. Click Add Library. Set the type to Manga. Give it a name. Set the folder to /data/manga. Do the same with type Book and folder /data/books.
Server Settings → Libraries → Add Library.
To read, click a series on the home page. Click the Read button, or select one volume or chapter. Tap the edges of the screen to turn pages, or use the arrow keys. Kavita saves your position by itself for each account.
The series page → Read — the reader that turns pages.
New chapters from Suwayomi show after the next scan. New books in the shared folder also show after the next scan. To see them at once, open the library menu and use the Scan action.
To read on a phone, open the same address in the browser of the phone. Your progress stays the same. Or use an OPDS reader app. Get the OPDS URL from User Settings → 3rd Party Clients.
User Settings → 3rd Party Clients — the OPDS URL field.
49.5
WHEN IT GOES WRONG
Warning — the ownership change is the step that bites
chown 101000 sets the UID offset of an unprivileged container. Host UID 101000 maps to UID 1000 inside the container. Suwayomi cannot write files, or Kavita cannot see files? Then this ownership setting is the likely cause. Run the ownership fix again, but only on the own folders of Kavita: chown -R 101000:101000 /srv/media/manga /srv/media/books. Then reboot the container. Do not run it on all of /srv/media. You also built Ch. 52 · Immich? Then its folder /srv/media/photos must stay owned by 100000:100000. A chown of the whole tree takes that away. Photo uploads then start to fail, and nothing connects the two events.
Kavita opens, but a library scan finds no books or manga. The library stays empty. Inside the CT, run ls /data/manga. Or, without a shell, connect an SFTP file manager (WinSCP on Windows, Dolphin or Files on Linux or Mac) to the CT and browse to /data/manga. The folder is empty? Then the bind mount has no effect yet. Run pct reboot 115 on the host. Check again. The files are there, but Kavita still cannot read them? Fix the ownership on the host with chown -R 101000:101000 /srv/media/manga /srv/media/books. Also check that the Library folder inside Kavita points to the container path /data/manga. It must not be the host path /srv/media/manga.
Each file shows up as its own entry. Chapters or books do not group into a series. Kavita groups files by folder. Each series needs its own subfolder. Organize the files as /data/manga/<Series Name>/<chapters…> and /data/books/<Author or Series>/<book>. The easiest way to move many files into these folders is an SFTP file manager (WinSCP on Windows, Dolphin or Files on Linux or Mac) that is connected to the CT. Drag the files into place there. You type no shell commands. Do not put loose files directly in /data/manga. Then, in Kavita, open the library and click Scan.
You update the container (docker pull … && docker rm -f kavita, then docker run again), and your admin account and libraries are gone. The database of Kavita is in the config volume. When you run docker run again, include the exact same flag -v /opt/kavita/config:/config. Copy the update command that works from the Reference Card below. Do not type it again from memory. Never delete /opt/kavita/config on the CT. That folder is your Kavita data and settings.
49.6
A download step fails with Temporary failure resolving deb.debian.org, or with another "cannot resolve" message. The container has no working DNS server. It cannot change a name into an address. This is not a typing mistake. It does not fix itself. In the Proxmox page, select this container in the left tree. Open DNS. Select Edit. Type your router address in DNS servers (192.168.1.1 here; use your own). Then run pct reboot 115 in the host shell. Run the failed step again.
A command fails. You do not know if you are on the server or in the container. Read the prompt. In the container, it ends with the name of the container. On the server, it shows root@homelab. The prompt still shows root@homelab after pct enter? Then the command did not work. Type exit. Run the pct enter line again. Check the prompt before you paste anything else. You can paste a build block on the server by mistake. It seems to work. It installs without an error, and the app even answers. But the app is on the server, and it must not be there.
How to see that it happened, and how to undo it. The app does not open at the container address (192.168.1.236). It does open at the server address (192.168.1.220) on the same port. Then the app is on the host. To remove it, run docker rm -f kavita in the host shell. Then run pct enter 115. Check that the prompt changed. Paste the build block again. You lose nothing in the container, because nothing was built there. The first command can show Error: No such container. This is good. It means that the app was never on the host. Do not paste the build block again. Look for another cause.
The page does not open. The browser spins, or says it cannot connect. Do these checks in order, in the host shell. 1. Is the container running? Run pct status 115. It must say running. If it does not, run pct start 115. 2. Is the container at the address that you typed? Run pct config 115 | grep net0. It shows the real address. A wrong digit in the wizard puts the container at another address, and nothing warns you. 3. Does the app run in the container? Run pct enter 115. Then run docker ps. An empty list means that the app did not start. Run docker ps -a to see that it stopped. Run docker logs to see why. 4. Does the app answer in the container? Run curl -I http://localhost followed by the port of the app. You get a reply here, but nothing from your PC? Then the address or your own network is the problem. The app is fine. Your browser reaches 192.168.1.236 but not the port? Then the app is down. It reaches neither? Then the container is down.
Docker does not start, or you see Cannot connect to the Docker daemon, a keyring error, or an overlay error. This is the most common failure in these guides. It means that the two container features are off. A later pct set --features can switch them off, also when you set them before. Run this in the host shell, not in the container: pct set 115 --features nesting=1,keyctl=1. Then run pct reboot 115. Then run the failed step again. Type both settings on one line. If you send only one setting, it replaces the pair and switches the other one off.
REFERENCE CARD
Paste this in 115 → Summary → Notes. The key facts then stay next to the container in Proxmox. Before you ever run the update line on this card, compare it with the docker run you actually used at install. The card is a snapshot of the standard build: if you added anything of your own — a device, an extra -e setting, a second folder — it is not on the card, and re-running the card's line drops it. The container comes back up looking healthy with your setting gone. The update line below still says TZ=Region/City. That is a placeholder, not a real timezone: run it unchanged and the app comes back on UTC while looking perfectly healthy, so every schedule and timestamp silently shifts. Put your own zone in before you use this card — the same one you set at install.
📋 Reference — paste into this container's Notes in Proxmox (not a shell command)
## Kavita — CT 115
dashboard http://192.168.1.236:5000 · docs https://wiki.kavitareader.com/ · library at host /srv/media (mounted in as /data)

```sh
# is it running?
docker ps --filter name=kavita
curl -fsS http://localhost:5000 >/dev/null && echo OK   # quick health check
# logs (last 50)
docker logs kavita --tail 50
# stop / start / restart
docker stop kavita
docker start kavita
docker restart kavita
# is there an update? ("Image is up to date" = no)
docker pull lscr.io/linuxserver/kavita
# update (settings + reading progress survive in /opt/kavita/config)
docker pull lscr.io/linuxserver/kavita && docker rm -f kavita && docker run -d --name kavita --restart=unless-stopped -p 5000:5000 -e PUID=1000 -e PGID=1000 -e TZ=Region/City -v /opt/kavita/config:/config -v /data:/data lscr.io/linuxserver/kavita
```
Part E · Media & personal cloud
50Suwayomi
Suwayomi uses the same source extensions as the phone app Mihon/Tachiyomi. Browse manga online and read on demand, streamed from the source. Or download chapters into the folder that Kavita reads.
This chapter needs the items below. You came here directly? Do them first. Each item takes a short time. Nothing on this page works without them.
Proxmox is installed and works at https://192.168.1.220:8006. You can log in as root. See Ch. 6 · Install Proxmox. At your first visit, the browser shows a certificate warning. Select Advanced. Then select Proceed. The warning is normal. Proxmox makes its own certificate.
The Debian 13 image is downloaded. You do this one time. See Ch. 10 · The container wizard. Without the image, the Template list in the wizard is empty.
You have an SSH key from your PC (Ch. 9 · SSH & the terminal). Or you type a password in the two password boxes of the wizard. The wizard needs one of the two. The Next button stays grey until you give one.
You know your own network numbers. Where this chapter shows 192.168.1.x, use your own numbers. The rule is in Ch. 3 · How to read this manual. The address of this chapter must be outside the range that your router gives out by itself (the DHCP pool, often .100–.200, but yours can differ). An address inside the pool can go to a phone later. Two devices on one address break name lookups, and the cause is hard to find.
The shared media folder exists. It is /srv/media. You make it one time in Ch. 40 · Shared storage first. This chapter keeps its data there, not on the small SSD. Build that chapter first. Without the folder, the data goes to the small system SSD. The mount exists to prevent this.
Commands marked HOST run on the server. In the Proxmox page, select homelab in the left tree. Then select >_ Shell. Commands marked CT run inside the container of this chapter. The chapter shows you how to get there.
The wizard does not work?Next is grey: you gave no password and no key. Give one of the two. The Template list is empty: the Debian image is not downloaded. Download it first. Each tab is explained in Ch. 10 · The container wizard.
50.1
CREATE THE CONTAINER
Notice — read-online mode keeps it small
By default, Suwayomi reads online with no download. It stores only what you download. Run it in read-online mode to keep it small. Download only what you want to keep in Kavita. Delete files as you go.
Do this task with the mouse in the Proxmox web page. You type nothing yet.
Open https://192.168.1.220:8006.
Click homelab in the left tree.
Click the blue Create CT button at the top right.
Fill in each tab as the reference shows. Leave each field that is not listed at its default value.
Click Finish.
General tab, CT 116: hostname suwayomi, unprivileged ticked.
You prefer the command line? The box below does the same task with one pct create command.
Wizard reference — Create CT 116
Tab → Field
Entry
General → Node
Select homelab.
General → CT ID
Type 116. Do not keep the number that the wizard suggests.
General → Hostname
Type suwayomi.
General → Unprivileged container
Keep this box ticked.
General → Nesting
Keep this box ticked. It is ticked by default. The wizard has no box for keyctl, which Docker also needs. The host command after Finish sets it. It is the first line of the next listing.
General → Password / SSH public key
Keep the password empty. Paste your public key in the SSH field: ssh-ed25519 AAAA…your-key-here you@your-pc. With the key, you can run ssh root@192.168.1.237 from your PC. The command pct enter 116 on the host needs no password.
Template → Storage, Template
Select local. Then select debian-13-standard.
Disks → Storage, Disk size
Select local-lvm. Set 10 GiB.
CPU → Cores
Set 1 core.
Memory → Memory (MiB)
Set 1024. Keep Swap at its default.
Network → IPv4
Select Static. Set IPv4/CIDR to 192.168.1.237/24. Set Gateway to 192.168.1.1. Keep IPv6 at its default.
DNS → DNS domain
Keep this field empty. Do not type 192.168.1.1 here.
DNS → DNS servers
Always type 192.168.1.1. Never keep this field empty.
Confirm
Read the summary. Keep Start after created unticked. Select Finish.
The wizard has no box for three settings: the Docker permission keyctl, the timezone, and start at boot. The first command below sets all three. Run these 4 commands on the host. They set the missing settings, start the container, and open its shell. Each part is explained in Ch. 10 · The container wizard, section "The host command every build needs".
⌨ Type this on the Proxmox host (homelab)
Before you run anything on this page: every 192.168.1.x address below is this manual's example network. If your own network uses different numbers, substitute yours as you type — the rule is in Ch. 3 · How to read this manual. A command that runs with the wrong address usually succeeds and leaves you unreachable.
pct set 116 --features nesting=1,keyctl=1 --onboot 1 --timezone host
pct set 116 -mp0 /srv/media,mp=/data   # bind the shared media folder in as /data
pct start 116
pct enter 116                          # now INSIDE CT 116 — the rest of this page runs here
Notice — set your timezone
--timezone host copies the timezone of the server into the container. To see the valid zone names, run timedatectl list-timezones on the host. Pick your Region/City (for example America/New_York). The Docker container that runs inside the LXC does not pick up that setting by itself. It keeps its own separate clock. So it needs the timezone one more time, on its own line. Add -e TZ=Region/City to its docker run line, as the build step below does. If not, its logs, and the dates in the file names that it makes, stay in UTC. Where you see TZ=Region/City, replace it with your own zone name, for example America/New_York or Europe/Berlin. A wrong zone only makes clocks and schedules look odd. Nothing breaks.
Notice — /data today, a real drive later
The manga library lives on the shared mount /data. It points at /srv/media on the 500 GB SSD. You made it one time in Ch. 40 · Shared storage first. A manga collection fills 500 GB fast. When you add a real drive, you move /srv/media onto it (see Ch. 65 · Add an external drive). The containers do not notice, because the path inside them stays /data.
Prefer the terminal? — the same task with one pct create command
⌨ Type this on the Proxmox host (homelab)
TMPL=$(pveam available --section system | awk '/debian-13-standard/{print $2}' | tail -1)
pveam download local "$TMPL"          # once per host; harmless to re-run
pct create 116 local:vztmpl/"$TMPL" \
  --hostname suwayomi --cores 1 --memory 1024 --rootfs local-lvm:10 \
  --net0 name=eth0,bridge=vmbr0,ip=192.168.1.237/24,gw=192.168.1.1 \
  --nameserver 192.168.1.1 --features nesting=1,keyctl=1 --unprivileged 1 --onboot 1 --timezone host \
  -mp0 /srv/media,mp=/data
pct start 116
pct enter 116                      # you are now INSIDE CT 116 — everything below runs here
Shows the host folder /srv/media inside the container at /data. The container reads and writes the shared data in place.
50.2
BUILD — SHARE THE MANGA FOLDER
Notice — each command below runs inside CT 116
When the container exists, you type the rest of this page in the shell of the container. You do not type it on homelab (192.168.1.220). You open that shell in one of two ways. Run pct enter 116 on the host (first homelab → >_ Shell). Or run ssh root@192.168.1.237 from your PC. (You set that up one time in Ch. 9 · SSH & the terminal.) (The >_ Console button of the container shows a login: prompt. The containers of this manual cannot answer it. Skip it.) Only the pct and pveam commands go back to the host. Each guide names those commands where you use them.
Give Suwayomi the same shared folder that Kavita reads. Bind-mount /srv/media into the container at /data. This is the same pattern as for Radarr and the other download-manager apps (Ch. 43 · Radarr). Suwayomi then downloads into /data/manga, and Kavita (Ch. 49 · Kavita) reads that same folder.
Notice — this part has no buttons
The tab Resources in the Proxmox GUI can only add a new mount point with its own storage. It cannot bind an existing host folder such as /srv/media into a container. Type the bind-mount on the host. Then type the rest inside CT 116 (pct enter 116 from homelab → >_ Shell).
Check that the shared-media mount is there. The block after the wizard table already added it. On the Proxmox host (the server, 192.168.1.220), run pct config 116. Look for a line that reads mp0: /srv/media,mp=/data. It is there? Then this step is done. Running the same pct set line again does no harm. It writes the same line again. Never use a different slot (-mp1, for example) for the same /data. The line is missing? Add it now with pct set 116 -mp0 /srv/media,mp=/data.
Restart the container, so that the mount goes live: pct reboot 116.
Open a shell inside CT 116: pct enter 116 on the host, or ssh root@192.168.1.237 from your PC.
Type the commands on the right in that container shell.
⌨ Type this inside CT 116
apt update && apt install -y docker.io curl
mkdir -p /opt/suwayomi/config /data/manga
chown -R 1000:1000 /opt/suwayomi/config   # Suwayomi runs as user 1000 and must own its config
chown 1000:1000 /data/manga               # let Suwayomi create download folders in the shared manga folder
docker run -d --name suwayomi --restart=unless-stopped -p 4567:4567 -e TZ=Region/City \
  -v /data/manga:/home/suwayomi/.local/share/Tachidesk/downloads \
  -v /opt/suwayomi/config:/home/suwayomi/.local/share/Tachidesk \
  ghcr.io/suwayomi/suwayomi-server:stable
Explanation of each part
The Docker install line and the flags -d, --name, --restart, -v, -p, and -e are explained in Ch. 9 · SSH & the terminal. These parts are specific to Suwayomi:
mkdir -p /opt/suwayomi/config /data/manga
Makes the config folder and the manga subfolder on the shared mount. -p makes any parent folder that is missing. It does nothing if they exist already.
chown … 1000:1000 …
Gives the config folder and the shared folder /data/manga to user 1000. This is the account that Suwayomi runs as inside the container. You skip this? Then the container without root rights cannot write its settings or its database. It fails with a "permission denied" error and keeps restarting.
-p 4567:4567
Sends port 4567 of the host to port 4567 of the container. Use this port to reach the web page of Suwayomi.
Links the shared folder /data/manga to the internal path that Suwayomi (formerly named Tachidesk) uses for downloaded chapters. Downloads land in a folder that you control. Kavita also reads it.
Links a host folder for the app settings and the database of Suwayomi. The configuration then stays when you make the container again.
ghcr.io/suwayomi/suwayomi-server:stable
The container image to run: the official Suwayomi manga server, with the tag stable. It comes from the container registry of GitHub.
Check that it runs: docker ps shows suwayomi with the status Up. The first start can take a minute or two. The page does not answer yet? Wait and refresh before you change anything.
50.3
SET UP — ADD A SOURCE, THEN READ
Open http://192.168.1.237:4567. Suwayomi has no sources by default. The old Tachiyomi repo was shut down. So you add one yourself before anything appears.
Add an extension repository. Open Settings → Browse → Extension Repositories. Add the Keiyoushi repo URL https://raw.githubusercontent.com/keiyoushi/extensions/repo/index.min.json.
Go to Extensions. Install the sources that you want. Then browse and read. Anything that you download lands by itself in the shared folder that Kavita reads.
Leave the download location at its default. Suwayomi saves downloads into the downloads subfolder of its data directory. The volume mount maps that folder onto /data/manga exactly. Do not set a custom Downloads path in Settings. If you do, downloads do not reach Kavita.
Settings → Browse → Extension Repositories — paste the Keiyoushi URL and confirm.The Extensions list — click Install next to each source that you want.
Warning — Suwayomi has no login by default
Anyone on the LAN who reaches :4567 can use it. Turn on its Basic Auth option under Settings → Server. Or reach it only through Nginx Proxy Manager (Ch. 17 · Nginx Proxy Manager) or Tailscale (Ch. 19 · Remote access: Tailscale). Do not leave the raw port open.
Settings → Server — the Basic Auth switch.
CT 116/suwayomi, 10 GiB, 1 CPU, 1024 MB, 192.168.1.237/24, plus the bind-mount /data.
50.4
HOW TO USE IT: THE BASICS
The daily loop: browse a source. Add titles to your Library. Read on demand, so that you use no storage. Download only the chapters that Kavita must keep.
Open http://192.168.1.237:4567. The left menu holds the whole app. Library holds your saved titles. Updates shows new chapters. Browse finds manga. Downloads shows the download queue.
To install a source, go to Browse → Extensions. Select a source from the repository that you added during the setup. Click Install.
To find a title, go to Browse → Sources and open the source. Look in the lists Popular and Latest. Or use the search icon for a specific title.
Browse → Sources — the lists Popular and Latest, the search icon at the top right.
To save a title, open it and click Add To Library. The title then shows in Library. New chapters for it show in Updates.
The page of a title — the Add To Library button.
To read on demand, click a chapter. The pages stream from the source. Suwayomi stores nothing on the disk.
To keep chapters for Kavita, click the download icon next to a chapter. Or select several and use Download selected. Downloads go to the shared folder /data/manga. They do not show in Kavita? Run a library scan there.
The chapter row — the download icon, and Download selected.
To check for new chapters, click the button refresh (Update library) in Library. Then read the results in Updates.
Notice — how to get space back
Only a download writes files. Reading streams the pages. Select the chapters that you kept. Use Delete downloaded to remove them. Kavita loses them too, because both apps read the same folder /data/manga.
50.5
WHEN IT GOES WRONG
You open the Extensions tab, and it is completely empty. There are no sources to install and nothing to browse. Suwayomi has no sources by default. Add an extension repository first: Settings → Browse → Extension Repositories. Add https://raw.githubusercontent.com/keiyoushi/extensions/repo/index.min.json. Then open Extensions again. The sources then appear.
The container does not stay up. docker ps shows it restarting. docker logs suwayomi shows "permission denied", or says that it cannot make server.conf. The config and manga folders do not belong to the user of the container, 1000. In the CT, run docker rm -f suwayomi. Then run chown -R 1000:1000 /opt/suwayomi/config. Then run chown 1000:1000 /data/manga. Then run the docker run command again. It is the same one as in "Type this inside CT 116" in BUILD — SHARE THE MANGA FOLDER above.
A source fails to load, or it shows a Cloudflare "checking your browser" page or an HTTP 403 challenge when you try to browse it. That source is behind Cloudflare. This is an advanced side task. It is a second container, that you run one time, inside CT 116: docker run -d --name flaresolverr --restart=unless-stopped -p 8191:8191 ghcr.io/flaresolverr/flaresolverr:latest. That container listens on the own address of the CT. So make Suwayomi again (Ch. 12 · After every build + common Proxmox tasks, section "Change a setting on a Docker app"). Add two extra flags to its docker run line: -e FLARESOLVERR_ENABLED=true -e FLARESOLVERR_URL=http://192.168.1.237:8191. (This is the own IP of this CT and the port that you just opened.) The Chromium bypass uses a lot of memory. The container hits its limit? Then the kernel kills something inside it. Often the whole container stops. In that state you cannot run docker logs or docker ps. Nothing runs that you can ask. Go to the host shell instead. pct status 116 tells you if it is stopped. pct start 116 brings it back. dmesg -T | grep -i "killed process" on the host names what was killed and when. Then raise the limit before it happens again: pct set 116 -memory 4096 and pct reboot 116.
You download chapters in Suwayomi, but they never show up in Kavita. First check that docker logs suwayomi shows no errors when it writes to /data/manga. It does? Then fix the ownership of the folder as above. Then, in Kavita, open the library and click Scan Library. Kavita does not always find new folders at once.
The first time that you open http://192.168.1.237:4567, it shows a blank page or stays on "loading". At the first start, Suwayomi downloads its web page. Wait about a minute. Then refresh the page. Watch the progress with docker logs suwayomi --tail 50.
50.6
A download step fails with Temporary failure resolving deb.debian.org, or with another "cannot resolve" message. The container has no working DNS server. It cannot change a name into an address. This is not a typing mistake. It does not fix itself. In the Proxmox page, select this container in the left tree. Open DNS. Select Edit. Type your router address in DNS servers (192.168.1.1 here; use your own). Then run pct reboot 116 in the host shell. Run the failed step again.
A command fails. You do not know if you are on the server or in the container. Read the prompt. In the container, it ends with the name of the container. On the server, it shows root@homelab. The prompt still shows root@homelab after pct enter? Then the command did not work. Type exit. Run the pct enter line again. Check the prompt before you paste anything else. You can paste a build block on the server by mistake. It seems to work. It installs without an error, and the app even answers. But the app is on the server, and it must not be there.
How to see that it happened, and how to undo it. The app does not open at the container address (192.168.1.237). It does open at the server address (192.168.1.220) on the same port. Then the app is on the host. To remove it, run docker rm -f suwayomi in the host shell. Then run pct enter 116. Check that the prompt changed. Paste the build block again. You lose nothing in the container, because nothing was built there. The first command can show Error: No such container. This is good. It means that the app was never on the host. Do not paste the build block again. Look for another cause.
The page does not open. The browser spins, or says it cannot connect. Do these checks in order, in the host shell. 1. Is the container running? Run pct status 116. It must say running. If it does not, run pct start 116. 2. Is the container at the address that you typed? Run pct config 116 | grep net0. It shows the real address. A wrong digit in the wizard puts the container at another address, and nothing warns you. 3. Does the app run in the container? Run pct enter 116. Then run docker ps. An empty list means that the app did not start. Run docker ps -a to see that it stopped. Run docker logs to see why. 4. Does the app answer in the container? Run curl -I http://localhost followed by the port of the app. You get a reply here, but nothing from your PC? Then the address or your own network is the problem. The app is fine. Your browser reaches 192.168.1.237 but not the port? Then the app is down. It reaches neither? Then the container is down.
Docker does not start, or you see Cannot connect to the Docker daemon, a keyring error, or an overlay error. This is the most common failure in these guides. It means that the two container features are off. A later pct set --features can switch them off, also when you set them before. Run this in the host shell, not in the container: pct set 116 --features nesting=1,keyctl=1. Then run pct reboot 116. Then run the failed step again. Type both settings on one line. If you send only one setting, it replaces the pair and switches the other one off.
REFERENCE CARD
Paste this in 116 → Summary → Notes in Proxmox. The key facts and the update steps then stay with the container. The commands inside it have no buttons either. Type them inside CT 116 (pct enter 116). Before you ever run the update line on this card, compare it with the docker run you actually used at install. The card is a snapshot of the standard build: if you added anything of your own — a device, an extra -e setting, a second folder — it is not on the card, and re-running the card's line drops it. The container comes back up looking healthy with your setting gone. The update line below still says TZ=Region/City. That is a placeholder, not a real timezone: run it unchanged and the app comes back on UTC while looking perfectly healthy, so every schedule and timestamp silently shifts. Put your own zone in before you use this card — the same one you set at install.
📋 Reference — paste into this container's Notes in Proxmox (not a shell command)
## Suwayomi — CT 116
dashboard http://192.168.1.237:4567 · downloads to shared /data/manga (read by Kavita) · docs https://github.com/Suwayomi/Suwayomi-Server

```sh
# is it running?
docker ps --filter name=suwayomi
curl -fsS http://localhost:4567 >/dev/null && echo OK   # quick health check
# logs (last 50)
docker logs suwayomi --tail 50
# stop / start / restart
docker stop suwayomi
docker start suwayomi
docker restart suwayomi
# is there an update? ("Image is up to date" = no)
docker pull ghcr.io/suwayomi/suwayomi-server:stable
# update (settings + library survive in /opt/suwayomi/config)
docker pull ghcr.io/suwayomi/suwayomi-server:stable && docker rm -f suwayomi && docker run -d --name suwayomi --restart=unless-stopped -p 4567:4567 -e TZ=Region/City -v /data/manga:/home/suwayomi/.local/share/Tachidesk/downloads -v /opt/suwayomi/config:/home/suwayomi/.local/share/Tachidesk ghcr.io/suwayomi/suwayomi-server:stable
```
Part E · Media & personal cloud
51Fireshare
Drop a game clip into a folder, or upload it in the browser. Fireshare gives it a link that you can share, and a thumbnail. There is no upload limit and no expiry.
This chapter needs the items below. You came here directly? Do them first. Each item takes a short time. Nothing on this page works without them.
Proxmox is installed and works at https://192.168.1.220:8006. You can log in as root. See Ch. 6 · Install Proxmox. At your first visit, the browser shows a certificate warning. Select Advanced. Then select Proceed. The warning is normal. Proxmox makes its own certificate.
The Debian 13 image is downloaded. You do this one time. See Ch. 10 · The container wizard. Without the image, the Template list in the wizard is empty.
You have an SSH key from your PC (Ch. 9 · SSH & the terminal). Or you type a password in the two password boxes of the wizard. The wizard needs one of the two. The Next button stays grey until you give one.
You know your own network numbers. Where this chapter shows 192.168.1.x, use your own numbers. The rule is in Ch. 3 · How to read this manual. The address of this chapter must be outside the range that your router gives out by itself (the DHCP pool, often .100–.200, but yours can differ). An address inside the pool can go to a phone later. Two devices on one address break name lookups, and the cause is hard to find.
The shared media folder exists. It is /srv/media. You make it one time in Ch. 40 · Shared storage first. This chapter keeps its data there, not on the small SSD. Build that chapter first. Without the folder, the data goes to the small system SSD. The mount exists to prevent this.
Commands marked HOST run on the server. In the Proxmox page, select homelab in the left tree. Then select >_ Shell. Commands marked CT run inside the container of this chapter. The chapter shows you how to get there.
The wizard does not work?Next is grey: you gave no password and no key. Give one of the two. The Template list is empty: the Debian image is not downloaded. Download it first. Each tab is explained in Ch. 10 · The container wizard.
Fireshare is your own private video-sharing site. You upload, organise, and share clips by link. It is like a private Streamable, or an unlisted YouTube channel that you own. Each video gets its own web link and thumbnail. New recordings appear in the library by themselves. The person that you send the link to needs no account. Fireshare runs as a single container, with no separate database.
Notice — where the clips live
The small database of Fireshare sits on the own SSD disk of the container. But the video files belong on bulk storage. This guide keeps the clip library on the shared media folder /srv/media. It is bind-mounted into the container at /data. A bind mount means that the container sees that one folder of the server under a second name, /data. Nothing is copied. Set that folder up one time in Ch. 40 · Shared storage first before this chapter. This guide assumes that it exists.
51.1
CREATE THE CONTAINER
You do this task with the mouse, in the Proxmox web page. You type nothing. You prefer the command line? The box below does the same task with one pct create command.
On your PC, open https://192.168.1.220:8006.
Click homelab in the left tree.
Click the blue Create CT button at the top right.
Fill in the tabs as the table shows. Keep each field that is not listed at its default value.
Click Finish. The wizard cannot attach the /data folder. The commands after the table do that, on the server.
General tab of the Create CT wizard, filled in for container 142.
Wizard reference — Create CT 142
Tab → Field
Entry
General → Node
Select homelab.
General → CT ID
Type 142. Do not keep the number that the wizard suggests.
General → Hostname
Type fireshare.
General → Unprivileged container
Keep this box ticked.
General → Nesting
Keep this box ticked. It is ticked by default. The wizard has no box for keyctl, which Docker also needs. The host command after Finish sets it. It is the first line of the next listing.
General → Password / SSH public key
Keep the password empty. Paste your public key in the SSH field: ssh-ed25519 AAAA…your-key-here you@your-pc. With the key, you can run ssh root@192.168.1.218 from your PC. The command pct enter 142 on the host needs no password.
Template → Storage, Template
Select local. Then select debian-13-standard.
Disks → Storage, Disk size
Select local-lvm. Set 8 GiB.
CPU → Cores
Set 2 cores.
Memory → Memory (MiB)
Set 2048. Keep Swap at its default.
Network → IPv4
Select Static. Set IPv4/CIDR to 192.168.1.218/24. Set Gateway to 192.168.1.1. Keep IPv6 at its default.
DNS → DNS domain
Keep this field empty. Do not type 192.168.1.1 here.
DNS → DNS servers
Always type 192.168.1.1. Never keep this field empty.
Confirm
Read the summary. Keep Start after created unticked. Select Finish.
The wizard has no box for three settings: the Docker permission keyctl, the timezone, and start at boot. The first command below sets all three. Run these 4 commands on the host. They set the missing settings, start the container, and open its shell. Each part is explained in Ch. 10 · The container wizard, section "The host command every build needs".
⌨ Type this on the Proxmox host (homelab)
Before you run anything on this page: every 192.168.1.x address below is this manual's example network. If your own network uses different numbers, substitute yours as you type — the rule is in Ch. 3 · How to read this manual. A command that runs with the wrong address usually succeeds and leaves you unreachable.
pct set 142 --features nesting=1,keyctl=1 --onboot 1 --timezone host
pct set 142 -mp0 /srv/media,mp=/data   # bind the shared media folder in as /data
pct start 142
pct enter 142                          # now INSIDE CT 142 — the rest of this page runs here
Prefer the terminal? — the same task with one pct create command
⌨ Type this on the Proxmox host (homelab)
TMPL=$(pveam available --section system | awk '/debian-13-standard/{print $2}' | tail -1)
pveam download local "$TMPL"          # once per host; harmless to re-run
pct create 142 local:vztmpl/"$TMPL" \
  --hostname fireshare --cores 2 --memory 2048 --rootfs local-lvm:8 \
  --net0 name=eth0,bridge=vmbr0,ip=192.168.1.218/24,gw=192.168.1.1 \
  --nameserver 192.168.1.1 --features nesting=1,keyctl=1 --unprivileged 1 --onboot 1 --timezone host \
  -mp0 /srv/media,mp=/data
pct start 142
pct enter 142                      # you are now INSIDE CT 142 — everything below runs here
Shows the host folder /srv/media inside the container at /data. The container reads and writes the shared data in place.
Notice — when a real drive arrives
A clip library grows fast. A 500 GB SSD fills quickly. Screen recordings are large. When you add a real drive in Ch. 65 · Add an external drive, you move /srv/media onto it. Fireshare still finds the clips at /data. That name is only a pointer to the folder. If you swap the physical drive under it, the app sees no change.
Notice — set your timezone
The docker run command below has Region/City as a placeholder timezone. Replace it with your own, for example Europe/Paris or America/Vancouver. To find the exact spelling, run timedatectl list-timezones. Search the output for your city. A wrong zone only makes clocks and schedules look odd. Nothing breaks.
51.2
INSTALL FIRESHARE (IN CT 142)
This part has no buttons. These commands run inside CT 142. In the host Shell (homelab → >_ Shell), run pct enter 142. You are still inside from the section before? Then continue. There are two other ways to open the same shell. Run pct enter 142 on the server. Or run ssh root@192.168.1.218 from your PC. All three are equal. Only the pct commands from the section before, and pveam (the command that downloads templates, in the supplement for the terminal), run on the server itself.
Install Docker. Make the folders. Make the secrets. Then start Fireshare as a single container. Its web page then answers on port 8080.
Install the Docker engine.
Make the app folders on the SSD. Make the clip folder on the shared /data mount.
Write a random admin password and a secret key into a locked .env file.
Start the Fireshare container.
Open http://192.168.1.218:8080 to check that it is up.
Where you see TZ=Region/City in the listing below, replace it with your own zone name, for example America/New_York or Europe/Berlin.
⌨ Type this inside CT 142
apt update && apt install -y docker.io curl
mkdir -p /opt/fireshare/{data,processed,images}
mkdir -p /data/fireshare && chown 1000:1000 /data/fireshare   # clip library on the shared media mount
printf 'ADMIN_PASSWORD=%s\nSECRET_KEY=%s\n' "$(openssl rand -base64 18)" "$(openssl rand -hex 32)" > /opt/fireshare/.env
chmod 600 /opt/fireshare/.env                # secrets stay off the command line + out of history
docker run -d --name fireshare --restart=unless-stopped \
  -p 8080:80 --env-file /opt/fireshare/.env \
  -e ADMIN_USERNAME=admin -e PUID=1000 -e PGID=1000 -e TZ=Region/City \
  -e MINUTES_BETWEEN_VIDEO_SCANS=5 -e DOMAIN=192.168.1.218:8080 \
  -v /opt/fireshare/data:/data -v /opt/fireshare/processed:/processed \
  -v /opt/fireshare/images:/images -v /data/fireshare:/videos \
  shaneisrael/fireshare:latest-lite
Explanation of each part
The Docker install line and the flags -d, --name, --restart, -v, -p, and -e are explained in Ch. 9 · SSH & the terminal. These parts are specific to Fireshare:
mkdir -p /opt/fireshare/{data,processed,images}
Makes three subfolders under /opt/fireshare: data, processed, and images. They hold the files of the application that must stay. They are on the SSD disk of the container.
Makes the clip folder on the shared media mount. Then gives it to user 1000, so that the app can write into it. The app runs as PUID and PGID 1000. This is where the real video files live.
Makes a random admin password and a random secret key. Writes them into a .env file. When the container starts, Docker hands it each line of that file as a setting that the app reads at its start. It is like a note that says ADMIN_PASSWORD=…. Settings that you pass in this way are called environment variables.
chmod 600 /opt/fireshare/.env
Limits the permissions of the .env file. Only its owner can read or write it. The file has secrets.
--env-file /opt/fireshare/.env
Loads the secrets from the .env file into the container.
-p 8080:80
Sends port 8080 of the host to the web port 80 of the container.
-e ADMIN_USERNAME=admin -e PUID=1000 -e PGID=1000
Sets the user name of the admin login. It also sets the Linux user and group ID that the container writes files as. These IDs match the identity that owns the shared /data mount.
-e MINUTES_BETWEEN_VIDEO_SCANS=5
Sets how often, in minutes, the application scans the video folder again for new files to add to its library.
-e DOMAIN=192.168.1.218:8080
This is the host and the port where your instance can be reached, with no http or https before it. Without this setting, shared links still work. But they lose their rich preview thumbnail when you paste them in Discord, Slack, or similar apps.
Links the internal folders of the application to matching folders on the SSD. These are the folders for data, processed files, and thumbnail images. They stay when it restarts. The own internal /data of Fireshare here is the database of the app. It is not the same as the shared /data mount of the container, which holds the clips.
-v /data/fireshare:/videos
Links the clip folder on the shared media mount into the container at /videos. Fireshare can then see and serve the real video files.
shaneisrael/fireshare:latest-lite
The container image to run: the Fireshare application, latest version. The tag -lite is the official build for machines without a dedicated GPU. This is right for this mini-PC.
51.3
FIRST RUN
Before you open the page, get the password that was made for you. In the shell of CT 142 (from pct enter 142 above, or open homelab → >_ Shell and run it again), run cat /opt/fireshare/.env. Read the value after ADMIN_PASSWORD=. Then open http://192.168.1.218:8080 and log in as admin with that password. Each video gets a public share link.
The login screen: user admin, password from .env.
Notice — public links leave your LAN
You do not want those share links to be reachable from outside your home network? Put Fireshare behind Ch. 17 · Nginx Proxy Manager and a login. See Ch. 11 · Security basics for why each exposed service needs one.
51.4
HOW TO USE IT — THE BASICS
Fireshare stores a video clip. It gives you a link to share.
Open http://192.168.1.218:8080. Log in as admin with the password from /opt/fireshare/.env. Only the admin logs in. People who get a link need no account.
Add a clip in one of two ways. Use the card Upload Video in the web page. There you can also set a Game and Tags. Or drop the file straight into the folder /data/fireshare inside CT 142. You do that from your own PC with a file manager that can open a folder on the server: WinSCP on Windows, Files or Dolphin on Linux and Mac. The steps to connect are in Ch. 12 · After every build + common Proxmox tasks, section “Move a file to or from the server”. Connect to 192.168.1.218. Open /data/fireshare. Drag the clip in. In both ways, the clip appears in the library by itself in five minutes or less.
The Upload Video card, with the fields Game and Tags.
To share a clip, move the pointer over its card. Click Copy Link. Paste the link into a Discord channel or any other chat. The clip plays in the browser. It shows a preview thumbnail.
The hover state of a clip card, with the Copy Link button.
To find clips, use the views in the sidebar: Videos, Folders, Games, and Tags. Or use the search bar.
The library grid, with the views in the sidebar and the search bar.
To control public access, open the File Manager. Select clips. Use Set private or Set public. A private clip is not in the public feed. But its direct link continues to work.
The File Manager, with clips selected and Set private and Set public.
51.5
WHEN IT GOES WRONG
The page at http://192.168.1.218:8080 does not load, or it shows nothing. Check that the container runs with docker ps. Read docker logs fireshare. Check that you use the own address of the CT, http://192.168.1.218:8080, not the address of the server. docker ps shows nothing, and Docker does not start? Then check the features of the container on the server with pct config 142 | grep features. The line must show keyctl=1,nesting=1. It does not? Run pct set 142 --features nesting=1,keyctl=1. Then run pct reboot 142. (nesting lets containers run inside this container. keyctl lets Docker manage its own processes.) The reboot makes them take effect.
Clips that you dropped into the folder do not appear. Check the owner first. Files that you drop in over SFTP often land with the wrong owner. Fireshare (it runs as PUID and PGID 1000) ignores, without a sign, files that it cannot read. Inside the CT, run chown -R 1000:1000 /data/fireshare to fix that. Then wait for the next scan. The owner was not the problem? Check that the file is really in /data/fireshare and has a format that is supported (mp4, webm, or mov). Fireshare scans again every five minutes. Wait, or run docker restart fireshare.
You are locked out, or you forgot the admin password. The password is in the file /opt/fireshare/.env inside CT 142, on the line that starts with ADMIN_PASSWORD=. To read it in the shell of the container, run cat /opt/fireshare/.env. You prefer a window to a terminal? Open the same file over SFTP. The steps to connect are in Ch. 12 · After every build + common Proxmox tasks, section “Move a file to or from the server”. Connect to 192.168.1.218. Open the folder /opt/fireshare. A name that starts with a dot counts as hidden. So switch on “show hidden files” (WinSCP: Options → Preferences → Panels → Show hidden files; file managers on Linux and Mac: Ctrl+H). If not, .env does not appear in the list.
You deleted those two lines from the file after the first run? Put them back for one login:
Open /opt/fireshare/.env to edit it. In the shell of the container, run nano /opt/fireshare/.env. Or open it over SFTP as described just above.
Add two lines: ADMIN_USERNAME=admin and ADMIN_PASSWORD= followed by a password that you choose.
Save the file. In nano, this is Ctrl+O, Enter, then Ctrl+X to leave. In a graphical editor, it is the usual Save.
Run docker restart fireshare in the shell of the container.
Log in with that user name and password. Set the password that you really want inside Fireshare.
Delete the two lines from .env again. Run docker restart fireshare one more time. The temporary password is then not left in the file.
Share links do not show a preview when you paste them in Discord or another chat. Set the variable DOMAIN to the address that you serve Fireshare at, with no http:// before it. That setting lets Discord, Slack, and similar apps show a thumbnail and a title instead of a bare link. It is the line -e DOMAIN= of the docker run command above. Change that line. Make the container of the app again. The exact five steps are in Ch. 12 · After every build + common Proxmox tasks, section “Change a setting on a Docker app”. Your clips and database folders are not touched.
Fireshare cannot write clips, or uploads fail with a permission error. The clip folder on the shared mount has the wrong owner. Inside the CT, run chown -R 1000:1000 /data/fireshare to match PUID and PGID 1000.
51.6
A download step fails with Temporary failure resolving deb.debian.org, or with another "cannot resolve" message. The container has no working DNS server. It cannot change a name into an address. This is not a typing mistake. It does not fix itself. In the Proxmox page, select this container in the left tree. Open DNS. Select Edit. Type your router address in DNS servers (192.168.1.1 here; use your own). Then run pct reboot 142 in the host shell. Run the failed step again.
A command fails. You do not know if you are on the server or in the container. Read the prompt. In the container, it ends with the name of the container. On the server, it shows root@homelab. The prompt still shows root@homelab after pct enter? Then the command did not work. Type exit. Run the pct enter line again. Check the prompt before you paste anything else. You can paste a build block on the server by mistake. It seems to work. It installs without an error, and the app even answers. But the app is on the server, and it must not be there.
How to see that it happened, and how to undo it. The app does not open at the container address (192.168.1.218). It does open at the server address (192.168.1.220) on the same port. Then the app is on the host. To remove it, run docker rm -f fireshare in the host shell. Then run pct enter 142. Check that the prompt changed. Paste the build block again. You lose nothing in the container, because nothing was built there. The first command can show Error: No such container. This is good. It means that the app was never on the host. Do not paste the build block again. Look for another cause.
The page does not open. The browser spins, or says it cannot connect. Do these checks in order, in the host shell. 1. Is the container running? Run pct status 142. It must say running. If it does not, run pct start 142. 2. Is the container at the address that you typed? Run pct config 142 | grep net0. It shows the real address. A wrong digit in the wizard puts the container at another address, and nothing warns you. 3. Does the app run in the container? Run pct enter 142. Then run docker ps. An empty list means that the app did not start. Run docker ps -a to see that it stopped. Run docker logs to see why. 4. Does the app answer in the container? Run curl -I http://localhost followed by the port of the app. You get a reply here, but nothing from your PC? Then the address or your own network is the problem. The app is fine. Your browser reaches 192.168.1.218 but not the port? Then the app is down. It reaches neither? Then the container is down.
Docker does not start, or you see Cannot connect to the Docker daemon, a keyring error, or an overlay error. This is the most common failure in these guides. It means that the two container features are off. A later pct set --features can switch them off, also when you set them before. Run this in the host shell, not in the container: pct set 142 --features nesting=1,keyctl=1. Then run pct reboot 142. Then run the failed step again. Type both settings on one line. If you send only one setting, it replaces the pair and switches the other one off.
REFERENCE CARD
Paste this in 142 → Summary → Notes in Proxmox. The key facts then stay next to the container. Before you ever run the update line on this card, compare it with the docker run you actually used at install. The card is a snapshot of the standard build: if you added anything of your own — a device, an extra -e setting, a second folder — it is not on the card, and re-running the card's line drops it. The container comes back up looking healthy with your setting gone. The update line below still says TZ=Region/City. That is a placeholder, not a real timezone: run it unchanged and the app comes back on UTC while looking perfectly healthy, so every schedule and timestamp silently shifts. Put your own zone in before you use this card — the same one you set at install.
Notice — set your timezone
Where you see TZ=Region/City, replace it with your own zone name, for example America/New_York or Europe/Berlin. To see each valid name, run timedatectl list-timezones on the server. A wrong zone only makes clocks and schedules look odd. Nothing breaks.
📋 Reference — paste into this container's Notes in Proxmox (not a shell command)
## Fireshare — CT 142
dashboard http://192.168.1.218:8080 · admin / (see /opt/fireshare/.env) · docs https://github.com/ShaneIsrael/fireshare
```sh
# is it running?
docker ps --filter name=fireshare
curl -fsS http://localhost:8080 >/dev/null && echo OK # quick health check# logs (last 50)
docker logs fireshare --tail 50
# stop / start / restart
docker stop fireshare
docker start fireshare
docker restart fireshare
# is there an update? ("Image is up to date" = no)
docker pull shaneisrael/fireshare:latest-lite
# update (settings survive in /opt/fireshare, clips in /data/fireshare)
docker pull shaneisrael/fireshare:latest-lite && docker rm -f fireshare && docker run -d --name fireshare --restart=unless-stopped \
-p 8080:80 --env-file /opt/fireshare/.env \
-e ADMIN_USERNAME=admin -e PUID=1000 -e PGID=1000 -e TZ=Region/City \
-e MINUTES_BETWEEN_VIDEO_SCANS=5 -e DOMAIN=192.168.1.218:8080 \
-v /opt/fireshare/data:/data -v /opt/fireshare/processed:/processed \
-v /opt/fireshare/images:/images -v /data/fireshare:/videos \
shaneisrael/fireshare:latest-lite
```
Part E · Media & personal cloud
52Immich
Immich gives your phone an automatic photo backup to your own server. It has a timeline and AI search for faces and objects. It is your own Google Photos, without Google.
This chapter needs the items below. You came here directly? Do them first. Each item takes a short time. Nothing on this page works without them.
Proxmox is installed and works at https://192.168.1.220:8006. You can log in as root. See Ch. 6 · Install Proxmox. At your first visit, the browser shows a certificate warning. Select Advanced. Then select Proceed. The warning is normal. Proxmox makes its own certificate.
The Debian 13 image is downloaded. You do this one time. See Ch. 10 · The container wizard. Without the image, the Template list in the wizard is empty.
You have an SSH key from your PC (Ch. 9 · SSH & the terminal). Or you type a password in the two password boxes of the wizard. The wizard needs one of the two. The Next button stays grey until you give one.
You know your own network numbers. Where this chapter shows 192.168.1.x, use your own numbers. The rule is in Ch. 3 · How to read this manual. The address of this chapter must be outside the range that your router gives out by itself (the DHCP pool, often .100–.200, but yours can differ). An address inside the pool can go to a phone later. Two devices on one address break name lookups, and the cause is hard to find.
The shared media folder exists. It is /srv/media. You make it one time in Ch. 40 · Shared storage first. This chapter keeps its data there, not on the small SSD. Build that chapter first. Without the folder, the data goes to the small system SSD. The mount exists to prevent this.
Commands marked HOST run on the server. In the Proxmox page, select homelab in the left tree. Then select >_ Shell. Commands marked CT run inside the container of this chapter. The chapter shows you how to get there.
The wizard does not work?Next is grey: you gave no password and no key. Give one of the two. The Template list is empty: the Debian image is not downloaded. Download it first. Each tab is explained in Ch. 10 · The container wizard.
Immich is a photo service that you host yourself. The phone app uploads each photo to your server, not to Google or Apple. The web app shows a timeline, albums, sharing, and search by face or object. The backup is automatic. You do nothing each day. Immich is a bundle of several containers that work together. There is the server. There is a machine-learning container for the search of faces and objects. There is Postgres, its database, where it keeps track of each photo and album. There is Redis, a small helper cache that speeds things up.
Notice — where these commands run
The pct and pveam commands run on the Proxmox host (the server, 192.168.1.220). Each one is marked where you use it. Everything else runs inside CT 127. It does not run on the host or on your PC. You open the shell of the container in one of two equal ways. In the Proxmox web page, open homelab → >_ Shell and run pct enter 127. It needs no password. Or run ssh root@192.168.1.248 from your PC.
Notice — shared storage comes first
Your photos live in /srv/media/photos on the server. This is inside the shared media folder /srv/media, which is bind-mounted into this container as /data. Make /srv/media one time in Ch. 40 · Shared storage first before this chapter. This guide assumes that it exists. It only adds its own subfolder photos. Photos are large. They do not belong on the small SSD disk of the container.
52.1
CREATE THE CONTAINER
Build the container with the mouse in the Proxmox web page. You prefer the command line? The box below does the same task with one pct create command.
Open https://192.168.1.220:8006.
Click homelab in the left tree.
Click the blue Create CT button at the top right.
Fill in the General tab as shown.
Fill in the other tabs as the reference shows. Leave each field that is not listed at its default value.
Keep Start after created unticked. Click Finish. Docker needs a few settings that the wizard has no box for. It also needs the shared /data mount. So a few commands on the server come next.
The Create CT wizard, General tab: CT ID 127, hostname immich, memory set to 8192 MiB. The machine-learning container of Immich needs the extra RAM.
Wizard reference — Create CT 127
Tab → Field
Entry
General → Node
Select homelab.
General → CT ID
Type 127. Do not keep the number that the wizard suggests.
General → Hostname
Type immich.
General → Unprivileged container
Keep this box ticked.
General → Nesting
Keep this box ticked. It is ticked by default. The wizard has no box for keyctl, which Docker also needs. The host command after Finish sets it. It is the first line of the next listing.
General → Password / SSH public key
Keep the password empty. Paste your public key in the SSH field: ssh-ed25519 AAAA…your-key-here you@your-pc. With the key, you can run ssh root@192.168.1.248 from your PC. The command pct enter 127 on the host needs no password.
Template → Storage, Template
Select local. Then select debian-13-standard.
Disks → Storage, Disk size
Select local-lvm. Set 15 GiB.
CPU → Cores
Set 4 cores.
Memory → Memory (MiB)
Set 8192. Keep Swap at its default.
Network → IPv4
Select Static. Set IPv4/CIDR to 192.168.1.248/24. Set Gateway to 192.168.1.1. Keep IPv6 at its default.
DNS → DNS domain
Keep this field empty. Do not type 192.168.1.1 here.
DNS → DNS servers
Always type 192.168.1.1. Never keep this field empty.
Confirm
Read the summary. Keep Start after created unticked. Select Finish.
The wizard has no box for three settings: the Docker permission keyctl, the timezone, and start at boot. The first command below sets all three. Run these 7 commands on the host. They set the missing settings, start the container, and open its shell. Each part is explained in Ch. 10 · The container wizard, section "The host command every build needs".
⌨ Type this on the Proxmox host (homelab)
Before you run anything on this page: every 192.168.1.x address below is this manual's example network. If your own network uses different numbers, substitute yours as you type — the rule is in Ch. 3 · How to read this manual. A command that runs with the wrong address usually succeeds and leaves you unreachable.
pct set 127 --features nesting=1,keyctl=1 --onboot 1 --timezone host
mountpoint -q /srv/media || echo "WARNING: /srv/media is NOT a mounted share — the next line would create it on the system disk. Build the shared-storage chapter first."
mkdir -p /srv/media/photos             # the host folder must exist before the mount
chown 100000:100000 /srv/media/photos   # Immich runs as the CT's root — the folder must be owned by the container's mapped root
pct set 127 -mp0 /srv/media,mp=/data   # bind the shared media folder in as /data
pct start 127
pct enter 127                          # now INSIDE CT 127 — the rest of this page runs here
After pct enter 127 you are inside the container. The commands below run there.
Prefer the terminal? — the same task with one pct create command
⌨ Type this on the Proxmox host (homelab)
TMPL=$(pveam available --section system | awk '/debian-13-standard/{print $2}' | tail -1)
pveam download local "$TMPL"          # once per host; harmless to re-run
mkdir -p /srv/media/photos            # the host folder must exist before the mount
chown 100000:100000 /srv/media/photos   # Immich runs as the CT's root — the folder must be owned by the container's mapped root
pct create 127 local:vztmpl/"$TMPL" \
  --hostname immich --cores 4 --memory 8192 --rootfs local-lvm:15 \
  --net0 name=eth0,bridge=vmbr0,ip=192.168.1.248/24,gw=192.168.1.1 \
  --nameserver 192.168.1.1 --features nesting=1,keyctl=1 --unprivileged 1 --onboot 1 --timezone host \
  -mp0 /srv/media,mp=/data
pct start 127
pct enter 127                      # you are now INSIDE CT 127 — everything below runs here
Prepares the host folder that this container needs before it starts.
chown 100000:100000 /srv/media/photos
Immich runs as the container's root user, which the host maps to UID 100000. A folder created by the host's own root is outside the container's mapped range, so every upload would fail with permission-denied. This single command makes the photo folder writable before the first upload.
-mp0 /srv/media,mp=/data
Shows the host folder /srv/media inside the container at /data. The container reads and writes the shared data in place.
Notice — when a real drive arrives
A photo library grows with no limit. A 500 GB SSD fills fast. When you add a real drive in Ch. 65 · Add an external drive, you move /srv/media onto it. The bind mount keeps the same /data path. So the container does not notice the change.
Notice — photos are the exception to the house ownership rule
Each other media app runs as user 1000. So the shared folder belongs to host 101000 (see Ch. 40 · Shared storage first). Immich is different. It runs as the root user of the container. Proxmox renumbers the root of a container to a different, harmless number on the host side, for safety (explained in Ch. 40 · Shared storage first). So its folder /srv/media/photos must belong to host 100000:100000, not to the usual number. The block after the table above already makes it with that owner. Keep the two apart. When you set the ownership again on the media stack, run chown on the other subfolders (torrents, movies, tv, music, books). Leave photos at 100000.
Warning — your photos exist nowhere else
A movie can be downloaded again. Your photos cannot. The only copy of your photos is on this server. A single dead disk loses them all. This folder /srv/media/photos is exactly the kind of data that you cannot replace. It needs a real backup on another machine. Set one up in Ch. 64 · Backups done right (3-2-1) before you delete the originals from your phone.
Notice — set your timezone
The pct create line above uses --timezone host. This makes the container follow the own clock of the server. So there is nothing to replace there. The timezone of the server is right? Then the one of this container is right too. You must check the own timezone setting of the app further down. Each TZ= line in a docker run or .env must have a real zone such as Europe/Paris. It must never be the literal Region/City. Run timedatectl list-timezones on the host to see each valid name.
52.2
INSTALL IMMICH
This part has no buttons. You type commands inside CT 127. You are already there from pct enter 127 above. (You closed that shell? Open homelab → >_ Shell and run pct enter 127 again.) Immich comes as a bundle. You get its official docker-compose.yml and its example .env. You make two edits. Then you start the whole set with one command. The key edit points its upload place at the bind-mounted photo folder. Photos are large. They do not belong on the SSD. You prefer not to use the terminal editor nano? You can open the same .env file with a file browser over SFTP instead. See Ch. 12 · After every build + common Proxmox tasks, section "Move a file to or from the server", for the exact steps. In both cases, run docker compose up -d afterwards, so that Immich picks up the change.
⌨ Type this inside CT 127
apt update && apt install -y docker.io docker-compose curl
mkdir -p /opt/immich && cd /opt/immich
curl -Lo docker-compose.yml https://github.com/immich-app/immich/releases/latest/download/docker-compose.yml
curl -Lo .env https://github.com/immich-app/immich/releases/latest/download/example.env
# STOP HERE — the two edits below must happen BEFORE anything starts
Notice — the next command opens an editor
Do not paste this one with the block above. Type it on its own. Press Enter:
⌨ Inside CT 127 — type this by itself
nano .env
This opens the .env file in nano. It is a text editor that runs in the terminal. It fills the whole terminal. Nothing that you paste afterwards goes to the shell until you save and close it. Make these two changes:
Change UPLOAD_LOCATION=./library to UPLOAD_LOCATION=/data/photos. If you leave it, each photo lands on the small system disk of the container, not on the shared store. The disk then fills.
Change DB_PASSWORD=postgres to your own password (letters and numbers only). You cannot fix this one later. Postgres writes the password into its database the first time that it starts. A stack that starts with the default keeps the default for ever. If you change the file afterwards, the app can no longer connect.
Save and close with Ctrl+O, Enter, then Ctrl+X. Only now start the stack:
⌨ Inside CT 127 — after you save the file
docker compose up -d
Explanation of each part
The Docker install line is explained in Ch. 9 · SSH & the terminal, section "Install Docker in the container". These parts are specific to Immich:
apt install -y docker.io docker-compose curl
Installs Docker, Docker Compose (a tool that runs setups with many containers from one config file), and curl (a tool to download files). On Debian 13, docker-compose is Compose v2.
mkdir -p /opt/immich && cd /opt/immich
Makes a folder for the Immich setup and goes into it. The compose file and the .env file live here.
Downloads the official docker-compose file of Immich. It is the recipe that describes all its services. Saves it as docker-compose.yml. The flag -L follows redirects. The flag -o names the output file.
curl -Lo .env https://.../example.env
Downloads the example file with environment variables of Immich. It has settings such as the database password and the upload path. Saves it as .env. This is the name that the compose file reads.
UPLOAD_LOCATION=/data/photos
This is the one edit that matters. It tells Immich to store uploaded photos in /data/photos. On the server, that is /srv/media/photos, through the bind mount. Photos are large. So they belong on the shared media folder, not on the small SSD disk of the container.
DB_PASSWORD
Change the default postgres to your own password. Use letters and numbers only. This is the password for the internal Postgres database of Immich. You do not type it again after this.
docker compose up -d
Starts all the services that docker-compose.yml defines, in the background (-d). It starts the full Immich stack: the server, the machine-learning container, Postgres, and Redis.
52.3
FIRST-RUN SETUP
The container, CT 127 named immich, uses 15 GiB storage, 4 CPU cores, 8192 MB memory, and the address 192.168.1.248/24. Your photos are on the shared /data mount. Set up your account one time in the web page.
Open http://192.168.1.248:2283.
Click Getting Started and register your account. The first account that you register becomes the admin by itself. Make yours before anyone else's.
Getting Started — the form to register an account. The first account that is registered becomes the admin.
Install the Immich app on your phone. Point it at this same address.
Notice — why this CT got 8 GB up front
Immich needs at least 6 GB of RAM (8 GB is recommended). The AI search for faces and objects runs in its own machine-learning container. This is why the wizard table above already set Memory to 8192. With too little, that container crashes and restarts in a loop. You would have to turn the AI search off. That defeats the main reason to run Immich. You lowered the memory and you see this? Put it back from the GUI: 127 → Resources. Double-click the Memory row. Set it to 8192. Click OK. Then restart the container. The same change from the terminal is pct set 127 -memory 8192 && pct reboot 127. On a machine with 16 GB, 8 GB is half of your total. Run Immich next to a few light services, not next to each other heavy app at the same time. Watch the real usage in Ch. 15 · Beszel. Shut down what you do not use.
52.4
HOW TO USE IT — THE BASICS
Daily use happens in two places: the web app in a browser, and the Immich app on your phone.
Open http://192.168.1.248:2283 and register an account. The first account becomes the admin by itself. Make your account before other people.
Install the Immich app on the phone. Enter http://192.168.1.248:2283 as the server endpoint. Log in with the same account. The own screens of the phone app are not shown here. See them on your own device.
Tap the cloud icon in the top right corner of the app. Select the album or albums to back up, including the camera roll. Go to the bottom of the screen and press Enable Backup. The app then uploads new photos by itself.
Use the web timeline to see all photos by date.
The web timeline. It is a photo library that you host yourself, with AI search, like Google Photos.
Use the search bar to find photos by their content, for example type beach or dog. You need no tags. The machine-learning container does this search.
The search bar — an example query for content and its results.
Open Explore → People. Immich shows the faces that it found. Click a face. Give it a name. You can then search by person.
Explore → People — click a face that it found and give it a name.
Open Albums in the sidebar. Click Create album to group photos. You can share albums with the other accounts on the server.
The Albums sidebar — the Create album dialog.
Notice — one account per person
Make one account for each person. Each user gets a private timeline. As admin, click your avatar (top right) → Administration → Users. Add an account for each person. Each person installs the app and connects to the same address.
Administration → Users — the dialog to add an account.
52.5
WHEN IT GOES WRONG
The Immich phone app says "Server is not reachable" when you type the address. Enter the Server Endpoint URL as http://192.168.1.248:2283. The current app adds /api by itself. First check that the web page loads in a browser at that address. The browser works, but the app still fails? Try http://192.168.1.248:2283/api. Check that the phone is on the same home network. Or reach it over Ch. 19 · Remote access: Tailscale.
docker compose up -d fails with "Cannot connect to the Docker daemon", or the containers do not run. Docker is not allowed inside the LXC container. On the server, check the features with pct config 127 | grep features. The line must show keyctl=1,nesting=1. It does not? Turn on the two features that Docker needs, then reboot the CT: pct set 127 --features nesting=1,keyctl=1, then pct reboot 127. (nesting=1 lets Docker run containers inside a container. keyctl=1 gives it a security feature that it needs.) The docs of Immich say that Docker in an LXC needs this extra setup.
Right after docker compose up -d, you open :2283, and it shows a 502 error or a blank page. Immich still downloads several GB of images. It runs the first database setup. Wait 2–5 minutes. Watch the progress with cd /opt/immich && docker compose logs -f immich_server. (The flag -f keeps the log scrolling live. You can watch it finish.) It is ready when the server reports that it listens on port 2283. Press Ctrl+C to stop watching the logs.
Photo uploads fail, or the logs show "permission denied" when it writes to /data. There are two causes. First, give the container write access. On the server, run chown -R 100000:100000 /srv/media/photos. Proxmox renumbers the root user of the container for safety. So it shows up as 100000 on the side of the server. That is the user that Immich runs as. Second, the folder must be on a Linux filesystem (ext4, xfs, btrfs, or zfs). Immich does not work on NTFS or exFAT. The SSD already is a Linux filesystem. So this matters only after you move /srv/media to an external drive in Ch. 65 · Add an external drive. Format that drive as ext4, not as NTFS or exFAT.
The search for faces and objects never appears, or docker compose ps shows immich_machine_learning that is always "Restarting". That container ran out of memory. Give the CT at least 6 GB (8 GB is recommended). On the server, run pct set 127 -memory 8192 && pct reboot 127.
52.6
A download step fails with Temporary failure resolving deb.debian.org, or with another "cannot resolve" message. The container has no working DNS server. It cannot change a name into an address. This is not a typing mistake. It does not fix itself. In the Proxmox page, select this container in the left tree. Open DNS. Select Edit. Type your router address in DNS servers (192.168.1.1 here; use your own). Then run pct reboot 127 in the host shell. Run the failed step again.
A command fails. You do not know if you are on the server or in the container. Read the prompt. In the container, it ends with the name of the container. On the server, it shows root@homelab. The prompt still shows root@homelab after pct enter? Then the command did not work. Type exit. Run the pct enter line again. Check the prompt before you paste anything else. You can paste a build block on the server by mistake. It seems to work. It installs without an error, and the app even answers. But the app is on the server, and it must not be there.
How to see that it happened, and how to undo it. The app does not open at the container address (192.168.1.248). It does open at the server address (192.168.1.220) on the same port. Then the app is on the host. To remove it, run cd /opt/immich && docker compose down (this app is a Compose stack — several containers at once, so there is no single name to remove) in the host shell. Then run pct enter 127. Check that the prompt changed. Paste the build block again. You lose nothing in the container, because nothing was built there. The first command can show Error: No such container. This is good. It means that the app was never on the host. Do not paste the build block again. Look for another cause.
The page does not open. The browser spins, or says it cannot connect. Do these checks in order, in the host shell. 1. Is the container running? Run pct status 127. It must say running. If it does not, run pct start 127. 2. Is the container at the address that you typed? Run pct config 127 | grep net0. It shows the real address. A wrong digit in the wizard puts the container at another address, and nothing warns you. 3. Does the app run in the container? Run pct enter 127. Then run docker ps. An empty list means that the app did not start. Run docker ps -a to see that it stopped. Run docker logs to see why. 4. Does the app answer in the container? Run curl -I http://localhost followed by the port of the app. You get a reply here, but nothing from your PC? Then the address or your own network is the problem. The app is fine. Your browser reaches 192.168.1.248 but not the port? Then the app is down. It reaches neither? Then the container is down.
Docker does not start, or you see Cannot connect to the Docker daemon, a keyring error, or an overlay error. This is the most common failure in these guides. It means that the two container features are off. A later pct set --features can switch them off, also when you set them before. Run this in the host shell, not in the container: pct set 127 --features nesting=1,keyctl=1. Then run pct reboot 127. Then run the failed step again. Type both settings on one line. If you send only one setting, it replaces the pair and switches the other one off.
REFERENCE CARD
Paste this in 127 → Summary → Notes in Proxmox. The key facts then stay next to the container.
📋 Reference — paste into this container's Notes in Proxmox (not a shell command)
## Immich — CT 127
dashboard http://192.168.1.248:2283 · docs https://immich.app/docs
compose in /opt/immich · photos in /data/photos (/srv/media/photos)

```sh
# is it running?
cd /opt/immich && docker compose ps
curl -fsS http://localhost:2283 >/dev/null && echo OK   # quick health check
# logs (last 50)
cd /opt/immich && docker compose logs --tail 50
# stop / start / restart
cd /opt/immich && docker compose stop
cd /opt/immich && docker compose start
cd /opt/immich && docker compose restart
# is there an update? ("up to date" = no)
cd /opt/immich && docker compose pull
# update (Immich updates often; .env + /data/photos survive)
# snapshot the container first (see the after-every-build ritual) — instant rollback if the update misbehaves
cd /opt/immich && docker compose pull && docker compose up -d
```
Part E · Media & personal cloud
53Nextcloud
Nextcloud is your own Google Drive, Calendar, and Contacts in one package. It has files, sync, a calendar, and contacts on your own server. Your phone photos upload by themselves.
This chapter needs the items below. You came here directly? Do them first. Each item takes a short time. Nothing on this page works without them.
Proxmox is installed and works at https://192.168.1.220:8006. You can log in as root. See Ch. 6 · Install Proxmox. At your first visit, the browser shows a certificate warning. Select Advanced. Then select Proceed. The warning is normal. Proxmox makes its own certificate.
The Debian 13 image is downloaded. You do this one time. See Ch. 10 · The container wizard. Without the image, the Template list in the wizard is empty.
You have an SSH key from your PC (Ch. 9 · SSH & the terminal). Or you type a password in the two password boxes of the wizard. The wizard needs one of the two. The Next button stays grey until you give one.
You know your own network numbers. Where this chapter shows 192.168.1.x, use your own numbers. The rule is in Ch. 3 · How to read this manual. The address of this chapter must be outside the range that your router gives out by itself (the DHCP pool, often .100–.200, but yours can differ). An address inside the pool can go to a phone later. Two devices on one address break name lookups, and the cause is hard to find.
The shared media folder exists. It is /srv/media. You make it one time in Ch. 40 · Shared storage first. This chapter keeps its data there, not on the small SSD. Build that chapter first. Without the folder, the data goes to the small system SSD. The mount exists to prevent this.
Commands marked HOST run on the server. In the Proxmox page, select homelab in the left tree. Then select >_ Shell. Commands marked CT run inside the container of this chapter. The chapter shows you how to get there.
The wizard does not work?Next is grey: you gave no password and no key. Give one of the two. The Template list is empty: the Debian image is not downloaded. Download it first. Each tab is explained in Ch. 10 · The container wizard.
This suite brings files, sync, calendar, contacts, and office tools together in one app. It is the most complete replacement for Google or Dropbox that you can host yourself. Your files live on the shared media area at /srv/media/files. They do not live on the own disk of the container. The All-in-One (AIO) image is the easiest way to run it. A single master container installs and manages each other piece for you.
Notice — where these commands run
Make CT 128 first. Then run each shell command on this page inside CT 128. Do not run them on the Proxmox host (the server, 192.168.1.220) or on your PC. You open the shell of the container in one of two equal ways. In the Proxmox web page, open homelab → >_ Shell and run pct enter 128. It needs no password. Or run ssh root@192.168.1.249 from your PC. Only the pct and pveam commands go back to the host. Each one is marked where you use it.
53.1
CREATE THE CONTAINER
Do this task with the mouse in the Proxmox web page. You type nothing yet. You prefer the command line? The box below does the same task with one pct create command.
Open https://192.168.1.220:8006.
Click homelab in the left tree.
Click the blue Create CT button at the top right.
Fill in each tab as the reference shows. Leave each field that is not listed at its default value.
Keep Start after created unticked. Click Finish. A few commands on the host come next.
General tab for CT 128. Nesting stays ticked at its default.
Wizard reference — Create CT 128
Tab → Field
Entry
General → Node
Select homelab.
General → CT ID
Type 128. Do not keep the number that the wizard suggests.
General → Hostname
Type nextcloud.
General → Unprivileged container
Keep this box ticked.
General → Nesting
Keep this box ticked. It is ticked by default. The wizard has no box for keyctl, which Docker also needs. The host command after Finish sets it. It is the first line of the next listing.
General → Password / SSH public key
Keep the password empty. Paste your public key in the SSH field: ssh-ed25519 AAAA…your-key-here you@your-pc. With the key, you can run ssh root@192.168.1.249 from your PC. The command pct enter 128 on the host needs no password.
Template → Storage, Template
Select local. Then select debian-13-standard.
Disks → Storage, Disk size
Select local-lvm. Set 20 GiB.
CPU → Cores
Set 2 cores.
Memory → Memory (MiB)
Set 4096. Keep Swap at its default.
Network → IPv4
Select Static. Set IPv4/CIDR to 192.168.1.249/24. Set Gateway to 192.168.1.1. Keep IPv6 at its default.
DNS → DNS domain
Keep this field empty. Do not type 192.168.1.1 here.
DNS → DNS servers
Always type 192.168.1.1. Never keep this field empty.
Confirm
Read the summary. Keep Start after created unticked. Select Finish.
The wizard has no box for three settings: the Docker permission keyctl, the timezone, and start at boot. The first command below sets all three. Run these 7 commands on the host. They set the missing settings, start the container, and open its shell. Each part is explained in Ch. 10 · The container wizard, section "The host command every build needs".
⌨ Type this on the Proxmox host (homelab)
Before you run anything on this page: every 192.168.1.x address below is this manual's example network. If your own network uses different numbers, substitute yours as you type — the rule is in Ch. 3 · How to read this manual. A command that runs with the wrong address usually succeeds and leaves you unreachable.
pct set 128 --features nesting=1,keyctl=1 --onboot 1 --timezone host
mountpoint -q /srv/media || echo "WARNING: /srv/media is NOT a mounted share — the next line would create it on the system disk. Build the shared-storage chapter first."
mkdir -p /srv/media/files && chown -R 100000:100000 /srv/media/files
chown -R 100000:100000 /srv/media/files   # unprivileged-LXC UID remap — see note
pct set 128 -mp0 /srv/media,mp=/data   # bind /srv/media in as /data
pct start 128
pct enter 128                          # now INSIDE CT 128 — the rest of this page runs here
Notice — the shared media folder /srv/media
/srv/media is the one place where all media apps share their data. You make it one time in Ch. 40 · Shared storage first. This chapter assumes that it exists. It only adds a subfolder files inside it. The line -mp0 /srv/media,mp=/data is a bind mount. It makes that host folder show up at a second path, /data, inside the container. They are the same files, reached by two doors. So /srv/media/files on the host is the same folder as /data/files inside CT 128. The chown to 100000:100000 fixes a mismatch of owners. The own admin user of the container has a different ID number from the one of the host. So it needs permission to write there, given in a clear way. Without that chown, Nextcloud reports that the data directory is not writable.
Notice — when you add a real drive later
Everything here lives on the single 500 GB SSD. A full Nextcloud with photos and file history fills that fast. When you add a real drive in Ch. 65 · Add an external drive, you move /srv/media onto it. The containers keep mounting /data exactly as before. They do not notice the change.
Notice — set your timezone
--timezone host makes the container match the Proxmox host. Without it, a new container uses UTC. Its logs and scheduled jobs are then hours away from your local time. A Docker container inside the LXC keeps its own timezone. Its output stays in UTC? Then also add a line -e TZ=Region/City to the docker run command below. It works in the same way as the other -e lines that are explained in the box under it. To list the valid names, run timedatectl list-timezones on the host.
Prefer the terminal? — the same task with one pct create command
⌨ Type this on the Proxmox host (homelab)
TMPL=$(pveam available --section system | awk '/debian-13-standard/{print $2}' | tail -1)
pveam download local "$TMPL"          # once per host; harmless to re-run
mkdir -p /srv/media/files && chown -R 100000:100000 /srv/media/files
chown -R 100000:100000 /srv/media/files   # unprivileged-LXC UID remap — see note
pct create 128 local:vztmpl/"$TMPL" \
  --hostname nextcloud --cores 2 --memory 4096 --rootfs local-lvm:20 \
  --net0 name=eth0,bridge=vmbr0,ip=192.168.1.249/24,gw=192.168.1.1 \
  --nameserver 192.168.1.1 --features nesting=1,keyctl=1 --unprivileged 1 --onboot 1 --timezone host \
  -mp0 /srv/media,mp=/data
pct start 128
pct enter 128                      # you are now INSIDE CT 128 — everything below runs here
Prepares the host folder that this container needs before it starts.
chown -R 100000:100000 /srv/media/files
Prepares the host folder that this container needs before it starts.
-mp0 /srv/media,mp=/data
Shows the host folder /srv/media inside the container at /data. The container reads and writes the shared data in place.
53.2
INSTALL NEXTCLOUD (ALL-IN-ONE)
This part has no buttons. You type commands inside CT 128. These commands run inside CT 128. In the host Shell (homelab → >_ Shell), run pct enter 128. You are still inside from the section before? Then continue. Install Docker. Then start the AIO master container. This one container installs and manages each other Nextcloud piece for you.
Install the Docker engine.
Start the AIO master container. Your files point at the shared media mount. So they never land on the small disk of the container.
Warning — two AIO requirements, or the setup breaks
The master container must be named exactly nextcloud-aio-mastercontainer. AIO finds itself by that name. And NEXTCLOUD_DATADIR=/data/filesmust be set at this first run. You cannot change it later from the setup page. Without it, your files land inside the own 20 GiB disk of the container, not on the shared /data mount. You then fill that disk fast.
Explanation of each part
The Docker install line and the flags -d, --name, --restart, -v, -p, and -e are explained in Ch. 9 · SSH & the terminal. These parts are specific to Nextcloud AIO:
--init
Runs a small init program inside the container. It cleans up processes that end and stay as zombies. The official Nextcloud instructions use it. The app also ran without it in a test, but keep it.
--name nextcloud-aio-mastercontainer
Gives the container a name that you can use later, for example docker stop nextcloud-aio-mastercontainer. AIO also needs this exact name to find itself.
-p 80:80 -p 8080:8080 -p 8443:8443
Opens the three ports that the AIO installer needs. Port 8080 is the setup web page that you open. It has a self-signed certificate. Port 80 is used later to get a free Let's Encrypt certificate. Port 8443 serves the same setup page over a trusted certificate when you set up a domain. Keep all three.
Stores the configuration of the app in a named volume that Docker manages. It is mounted at /mnt/docker-aio-config. The settings stay when it restarts.
-v /var/run/docker.sock:/var/run/docker.sock:ro
Gives the container read-only access to Docker itself (the Docker socket). :ro means read-only. This lets the master container start the other Nextcloud containers that it needs.
-e NEXTCLOUD_DATADIR=/data/files
Tells Nextcloud to store your files (documents and photos) at /data/files. On the host, this is /srv/media/files, the shared media mount. It is not the default place on the disk of the container.
ghcr.io/nextcloud-releases/all-in-one:latest
The image to run: the official Nextcloud All-in-One installer. It comes from the container registry of GitHub (ghcr.io). The tag latest means the newest version.
This one master container may start and stop other containers for you. The docker.sock line gives it that permission. You do not set up the database or the other parts by hand. You control everything from its setup page at :8080. Your files end up in /data/files (this is /srv/media/files on the host) by themselves, because you set NEXTCLOUD_DATADIR at the first run. That setting is locked at install time. It is not a choice on the setup page. Updates happen through the same admin page. They do not happen through docker pull.
Docker inside an LXC needs two features on the container. Both were turned on when you made CT 128: Nesting, ticked in the wizard, and keyctl, added by a command on the host right after. ("Features" here means switches that give the container extra permissions that it does not have by default.) The master container refuses to start? Check the features. Then open the setup page:
If needed, on the Proxmox host, run pct config 128 | grep features. The line must show keyctl=1,nesting=1. It does not? Run pct set 128 --features nesting=1,keyctl=1, or tick Nesting and keyctl under 128 → Options → Features. Then run pct reboot 128.
Open https://192.168.1.249:8080 in your browser. The browser warns that the certificate is not trusted. This is normal for this page. Click Advanced → Proceed.
The page shows a passphrase that it made, to log in to AIO. Save it. Then follow the AIO setup. It manages its own sub-containers. This first run can take several minutes while it downloads each container image. A progress bar on the page shows that it still works and is not stuck.
The AIO setup page — the passphrase that it made logs you in to the AIO admin page, not to Nextcloud itself.
The setup page asks for a domain name. Nextcloud needs a real domain with a valid HTTPS certificate to finish the setup. A bare LAN IP such as 192.168.1.249 does not finish the setup. For an option with no paperwork, expand "Don't have a domain? Get a free one from deSEC" on the page where you enter the domain. This registers a free *.dedyn.io domain. AIO points it at your server and keeps it up to date. AIO later refuses the domain with the message "internal or reserved ip-address"? That is expected on a home network. See "When it goes wrong" below.
The AIO domain page — expand "Don't have a domain?" for a free deSEC domain. This setup page is light only. The main interface of the app stays dark.
Notice — mind the 16 GB budget
Nextcloud AIO runs several containers. It is one of the heaviest apps in this manual. Your machine has 16 GB of RAM in total. Run a few heavy apps at one time, not all of them together. You also run Ch. 52 · Immich or other large services? Watch the memory in Ch. 15 · Beszel. Stop what you do not use.
53.3
HOW TO USE IT — THE BASICS
The AIO admin page is only for the setup. You use Nextcloud on your domain, in the standard Nextcloud interface.
Open the AIO page https://192.168.1.249:8080. Pick which apps to install. Click Download and start containers. Wait until all containers show as running.
When the setup is done, the page shows the Nextcloud admin login: the user name admin and a password that it made. Copy them. Click Open your Nextcloud.
Log in with those credentials. Then change the password that it made. Click your avatar (top right). Then click Settings → Security, in the password section.
Open the Files app in the top bar. Click + New → Upload files. Or drag files from your PC into the window. Use the same menu to make folders.
To share a file or folder, click its share icon. In the panel Sharing, click + next to Share link. Then click the copy icon. A person with the link can download without an account.
Install the Nextcloud app on your phone and the desktop client on your PC. Enter your domain as the server address. Log in. The phone can upload photos by itself. A folder that you select stays identical on both sides.
Make one account for each person. Open the account menu (top right) → Users. Add an account for each family member. Each person gets their own login, files, and quota.
The AIO page — the first run shows "Download and start containers". After a reboot, the same spot shows "Start containers".The AIO setup page — the Nextcloud admin user name and password that it made.Settings → Security — replace the password that it made with your own.The Files app, + New → Upload files.The Sharing panel — + next to Share link, then the copy icon.The account menu → Users — one login for each person.
53.4
WHEN IT GOES WRONG
You open https://192.168.1.249:8080, and it shows a full-page warning such as "Your connection is not private" or NET::ERR_CERT_AUTHORITY_INVALID. The setup page does not load. This is expected. Port 8080 uses a self-signed certificate. Click Advanced. Then click Proceed to 192.168.1.249 (unsafe). The AIO setup page then loads normally.
During the setup, AIO rejects your domain with "The ip-address of your domain is an internal or reserved ip-address." This happens when the domain points to a LAN address such as 192.168.1.249. For an instance that stays on your LAN, do these three steps. None of them touch your files or your AIO settings. Those live in the shared media folder and in the named volume. They are not inside the master container itself. So when you remove the container, you only clear the way to start a new one with one extra switch.
Stop and remove the old master container: docker stop nextcloud-aio-mastercontainer && docker rm nextcloud-aio-mastercontainer.
Run the full docker run command again with one line added:
Open the setup page again. Continue where you stopped. Your choice of domain and your progress are not lost.
Which case are you in? On your own network, the domain points to a 192.168.1.x address. Check by running ping yourdomain.com on your PC. Read the address that it prints. That address starts with 192.168.? Then use the LAN line above as it is. It prints something else? That is your public address. Use --add-host yourdomain.com:THAT-ADDRESS in place of the LAN one. Do not guess. The wrong one gives a Nextcloud that loads for you and not for anyone else.
The master container runs, but the Nextcloud sub-containers never start. Its logs show errors about the Docker socket, overlay, or permissions. This is common when Docker runs inside an unprivileged LXC. On the Proxmox host, run pct set 128 --features nesting=1,keyctl=1 && pct reboot 128. Then, inside the CT, run docker restart nextcloud-aio-mastercontainer.
AIO reports that the data directory /data/files is "not writable", or permission is denied when it makes files. An unprivileged LXC maps the root of the container to host UID 100000. So the bind-mounted folder must belong to that UID. On the Proxmox host, run chown -R 100000:100000 /srv/media/files. Then try the setup step again.
You reboot CT 128 or the whole server, and Nextcloud cannot be reached, although the master container runs. Only the master container restarts by itself. The Nextcloud stack stays stopped until you start it. Open the AIO interface at https://192.168.1.249:8080. Click Start containers. Turn on the option for the daily backup and the automatic update there. The stack then starts by itself after future reboots.
The docker run command fails with "port is already allocated" or "address already in use". Another program in CT 128 already holds port 80, 8080, or 8443. In a container of its own, this is rare. Find the holder with docker ps. Remove any earlier try (docker rm -f nextcloud-aio-mastercontainer) before you run the command again. The -f removes it by force, also while it runs. Your files and settings are not touched. They live in the shared media folder and in the named volume. They are not in the container itself. Port 8080 is really taken? Then map the AIO page to a free host port. Change that one line. Run the full command again:
Then open the interface at :8081. Leave ports 80 and 8443 as they are. AIO needs them for its certificates.
53.5
A download step fails with Temporary failure resolving deb.debian.org, or with another "cannot resolve" message. The container has no working DNS server. It cannot change a name into an address. This is not a typing mistake. It does not fix itself. In the Proxmox page, select this container in the left tree. Open DNS. Select Edit. Type your router address in DNS servers (192.168.1.1 here; use your own). Then run pct reboot 128 in the host shell. Run the failed step again.
A command fails. You do not know if you are on the server or in the container. Read the prompt. In the container, it ends with the name of the container. On the server, it shows root@homelab. The prompt still shows root@homelab after pct enter? Then the command did not work. Type exit. Run the pct enter line again. Check the prompt before you paste anything else. You can paste a build block on the server by mistake. It seems to work. It installs without an error, and the app even answers. But the app is on the server, and it must not be there.
How to see that it happened, and how to undo it. The app does not open at the container address (192.168.1.249). It does open at the server address (192.168.1.220) on the same port. Then the app is on the host. To remove it, run docker rm -f nextcloud-aio-mastercontainer in the host shell. Then run pct enter 128. Check that the prompt changed. Paste the build block again. You lose nothing in the container, because nothing was built there. The first command can show Error: No such container. This is good. It means that the app was never on the host. Do not paste the build block again. Look for another cause.
The page does not open. The browser spins, or says it cannot connect. Do these checks in order, in the host shell. 1. Is the container running? Run pct status 128. It must say running. If it does not, run pct start 128. 2. Is the container at the address that you typed? Run pct config 128 | grep net0. It shows the real address. A wrong digit in the wizard puts the container at another address, and nothing warns you. 3. Does the app run in the container? Run pct enter 128. Then run docker ps. An empty list means that the app did not start. Run docker ps -a to see that it stopped. Run docker logs to see why. 4. Does the app answer in the container? Run curl -I http://localhost followed by the port of the app. You get a reply here, but nothing from your PC? Then the address or your own network is the problem. The app is fine. Your browser reaches 192.168.1.249 but not the port? Then the app is down. It reaches neither? Then the container is down.
Docker does not start, or you see Cannot connect to the Docker daemon, a keyring error, or an overlay error. This is the most common failure in these guides. It means that the two container features are off. A later pct set --features can switch them off, also when you set them before. Run this in the host shell, not in the container: pct set 128 --features nesting=1,keyctl=1. Then run pct reboot 128. Then run the failed step again. Type both settings on one line. If you send only one setting, it replaces the pair and switches the other one off.
REFERENCE CARD
Paste this in 128 → Summary → Notes. The key facts then stay with the container.
📋 Reference — paste into this container's Notes in Proxmox (not a shell command)
## Nextcloud AIO — CT 128
dashboard https://192.168.1.249:8080 (AIO admin) · docs https://github.com/nextcloud/all-in-one
files on host: /srv/media/files (=/data/files in the CT)
```sh
# is it running? (the AIO page lists every sub-container)
docker ps --filter name=nextcloud-aio
curl -fskS https://localhost:8080 >/dev/null && echo OK # quick health check (-k: self-signed cert)# logs (last 50) — master container; sub-container logs live in the AIO page
docker logs nextcloud-aio-mastercontainer --tail 50
# stop / start / restart the master container
docker stop nextcloud-aio-mastercontainer
docker start nextcloud-aio-mastercontainer
docker restart nextcloud-aio-mastercontainer
# after a reboot the stack stays down — open the AIO page, click Start containers# snapshot the container first (see the after-every-build ritual) — instant rollback if the update misbehaves# UPDATES: not docker pull. Open https://192.168.1.249:8080 →# Stop containers → Start and update containers (updates the whole stack)# a master-container update shows its own button on the same page# a daily cron checks for updates and notifies Nextcloud admins
```
Part E · Media & personal cloud
54Funkwhale
Stream your own music library to any phone. This chapter builds the light and easy Navidrome first. It points at the real Funkwhale only if you want its social side. That side lets you follow music libraries that other people run on their own servers. This is what "federation" means.
This chapter needs the items below. You came here directly? Do them first. Each item takes a short time. Nothing on this page works without them.
Proxmox is installed and works at https://192.168.1.220:8006. You can log in as root. See Ch. 6 · Install Proxmox. At your first visit, the browser shows a certificate warning. Select Advanced. Then select Proceed. The warning is normal. Proxmox makes its own certificate.
The Debian 13 image is downloaded. You do this one time. See Ch. 10 · The container wizard. Without the image, the Template list in the wizard is empty.
You have an SSH key from your PC (Ch. 9 · SSH & the terminal). Or you type a password in the two password boxes of the wizard. The wizard needs one of the two. The Next button stays grey until you give one.
You know your own network numbers. Where this chapter shows 192.168.1.x, use your own numbers. The rule is in Ch. 3 · How to read this manual. The address of this chapter must be outside the range that your router gives out by itself (the DHCP pool, often .100–.200, but yours can differ). An address inside the pool can go to a phone later. Two devices on one address break name lookups, and the cause is hard to find.
The shared media folder exists. It is /srv/media. You make it one time in Ch. 40 · Shared storage first. This chapter keeps its data there, not on the small SSD. Build that chapter first. Without the folder, the data goes to the small system SSD. The mount exists to prevent this.
Commands marked HOST run on the server. In the Proxmox page, select homelab in the left tree. Then select >_ Shell. Commands marked CT run inside the container of this chapter. The chapter shows you how to get there.
The wizard does not work?Next is grey: you gave no password and no key. Give one of the two. The Template list is empty: the Debian image is not downloaded. Download it first. Each tab is explained in Ch. 10 · The container wizard.
Read the title of this chapter as the goal, not as the product. "Funkwhale" here means music streaming that you host yourself. The container that you build below is named funkwhale (CT 129). But by default it runs the software of Navidrome, not the Funkwhale app. You clicked through and you expected the real Funkwhale? It is still here. See REAL FUNKWHALE — ONLY IF YOU WANT FEDERATION further down. But most readers want the simple path first.
Funkwhale is a music server that you host yourself. It is your own Spotify for the files that you own. It streams your MP3 or FLAC collection to your phone or browser, at home or away. It adds a social layer on top. Your server can follow music libraries on the servers of other people. This is what "federation" means. That layer makes it heavy. Only to keep track of who follows whose library, Funkwhale runs half a dozen programs in the background, a database, and a search index, all at the same time. For the common goal, "just stream my own library", this chapter builds the far lighter Navidrome instead. It then shows the full Funkwhale stack for the case when you really want federation.
Notice — think again before you pick Funkwhale
For "just stream my library", Navidrome is far lighter than Funkwhale. The extra weight of Funkwhale is several services plus a database and a search engine. It pays off only if you want the social or federation feature. Read the simple path first. Choose the real Funkwhale only if you decided that you want the ActivityPub layer. ActivityPub is the shared language that lets one server follow another. Mastodon uses the same one.
Notice — where these commands run
Run the shell commands inside CT 129. Do not run them on the Proxmox host (the server, 192.168.1.220) or on your PC. You open the shell of the container in one of two equal ways. In the Proxmox web page, open homelab → >_ Shell and run pct enter 129. It needs no password. Or run ssh root@192.168.1.250 from your PC. That second address is the own address of CT 129. It is the fixed address that you give the container on the tab Network of the wizard in the next section. It is separate from the 192.168.1.220 of the server. Only the pct and pveam commands go back to the host. Each one is marked where you use it.
54.1
CREATE THE CONTAINER
Do this task with the mouse in the Proxmox web page. You type nothing. You prefer the command line? The box below does the same task with one pct create command.
Open https://192.168.1.220:8006.
Click homelab in the left tree.
Click the blue Create CT button at the top right.
Fill in each tab as the reference shows. Leave each field that is not listed at its default value.
Keep Start after created unticked. Click Finish. Docker runs an app inside its own sealed box. You install it a few steps below.
General tab: CT ID 129, hostname funkwhale.
Wizard reference — Create CT 129
Tab → Field
Entry
General → Node
Select homelab.
General → CT ID
Type 129. Do not keep the number that the wizard suggests.
General → Hostname
Type funkwhale.
General → Unprivileged container
Keep this box ticked.
General → Nesting
Keep this box ticked. It is ticked by default. The wizard has no box for keyctl, which Docker also needs. The host command after Finish sets it. It is the first line of the next listing.
General → Password / SSH public key
Keep the password empty. Paste your public key in the SSH field: ssh-ed25519 AAAA…your-key-here you@your-pc. With the key, you can run ssh root@192.168.1.250 from your PC. The command pct enter 129 on the host needs no password.
Template → Storage, Template
Select local. Then select debian-13-standard.
Disks → Storage, Disk size
Select local-lvm. Set 10 GiB.
CPU → Cores
Set 2 cores.
Memory → Memory (MiB)
Set 2048. Keep Swap at its default.
Network → IPv4
Select Static. Set IPv4/CIDR to 192.168.1.250/24. Set Gateway to 192.168.1.1. Keep IPv6 at its default.
DNS → DNS domain
Keep this field empty. Do not type 192.168.1.1 here.
DNS → DNS servers
Always type 192.168.1.1. Never keep this field empty.
Confirm
Read the summary. Keep Start after created unticked. Select Finish.
The wizard has no box for three settings: the Docker permission keyctl, the timezone, and start at boot. The first command below sets all three. Run these 4 commands on the host. They set the missing settings, start the container, and open its shell. Each part is explained in Ch. 10 · The container wizard, section "The host command every build needs".
⌨ Type this on the Proxmox host (homelab)
Before you run anything on this page: every 192.168.1.x address below is this manual's example network. If your own network uses different numbers, substitute yours as you type — the rule is in Ch. 3 · How to read this manual. A command that runs with the wrong address usually succeeds and leaves you unreachable.
pct set 129 --features nesting=1,keyctl=1 --onboot 1 --timezone host
pct set 129 -mp0 /srv/media,mp=/data   # bind the shared media folder in as /data
pct start 129
pct enter 129                          # now INSIDE CT 129 — the rest of this page runs here
Notice — set your timezone
--timezone host makes the container match the Proxmox host. Without it, a new container uses UTC. Its logs and scheduled jobs are then hours away from your local time. A Docker container inside the LXC keeps its own timezone. Its output stays in UTC? Then also pass -e TZ=Region/City to docker run. To list the valid names, run timedatectl list-timezones on the host.
Prefer the terminal? — the same task with one pct create command
⌨ Type this on the Proxmox host (homelab)
TMPL=$(pveam available --section system | awk '/debian-13-standard/{print $2}' | tail -1)
pveam download local "$TMPL"          # once per host; harmless to re-run
pct create 129 local:vztmpl/"$TMPL" \
  --hostname funkwhale --cores 2 --memory 2048 --rootfs local-lvm:10 \
  --net0 name=eth0,bridge=vmbr0,ip=192.168.1.250/24,gw=192.168.1.1 \
  --nameserver 192.168.1.1 --features nesting=1,keyctl=1 --unprivileged 1 --onboot 1 --timezone host \
  -mp0 /srv/media,mp=/data
pct start 129
pct enter 129                      # you are now INSIDE CT 129 — everything below runs here
Shows the host folder /srv/media inside the container at /data. The container reads and writes the shared data in place.
54.2
MOUNT YOUR MUSIC FOLDER
Your music lives in the shared media folder on the host: /srv/media/music. You made it one time in Ch. 40 · Shared storage first. Bind-mount that shared folder into CT 129. The music then appears inside the container at /data/music. A music server can play only the files that it can see. Without this mount, it finds zero songs.
This part has no buttons. The dialog 129 → Resources → Add → Mount Point in the GUI only makes a new, empty storage volume. It cannot point at a folder on the host that exists already. The block after the wizard table adds the mount for you. Check it on the host. Then you go into the container.
Check that the shared-media mount is already there. On the Proxmox host, run pct config 129. Look for mp0: /srv/media,mp=/data. It is there? Then this step is done. Running the same pct set line again does no harm. It writes the same line again. Never use a different slot (-mp1, for example) for the same /data. The line is really missing? Add it with pct set 129 -mp0 /srv/media,mp=/data. Then reboot the container with pct reboot 129.
Open a shell inside CT 129: pct enter 129 on the host.
Type the commands on the right inside the container. They make a folder for the database of Navidrome. They start Navidrome with your music mounted read-only.
No container starts, and the terminal answers with a wall of error text that mentions cgroup, overlay, or permission denied? Check the features of CT 129. On the Proxmox host (not inside the CT), run pct config 129 | grep features. The line must show keyctl=1,nesting=1. It does not? Run pct set 129 --features nesting=1,keyctl=1. Then run pct reboot 129. Then run the docker run line again.
Explanation of each part
The Docker install line and the flags -d, --name, --restart, -v, and -p are explained in Ch. 9 · SSH & the terminal. These parts are specific to Navidrome:
mkdir -p /opt/navidrome/data
Makes a folder inside the container to store the database and the settings of Navidrome. The flag -p makes the parent folders too. It shows no error if the folder exists already.
-p 4533:4533
Opens port 4533 and links it to the same port inside the container. This is the web and app interface of Navidrome.
-v /opt/navidrome/data:/data
Saves the database and the settings of Navidrome in /opt/navidrome/data. They stay if the container is made again.
-v /data/music:/music:ro
Gives Navidrome access to your music at /data/music (the shared media mount). It is mounted read-only (:ro). So Navidrome cannot change or delete your originals.
deluan/navidrome:latest
The image to run: Navidrome, a music streaming server that you host yourself (a personal Spotify). It is the newest version.
Open http://192.168.1.250:4533 and make the admin account.
Navidrome has no upload button. It only plays files that are already in /data/music (this is /srv/media/music on the host). Copy your albums into that folder yourself. The simplest route is a file window, not a terminal. Follow Ch. 12 · After every build + common Proxmox tasks, section “Move a file to or from the server”. It shows how to connect with WinSCP on Windows or with Files or Dolphin on Linux and Mac. When it asks for an address, use sftp://root@192.168.1.220. This is the server, not this container. Drop your albums into /srv/media/music. Then force a rescan from the app: avatar menu → Scan.
Point a Subsonic app (Symfonium, DSub, play:Sub) at it to stream on your phone. Your music stays read-only on /data/music. So Navidrome cannot touch the files.
The first visit: make the admin account.
54.3
HOW TO USE IT — THE BASICS
Navidrome has only one setup form. Make the admin account. Let it scan the library. Then play music in the browser or from a phone app.
Open http://192.168.1.250:4533. The first visit shows a form to make the admin. Enter a user name and a password. Navidrome scans /data/music at its start. The library appears by itself. There is nothing to import.
Browse with the sidebar: Albums, Artists, Songs. Click an album and press play. The player is at the bottom of the page.
Click the heart on a song or an album to mark it as a favourite. Favourites get their own filter view. It is the fastest way back to the music that you play.
Select the checkbox on some songs. Then use the action Add to playlist at the top. Type a new name there to make a playlist. Playlists live in the sidebar under Playlists.
Install a Subsonic-compatible app on the phone: Symfonium or DSub on Android, play:Sub or substreamer on iPhone. Add a server with the address http://192.168.1.250:4533. Enter your Navidrome user name and password. The app streams the full library and your playlists. It downloads albums for offline play on a plane or the subway. This is the same job that you paid Spotify or Apple Music to do. Now it comes from your own files.
Copy albums with correct tags into /data/music to add new music. The periodic scan of Navidrome finds them. See the troubleshooting section if they do not appear.
Browse Albums, Artists, and Songs. The player is at the bottom.The heart icon marks a favourite.Select songs. Then Add to playlist.
Notice — one account per listener
As administrator, add users under Users in the sidebar. Each user gets separate favourites, playlists, and play counts. Each phone app logs in with its own user name.
The Users sidebar: add a login for each listener.
54.4
REAL FUNKWHALE — ONLY IF YOU WANT FEDERATION
Real Funkwhale is the heavy option that is described at the top of this chapter: half a dozen programs in the background, a database, and a search index, all together. It pays off only if you really want the social side, to follow other servers. This is the ActivityPub layer. It means to follow music libraries on the servers of other people and to publish podcasts. That is you? Then follow the official Docker install of Funkwhale, not Navidrome.
On the host, keep the same shared music mount from earlier. Funkwhale reads your library through /data/music, as Navidrome does.
Open the official Docker install guide at docs.funkwhale.audio/administrator/installation/docker.html. Run its commands inside CT 129. Its first steps do three things. Each one has a plain meaning:
Make a Funkwhale user. This is an account on the server itself, named funkwhale. It owns the files of the app. It is not a login for the music website. You never sign in to it. It exists so that the app runs without the powers of root.
Download the project files. The own commands of the guide get a folder of ready-made Funkwhale configuration onto the server. The guide tells you which folder it lands in. Write that path down. The next step edits a file inside it.
Fill in the environment file. That is a plain text file named .env. It is in the folder that you just downloaded. It holds the settings of the app, one line NAME=value for each. Funkwhale reads it each time that it starts.
Edit that .env file. In the shell of CT 129, go into the folder from the step above (cd and then the path). Then run nano .env. It is a simple editor that runs in the terminal. Save with Ctrl+O, Enter. Exit with Ctrl+X. You prefer the text editor of your PC? Copy the file to your PC. Change it there. Copy it back into the same folder. The method with the file explorer is in Ch. 12 · After every build + common Proxmox tasks, section “Move a file to or from the server”. Three lines matter:
FUNKWHALE_HOSTNAME= — the public name that people type in a browser, for example FUNKWHALE_HOSTNAME=music.example.com.
DJANGO_SECRET_KEY= — a long random string that the app uses to sign its own logins. Run openssl rand -base64 45 in the shell. Paste what it prints after the =. Never reuse the key of someone else.
The line for the music path. The guide names it. Set it to the folder where Funkwhale can see your music. It is /data/music if you kept the shared mount from step 1.
Save the file. Then start Funkwhale with the own start command of the guide. When you change any line here later, you need that same restart before it takes effect.
The several services of Funkwhale, plus a database and a search engine, add up. Run it next to a couple of other heavy apps at most. Do not run the whole catalog at one time. Watch the memory in Ch. 15 · Beszel. You want only private streaming? Then Navidrome above is the lighter and easier choice.
54.5
WHEN IT GOES WRONG
Navidrome opens fine, but the library is empty or shows 0 songs after you add music. Check that the music really reached the container. Run docker exec navidrome ls /music inside CT 129. It is empty? Then the shared media folder is not mounted into the CT. On the Proxmox host, run pct config 129 | grep mp0. The line is missing? Run pct set 129 -mp0 /srv/media,mp=/data and then pct reboot 129. Check that your files are really copied into /srv/media/music. After the files show up, force a rescan from the web page (the avatar menu at the top right, for the admin only), or run docker restart navidrome.
You want to add music through the Navidrome website, but there is no upload button. This is by design. Navidrome never uploads files. It only serves files that are already on the disk. Copy albums into /srv/media/music with a file share, SFTP, or a file manager. Navidrome finds new files by itself at its start and during its periodic scan.
Music files are on the disk, but songs appear under 'Unknown Artist/Album', or they do not group correctly. Navidrome organizes files by the tags that are inside them, not by folder names. Tag the files with MusicBrainz Picard (free, from picard.musicbrainz.org) or Mp3tag (artist, album, title, track). Save. Then scan the library again (avatar menu → Scan, or docker restart navidrome).
docker logs navidrome shows 'permission denied' when it reads music, or some files are skipped without a sign. This is common in an unprivileged Proxmox CT. Unprivileged LXCs remap the ownership of files on the host. So the container may not have permission to read your files. Make the library readable for all on the host: chmod -R a+rX /srv/media/music. The mount is read-only (:ro). So read access is all that Navidrome needs.
54.6
A download step fails with Temporary failure resolving deb.debian.org, or with another "cannot resolve" message. The container has no working DNS server. It cannot change a name into an address. This is not a typing mistake. It does not fix itself. In the Proxmox page, select this container in the left tree. Open DNS. Select Edit. Type your router address in DNS servers (192.168.1.1 here; use your own). Then run pct reboot 129 in the host shell. Run the failed step again.
A command fails. You do not know if you are on the server or in the container. Read the prompt. In the container, it ends with the name of the container. On the server, it shows root@homelab. The prompt still shows root@homelab after pct enter? Then the command did not work. Type exit. Run the pct enter line again. Check the prompt before you paste anything else. You can paste a build block on the server by mistake. It seems to work. It installs without an error, and the app even answers. But the app is on the server, and it must not be there.
How to see that it happened, and how to undo it. The app does not open at the container address (192.168.1.250). It does open at the server address (192.168.1.220) on the same port. Then the app is on the host. To remove it, run docker rm -f navidrome in the host shell. Then run pct enter 129. Check that the prompt changed. Paste the build block again. You lose nothing in the container, because nothing was built there. The first command can show Error: No such container. This is good. It means that the app was never on the host. Do not paste the build block again. Look for another cause.
The page does not open. The browser spins, or says it cannot connect. Do these checks in order, in the host shell. 1. Is the container running? Run pct status 129. It must say running. If it does not, run pct start 129. 2. Is the container at the address that you typed? Run pct config 129 | grep net0. It shows the real address. A wrong digit in the wizard puts the container at another address, and nothing warns you. 3. Does the app run in the container? Run pct enter 129. Then run docker ps. An empty list means that the app did not start. Run docker ps -a to see that it stopped. Run docker logs to see why. 4. Does the app answer in the container? Run curl -I http://localhost followed by the port of the app. You get a reply here, but nothing from your PC? Then the address or your own network is the problem. The app is fine. Your browser reaches 192.168.1.250 but not the port? Then the app is down. It reaches neither? Then the container is down.
Docker does not start, or you see Cannot connect to the Docker daemon, a keyring error, or an overlay error. This is the most common failure in these guides. It means that the two container features are off. A later pct set --features can switch them off, also when you set them before. Run this in the host shell, not in the container: pct set 129 --features nesting=1,keyctl=1. Then run pct reboot 129. Then run the failed step again. Type both settings on one line. If you send only one setting, it replaces the pair and switches the other one off.
REFERENCE CARD
Paste this in 129 → Summary → Notes. The key facts then stay with the container. Before you ever run the update line on this card, compare it with the docker run you actually used at install. The card is a snapshot of the standard build: if you added anything of your own — a device, an extra -e setting, a second folder — it is not on the card, and re-running the card's line drops it. The container comes back up looking healthy with your setting gone.
📋 Reference — paste into this container's Notes in Proxmox (not a shell command)
## Music (Navidrome) — CT 129
dashboard http://192.168.1.250:4533 · docs https://www.navidrome.org/docs/
library: /data/music (read-only, from /srv/media/music)

```sh
# is it running?
docker ps --filter name=navidrome
curl -fsS http://localhost:4533 >/dev/null && echo OK   # quick health check
# logs (last 50)
docker logs navidrome --tail 50
# stop / start / restart
docker stop navidrome
docker start navidrome
docker restart navidrome
# is there an update? ("Image is up to date" = no)
docker pull deluan/navidrome:latest
# update (library + play counts survive in /opt/navidrome/data)
docker pull deluan/navidrome:latest && docker rm -f navidrome && docker run -d --name navidrome --restart=unless-stopped -p 4533:4533 -v /opt/navidrome/data:/data -v /data/music:/music:ro deluan/navidrome:latest
```
Part E · Media & personal cloud
55Faircamp
Point Faircamp at a folder of your finished releases. It builds a complete static website that streams and sells your music. It is your own Bandcamp, with no platform, no fees, and no cut.
This chapter needs the items below. You came here directly? Do them first. Each item takes a short time. Nothing on this page works without them.
Proxmox is installed and works at https://192.168.1.220:8006. You can log in as root. See Ch. 6 · Install Proxmox. At your first visit, the browser shows a certificate warning. Select Advanced. Then select Proceed. The warning is normal. Proxmox makes its own certificate.
The Debian 13 image is downloaded. You do this one time. See Ch. 10 · The container wizard. Without the image, the Template list in the wizard is empty.
You have an SSH key from your PC (Ch. 9 · SSH & the terminal). Or you type a password in the two password boxes of the wizard. The wizard needs one of the two. The Next button stays grey until you give one.
You know your own network numbers. Where this chapter shows 192.168.1.x, use your own numbers. The rule is in Ch. 3 · How to read this manual. The address of this chapter must be outside the range that your router gives out by itself (the DHCP pool, often .100–.200, but yours can differ). An address inside the pool can go to a phone later. Two devices on one address break name lookups, and the cause is hard to find.
The shared media folder exists. It is /srv/media. You make it one time in Ch. 40 · Shared storage first. This chapter keeps its data there, not on the small SSD. Build that chapter first. Without the folder, the data goes to the small system SSD. The mount exists to prevent this.
Commands marked HOST run on the server. In the Proxmox page, select homelab in the left tree. Then select >_ Shell. Commands marked CT run inside the container of this chapter. The chapter shows you how to get there.
The wizard does not work?Next is grey: you gave no password and no key. Give one of the two. The Template list is empty: the Debian image is not downloaded. Download it first. Each tab is explained in Ch. 10 · The container wizard.
Faircamp is a generator. It is not a live app. You run it to build or rebuild the site from a folder of your releases. A small web server then serves the finished files. You run it again only when you publish new music. Between releases, the site is static and needs no maintenance.
Notice — where these commands run
After you make the container, run each shell command on this page inside CT 145. Do not run them on the Proxmox host (the server, 192.168.1.220) or on your PC. You open the shell of the container in one of two equal ways. In the Proxmox web page, open homelab → >_ Shell and run pct enter 145. It needs no password. Or run ssh root@192.168.1.201 from your PC. Only the pct and pveam commands go back to the host. Each one is marked where you use it.
55.1
CREATE THE CONTAINER
Do this task with the mouse in the Proxmox web page. You type nothing. You prefer the command line? The box below does the same task with one pct create command.
Open https://192.168.1.220:8006.
Click homelab in the left tree.
Click the blue Create CT button at the top right.
Fill in each tab as the reference shows. Leave each field that is not listed at its default value.
The Create CT wizard, General tab, filled in for CT 145.
Keep Start after created unticked. Click Finish.
Wizard reference — Create CT 145
Tab → Field
Entry
General → Node
Select homelab.
General → CT ID
Type 145. Do not keep the number that the wizard suggests.
General → Hostname
Type faircamp.
General → Unprivileged container
Keep this box ticked.
General → Nesting
Keep this box ticked. It is ticked by default. The wizard has no box for keyctl, which Docker also needs. The host command after Finish sets it. It is the first line of the next listing.
General → Password / SSH public key
Keep the password empty. Paste your public key in the SSH field: ssh-ed25519 AAAA…your-key-here you@your-pc. With the key, you can run ssh root@192.168.1.201 from your PC. The command pct enter 145 on the host needs no password.
Template → Storage, Template
Select local. Then select debian-13-standard.
Disks → Storage, Disk size
Select local-lvm. Set 8 GiB.
CPU → Cores
Set 2 cores.
Memory → Memory (MiB)
Set 2048. Keep Swap at its default.
Network → IPv4
Select Static. Set IPv4/CIDR to 192.168.1.201/24. Set Gateway to 192.168.1.1. Keep IPv6 at its default.
DNS → DNS domain
Keep this field empty. Do not type 192.168.1.1 here.
DNS → DNS servers
Always type 192.168.1.1. Never keep this field empty.
Confirm
Read the summary. Keep Start after created unticked. Select Finish.
The wizard has no box for three settings: the Docker permission keyctl, the timezone, and start at boot. The first command below sets all three. Run these 4 commands on the host. They set the missing settings, start the container, and open its shell. Each part is explained in Ch. 10 · The container wizard, section "The host command every build needs".
⌨ Type this on the Proxmox host (homelab)
Before you run anything on this page: every 192.168.1.x address below is this manual's example network. If your own network uses different numbers, substitute yours as you type — the rule is in Ch. 3 · How to read this manual. A command that runs with the wrong address usually succeeds and leaves you unreachable.
pct set 145 --features nesting=1,keyctl=1 --onboot 1 --timezone host
pct set 145 -mp0 /srv/media,mp=/data   # share the media folder into the container as /data
pct start 145
pct enter 145                          # now INSIDE CT 145 — the rest of this page runs here
Notice — where your music lives
/srv/media is the one folder on the host where all your media lives. You make it one time in Ch. 40 · Shared storage first. The line -mp0 /srv/media,mp=/data bind-mounts it into this container as /data. So your masters and the built site sit on the shared drive, not on the small disk of the container. It lives on the 500 GB SSD for now. A catalogue without loss of quality fills that fast. This is expected at this stage. When you add a real drive later (Ch. 66 · Add an internal drive or Ch. 65 · Add an external drive), you move /srv/media onto it one time. The container does not notice, because it points at /data, not at the physical disk.
Notice — set your timezone
--timezone host makes the container match the Proxmox host. Without it, a new container uses UTC. Its logs and scheduled jobs are then hours away from your local time. A Docker container inside the LXC keeps its own timezone. You set it separately with an -e flag. This is a switch on the docker run line. It hands the container a named setting when it starts. The own output of Faircamp still shows UTC? Then add -e TZ=Region/City to its docker run command. To see each valid name, run timedatectl list-timezones. A wrong zone only makes clocks and schedules look odd. Nothing breaks.
Prefer the terminal? — the same task with one pct create command
⌨ Type this on the Proxmox host (homelab)
TMPL=$(pveam available --section system | awk '/debian-13-standard/{print $2}' | tail -1)
pveam download local "$TMPL"          # once per host; harmless to re-run
pct create 145 local:vztmpl/"$TMPL" \
  --hostname faircamp --cores 2 --memory 2048 --rootfs local-lvm:8 \
  --net0 name=eth0,bridge=vmbr0,ip=192.168.1.201/24,gw=192.168.1.1 \
  --nameserver 192.168.1.1 --features nesting=1,keyctl=1 --unprivileged 1 --onboot 1 --timezone host \
  -mp0 /srv/media,mp=/data
pct start 145
pct enter 145                      # you are now INSIDE CT 145 — everything below runs here
Shows the host folder /srv/media inside the container at /data. The container reads and writes the shared data in place.
55.2
BUILD THE SITE — IN CT 145
This part has no buttons. You type commands inside CT 145. You are already there from pct enter 145 above. (You closed that shell? Open homelab → >_ Shell and run pct enter 145 again.) Faircamp is a generator. One command builds the site. A second command serves it. You run the build again after each change to your music.
Everything below runs inside CT 145, not on the Proxmox host.
Install the Docker engine.
Make the catalogue folder on the shared drive, with one subfolder for each release.
Run the Faircamp generator one time to build the finished site.
Start a tiny web server that is always on. It serves the built folder.
⌨ Type this inside CT 145
apt update && apt install -y docker.io curl
# 1) your music: one sub-folder per release, each with the audio files (+ optional cover.jpg + a text blurb)
mkdir -p /data/music-releases
# 2) generate the site (community Faircamp image; re-run whenever you add/change releases):
docker run --rm -v /data/music-releases:/data n3wjack/faircamp:latest
# -> builds the finished site into /data/music-releases/.faircamp_build/# 3) serve that folder with a tiny always-on web server:
docker run -d --name faircamp --restart=unless-stopped \
-p 8080:80 \
-v /data/music-releases/.faircamp_build:/usr/share/nginx/html:ro \
nginx:alpine
Notice — the build must finish before the server has anything to show
Step 2 writes the whole website into .faircamp_build. Step 3 only serves what is in that folder. You start the nginx server before the first build finishes? Then it shows an empty page. Run step 2. Then reload.
Explanation of each part
The Docker install line and the flags -d, --name, --restart, -v, and -p are explained in Ch. 9 · SSH & the terminal. These parts are specific to Faircamp:
mkdir -p /data/music-releases
Makes the catalogue folder on the shared media drive. Each release that you publish becomes one subfolder inside it. It holds the audio files of that release.
docker run --rm -v /data/music-releases:/data n3wjack/faircamp:latest
Runs the Faircamp generator one time. --rm deletes the container afterwards. Faircamp reads your music that is mounted at /data. It writes the finished website into a subfolder .faircamp_build.
.faircamp_build
The static website that was made: plain HTML plus the audio in a new format. Nothing needs to keep running to hold it. The web server only serves these files.
docker run -d --name faircamp … nginx:alpine
Starts a small web server that is always on. It serves the folder that was made. --restart=unless-stopped brings it back after a reboot.
-p 8080:80
Opens the port. The site can then be reached at http://192.168.1.201:8080.
-v …/.faircamp_build:/usr/share/nginx/html:ro
Shows nginx the site that was made. The option :ro means read-only. nginx never changes the files.
55.3
FIRST RUN
Open http://192.168.1.201:8080 to see the site. Use the IP of the CT, 192.168.1.201, not the host 192.168.1.220.
The homepage of the site that was made, served at http://192.168.1.201:8080, with a list of releases.
To add a release, put a new subfolder into /data/music-releases. Then run step 2 of the build again to rebuild. Faircamp reads a small text file named release.eno for each release. It sets titles, descriptions, and options for download or price. It is optional. It is covered step by step below, in HOW TO USE IT — THE BASICS.
55.4
HOW TO USE IT — THE BASICS
The daily use of Faircamp is a loop. Add a release folder with tagged files to the catalogue. Describe it in a small text file if you want. Rebuild. Refresh.
Tag the audio files first with artist, album, title, and track number. Tagging means that you write that information into the audio file itself, not into its file name. Any player (and Faircamp) can then read it. MusicBrainz Picard is a free desktop app that does this. Point it at your album folder. Confirm the match. Click save. Faircamp reads names and track order from the metadata of the file, not from the file names.
Make one subfolder for each release inside /data/music-releases. Then copy the audio files into it from your PC. Use the graphical file-transfer connection to CT 145 that Ch. 12 · After every build + common Proxmox tasks, section "Move a file to or from the server", describes. Connect, make the subfolder, and drag the audio files in. Add a cover image named cover.jpg (front.jpg and .png also work) in the same way. This image becomes the cover of the release.
Optional: add a plain-text file named release.eno in the release folder. It sets what the tags cannot. The easiest way to make it is over the same file-transfer connection from the step above. Make a new text file named release.eno. Open it in the text editor of your PC. You are at the shell of CT 145 already? Then nano /data/music-releases/your-release-folder/release.eno opens a simple editor in the terminal. Type your lines. Press Ctrl+O to save. Press Ctrl+X to exit. Examples: title: My EP and date: 2026-07-01. Set the download formats with a list release_downloads: of lines such as - flac and - mp3. The own documentation of Faircamp lists every option that this file accepts. This manual prints only the few lines above. It does not print a full reference. Use the docs link at the top of this chapter for anything more.
Rebuild the site. Run the generator command from step 2 of the build again: docker run --rm -v /data/music-releases:/data n3wjack/faircamp:latest. Then refresh http://192.168.1.201:8080. No change appears without a rebuild.
Share the address. Visitors stream each track in the browser. They download the formats that you permitted. Prices, payment links, and download codes are also options of release.eno. But this manual does not document their syntax. A guess at it makes a file that Faircamp rejects. Take the exact spelling of each from the own documentation of Faircamp (the docs link at the top of this chapter) before you add them. Everything above works without any of them.
A release page: cover, streaming player, and links for the download formats.
Notice — hide a release that is not ready
The option unlisted in release.eno keeps a release off the front page. It stays reachable through its direct link. So you can share a private preview before the full release.
55.5
WHEN IT GOES WRONG
The site is empty, or no releases show. The audio files must be inside subfolders of the catalogue, one for each release. They must not be loose in the top folder. Fix the layout. Then run step 2 again.
Your changes do not appear. Faircamp is a generator. You must run step 2 again after each change. The nginx server only serves what was built last.
nginx shows "403 Forbidden" or a blank page. Step 2 did not make .faircamp_build. Read the output of that run for errors. Or the path in the -v mount is wrong.
"Permission denied" during the build. The Faircamp generator container runs as root. So this is rare. Check that /data/music-releases is on the shared mount that can be written to (not read-only). Run again: ls -ld /data/music-releases. The folder is really locked? Then chown -R 0:0 /data/music-releases from inside CT 145 gives the root owner back. (-R applies the change to each file inside the folder. 0:0 is the root user and group.)
docker run fails inside CT 145 with a cgroup, overlay, or 'permission denied' error. The LXC may miss the features that Docker needs. On the Proxmox HOST (not inside the CT), run pct config 145 | grep features. The line must show keyctl=1,nesting=1. It does not? Run pct set 145 --features nesting=1,keyctl=1. Then run pct reboot 145. Run the command that failed again.
55.6
A download step fails with Temporary failure resolving deb.debian.org, or with another "cannot resolve" message. The container has no working DNS server. It cannot change a name into an address. This is not a typing mistake. It does not fix itself. In the Proxmox page, select this container in the left tree. Open DNS. Select Edit. Type your router address in DNS servers (192.168.1.1 here; use your own). Then run pct reboot 145 in the host shell. Run the failed step again.
A command fails. You do not know if you are on the server or in the container. Read the prompt. In the container, it ends with the name of the container. On the server, it shows root@homelab. The prompt still shows root@homelab after pct enter? Then the command did not work. Type exit. Run the pct enter line again. Check the prompt before you paste anything else. You can paste a build block on the server by mistake. It seems to work. It installs without an error, and the app even answers. But the app is on the server, and it must not be there.
How to see that it happened, and how to undo it. The app does not open at the container address (192.168.1.201). It does open at the server address (192.168.1.220) on the same port. Then the app is on the host. To remove it, run docker rm -f faircamp in the host shell. Then run pct enter 145. Check that the prompt changed. Paste the build block again. You lose nothing in the container, because nothing was built there. The first command can show Error: No such container. This is good. It means that the app was never on the host. Do not paste the build block again. Look for another cause.
The page does not open. The browser spins, or says it cannot connect. Do these checks in order, in the host shell. 1. Is the container running? Run pct status 145. It must say running. If it does not, run pct start 145. 2. Is the container at the address that you typed? Run pct config 145 | grep net0. It shows the real address. A wrong digit in the wizard puts the container at another address, and nothing warns you. 3. Does the app run in the container? Run pct enter 145. Then run docker ps. An empty list means that the app did not start. Run docker ps -a to see that it stopped. Run docker logs to see why. 4. Does the app answer in the container? Run curl -I http://localhost followed by the port of the app. You get a reply here, but nothing from your PC? Then the address or your own network is the problem. The app is fine. Your browser reaches 192.168.1.201 but not the port? Then the app is down. It reaches neither? Then the container is down.
Docker does not start, or you see Cannot connect to the Docker daemon, a keyring error, or an overlay error. This is the most common failure in these guides. It means that the two container features are off. A later pct set --features can switch them off, also when you set them before. Run this in the host shell, not in the container: pct set 145 --features nesting=1,keyctl=1. Then run pct reboot 145. Then run the failed step again. Type both settings on one line. If you send only one setting, it replaces the pair and switches the other one off.
REFERENCE CARD
Paste this in 145 → Summary → Notes. The key facts then stay with the container. Before you ever run the update line on this card, compare it with the docker run you actually used at install. The card is a snapshot of the standard build: if you added anything of your own — a device, an extra -e setting, a second folder — it is not on the card, and re-running the card's line drops it. The container comes back up looking healthy with your setting gone.
📋 Reference — paste into this container's Notes in Proxmox (not a shell command)
## Faircamp — CT 145
dashboard http://192.168.1.201:8080 · docs https://faircamp.org/docs/
music & built site: /data/music-releases (/srv/media on the host)

```sh
# is it running? (the nginx web server that serves the built site)
docker ps --filter name=faircamp
curl -fsS http://localhost:8080 >/dev/null && echo OK   # quick health check
# logs (last 50)
docker logs faircamp --tail 50
# stop / start / restart the web server
docker stop faircamp
docker start faircamp
docker restart faircamp
# rebuild the site after adding or changing music (run, then reload the page)
docker run --rm -v /data/music-releases:/data n3wjack/faircamp:latest
# is there an update? ("Image is up to date" = no)
docker pull n3wjack/faircamp:latest && docker pull nginx:alpine
# update the web server (your music + built site survive in /data/music-releases)
docker pull nginx:alpine && docker rm -f faircamp && docker run -d --name faircamp --restart=unless-stopped -p 8080:80 -v /data/music-releases/.faircamp_build:/usr/share/nginx/html:ro nginx:alpine
```
Part F · Game servers
56Pick your game setup
This is the front door to game servers. First decide what you want. One game that is always on for the kids and their friends? Or a panel that runs many games at once? Then go straight to the right chapter.
In this chapter
Part F turns your homelab into game hosting that you own. People rent the same always-on private server from a company for about $15 each month. Here it runs free on hardware that you already have. Part F has seven chapters. Four are real game servers (Palworld, Minecraft, Project Zomboid, Valheim). Three are tools that support them (LanCache, Pelican, RomM). They make hosting easier, or they add a library. Read the one that you want. Skip the rest. None of them depends on another. This page sorts them, so that you build only what you need. It also warns you about the one resource that they all fight over: memory.
56.1
START HERE — WHICH KIND OF SETUP DO YOU WANT?
Almost everyone who reaches Part F is one of two people. Find yourself below. Then follow the arrow.
Pick your path
You want…
Go to
One game, always on, for the kids or a group of friends
Games that change, or several servers that people manage themselves
Build Ch. 62 · Pelican panel. It is one web panel that starts Minecraft, Palworld, Valheim, and more when you ask. It is worth it only when you run two or more servers. See the section ROTATING GAMES below.
Faster game downloads across several gaming PCs in the house
That is Ch. 61 · LanCache. It is a download cache, not a game server. See TWO TOOLS THAT ARE NOT GAME SERVERS below.
A tidy shelf that you can browse, for a collection of retro ROMs
That is Ch. 63 · RomM. It is a library, not a server. See TWO TOOLS THAT ARE NOT GAME SERVERS below.
56.2
ONE GAME FOR THE KIDS OR FRIENDS — MINECRAFT OR PALWORLD
These are the servers that are always on for the group. Minecraft and Palworld both run inside a small sealed app package called a container. The game and everything that it needs live in one box. You can start it, stop it, or move it as one unit. Ch. 59 · Project Zomboid server is the odd one out. It installs straight onto the server in a different way. Its own chapter shows you each step. All three keep the world safe between sessions. Choose by the game that your group really plays. The table compares the two that people ask for most.
The classic game of building with blocks. Most kids ask for it. It has no end with mods.
A survival game in an open world, where you collect creatures. You play it as a team with a few friends.
How many players
No hard limit. A few friends is normal. More players need more RAM.
Up to 32 on one world. You set it in the server config.
RAM appetite
The container reserves 12 GB. Vanilla is happy with 2–4 GB of that. A big modpack wants 6–10 GB.
The container reserves 8 GB. Palworld really uses most of it, also when nobody plays.
Mods
Huge. Fabric, Forge, and ready-made modpacks from Modrinth and CurseForge. You pick one when you set up the server. It installs by itself. See Ch. 58 · Minecraft server for the exact steps. Everyone must run the same pack.
Small. Mostly server settings (difficulty, rates, length of the day). There is no big ecosystem of modpacks.
Who can join ⚠
Java Edition only. Players on a console or a phone use Bedrock. They cannot join. Read the warning below before you promise the kids anything.
Cross-play is friendlier. But the dedicated server is the Steam (PC) version. So check the platform of your friends.
Project Zomboid is the third pick below. It does not need this check of the platform. It is only for Steam and PC. It has no console or mobile version. So there is no trap like Java against Bedrock.
Warning — kids on a console or a phone run Bedrock and cannot join a Java server
This is the most common heartbreak for the parents who read this manual. So settle it before you build. Minecraft comes in two separate games. Java Edition runs on Windows, Mac, and Linux computers. Bedrock Edition runs on Xbox, PlayStation, Nintendo Switch, phones, tablets, and the app "Minecraft for Windows". They are different software. A Bedrock client cannot join a Java server. An Xbox also cannot run a PlayStation disc. The server in Ch. 58 · Minecraft server is Java. So each kid who wants in needs Minecraft: Java Edition on a PC. Your household is all consoles and phones? Then a plain Java server does not help them. But you are not stuck. Ch. 58 · Minecraft server has a bridge route (Paper plus GeyserMC and Floodgate). It lets Bedrock players join a Java server. It has more moving parts than the plain build. So read the opening warning of that chapter before you choose.
56.3
ROTATING GAMES, OR MANY SERVERS — PELICAN
Ch. 62 · Pelican panel is a web control panel for game servers. It is a fork of Pterodactyl that is still maintained. In one browser page, you make a Minecraft, Palworld, or Valheim server. You start and stop it. You watch its live console. You give a friend a login that controls only their own server. Behind the scenes, it runs each game in its own separate little box. If one game crashes or you install it again, it cannot touch the others.
Notice — Pelican is worth it only past one server
Pelican has two moving parts. The Panel is the web page plus its database. Wings is a helper program in the background on your server. It really starts and stops each game. That is real extra complexity. For a single server that you rarely change, it is too much. Build the plain Ch. 58 · Minecraft server or Ch. 57 · Palworld dedicated server chapter and manage it by hand. Use Pelican when you run two or more game servers, when you rotate through games from month to month, or when you want other people to manage their own server without touching your Proxmox host. Also remember that each server that Pelican starts needs its own RAM on top of the panel. See the warning at the end.
56.4
TWO TOOLS THAT ARE NOT GAME SERVERS
Both of these are in Part F because they are close to gaming. But neither hosts a game. Build them only if the specific need fits.
LanCache — a download cache for a house with several gamers
Ch. 61 · LanCache is a private download cache. The first PC downloads a game from Steam, Epic, or Battle.net from the internet. LanCache keeps a copy. Each other PC on your network then gets that game from the copy at LAN speed. It does not download it again. A game of 100 GB is fetched one time, not one time for each machine.
Notice — LanCache runs today, at a limited size
It pays off only with two or more gaming PCs that play the same games, or on a slow internet connection or one with a cap. With a single gaming PC, it only costs disk space for nothing. LanCache runs on the machine that you already have. It shares the SSD of the server with the media library folder from Ch. 40 · Shared storage first. Its size is limited to 100 GB. A real drive (Part G — Ch. 65 · Add an external drive or Ch. 66 · Add an internal drive) lets you raise that limit when the cache is full. Build it now if two or more gaming PCs share your Wi-Fi. Expect to look at the limit again after Part G.
RomM — a shelf that you can browse, for a collection of retro games
Ch. 63 · RomM turns a folder of ROMs into a library with cover art. You browse it in the browser. You play there, or you download to a handheld. It is a Jellyfin for retro games. It is a library manager. It is not a server and not a downloader. There is no automatic grabber. You fill the shelf yourself. Its library lives in the shared media folder. So set up Ch. 40 · Shared storage first first. Build it if you have a large collection of ROMs. For a few files, a plain folder and one emulator are simpler.
56.5
ONE WARNING BEFORE YOU BUILD — GAME SERVERS ARE THE PART OF THIS MANUAL THAT NEEDS THE MOST RAM
Each other part of this manual runs comfortable little containers that use a gigabyte or two. Game servers do not. Minecraft reserves 12 GB. Project Zomboid reserves 12 GB. Palworld and Valheim reserve 8 GB each. Any one of them alone nearly fills the 16 GB of the example machine.
Warning — do not run two heavy game servers, or a big modpack, at the same time
You cannot run a Minecraft modpack of 12 GB and the Palworld server of 8 GB together on 16 GB of RAM. The server can crash or freeze in the middle of a game. Anyone who plays could lose progress that is not saved. Run one heavy game at a time. Shut down the one that nobody plays. Check your free memory before you commit to a game server. You built Ch. 15 · Beszel? Its front page lists the live memory of every machine. Click the name of a machine to open its full memory graph. You did not build it? Use the host shell instead: homelab → >_ Shell, then free -h. Read the column available. Keep at least 8–12 GB available before you start a game server. If not, it fights with the containers that you already run. Also check that the address that a new container wants is free. The Container & IP map in the back matter of the manual lists each container and address that this book uses. Reach it from the index or from the search box. It is not a numbered chapter. Your household really needs several big servers online at the same time? The honest answer is more RAM in the machine. Do not squeeze them onto 16 GB.
Part F · Game servers
57Palworld dedicated server
Run a dedicated Palworld server in a container. The shared world then stays online for you and your friends. Nobody has to leave a gaming PC on.
This chapter needs the items below. You came here directly? Do them first. Each item takes a short time. Nothing on this page works without them.
Proxmox is installed and works at https://192.168.1.220:8006. You can log in as root. See Ch. 6 · Install Proxmox. At your first visit, the browser shows a certificate warning. Select Advanced. Then select Proceed. The warning is normal. Proxmox makes its own certificate.
The Debian 13 image is downloaded. You do this one time. See Ch. 10 · The container wizard. Without the image, the Template list in the wizard is empty.
You have an SSH key from your PC (Ch. 9 · SSH & the terminal). Or you type a password in the two password boxes of the wizard. The wizard needs one of the two. The Next button stays grey until you give one.
You know your own network numbers. Where this chapter shows 192.168.1.x, use your own numbers. The rule is in Ch. 3 · How to read this manual. The address of this chapter must be outside the range that your router gives out by itself (the DHCP pool, often .100–.200, but yours can differ). An address inside the pool can go to a phone later. Two devices on one address break name lookups, and the cause is hard to find.
The folder /srv/backups exists. It is registered in Proxmox as a storage named backups. You make it when you add a drive: Ch. 65 · Add an external drive for an external drive, Ch. 66 · Add an internal drive for an internal drive. Ch. 64 · Backups done right (3-2-1)uses this folder, but it does not make it. You added no drive yet? Then this chapter cannot write there. Do one of the two drive chapters first. Or point the job at the local storage. It needs no drive. It keeps its archives in /var/lib/vz/dump on the system SSD.
Commands marked HOST run on the server. In the Proxmox page, select homelab in the left tree. Then select >_ Shell. Commands marked CT run inside the container of this chapter. The chapter shows you how to get there.
The wizard does not work?Next is grey: you gave no password and no key. Give one of the two. The Template list is empty: the Debian image is not downloaded. Download it first. Each tab is explained in Ch. 10 · The container wizard.
57.1
CREATE THE CONTAINER
You do this in the Proxmox web page with the mouse.
Open https://192.168.1.220:8006 and log in.
Click homelab in the left tree.
Click the blue Create CT button at the top right.
Fill in each tab as the reference shows. Leave each field that is not listed at its default.
On the Confirm tab, keep Start after created unticked. Then click Finish.
Run the host commands after the table. They add the settings that Docker needs and start the container.
Log in at https://192.168.1.220:8006.Click Create CT at the top right of the node view.General tab — CT ID 101, hostname palworld. Unprivileged stays ticked.
Wizard reference — Create CT 101
Tab → Field
Entry
General → Node
Select homelab.
General → CT ID
Type 101. Do not keep the number that the wizard suggests.
General → Hostname
Type palworld.
General → Unprivileged container
Keep this box ticked.
General → Nesting
Keep this box ticked. It is ticked by default. The wizard has no box for keyctl, which Docker also needs. The host command after Finish sets it. It is the first line of the next listing.
General → Password / SSH public key
Keep the password empty. Paste your public key in the SSH field: ssh-ed25519 AAAA…your-key-here you@your-pc. With the key, you can run ssh root@192.168.1.222 from your PC. The command pct enter 101 on the host needs no password.
Template → Storage, Template
Select local. Then select debian-13-standard.
Disks → Storage, Disk size
Select local-lvm. Set 40 GiB.
CPU → Cores
Set 4 cores.
Memory → Memory (MiB)
Set 8192. Keep Swap at its default.
Network → IPv4
Select Static. Set IPv4/CIDR to 192.168.1.222/24. Set Gateway to 192.168.1.1. Keep IPv6 at its default.
DNS → DNS domain
Keep this field empty. Do not type 192.168.1.1 here.
DNS → DNS servers
Always type 192.168.1.1. Never keep this field empty.
Confirm
Read the summary. Keep Start after created unticked. Select Finish.
The wizard has no box for three settings: the Docker permission keyctl, the timezone, and start at boot. The first command below sets all three. Run these 3 commands on the host. They set the missing settings, start the container, and open its shell. Each part is explained in Ch. 10 · The container wizard, section "The host command every build needs".
⌨ Type this on the Proxmox host (homelab)
Before you run anything on this page: every 192.168.1.x address below is this manual's example network. If your own network uses different numbers, substitute yours as you type — the rule is in Ch. 3 · How to read this manual. A command that runs with the wrong address usually succeeds and leaves you unreachable.
pct set 101 --features nesting=1,keyctl=1 --onboot 1 --timezone host
pct start 101
pct enter 101                          # now INSIDE CT 101 — the rest of this page runs here
Notice — set your timezone
--timezone host makes the container match the timezone of the host. Without it, a new container uses UTC. Its logs and the names of its backup files then show a time that is hours away from your local time. To see the valid names for the host, run timedatectl list-timezones. This Palworld setup is a Docker container that runs inside the Proxmox LXC container that you just made. There are two layers, one inside the other. Each has its own clock. The Docker container inside the LXC keeps its own clock separately. Its output stays in UTC? Then also pass -e TZ=Region/City to docker run.
Prefer the terminal? — the same task with one pct create command
⌨ Type this on the Proxmox host (homelab)
TMPL=$(pveam available --section system | awk '/debian-13-standard/{print $2}' | tail -1)
pveam download local "$TMPL"          # once per host; harmless to re-run
pct create 101 local:vztmpl/"$TMPL" \
  --hostname palworld --cores 4 --memory 8192 --rootfs local-lvm:40 \
  --net0 name=eth0,bridge=vmbr0,ip=192.168.1.222/24,gw=192.168.1.1 \
  --nameserver 192.168.1.1 --features nesting=1,keyctl=1 --unprivileged 1 --onboot 1 --timezone host
pct start 101
pct enter 101                      # you are now INSIDE CT 101 — everything below runs here
Asks Proxmox for the list of OS images that you can download. Picks the newest Debian 13 image. Keeps its exact file name in a variable. You then never type a version number that goes out of date.
pveam download local "$TMPL"
Downloads that template into the local storage of the host. You need it one time for each host. If you run it again when the template is there, it does no harm.
--rootfs local-lvm:40
Gives the container a disk of 40 GiB on the SSD. The value is a maximum. It is not a reservation. local-lvm is thin-provisioned. So it uses only the space that is really written. Watch the Data% of the pool as you add containers. A total of maximums that is above the size of the pool is fine. A full pool is not.
--features nesting=1,keyctl=1
These two features let Docker run inside the container. Without them, the Docker daemon does not start. It shows errors about keyrings or overlay. This is the most common mistake.
--unprivileged 1
Runs the container without root rights. Its root user is not the root user of the host. This is the safer setting. This manual uses it everywhere.
--onboot 1
Starts the container by itself when the host boots. A power cut then does not leave the server down.
pct enter 101
Opens a root shell inside the container. All steps after this run in the container. Type exit to go back to the host.
57.2
INSTALL AND RUN THE SERVER
Notice — everything below runs in CT 101
After the container exists, you type the rest of this chapter in the shell of the container. You open it in one of two ways. Run pct enter 101 on the host (first homelab → >_ Shell). Or run ssh root@192.168.1.222 from your PC. (The >_ Console button of the container shows a login: prompt. The containers of this manual cannot answer it. Skip it.) Only the pct and pveam commands go back to the host.
The >_ Console button of the CT opens a login: prompt, not a shell. Use pct enter 101 from homelab → >_ Shell.
To open the host Shell is the last button that you press. To install Docker and start the server has no buttons. You type each step below inside CT 101.
Install Docker. Then start the Palworld image from the community. Change the two passwords before you run it.
The Docker install line and the flags -d, --name, --restart, -v, -p, and -e are explained in Ch. 9 · SSH & the terminal. These parts are specific to Palworld:
--stop-timeout 30
Gives the server up to 30 seconds to shut down in a clean way. The default of Docker is 10 seconds. It can cut a save short. The extra time lets the world be written to the disk first.
-p 8211:8211/udp
Opens UDP port 8211, the game port of Palworld, from the container to the host. Palworld uses UDP, not TCP.
-p 27015:27015/udp
Opens the Steam query port. The GameDig monitor of Uptime Kuma cannot use it. Palworld does not answer Steam A2S queries. (See chapter Ch. 14 · Uptime Kuma. It monitors this server with Ping instead.) Tools for the Steam server browser from third parties, outside this manual, may still want it open. You can drop this line if you never use one.
-e PUID=1000 -e PGID=1000
Sets the user ID and group ID that own the files of the container. The permissions then match a normal Linux user.
-e PORT=8211 -e PLAYERS=8
Tells the server to listen on 8211. Limits the world to 8 players. The official image allows up to 32.
-e ENABLE_PERF_THREADING_ARGS=true
Turns on the start arguments of the server for many threads (-useperfthreads -NoAsyncLoadingThread -UseMultithreadForDS). They improve speed on hosts with many cores.
-e SERVER_NAME="My Palworld Server"
The name that players see when they browse for the server. Spaces are fine inside the double quotes. Do not use a comma or a double quote in the name. The settings file separates values with commas. Those characters corrupt the config. The name does not select which save loads.
-e SERVER_PASSWORD="…"
The password that friends type to join. Change it from the placeholder.
-e ADMIN_PASSWORD="…"
The admin password. RCON and the REST API both use it to log in. So a clean save when it stops needs it. Change it from the placeholder.
-e RCON_ENABLED=true -e RCON_PORT=25575
Turns on RCON, the channel for remote admin. The image needs RCON so that docker stop can save the world and shut down in a clean way. Without it, a stop can land in the middle of a write. You then lose the last minutes of play. RCON also runs the admin commands in the game. The port stays inside the container. It is not published. So nothing on your LAN reaches it.
-e REST_API_ENABLED=true -e REST_API_PORT=8212
The REST API is on by default. The backup job calls it to write a save before it makes the archive. It is not published here. So it can be reached only from inside the container. Never forward 8212 to the internet.
-v /opt/palworld:/palworld
Mounts the host folder /opt/palworld into the container at /palworld. The save of the world and the config live here. They stay even if you delete the container and make it again.
thijsvanloef/palworld-server-docker
The image that is built already. It is a ready-made template with SteamCMD and the Palworld dedicated-server program.
Notice — the first start looks stuck, but it is not
At the first run, the container downloads the game server from Steam. It is about 8 GB. It takes 10 to 20 minutes. Watch it with docker logs -f palworld. You see many lines Update state (0x61) downloading…. Then you see Success! App '2394010' fully installed. Then you see Running Palworld dedicated server on :8211. After that, the log goes silent. This means that the server is up and idle, not stuck. No players are connected. Press Ctrl-C to stop following the log. That closes the view. It does not stop the server. Check with docker ps. The status must read Up … (healthy). The first start also makes a new empty world and the folder /opt/palworld/Pal/Saved. Do not restart the container during the download.
Notice — RAM budget on a 16 GB machine
The official image of Palworld recommends 16 GB of RAM. The memory use of the server grows during a session. This container is set to 8 GB. This runs a small group. It leaves room for the rest of the homelab. The container keeps restarting? Or docker logs palworld shows Killed or a message about out of memory? Then raise the memory of CT 101 in the web page (101 → Resources → Memory) toward 16384 MB. Reboot the CT. On a machine with 16 GB, you cannot run Palworld with full RAM next to other heavy apps. Check Beszel. Stop what you do not use.
CT 101 → Resources → double-click the Memory row → raise it and click OK.
57.3
LET FRIENDS IN
Start with the easy case. Everyone plays on your home network? Then you forward nothing. In Palworld, they choose Join Multiplayer (Dedicated) → Connect with IP. They enter 192.168.1.222:8211 with the join password. That is the whole setup for play on the LAN.
Only friends who come in over the internet need port forwarding. Palworld has no other way in with join-by-IP. This is the planned exception to the rule of the manual to never expose a service to the internet.
Warning — this opens a hole in your firewall
Chapter Ch. 4 · Networking in 10 minutes says to keep each service behind the router and never forward ports. A game server for friends on the internet is the one exception that is allowed. So understand exactly what you do:
Forward only UDP 8211 to 192.168.1.222. On your router, look under Port Forwarding. (Some brands call it "Virtual Server" or "Applications & Gaming".) Nothing else is forwarded: not RCON (25575), not the REST API (8212), not the query port, unless you want a public listing.
What this exposes: anyone on the internet can send traffic to the Palworld server on that one port. They cannot reach any other container. Only 8211 is forwarded. The server runs in an isolated container without root rights.
Why this risk is acceptable: the exposed surface is a single game server. It needs your SERVER_PASSWORD to join. It holds only a game world. You can build it again from a backup in minutes. That is a far smaller target than a login page or a file share that you expose.
Keep SERVER_PASSWORD set to a real password. Strangers find and join an open Palworld server on the public internet.
Find your public address in this way. Open the status page of your router (the address is in Ch. 4 · Networking in 10 minutes). Read the WAN or Internet address that it shows. That is the number that friends need. A search engine can also tell you. But the router cannot be wrong about your own line. Give friends YOUR-PUBLIC-IP:8211. They select Join Multiplayer (Dedicated) → Connect with IP. They enter it with the join password.
Notice — the safer alternative: Tailscale
Your friends will install one app? Then you can skip port forwarding. Add them to your Tailscale network. This is not covered in Ch. 19 · Remote access: Tailscale. That chapter sets up your own machines, not the machines of other people. Do it from the Tailscale admin console in a browser. Open the Users page. Send each friend an invite to their email. They install Tailscale, accept, and reach the server at its tailnet address. You would rather not put friends on your private network? Use the port-forward route instead.
Notice — nobody at home can use the public IP
Anyone on the same home network as the server must join with 192.168.1.222:8211, not with the public IP. Most home routers cannot loop a public address back to a device inside the house (there is no NAT hairpinning). So a housemate who types the public IP only gets a timeout.
Players can connect? Then add a Ping monitor in Uptime Kuma (chapter Ch. 14 · Uptime Kuma) on the server. It alerts you if the server goes down.
57.4
CHANGE GAME SETTINGS
This part has no buttons. You type commands inside CT 101 (pct enter 101 from homelab → >_ Shell). It is the same place where you ran Docker earlier.
There are two ways to change the settings of the world: difficulty, length of the day, speed of breeding, and the rest. Pick one. Do not mix them.
By environment variable (the simplest). Add more -e flags to the docker run command. Then make the container again. Stop it. Remove it. Run the same docker run line again with your new flags added. The exact steps are in Ch. 12 · After every build + common Proxmox tasks, section "Change a setting on a Docker app". Your world save in /opt/palworld is not touched, because it lives outside the container. At the next start, the server writes your new flags into the settings file for you.
By editing the file directly. The file is /opt/palworld/Pal/Saved/Config/LinuxServer/PalWorldSettings.ini. It appears only after the server has fully started at least one time. This route stays only if you already set -e DISABLE_GENERATE_SETTINGS=true (see the notice below the worked example). If not, the server overwrites your edit at its next start. The numbered steps are below the worked example.
A worked example. These are the four groups of settings that people ask about most. They use the easy way (way 1). Add any of these -e flags to the docker run command in the reference card. Then make the container again. (The update block there shows the pattern of rm and run. Do it while the server is empty.)
⌨ Example flags — add the ones you want to the docker run line
# level twice as fast (1 = normal)
-e EXP_RATE=2 \
# pals are easier to catch
-e PAL_CAPTURE_RATE=1.5 \
# pals get hungry half as fast — yes, the game misspells "decrease"
-e PAL_STOMACH_DECREACE_RATE=0.5 \
# drop only items on death — None / Item / ItemAndEquipment / All
-e DEATH_PENALTY=Item \
Explanation of each part
-e EXP_RATE=2
The multiplier of experience for players and pals. 1 is the normal speed of the game. Casual groups of friends often like 2–3.
-e PAL_CAPTURE_RATE=1.5
Multiplies the chance to catch a pal. Values below 1 make it harder to catch.
-e PAL_STOMACH_DECREACE_RATE=0.5
How fast hunger drains for pals. The version for the player is PLAYER_STOMACH_DECREACE_RATE. The wrong spelling is from Palworld itself, in its settings file. The image copies it as it is. So spell it exactly this way.
-e DEATH_PENALTY=Item
What a player drops on death. None is for a relaxed server. All is for the full survival experience.
Each setting on the screen where you make the world in the game has an environment name like these. The documentation of the image (linked on the reference card) lists all of them next to their keys in PalWorldSettings.ini. A value does not seem to take effect? First check the spelling against that list.
Notice — keep your hand edits from being overwritten
By default, the image makes PalWorldSettings.ini again from the environment variables each time that the container starts (DISABLE_GENERATE_SETTINGS=false). You edit that file by hand? Then your changes are wiped at the next restart. You want to manage the file yourself? Add -e DISABLE_GENERATE_SETTINGS=true to the docker run command. Make the container again. The exact steps are the update steps in the reference card below (stop, remove, run again with your new flag). The server then leaves your file alone.
Way 2, step by step. Do this only after you add -e DISABLE_GENERATE_SETTINGS=true as described above. If not, the server overwrites your edit at its next start:
Start the container. Watch docker logs -f palworld until you see the line Running Palworld dedicated server on :8211, described in "INSTALL AND RUN THE SERVER" above. This means that it is up and ready for you to edit around it.
Save and stop it: docker exec palworld rcon-cli Save, then docker stop palworld.
Edit /opt/palworld/Pal/Saved/Config/LinuxServer/PalWorldSettings.ini. The easiest way is over SFTP with a file manager on your PC. Connect to 192.168.1.222 exactly as in Ch. 12 · After every build + common Proxmox tasks, section "Move a file to or from the server". Then open that path with any text editor. Inside the shell of the container, the command nano /opt/palworld/Pal/Saved/Config/LinuxServer/PalWorldSettings.ini does the same job.
Start it again: docker start palworld.
57.5
BACK UP THE WORLD
To take and schedule backups, you need commands inside CT 101. But when snapshots exist, you can also browse and copy them off with a file manager over SFTP. See Ch. 12 · After every build + common Proxmox tasks, section "Move a file to or from the server".
The save lives on the host at /opt/palworld. So it stays when you update and when you make the container again. The image also backs up the world on a schedule by itself.
To back up more often and to remove old snapshots, add these flags and make the container again. Do it while the server is empty. If you make it again, you disconnect players.
⌨ Extra flags for the docker run line, inside CT 101
Turns on the internal backup cron. It is on by default. If you set it in a clear way, the aim is visible in the command.
-e BACKUP_CRON_EXPRESSION="*/30 * * * *"
Runs the backup every 30 minutes. The five fields are minute, hour, day of the month, month, day of the week. */30 in the minute field means "each 30th minute".
-e DELETE_OLD_BACKUPS=true
Lets the container remove old files from its own backup folder. Without it, snapshots pile up for ever. At 48 each day, they fill the disk in a couple of weeks.
-e OLD_BACKUP_DAYS=3
Deletes snapshots that are older than three days. The default is 30 when this removal is on.
You can also take one by hand at any time. It needs no restart and does not disturb players:
⌨ Type this inside CT 101
docker exec palworld backup           # run the image's own backup now
ls -lh /opt/palworld/backups/
Warning — a backup on the same disk is not a backup
These snapshots live on the same SSD as the server. The disk dies? Then they die with it. That is fine as a rollback for a bad decision in the game. But it does not protect you from a failure of the hardware. To copy the save off this machine on a schedule, remember this. /opt/palworld exists only inside CT 101. The Proxmox host has no such folder. A backup tool that you point at it there stops with a no-such-file error and saves nothing. There are two ways. The first: let Ch. 20 · Backups before apps back up the whole container. Its archive includes the save. The second: copy the folder out to the host first. From the host shell, run pct exec 101 -- tar czf - /opt/palworld > /srv/backups/palworld-$(date +%F).tar.gz. Then point your backup tool at /srv/backups. Test the restore at least one time. A backup that nobody has restored is a guess, not a backup.
57.6
HOW TO USE IT DAY TO DAY
The server has no web page. Daily use is friends who join the game. Plus a few admin commands that you run over RCON inside CT 101.
See who is online: docker exec palworld rcon-cli ShowPlayers.
Warn everyone before a restart: docker exec palworld rcon-cli "Broadcast Restart_in_5_min". Use underscores. The game drops everything after the first space.
Save the world at once: docker exec palworld rcon-cli Save. Do this before each docker restart palworld and before each update.
57.7
WHEN IT GOES WRONG
Friends time out or cannot see the server, but docker logs palworld shows that it runs. On the router, check that UDP 8211 (not TCP) is forwarded to 192.168.1.222. Check that friends use Connect with IP with YOUR-PUBLIC-IP:8211. Anyone on your home network must use 192.168.1.222:8211 instead. The NAT loopback of the router blocks the public IP from inside the house.
The progress of the world rolls back after a docker restart or an update. The clean save at stop runs only when RCON can log in. Start the container with -e RCON_ENABLED=true, -e ADMIN_PASSWORD="…", and --stop-timeout 30. Make a habit of running docker exec palworld rcon-cli Save first. Check with docker logs palworld --tail 50 after a restart. You must see a line for save or shutdown. You must not see an abrupt stop.
The container keeps restarting, or the log shows Killed or out of memory. It ran out of RAM. Raise the memory of CT 101 (101 → Resources → Memory) toward 16384 MB. Reboot the CT. Do not run Palworld and another game server with full RAM at the same time on a host with 16 GB.
The first docker run seems to hang for many minutes with text from SteamCMD. This is normal. The first boot downloads the server program of about 8 GB (UPDATE_ON_BOOT is true by default). Run docker logs -f palworld. Wait for the line that says "running". Do not restart during the download.
After an update of Palworld, players see "version does not match". The clients updated, but the server image did not. Update the server with the steps in the reference card: docker pull …, docker rm -f palworld, then run the full docker run … command again. Do this while the server is empty.
57.8
A download step fails with Temporary failure resolving deb.debian.org, or with another "cannot resolve" message. The container has no working DNS server. It cannot change a name into an address. This is not a typing mistake. It does not fix itself. In the Proxmox page, select this container in the left tree. Open DNS. Select Edit. Type your router address in DNS servers (192.168.1.1 here; use your own). Then run pct reboot 101 in the host shell. Run the failed step again.
A command fails. You do not know if you are on the server or in the container. Read the prompt. In the container, it ends with the name of the container. On the server, it shows root@homelab. The prompt still shows root@homelab after pct enter? Then the command did not work. Type exit. Run the pct enter line again. Check the prompt before you paste anything else. You can paste a build block on the server by mistake. It seems to work. It installs without an error, and the app even answers. But the app is on the server, and it must not be there.
How to see that it happened, and how to undo it. The app does not open at the container address (192.168.1.222). It does open at the server address (192.168.1.220) on the same port. Then the app is on the host. To remove it, run docker rm -f palworld in the host shell. Then run pct enter 101. Check that the prompt changed. Paste the build block again. You lose nothing in the container, because nothing was built there. The first command can show Error: No such container. This is good. It means that the app was never on the host. Do not paste the build block again. Look for another cause.
The page does not open. The browser spins, or says it cannot connect. Do these checks in order, in the host shell. 1. Is the container running? Run pct status 101. It must say running. If it does not, run pct start 101. 2. Is the container at the address that you typed? Run pct config 101 | grep net0. It shows the real address. A wrong digit in the wizard puts the container at another address, and nothing warns you. 3. Does the app run in the container? Run pct enter 101. Then run docker ps. An empty list means that the app did not start. Run docker ps -a to see that it stopped. Run docker logs to see why. 4. Is the app listening? Run ss -lntup in the container. Look for the port of this chapter in the list. (Do not use curl. A game server does not use HTTP, so curl shows an error also when the server is fine.) Your browser reaches 192.168.1.222 but not the port? Then the app is down. It reaches neither? Then the container is down.
Docker does not start, or you see Cannot connect to the Docker daemon, a keyring error, or an overlay error. This is the most common failure in these guides. It means that the two container features are off. A later pct set --features can switch them off, also when you set them before. Run this in the host shell, not in the container: pct set 101 --features nesting=1,keyctl=1. Then run pct reboot 101. Then run the failed step again. Type both settings on one line. If you send only one setting, it replaces the pair and switches the other one off.
REFERENCE CARD
Paste this in 101 → Summary → Notes. Proxmox shows it as Markdown. Before you ever run the update line on this card, compare it with the docker run you actually used at install. The card is a snapshot of the standard build: if you added anything of your own — a device, an extra -e setting, a second folder — it is not on the card, and re-running the card's line drops it. The container comes back up looking healthy with your setting gone. The update line below still says TZ=Region/City. That is a placeholder, not a real timezone: run it unchanged and the app comes back on UTC while looking perfectly healthy, so every schedule and timestamp silently shifts. Put your own zone in before you use this card — the same one you set at install.
📋 Reference — paste into CT 101's Notes (not a shell command)
## Palworld — CT 101
join LAN 192.168.1.222:8211 · internet YOUR-PUBLIC-IP:8211 (UDP 8211 forwarded)
save in /opt/palworld · docs https://palworld-server-docker.loef.dev/
```sh
# is it running?
docker ps --filter name=palworld
# save the world NOW (do this before any stop or update)
docker exec palworld rcon-cli Save
# who is online / message everyone
docker exec palworld rcon-cli ShowPlayers
docker exec palworld rcon-cli "Broadcast Restart_in_5_min" # underscores, no spaces
# logs (last 50)
docker logs palworld --tail 50
# stop / start / restart (restart saves + kicks players — do it empty)
docker stop palworld
docker start palworld
docker restart palworld
# is there an update? ("Image is up to date" = no)
docker pull thijsvanloef/palworld-server-docker
# !! STOP — before you paste the update lines below, change change-this-join-password
# and change-this-admin-password back to YOUR OWN (the ones you set at install).
# Paste them as-is and the server comes back with the placeholders: nobody can
# join with the old password, and your admin password is a public default.
# update (save survives in /opt/palworld) — do it empty:
docker exec palworld rcon-cli Save
docker pull thijsvanloef/palworld-server-docker
docker rm -f palworld
docker run -d --name palworld --restart=unless-stopped --stop-timeout 30 \
-p 8211:8211/udp -p 27015:27015/udp \
-e PUID=1000 -e PGID=1000 -e PORT=8211 -e PLAYERS=8 \
-e ENABLE_PERF_THREADING_ARGS=true \
-e SERVER_NAME="My Palworld Server" \
-e SERVER_PASSWORD="change-this-join-password" \
-e ADMIN_PASSWORD="change-this-admin-password" \
-e RCON_ENABLED=true -e RCON_PORT=25575 \
-e REST_API_ENABLED=true -e REST_API_PORT=8212 \
-e TZ=Region/City \
-v /opt/palworld:/palworld thijsvanloef/palworld-server-docker
```
(the Update notifications chapter adds automatic pings when a new image ships)
Part F · Game servers
58Minecraft server
A Minecraft server that you own. It is always on, so friends join when they like and the world lives on between sessions. Vanilla comes first. A supplement on modpacks comes after.
This chapter needs the items below. You came here directly? Do them first. Each item takes a short time. Nothing on this page works without them.
Proxmox is installed and works at https://192.168.1.220:8006. You can log in as root. See Ch. 6 · Install Proxmox. At your first visit, the browser shows a certificate warning. Select Advanced. Then select Proceed. The warning is normal. Proxmox makes its own certificate.
The Debian 13 image is downloaded. You do this one time. See Ch. 10 · The container wizard. Without the image, the Template list in the wizard is empty.
You have an SSH key from your PC (Ch. 9 · SSH & the terminal). Or you type a password in the two password boxes of the wizard. The wizard needs one of the two. The Next button stays grey until you give one.
You know your own network numbers. Where this chapter shows 192.168.1.x, use your own numbers. The rule is in Ch. 3 · How to read this manual. The address of this chapter must be outside the range that your router gives out by itself (the DHCP pool, often .100–.200, but yours can differ). An address inside the pool can go to a phone later. Two devices on one address break name lookups, and the cause is hard to find.
Commands marked HOST run on the server. In the Proxmox page, select homelab in the left tree. Then select >_ Shell. Commands marked CT run inside the container of this chapter. The chapter shows you how to get there.
The wizard does not work?Next is grey: you gave no password and no key. Give one of the two. The Template list is empty: the Debian image is not downloaded. Download it first. Each tab is explained in Ch. 10 · The container wizard.
This is a Minecraft: Java Edition server. It runs in Docker with the itzg/minecraft-server image. This is the standard image from the community for Minecraft that you host yourself. The save data stays on a host folder that stays when you update. You control the server from a built-in admin console. It is a text prompt, called RCON. You type game commands in it, such as whitelist add Name, without opening a game client. Friends join through your public IP address on TCP port 25565.
Warning — read this first: players on a console, phone, or tablet cannot join a Java server
Minecraft comes in two editions that do not play together by default. This chapter builds a Java Edition server. Anyone on an Xbox, PlayStation, Nintendo Switch, a phone, a tablet, or the app "Minecraft for Windows" from the Microsoft Store runs Bedrock Edition. Whatever they type, they get an error "unable to connect" or "outdated" against this server. Only the separate Java Edition app, on a Windows, macOS, or Linux computer, joins a Java server. Decide this before you build. It changes what you install:
Everyone plays Java on a computer (the simplest. Recommended). Each player owns Minecraft: Java Edition and joins from a PC. You add nothing extra on the server. The rest of this chapter is all that you need. A Microsoft account that bought Minecraft usually owns both editions. So a child who normally plays on a console can also play the Java version on the family computer.
Let Bedrock devices in with a bridge. A plugin called GeyserMC translates Bedrock clients. Consoles, phones, and tablets can then join a Java server. It works well, but it has more fiddly parts. You run a server that accepts plugins, not plain vanilla. You add two plugins. You open a second port. See the supplement below for the route for beginners and the official guide.
Let players on a console, phone, or tablet in — the Bedrock crossplay route (GeyserMC)
What it is. GeyserMC is a bridge. It lets Minecraft Bedrock clients (console, phone, tablet, the app from the Microsoft Store) join a Minecraft Java server. A companion plugin, Floodgate, lets those Bedrock players join without also owning a paid Java account. The image itzg/minecraft-server runs both for you. It downloads plugins on a PaperMC server. Paper plays exactly like vanilla, but it accepts plugins.
The route for beginners. Do not use the plain docker run later in this chapter. Add three things to it. Switch the server type to Paper. List the two plugin downloads. Open the Bedrock port of Geyser (UDP 19132):
⌨ Extra lines for the docker run, inside CT 126
Before you run anything on this page: every 192.168.1.x address below is this manual's example network. If your own network uses different numbers, substitute yours as you type — the rule is in Ch. 3 · How to read this manual. A command that runs with the wrong address usually succeeds and leaves you unreachable.
You do not have to splice those three lines in by hand. Here is the whole command with them in place. Use this one instead of the vanilla docker run in the install section later in this chapter. Everything before it (to install Docker) and after it (the first boot, the whitelist, the backups) does not change. You still replace change-this-rcon-password with a password of your own:
⌨ The complete Paper + Geyser docker run, inside CT 126
Java players still connect on 25565. Bedrock players open Add Server in their game and use your address with port 19132. This has more moving parts than vanilla. A version mismatch or a missing port is the usual first problem. Follow the current and authoritative steps. Do not memorise flags. See the examples page of the image (search "Geyser") and the setup guide of GeyserMC.
An honest note. Your group is small, and everyone can reach a computer? Then the option Java on a PC above is far less to set up and maintain. Use Geyser only when a player really cannot get to a computer.
Notice — where these commands run
Run the shell commands inside CT 126. Do not run them on the Proxmox host (the server, 192.168.1.220) or on your PC. You open the shell of the container in one of two equal ways. In the Proxmox web page, open homelab → >_ Shell and run pct enter 126. It needs no password. Or run ssh root@192.168.1.247 from your PC. Only the pct and pveam commands go back to the host. Each one is marked where you use it.
The >_ Console button of the CT opens a login: prompt, not a shell. Use pct enter 126 from homelab → >_ Shell.
58.1
CREATE THE CONTAINER
Do this task with the mouse in the Proxmox web page. You type nothing. You prefer the command line? The box below does the same task with one pct create command.
Open https://192.168.1.220:8006.
Click homelab in the left tree.
Click the blue Create CT button at the top right.
Fill in each tab as the reference shows. Leave each field that is not listed at its default value.
Keep Start after created unticked. Click Finish. One command on the host comes next.
The Proxmox VE login page, at https://192.168.1.220:8006.The Create CT button, at the top right of the node view.The General tab of the wizard, filled in for CT 126.
Wizard reference — Create CT 126
Tab → Field
Entry
General → Node
Select homelab.
General → CT ID
Type 126. Do not keep the number that the wizard suggests.
General → Hostname
Type minecraft.
General → Unprivileged container
Keep this box ticked.
General → Nesting
Keep this box ticked. It is ticked by default. The wizard has no box for keyctl, which Docker also needs. The host command after Finish sets it. It is the first line of the next listing.
General → Password / SSH public key
Keep the password empty. Paste your public key in the SSH field: ssh-ed25519 AAAA…your-key-here you@your-pc. With the key, you can run ssh root@192.168.1.247 from your PC. The command pct enter 126 on the host needs no password.
Template → Storage, Template
Select local. Then select debian-13-standard.
Disks → Storage, Disk size
Select local-lvm. Set 40 GiB.
CPU → Cores
Set 4 cores.
Memory → Memory (MiB)
Set 12288. Keep Swap at its default.
Network → IPv4
Select Static. Set IPv4/CIDR to 192.168.1.247/24. Set Gateway to 192.168.1.1. Keep IPv6 at its default.
DNS → DNS domain
Keep this field empty. Do not type 192.168.1.1 here.
DNS → DNS servers
Always type 192.168.1.1. Never keep this field empty.
Confirm
Read the summary. Keep Start after created unticked. Select Finish.
The wizard has no box for three settings: the Docker permission keyctl, the timezone, and start at boot. The first command below sets all three. Run these 3 commands on the host. They set the missing settings, start the container, and open its shell. Each part is explained in Ch. 10 · The container wizard, section "The host command every build needs".
⌨ Type this on the Proxmox host (homelab)
pct set 126 --features nesting=1,keyctl=1 --onboot 1 --timezone host
pct start 126
pct enter 126 # now INSIDE CT 126 — the rest of this page runs here
Notice — set your timezone
--timezone host makes the container match the Proxmox host. Without it, a new container uses UTC. Its logs and scheduled jobs are then hours away from your local time. A Docker app inside this container keeps its own separate clock setting. The output of an app still shows UTC times? Then add a line -e TZ=Region/City to the docker run command that started it. This chapter has two such commands. One is in the install section that comes next. One is in the backup section. The backup one already has that line. Where you see TZ=Region/City, replace it with your own zone name, for example America/New_York or Europe/Berlin. To see each valid name, run timedatectl list-timezones. A wrong zone only makes clocks and schedules look odd. Nothing breaks.
Notice — 16 GB in total, so do not run everything at once
This container reserves up to 12 GB. This is most of the 16 GB of the machine. A vanilla server uses only a few GB. It leaves plenty for other services. A large modpack uses far more. Do not run a heavy modpack, the Ch. 57 · Palworld dedicated server, and other apps that need much memory at the same time. Watch the total use in Beszel. Shut down what you do not use.
Prefer the terminal? — the same task with one pct create command
⌨ Type this on the Proxmox host (homelab)
TMPL=$(pveam available --section system | awk '/debian-13-standard/{print $2}' | tail -1)
pveam download local "$TMPL" # once per host; harmless to re-run
pct create 126 local:vztmpl/"$TMPL" \
--hostname minecraft --cores 4 --memory 12288 --rootfs local-lvm:40 \
--net0 name=eth0,bridge=vmbr0,ip=192.168.1.247/24,gw=192.168.1.1 \
--nameserver 192.168.1.1 --features nesting=1,keyctl=1 --unprivileged 1 --onboot 1 --timezone host
pct start 126
pct enter 126 # you are now INSIDE CT 126 — everything below runs here
This part has no buttons. You type commands inside CT 126. Open homelab → >_ Shell and run pct enter 126 to get there. Install Docker. Then start a vanilla server in one Docker container. The image itzg/minecraft-server downloads the latest Minecraft: Java Edition server at the first run.
Install the Docker engine and curl.
Start the server. EULA=TRUE accepts the licence of Mojang. It is required. The server refuses to start without it. The world is stored on /opt/minecraft. It stays when you update.
Wait for the first boot. Watch docker logs -f minecraft until it prints Done and For help, type "help". Press Ctrl-C to leave the log view. That closes the display only. It does not stop the server.
Read the error message. It mentions cgroup or overlay, two internal Linux features that Docker uses? Or it only says permission denied? Then check the features of CT 126. On the Proxmox host (not inside the CT), run pct config 126 | grep features. The line must show keyctl=1,nesting=1. It does not? Run pct set 126 --features nesting=1,keyctl=1. Then run pct reboot 126. Then run the docker run line again.
Explanation of each part
The Docker install line and the flags -d, --name, --restart, -v, -p, and -e are explained in Ch. 9 · SSH & the terminal. These parts are specific to Minecraft:
--stop-timeout 60
Gives the server up to 60 seconds to shut down in a clean way. The default of Docker is 10 seconds. The extra time lets the server save the world before the container stops. The image saves through RCON when it stops. So a clean stop does not lose progress.
-p 25565:25565 -p 25565:25565/udp
Opens the game port. TCP 25565 is how players connect. You need the UDP line only if you turn on the query protocol (below). The monitor of Uptime Kuma uses it.
-e EULA=TRUE
Accepts the End User Licence Agreement of Minecraft. Mojang and Microsoft require it. The server refuses to start without it. When you set it, you confirm that you agree to the licence at minecraft.net/eula.
-e MEMORY=4G
Sets the size of the Java heap, both the first and the maximum, to 4 GB. Vanilla is comfortable at 2–4 GB. Keep the heap below the total RAM of the container (12 GB here). The JVM and the operating system then both have room. A modpack needs more. See the modpack section.
Turns on the whitelist and enforces it at once. Only players that you name can join. Players who are already connected are also checked again. This is the most important setting for a server that can be reached from the internet. Add players with whitelist add Name in the console (below).
-e ENABLE_QUERY=true
Turns on the GameSpy query protocol of Minecraft on UDP 25565. The GameDig monitor of Uptime Kuma uses it to read the status of the server and the number of players that are online (see Ch. 14 · Uptime Kuma). Without it, a GameDig monitor cannot see the server.
-e RCON_PASSWORD="change-this-rcon-password"
Sets a fixed password for the RCON channel of the server. It is not a new random one at each boot. The sidecar mc-backup (below) and any other RCON tool must use this same value to log in. Change it from the placeholder.
-v /opt/minecraft:/data
Mounts the host folder /opt/minecraft into the container at /data. The image keeps the world, server.properties, mods, and the whitelist there. Your world stays even if the container is deleted and made again.
itzg/minecraft-server
The Docker image to run: the standard Minecraft server image from the community, by itzg. No VERSION or TYPE is set. So it downloads the latest vanilla Java Edition server from Mojang. Pin a version later with -e VERSION=1.21.1 if your group wants a specific release.
Notice — the first start looks as if it hangs
At the first run, the image downloads the server. For modpacks, it also downloads the mod loader. Then it makes the chunks of the spawn area. docker logs -f minecraft shows many lines. Then it goes quiet after Done (…)! For help, type "help". That silence means that the server is up and idle, not stuck. No players are connected, so it writes nothing. Check with docker ps. The status shows Up … (healthy).
58.3
OPEN IT TO FRIENDS
On your own network, friends connect to 192.168.1.247. There is nothing else to set up. To let friends outside your home join, you have two choices. Forward one port on the router. Or, safer, invite them onto your Tailscale network.
Option A — port-forward TCP 25565 (the exception that is allowed)
Most of this manual keeps each service off the public internet. A game server is the planned exception. Friends elsewhere cannot reach it in any other way. Forward only this one port. Keep the whitelist on.
Warning — to forward a port exposes this server to the whole internet
When TCP 25565 is forwarded, anyone on the internet can reach it. Automatic scanners find open Minecraft ports within hours. Protect it. Keep ENABLE_WHITELIST=true and ENFORCE_WHITELIST=true, so that only named players can join. Leave the server in online-mode (the default), so that Mojang checks each account. Never forward the RCON port 25575. Forward only 25565, nothing else. You do not need public access? Use Option B instead. You then forward no ports at all.
On your router, open Port Forwarding. (Some routers call it "Virtual Server" or "Applications & Gaming".) Forward TCP 25565 to 192.168.1.247. You turned on the query monitor? Then also forward UDP 25565.
Find your public IP. Open the status page of your router (the address is in Ch. 4 · Networking in 10 minutes). Read the WAN or Internet address that it shows. That is the number that friends need. A search engine can also tell you. But the router cannot be wrong about your own line. That address is YOUR-PUBLIC-IP below.
Tell friends to open Multiplayer → Add Server. They enter YOUR-PUBLIC-IP:25565.
Add each player to the whitelist before they connect (see the next section). With the whitelist enforced, unknown players are refused, although the port is open.
Anyone in your own home, on the same network as the server, must use 192.168.1.247 instead of the public IP. Most routers cannot send a public address back to a device inside the house.
Option B — Tailscale (no port forwarding)
Your friends will install Tailscale? Then you can skip the router. You expose nothing to the public internet. Add the homelab to your tailnet (see Ch. 19 · Remote access: Tailscale). This manual does not cover how to invite friends onto that tailnet.Ch. 19 · Remote access: Tailscale sets up your own devices, not the devices of other people. Do it from the Tailscale admin console in your browser. Open the Users page. Send an invite to the email of each friend. They install Tailscale, accept, and then reach the server by its tailnet address. You would rather not put friends on your private network at all? Use the route with the port forward above instead.
58.4
RUN THE SERVER: THE CONSOLE (RCON)
This part has no buttons. You type commands inside CT 126. Server commands such as whitelist add Name go to the game, not to Linux. You type them in the console of the server. At the shell of the container, they answer whitelist: command not found. Open the console first.
Open the console of the server: docker exec -i minecraft rcon-cli inside CT 126. (The image has rcon-cli for exactly this.) The prompt that appears is the own prompt of the server. Each server command in this chapter goes in that prompt. To leave it, press Ctrl+D. This does not stop the server.
Whitelist a player before they join. At that prompt, type whitelist add NAME. Use the exact Minecraft user name. Then type whitelist reload. Then type whitelist on.
See who is connected: type list.
Send a message to everyone, for example before a restart: type say Server restarting in 5 min.
Run a single command without you opening the prompt: docker exec minecraft rcon-cli list from the shell of the CT.
Restart the server in a clean way: docker restart minecraft. The image saves the world through RCON first. So no progress is lost. Do this when the server is empty.
What it is & why you would want it RCON is the channel for remote admin of the server. The image turns it on at the internal port 25575. It connects it to the bundled tool rcon-cli. So you never edit a config file to use it. The port stays inside the container. It is not published. So no device on your LAN, and nothing on the internet, can reach it. Never forward port 25575.
58.5
BACK UP THE WORLD
This part has no buttons. You type commands inside CT 126. Open homelab → >_ Shell and run pct enter 126 to get there. The world lives on the host at /opt/minecraft. So it already stays when you update and when you make the container again. It does not stay after a bad accident in the game or a dead disk. For that, you need copies on a schedule. The image itzg/minecraft-server has no scheduler for backups. So its maintainer makes a companion image, a "sidecar", itzg/mc-backup. It runs next to the server and does the job in the right way.
Run the sidecar one time. It stays running. From then on, it backs up by itself. Its /data is mounted read-only from the same folder as the server. The archives land in /opt/mc-backups on the host. This is a separate folder. So a backup is never inside the thing that it backs up.
Start the sidecar with the command on the right. It attaches to the network of the running container minecraft for RCON.
Check that it is up: docker ps --filter name=mc-backup. The first backup runs shortly after the start.
Check that archives appear: ls -lh /opt/mc-backups/. You see files with names such as world-YYYYMMDD-HHMMSS.tgz. The folder is empty? That is expected if nobody played. The command block sets PAUSE_IF_NO_PLAYERS=true. It skips a backup when the server is empty. So a new server backs up nothing until someone joins. Join one time yourself. Stay a minute. Then wait for the next backup interval. Check again. An empty folder after real play is a real fault. An empty folder before anyone played is the flag that does its job.
docker run -d --name mc-backup --restart=unless-stopped
Starts the backup sidecar in the background. It restarts after a reboot or a crash, unless you stop it by hand. It runs for ever, quietly, next to the server.
--network container:minecraft
Puts the sidecar on the same network as the container minecraft. So it reaches RCON of the server on localhost:25575 without any published port.
-e RCON_PASSWORD="change-this-rcon-password"
It must be the same as the RCON_PASSWORD that you set on the container minecraft. mc-backup logs in to the server over RCON to pause and to flush writes before each archive. A mismatch means that backups run with no coordination, or that they fail at once.
-e BACKUP_INTERVAL="6h"
Backs up every six hours. It accepts values such as 2h 30m or 1d. For a busy server, make it shorter. For a quiet one, make it longer.
-e PRUNE_BACKUPS_DAYS=7
Deletes archives that are older than seven days. The folder then does not grow with no limit. Without it, snapshots pile up until the SSD is full.
-e PAUSE_IF_NO_PLAYERS=true
Skips backups when nobody is online. An idle world does not change. So there is nothing new to save. Backups start again by themselves when a player joins.
-e TZ=Region/City
Sets the clock of the sidecar. The time stamps of the archives then show your local time. Use the same value as in the timezone notice earlier in this chapter. To list the valid names, run timedatectl list-timezones on the host.
-v /opt/minecraft:/data:ro
Mounts the data folder of the server read-only as the source of the backup. Read-only means that the backup job can never change the live world.
-v /opt/mc-backups:/backups
Mounts the host folder /opt/mc-backups as the destination for the .tgz archives. It is on purpose outside /opt/minecraft. So a backup is never a copy of itself.
itzg/mc-backup
The companion image by the same author as the server image. It is built to work with it over RCON.
Take one by hand at any time. It needs no restart. It does not disturb players:
⌨ Type this inside CT 126
docker exec mc-backup backup now # run a backup immediately
ls -lh /opt/mc-backups/
Restore a world from a backup
Each archive holds the content of /data: the world, server.properties, the whitelist. To roll back, stop the server. Put the current data aside as a copy for safety. Then extract the archive that you want. The server downloads its own jar again at the next start. So it is not in the archive, and it does not need to be.
Stop the server: docker stop minecraft. Do this with no players online.
Pick an archive from the list: ls -lh /opt/mc-backups/.
Move the current data aside. Do not delete it yet, in case the restore is wrong.
Make the folder again. Extract your chosen archive into it.
Start the server again: docker start minecraft. Join. Check that the world is the one that you wanted. Then delete /opt/minecraft.bad.
Warning — a backup on the same disk is not a backup
These archives are on the same SSD as the server. The disk dies? Then they die with it. That is fine as a rollback for a bad decision in the game. But it does not protect you from a failure of the hardware. To copy the world off this machine on a schedule, you need a real second copy. Follow Ch. 64 · Backups done right (3-2-1). It points /opt/mc-backups at the same pipeline for backups that each other app in this manual uses. Test the restore above at least one time. A backup that nobody has restored is a guess, not a backup.
58.6
RUNNING A MODPACK (SUPPLEMENT)
This part has no buttons. You type commands inside CT 126. Open homelab → >_ Shell and run pct enter 126 to get there. Vanilla is the default. To run a server with mods, you start the container with a few extra settings. Those settings are the lines -e NAME=value in the docker run command. They are the same kind of line as -e MEMORY=4G in the install section. Two of them do the work here. TYPE picks the mod loader. This is the program that loads mods into the game. Normally it is Forge or Fabric. You can also name a modpack that is ready-made, in place of a loader that you pick yourself. A modpack is a bundle of mods that someone published. It brings its own loader with it. In both cases, you also raise MEMORY, because mods need more of it. The image itzg/minecraft-server is the packaged server program. It downloads and sets up the loader and the mods at the start. So you never install Java, Forge, or Fabric by hand. Everyone who joins must run the same modpack in their own client. A vanilla client cannot connect to a server with mods.
Notice — modpacks are heavier
A large modpack can need 6–10 GB of heap, not the 4 GB that vanilla uses. Raise -e MEMORY to match (for example -e MEMORY=8G). Keep it below the 12 GB of CT 126. The container is killed, or it restarts in a loop? Then the heap is too large for the container. Lower MEMORY. Or first raise the own RAM limit of the CT: 126 → Resources → Memory row → double-click → Edit: Memory. Raise the value. Click OK.
Raise the memory limit of a container on the Resources tab.
A bare mod loader (build your own list of mods)
Set TYPE to a loader. The server program downloads it and runs it. The mods are yours to supply. Each mod is a single .jar file. They all live in one folder on the server: /opt/minecraft/mods. (The image also has variables that can download mods for you. But the route with the folder below needs nothing new to learn.)
Fabric — -e TYPE=FABRIC. It is light. It is popular for mods that improve performance.
Forge — -e TYPE=FORGE. This is the classic loader for large mods with much content. Pin the version of the game when you use it, for example -e TYPE=FORGE -e VERSION=1.20.1.
To put mod files in that folder, you need no terminal. A file explorer on your own PC does it:
Start the container one time with the loader set, so that the folder exists. /opt/minecraft/mods is still missing after that? Make it: inside CT 126, run mkdir -p /opt/minecraft/mods.
On your PC, download the mod .jar files that you want. Each one must match both the loader that you chose and the version of the game that the server runs.
Copy them across with a file explorer. Follow Ch. 12 · After every build + common Proxmox tasks, section “Move a file to or from the server”. Connect to the address of this container, 192.168.1.247. Drop the files into /opt/minecraft/mods.
Apply them: inside CT 126, run docker restart minecraft. Mods are read at the start. Nothing happens until you do this.
Watch docker logs -f minecraft for a mod that refuses to load. The usual cause is a .jar that is built for a different version of the game. Remove that one file. Restart again.
Give each player the same list of mod files. A client without them cannot join.
A modpack that is ready-made (recommended for a group of friends)
Point the image at a modpack that is published. It installs the correct loader, mods, and configs for you. It can also upgrade them later. There are two sources:
Modrinth — -e TYPE=MODRINTH and -e MODRINTH_MODPACK= set to the project slug of the pack or to a full URL of the modpack. You need no API key.
CurseForge — -e TYPE=AUTO_CURSEFORGE and -e CF_PAGE_URL= set to the URL of the CurseForge page of the modpack. The image now bundles an API key for CurseForge. This is a download pass that CurseForge gives to programs. So most readers can skip this. Packs normally install with nothing extra. Only if a pack refuses, and the log asks for a key, do you need your own. In that case, make a free CurseForge account. Make a key in the developer console of CurseForge. Then add the line -e CF_API_KEY='...'. Keep the single quotes. The key has a $ character. The shell would try to interpret it, and would not pass it along.
Example: make the container again as a server with a Modrinth modpack. This replaces the vanilla container. The world in /opt/minecraft is kept. But a modpack makes a new world with mods. So start a modpack on a fresh data folder if you want to keep a vanilla world apart.
Stop and remove the vanilla container: docker rm -f minecraft. The folder /opt/minecraft is not touched.
Start it again with the modpack variables and more memory.
Watch docker logs -f minecraft. The first boot with mods downloads the pack. It can take several minutes.
Raises the Java heap to 8 GB for the mod loader and its mods. Keep it below the 12 GB of CT 126. The JVM and the operating system then both have room.
-e TYPE=MODRINTH
Tells the image to run a Modrinth modpack instead of vanilla. It installs the loader (Fabric or Forge) that the pack declares. So you do not choose one yourself.
-e MODRINTH_MODPACK="modpack-slug-or-url"
Selects which pack. Use the project slug of the pack. This is the last part of its Modrinth URL. Or paste the full URL of the page of the modpack. Replace the placeholder with the pack that your group agreed on.
For CurseForge instead
Swap the two lines for -e TYPE=AUTO_CURSEFORGE and -e CF_PAGE_URL="https://www.curseforge.com/minecraft/modpacks/<pack>". Add -e CF_API_KEY='...' only if that pack needs your own key.
Everyone runs the same pack
Give friends the same name and version of the modpack. They install it with the Modrinth app or the CurseForge or Prism launcher. Then they connect as normal. A mismatch shows "version does not match" when they join.
58.7
WHEN IT GOES WRONG
The container exits at once, and docker logs minecraft mentions the EULA. You must accept the licence of Mojang. Check the docker run command that you used for the line -e EULA=TRUE. Add it if it is missing. Then make the container of the app again. The exact five steps are in Ch. 12 · After every build + common Proxmox tasks, section “Change a setting on a Docker app”. Your world is not at risk. It is in /opt/minecraft. This is a folder on the disk of the container that is plugged into the app. If you delete the container of the app and make it again, it is not touched.
docker run (or the Docker service) fails inside CT 126 with an error about cgroup, overlay, or 'permission denied'. CT 126 may miss nesting. This is the feature that lets Docker run inside a container. On the Proxmox HOST (not inside the CT), run pct config 126 | grep features. The line must show keyctl=1,nesting=1. It does not? Run pct set 126 --features nesting=1,keyctl=1. Then run pct reboot 126. Then run the docker run line again.
'Failed to bind to port' 25565. Another process already holds that port. Check with ss -tlnp | grep 25565 inside CT 126. Check that only one Minecraft container runs (docker ps).
Friends cannot connect from the internet, although the server is up. Forward TCP 25565 on the router to 192.168.1.247. Have friends use YOUR-PUBLIC-IP:25565. Anyone on your own home network must use 192.168.1.247 instead. The NAT of the router usually blocks the public IP from inside the house. You use Tailscale instead? Then you need no port forward. Friends use the Tailscale IP of the server.
Friends on the whitelist are still refused, or unknown players get in. Check ENABLE_WHITELIST=true and ENFORCE_WHITELIST=true. Add each name with whitelist add Name in the console. Then run whitelist reload. Names are the exact Minecraft user names.
The container is killed, or it restarts in a loop. The logs show an error about out of memory. The heap is too large for the container. Lower -e MEMORY. Or raise the RAM of CT 126 in 126 → Resources → Memory and reboot the CT. Do not run a heavy modpack and the Palworld server at the same time.
A Minecraft GameDig monitor in Uptime Kuma shows 'Down', although the server is up. Set -e ENABLE_QUERY=true and publish UDP 25565. Then point the monitor at the query port 25565, not at a different port.
Backups run (or mc-backup starts), but docker logs mc-backup shows an error of RCON authentication.RCON_PASSWORD must be the same on both containers, minecraft and mc-backup. Make both containers again with the same value. Use the five steps in Ch. 12 · After every build + common Proxmox tasks, section “Change a setting on a Docker app”. docker ps shows mc-backup as "Up" in both cases. So this failure is silent in any other way.
After an update of Minecraft, players see 'version does not match'. The clients updated, but the server image did not. Or a pinned VERSION is different. Update the server with the steps of the Reference card (docker pull, docker rm -f, run again). Check that everyone runs the same version or modpack.
58.8
A download step fails with Temporary failure resolving deb.debian.org, or with another "cannot resolve" message. The container has no working DNS server. It cannot change a name into an address. This is not a typing mistake. It does not fix itself. In the Proxmox page, select this container in the left tree. Open DNS. Select Edit. Type your router address in DNS servers (192.168.1.1 here; use your own). Then run pct reboot 126 in the host shell. Run the failed step again.
A command fails. You do not know if you are on the server or in the container. Read the prompt. In the container, it ends with the name of the container. On the server, it shows root@homelab. The prompt still shows root@homelab after pct enter? Then the command did not work. Type exit. Run the pct enter line again. Check the prompt before you paste anything else. You can paste a build block on the server by mistake. It seems to work. It installs without an error, and the app even answers. But the app is on the server, and it must not be there.
How to see that it happened, and how to undo it. The app does not open at the container address (192.168.1.247). It does open at the server address (192.168.1.220) on the same port. Then the app is on the host. To remove it, run docker rm -f minecraft in the host shell. Then run pct enter 126. Check that the prompt changed. Paste the build block again. You lose nothing in the container, because nothing was built there. The first command can show Error: No such container. This is good. It means that the app was never on the host. Do not paste the build block again. Look for another cause.
The page does not open. The browser spins, or says it cannot connect. Do these checks in order, in the host shell. 1. Is the container running? Run pct status 126. It must say running. If it does not, run pct start 126. 2. Is the container at the address that you typed? Run pct config 126 | grep net0. It shows the real address. A wrong digit in the wizard puts the container at another address, and nothing warns you. 3. Does the app run in the container? Run pct enter 126. Then run docker ps. An empty list means that the app did not start. Run docker ps -a to see that it stopped. Run docker logs to see why. 4. Is the app listening? Run ss -lntup in the container. Look for the port of this chapter in the list. (Do not use curl. A game server does not use HTTP, so curl shows an error also when the server is fine.) Your browser reaches 192.168.1.247 but not the port? Then the app is down. It reaches neither? Then the container is down.
Docker does not start, or you see Cannot connect to the Docker daemon, a keyring error, or an overlay error. This is the most common failure in these guides. It means that the two container features are off. A later pct set --features can switch them off, also when you set them before. Run this in the host shell, not in the container: pct set 126 --features nesting=1,keyctl=1. Then run pct reboot 126. Then run the failed step again. Type both settings on one line. If you send only one setting, it replaces the pair and switches the other one off.
REFERENCE CARD
Paste this in 126 → Summary → Notes. The key facts then stay with the container. Before you ever run the update line on this card, compare it with the docker run you actually used at install. The card is a snapshot of the standard build: if you added anything of your own — a device, an extra -e setting, a second folder — it is not on the card, and re-running the card's line drops it. The container comes back up looking healthy with your setting gone.
📋 Reference — paste into this container's Notes in Proxmox (not a shell command)
## Minecraft — CT 126
connect YOUR-PUBLIC-IP:25565 (forward TCP 25565) · LAN 192.168.1.247 · docs https://docker-minecraft-server.readthedocs.io
```sh
# is it running? (Minecraft is not HTTP, so check the container + the open port)
docker ps --filter name=minecraft
ss -tlnp | grep 25565 && echo OK # is the game port listening?
# logs (last 50)
docker logs minecraft --tail 50
# live server console (RCON) — Ctrl+D to leave, does NOT stop the server
docker exec -i minecraft rcon-cli
whitelist add Name # typed at the rcon-cli prompt — exact Minecraft username
list # who is online
# world backups (itzg/mc-backup sidecar) — back up now / list archives
docker exec mc-backup backup now
ls -lh /opt/mc-backups/
# stop / start / restart (restart saves the world first)
docker stop minecraft
docker start minecraft
docker restart minecraft
# is there an update? ("Image is up to date" = no)
docker pull itzg/minecraft-server
# !! STOP — before you paste the update line below, change change-this-rcon-password
# back to YOUR OWN password (the one you set when you installed).
# Paste it as-is and the server comes back with the placeholder password: the
# backup sidecar can no longer talk to it, and it fails quietly from then on.
# update (world + settings survive in /opt/minecraft)
docker pull itzg/minecraft-server && docker rm -f minecraft && docker run -d --name minecraft --restart=unless-stopped --stop-timeout 60 -p 25565:25565 -p 25565:25565/udp -e EULA=TRUE -e MEMORY=4G -e ENABLE_WHITELIST=true -e ENFORCE_WHITELIST=true -e ENABLE_QUERY=true -e RCON_PASSWORD="change-this-rcon-password" -v /opt/minecraft:/data itzg/minecraft-server
```
Part F · Game servers
59Project Zomboid server
Run a dedicated Project Zomboid server in a container. The apocalypse then keeps running for you and your friends. It is the same world at any hour. Nobody hosts it from their gaming PC.
This chapter needs the items below. You came here directly? Do them first. Each item takes a short time. Nothing on this page works without them.
Proxmox is installed and works at https://192.168.1.220:8006. You can log in as root. See Ch. 6 · Install Proxmox. At your first visit, the browser shows a certificate warning. Select Advanced. Then select Proceed. The warning is normal. Proxmox makes its own certificate.
The Debian 13 image is downloaded. You do this one time. See Ch. 10 · The container wizard. Without the image, the Template list in the wizard is empty.
You have an SSH key from your PC (Ch. 9 · SSH & the terminal). Or you type a password in the two password boxes of the wizard. The wizard needs one of the two. The Next button stays grey until you give one.
You know your own network numbers. Where this chapter shows 192.168.1.x, use your own numbers. The rule is in Ch. 3 · How to read this manual. The address of this chapter must be outside the range that your router gives out by itself (the DHCP pool, often .100–.200, but yours can differ). An address inside the pool can go to a phone later. Two devices on one address break name lookups, and the cause is hard to find.
The folder /srv/backups exists. It is registered in Proxmox as a storage named backups. You make it when you add a drive: Ch. 65 · Add an external drive for an external drive, Ch. 66 · Add an internal drive for an internal drive. Ch. 64 · Backups done right (3-2-1)uses this folder, but it does not make it. You added no drive yet? Then this chapter cannot write there. Do one of the two drive chapters first. Or point the job at the local storage. It needs no drive. It keeps its archives in /var/lib/vz/dump on the system SSD.
Commands marked HOST run on the server. In the Proxmox page, select homelab in the left tree. Then select >_ Shell.
The wizard does not work?Next is grey: you gave no password and no key. Give one of the two. The Template list is empty: the Debian image is not downloaded. Download it first. Each tab is explained in Ch. 10 · The container wizard.
59.1
CREATE THE CONTAINER
You do this in the Proxmox web page with the mouse. Most chapters differ from this one. This server runs without Docker. It is a plain Java program. So the container needs no special features. The install is SteamCMD directly on Debian.
Open https://192.168.1.220:8006 and log in.
Click homelab in the left tree.
Click the blue Create CT button at the top right.
Fill in each tab as the reference shows. Leave each field that is not listed at its default.
On the Confirm tab, keep Start after created unticked. Then click Finish.
Run the host commands after the table. They set the timezone and the start at boot. Then start the container.
General tab — CT ID 147, hostname zomboid. Unprivileged stays ticked.
Wizard reference — Create CT 147
Tab → Field
Entry
General → Node
Select homelab.
General → CT ID
Type 147. Do not keep the number that the wizard suggests.
General → Hostname
Type zomboid.
General → Unprivileged container
Keep this box ticked.
General → Nesting
Keep the default. This chapter runs no Docker. The host command after Finish sets only the timezone and start at boot.
General → Password / SSH public key
Keep the password empty. Paste your public key in the SSH field: ssh-ed25519 AAAA…your-key-here you@your-pc. With the key, you can run ssh root@192.168.1.203 from your PC. The command pct enter 147 on the host needs no password.
Template → Storage, Template
Select local. Then select debian-13-standard.
Disks → Storage, Disk size
Select local-lvm. Set 20 GiB.
CPU → Cores
Set 4 cores.
Memory → Memory (MiB)
Set 12288. Keep Swap at its default.
Network → IPv4
Select Static. Set IPv4/CIDR to 192.168.1.203/24. Set Gateway to 192.168.1.1. Keep IPv6 at its default.
DNS → DNS domain
Keep this field empty. Do not type 192.168.1.1 here.
DNS → DNS servers
Always type 192.168.1.1. Never keep this field empty.
Confirm
Read the summary. Keep Start after created unticked. Select Finish.
The wizard has no box for two settings: the timezone and start at boot. The first command below sets both. Run these 3 commands on the host. They set the missing settings, start the container, and open its shell. Each part is explained in Ch. 10 · The container wizard, section "The host command every build needs".
⌨ Type this on the Proxmox host (homelab)
Before you run anything on this page: every 192.168.1.x address below is this manual's example network. If your own network uses different numbers, substitute yours as you type — the rule is in Ch. 3 · How to read this manual. A command that runs with the wrong address usually succeeds and leaves you unreachable.
pct set 147 --onboot 1 --timezone host
pct start 147
pct enter 147 # now INSIDE CT 147 — the rest of this page runs here
Notice — size for mods
The 12 GB here assumes that you will run mods. Groups of Zomboid always end up with mods. A vanilla server for six needs only 8 GB. What really costs memory is content that is loaded: mods for the map, big packs of vehicles, and huge packs of items. Mods that only have scripts and change behaviour cost almost nothing. Disk is the opposite. Each Workshop mod is downloaded to the server. So a heavy list of mods eats the 20 GB disk before it ever troubles the RAM.
Prefer the terminal? — the same task with one pct create command
⌨ Type this on the Proxmox host (homelab)
TMPL=$(pveam available --section system | awk '/debian-13-standard/{print $2}' | tail -1)
pveam download local "$TMPL" # once per host; harmless to re-run
pct create 147 local:vztmpl/"$TMPL" \
--hostname zomboid --cores 4 --memory 12288 --rootfs local-lvm:20 \
--net0 name=eth0,bridge=vmbr0,ip=192.168.1.203/24,gw=192.168.1.1 \
--nameserver 192.168.1.1 --unprivileged 1 --onboot 1 --timezone host
pct start 147
pct enter 147 # you are now INSIDE CT 147 — everything below runs here
You open that shell in one of two ways. Run pct enter 147 on the server (first homelab → >_ Shell). Or run ssh root@192.168.1.203 from your PC. (Chapter Ch. 9 · SSH & the terminal sets up that access.) (The >_ Console button of the container shows a login: prompt. The containers of this manual cannot answer it. Skip it.)
SteamCMD is the downloader of Valve for the command line. It is the same tool that each rented game host runs behind the scenes. Debian ships it in a non-free section. That section is off by default. So the first command below turns it on. SteamCMD is also a 32-bit program. So the second command turns on support for 32-bit too. The server itself then installs with one SteamCMD command, as a normal user account named pz. A program that talks to the internet all day must not run as root.
⌨ Type this inside CT 147 — turn on non-free and install SteamCMD
Debian keeps software that is not free (SteamCMD is one) in sections that are off by default. This edit replaces the whole line Components: in both entries of the sources file, whatever it says now. The container template of Proxmox and stock Debian ship it with different content. This form fixes both.
dpkg --add-architecture i386
Tells Debian to also install 32-bit packages. SteamCMD is a 32-bit program. It is one of the last ones that you will meet. It refuses to install without this.
echo steam … | debconf-set-selections
Answers the licence agreement of Steam in advance. The install then does not stop at a text screen that waits for you to agree by hand.
apt install -y steamcmd ca-certificates
Installs SteamCMD from the non-free section that you just turned on. It also installs the root certificates of the internet. A minimal container does not ship them. Without them, SteamCMD cannot check the servers of Steam. It fails with an SSL error before it downloads anything.
adduser --disabled-password --gecos "" pz
Makes the user pz that the server runs as. It has no password. You reach this account with su - pz from the root of the container. You never log in to it.
Now download the dedicated server. It is about 7 GB. So this takes a while. The lines of progress are SteamCMD at work. They do not mean that it is stuck.
⌨ Type this inside CT 147 — download the server as the pz user
su - pz
Wait for the prompt to change from # to pz@…$. Then paste the download as its own command. You paste it together with su? Then the shell switch swallows it, and nothing runs:
Switches from root to the user pz. The prompt changes from # to $. From now on, everything for the server happens as this user.
+force_install_dir /home/pz/pzserver
The place where the server program lands. It must come before the part for the login. If not, SteamCMD ignores it.
+login anonymous
The Zomboid server is free to download. You need no Steam account or password.
+app_update 380870 validate
380870 is the ID of the dedicated server in the catalog of Steam. validate checks each file again. So this same command is also the update command later. The default download is Build 42. It is the version that went stable in July 2026. (A group that wants to stay on the old version can add -beta legacy41 to get Build 41.78. For a new world, there is no reason to.)
59.3
SET THE MEMORY POT, THEN FIRST BOOT
The server is a Java program. Java keeps one big pot of memory, the heap. Everything in your world lives in it: each zombie, each room that was looted, each chunk of the map that your friends explore. Two dials control the pot. The server ships with the wrong ones for this container:
-Xmx is the maximum size of the pot. Java never uses more than this for the world. The world really needs more? Then the server stutters. Then it crashes out of memory.
-Xms is how full the pot is at the start. It is claimed at once at launch, before a single friend joins.
The trap: the pot is not the whole cost. Java needs an extra 1–2 GB around the pot for its own machinery. So the maximum of the pot must stay below the memory of the container. This is the logic of the numbers of this chapter: a container of 12 GB, a pot that starts at 4 GB and can grow to 10 GB. The server ships with the maximum at -Xmx8g and no size at the start. One edit in one file fixes both:
⌨ Type this inside CT 147, as the pz user
cd /home/pz/pzserver
sed -i 's/"-Xmx8g"/"-Xms4g", "-Xmx10g"/' ProjectZomboid64.json
grep Xm ProjectZomboid64.json # should now show -Xms4g and -Xmx10g
Explanation of each part
sed -i 's/"-Xmx8g"/"-Xms4g", "-Xmx10g"/' ProjectZomboid64.json
Finds the exact text "-Xmx8g" in the file. This is the setting for the maximum pot that the server ships with. It replaces it with two settings, "-Xms4g", "-Xmx10g": a size at the start of 4 GB and a maximum of 10 GB. The quotes and commas match the own JSON format of the file exactly. This is why it is a find-and-replace on the exact text. It is not an edit by hand.
grep Xm ProjectZomboid64.json
Prints each line that has Xm. You can see at once that the replacement landed. You do not trust it blindly.
The first boot is the one start where you answer questions. After about a minute of loading, the server stops. It asks Enter new administrator password:, then Confirm the password:. Type one. Pick something real. This is the account that controls the server from inside the game. The boot then continues to make the world. Two notes, so that nothing surprises you. A line ERROR: ld.so: … libjsig.so … ignored appears at each start. It is harmless. The server itself says so ("ignored"). The whole first boot takes about a minute.
⌨ Type this inside CT 147, as the pz user — first boot, with you present
cd /home/pz/pzserver && bash start-server.sh
The line that you wait for is *** SERVER STARTED ****. Then stop it again. Press Ctrl-C. The world is new and empty. Nothing is at risk. The next section hands the server to systemd. It starts it properly from now on.
Notice — where everything lives from now on
The program is in /home/pz/pzserver. Everything that is yours is in /home/pz/Zomboid: Server/servertest.ini (the settings of the server), Server/servertest_SandboxVars.lua (the rules of the world), Saves/ (the world itself), Logs/. Back up /home/pz/Zomboid, and you have backed up the world.
59.4
RUN IT AS A SERVICE
You start a game server by hand? Then it dies with your SSH session. It stays down after a power cut. You need something that restarts it after a crash and starts it again at boot. Each other chapter gets that from Docker by itself. This server has no Docker. So you write the same thing yourself as a systemd unit. It is a short text file that tells the own service manager of Linux the same two things: restart on a crash, and start at boot. It is worth seeing one time. It is eleven honest lines.
⌨ Type this inside CT 147, as root (type exit if the prompt shows $)
Writes the service file in one paste. Everything until the last line EOF goes into the file. This one must happen at the terminal. The file belongs to root. It lives outside what the file manager reaches. The settings files later in this chapter are different.
[Unit]
General information about the service. Here it is only its description and After=network-online.target. This tells systemd to wait for the network before it starts. The server needs it at once.
[Service]
How to run it: which user, which folder, which command, and how to stop it cleanly (below).
[Install]
WantedBy=multi-user.target is what gives enable a meaning. It tells systemd to start this service as part of the normal boot of the container.
User=pz
Runs the server as the user pz, never as root.
KillSignal=SIGTERM / TimeoutStopSec=120
How the service stops. systemd sends the polite signal to stop. It waits up to two minutes. This was checked on a live Build 42 server. On that signal, the log shows Shutdown handling started, then SaveAll, Saving players, Saving finish, and a clean exit in about fifteen seconds. So systemctl stop is a real save and quit. It is not a kill.
systemctl enable --now zomboid
enable makes it start with the container. (The container itself starts with the host. The wizard command set --onboot.) --now also starts it at once.
What you must see:systemctl status zomboid reports active (running). journalctl -u zomboid -f shows the boot lines that end in *** SERVER STARTED ****. Press Ctrl-C to stop watching the log. The server keeps running.
59.5
SETTINGS, WORLD RULES, AND MODS
All configuration is two files in /home/pz/Zomboid/Server/. The first boot makes them. Edit them as the user pz with nano. Then restart the service.
servertest.ini — the server. Set Public=false (your friends join by IP, not from the public browser). Set a join password in Password=. Set MaxPlayers=6. Leave DefaultPort=16261 alone.
servertest_SandboxVars.lua — the world. The number of zombies, the rarity of loot, the XP multiplier, the length of the day, hunger. It has each option that the host screen in the game offers, as one file that is pleasant to read. Each entry has a comment that explains what it does and what the numbers mean. Change these before people invest hours in the world. Some apply only to a fresh save.
Mods. Two lines in servertest.ini: WorkshopItems= takes Workshop IDs, separated by semicolons (the number in the Steam URL of a mod). Mods= takes the matching mod IDs (listed on each Workshop page). The server downloads the mods itself at the next start. Players get them by themselves when they join.
A worked example. These are the settings that groups ask about most, exactly as they appear in the file (values quoted from a live server with Build 42). For the first three, a higher number means slower. The comment above each key in the file explains its scale:
⌨ Inside servertest_SandboxVars.lua — with the file open in nano, press Ctrl-W and type the name of a key to jump straight to it
StatsDecrease = 3, -- hunger/thirst/fatigue drain · 3 = Normal, 4 = Slow
FoodRotSpeed = 3, -- how fast food spoils · 3 = Normal, 4 = Slow
DayLength = 4, -- 4 = 1 hour 30 min per in-game day (option 4 of 27)
Zombies = 4, -- population · 1 = Insane … 4 = Normal … 6 = None
FoodLootNew = 0.8, -- loot rarity multipliers, one per category —
WeaponLootNew = 0.6, -- raise for more loot, lower for scarcity
The XP rate lives a few lines down inside MultiplierConfig. Set Global = 2.0, and everyone levels twice as fast. After any edit: save the file. Then run systemctl restart zomboid (as root). The file holds a couple of hundred more options. Each one has a comment. To search it is the documentation.
Notice — you prefer a windowed editor? Your file manager already does this
You do not have to edit these files in the terminal. The container speaks SSH. Each desktop file manager can open an SSH location like a local folder. On Windows, install WinSCP and connect to 192.168.1.203 as root. On a Mac or a Linux desktop, point the file manager at sftp://root@192.168.1.203/home/pz/Zomboid/Server. Double-click a file. Edit it in a normal graphical editor. Save. Then apply it with systemctl restart zomboid (one command, in the shell of the container or in your terminal). The editing is the only part that the terminal did. The restart still needs it.
Warning — Build 42 broke most Workshop mods
Build 42 changed the inside of the game enough that most Workshop mods for Build 41 do not work on it yet. Right after a major update, keep the list of mods short. Check the Workshop page of each mod for a tag "42" or a note about a recent update. A server that crashes at boot right after you add mods has a broken mod nine times out of ten. Remove the last ones that you added. Start it again.
Notice — the name servertest is not a placeholder
The default profile of the server really is called servertest. Each config and save folder has that name. Leave it. To rename the profile, you must pass -servername flags everywhere and rename config files to match. It is pain, with no gain.
59.6
LET FRIENDS IN
The easy case first: on your home network, there is nothing to set up. In the game: Join → Favorites → Add, server 192.168.1.203, port 16261. Joining asks for two different passwords. Keep them straight. Your personal password is one that each player makes up for themselves the first time that they connect. Zomboid remembers it as their own account from then on. The server password is the one shared password from Password= in servertest.ini. Everyone types the same one.
Friends over the internet need the same port forwarded. It is the one exception for the firewall that is allowed. The Palworld chapter walks through it in the same way:
Warning — this opens a hole in your firewall
Forward UDP 16261–16262 to 192.168.1.203 on the router (Port Forwarding. Some brands say "Virtual Server"). 16261 is the game. 16262 carries the direct connections of each player.
What this exposes: one game server that has a password, in a container without root rights. It holds nothing but a shared apocalypse. Keep Password= set in servertest.ini.
Friends connect to YOUR-PUBLIC-IP port 16261. To find it, open the status page of your router (the address is in Ch. 4 · Networking in 10 minutes). Read the WAN or Internet address that it shows. That is the number that friends need. A search engine can also tell you. But the router cannot be wrong about your own line. Anyone inside the house keeps using 192.168.1.203. The public address does not loop back from inside. (The Palworld chapter explains this quirk of NAT.)
Notice — the safer alternative: Tailscale
Friends who are willing to install one app can skip the hole in the firewall. Add them to your Tailscale network (chapter Ch. 19 · Remote access: Tailscale). They join through the Tailscale address of the container, as if they were on your LAN.
Uptime Kuma cannot probe a UDP game port directly. So monitor the container instead. Add a Ping monitor on 192.168.1.203 in the dashboard of chapter Ch. 14 · Uptime Kuma. Tick your ntfy notification on it. You then know the moment that the whole container goes down. This is the most common real failure. (A crash of only the game process is caught by the status of systemd instead. It is the first command of the reference card.)
59.7
HOW TO USE IT DAY TO DAY
Admin work happens in the game. Log in as admin with the password from the first boot. Press T for chat. Type commands that start with /.
See who is on:/players.
Warn before a restart:/servermsg "Restarting in 5 minutes — get somewhere safe". Zombies do not pause for maintenance.
Save the world now:/save. Do it before each restart as a habit, even though the stop also saves.
Restart from the container:systemctl restart zomboid (as root in CT 147). The server also saves by itself on a timer while it runs.
59.8
UPDATES AND BACKUPS
To update the server, you run the download command again. SteamCMD only gets what changed:
⌨ Type this inside CT 147 — update (empty the server first)
Zomboid updates often in the weeks after a big release. Friends suddenly say "can't join — wrong version"? Their game updated, and the server did not. Run the block above.
Warning — a backup on the same disk is not a backup
The world lives in /home/pz/Zomboid/Saves. It is on the same SSD as everything else. So the disk dies? Then the world dies with it.
Do you have a copy? Only if you built the backup job in Ch. 20 · Backups before apps. That job runs one time each week, on Sunday at 03:00. It is set to All. So it picks up each container by itself, including this one. You tick nothing.
Read that with care. It matters more for a game server than for anything else in this manual. Weekly means this. The disk fails on Saturday? Then you lose six days of the progress of everyone. Bases, loot, exploration of the map. All of it. That is often the difference between a group that keeps playing and one that quietly stops.
/home/pz/Zomboid lives inside CT 147. The restic backup that Ch. 64 · Backups done right (3-2-1) sets up runs on the host. It cannot see inside a container. So if you point it there, restic exits with a fatal error for a missing path and saves nothing. There are two ways round it. The first: back the whole container up with vzdump. This is what Ch. 20 · Backups before apps already schedules. It includes the saves. The second: copy the saves out to the host on a schedule. Let restic take them from there. Do not bind-mount over /home/pz/Zomboid. You mount an empty host folder onto a path that already holds your world? Then it hides the saves under it. The server starts on a blank map. You want them on the host? Copy them. Do not mount. From the host shell, run pct exec 147 -- tar czf - /home/pz/Zomboid > /srv/backups/zomboid-$(date +%F).tar.gz. Point restic at /srv/backups. A second copy then lives off this machine. And before anything risky, such as a change of mods or an update of the game, take a snapshot by hand first. Ch. 12 · After every build + common Proxmox tasks shows the two clicks. It takes about ten seconds.
59.9
WHEN IT GOES WRONG
Friends time out, but systemctl status zomboid says running. Check that UDP 16261–16262 (not TCP) forwards to 192.168.1.203. Check that friends on the internet use the public IP, and that housemates use the LAN address. Then check the join password. Zomboid rejects without a sign on a wrong server password more often than it explains.
The service dies right at boot, and journalctl -u zomboid shows a kill for out of memory or an error about the heap. The memory pot is set larger than the container. Check the edit of -Xms and -Xmx again. The maximum must stay about 2 GB below the memory of CT 147.
The server boots, then crashes after you add mods. A mod that is broken, or one that works only for Build 41. Remove the most recent additions to WorkshopItems= and Mods=. Start again. Then add them back one at a time.
Stutters and long pauses with a full house. The pot is too small for the list of mods and the number of players. Raise -Xmx (and the memory of CT 147 with it, and keep the gap of 2 GB: 147 → Resources → Memory).
The server does not start as pz, or files in /home/pz/pzserver belong to root. SteamCMD ran as root at some point. This is easy to do. A command that you pasted together with su - pz is queued. It fires at the root prompt the moment that you exit. The files are fine. Give them back with chown -R pz:pz /home/pz/pzserver (as root). Then carry on as pz.
The first boot never asks for the admin password and exits. It was started as the wrong user or in the wrong folder. Run it exactly as the user pz from /home/pz/pzserver with bash start-server.sh. Check that the disk is not full (df -h).
59.10
A download step fails with Temporary failure resolving deb.debian.org, or with another "cannot resolve" message. The container has no working DNS server. It cannot change a name into an address. This is not a typing mistake. It does not fix itself. In the Proxmox page, select this container in the left tree. Open DNS. Select Edit. Type your router address in DNS servers (192.168.1.1 here; use your own). Then run pct reboot 147 in the host shell. Run the failed step again.
A command fails. You do not know if you are on the server or in the container. Read the prompt. In the container, it ends with the name of the container. On the server, it shows root@homelab. The prompt still shows root@homelab after pct enter? Then the command did not work. Type exit. Run the pct enter line again. Check the prompt before you paste anything else. You can paste a build block on the server by mistake. It seems to work. It installs without an error, and the app even answers. But the app is on the server, and it must not be there.
How to see that it happened, and how to undo it. The app does not open at the container address (192.168.1.203). It does open at the server address (192.168.1.220) on the same port. Then the app is on the host. To remove it, run docker rm -f zomboid in the host shell. Then run pct enter 147. Check that the prompt changed. Paste the build block again. You lose nothing in the container, because nothing was built there. The first command can show Error: No such container. This is good. It means that the app was never on the host. Do not paste the build block again. Look for another cause.
The page does not open. The browser spins, or says it cannot connect. Do these checks in order, in the host shell. 1. Is the container running? Run pct status 147. It must say running. If it does not, run pct start 147. 2. Is the container at the address that you typed? Run pct config 147 | grep net0. It shows the real address. A wrong digit in the wizard puts the container at another address, and nothing warns you. 3. Does the app run in the container? Run pct enter 147. Then run systemctl status with the service name of this chapter. Any status other than active (running) means that the app did not start. Run journalctl -u <service> -n 50 to see why. (This chapter runs no Docker. docker ps only shows command not found.) 4. Is the app listening? Run ss -lntup in the container. Look for the port of this chapter in the list. (Do not use curl. A game server does not use HTTP, so curl shows an error also when the server is fine.) Your browser reaches 192.168.1.203 but not the port? Then the app is down. It reaches neither? Then the container is down.
Docker does not start, or you see Cannot connect to the Docker daemon, a keyring error, or an overlay error. This is the most common failure in these guides. It means that the two container features are off. A later pct set --features can switch them off, also when you set them before. Run this in the host shell, not in the container: pct set 147 --features nesting=1,keyctl=1. Then run pct reboot 147. Then run the failed step again. Type both settings on one line. If you send only one setting, it replaces the pair and switches the other one off.
REFERENCE CARD
Paste this in 147 → Summary → Notes. Proxmox shows it as Markdown.
📋 Reference — paste into CT 147's Notes (not a shell command)
## Project Zomboid — CT 147
join LAN 192.168.1.203:16261 · internet YOUR-PUBLIC-IP:16261 (UDP 16261-16262 forwarded)
world in /home/pz/Zomboid · config Server/servertest.ini · admin cmds in-game (T, /help)
```sh
# is it running?
systemctl status zomboid --no-pager
# logs (follow / last 50)
journalctl -u zomboid -f
journalctl -u zomboid -n 50
# stop / start / restart (warn players in-game first: /servermsg)
systemctl stop zomboid
systemctl start zomboid
systemctl restart zomboid
# update the server (stop it first; also fixes "wrong version" joins)
systemctl stop zomboid
su - pz -c 'steamcmd +force_install_dir /home/pz/pzserver +login anonymous +app_update 380870 validate +quit'
systemctl start zomboid
# edit settings / world rules / mods (as pz), then restart
nano /home/pz/Zomboid/Server/servertest.ini
nano /home/pz/Zomboid/Server/servertest_SandboxVars.lua
```
Part F · Game servers
60Valheim server
A Valheim world that stays on for you and your friends, with a backup every 30 minutes and a copy of the newest five kept on your own PC.
This chapter needs the items below. You came here directly? Do them first. Each item takes a short time. Nothing on this page works without them.
Proxmox is installed and works at https://192.168.1.220:8006. You can log in as root. See Ch. 6 · Install Proxmox. At your first visit, the browser shows a certificate warning. Select Advanced. Then select Proceed. The warning is normal. Proxmox makes its own certificate.
The Debian 13 image is downloaded. You do this one time. See Ch. 10 · The container wizard. Without the image, the Template list in the wizard is empty.
You have an SSH key from your PC (Ch. 9 · SSH & the terminal). Or you type a password in the two password boxes of the wizard. The wizard needs one of the two. The Next button stays grey until you give one.
You know your own network numbers. Where this chapter shows 192.168.1.x, use your own numbers. The rule is in Ch. 3 · How to read this manual. The address of this chapter must be outside the range that your router gives out by itself (the DHCP pool, often .100–.200, but yours can differ). An address inside the pool can go to a phone later. Two devices on one address break name lookups, and the cause is hard to find.
Commands marked HOST run on the server. In the Proxmox page, select homelab in the left tree. Then select >_ Shell. Commands marked CT run inside the container of this chapter. The chapter shows you how to get there.
The wizard does not work?Next is grey: you gave no password and no key. Give one of the two. The Template list is empty: the Debian image is not downloaded. Download it first. Each tab is explained in Ch. 10 · The container wizard.
This chapter builds a dedicated Valheim server. It runs in Docker with a community image that downloads the real server from Steam. The world lives in a host-side folder that survives updates. Backups go to a second host folder, and your PC pulls the newest ones.
Notice — where these commands run
Run the shell commands inside CT 148, not on the Proxmox host (192.168.1.220) and not on your PC. Open the container shell in the Proxmox web UI: homelab → >_ Shell, then run pct enter 148. It needs no password. Each command block says where it runs.
60.1
CREATE THE CONTAINER
Do this task with the mouse in the Proxmox web UI. There is nothing to type. If you prefer the command line, the supplement below does the same task with one pct create command.
Open https://192.168.1.220:8006.
Click homelab in the left tree.
Click the blue Create CT button at the top right.
Complete each tab as shown in the reference. Leave any field that is not listed at its default value.
Keep Start after created unticked. Click Finish. The commands after the table finish the job on the host.
Wizard reference — Create CT 148
Tab → Field
Entry
General → Node
Select homelab.
General → CT ID
Type 148. Do not keep the number that the wizard suggests.
General → Hostname
Type valheim.
General → Unprivileged container
Keep this box ticked.
General → Nesting
Keep this box ticked. It is ticked by default. The wizard has no box for keyctl, which Docker also needs. The host command after Finish sets it. It is the first line of the next listing.
General → Password / SSH public key
Keep the password empty. Paste your public key in the SSH field: ssh-ed25519 AAAA…your-key-here you@your-pc. With the key, you can run ssh root@192.168.1.204 from your PC. The command pct enter 148 on the host needs no password.
Template → Storage, Template
Select local. Then select debian-13-standard.
Disks → Storage, Disk size
Select local-lvm. Set 20 GiB.
CPU → Cores
Set 4 cores.
Memory → Memory (MiB)
Set 8192. Keep Swap at its default.
Network → IPv4
Select Static. Set IPv4/CIDR to 192.168.1.204/24. Set Gateway to 192.168.1.1. Keep IPv6 at its default.
DNS → DNS domain
Keep this field empty. Do not type 192.168.1.1 here.
DNS → DNS servers
Always type 192.168.1.1. Never keep this field empty.
Confirm
Read the summary. Keep Start after created unticked. Select Finish.
The wizard has no box for three settings: the Docker permission keyctl, the timezone, and start at boot. The first command below sets all three. Run these 6 commands on the host. They set the missing settings, start the container, and open its shell. Each part is explained in Ch. 10 · The container wizard, section "The host command every build needs".
⌨ Type this on the Proxmox host (homelab)
Before you run anything on this page: every 192.168.1.x address below is this manual's example network. If your own network uses different numbers, substitute yours as you type — the rule is in Ch. 3 · How to read this manual. A command that runs with the wrong address usually succeeds and leaves you unreachable.
pct set 148 --features nesting=1,keyctl=1 --onboot 1 --timezone host
mkdir -p /srv/valheim-backups # folder for world backups, on the server's SSD
chown 100000:100000 /srv/valheim-backups # let the container write into it
pct set 148 -mp0 /srv/valheim-backups,mp=/backups # show that folder inside as /backups
pct start 148
pct enter 148 # now INSIDE CT 148 — the rest of this page runs here
Notice — set your timezone
--timezone host makes the container match the Proxmox host. A Docker app inside the container keeps its own clock setting. This chapter sets it with -e TZ=Region/City. Replace Region/City with your own zone, for example America/New_York. To list every valid name, run timedatectl list-timezones on the host. The schedules in this chapter (the daily restart and the backups) follow that setting.
Notice — 16 GB total, so do not run every game at once
This container may use up to 8 GB. The server's own README says an idle server used about 2.8 GB of RAM and about 30% of one CPU core, measured on an older 2.40 GHz Intel Xeon. It lists 2 cores and 4 GB as the minimum, and 4 cores and 8 GB as the recommended size. Exploring new map areas uses more than standing still. Do not run this server together with a large Minecraft modpack and the Ch. 57 · Palworld dedicated server at the same time.
Prefer the terminal? — the same task with one pct create command
⌨ Type this on the Proxmox host (homelab)
TMPL=$(pveam available --section system | awk '/debian-13-standard/{print $2}' | tail -1)
pveam download local "$TMPL" # once per host; harmless to re-run
mkdir -p /srv/valheim-backups # folder for world backups, on the server's SSD
chown 100000:100000 /srv/valheim-backups # let the container write into it
pct create 148 local:vztmpl/"$TMPL" \
--hostname valheim --cores 4 --memory 8192 --rootfs local-lvm:20 \
--net0 name=eth0,bridge=vmbr0,ip=192.168.1.204/24,gw=192.168.1.1 \
--nameserver 192.168.1.1 --features nesting=1,keyctl=1 --unprivileged 1 --onboot 1 --timezone host \
-mp0 /srv/valheim-backups,mp=/backups
pct start 148
pct enter 148 # you are now INSIDE CT 148 — everything below runs here
Makes the host folder where the Valheim server writes its backups. It lives on the host, so the backups survive if you delete the container.
chown 100000:100000 /srv/valheim-backups
An unprivileged container sees its own root user as user 100000 on the host. This gives that user the folder, so the server can write backups into it.
-mp0 /srv/valheim-backups,mp=/backups
Shows the host folder /srv/valheim-backups inside the container at /backups. The server writes a backup there every 30 minutes, and your PC pulls the newest ones.
60.2
INSTALL THE VALHEIM SERVER
This part has no buttons. You type commands inside CT 148. Install Docker, make the world folders, then start the server in one Docker container.
Change three values in the command. SERVER_NAME is the name of the server. WORLD_NAME is the name of your world. SERVER_PASS is the join password. It must be at least 5 characters, or the server refuses to start.
Replace Region/City with your own timezone.
Paste the block. The first start downloads about 1 GB from Steam, so it takes several minutes.
Watch docker logs -f valheim. When the lines slow down, try to join. Press Ctrl-C to leave the log view. That closes the display only. It does not stop the server.
The Docker install line and the flags -d, --name, --restart, -v, -p, and -e are explained in Ch. 9 · SSH & the terminal. These parts are specific to Valheim:
apt update && apt install -y docker.io curl unzip
Refreshes the package list, then installs Docker, curl, and unzip. You need unzip later to restore a backup.
Makes the two host folders. config holds your world files inside worlds_local. data holds the downloaded server, so it is not downloaded again on each start.
--restart=unless-stopped
Docker restarts the container after a reboot or a crash. It stays off only if you stop it yourself.
--cap-add=sys_nice
Lets the server raise its own process priority. The image's own example uses it.
--stop-timeout 120
Gives the server up to 2 minutes to shut down. The server saves the world when it stops, so a short timeout can lose progress. Docker's default is 10 seconds.
-p 2456-2457:2456-2457/udp
Publishes the two UDP ports the game uses. Valheim uses UDP, not TCP.
-v /opt/valheim/config:/config
Keeps your world files on the host, so they survive if the container is deleted and recreated.
-v /opt/valheim/data:/opt/valheim
Keeps the downloaded server files on the host.
-v /backups:/backups
Shows the host backup folder inside the container. You made that folder when you created the container.
-e SERVER_NAME / -e WORLD_NAME
The name shown for the server, and the name of the world. A new world with that name is made on the first start. For an existing world, use the name of its folder inside worlds_local.
-e SERVER_PASS
The join password. At least 5 characters. Use a long one, because the server may face the internet.
-e SERVER_PUBLIC=false
Does not list the server in the public server browser. Friends join with the address instead.
-e TZ=Region/City
The container's clock. The daily restart and the backup schedule follow it.
-e BACKUPS_CRON="*/30 * * * *"
A backup at minute 0 and minute 30 of every hour. The image's default is once an hour.
-e BACKUPS_DIRECTORY=/backups
Writes the backups to the host folder, not inside the container's own disk. Do not point it inside worlds_local, or each backup would include all earlier backups.
-e BACKUPS_MAX_AGE=7
The server deletes its own backups after 7 days. This is separate from the five copies your PC keeps.
ghcr.io/community-valheim-tools/valheim-server
The image to run. It is a community project.
Notice — what the server does by itself
It checks for Valheim updates every 15 minutes, only when nobody is online. It restarts once a day at 05:10 in the container's timezone, only when nobody is online. Both are the image's defaults. The server has no auto-stop when empty. The container keeps running, and keeps using its RAM, until you stop it.
60.3
OPEN IT TO FRIENDS
On your own network, friends join with the server's address and nothing else. In Valheim, choose Join Game → Join IP. Type 192.168.1.204:2456 and the password. To let friends outside your home join, forward two ports on the router, or invite them onto your Tailscale network.
Option A — port-forward UDP 2456–2457 (the explicit exception)
Most of this manual keeps every service off the public internet. A game server is the deliberate exception. Forward only these two ports.
Warning — forwarding a port exposes this server to the whole internet
Once the ports are forwarded, anyone on the internet can reach the server. The only protection is the password. Use a long, unique one. Never reuse a password from another account. Remove the forward when you stop playing for a long time.
On your router, open Port Forwarding. Some routers call it "Virtual Server" or "Applications & Gaming". Forward UDP 2456 to 2457 to 192.168.1.204.
Find your public IP. Open your router's status page (the address in Ch. 4 · Networking in 10 minutes) and read the WAN or Internet address. That address is YOUR-PUBLIC-IP below.
Tell friends to choose Join Game → Join IP and type YOUR-PUBLIC-IP:2456.
Anyone inside your own home must use 192.168.1.204:2456 instead. Most routers cannot send a public address back to a device inside the house.
Notice — your public IP can change
Your internet provider may give you a new public IP from time to time. If friends who joined before cannot connect, check the router's WAN address first.
Option B — Tailscale (no port forwarding)
If your friends will install Tailscale, you can skip the router and expose nothing to the public internet. Add the homelab to your tailnet (see Ch. 19 · Remote access: Tailscale). Inviting friends onto that tailnet is not covered in this manual. Each friend uses the container's Tailscale address in Join IP.
Notice — crossplay is a third way
The image's README says that with CROSSPLAY=true you do not need port forwarding. Players then join with a code from the in-game menu. Crossplay is also required if anyone plays on Xbox or the Microsoft Store version. This chapter has not tested it. Read the README section named "Crossplay" before you use it.
60.4
BACK UP THE WORLD
You already have the first half. The server makes a backup every 30 minutes and writes it to /srv/valheim-backups on the host. This half copies the newest five to your PC and deletes older copies there.
Notice — five backups is only two and a half hours
One backup per 30 minutes means five files go back 2.5 hours. If you find a problem the next day, the copies on your PC are too new. The host folder keeps 7 days. Use those older files to go further back.
Notice — a backup can land mid-save
The image's README says backups run while the server runs, so a file can be open at that moment. The server writes the world every 20 minutes. If one zip does not restore, try the one before it.
One-time setup on your PC
Notice — the step-by-step route here is for a Linux PC
The copy itself works on any PC with ssh and rsync. Making it run every 30 minutes needs your system's scheduler. This chapter shows systemd, which is Linux. On Windows or a Mac, run the script by hand, or set up Task Scheduler or launchd to run it. The chapter on backing up a PC folder (Ch. 68 · Back up any folder, on a schedule) explains the same limit.
#!/usr/bin/env bash
# Copies the newest 5 Valheim world backups from the server to this PC. Keeps max 5 here.
set -euo pipefail
SRC_HOST="root@192.168.1.220"
SRC_DIR="/srv/valheim-backups"
DEST="$HOME/valheim-backups"
KEEP=5
mkdir -p "$DEST"
LIST="$(mktemp)"
trap 'rm -f "$LIST"' EXIT
# 1. ask the server for the names of its newest zips
ssh -o BatchMode=yes -o ConnectTimeout=10 "$SRC_HOST" \
"ls -1t $SRC_DIR/*.zip 2>/dev/null | head -n $KEEP | xargs -r -n1 basename" > "$LIST"
# 2. copy only those files
if [ -s "$LIST" ]; then
rsync -a --files-from="$LIST" "$SRC_HOST:$SRC_DIR/" "$DEST/"
fi
# 3. keep only the newest 5 here
ls -1t "$DEST"/*.zip 2>/dev/null | tail -n +$((KEEP + 1)) | xargs -r rm --
⌨ Save as ~/.config/systemd/user/valheim-pull.service on your PC
[Unit]
Description=Pull Valheim world backups from the server
[Service]
Type=oneshot
ExecStart=%h/.local/bin/valheim-pull.sh
⌨ Save as ~/.config/systemd/user/valheim-pull.timer on your PC
Lists the files on your PC, newest first. Skips the first five. Deletes the rest. This is what keeps the count at five.
OnCalendar=*:05,35
Runs at 5 and 35 minutes past every hour. That is a few minutes after each server backup, so the new file is complete.
Persistent=true
If your PC was off at a scheduled time, the timer runs once when the PC is back.
systemctl --user enable --now valheim-pull.timer
Turns the timer on now and at every login. --user means it runs as you, not as root.
If the folder is empty, the server has not made its first backup yet. It appears at the next minute 0 or minute 30. Make one now with the command in the reference card.
Notice — this is still one building
The server and your PC are both in your home. A fire or a theft reaches both. See Ch. 64 · Backups done right (3-2-1) for the plan that keeps a copy somewhere else.
60.5
RESTORE A BACKUP
Use this when the world is damaged. Do it with the server stopped. The layout inside the zip is not documented in the image's README, so look inside first.
Pick a file. List them newest first, then look inside one.
Stop the server. Move the current world folder aside. Do not delete it yet.
Unzip the backup. Check the result, then start the server.
⌨ Type this inside CT 148
ls -lt /backups | head
unzip -l /backups/PICK-A-FILE.zip | head -20
Read the unzip -l output. This image writes names that start with config/worlds_local/ (tested). Use the first block for them. A zip with names that start with worlds_local/ needs the second block. A zip with any other names needs the third block. A wrong block puts the world in the wrong folder. The server then does not find it, and it starts an empty new world.
⌨ Files start with config/worlds_local/ — type this inside CT 148
docker stop valheim
mv /opt/valheim/config/worlds_local /opt/valheim/config/worlds_local.broken
unzip /backups/PICK-A-FILE.zip -d /opt/valheim/
ls -R /opt/valheim/config/worlds_local | head
docker start valheim
⌨ Files start with worlds_local/ — type this inside CT 148 (second block)
docker stop valheim
mv /opt/valheim/config/worlds_local /opt/valheim/config/worlds_local.broken
unzip /backups/PICK-A-FILE.zip -d /opt/valheim/config/
ls -R /opt/valheim/config/worlds_local | head
docker start valheim
⌨ Files start with other names — type this inside CT 148 (third block)
docker stop valheim
mv /opt/valheim/config/worlds_local /opt/valheim/config/worlds_local.broken
mkdir /opt/valheim/config/worlds_local
unzip /backups/PICK-A-FILE.zip -d /opt/valheim/config/worlds_local/
ls -R /opt/valheim/config/worlds_local | head
docker start valheim
Notice — keep the old folder for a while
Keep worlds_local.broken until you have played on the restored world. Then you can delete it.
60.6
WHEN IT GOES WRONG
The container exits right away, and docker logs valheim shows a password message.SERVER_PASS is shorter than 5 characters. Recreate the container with a longer one — the exact five steps are in Ch. 12 · After every build + common Proxmox tasks.
docker run (or the Docker service) fails inside CT 148 with a cgroup, overlay, or "permission denied" error. CT 148 may miss the features that let Docker run inside a container. On the Proxmox HOST (not inside the CT), run pct config 148 | grep features. The line must show keyctl=1,nesting=1. It does not? Run pct set 148 --features nesting=1,keyctl=1. Then run pct reboot 148.
Friends on the internet cannot connect, though the server is up. Check that the router forwards UDP 2456 to 2457 to 192.168.1.204. Check that friends use YOUR-PUBLIC-IP:2456. Your public IP may have changed. Anyone inside your own home must use 192.168.1.204:2456.
It works from your PC but not from outside. That points at the router forward, not the server. Check the forward first.
The log shows UnauthorizedAccessException and the world does not load. The server cannot open its own save folder. Check the owner and the permissions on /opt/valheim/config/worlds_local.
The container is killed or restarts in a loop, and logs show an out-of-memory error. The container has too little RAM. Raise it in 148 → Resources → Memory and reboot the CT. Do not run a heavy modpack and another game server at the same time.
The PC folder stays empty. Run journalctl --user -u valheim-pull.service -n 20 on your PC. A Permission denied message means the passwordless SSH login from Ch. 9 · SSH & the terminal is not set up. If the message says the folder does not exist, the server has not made a backup yet.
The backup folder in CT 148 is missing, or the server cannot write to it. The folder /srv/valheim-backups must exist on the host before the container starts, and it must belong to 100000:100000. Run ls -ld /backups inside CT 148 to check.
60.7
A download step fails with Temporary failure resolving deb.debian.org, or with another "cannot resolve" message. The container has no working DNS server. It cannot change a name into an address. This is not a typing mistake. It does not fix itself. In the Proxmox page, select this container in the left tree. Open DNS. Select Edit. Type your router address in DNS servers (192.168.1.1 here; use your own). Then run pct reboot 148 in the host shell. Run the failed step again.
A command fails. You do not know if you are on the server or in the container. Read the prompt. In the container, it ends with the name of the container. On the server, it shows root@homelab. The prompt still shows root@homelab after pct enter? Then the command did not work. Type exit. Run the pct enter line again. Check the prompt before you paste anything else. You can paste a build block on the server by mistake. It seems to work. It installs without an error, and the app even answers. But the app is on the server, and it must not be there.
How to see that it happened, and how to undo it. The app does not open at the container address (192.168.1.204). It does open at the server address (192.168.1.220) on the same port. Then the app is on the host. To remove it, run docker rm -f valheim in the host shell. Then run pct enter 148. Check that the prompt changed. Paste the build block again. You lose nothing in the container, because nothing was built there. The first command can show Error: No such container. This is good. It means that the app was never on the host. Do not paste the build block again. Look for another cause.
The page does not open. The browser spins, or says it cannot connect. Do these checks in order, in the host shell. 1. Is the container running? Run pct status 148. It must say running. If it does not, run pct start 148. 2. Is the container at the address that you typed? Run pct config 148 | grep net0. It shows the real address. A wrong digit in the wizard puts the container at another address, and nothing warns you. 3. Does the app run in the container? Run pct enter 148. Then run docker ps. An empty list means that the app did not start. Run docker ps -a to see that it stopped. Run docker logs to see why. 4. Is the app listening? Run ss -lntup in the container. Look for the port of this chapter in the list. (Do not use curl. A game server does not use HTTP, so curl shows an error also when the server is fine.) Your browser reaches 192.168.1.204 but not the port? Then the app is down. It reaches neither? Then the container is down.
Docker does not start, or you see Cannot connect to the Docker daemon, a keyring error, or an overlay error. This is the most common failure in these guides. It means that the two container features are off. A later pct set --features can switch them off, also when you set them before. Run this in the host shell, not in the container: pct set 148 --features nesting=1,keyctl=1. Then run pct reboot 148. Then run the failed step again. Type both settings on one line. If you send only one setting, it replaces the pair and switches the other one off.
REFERENCE CARD
Paste this into 148 → Summary → Notes so the essentials travel with the container. Before you ever run the update line on this card, compare it with the docker run you actually used at install. The card is a snapshot of the standard build: if you added anything of your own — a device, an extra -e setting, a second folder — it is not on the card, and re-running the card's line drops it. The container comes back up looking healthy with your setting gone.
📋 Reference — paste into this container's Notes in Proxmox (not a shell command)
## Valheim — CT 148
join YOUR-PUBLIC-IP:2456 (forward UDP 2456-2457) · LAN 192.168.1.204:2456 · README https://github.com/community-valheim-tools/valheim-server-docker
```sh
# is it running?
docker ps --filter name=valheim
# logs (last 50), or live
docker logs valheim --tail 50
docker logs -f valheim
# RAM and CPU use
docker stats --no-stream
# back up now / list backups
docker exec -it valheim supervisorctl signal HUP valheim-backup
ls -lh /backups
# stop / start / restart (stop saves the world first; do it when empty)
docker stop valheim
docker start valheim
docker restart valheim
# update the server image (do it when empty)
docker pull ghcr.io/community-valheim-tools/valheim-server
docker rm -f valheim
# then run the same docker run command again — the world stays in /opt/valheim/config
```
On your PC:
```sh
systemctl --user start valheim-pull.service # copy backups now
journalctl --user -u valheim-pull.service -n 20 # why did it fail?
ls -1 ~/valheim-backups | wc -l # never more than 5
```
Part F · Game servers
61LanCache
Download a game one time. Then serve it to each PC on the LAN at gigabit speed.
This chapter needs the items below. You came here directly? Do them first. Each item takes a short time. Nothing on this page works without them.
Proxmox is installed and works at https://192.168.1.220:8006. You can log in as root. See Ch. 6 · Install Proxmox. At your first visit, the browser shows a certificate warning. Select Advanced. Then select Proceed. The warning is normal. Proxmox makes its own certificate.
The Debian 13 image is downloaded. You do this one time. See Ch. 10 · The container wizard. Without the image, the Template list in the wizard is empty.
You have an SSH key from your PC (Ch. 9 · SSH & the terminal). Or you type a password in the two password boxes of the wizard. The wizard needs one of the two. The Next button stays grey until you give one.
You know your own network numbers. Where this chapter shows 192.168.1.x, use your own numbers. The rule is in Ch. 3 · How to read this manual. The address of this chapter must be outside the range that your router gives out by itself (the DHCP pool, often .100–.200, but yours can differ). An address inside the pool can go to a phone later. Two devices on one address break name lookups, and the cause is hard to find.
The shared media folder exists. It is /srv/media. You make it one time in Ch. 40 · Shared storage first. This chapter keeps its data there, not on the small SSD. Build that chapter first. Without the folder, the data goes to the small system SSD. The mount exists to prevent this.
You built Ch. 16 · AdGuard Home already. The steps below use that chapter: a container, an address, a key, or a job that must exist. You cannot finish this chapter without it.
Commands marked HOST run on the server. In the Proxmox page, select homelab in the left tree. Then select >_ Shell. Commands marked CT run inside the container of this chapter. The chapter shows you how to get there.
The wizard does not work?Next is grey: you gave no password and no key. Give one of the two. The Template list is empty: the Debian image is not downloaded. Download it first. Each tab is explained in Ch. 10 · The container wizard.
Notice — where these commands run
Each command in the sections for install and DNS runs inside CT 138. It does not run on the Proxmox host. Only the pct and pveam commands run on the host (the server at 192.168.1.220). Each one is labelled where you use it. You open the shell of CT 138 in one of two ways. Run pct enter 138 on the host (first homelab → >_ Shell). Or run ssh root@192.168.1.214 from your PC. In both ways, you arrive as root by itself. (The >_ Console button of the container shows a login: prompt. The containers of this manual cannot answer it. Skip it.)
The >_ Console button of the CT opens a login: prompt, not a shell. Use pct enter 138 from homelab → >_ Shell.
61.1
CREATE THE CONTAINER
You do this task with the mouse in the Proxmox web page. You type nothing. You prefer the command line? The box below does the same task with one pct create command.
Open https://192.168.1.220:8006.
Click homelab in the left tree.
Click the blue Create CT button at the top right.
Fill in the tabs as the reference of the wizard shows. Leave each field that is not listed at its default value.
Click Finish. The wizard cannot attach the shared cache folder. So the last step is a short run of commands on the host.
The login page of the Proxmox web page, at https://192.168.1.220:8006.The blue Create CT button, at the top right of the node view.
Wizard reference — Create CT 138
Tab → Field
Entry
General → Node
Select homelab.
General → CT ID
Type 138. Do not keep the number that the wizard suggests.
General → Hostname
Type lancache.
General → Unprivileged container
Keep this box ticked.
General → Nesting
Keep this box ticked. It is ticked by default. The wizard has no box for keyctl, which Docker also needs. The host command after Finish sets it. It is the first line of the next listing.
General → Password / SSH public key
Keep the password empty. Paste your public key in the SSH field: ssh-ed25519 AAAA…your-key-here you@your-pc. With the key, you can run ssh root@192.168.1.214 from your PC. The command pct enter 138 on the host needs no password.
Template → Storage, Template
Select local. Then select debian-13-standard.
Disks → Storage, Disk size
Select local-lvm. Set 8 GiB.
CPU → Cores
Set 2 cores.
Memory → Memory (MiB)
Set 2048. Keep Swap at its default.
Network → IPv4
Select Static. Set IPv4/CIDR to 192.168.1.214/24. Set Gateway to 192.168.1.1. Keep IPv6 at its default.
DNS → DNS domain
Keep this field empty. Do not type 192.168.1.1 here.
DNS → DNS servers
Always type 192.168.1.1. Never keep this field empty.
Confirm
Read the summary. Keep Start after created unticked. Select Finish.
The Create CT wizard, General tab, with CT ID 138, hostname lancache, and Unprivileged container ticked.
The wizard has no box for three settings: the Docker permission keyctl, the timezone, and start at boot. The first command below sets all three. Run these 7 commands on the host. They set the missing settings, start the container, and open its shell. Each part is explained in Ch. 10 · The container wizard, section "The host command every build needs".
⌨ Type this on the Proxmox host (homelab)
Before you run anything on this page: every 192.168.1.x address below is this manual's example network. If your own network uses different numbers, substitute yours as you type — the rule is in Ch. 3 · How to read this manual. A command that runs with the wrong address usually succeeds and leaves you unreachable.
pct set 138 --features nesting=1,keyctl=1 --onboot 1 --timezone host
mountpoint -q /srv/media || echo "WARNING: /srv/media is NOT a mounted share — the next line would create it on the system disk. Build the shared-storage chapter first."
mkdir -p /srv/media/lancache # create it if the media stack is not built yet
chown 100000:100000 /srv/media/lancache # 100000 = the unprivileged CT's own root
pct set 138 -mp0 /srv/media,mp=/data # bind the shared store in as /data
pct start 138
pct enter 138 # now INSIDE CT 138 — the rest of this page runs here
Notice — set your timezone
The option --timezone host makes the container follow the clock of the host. List the valid names with timedatectl list-timezones. Pick the line that matches your city, for example America/New_York or Europe/Berlin.
Notice — the shared store and its owner
The line -mp0 /srv/media,mp=/data binds the host folder /srv/media into the container. There it appears as /data. That folder is the same shared store that the media apps use. You made it one time in Ch. 40 · Shared storage first. Build Ch. 40 · Shared storage first first. The mkdir in the next section runs inside the container at /data. It is there only because /srv/media on the host is bound in. Without the host folder, the cache has nowhere to live on the shared store. It fills the small system SSD instead. You need to do nothing about ownership here. It is handled already. For the curious: LanCache runs as root inside its container. This CT is "unprivileged". This is a Proxmox setting. It maps that root user inside to a harmless user number outside. It does not map it to the real root of the host. That number outside is 100000. So the cache folder belongs to 100000 on the host. This is a different number from the media apps. They use a separate scheme of numbers. When you add a real drive later (see Ch. 65 · Add an external drive), you move /srv/media onto it. The container does not notice. The path /data inside stays the same.
Prefer the terminal? — the same task with one pct create command
⌨ Type this on the Proxmox host (homelab)
TMPL=$(pveam available --section system | awk '/debian-13-standard/{print $2}' | tail -1)
pveam download local "$TMPL" # once per host; harmless to re-run
mkdir -p /srv/media/lancache # create it if the media stack is not built yet
chown 100000:100000 /srv/media/lancache # 100000 = the unprivileged CT's own root
pct create 138 local:vztmpl/"$TMPL" \
--hostname lancache --cores 2 --memory 2048 --rootfs local-lvm:8 \
--net0 name=eth0,bridge=vmbr0,ip=192.168.1.214/24,gw=192.168.1.1 \
--nameserver 192.168.1.1 --features nesting=1,keyctl=1 --unprivileged 1 --onboot 1 --timezone host \
-mp0 /srv/media,mp=/data
pct start 138
pct enter 138 # you are now INSIDE CT 138 — everything below runs here
Creates the cache folder on the host. The shared store /srv/media is normally made in the shared-storage chapter; this line makes just the part LanCache needs, so this chapter works on its own. -p means it does not complain if it already exists.
chown 100000:100000 /srv/media/lancache
Prepares the host folder that this container needs before it starts.
-mp0 /srv/media,mp=/data
Shows the host folder /srv/media inside the container at /data. The container reads and writes the shared data in place.
61.2
INSTALL THE CACHE
The cache is one container: lancachenet/monolithic. It is the cache for all CDNs in a single image. It saves local copies of game downloads and updates. Later PCs then get them from your LAN, not from the internet.
This part has no buttons. You type commands inside CT 138. You are already there from pct enter 138 above. (You closed that shell? Open homelab → >_ Shell and run pct enter 138 again.) Do not type them on the Proxmox host or on a gaming PC.
Install Docker and curl. The checks in this chapter and in several later ones expect curl. The reference card uses it for a quick health check. It is a one-word addition to the same apt line.
Make the folders for the cache and the logs. The cache folder is inside the shared store that you bound in at /data. The logs stay on the small system disk. (You can also make these two folders with a file manager that is connected over SFTP. You then do not type mkdir. See Ch. 12 · After every build + common Proxmox tasks, section "Move a file to or from the server," for how to connect.)
Start the cache container. It listens on ports 80 and 443 at the address of the CT, 192.168.1.214.
docker reports command not found, or the container does not start right after the install? Run systemctl enable --now docker. Then try the docker run line again.
The Docker install line and the flags -d, --name, --restart, -v, -p, and -e are explained in Ch. 9 · SSH & the terminal. These parts are specific to LanCache:
mkdir -p /data/lancache /opt/lancache/logs
Makes the two folders that LanCache writes to. /data/lancache is on the shared store (the host folder /srv/media/lancache). It holds the data of the games that are cached. /opt/lancache/logs is on the system disk. It holds the access log. -p does not complain if a folder exists already.
-e CACHE_DISK_SIZE=100g
Limits the cache to 100 gigabytes. Keep this well under the free space of the disk that holds the cache. The default of the image is 1000g. On a 500 GB SSD that you share with your media, 100g is a safe start. Raise it when the cache lives on a large drive (see the warning below). LanCache keeps about 10 GB free when it removes old data. So leave room.
-e CACHE_MAX_AGE=3650d
Keeps cached files for up to 3650 days, about 10 years, before LanCache treats them as old. Game files rarely change. So a long age is fine.
-e UPSTREAM_DNS=192.168.1.223
The cache needs the real internet address for a file that it does not have yet. It then asks this DNS server. It is your Ch. 16 · AdGuard Home at 192.168.1.223. The default of the image is Google DNS (8.8.8.8). When you point it at AdGuard, the blocking of ads stays on for those lookups too. See the DNS section for the one case where this must be a plain resolver of the internet instead.
-v /data/lancache:/data/cache
Stores the cached download data at /data/lancache inside the CT. This is /srv/media/lancache on the host. It is mapped to the own /data/cache of the container. The cache stays even if the container is deleted.
-v /opt/lancache/logs:/data/logs
Stores the access log of LanCache on the system disk of the CT at /opt/lancache/logs. You watch this log to confirm hits of the cache.
-p 80:80 -p 443:443
Opens the two web ports. Traffic of games that is redirected then reaches LanCache. Port 80 is plain HTTP. LanCache caches it and serves it locally. Port 443 is HTTPS, which is encrypted. LanCache cannot cache encrypted data. So it passes HTTPS straight through to the real server with no cache. Port 443 must still stay open. If not, the HTTPS requests fail.
lancachenet/monolithic:latest
The container image: the caching server of LanCache that does everything. It caches the traffic of Steam, Epic, Battle.net, Riot, Ubisoft, and Windows Update in one instance. So you do not need a separate cache for each service.
CT 138/lancache: 8 GiB system disk, 2 CPU, 2048 MB, 192.168.1.214/24 (the /24 only means the usual mask of a home network). The cache data lands on the shared store at /data/lancache (host /srv/media/lancache). It is limited to 100 GB. The only hard part is DNS, next. The domains for game downloads must point at this container.
Warning — game caches are huge. Keep them off the system disk
The system disk of CT 138 is only 8 GiB. A game cache is measured in hundreds of gigabytes. A single modern title is 100 GB or more. The cache must land on the shared store, not on the system disk. If not, the container fills its own disk and crashes.
There are two safeguards. Both are in the commands above already:
The cache path /data/lancache is the shared store that is bind-mounted. Check it before you download anything. Run df -h /data inside CT 138. The column Size must show the shared store (hundreds of GB). It must not show about 8 GB. It shows about 8 GB? Then the bind-mount -mp0 is missing. Stop. Add it on the host with pct set 138 -mp0 /srv/media,mp=/data. Then run pct reboot 138.
CACHE_DISK_SIZE=100g keeps the cache under the free space of a 500 GB SSD that also holds your media library. On the shared SSD, treat 100g as a ceiling, not as a target.
100 GB is not enough? Or the cache starts to crowd out your media? Add a drive of its own. Move /srv/media onto it (see Ch. 65 · Add an external drive). Then raise CACHE_DISK_SIZE to match the new disk. The container does not notice the move. Its cache path stays /data.
61.3
THE DNS HALF — HOW PCs REACH THE CACHE
The cache helps only when game clients point the CDN domains at it. A second small container, lancachenet/lancache-dns, does that. Run it in the same CT 138. It answers the game-CDN domains with the address of the cache. It forwards everything else to Ch. 16 · AdGuard Home.
docker run -d --name lancache-dns --restart=unless-stopped
Starts a container named lancache-dns in the background. It restarts by itself after a crash or a reboot.
-e USE_GENERIC_CACHE=true
Tells the DNS service that there is a single cache server on the network. It can then point each domain that can be cached at one address. It does not need a separate IP for each service.
-e LANCACHE_IP=192.168.1.214
The address of the cache. A device asks for a download that can be cached, for example a Steam or Epic CDN host. This DNS server then answers with 192.168.1.214 in place of the real address on the internet. The request lands on the cache.
-e UPSTREAM_DNS=192.168.1.223
For each request that is not a game domain with a cache, the DNS service forwards the lookup to your AdGuard at 192.168.1.223. So normal browsing still works, and it stays free of ads.
-p 53:53/udp -p 53:53/tcp
Opens port 53, the standard DNS port, over both UDP and TCP. DNS uses both.
lancachenet/lancache-dns:latest
The container image: a DNS server that redirects requests for games and software downloads to the local LanCache. It passes everything else upstream.
Notice — how it fits with AdGuard
Two DNS services now exist on your LAN. They do not conflict. AdGuard answers on 192.168.1.223:53. lancache-dns answers on 192.168.1.214:53. lancache-dns replies to the game-CDN domains (Steam, Epic, Battle.net, …) with 192.168.1.214, the cache. It forwards everything else to AdGuard. So you point the DNS of each gaming PC, or the DNS that the DHCP of the router hands out, at 192.168.1.214. AdGuard still filters the rest through the upstream hand-off. lancache-dns must be the only DNS server that your gaming clients use. A client also has a second resolver? Then it can look the CDN up there and skip the cache completely.
Notice — the alternative with one container, and its trap
You can skip the container lancache-dns completely. You teach AdGuard itself to answer each game-CDN domain with 192.168.1.214. You use the own feature of AdGuard for DNS rewrites. That saves one container on CT 138.
It also opens a trap. LanCache still has to look up the real internet address for anything that it has not cached yet. This is what UPSTREAM_DNS in the install command is for. You point that lookup at AdGuard, while AdGuard rewrites the same CDN domain to 192.168.1.214? Then AdGuard hands LanCache back its own address. It does not hand back the real CDN server. The lookup loops. The download stalls. So the path with one container works only if you also change UPSTREAM_DNS of LanCache to a plain resolver on the internet. It must be one that knows nothing about the rewrite, such as 8.8.8.8. It must not be 192.168.1.223 of AdGuard.
That is one more setting to keep straight by hand. It is also a list that you must maintain. The game-CDN domains change as platforms add servers. The container lancache-dns has that list maintained for it. It uses the list cache-domains of the community. On the route by hand, you copy the entries from that same list into Filters → DNS rewrites in Ch. 16 · AdGuard Home. You keep them current yourself, for ever. The setup with two containers that this chapter already documents avoids both problems. This is why it is the path that we recommend.
Warning — the benefit appears only on repeat downloads, and only when DNS is really used
The first download of any game runs at the normal speed of the internet. It is what fills the cache. Each PC that downloads it after that gets LAN speed. To make the redirect work on each gaming PC:
Set the DNS server to 192.168.1.214 (on the PC, or one time on the router for the whole LAN).
Turn off each option "Secure DNS" or "DNS over HTTPS (DoH)" in the browser and in the operating system of that PC. DoH bypasses the DNS of your LAN completely. So the cache never sees the request and stores nothing.
61.4
USE IT — THE BASICS
LanCache has no login and no web page. To use it, point the DNS of each gaming PC at the cache. Then download games as before.
On each gaming PC, set the DNS server to 192.168.1.214. On Windows 11: Settings → Network & internet → Ethernet → DNS server assignment → Edit. Select Manual. Turn on IPv4. Enter the address.
Turn off each option "Secure DNS" or "DNS over HTTPS" in the browser and the operating system of that PC. With DoH on, nothing is cached.
Clear the old lookups. Run ipconfig /flushdns in a Windows terminal. Then restart Steam.
In Steam, set one fixed download region: Steam → Settings → Downloads → Download Region. This stops Steam from hopping between CDNs.
Download a game on one PC. The speed is the normal speed of the internet. This first download fills the cache.
Download the same game on a second PC. The speed is now LAN speed. To check, run docker exec lancache tail -f /data/logs/access.log inside CT 138. Watch for lines with HIT. They mean that the cache served the data. Press Ctrl-C to stop watching. (For a quick look without a live tail, you can also open access.log with a file manager over SFTP.)
Notice — downloads again count too
The second copy can be on the same machine. Remove a game and install it again later. The data then comes from the cache. A new install takes minutes, not hours. The same is true for a big patch that each PC in the house gets in the end.
Notice — add it to the ritual after the build
When the cache is proven, finish it like any other service. Add a TCP monitor in Ch. 14 · Uptime Kuma on 192.168.1.214 port 80. Attach your notification of Ch. 13 · ntfy, so that a dead cache reaches your phone. Add a tile in Ch. 18 · Homarr dashboard. Take a Proxmox snapshot.
61.5
WHEN IT GOES WRONG
Games still download at the full speed of the internet, and the cache hardly grows, also on the second PC. du -sh /data/lancache stays almost empty.
The client does not really use the DNS of LanCache. On the gaming PC, set the DNS server to 192.168.1.214. Turn off Secure DNS and DNS over HTTPS in both the browser and the operating system. Then flush DNS (ipconfig /flushdns on Windows). Check the hits inside CT 138 with docker exec lancache tail -f /data/logs/access.log. Look for lines with HIT. The first download of any game is always a MISS while it fills the cache.
Right after apt install -y docker.io, docker run fails with "Cannot connect to the Docker daemon", or the daemon does not start inside the container.
The container needs two features before Docker runs inside it: nesting (it lets one container run another container inside itself) and keyctl (a feature for security keys that Docker needs). On the Proxmox host, check them with pct config 138 | grep features. The line must show keyctl=1,nesting=1. It does not? Run pct set 138 --features nesting=1,keyctl=1 to turn both on. Then run pct reboot 138. Enter again with pct enter 138 and try again. If needed, start Docker with systemctl enable --now docker.
lancache-dns does not start. docker logs lancache-dns shows bind: address already in use on port 53.
Another resolver inside CT 138 already holds port 53, usually systemd-resolved. Find it with ss -tulpn | grep :53. It is systemd-resolved? Run systemctl disable --now systemd-resolved to turn it off. Then fix /etc/resolv.conf. This file tells this container which DNS server to use for its own lookups. Run rm -f /etc/resolv.conf && echo 'nameserver 192.168.1.223' > /etc/resolv.conf. (You can do this same edit with a text editor over SFTP instead of the echo command, if you prefer.) Then run docker restart lancache-dns.
The cache container gets permission denied when it writes to /data/cache, or nothing is stored although downloads run.
The cache folder on the host has the wrong owner. LanCache runs as root inside its container. This is host UID 100000 in an unprivileged CT. On the host, run chown -R 100000:100000 /srv/media/lancache. Then run docker restart lancache inside CT 138. Use 100000 here, not 101000. LanCache does not use the scheme PUID and PGID of the media apps.
The root disk of CT 138 reaches 100% in the Proxmox web page, and the container stops or does not boot.
The cache wrote to the system disk of 8 GiB, because /data was not the real mount of the shared store. Stop the container with docker stop lancache. Clear the data that is in the wrong place with rm -rf /data/lancache/*. Then on the host, add the bind-mount: pct set 138 -mp0 /srv/media,mp=/data and pct reboot 138. Check with df -h /data inside the CT. It must show the shared store, not about 8 GB. Then start the container again.
Steam downloads are still not cached, although DNS points at 192.168.1.214.
In Steam, set a single fixed download region (Steam → Settings → Downloads → Download Region). Steam then stops switching between CDNs. Restart Steam. Watch docker exec lancache tail -f /data/logs/access.log again for lines with HIT and MISS. The first PC that gets a given game always has a MISS. Only the second PC onward sees a HIT.
61.6
A download step fails with Temporary failure resolving deb.debian.org, or with another "cannot resolve" message. The container has no working DNS server. It cannot change a name into an address. This is not a typing mistake. It does not fix itself. In the Proxmox page, select this container in the left tree. Open DNS. Select Edit. Type your router address in DNS servers (192.168.1.1 here; use your own). Then run pct reboot 138 in the host shell. Run the failed step again.
A command fails. You do not know if you are on the server or in the container. Read the prompt. In the container, it ends with the name of the container. On the server, it shows root@homelab. The prompt still shows root@homelab after pct enter? Then the command did not work. Type exit. Run the pct enter line again. Check the prompt before you paste anything else. You can paste a build block on the server by mistake. It seems to work. It installs without an error, and the app even answers. But the app is on the server, and it must not be there.
How to see that it happened, and how to undo it. The app does not open at the container address (192.168.1.214). It does open at the server address (192.168.1.220) on the same port. Then the app is on the host. To remove it, run docker rm -f lancache in the host shell. Then run pct enter 138. Check that the prompt changed. Paste the build block again. You lose nothing in the container, because nothing was built there. The first command can show Error: No such container. This is good. It means that the app was never on the host. Do not paste the build block again. Look for another cause.
The page does not open. The browser spins, or says it cannot connect. Do these checks in order, in the host shell. 1. Is the container running? Run pct status 138. It must say running. If it does not, run pct start 138. 2. Is the container at the address that you typed? Run pct config 138 | grep net0. It shows the real address. A wrong digit in the wizard puts the container at another address, and nothing warns you. 3. Does the app run in the container? Run pct enter 138. Then run docker ps. An empty list means that the app did not start. Run docker ps -a to see that it stopped. Run docker logs to see why. 4. Is the app listening? Run ss -lntup in the container. Look for the port of this chapter in the list. (Do not use curl. A game server does not use HTTP, so curl shows an error also when the server is fine.) Your browser reaches 192.168.1.214 but not the port? Then the app is down. It reaches neither? Then the container is down.
Docker does not start, or you see Cannot connect to the Docker daemon, a keyring error, or an overlay error. This is the most common failure in these guides. It means that the two container features are off. A later pct set --features can switch them off, also when you set them before. Run this in the host shell, not in the container: pct set 138 --features nesting=1,keyctl=1. Then run pct reboot 138. Then run the failed step again. Type both settings on one line. If you send only one setting, it replaces the pair and switches the other one off.
REFERENCE CARD
Paste this in 138 → Summary → Notes in Proxmox. The key facts then stay with the container. Before you ever run the update line on this card, compare it with the docker run you actually used at install. The card is a snapshot of the standard build: if you added anything of your own — a device, an extra -e setting, a second folder — it is not on the card, and re-running the card's line drops it. The container comes back up looking healthy with your setting gone.
📋 Reference — paste into this container's Notes in Proxmox (not a shell command)
## LanCache — CT 138
cache on /srv/media/lancache (bound in as /data/lancache) · point clients' DNS at 192.168.1.214 · docs https://lancache.net/docs/
```sh
# are both containers running?
docker ps --filter name=lancache
# how big has the cache grown?
du -sh /data/lancache
# cache hits/misses (Ctrl-C to stop)
docker exec lancache tail -f /data/logs/access.log
# logs (last 50)
docker logs lancache --tail 50
docker logs lancache-dns --tail 50
# stop / start / restart
docker stop lancache
docker start lancache
docker restart lancache
docker restart lancache-dns
# is there an update? ("Image is up to date" = no)
docker pull lancachenet/monolithic:latest
docker pull lancachenet/lancache-dns:latest
# update the cache (cached data survives in /srv/media/lancache)
docker pull lancachenet/monolithic:latest && docker rm -f lancache && docker run -d --name lancache \
--restart=unless-stopped -e CACHE_DISK_SIZE=100g -e CACHE_MAX_AGE=3650d -e UPSTREAM_DNS=192.168.1.223 \
-v /data/lancache:/data/cache -v /opt/lancache/logs:/data/logs -p 80:80 -p 443:443 lancachenet/monolithic:latest
# update the DNS helper
docker pull lancachenet/lancache-dns:latest && docker rm -f lancache-dns && docker run -d --name lancache-dns \
--restart=unless-stopped -e USE_GENERIC_CACHE=true -e LANCACHE_IP=192.168.1.214 -e UPSTREAM_DNS=192.168.1.223 \
-p 53:53/udp -p 53:53/tcp lancachenet/lancache-dns:latest
```
(the Update notifications chapter adds automatic pings when a new image lands)
Explanation of each part
docker ps --filter name=lancache
Lists both containers, lancache and lancache-dns, if they run. A missing one is stopped. Check its logs next.
du -sh /data/lancache
Shows how much disk the cache has grown to. Compare it with CACHE_DISK_SIZE and with the free space on the shared store.
Follows the access log live. Lines with HIT mean that the cache served the data from the disk. MISS means that it got the data from the internet and stored a copy. Ctrl-C stops the view. It does not stop the cache.
Shows the last 50 lines of the own output of each container. Use it to find out why a container crashed or did not start well.
docker stop / start / restart lancache
Stops, starts, or restarts the cache. Use it for example to apply a fix or to recover from a crash. The cached data in /srv/media/lancache is not touched.
docker pull …:latest
Downloads the newest version of an image. "Image is up to date" means that you have it already.
docker pull … && docker rm -f … && docker run …
The sequence for the update: get the new image, remove the old container, then make it again with the same settings. The behaviour of the cache and of DNS is kept, because the volumes and the env variables are identical.
Part F · Game servers
62Pelican panel
Run each game server (Minecraft, Palworld, Valheim) from one web control panel on your own hardware. Give friends a login for their own server.
This chapter needs the items below. You came here directly? Do them first. Each item takes a short time. Nothing on this page works without them.
Proxmox is installed and works at https://192.168.1.220:8006. You can log in as root. See Ch. 6 · Install Proxmox. At your first visit, the browser shows a certificate warning. Select Advanced. Then select Proceed. The warning is normal. Proxmox makes its own certificate.
The Debian 13 image is downloaded. You do this one time. See Ch. 10 · The container wizard. Without the image, the Template list in the wizard is empty.
You have an SSH key from your PC (Ch. 9 · SSH & the terminal). Or you type a password in the two password boxes of the wizard. The wizard needs one of the two. The Next button stays grey until you give one.
You know your own network numbers. Where this chapter shows 192.168.1.x, use your own numbers. The rule is in Ch. 3 · How to read this manual. The address of this chapter must be outside the range that your router gives out by itself (the DHCP pool, often .100–.200, but yours can differ). An address inside the pool can go to a phone later. Two devices on one address break name lookups, and the cause is hard to find.
Commands marked HOST run on the server. In the Proxmox page, select homelab in the left tree. Then select >_ Shell. Commands marked CT run inside the container of this chapter. The chapter shows you how to get there.
The wizard does not work?Next is grey: you gave no password and no key. Give one of the two. The Template list is empty: the Debian image is not downloaded. Download it first. Each tab is explained in Ch. 10 · The container wizard.
62.1
CREATE THE CONTAINER
You do this task with the mouse in the Proxmox web page. You type nothing. You prefer the command line? The box below does the same task with one pct create command.
Open https://192.168.1.220:8006 and log in.
Click homelab in the left tree.
Click the blue Create CT button at the top right.
Fill in the tabs as the reference of the wizard shows. Leave each field that is not listed at its default value.
Click Finish. The commands after the table finish the job on the host.
The Proxmox VE login page.Select Create CT to open the wizard.General tab: CT ID 139, hostname pelican, Unprivileged container ticked.
Wizard reference — Create CT 139
Tab → Field
Entry
General → Node
Select homelab.
General → CT ID
Type 139. Do not keep the number that the wizard suggests.
General → Hostname
Type pelican.
General → Unprivileged container
Keep this box ticked.
General → Nesting
Keep this box ticked. It is ticked by default. The wizard has no box for keyctl, which Docker also needs. The host command after Finish sets it. It is the first line of the next listing.
General → Password / SSH public key
Keep the password empty. Paste your public key in the SSH field: ssh-ed25519 AAAA…your-key-here you@your-pc. With the key, you can run ssh root@192.168.1.215 from your PC. The command pct enter 139 on the host needs no password.
Template → Storage, Template
Select local. Then select debian-13-standard.
Disks → Storage, Disk size
Select local-lvm. Set 15 GiB.
CPU → Cores
Set 2 cores.
Memory → Memory (MiB)
Set 2048. Keep Swap at its default.
Network → IPv4
Select Static. Set IPv4/CIDR to 192.168.1.215/24. Set Gateway to 192.168.1.1. Keep IPv6 at its default.
DNS → DNS domain
Keep this field empty. Do not type 192.168.1.1 here.
DNS → DNS servers
Always type 192.168.1.1. Never keep this field empty.
Confirm
Read the summary. Keep Start after created unticked. Select Finish.
The wizard has no box for three settings: the Docker permission keyctl, the timezone, and start at boot. The first command below sets all three. Run these 3 commands on the host. They set the missing settings, start the container, and open its shell. Each part is explained in Ch. 10 · The container wizard, section "The host command every build needs".
⌨ Type this on the Proxmox host (homelab)
Before you run anything on this page: every 192.168.1.x address below is this manual's example network. If your own network uses different numbers, substitute yours as you type — the rule is in Ch. 3 · How to read this manual. A command that runs with the wrong address usually succeeds and leaves you unreachable.
pct set 139 --features nesting=1,keyctl=1 --onboot 1 --timezone host
pct start 139
pct enter 139 # now INSIDE CT 139 — the rest of this page runs here
Notice — set your timezone
The option --timezone host makes the container follow the clock of the host. So the logs of the server and the restarts on a schedule read in your local time. List the valid names with timedatectl list-timezones. Pick the line that matches your city, for example America/New_York or Europe/Berlin.
Warning — CT 139 is small, and the game servers run inside it
The wizard gives CT 139 only 2048 MB of RAM and 15 GiB of disk. That is enough for the Panel and Wings. But Wings starts each game server inside this same container. The limits of CT 139 are shared by all of them. A Minecraft or Palworld server needs several gigabytes on its own. So before you create a game server, raise the memory of CT 139. In the Proxmox web page, select CT 139. Open Resources. Double-click the Memory row. Type the new value in MiB. Click OK. Then restart the container. Do the same for the disk (Resources → Root Disk → Volume Action → Resize) if the game needs it. Your whole machine has 16 GB. See Ch. 56 · Pick your game setup for the RAM that each game wants.
Prefer the terminal? — the same task with one pct create command
⌨ Type this on the Proxmox host (homelab)
TMPL=$(pveam available --section system | awk '/debian-13-standard/{print $2}' | tail -1)
pveam download local "$TMPL" # once per host; harmless to re-run
pct create 139 local:vztmpl/"$TMPL" \
--hostname pelican --cores 2 --memory 2048 --rootfs local-lvm:15 \
--net0 name=eth0,bridge=vmbr0,ip=192.168.1.215/24,gw=192.168.1.1 \
--nameserver 192.168.1.1 --features nesting=1,keyctl=1 --unprivileged 1 --onboot 1 --timezone host
pct start 139
pct enter 139 # you are now INSIDE CT 139 — everything below runs here
This part has no buttons. You type commands inside CT 139. You are already there from pct enter 139 above. (You closed that shell? Open homelab → >_ Shell and run pct enter 139 again.) Two other ways open the same shell. Run pct enter 139 on the host. Or run ssh root@192.168.1.215 from your PC. Each command below is typed inside CT 139, not on Proxmox itself. The only exceptions are pct and pveam commands. They run on the host.
The >_ Console button of the CT opens a login: prompt, not a shell. Use pct enter 139 from homelab → >_ Shell.
Install the Panel first. It is the web control room and its database. The own documentation of Pelican gives a short Docker Compose file. It is one container that bundles the Panel, a built-in web server (called Caddy), and a database file. The database file stores your accounts and servers. So there is nothing else to connect.
Install Docker and Compose. Make the app folder.
Write the compose.yml that the docs of Pelican give into /opt/pelican.
Open compose.yml in the nano editor. Set ADMIN_EMAIL to your own email address. APP_URL is already http://192.168.1.215. Leave it, unless your container answers at another address. Save with Ctrl+O, then Ctrl+X to exit. You prefer the mouse? Open the same file over SFTP instead. See Ch. 12 · After every build + common Proxmox tasks, section "Move a file to or from the server". Edit /opt/pelican/compose.yml there before you start the Panel in the next step.
Start the Panel with docker compose up -d.
Open http://192.168.1.215/installer in a browser. The wizard for the first run checks the environment. It makes your admin account. The path /installer matters. The bare address shows a page to sign in. You have no account for it yet.
The installer wizard at /installer checks the environment and makes the admin account.
APP_URL must match the address that you type in the browser exactly. If not, the login and the links to assets break. It starts with http://, not https://. This means that the connection is not encrypted. That is fine for a home network. Later, you can add encryption with a reverse proxy (Ch. 17 · Nginx Proxy Manager), if you want it. Or reach the Panel in private over Ch. 19 · Remote access: Tailscale.
⌨ Type this inside CT 139
apt update && apt install -y docker.io docker-compose curl nano
mkdir -p /opt/pelican && cd /opt/pelican
# 1) write the compose file from Pelican's docs (Panel + Caddy + SQLite)
cat > compose.yml <<'EOF'
services:
panel:
image: ghcr.io/pelican-dev/panel:latest
restart: always
networks:
- default
ports:
- "80:80"
- "443:443"
extra_hosts:
- "host.docker.internal:host-gateway"
volumes:
- pelican-data:/pelican-data
- pelican-logs:/var/www/html/storage/logs
environment:
XDG_DATA_HOME: /pelican-data
APP_URL: "http://192.168.1.215"
ADMIN_EMAIL: "YOUR-EMAIL-HERE"
volumes:
pelican-data:
pelican-logs:
networks:
default:
ipam:
config:
- subnet: 172.20.0.0/16
EOF
# 2) edit compose.yml: put your own address in ADMIN_EMAIL# 3) start the Panel
docker compose up -d
# 4) open http://192.168.1.215/installer — the wizard makes your admin account
Explanation of each part
The Docker install line is explained in Ch. 9 · SSH & the terminal, section "Install Docker in the container". These parts are specific to Pelican:
apt install -y docker.io docker-compose curl nano
Installs Docker, Docker Compose (it runs apps with many containers from one config file), curl (used later to test that the Panel answers), and nano (a simple text editor for the one config edit). On Debian 13, docker-compose is Compose v2.
mkdir -p /opt/pelican && cd /opt/pelican
Makes a folder for the files of Pelican. Goes into it. Compose looks for compose.yml in the current folder. So each docker compose command later runs from here.
cat > compose.yml <<'EOF' … EOF
Writes everything between the two EOF lines into compose.yml in one paste. The quotes around 'EOF' stop the shell from touching the text on the way through. This is the file that the documentation of Pelican gives to end users. It has one service panel from the image ghcr.io/pelican-dev/panel:latest. It has two named volumes. pelican-data is for the SQLite database and your settings. pelican-logs is for the log files. So both stay when you update. The code repository of Pelican also publishes a compose.yml. But that one is the build file of the developers. It has a banner "DANGER ZONE". Use the block above instead.
nano compose.yml
Opens the file so that you check two values. APP_URL is the address that you visit. The block above set it already to http://192.168.1.215. ADMIN_EMAIL is your own email address. The built-in web server Caddy uses it to ask for a certificate from Let's Encrypt. This happens if you later switch the URL to https:// with a real domain. Save with Ctrl+O. Exit with Ctrl+X.
docker compose up -d
Reads compose.yml. Starts the Panel container in the background (-d). The built-in Caddy answers on port 80.
62.3
INSTALL WINGS
The Panel is only the control room. It cannot start a game until Wings runs. Wings is the daemon that starts each game server as its own Docker container. It takes four moves, in this order: download the Wings program, make the node in the Panel, test it by hand, then run it as a service. The usual reason that the node never turns green is that you skipped the first move.
The first move has no buttons. You type commands inside CT 139. You are already there from pct enter 139 above. (You closed that shell? Open homelab → >_ Shell and run pct enter 139 again.) Do not type them on the Proxmox host. Docker is already installed from the Panel step above.
⌨ Type this inside CT 139 (192.168.1.215) — download Wings
mkdir -p /etc/pelican /var/run/wings
curl -L -o /usr/local/bin/wings \
https://github.com/pelican-dev/wings/releases/latest/download/wings_linux_amd64
chmod u+x /usr/local/bin/wings
wings version # prints a version number when the download worked
amd64 is the build for a 64-bit Intel or AMD machine. This is what your server is. On an ARM board, for example a Raspberry Pi, download wings_linux_arm64 instead.
In the Panel, sign in as admin. Then go to Admin → Nodes → Create Node.
Fill in the node name. Type homelab-wings. Set its FQDN or IP to 192.168.1.215. Save.
Open the tab Configuration of the new node. Click Auto Deploy Command.
Paste that command inside CT 139 and run it. It only writes the config file /etc/pelican/config.yml, that points at this Panel already. It does not put the Wings program on the disk. This is why you downloaded it first.
The Create Node dialog: node name and FQDN or IP.
Now start Wings by hand one time, to read its output. It stays in the foreground and keeps printing. This is normal.
⌨ Type this inside CT 139 — the smoke test
wings --debug # watch for errors, then press Ctrl-C to stop it
Lines about listening for connections mean that it works. Press Ctrl+C to stop it before the next step. The service that you are about to make cannot start while this copy still runs.
Last, make Wings a service, so that it starts with the container. Debian has no package for this. So you write the unit file yourself. The block below is the one that the own documentation of Pelican supplies.
⌨ Type this inside CT 139 — run Wings as a service
cat > /etc/systemd/system/wings.service <<'EOF'
[Unit]
Description=Wings Daemon
After=docker.service
Requires=docker.service
PartOf=docker.service
[Service]
User=root
WorkingDirectory=/etc/pelican
LimitNOFILE=4096
PIDFile=/var/run/wings/daemon.pid
ExecStart=/usr/local/bin/wings
Restart=on-failure
StartLimitInterval=180
StartLimitBurst=30
RestartSec=5s
[Install]
WantedBy=multi-user.target
EOF
systemctl daemon-reload
systemctl enable --now wings # starts Wings now and at every boot
systemctl status wings # expect "active (running)"
Back in the list Nodes of the Panel, the status light of the node changes from red to green within a minute, when Wings connects.
Explanation of each part
mkdir -p /etc/pelican /var/run/wings
Makes the two folders that Wings expects. /etc/pelican holds its config file. /var/run/wings holds its file with the process ID. -p makes parents. It stays quiet if they exist already.
Downloads the Wings program itself from its page of releases on GitHub. Saves it as /usr/local/bin/wings. This is the standard place for programs that you install by hand. -L follows redirects. The link latest of GitHub always uses them.
chmod u+x /usr/local/bin/wings
Marks the downloaded file as executable. Without this, the system refuses to run it. It says "permission denied".
wings --debug
Runs Wings in the foreground with output that has many details. You see errors in the config on the screen. You do not hunt for them in the log. Ctrl+C stops it.
Writes everything between the two EOF lines into the service file in one paste. The quotes around 'EOF' stop the shell from touching the text on the way through.
systemctl daemon-reload
Tells systemd to read its unit files again. It then notices the file that you just made. You skip this? Then the next command answers "Unit wings.service could not be found".
systemctl enable --now wings
Starts Wings at once (--now). Marks it to start by itself each time that CT 139 boots.
Notice — this is a project, not a setup of one line
To connect the Panel, Wings, and your first server takes about an evening. The installer wizard of the Panel and its command Create Node take you through each step. The browser handles the rest. You can edit the config files of a game in the browser, in the tab Files of each server.
62.4
USE IT — CREATE AND SHARE SERVERS
All work happens in the Panel. You define servers in the admin area. You and your friends operate them in the client view. "Eggs" are ready-made templates for servers: Minecraft, Palworld, Rust. So you do not edit server.properties by hand any more.
Open http://192.168.1.215 and sign in with the admin account from the installer wizard. (That wizard itself is at http://192.168.1.215/installer. You visit it only one time.) The icon at the top right opens the admin area. Or go straight to http://192.168.1.215/admin. The logo takes you back to the client view.
In the admin area, go to Servers → Create New. Fill in the fields below. Pelican then downloads the game files.
Warning — two of these dropdowns are empty on a new Panel
Before you open Create New Server, know this. A new install of Pelican has no eggs. Your new node has no allocations. Both are dropdowns in the form below, and both are empty. There is nothing to select, and this manual never fills them. This is not a mistake that you made.
Eggs (the templates for games) are imported in the section Eggs of the admin area. Pelican publishes ready-made ones for Minecraft, Palworld, Rust, and the rest. Allocations are the pairs of IP and port that a node may hand out. You add them on the tab Allocations of the node itself. A node that you made with only a name and an address has none.
Both screens change between versions of Pelican. So we do not print steps that may not match your build. Do them from pelican.dev/docs for the version that you installed. Come back when the dropdowns for Egg and Allocation have entries in them. The rest of this section then works as written.
Wizard reference — Create New Server
Field
Entry
Owner
Select yourself. When you build a server for a friend, their account goes here instead.
Egg
Select the template of the game: Minecraft, Palworld, Rust, and so on. The egg carries its own install script and start command.
Node
Select the node that you made above, homelab-wings.
CPU / RAM / Disk
Set the limits for this one server. Leave room. The 16 GB of RAM cover the host and each other container too. The server runs inside CT 139. So the memory of CT 139 must be at least as large as the sum of your servers. See the warning in the first section.
Allocation
Select a free port. Players connect to 192.168.1.215 plus this port.
The Create New Server dialog: Egg, node, limits for resources, allocation of the port.
Go to the client view and click the server. The tab Console shows the live output. Use the buttons Start, Restart, and Stop. Type admin commands of the game in the box at the bottom, for example commands for the whitelist or for a broadcast.
Use the tab Files of the server to edit configuration files in the browser. Use the tab Startup to change the variables of the egg, for example the name of the world or the maximum number of players.
To give a friend access: in the admin area, go to Users → Create New and make an account.
The Create New User dialog: the email address of a friend.
Open the tab Users of the server and add the friend. The invite email does not arrive. Nothing in this chapter sets up a server for outgoing mail. So Pelican cannot send one. The account just sits there, unclaimed. Make the account with a password instead. The screen Users → Create New of the admin area does this. Pass the details to your friend yourself. Select only the permissions that they need, for example start and stop, but not delete. To set up mail is a job of Pelican beyond this chapter. Its docs link at the top of the page covers it.
Friends connect to the game at 192.168.1.215 plus the port of the server. The tab Allocations of the server shows it. For friends outside your home network, forward that port on the router. Or share access in private over Ch. 19 · Remote access: Tailscale.
62.5
WHEN IT GOES WRONG
The Panel loads, but you cannot make a server.
You have not linked Wings yet. Work through INSTALL WINGS above in order: download the program, make the node, run its Auto Deploy Command, then make the service. The Panel is only the control room. Without a node that runs, it has nowhere to start a game.
systemctl enable --now wings answers "Unit wings.service could not be found", or wings: command not found.
The service file or the program itself is missing. The Auto Deploy Command writes only /etc/pelican/config.yml. It installs neither of the two. Run the listing for the download and the listing for the service in INSTALL WINGS above, in that order. Do not skip systemctl daemon-reload.
A node shows "not responding", or Wings does not connect.
First run systemctl status wings inside CT 139. "could not be found" or "inactive (dead)" means that the service step above was skipped or failed. Fix that first. It is active (running)? Then the address and ports of the node do not match what the Panel expects. Do the step of the Auto Deploy Command from INSTALL WINGS above again. Open the tab Configuration of the node in the Panel. Click Auto Deploy Command again. Paste and run the new command inside CT 139. It overwrites /etc/pelican/config.yml with settings that match the Panel. Then restart Wings with systemctl restart wings. Check that the FQDN or IP of the node is 192.168.1.215.
You get a page to sign in, not the installer wizard.
You left off the path. The wizard for the first run is at http://192.168.1.215/installer. The bare address is the page to sign in. You have no account until the wizard makes one.
The installer wizard shows an error.
Check the logs of the Panel. Inside CT 139, run cd /opt/pelican && docker compose logs --tail 50. The most common cause is that APP_URL in compose.yml does not match exactly the address that you visit (http://192.168.1.215). Fix it. Then run docker compose up -d again.
You cannot join a game server that you made.
Open the port that was given to it on the router or firewall. Pelican gives a port to each server. It is shown under the tab Allocations of the server. A friend on the same home network reaches it directly. A friend outside needs that port forwarded, or a shared Ch. 19 · Remote access: Tailscale network.
A server that you made is killed, or it stops with a message about memory.
The servers run inside CT 139. It has only 2048 MB by default. Raise its memory in 139 → Resources → Memory. Restart the container. See the warning in the first section.
Right after the install, docker: command not found, or the Panel container fails to start with an error about cgroup or permission.
Start the Docker service inside CT 139: run systemctl enable --now docker. Then run docker compose up -d again. Docker still refuses to start? Then the container may miss the features nesting and keyctl. On the Proxmox host, check them with pct config 139 | grep features. The line must show keyctl=1,nesting=1. It does not? Run pct set 139 --features nesting=1,keyctl=1. Then run pct reboot 139.
62.6
A download step fails with Temporary failure resolving deb.debian.org, or with another "cannot resolve" message. The container has no working DNS server. It cannot change a name into an address. This is not a typing mistake. It does not fix itself. In the Proxmox page, select this container in the left tree. Open DNS. Select Edit. Type your router address in DNS servers (192.168.1.1 here; use your own). Then run pct reboot 139 in the host shell. Run the failed step again.
A command fails. You do not know if you are on the server or in the container. Read the prompt. In the container, it ends with the name of the container. On the server, it shows root@homelab. The prompt still shows root@homelab after pct enter? Then the command did not work. Type exit. Run the pct enter line again. Check the prompt before you paste anything else. You can paste a build block on the server by mistake. It seems to work. It installs without an error, and the app even answers. But the app is on the server, and it must not be there.
How to see that it happened, and how to undo it. The app does not open at the container address (192.168.1.215). It does open at the server address (192.168.1.220) on the same port. Then the app is on the host. To remove it, run cd /opt/pelican && docker compose down (this app is a Compose stack — several containers at once, so there is no single name to remove) in the host shell. Then run pct enter 139. Check that the prompt changed. Paste the build block again. You lose nothing in the container, because nothing was built there. The first command can show Error: No such container. This is good. It means that the app was never on the host. Do not paste the build block again. Look for another cause.
The page does not open. The browser spins, or says it cannot connect. Do these checks in order, in the host shell. 1. Is the container running? Run pct status 139. It must say running. If it does not, run pct start 139. 2. Is the container at the address that you typed? Run pct config 139 | grep net0. It shows the real address. A wrong digit in the wizard puts the container at another address, and nothing warns you. 3. Does the app run in the container? Run pct enter 139. Then run docker ps. An empty list means that the app did not start. Run docker ps -a to see that it stopped. Run docker logs to see why. 4. Is the app listening? Run ss -lntup in the container. Look for the port of this chapter in the list. (Do not use curl. A game server does not use HTTP, so curl shows an error also when the server is fine.) Your browser reaches 192.168.1.215 but not the port? Then the app is down. It reaches neither? Then the container is down.
Docker does not start, or you see Cannot connect to the Docker daemon, a keyring error, or an overlay error. This is the most common failure in these guides. It means that the two container features are off. A later pct set --features can switch them off, also when you set them before. Run this in the host shell, not in the container: pct set 139 --features nesting=1,keyctl=1. Then run pct reboot 139. Then run the failed step again. Type both settings on one line. If you send only one setting, it replaces the pair and switches the other one off.
REFERENCE CARD
Paste this in 139 → Summary → Notes in Proxmox. The key facts then stay with the container.
📋 Reference — paste into this container's Notes in Proxmox (not a shell command)
## Pelican — CT 139
Panel http://192.168.1.215 · docs https://pelican.dev/docs/ · Wings runs the game servers
```sh
# is it running? (Panel)
cd /opt/pelican && docker compose ps
curl -fsS http://localhost >/dev/null && echo OK # quick health check
# logs (last 50)
cd /opt/pelican && docker compose logs --tail 50
# stop / start / restart the Panel
cd /opt/pelican && docker compose stop
cd /opt/pelican && docker compose start
cd /opt/pelican && docker compose restart
# is there an update? ("up to date" = no)
cd /opt/pelican && docker compose pull
# update (settings survive in the pelican-data volume)
cd /opt/pelican && docker compose pull && docker compose up -d
# Wings runs as a systemd service (not compose):
systemctl status wings
systemctl restart wings
```
Explanation of each part
cd /opt/pelican && docker compose ps
Goes into the app folder. Lists the Panel container with its state. An empty result means that it is stopped. Check the logs next.
curl -fsS http://localhost >/dev/null && echo OK
Asks the Panel for its web page from inside the container. It prints OK only when Caddy answers on port 80. This is a fast check that the Panel is up.
docker compose logs --tail 50
Shows the last 50 lines of the log output of the Panel. This is the first place to look when the installer or the login does not work well.
docker compose stop · start · restart
Stops, starts, or restarts the Panel container, for example to apply a change of the config or to recover from a crash. Your accounts and servers stay in the data volume.
docker compose pull
Downloads the newest image of the Panel. "up to date" means that there is nothing new.
docker compose pull && docker compose up -d
Downloads the newest image. Then makes the Panel container again from it. Settings and the database stay in the volume pelican-data. (Ch. 72 · Update notifications can ping your phone when a new version lands.)
systemctl status wings · restart wings
Wings is a native service. It is not a Compose app. Use these to check if it runs and to restart it after a change of the config. The Panel shows a node as offline? Restart Wings here first.
Part F · Game servers
63RomM
RomM turns a folder of ROMs into a library with box art that you can browse. You play in the browser or download to a handheld. It is a Jellyfin for retro games, with its own database.
This chapter needs the items below. You came here directly? Do them first. Each item takes a short time. Nothing on this page works without them.
Proxmox is installed and works at https://192.168.1.220:8006. You can log in as root. See Ch. 6 · Install Proxmox. At your first visit, the browser shows a certificate warning. Select Advanced. Then select Proceed. The warning is normal. Proxmox makes its own certificate.
The Debian 13 image is downloaded. You do this one time. See Ch. 10 · The container wizard. Without the image, the Template list in the wizard is empty.
You have an SSH key from your PC (Ch. 9 · SSH & the terminal). Or you type a password in the two password boxes of the wizard. The wizard needs one of the two. The Next button stays grey until you give one.
You know your own network numbers. Where this chapter shows 192.168.1.x, use your own numbers. The rule is in Ch. 3 · How to read this manual. The address of this chapter must be outside the range that your router gives out by itself (the DHCP pool, often .100–.200, but yours can differ). An address inside the pool can go to a phone later. Two devices on one address break name lookups, and the cause is hard to find.
The shared media folder exists. It is /srv/media. You make it one time in Ch. 40 · Shared storage first. This chapter keeps its data there, not on the small SSD. Build that chapter first. Without the folder, the data goes to the small system SSD. The mount exists to prevent this.
Commands marked HOST run on the server. In the Proxmox page, select homelab in the left tree. Then select >_ Shell. Commands marked CT run inside the container of this chapter. The chapter shows you how to get there.
The wizard does not work?Next is grey: you gave no password and no key. Give one of the two. The Template list is empty: the Debian image is not downloaded. Download it first. Each tab is explained in Ch. 10 · The container wizard.
RomM scans a folder of ROMs. It gets cover art and metadata. It lets you browse the games and play them in the browser (EmulatorJS), or download them to a device. It is a library manager. It is not a downloader. There is no automatic grabber for games like Sonarr. So you fill the library yourself (below). This is an app with two parts: the RomM web app plus a MariaDB database that stores the library.
Notice — where these commands run
The pct and pveam commands run on the Proxmox host (the server, 192.168.1.220). Each one is marked where you use it. Everything else runs inside CT 143. It does not run on the host or on your PC. You open the shell of the container in one of two equal ways. In the Proxmox web page, open homelab → >_ Shell and run pct enter 143. It needs no password. Or run ssh root@192.168.1.219 from your PC.
The >_ Console button of the CT opens a login: prompt, not a shell. Use pct enter 143 from homelab → >_ Shell.
Notice — shared storage comes first
Your ROMs live in /srv/media/roms on the server. This is inside the shared media folder /srv/media, which is bind-mounted into this container as /data. Make /srv/media one time in Ch. 40 · Shared storage first before this chapter. This guide assumes that it exists. It only adds its own tree roms. The block after the wizard table makes the three folders roms/library, roms/assets, and roms/config, with the right owner. A library of ROMs grows large. It does not belong on the small SSD disk of the container.
63.1
CREATE THE CONTAINER
You do this task with the mouse, in the Proxmox web page. You type nothing. You prefer the command line? The box below does the same task with one pct create command.
On your PC, open https://192.168.1.220:8006.
The Proxmox VE login page.
Click homelab in the left tree.
Click the blue Create CT button at the top right.
The Create CT button.
Fill in the tabs as the table shows. Keep each field that is not listed at its default value.
General tab: CT ID 143, hostname romm, Unprivileged ticked.
Click Finish. The wizard cannot add the shared /data folder. The commands after the table add it, on the server.
Wizard reference — Create CT 143
Tab → Field
Entry
General → Node
Select homelab.
General → CT ID
Type 143. Do not keep the number that the wizard suggests.
General → Hostname
Type romm.
General → Unprivileged container
Keep this box ticked.
General → Nesting
Keep this box ticked. It is ticked by default. The wizard has no box for keyctl, which Docker also needs. The host command after Finish sets it. It is the first line of the next listing.
General → Password / SSH public key
Keep the password empty. Paste your public key in the SSH field: ssh-ed25519 AAAA…your-key-here you@your-pc. With the key, you can run ssh root@192.168.1.219 from your PC. The command pct enter 143 on the host needs no password.
Template → Storage, Template
Select local. Then select debian-13-standard.
Disks → Storage, Disk size
Select local-lvm. Set 12 GiB.
CPU → Cores
Set 2 cores.
Memory → Memory (MiB)
Set 2048. Keep Swap at its default.
Network → IPv4
Select Static. Set IPv4/CIDR to 192.168.1.219/24. Set Gateway to 192.168.1.1. Keep IPv6 at its default.
DNS → DNS domain
Keep this field empty. Do not type 192.168.1.1 here.
DNS → DNS servers
Always type 192.168.1.1. Never keep this field empty.
Confirm
Read the summary. Keep Start after created unticked. Select Finish.
The wizard has no box for three settings: the Docker permission keyctl, the timezone, and start at boot. The first command below sets all three. Run these 7 commands on the host. They set the missing settings, start the container, and open its shell. Each part is explained in Ch. 10 · The container wizard, section "The host command every build needs".
⌨ Type this on the Proxmox host (homelab)
Before you run anything on this page: every 192.168.1.x address below is this manual's example network. If your own network uses different numbers, substitute yours as you type — the rule is in Ch. 3 · How to read this manual. A command that runs with the wrong address usually succeeds and leaves you unreachable.
pct set 143 --features nesting=1,keyctl=1 --onboot 1 --timezone host
mountpoint -q /srv/media || echo "WARNING: /srv/media is NOT a mounted share — the next line would create it on the system disk. Build the shared-storage chapter first."
mkdir -p /srv/media/roms/{library,assets,config} # the host folders must exist before the mount
chown -R 101000:101000 /srv/media/roms # RomM (uid 1000) = host 101000 in an unprivileged CT
pct set 143 -mp0 /srv/media,mp=/data # bind the shared media folder in as /data
pct start 143
pct enter 143 # now INSIDE CT 143 — the rest of this page runs here
After pct enter 143 you are in the container. The commands below run there.
Prefer the terminal? — the same task with one pct create command
⌨ Type this on the Proxmox host (homelab)
TMPL=$(pveam available --section system | awk '/debian-13-standard/{print $2}' | tail -1)
pveam download local "$TMPL" # once per host; harmless to re-run
mkdir -p /srv/media/roms/{library,assets,config} # the host folders must exist before the mount
chown -R 101000:101000 /srv/media/roms # RomM (uid 1000) = host 101000 in an unprivileged CT
pct create 143 local:vztmpl/"$TMPL" \
--hostname romm --cores 2 --memory 2048 --rootfs local-lvm:12 \
--net0 name=eth0,bridge=vmbr0,ip=192.168.1.219/24,gw=192.168.1.1 \
--nameserver 192.168.1.1 --features nesting=1,keyctl=1 --unprivileged 1 --onboot 1 --timezone host \
-mp0 /srv/media,mp=/data
pct start 143
pct enter 143 # you are now INSIDE CT 143 — everything below runs here
Prepares the host folder that this container needs before it starts.
chown -R 101000:101000 /srv/media/roms
Prepares the host folder that this container needs before it starts.
-mp0 /srv/media,mp=/data
Shows the host folder /srv/media inside the container at /data. The container reads and writes the shared data in place.
Notice — when a real drive arrives
A collection of ROMs grows with no limit. A 500 GB SSD fills fast. When you add a real drive in Ch. 66 · Add an internal drive or Ch. 65 · Add an external drive, you move /srv/media onto it. The bind mount keeps the same /data path. So the container does not notice the change.
Notice — set your timezone
The pct create line above uses --timezone host. This makes the container follow the own clock of the server. So there is nothing to replace there. The timezone of the server is right? Then the one of this container is right too. You must check the own timezone setting of the app further down. Each TZ= line in a docker run or .env must have a real zone such as Europe/Paris. It must never be the literal Region/City. Run timedatectl list-timezones on the host to see each valid name.
63.2
INSTALL ROMM
This part has no buttons. These commands run inside CT 143. In the host Shell (homelab → >_ Shell), run pct enter 143. You are still inside from the section before? Then continue. You install Docker. Then you make one password for the database. Compose then starts both containers, RomM and its MariaDB database, with one command. The reuse of the password is explained below.
⌨ Type this inside CT 143
apt update && apt install -y docker.io docker-compose curl
mkdir -p /opt/romm
# one DB password reused for both DB_PASSWD and MARIADB_PASSWORD so they always match:
PW=$(openssl rand -hex 16)
printf 'DB_PASSWD=%s\nMARIADB_PASSWORD=%s\nMARIADB_ROOT_PASSWORD=%s\nROMM_AUTH_SECRET_KEY=%s\n' \
"$PW" "$PW" "$(openssl rand -hex 16)" "$(openssl rand -hex 32)" > /opt/romm/.env
chmod 600 /opt/romm/.env
Explanation of each part
The Docker install line is explained in Ch. 9 · SSH & the terminal, section "Install Docker in the container". These parts are specific to RomM:
apt install -y docker.io docker-compose curl
Installs Docker, Docker Compose (a tool that runs setups of apps with many containers from one config file), and curl (a tool to download files and to check health). On Debian 13, docker-compose is Compose v2.
mkdir -p /opt/romm
Makes a folder to hold the Compose file and the .env file of RomM.
PW=$(openssl rand -hex 16)
Makes one random password. Stores it in a shell variable. The same value then goes to both the database user and the app. DB_PASSWD of RomM must be equal to MARIADB_PASSWORD of MariaDB. When you reuse one variable, this is sure.
printf 'DB_PASSWD=…' > /opt/romm/.env
Writes the .env file. It has the shared password for the database (the app and the database user both use it). It has a separate random root password for the database. It has a random secret key of 32 bytes that signs login sessions. Compose reads this file by itself from the same folder.
chmod 600 /opt/romm/.env
Locks the .env file. Only its owner can read it. It holds passwords.
Now make that file inside CT 143. Run nano /opt/romm/docker-compose.yml. Paste the block below. Save and exit with Ctrl+O, Enter, Ctrl+X. (You prefer the mouse? Connect to root@192.168.1.219 with an SFTP file manager instead. Make the file there. The exact steps are in Ch. 12 · After every build + common Proxmox tasks, section "Move a file to or from the server".) Compose reads the .env file next to it by itself.
⌨ Save as /opt/romm/docker-compose.yml inside CT 143
This is the main web app of RomM. It reads the connection to the database and its secret key from the environment. It serves its web page on port 8080. It stores the metadata and covers that it gets, and its cache, in named Docker volumes. It reads the library of games, the assets, and the config from the folders /data/roms that are bind-mounted. So nothing is lost at a restart. It waits for the database to report that it is healthy before it starts.
romm-db
This is a MariaDB database container that stores the data of the RomM library. It gets its root password and app password from the environment. It keeps its data files in the volume mysql_data. RomM cannot run without it. The healthcheck tells RomM when the database is really ready to accept connections.
DB_PASSWD / MARIADB_PASSWORD
Both take the same value from your .env file. DB_PASSWD is what RomM logs in with. MARIADB_PASSWORD is what the database makes the user with. The two ever differ? Then RomM cannot connect. The syntax ${...} takes the values out of the .env file.
volumes: /data/roms/library:/romm/library
This maps the library folder that is bind-mounted into the container. On the server it is /srv/media/roms/library. Inside RomM it is /romm/library. Your ROMs live in a subfolder roms/<platform>/ under it. This is the fixed default layout of RomM. The folders assets and config follow the same pattern.
HASHEOUS_API_ENABLED=true
This turns on the integration of RomM with Hasheous. It is a free outside service that finds ROMs by the hash of the file. It needs no key. So RomM can match many games from the start.
ports: 8080:8080
This publishes the web page of RomM on port 8080 of the container. You reach it at http://192.168.1.219:8080.
This is the script for health checks that is built into MariaDB. --connect confirms that the database accepts a connection. --innodb_initialized confirms that its storage engine finished to start. So depends_on: condition: service_healthy really waits for a database that is ready. The start_period gives a grace window of 30 seconds. A slow first setup then does not fail the retries too early.
These are areas of storage with names that Docker manages. So the database files, the metadata and covers that were downloaded, and the cache all stay when the containers restart.
⌨ Type this inside CT 143
cd /opt/romm && docker compose up -d
Explanation of each part
cd /opt/romm && docker compose up -d
Goes into the folder with the file docker-compose.yml. Then starts all the containers that it defines, RomM plus its database, in the background. The first start pulls both images and sets up the database. So give it a minute before the web page loads.
Notice — the layout of the library is fixed
RomM expects library/roms/<platform>/game. On the server, that is /srv/media/roms/library/roms/<platform>/. Inside CT 143, the same path is /data/roms/library/roms/<platform>/, for example .../roms/snes/ or .../roms/gba/. The name of the platform folder must be a slug that RomM knows (snes, gba, n64, psx, and so on). RomM watches this tree. It imports anything that you add. You get nicer covers from free providers (ScreenScraper and SteamGridDB). Run nano /opt/romm/.env inside CT 143. Add lines such as SCREENSCRAPER_USER=yourname. Save. Then run cd /opt/romm && docker compose up -d again to apply them.
63.3
FILL THE LIBRARY
There is no automatic grabber like the *arr media stack. You add games in one of two ways.
Dump your own cartridges and discs to files. (To rip them into ROM files is a separate process. It uses its own hardware or software. This manual does not cover it.) The platform folder does not exist yet. So make it first. Inside CT 143, run mkdir -p /data/roms/library/roms/<platform>/. Replace <platform> with the slug, for example snes. Then copy the files into that folder.
Or download sets of ROMs by hand with the Ch. 42 · qBittorrent instance that you already run for media. Drop the files into the same folder. (Make it first in the same way, if you have not done it yet.) RomM scans them in by itself.
Warning — only games that you own
This is legal only for games that you own. To download ROMs that you do not own is piracy. That decision, and its consequences, are yours.
63.4
HOW TO USE IT — THE BASICS
The daily sequence: put ROM files in the library folder. Run a scan. Then play or download the games.
Open http://192.168.1.219:8080. The first start opens the Setup Wizard. Set an admin user name and a password. The first user always gets the role of Admin. Log in.
The Setup Wizard makes the first admin account.
The platform folder does not exist yet the first time. So make it first. Inside CT 143, run mkdir -p /data/roms/library/roms/<platform>/. Replace <platform> with the slug, for example snes. Then copy ROM files into that folder. On the server, the same path is /srv/media/roms/library/roms/<platform>/. Examples: roms/snes/, roms/gba/.
The library view, with the scan icon in the navigation.
Click the scan icon (a magnifying glass) in the main navigation. The page Library scan opens. Keep the type of scan on Quick scan (new games only). Click Scan. The page shows live progress. A large first scan is slow, because RomM looks up metadata for each game.
The Library scan page, at work on a Quick scan.
Open a game. Click Play. EmulatorJS starts the game in the browser. This works for the classic consoles (the time of NES, SNES, GBA, and PS1). A controller that is connected also works.
The page of a game — Play starts EmulatorJS in the browser.
To get the file, click Download on the page of the game. The browser downloads the ROM to your device. This is useful for a real handheld.
The Download button on the page of a game.
A game with no art, or with a generic name, is "unmatched". Add the API keys for metadata to .env. Run nano /opt/romm/.env inside CT 143. Add the lines. Save. Then run cd /opt/romm && docker compose up -d again. Then run a scan with the type Unmatched games.
Notice — a manual scan is usually not necessary
The matching with Hasheous is on already. It needs no key. RomM also runs a Quick scan on a schedule each night by default. So files that you drop in the library folder appear in the catalog overnight, also if you never open the scan page.
63.5
WHEN IT GOES WRONG
The web page does not load, or it shows a 500 error, right after you start it. RomM waits for its database. Check that cd /opt/romm && docker compose logs romm-db shows "ready for connections". Most early 500 errors mean that the database is not up yet. So give it a minute.
The logs show "Access denied for user 'romm-user'".DB_PASSWD (what RomM logs in with) must be equal to MARIADB_PASSWORD (what the database was made with). The install command sets both from one variable. So this happens only if you edited .env by hand. Open the file with nano /opt/romm/.env inside CT 143. Find the two lines. Make them identical. For example, both read DB_PASSWD=abc123... and MARIADB_PASSWORD=abc123.... Save and exit with Ctrl+O, Enter, Ctrl+X. Then run cd /opt/romm && docker compose down && docker compose up -d. MariaDB made the user already with the old password? Then also delete its data volume first: docker compose down -v. This is harmless only before your first scan that works. You scanned games in already? Then it wipes the catalog of the library (matched games, favorites, flags for unmatched) together with the database. You will need to scan again. It does not touch the ROM files themselves. They live outside the database.
Your ROMs do not show up, or a scan reports "permission denied" on /romm/library. There are two causes. First, the layout must be library/roms/<platform>/game. The platform folder must be a slug that is known (for example snes, gba, n64). Second, RomM must be able to write to the shared folder. On the server, run chown -R 101000:101000 /srv/media/roms. RomM runs as uid 1000. This is host 101000 inside an unprivileged CT. Then run a scan from the scan page.
There is no box art, or the names of the games are wrong. Add API keys for metadata (ScreenScraper and SteamGridDB) to .env. Scan again with the type Unmatched games. Without them, RomM relies on Hasheous alone. It does not cover each title.
docker compose up -d fails with "Cannot connect to the Docker daemon". Docker is not allowed inside the LXC yet. Docker needs two features. nesting=1 lets a container run other containers. keyctl=1 grants a permission of the kernel that the process manager of Docker needs. On the server, check them with pct config 143 | grep features. The line must show keyctl=1,nesting=1. It does not? Turn both on and reboot the CT: pct set 143 --features nesting=1,keyctl=1, then pct reboot 143.
Compose says "port is already allocated" for 8080. Another service in this container uses 8080. Stop it. Or open the compose file with nano /opt/romm/docker-compose.yml inside CT 143. Change the left number in the line ports:, for example 8096:8080. Save. Then reach RomM at that new port. Run docker compose up -d again.
63.6
A download step fails with Temporary failure resolving deb.debian.org, or with another "cannot resolve" message. The container has no working DNS server. It cannot change a name into an address. This is not a typing mistake. It does not fix itself. In the Proxmox page, select this container in the left tree. Open DNS. Select Edit. Type your router address in DNS servers (192.168.1.1 here; use your own). Then run pct reboot 143 in the host shell. Run the failed step again.
A command fails. You do not know if you are on the server or in the container. Read the prompt. In the container, it ends with the name of the container. On the server, it shows root@homelab. The prompt still shows root@homelab after pct enter? Then the command did not work. Type exit. Run the pct enter line again. Check the prompt before you paste anything else. You can paste a build block on the server by mistake. It seems to work. It installs without an error, and the app even answers. But the app is on the server, and it must not be there.
How to see that it happened, and how to undo it. The app does not open at the container address (192.168.1.219). It does open at the server address (192.168.1.220) on the same port. Then the app is on the host. To remove it, run cd /opt/romm && docker compose down (this app is a Compose stack — several containers at once, so there is no single name to remove) in the host shell. Then run pct enter 143. Check that the prompt changed. Paste the build block again. You lose nothing in the container, because nothing was built there. The first command can show Error: No such container. This is good. It means that the app was never on the host. Do not paste the build block again. Look for another cause.
The page does not open. The browser spins, or says it cannot connect. Do these checks in order, in the host shell. 1. Is the container running? Run pct status 143. It must say running. If it does not, run pct start 143. 2. Is the container at the address that you typed? Run pct config 143 | grep net0. It shows the real address. A wrong digit in the wizard puts the container at another address, and nothing warns you. 3. Does the app run in the container? Run pct enter 143. Then run docker ps. An empty list means that the app did not start. Run docker ps -a to see that it stopped. Run docker logs to see why. 4. Does the app answer in the container? Run curl -I http://localhost followed by the port of the app. You get a reply here, but nothing from your PC? Then the address or your own network is the problem. The app is fine. Your browser reaches 192.168.1.219 but not the port? Then the app is down. It reaches neither? Then the container is down.
Docker does not start, or you see Cannot connect to the Docker daemon, a keyring error, or an overlay error. This is the most common failure in these guides. It means that the two container features are off. A later pct set --features can switch them off, also when you set them before. Run this in the host shell, not in the container: pct set 143 --features nesting=1,keyctl=1. Then run pct reboot 143. Then run the failed step again. Type both settings on one line. If you send only one setting, it replaces the pair and switches the other one off.
REFERENCE CARD
Paste this in 143 → Summary → Notes in Proxmox. The key facts then stay next to the container.
📋 Reference — paste into this container's Notes in Proxmox (not a shell command)
## RomM — CT 143
dashboard http://192.168.1.219:8080 · docs https://docs.romm.app
compose in /opt/romm · ROMs in /data/roms/library/roms/<platform>/ (server: /srv/media/roms/library/roms/)
```sh
# is it running? (RomM + its MariaDB)
cd /opt/romm && docker compose ps
curl -fsS http://localhost:8080 >/dev/null && echo OK # quick health check
# logs (last 50)
cd /opt/romm && docker compose logs --tail 50
# stop / start / restart
cd /opt/romm && docker compose stop
cd /opt/romm && docker compose start
cd /opt/romm && docker compose restart
# is there an update? ("up to date" = no)
cd /opt/romm && docker compose pull
# update (settings survive in the DB volume + /data/roms)
cd /opt/romm && docker compose pull && docker compose up -d
```
Part G · When you outgrow 500 GB
64Backups done right (3-2-1)
The apps that you built in Parts B–F can be thrown away. The photos, documents, and passwords inside them cannot. This chapter opens Part G. It sets the strategy that keeps the half that you cannot replace. The chapters after it give you the drive that holds the backups and the tools that make them.
In this chapter
Before you start
This chapter needs the items below. You came here directly? Do them first. Each item takes a short time. Nothing on this page works without them.
Proxmox is installed and works at https://192.168.1.220:8006. You can log in as root. See Ch. 6 · Install Proxmox. At your first visit, the browser shows a certificate warning. Select Advanced. Then select Proceed.
You know where the host shell is. In the Proxmox page, select homelab in the left tree. Then select >_ Shell. You type each command of this page there, unless a step says otherwise. This is the server itself. It is not a container and it is not your own PC.
You know your own network numbers. Where this chapter shows 192.168.1.x, use your own numbers. The rule is in Ch. 3 · How to read this manual.
You built Ch. 20 · Backups before apps already. The steps below use that chapter: a container, an address, a key, or a job that must exist. You cannot finish this chapter without it.
This chapter builds no container. Another chapter built each container that it mentions.
Until now, this manual assumed one thing without saying it. A container breaks? You build it again. That is true for the software. It is not true for the data. At some point, the first time that you point a phone at Immich, save a real password in Vaultwarden, or scan a tax document into Paperless, your server stops being a toy that you can build again from nothing. It holds things that exist nowhere else. This chapter is the plan to protect them. It comes first in Part G on purpose. It sets the strategy, the three layers below. The chapters after it give the pieces. A second drive for the backups comes next (Ch. 65 · Add an external drive and Ch. 66 · Add an internal drive). The ready-made tools for the layers of file backups and off-site backups come later in this part (Ch. 68 · Back up any folder, on a schedule and Ch. 69 · Off-site backup). Read this to see the whole shape. Then build the pieces in order. One piece exists already. It is the weekly job for container backups from Ch. 20 · Backups before apps at the end of Part C. Layer 1 below is that same job. When you reach it, edit the job that you already have (select its row, then Edit). Do not add a second one.
64.1
WHEN BACKUPS BECOME NON-OPTIONAL
Sort everything on your server into two piles. Be honest about which pile each thing lands in. The whole strategy depends on this.
Can be built again. You could get it back from the internet in an afternoon. To lose it is annoying, not painful. Almost everything that you installed is here:
The operating systems of the containers and the apps that are installed (Parts B–F).
Libraries of movies, TV, and music. You can download them again.
Files of game servers, data of LanCache, ROMs.
Anything that a fresh install plus a config file would bring back.
Cannot be replaced. It exists only on your server, or the copy on your server is the one that matters. The disk dies? Then it is gone for good:
Photos and videos in Ch. 52 · Immich (the ones that your phone deleted after the upload).
Game saves, notes, and anything that you made, not downloaded.
Notice — the 3-2-1 rule, in one breath
The whole discipline fits in one line that professionals repeat: 3 copies of anything that you care about, on 2 different kinds of media, with 1 of them off-site. Your live data is copy 1. A backup on a second drive in the same machine is copy 2 (different media). An encrypted copy in the cloud is copy 3 (off-site). It survives a fire and a theft. The three layers below are exactly those three copies. Build them in order. Each one covers a failure that the one before cannot.
Warning — a backup on the same SSD is not a backup
This server has one SSD of 500 GB. A backup that you write to that same SSD protects you from a mistake, such as a deleted container or a bad upgrade. It does not protect you when the disk dies, because the original and the backup vanish together. Layer 1 below can start on the same SSD on day one. But it is a real backup only when its target lives on a second drive. That drive is the very next thing that this part builds. The two chapters after this one, Ch. 65 · Add an external drive (external) and Ch. 66 · Add an internal drive (internal), each show you how to add one. Only the walkthrough of the chapter for the external drive registers a storage named backups at /srv/backups by default. The default walkthrough of the chapter for the internal drive sets up a general-purpose storage instead. You took that path? Then use the same dialog Datacenter → Storage → Add → Directory. Set ID to backups and Directory to /srv/backups on your drive. Open Content and tick Backup only (untick Disk image, which is ticked by default). Then run pvesm set backups --is_mountpoint 1 on the host shell. Ch. 65 · Add an external drive shows this same command and why it matters. You skip the tick for Content? Then backups does not appear in the Storage dropdown later in this chapter. You skip is_mountpoint? Then a drive that is unplugged can let backups write to the SSD in silence. They do not fail loudly. Everything after Layer 1 assumes that /srv/backups exists on a second drive. Until then, you can run Layer 1 to local on the SSD. Accept that it guards against mistakes but not against a dead disk.
64.2
LAYER 1 — CONTAINER BACKUPS (vzdump)
Proxmox has a backup engine that is built in. It is called vzdump. It takes a full snapshot of an entire container: its disk, its config, its installed apps. It writes it to a single file that you can restore in minutes. One weekly job covers each container that you will ever build.
You already have that job.Ch. 20 · Backups before apps, at the end of Part C, built it and ran it. It covers every guest, each Sunday at 03:00. It keeps the last 2 archives. It writes to local on the SSD. Layer 1 is not a second job. It is that one job, pointed at the second drive and given a little more history. So this section is an Edit, not an Add. Two jobs for the full fleet on one server mean two sets of archives that fight over the same rules for retention. They also mean double the disk use, with no extra safety.
Notice — do this after the drive exists
This section moves the job to backups. This is the storage that the walkthrough of Ch. 65 · Add an external drive registers on the second drive at /srv/backups. You added the drive through Ch. 66 · Add an internal drive instead? Then the default walkthrough of that chapter does not set up a storage with this name. Register one yourself first (Datacenter → Storage → Add → Directory, IDbackups, Directory/srv/backups, Content ticked to Backup only). Then run pvesm set backups --is_mountpoint 1 on the host shell before you do the edit below. You miss the tick for Content? Then backups never shows up in the Storage dropdown. You miss is_mountpoint? Then a drive that is unplugged lets backups write to the SSD, and they do not fail loudly. You read Part G straight through? Then read this page for the shape. Add the drive. Come back to do the edit. Until then, the job of Part C keeps running to local. It is a net for mistakes. It is not a real backup.
Edit the job in the Proxmox web page. There is nothing to type.
Open https://192.168.1.220:8006 and log in.
Click Datacenter at the top of the left tree.
Click Backup in the middle column.
Click the row of your existing job. It is the one with the comment weekly — all guests. This selects it. Then click Edit. The dialog is titled Edit: Backup Job. It opens with everything that Part C set.
That table is empty? Then you skipped Ch. 20 · Backups before apps. Build the job here instead of editing one. This section is written as an edit, because the job normally exists already. It does not have to. Click Add. Fill in the dialog exactly as Ch. 20 · Backups before apps does: Node your server, Storagebackups (or local if you added no drive yet), Schedulesun 03:00, Selection modeAll, ModeSnapshot, CompressionZSTD. Click Create. Then continue with the next step. Read "Edit" as "the job that you just made". Do not skip this. Each layer below assumes that a container backup runs already.
On the General tab, change Storage from local to backups. backups is not in the dropdown? Then that storage is not registered yet. Go back to the drive chapter that you used and set it up (Datacenter → Storage → Add → Directory, IDbackups, Directory/srv/backups, Content ticked to Backup only). Then run pvesm set backups --is_mountpoint 1 on the host shell before you continue here. Without that flag, a drive that is unplugged lets backups write to the SSD in silence. Change nothing else: node, schedule, selection mode, mode, and compression all stay as they are.
Edit: Backup Job — the one field that must change is Storage. It is now the backups area of the second drive. The schedule sun 03:00 and the selection All are from Part C. They are not touched.
Open the Retention tab. Raise Keep Last from 2 to 3. Two was the compromise that a shared SSD forced. On a drive of its own, three weeks of history are cheap. Leave the other fields keep-* empty.
The Retention tab: Keep Last raised to 3.
Click OK. It is the same job and the same schedule, with a new destination. (You use a drive only for backups? Then Ch. 65 · Add an external drive, section "Or: make it a backup target", shows a version of this job that runs each night and keeps 7. Either one is fine. Use only one job.)
Prove the new destination now. Do not wait for Sunday. The row of the job is still selected. Click Run now. Let the task viewer reach TASK OK. Then look in homelab → backups → Backups in the left tree. The archives are in the new place. The old ones are still on local until you delete them by hand.
You know the rest of this layer already from Part C. Backup now on the own Backup tab of a single container gives a one-off archive before you change something risky. The drill for a restore below proves that an archive is real.
Reference for the backup job — Datacenter → Backup → select the row → Edit
Tab → Field
Entry
General → Storage
The only change. Select backups. This is the directory storage /srv/backups that the walkthrough of Ch. 65 · Add an external drive registers on the second drive. You took the path of Ch. 66 · Add an internal drive instead? Register that same storage backups at /srv/backups yourself first (Content ticked to Backup only, then pvesm set backups --is_mountpoint 1 on the host shell). Its default walkthrough does not. local is where Part C started. It lives on the same SSD as your data. It is fine as a net for mistakes. It is not a real backup.
General → Node
Leave homelab. You have one server.
General → Schedule
Leave sun 03:00. This is Sundays at 3 a.m., in the quiet hours. Part C set it. Any weekly slot when nothing streams works.
General → Selection mode
Leave All. Each container and VM on the node is backed up, including the ones that you have not built yet. You never have to touch this job again.
General → Mode
Leave Snapshot. The container keeps running while the backup is taken. There is no downtime beyond the moment that it takes to freeze it. So a file that is in the middle of a save does not get written in half into the backup.
General → Compression
Leave ZSTD (fast and good). It is fast, and it shrinks the dumps a lot. It is the default of Proxmox and the right choice here.
Notifications tab
Leave at the default (Use global notification settings). It is its own tab, separate from General. Nothing in this manual watches the backup job for you. Proxmox writes TASK ERROR into a list of tasks that you do not look at. It pushes no alert anywhere. Ch. 20 · Backups before apps says so plainly: the only way to find a failed run is to go and look. So put it in your own routine instead. Ch. 71 · Monthly maintenance has you check the date of the newest archive one time each month. That check is the safety net. Treat any claim that a failed backup will ping your phone as untrue for this build.
Notice — vzdump backs up containers, not bind-mounts
vzdump captures the root disk of each container: the OS, the app, and the small databases that live inside it (the vault of Vaultwarden, the configs of the *arr apps, the settings of AdGuard). It skips bind-mounted folders by default. This means that bulk data that you bind-mounted from the host is not in these dumps. This includes the photo library of Immich and the files of Nextcloud under /srv/media. Layer 2 below covers exactly that data. The two layers add to each other. They do not repeat each other.
You prefer the terminal? — one manual dump and where the files land
⌨ Type this on the Proxmox host (homelab)
Before you run anything on this page: every 192.168.1.x address below is this manual's example network. If your own network uses different numbers, substitute yours as you type — the rule is in Ch. 3 · How to read this manual. A command that runs with the wrong address usually succeeds and leaves you unreachable.
vzdump 104 --mode snapshot --storage backups --compress zstd # back up CT 104 (Vaultwarden) once, by hand
ls -lh /srv/backups/dump/ # --storage backups writes here, NOT /var/lib/vz/dump
vzdump 104
Runs the backup engine on container 104. Give it any CT ID, or several that you separate with spaces. The job on a schedule that you edited in the web page runs this same command with --all.
--mode snapshot
Takes a live snapshot. The container is not stopped during the backup. It is the same Snapshot mode that you picked in the dialog.
--storage backups
Writes the dump to the storage named backups on the second drive. If you name local instead, it puts the copy back on the same SSD as the original.
--compress zstd
Compresses the dump with zstd. It is fast, and the dump is much smaller on the disk.
64.3
LAYER 2 — FILE-LEVEL, VERSIONED (restic)
Layer 1 protects your containers. It does not protect the data that cannot be replaced, which those containers point at. This is the photos and files under /srv/media. For that, you want a tool that is built for files. It keeps versions. So you can go back to how a folder looked last Tuesday, not only to the latest state. It encrypts everything. After the first run, it stores only what changed. So a month of history uses almost no extra space. That tool is restic. It is the same tool that the chapter Ch. 68 · Back up any folder, on a schedule, later in this part, points at a single folder. Here you point it at each folder that holds data that you cannot download again.
The scanned documents of Paperless-ngx are not on this list. They live on the own container disk of Ch. 30 · Paperless-ngx (/opt/paperless). They are not on the shared bind-mount /srv/media. So the vzdump of Layer 1 carries them along. Layer 2 below is only for data that lives on the bind-mount: the photos of Immich and the files of Nextcloud.
This layer has no buttons. Backups that are versioned, encrypted, and without repeated data need a real backup engine. A copy of files is not enough. restic is a tool for the command line. It has no page of its own in the Proxmox GUI. So you type each command on the Proxmox host itself. It is the same host terminal that Ch. 10 · The container wizard first showed you: homelab → >_ Shell in the web page.
Set the repository up one time on the host. Then back up only the folders that cannot be replaced.
Install restic. Make a password for the repository.
Save that password somewhere outside this server, right now, before you go on. You built Ch. 22 · Vaultwarden, the password manager of this manual? Open its web vault. Click New → Login. Give it a name that you will know later, such as "restic repo password". Paste the value into the Password field. Click Save. You did not build it? Do not skip this step. Write the password on paper. Keep it with your important documents. Or store it in the password manager that your phone has already. It is the only key to the snapshots. You lose it? Then each backup that this chapter makes becomes unreadable. No support exists that can help.
Set up the repository on the second drive.
Back up the folders that hold data that you made, not data that you downloaded.
⌨ Type this on the Proxmox host (homelab)
apt update && apt install -y restic
openssl rand -base64 24 > /root/.restic-pass-local && chmod 600 /root/.restic-pass-local
# SAVE that password now: cat /root/.restic-pass-local → into Vaultwarden
restic -r /srv/backups/restic -p /root/.restic-pass-local init
# back up ONLY what you can't re-download — add the folders you care about:
ls -d /srv/media/*/ # FIRST: keep only the folders this lists
restic -r /srv/backups/restic -p /root/.restic-pass-local backup /srv/media/photos /srv/media/files
Warning — the password of the repository is the only key
restic encrypts on the way in. The password in /root/.restic-pass-local is the only thing that can decrypt the backup. You lose it? Then each snapshot is unreadable for good. The backup drive does not help. Save it in Ch. 22 · Vaultwarden the moment that you make it. Never edit or make the file again after init.
Explanation of each part
apt update && apt install -y restic
Refreshes the package list. Installs restic. A new Proxmox host does not have it. The host has curl and wget already. So nothing else is needed.
Makes a new, empty, encrypted repository at /srv/backups/restic on the second drive. -r sets the place of the repository. -p points to the password file.
Encrypts and stores the current content of those folders as a new snapshot. In later runs, it sends only the bytes that changed. So backups that you repeat are fast and small.
Run it one time by hand to prove that it works. Then put it on a schedule. You do that with two small text files that tell the OS what to run and when. A systemd service file holds the command to run. A systemd timer file holds the schedule. Proxmox has no GUI page for either. The fastest way to make them is to paste the block below straight into the host terminal. It is the same Shell as in Ch. 10 · The container wizard. It writes both files in one go. The pattern is a systemd oneshot service plus a timer. The chapter Ch. 68 · Back up any folder, on a schedule, later in this part, walks through the same shape line by line. This version backs up and removes old snapshots in one run each night:
⌨ Type this on the Proxmox host (homelab)
cat > /etc/systemd/system/restic-data.service <<'EOF'
[Service]
Type=oneshot
ExecStart=/usr/bin/restic -r /srv/backups/restic -p /root/.restic-pass-local backup /srv/media/photos /srv/media/files
ExecStartPost=/usr/bin/restic -r /srv/backups/restic -p /root/.restic-pass-local forget --keep-daily 7 --keep-weekly 4 --keep-monthly 6 --prune
EOF
cat > /etc/systemd/system/restic-data.timer <<'EOF'
[Timer]
# every night at 03:30, the host's local time — the comment must sit on its OWN line:
OnCalendar=*-*-* 03:30:00
Persistent=true
[Install]
WantedBy=timers.target
EOF
systemctl daemon-reload && systemctl enable --now restic-data.timer
systemctl start restic-data.service # TEST IT NOW instead of waiting for tonight
journalctl -u restic-data.service -n 20 --no-pager # a healthy run ends with "processed … files"
Notice — this list is frozen until you edit it
The folders that the line ExecStart names are the only ones that the nightly run ever touches. You add a new app later, with photos, documents, or anything else? Then it is not backed up. There is no warning and no error. The job keeps reporting success for the folders that it knows. When you add something that is worth keeping, edit /etc/systemd/system/restic-data.service. Add the path to that line. Then run systemctl daemon-reload. Put it on the monthly list in Ch. 71 · Monthly maintenance, so that it really happens.
Explanation of each part
Type=oneshot
Tells systemd that the service runs its commands one time and then exits. It does not stay in memory.
ExecStart=… backup …
The main step: back up the folders that are listed into the restic repository.
Runs after the backup works. It thins the history to 7 daily, 4 weekly, and 6 monthly snapshots. Then --prune deletes the data that no snapshot that stays uses. This frees space.
OnCalendar=*-*-* 03:30:00
Fires each day at 03:30 in the local time of the host. This is the timezone that you set when you installed Proxmox.
Persistent=true
The server was off at 03:30? Then the missed run happens as soon as it boots. A backup is never skipped in silence.
systemctl enable --now restic-data.timer
Turns the timer on at once. Registers it to start at each boot.
Notice — the repository is already locked
A run was cut off, for example the host rebooted in the middle of a backup? Then the next restic command may refuse with repository is already locked. You are sure that no other restic run is active? Then clear the old lock: restic -r /srv/backups/restic -p /root/.restic-pass-local unlock. Then try again.
64.4
LAYER 3 — OFF-SITE
Layers 1 and 2 both live in the same room as the original. A fire, a flood, a burglary, or a lightning strike takes all three copies at once. This is why the "1 off-site" in 3-2-1 is the copy that lets you sleep. The off-site copy goes to a place that is not your house: a bucket in the cloud. It is encrypted, so that the provider can never read it.
The full walkthrough is a chapter of its own, later in this part. Ch. 69 · Off-site backup sets up rclone with encryption on the side of the client (crypt). It syncs your backup folder to any cloud. The provider then stores only ciphertext. Point it at your folder /srv/backups. Both the vzdump dumps and the restic repository then go off-site together. Nobody but you can read them.
Notice — Backblaze B2 is the classic choice for a low budget
Any cloud works. But Backblaze B2 is the favourite of long standing for off-site backups at home. It costs a few dollars each month for a terabyte. restic talks to it natively. It does not go through rclone. To set it up, you make a B2 account. You make an application key on their dashboard. You hand restic that key through two environment variables. Then you point it at a repository b2: instead of a local path. These are enough separate steps that it earns its own walkthrough. It does not fit in a paragraph here. Ch. 69 · Off-site backup covers the off-site setup that this manual walks through from end to end. Treat B2 as the alternative to reach for when you are comfortable with the route of rclone in that chapter.
Notice — do not waste space off-site on data that you can download
Send only the pile that cannot be replaced. To upload a library of movies that you can download again from the internet burns bandwidth and money for no gain. Send the photos, the documents, and the vault off-site. Skip the libraries of media.
64.5
THE RESTORE DRILL
Here is the hard truth that each professional learns the hard way. A backup that you never restored is not a backup. It is a hope. Backups fail in silence. A job that reports success can still make a dump that does not restore. It can make a repository with a password that you saved wrong. It can miss a folder that was never included. You find out at the worst moment, unless you test. Run this drill now. Then run it again on a reminder that repeats. So the day that you need a restore is never the first time that you try one.
Drill A — restore a container (vzdump)
It is the same drill that you ran in Ch. 20 · Backups before apps, repeated on the new destination. Restore into a new CT ID. Nothing live is then overwritten. In the Proxmox web page:
Select homelab → backups → Backups. Use whichever storage the job writes to now.
Click one dump in the list. Click Restore. Make sure that you opened this from the own Backups list of the storage. Do not open it from the Backup tab of a container. You start from the own tab Backup of a container? Then the same button opens a dialog with the title Overwrite Restore. It erases that container in place. It does not make a safe new copy.
Restore: CT, opened from the Backups list of the storage. This is the door that lets you type the target ID.
In the dialog, set CT to a number that is not used, such as 199. Set storage to local-lvm. Leave Start after restore unticked.
Click Restore. Wait for the task to finish.
Give the copy a new address before you start it. It inherited the MAC address and the static IP of the original. So select 199 → Network. Double-click net0. Put a spare address in IPv4/CIDR (192.168.1.209/24). Or switch IPv4 to DHCP. You skip this? Then the original container drops in and out of the network while the copy runs.
Start CT 199. Then open its shell: homelab → >_ Shell, then pct enter 199.
The >_ Console button of the CT opens a login: prompt, not a shell. Use pct enter 199 from homelab → >_ Shell.
Check that the app and its data are really there. This is the step that the whole drill exists for. So make it concrete. Do two quick checks. Open the app that you restored in a browser at the address that you gave the copy, and log in. Inside the container, run ls -lh on its data folder. Check that the dates of the files match what you expect. A container that starts is not the same as a backup that worked. A login that works and files with the right dates are.
You are satisfied? Stop and destroy CT 199 (199 → More → Remove).
The toolbar of CT 199, More → Remove.
The drill is done. Nothing live was overwritten. The copy never fought the original for its address.
Drill B — restore one file (restic)
There are no buttons here either. restic runs from the command line. Pull a single file out of the repository. Check that it opens.
⌨ Type this on the Proxmox host (homelab)
restic -r /srv/backups/restic -p /root/.restic-pass-local snapshots # list restore points
ls /srv/media/files # pick a real filename from your own server
restic -r /srv/backups/restic -p /root/.restic-pass-local restore latest \
--target /tmp/restore-test \
--include /srv/media/files/FILE # replace FILE with the name from the ls above
ls -lh /tmp/restore-test/srv/media/files/ # confirm it's really there, then open it
Explanation of each part
restic … snapshots
Lists each restore point, the newest last, with its date and ID.
Restores from the most recent snapshot into a folder that you throw away. So nothing live is overwritten.
--include /srv/media/files/FILE
FILE is a placeholder. Swap it for a real file name from the ls above. It restores only that one file, not the whole snapshot. It is fast, and it is enough to prove that the backup is real. Drop the flag to restore everything.
Notice — put the drill on the calendar
Willpower forgets. A calendar does not. Add a reminder that repeats every 3 months: "Homelab: test one backup restore". Put it in the calendar that you really read. Ten minutes, four times each year, is the whole cost of knowing that your backups work. You skip it? Then you are back to hope.
64.6
REFERENCE CARD
Keep the whole strategy in one place. Paste this into a note that you will really find again. Use the Notes panel of the node (homelab → Notes) or a notes tile in Homarr.
📋 Reference — paste into Notes (renders as Markdown; not a shell command)
## Backups — the 3-2-1 strategy
3 copies · 2 media · 1 off-site · **test a restore every 3 months**
- Layer 1 — vzdump → Datacenter → Backup, EDIT the Part C job (weekly `sun 03:00`, Snapshot, storage `backups`, Keep Last 3)
- Layer 2 — restic → /srv/backups/restic (irreplaceable data, nightly 03:30)
- Layer 3 — off-site → rclone crypt or Backblaze B2 (see the off-site chapter)
```sh
# --- Layer 1: container backups (vzdump) ---
vzdump 104 --mode snapshot --storage backups --compress zstd # one manual dump
# restore: Datacenter → backups → Backups → pick a dump → Restore → NEW CT ID (e.g. 199)
# then re-address the copy BEFORE starting it: pct set 199 -net0 name=eth0,bridge=vmbr0,ip=dhcp
# --- Layer 2: file backups (restic) ---
restic -r /srv/backups/restic -p /root/.restic-pass-local snapshots # list restore points
restic -r /srv/backups/restic -p /root/.restic-pass-local backup /srv/media/photos /srv/media/files
restic -r /srv/backups/restic -p /root/.restic-pass-local restore latest --target /tmp/restore --include /srv/media/files/FILE
restic -r /srv/backups/restic -p /root/.restic-pass-local forget --keep-daily 7 --keep-weekly 4 --keep-monthly 6 --prune
restic -r /srv/backups/restic -p /root/.restic-pass-local unlock # clear a stale lock
# --- health ---
systemctl list-timers restic-data.timer
```
Repo password lives ONLY in Vaultwarden — lose it and the backups are unreadable.
Part G · When you outgrow 500 GB
65Add an external drive
One external USB drive turns your SSD of 500 GB from cramped to comfortable. Move the media library that keeps growing onto it, or give it to backups. You set it up one time on the Proxmox host.
This chapter needs the items below. You came here directly? Do them first. Each item takes a short time. Nothing on this page works without them.
Proxmox is installed and works at https://192.168.1.220:8006. You can log in as root. See Ch. 6 · Install Proxmox. At your first visit, the browser shows a certificate warning. Select Advanced. Then select Proceed.
You know where the host shell is. In the Proxmox page, select homelab in the left tree. Then select >_ Shell. You type each command of this page there, unless a step says otherwise. This is the server itself. It is not a container and it is not your own PC.
You know your own network numbers. Where this chapter shows 192.168.1.x, use your own numbers. The rule is in Ch. 3 · How to read this manual.
This chapter builds no container. Another chapter built each container that it mentions.
Notice — where the work of this chapter happens
Everything on this page happens on the Proxmox host. It does not happen inside a container or on your PC. The parts with the mouse are in the web page: homelab → Disks, Datacenter → Storage, and Datacenter → Backup. The parts that you type go in the host shell. Open homelab → Shell in that same web page, or run ssh root@192.168.1.220 from your PC. The host already has lsblk, lsusb, sgdisk, blkid, rsync, and pvesm. You install nothing for those.
Notice — you have probably filled the SSD already
Most readers reach this chapter after they build the catalog of apps and the media stack. Immich (Ch. 52 · Immich), Nextcloud (Ch. 53 · Nextcloud), Funkwhale (Ch. 54 · Funkwhale), and the rest already hold real data on the SSD at /srv/media. So the main path in this chapter is a migration. It moves that existing folder onto the new drive, and the containers do not notice. You add the drive first, before those apps exist? Then /srv/media is empty. You take the shorter shortcut for a fresh mount further down. The chapter on strategy (Ch. 64 · Backups done right (3-2-1)) already explained why the drive matters. This chapter is where you really add it.
65.1
FIND THE DRIVE
Plug the drive into the server. The web page lists each disk that the machine can see. So start there. You type nothing yet.
Select homelab in the tree. Then select Disks. The panel lists each drive in the server with its device name, its size, and how it is used.
Find the row whose size matches the drive that you just plugged in. That row is the whole physical drive.
Read the usage of that row. A drive that is new or empty shows no partitions in use.
Warning — identify the boot SSD first
The drive that runs Proxmox is your SSD. It always shows as busy. It carries local and local-lvm. It is never the target of anything in this chapter. You are not sure which row is which? Stop. Read the panel again before you note a device name.
Note the device name that the panel gives your new drive, for example /dev/sdb. You use it in the health check below.
Notice — check the health of the drive before you trust it
Before you put anything important on a drive, especially a drive that was used or taken out of a case, read its report about itself. The panel Disks has a summary of health for each row. It has a button that opens the full SMART values of the drive. The exact words of that button change a little between versions of Proxmox. So read the toolbar above the list of disks. Many USB-to-SATA bridges hide SMART behind a layer of translation. The panel then shows nothing useful. Then you use the shell. Install the tool one time with apt install -y smartmontools. Then run smartctl -a /dev/sdX. It prints "Unknown USB bridge" or no health data? Add -d sat: smartctl -d sat -a /dev/sdX. Look for SMART overall-health self-assessment test result: PASSED and a Reallocated_Sector_Ct of 0. For monitoring that goes on, Ch. 67 · Scrutiny — disk health watches each disk. It warns you before one dies.
The panel names the drive /dev/sdX. USB device letters are given in the order that you plug drives in. They can change at each reboot. So never write sdb or sdc into a mount, a script, or /etc/fstab. The name by-id, which is permanent, is not in the panel. You read it in the shell.
This part has no buttons. You type these commands in the host shell (homelab → Shell).
Select the node homelab, then Shell. The prompt is the host itself, as root.
Run lsblk on the right. Read the tree.
Find the row whose SIZE matches your drive and whose TYPE is disk. That is the whole drive. The rows that are indented under it (sdb1, sdb2) are its partitions that exist already, if there are any.
Check that it is the USB one with lsusb. It lists each USB device by maker and model.
Copy its permanent name from /dev/disk/by-id/ into the variable DISK. Each later command then points at the right disk, and you do not guess.
⌨ Type this on the Proxmox host (homelab)
Before you run anything on this page: every 192.168.1.x address below is this manual's example network. If your own network uses different numbers, substitute yours as you type — the rule is in Ch. 3 · How to read this manual. A command that runs with the wrong address usually succeeds and leaves you unreachable.
lsblk -o NAME,SIZE,TYPE,MODEL,SERIAL # every disk + its partitions
lsusb # confirm which one is the USB drive
ls -l /dev/disk/by-id/ # the stable, reboot-proof names# paste YOURS — the usb-… name, copied up to (not including) the "->":
DISK=/dev/disk/by-id/usb-Vendor_Model_0123456789-0:0
Notice — how to read the output of lsblk
Each line at the top level with TYPEdisk is a whole physical disk. The lines that are indented under it with TYPEpart are partitions on that disk. Your SSD is the one that carries the Proxmox system. You see the volumes local and local-lvm on it. It is usually named sda. The external drive is the extra line disk whose SIZE matches the label on the drive. It is often the last one to appear after you plug it in. Get this identification right. Everything after it targets this drive.
Explanation of each part
lsblk -o NAME,SIZE,TYPE,MODEL,SERIAL
Lists each block device (disk or partition) with the columns that you care about: its name, its size, if it is a whole disk or a partition, its model, and its serial number. The serial number is the surest way to tell two drives of the same size apart.
lsusb
Lists each device on the USB bus by maker and model. It also shows its ID VVVV:PPPP. These are the codes for the vendor and the product. You reuse them later to stop the drive from sleeping. This confirms that the disk that you found in the panel really is the USB one.
ls -l /dev/disk/by-id/
Shows the stable, permanent names that Linux keeps for each disk. Each one is an arrow (->) that points at the name /dev/sdX that changes. A name by-id never changes between reboots, unlike sdb. So it is safe to write it into scripts and into /etc/fstab.
Stores the stable identifier of the drive in a shell variable named DISK. Each later command uses "$DISK" instead of the long path. You type it one time. You cannot hit the wrong disk by mistake afterwards.
65.2
FORMAT THE DRIVE (EXT4)
Warning — this erases the drive
To format destroys each file on the drive. That is right for a drive that is new or empty. It is a disaster for a drive that holds data already. For example, a drive with old backups on it after you installed Proxmox again. The installer never touched it. The drive already holds files that you want? Do not format it. Skip to the step to mount, and only mount it. Check first with lsblk -f "$DISK". A partition shows a type of filesystem such as ext4 and a UUID? Then it holds a filesystem. Mount it so that it cannot be changed. Then look inside before you decide. These three commands make a scratch folder. They mount the partition onto it read-only (-o ro means that nothing can be written or deleted). They list what is there: mkdir -p /mnt/check, then mount -o ro "$DISK-part1" /mnt/check, then ls -la /mnt/check. When you have seen enough, release it again with umount /mnt/check.
Notice — the wizard picks the mount path, you do not
Read this before you touch the wizard below. The wizard always mounts the drive at /mnt/pve/<name>. It always takes the whole disk as one partition. That is fine for plain storage. The two payoffs in this chapter want the drive at a path that you choose: /srv/media, so that the media containers never notice the move, or /srv/backups. Either of those is your goal? Then skip the five steps of the wizard below completely. Open the box "You prefer the terminal?" at the end of this section. Format the drive there. Then mount it yourself in the next sections.
The route with the wizard, when you only want plain storage. Proxmox formats, mounts, and registers a whole blank disk for you. It protects you from writing to the wrong place while it does it. Three panels, no typing. This is not the route for the move of media or for the backup drive. For those, skip these five steps, as the notice above says. Use the box for the terminal at the end of this section.
Select homelab in the tree. Then select Disks. Select the row of your drive.
Select Wipe Disk and confirm. This erases the drive. The confirmation names the disk. Read that name. It is your last check.
Select Initialize Disk with GPT if the next step does not offer your drive. It acts at once, with no dialog. It is greyed out when the disk already has a partition table.
Open Disks → Directory. Then select Create: Directory. Set Disk to your drive. Set Filesystem to ext4. Give it a short Name such as media. Leave Add Storage ticked. Select Create.
Check the result in Datacenter → Storage. There is a storage of that name, backed by the drive. It is mounted at /mnt/pve/<name> at every boot.
The button stays clickable for each drive in the list. This includes the SSD that runs Proxmox. The dialog only asks you to confirm. It does not grey itself out on a disk that is in use. A wipe of a disk that the system still holds open normally fails with an error. It does not destroy it. Do not lean on that. Match the device name and the size in the dialog against the drive that you identified in the section before. Do this before you confirm.
Notice — why ext4
Format as ext4 (or xfs). Both store the ownership of files on Linux. Both support hardlinks. The media stack needs both. NTFS or exFAT from Windows cannot give either. Choose ext4 in the field Filesystem of the wizard, or use mkfs.ext4 in the shell. The result is the same filesystem.
You prefer the terminal? — format it yourself when you choose the mount path
One partition that spans the whole drive is all that you need. You then mount it where you want, in the sections that follow.
Warning — confirm $DISK first
The commands below run against "$DISK". A wrong value here formats the wrong disk. This includes the SSD. Run echo "$DISK" first. It must print the full path by-id from the section before. It prints a blank line? For example, you opened a new terminal since then. Then set the line DISK= again before you continue.
Run the five commands below, in order.
Wait for udevadm settle to finish before mkfs. It lets the new device link …-part1 appear first.
Give the filesystem a label (-L data), so that you can know it later in lsblk -f.
⌨ Type this on the Proxmox host (homelab)
sgdisk --zap-all "$DISK" # wipe any old partition table
sgdisk -n1:0:0 -t1:8300 "$DISK" # one partition, whole disk, Linux type
partx -u "$DISK" # re-read the table without a reboot
udevadm settle # wait for the …-part1 link to appear
mkfs.ext4 -L data "$DISK-part1" # format it ext4, label "data"
This is also the only way to split one drive into several partitions, for example a half for backups and a half for data. The wizards of Proxmox each take the whole disk. So a layout of your own has no buttons anywhere in the web page.
sgdisk --zap-all "$DISK"
The tool sgdisk edits the GPT partition table of a disk. This is the map of how the disk divides into sections. --zap-all erases the old table completely. You start from a clean slate.
sgdisk -n1:0:0 -t1:8300 "$DISK"
Makes partition 1. -n1:0:0 means "partition 1, from the default start to the end of the disk". This is the whole drive in one partition. -t1:8300 sets its type code to 8300, "Linux filesystem".
partx -u "$DISK"
Tells the kernel to read the partition table of the disk again now. The new partition then appears without a reboot. partx -u comes with the base system. The tool partprobe by itself lives in the package parted. Proxmox does not install it by default.
udevadm settle
Waits until udev made the link for the new partition device (…-part1). Without it, the next mkfs.ext4 can fail with "No such file or directory". It runs a moment before the link exists.
mkfs.ext4 -L data "$DISK-part1"
Formats the partition with the ext4 filesystem. Labels it data, so that it is easy to identify. ext4 is the standard filesystem of Linux. It stores the ownership and the hardlinks that your apps rely on.
65.3
MOVE YOUR MEDIA ONTO THE DRIVE
This is the main path, and the payoff. Earlier chapters put the shared media tree at /srv/media on the SSD. They warned that a library fills 500 GB fast. See Ch. 40 · Shared storage first. Now you move that folder onto the drive, at the same path. Each media container is bind-mounted (it is told "that folder is your /data") to /srv/media. The path does not change. So the containers never notice the move.
Proxmox has no panel to copy files or to edit /etc/fstab. So the copy and the edit of the mount config below are typed in the host shell (homelab → Shell). An SFTP client (WinSCP, Files, Dolphin) can browse the host over the same SSH login and drag files across. But it cannot keep the hardlinks and the ownership that the media library depends on, in the way that rsync does below. So for this specific move, to type the commands is the way that you can rely on.
Warning — do not mount the drive at /srv/media yet
It is tempting to mount the new drive straight onto /srv/media and be done. Do not. That mount hides the old folder of the SSD that has the same name. The files are still there underneath. But you cannot see them while the drive is mounted. The containers find an empty /data. The safe order is the opposite. Mount the drive in a neutral place first. Copy the data across while the folder of the SSD is still visible. Only then point the drive at /srv/media. The steps below do exactly that.
Check $DISK again first. Run echo "$DISK". It must print the full path by-id that you set in the first section. A blank line means that the shell has forgotten it. That happens when you close the tab Shell or come back on another day. Set the line DISK= from the first section again before you run anything below. If not, "$DISK-part1" turns into the path -part1, which means nothing, and the commands fail.
Stop the containers that use /srv/media, so that no app writes during the copy: pct stop <CTID> for each. You do not know the CTIDs by heart? The tree on the left names and numbers each container. Ch. 40 · Shared storage first lists which ones share this folder.
Mount the drive at a temporary path. Copy everything across with rsync. (The flags keep the ownership and the hardlinks. The media stack depends on both.) When it finishes, run echo $? at once. That prints the result code of the last command. 0 means that each file arrived. Any other number means that some files did not copy. Run the same rsync line again. It only gets what is missing. Do this until you get 0. Do not go on to the next step before then.
Unmount the temporary path. Then add the line to /etc/fstab that mounts the drive at /srv/media at each boot, by its permanent UUID.
Apply it with mount -a. Check that the files are there. Start the containers again. They find /data exactly as before.
⌨ Type this on the Proxmox host (homelab)
# 1. stop each container that uses /srv/media
pct stop <CTID>
# 2. mount the drive on a TEMPORARY path — not /srv/media yet
mkdir -p /mnt/newdrive
mount "$DISK-part1" /mnt/newdrive
# 3. copy everything, preserving owners (-a) + hardlinks (-H)
rsync -aHAX --info=progress2 /srv/media/ /mnt/newdrive/
# 4. unmount temp, then mount the drive AT /srv/media for good, by UUID
umount /mnt/newdrive
echo "UUID=$(blkid -s UUID -o value "$DISK-part1") /srv/media ext4 defaults,nofail 0 2" >> /etc/fstab
systemctl daemon-reload && mount -a
mountpoint /srv/media # must say "is a mountpoint". ls alone cannot tell you: an unmounted path shows the OLD copy and looks the same# 5. start the containers again — /data is unchanged
pct start <CTID>
Notice — what each field in the fstab line means
The line that you added has six fields. UUID=… says which partition. It is the permanent ID, and it does not change when the device letters move. /srv/media says where to mount it. ext4 is the type of the filesystem. defaults,nofail are the options of the mount. 0 means do not archive with the old tool dump. 2 means check this filesystem for errors at boot, after the 1 of the root disk. Each drive that is not the root gets a 2. The inner $(blkid -s UUID -o value …) runs first. It fills in the bare UUID for you. So there is no long value to copy by hand.
Warning — nofail is not optional on a USB drive
Without nofail, the drive is unplugged one day, and the host does not boot. It waits for ever for a disk that is not there. With nofail, Proxmox boots as normal and skips the drive that is missing. You mount by UUID, not by /dev/sdb1. So a device letter that moved after a reboot does not matter any more. The right partition is found by its ID each time.
Notice — the containers need no change
The bind-mount of each container points at the path/srv/media on the host. It does not point at the physical disk. Swap what is mounted there, and each container follows by itself. You edit not a single container. Bind mounts are one more thing with no GUI. The tab Resources can only add a new volume with its own storage. It can never point at a folder that exists already. This is the migration that each earlier chapter promised for "Part G".
Notice — the old copy still takes space on the SSD
The old files are still on the SSD, hidden under the mount. They use the same space as before. The SSD does not get its space back by itself. First use the apps for a few days. Check that everything works from the new drive. Then you can remove the old copy. The mount hides it. So look at it through a second view of the root disk. Run mkdir -p /mnt/rootview && mount --bind / /mnt/rootview. A bind-mount of / like this does not include the drive that is mounted on top. Then ls /mnt/rootview/srv/media shows the old copy. It looks right, and you are sure that the drive has the same data? Then remove it: rm -r /mnt/rootview/srv/media/*. Do this on the old copy only. Finally, run umount /mnt/rootview. Check with df -h / that the SSD has space again.
Notice — check the ownership again after the copy
rsync -a keeps the ownership. But something looks wrong inside the apps? Then set it again one time. Limit it to the subfolders of the media stack: chown -R 101000:101000 /srv/media/{torrents,movies,tv,music,books}. In an unprivileged container, the user 1000 of the app is host UID 101000. So that is the owner that those folders must have. Skip photos. You run Immich? Then that folder must stay owned by 100000:100000. See Ch. 40 · Shared storage first.
Explanation of each part
pct stop <CTID>
Stops a container. No app then writes to /srv/media while the copy runs. Repeat it for each container that is bind-mounted to the media tree. Start them again at the end. The button Shutdown on each container does the same thing, for one container at a time.
mount "$DISK-part1" /mnt/newdrive
Mounts the partition that you just formatted on a scratch path. You can then copy into it while the old /srv/media on the SSD is still visible.
Copies the whole tree. -a keeps permissions, ownership, and times. -H keeps hardlinks. This is vital. The media library shares files by hardlink. -A and -X carry ACLs and extended attributes. --info=progress2 shows a running total. The slashes at the end copy the content of the folder, not the folder itself.
umount /mnt/newdrive
Unmounts the drive from the scratch path. You can then mount it again at its real home.
Adds one line to /etc/fstab. This is the file that lists which disks Linux mounts at boot. The inner $(blkid -s UUID -o value …) puts in the bare UUID. So you never copy it by hand. nofail lets the host still boot if the drive is unplugged.
systemctl daemon-reload && mount -a
Loads again the mounts that systemd makes from /etc/fstab. Then mounts everything that is not mounted yet. So the drive appears at /srv/media with no reboot. The /data of the containers now lives on the drive.
65.4
SHORTCUT — A FRESH DRIVE WITH NOTHING TO MOVE
You added the drive before you built any media apps? Then /srv/media does not exist yet, or it is empty. There is nothing to migrate. Skip the copy completely. Make the mount point. Mount the drive straight at /srv/media by its permanent UUID. This is the whole of the section before, minus the rsync. Use the same idea with /srv/backups in place of /srv/media if this drive is for backups instead.
It is still work in the shell, for the same reason. You choose the mount path, and the wizard cannot.
Check $DISK again first. Run echo "$DISK". It must print the full path by-id that you set in the first section. It prints a blank line? Then the shell has forgotten it. Set the line DISK= from the first section again before you run anything below.
Make the empty folder for the mount point.
Add one line to /etc/fstab. The command fills in the UUID for you. So there is no long value to copy by hand.
Apply it now with mount -a. Then check with df -h.
The fields of fstab, and why nofail is a must, are explained in the two boxes in the section above. The line is identical.
⌨ Type this on the Proxmox host (homelab)
mkdir -p /srv/media
blkid "$DISK-part1" # see the UUID it prints# append the mount to /etc/fstab — fills in the UUID automatically:
echo "UUID=$(blkid -s UUID -o value "$DISK-part1") /srv/media ext4 defaults,nofail 0 2" >> /etc/fstab
systemctl daemon-reload && mount -a
df -h /srv/media # it should now show the drive's size
Explanation of each part
mkdir -p /srv/media
Makes the empty folder that becomes the mount point. This is the place in the filesystem where the content of the drive will appear.
blkid "$DISK-part1"
Prints the UUID of the partition (a unique ID that never changes) and the type of its filesystem. You mount by UUID. So the drive is always found, also if its device letter changes.
Adds one line to /etc/fstab. This is the file that lists which disks Linux mounts at boot. The inner $(blkid -s UUID -o value …) runs first and puts in the bare UUID. So you never copy it by hand. nofail lets the host still boot if the drive is unplugged.
systemctl daemon-reload
Tells systemd to read its configuration again. This includes the mounts that it makes from the updated /etc/fstab. You need no reboot.
mount -a
Mounts everything that is listed in /etc/fstab and is not mounted yet. So the new drive can be used at once.
df -h /srv/media
Shows the use of disk space in sizes that are easy to read for that mount point. It confirms that the drive mounted and reports its real capacity.
65.5
STOP THE DRIVE FROM SLEEPING
USB drives can suspend by themselves to save power. They can then disconnect in the middle of a write. One udev rule keeps this drive powered all the time while it is plugged in. The rule matches your specific drive by its USB codes for the vendor and the product. So you must find yours first.
udev rules have no panel in Proxmox. You type this one in the host shell (homelab → Shell).
Warning — find the IDs of your own drive first
The XXXX and YYYY below are placeholders. A rule with the wrong codes does nothing. It fails in silence, with no error. So check that it took. After you save it, re-read the rule file that you just wrote with cat /etc/udev/rules.d/50-usb-drive.rules. Check that the vendor and product codes match exactly what lsusb printed, character for character. One character that is swapped is the whole failure. Nothing else on this page will ever tell you. How to find the codes: run lsusb and read the line for your drive. It ends in ID VVVV:PPPP, for example ID 1058:25e1. The four characters before the colon are the vendor ID. Put them where XXXX is. The four after the colon are the product ID. Put them where YYYY is. Two USB devices look alike? Unplug the drive. Run lsusb. Plug it back in. Run lsusb again. The new line is yours.
Run lsusb. Note the codes VVVV:PPPP of your drive.
In the command on the right, replace XXXX with the vendor code. Replace YYYY with the product code.
Load udev again and trigger it now. The rule then applies to the drive that is plugged in already, with no reboot.
⌨ Type this on the Proxmox host (homelab)
echo 'ACTION=="add", SUBSYSTEM=="usb", ATTR{idVendor}=="XXXX", ATTR{idProduct}=="YYYY", ATTR{power/control}="on"' \
> /etc/udev/rules.d/50-usb-drive.rules
udevadm control --reload
udevadm trigger --subsystem-match=usb # apply it now, not just at next boot
Writes a udev rule. It is a rule of the system that fires by itself when hardware appears. It matches a USB device with your idVendor (XXXX) and idProduct (YYYY). It sets its power/control to on. This turns off the auto-suspend of USB for that drive. So it never sleeps and disconnects.
udevadm control --reload
Tells udev to read its rule files again. The new rule is then loaded. Alone, it affects only devices that you plug in after the reload. Your drive is attached already. So the next line is also needed.
udevadm trigger --subsystem-match=usb
Plays an "add" event again for USB devices now. It applies the rule that was just loaded to the drive that is plugged in already, at once. It does not wait for the next reboot or replug.
65.6
OR: MAKE IT A BACKUP TARGET
Instead of storage, you can give this drive to backups. This is a second copy of each container on hardware that is separate from the SSD. Mount it at /srv/backups. (Use the shortcut for a fresh mount above, with that path in place of /srv/media. A backup drive starts empty. So there is nothing to migrate.) Register it with Proxmox. Schedule a backup each night. This is the drive that Layer 1 of the chapter on strategy writes to.
Register the drive as storage for backups. The mount exists already. This dialog only tells Proxmox about it.
Go to Datacenter → Storage → Add → Directory.
Set ID to backups. This is the name that you see everywhere else in Proxmox.
Set Directory to /srv/backups, the path where the drive is mounted.
Open Content and tick Backup only. It is one dropdown with tick boxes inside it. It is not a row of boxes on the dialog. Untick Disk image. It is ticked when the dialog opens.
Select Add.
The dialog only registers a path. It does not format anything. It never makes the mount of the drive.
One safety flag, is_mountpoint, has no field anywhere in that dialog. So the GUI cannot finish the job. This single line in the host shell is the only way to set it.
⌨ Type this on the Proxmox host (homelab)
pvesm set backups --is_mountpoint 1
Notice — is_mountpoint protects you from a failure that is silent
The flag tells Proxmox to write here only if the drive is really mounted. The USB drive disconnects? Backups then fail with a clear error. They do not write copies onto the root of the SSD in silence. Those copies would fill the system disk and protect nothing. The staff of Proxmox were asked to add it to the dialog. Until they do, it stays a job of one line in the shell.
You prefer the terminal? — register the storage with one command
This does the whole dialog and the flag in a single line. It includes the retention.
⌨ Type this on the Proxmox host (homelab)
# register + set the mountpoint guard in one command:
pvesm add dir backups --path /srv/backups --content backup \
--is_mountpoint 1 --prune-backups keep-last=7
pvesm add dir backups --path /srv/backups
The Proxmox VE Storage Manager registers a new storage of type dir (a plain folder). It is named backups. It points at /srv/backups on the host.
--content backup
Limits this storage to archives of backups (vzdump files) only. It does not hold disk images or ISOs. So nothing else lands on your backup drive. It is the same choice as the list Content in the dialog.
--is_mountpoint 1
Makes Proxmox refuse to use this storage unless a drive is mounted at /srv/backups. This guards against a write to the empty folder of the SSD when the drive is unplugged.
--prune-backups keep-last=7
Deletes old backups by itself. It keeps only the 7 most recent. Proxmox removes old ones at the end of each job. So the folder cannot grow with no limit. Raise the number for a longer history. A large drive has room for many.
Schedule the backups. The job runs by itself from now on.
Notice — you land here with no Layer 1 job yet?
You skipped ahead and never built the Layer 1 job of the chapter on strategy? Then go to Datacenter → Backup → Add instead. Make it new with the settings below. There is one difference. A job that is brand new has none of those settings in place already. So where the steps below say "confirm", choose the value yourself. Do not check it. Set the selection mode to All, Mode to Snapshot, and Compression to ZSTD.
Open Datacenter → Backup. You made a job already in the chapter on strategy (Ch. 64 · Backups done right (3-2-1)). Select its row. Select Edit. You want one job that points at this drive. You do not want a second one that competes with it.
Set Storage to backups. This is the storage that you just registered.
Set Schedule to exactly 03:00. Nothing before it, nothing after it. The chapter on strategy left this field with sun 03:00. That sun makes the job run only on Sundays. Clear the field. Type 03:00 on its own. A bare time means each night. The time alone looks unchanged. So it is easy to skip this step by mistake. Read the field again before you move on. Make sure that no name of a day is left in it. (The field also takes presets from its dropdown, if you prefer to pick a daily one there.) This changes the job from weekly to nightly. Part G of this manual assumes nightly after this chapter.
Check that the selection mode is still All. Each container is then included, new ones too. The list of guests is on this same tab. There is no separate tab for it.
Check that Mode is Snapshot and Compression is ZSTD.
One tab holds the target, the time, the guests, and the mode.
Open the Retention tab. Set Keep Last to 7. This is a week of copies each night. It replaces the starter value of 3 from the chapter on strategy. The drive gives you room for more now.
Without a rule for retention, the drive fills until it is full. Keep Last is the simplest rule that works.
Select Save. Leave the tabs Notifications, Note Template, and Advanced as they are.
Warning — one external drive is not yet a real backup
This gives you a second copy on hardware that is separate from the SSD. It is the single most important win. But two honest limits remain. A drive that you use as /srv/media cannot also be your backup target. Pick one job for each drive. And a single drive, in the same room as the server, is lost together with it in a fire or a theft. As the chapter on strategy explained, the full plan is a local copy, a second drive on site, and one off-site. See Ch. 64 · Backups done right (3-2-1). Add a second internal disk in Ch. 66 · Add an internal drive. Push a copy off the box in the chapter on off-site backups. This drive is the first leg of that plan. It is not the whole plan.
65.7
SPACE, RECOMPUTED
With the drive in place, bulk data leaves the SSD. The SSD then holds only the OS, the system disks of the containers, and the small databases. The SSD goes from over-committed to comfortable.
Lives on
What
Rough size
SSD of 500 GB
Proxmox itself, the rootfs and config of each container, and small databases (Vaultwarden, Actual, Paperless…).
the OS + a handful of light containers fit comfortably
External drive (media)
Media library, photos (Immich), files (Nextcloud), music, books, clips from cameras.
grows toward the full size of the drive
External drive (backups)
A backup of the whole fleet each night: the rootfs of the containers and the databases (the 7 most recent are kept).
tens of GB — the rootfs is small
Notice — the next limit is RAM, not disk
The drive fixes storage. But the server still has 16 GB of RAM. Heavy apps each claim a large slice: a Minecraft or Palworld server, Immich, Nextcloud. Several at once can trigger the out-of-memory killer. Run a few heavy services at a time, not all of them. Watch the memory in Beszel. This is a choice of scheduling. The drive does not change it.
65.8
WHEN IT GOES WRONG
Right after the format, mkfs.ext4 fails with "No such file or directory" on "$DISK-part1". The device link …-part1 did not exist yet. The kernel and udev had not finished to make it. Run udevadm settle. Check the link with ls -l "$DISK-part1". Then run the mkfs line again. It keeps racing? Run apt install -y parted (it installs the package parted and asks nothing). Then run partprobe "$DISK" before mkfs. It does the same job as udevadm settle, to read the table again. It is for the stubborn drives that need a second nudge.
The wizard Create: Directory does not offer your drive in its list Disk. That list holds only drives that Proxmox sees as free and that carry a GPT partition table already. Select the row of the drive in Disks. Select Wipe Disk. Then select Initialize Disk with GPT. Open the wizard again.
The drive still suspends by itself or disconnects at random, also after you added the udev rule. The idVendor and idProduct of the rule almost surely do not match your drive. Run lsusb to read your real VVVV:PPPP. Put those into /etc/udev/rules.d/50-usb-drive.rules. Then run udevadm control --reload && udevadm trigger --subsystem-match=usb.
Inside a container, the app cannot write to /data ("Permission denied"), although you ran chown on the host. Unprivileged LXCs shift IDs. The UID 1000 of the app is host UID 101000, not 1000. On the host, run chown -R 101000:101000 /srv/media/<subdir>. Then test from inside with pct exec <CTID> -- touch /data/test.
A backup fails with "storage 'backups' is not online" or with a "not a mountpoint" error. The drive is not mounted. is_mountpoint does its job and refuses to write. Check findmnt /srv/backups. It is empty? Plug the drive in again and run mount -a. Then pvesm status must show backups as active. You can then run the backup again.
After the migration, /srv/media looks empty, and the apps show no library. One cause: the drive is not mounted (mountpoint /srv/media says "is not a mountpoint". Run mount -a). The other cause: you added the fstab line and ran mount -a before the rsync finished. You mounted the empty drive over the data. Unmount. Run the same line rsync -aHAX again from the temporary path. (It resumes. It copies only what is missing.) Then mount at /srv/media again.
smartctl prints "Unknown USB bridge" and no health data. The USB-to-SATA bridge hides SMART behind a layer of translation. Add -d sat: smartctl -d sat -a /dev/sdX. That still fails? Try -d sat,12 or -d usbjmicron for the odd bridge chip. Ch. 67 · Scrutiny — disk health finds most of these by itself.
65.9
REFERENCE CARD
This drive lives on the host, not in a container. So paste this into the own Notes of the node. Select homelab in the tree. Open Notes. Then select Edit. The checks are then always at hand.
📋 Reference — paste into the host node's Notes in Proxmox (not a shell command)
## External drive — on the HOST
mount /srv/media (data) or /srv/backups (vzdump) · docs https://pve.proxmox.com/pve-docs/chapter-pvesm.html
```sh
# is the drive mounted? ("is not a mountpoint" = it fell off — remount before use)
mountpoint /srv/media
lsblk -o NAME,SIZE,FSTYPE,MOUNTPOINT # see the whole picture
df -h /srv/media /srv/backups # how much space is left?
# health (add -d sat if it says "Unknown USB bridge")
smartctl -a /dev/sdX
# the drive fell off? replug it, then:
mount -a
# backup storage status + a one-off backup of one CT (e.g. Vaultwarden 104)
pvesm status # "backups" should read active
vzdump 104 --storage backups --mode snapshot
ls -lh /srv/backups/dump # the archives sitting on the drive
# TEST RESTORE into scratch CT 199 (same throwaway ID as the strategy chapter's Drill A) — do this ONCE; an untested backup is not a backup
ls /srv/backups/dump/vzdump-lxc-104-*.tar.zst # pick ONE filename from this list
pct restore 199 /srv/backups/dump/PASTE-ONE-FILENAME-HERE.tar.zst --storage local-lvm
```
Each command here runs on the Proxmox host. It already has mountpoint, lsblk, df, pvesm, and vzdump. smartctl needs apt install -y smartmontools one time. Keep the check with mountpoint as a habit. A path that is not mounted writes in silence to the empty folder of the SSD under it, not to the drive. To watch the fill level of the drive, use Ch. 15 · Beszel. It graphs the disk use of each machine. It is the chapter that warns you before a disk fills up. Ch. 72 · Update notifications does not cover this. It alerts on updates of Docker images only. For a backup that failed, check the date of the newest archive as Ch. 71 · Monthly maintenance describes. The backup job of Proxmox does not push an alert anywhere by itself.
Part G · When you outgrow 500 GB
66Add an internal drive
Fit a second SATA or NVMe drive inside the server. It is the cheapest and most reliable way to grow past the SSD of 500 GB.
This chapter needs the items below. You came here directly? Do them first. Each item takes a short time. Nothing on this page works without them.
Proxmox is installed and works at https://192.168.1.220:8006. You can log in as root. See Ch. 6 · Install Proxmox. At your first visit, the browser shows a certificate warning. Select Advanced. Then select Proceed.
You know where the host shell is. In the Proxmox page, select homelab in the left tree. Then select >_ Shell. You type each command of this page there, unless a step says otherwise. This is the server itself. It is not a container and it is not your own PC.
You know your own network numbers. Where this chapter shows 192.168.1.x, use your own numbers. The rule is in Ch. 3 · How to read this manual.
This chapter builds no container. Another chapter built each container that it mentions.
The SSD of 500 GB fills up when photos, media, and cloud files pile on. A second internal drive adds that space. It can be a SATA disk on a spare port, or an NVMe stick in a free M.2 slot. You have no cables that hang off the box. You have no problems that are particular to USB. The drive is not a container. You set it up one time on the server (the host at 192.168.1.220). Then you point apps and Proxmox storage at it. Almost all of it is clicks. The panel Disks erases the drive, partitions it, formats it, mounts it, and registers it. The route with typing stays on this page too. It is the only way to split one drive into several partitions, or to mount it at a path that you choose. This chapter covers what is different for an internal drive. It also covers when to choose one over a USB drive. The chapter for the external drive is Ch. 65 · Add an external drive.
Warning — every step runs on the server
The drive is physically inside the server. So only the server can see it. Do the clicking in the web page of the server. Browse to https://192.168.1.220:8006 and select homelab in the left tree. A few steps have no button. They need a host shell. You open one in two ways. (a) Select homelab, then >_ Shell. (b) From your PC, run ssh root@192.168.1.220 (see Ch. 9 · SSH & the terminal). You are in the right place when the prompt reads root@homelab:~#. Nothing on this page runs on your PC.
homelab → Shell — a terminal on the server, inside the browser. This is where the few steps that need a command go.
66.1
INTERNAL OR USB — WHICH TO ADD
Both routes end at the same place: a drive that is formatted, mounted on the host, and registered as Proxmox storage. Pick by how you will use it.
Internal drive vs USB drive
Question
Choose this
Data for every day (media library, photos, cloud files)?
Internal. It is faster. It never sleeps or disconnects in the middle of a write.
A backup copy that you want to unplug and store off-site?
You want the drive to survive a reboot with no fuss?
Internal. There is no rule for auto-suspend to write. There is no device letter that moves when you plug it in again.
Notice — this is where /srv/media gets real space
Earlier chapters keep the shared media at /srv/media on the SSD (see Ch. 40 · Shared storage first). When this drive is mounted, move that folder onto it. The containers do not notice. They still see /data through their bind-mounts. Point the checks on the health of the disk that go on at Ch. 67 · Scrutiny — disk health. The plan for backups that this drive feeds into is the one that the chapter on strategy opened this part with: Ch. 64 · Backups done right (3-2-1).
66.2
FIND THE NEW DRIVE — WHAT DIFFERS
An internal drive has no USB name. So finding it differs from the chapter on the external drive in two ways. There is no step with lsusb. There is no path usb-…. You identify it by its model and serial number. The panel Disks prints both next to each drive in the server.
The drive is still in the box? — bolt it in before you open the panel Disks
Everything on this page assumes that the drive is screwed in and wired up already. It is not? Do that first. The server has to be off. The case has to come open.
Shut the server down in a clean way. In the Proxmox web page, select homelab, then Shutdown. Wait for it to power off by itself.
Unplug the power cable, from the wall or from the power supply. Never open a case that is still plugged in.
Touch a bare metal part of the case before you touch anything inside it. This drains any static charge from your hands. A static shock that you cannot even feel can quietly kill a drive or the motherboard.
Open the case. Most sides come off with one or two thumbscrews or a latch. You need no tools beyond a screwdriver.
Fit the drive. For a SATA disk: screw it into a free bay. Plug in a SATA data cable and a SATA power cable. Both are flat and have a key. So they go in only one way. The other ends go to a free port on the motherboard and to a free connector from the power supply. For an NVMe stick: slide it into a free M.2 slot on the motherboard at a shallow angle. Press it down flat. Screw down the small screw that holds it in place.
Close the case. Plug the power back in.
Power the server on. Wait for the Proxmox web page to come back. Then continue with the steps below.
Select homelab in the left tree. Then select Disks.
One row for each drive. Read Model, Serial, and Size before you touch anything.
Find the boot SSD. Its column Usage is not empty. On this machine it reads LVM. The panel also lists its partitions BIOS boot and EFI. Do not look for the words pve-root or local-lvm in this panel. Those are names of what lives inside that LVM. The panel Disks does not print them. Never touch that drive.
Find the new drive. Its Model and Serial match the label that is printed on the disk. Its Usage says that it is free, or that it holds only an old filesystem.
Write down the device name in the column Device. It is /dev/sdb for a SATA disk, and /dev/nvme1n1 for an NVMe stick. Each dialog after this names that device back to you. That name is your last check.
Warning — identify the boot SSD first
The wipe in the next section is irreversible. Proxmox does not protect you. The button Wipe Disk stays clickable whatever the selected drive is doing. The dialog only asks you to confirm. On this machine, the SSD of 500 GB holds Proxmox itself. Your new drive shows a plain size and nothing on it. Do not settle this by a look at the panel. Settle it with a command that names the boot disk outright. Open homelab → >_ Shell. Run lsblk -o NAME,SIZE,MODEL,SERIAL,MOUNTPOINTS. The disk that has / under MOUNTPOINTS, or whose children are named pve-*, is the boot SSD. Then check the serial. The Serial that the dialog Wipe shows you must match the serial that is printed on the drive that you installed. The two strings are not identical? Then close the dialog. To erase the boot SSD destroys the whole server.
You prefer the terminal? — the same identification from the shell
The shell adds one thing that the panel does not. It shows the stable name by-id of the drive. This is ata-… for a SATA disk and nvme-… for an NVMe stick. The route with typing below uses it. So no command ever names a device letter.
List each disk with its model and serial number. You can then tell the new drive from the boot SSD.
Read the sizes and the column Usage. The drive that is already in use (Usage LVM, with the partitions BIOS boot and EFI listed) is the boot SSD. Never touch it. The other one is your new drive. Confirm with the lsblk line above before you click anything.
Copy the stable name by-id of the new drive into a variable DISK. Later commands then never guess a device letter.
Check the variable before you erase anything.
⌨ Type this on the Proxmox host (homelab)
Before you run anything on this page: every 192.168.1.x address below is this manual's example network. If your own network uses different numbers, substitute yours as you type — the rule is in Ch. 3 · How to read this manual. A command that runs with the wrong address usually succeeds and leaves you unreachable.
lsblk -o NAME,SIZE,MODEL,SERIAL # which disk is which — new drive vs boot SSD
ls -l /dev/disk/by-id/ | grep -iE 'ata-|nvme-' # stable names (not sdb/nvme1n1, which can move)
DISK=/dev/disk/by-id/ata-YOUR_MODEL_SERIAL # paste YOURS: the ata-… or nvme-… line, up to (not including) the "->"
echo "$DISK" # must print the full path, not a blank line
lsblk -o NAME,SIZE,MODEL,SERIAL
Lists each disk and partition with its device name, size, model, and serial number. Use the model and the serial number, which are printed on the label of the drive. You then know for sure which entry is the drive that you just fitted.
ls -l /dev/disk/by-id/ | grep -iE 'ata-|nvme-'
Lists disks by their stable, permanent ID names. Keeps only the internal ones: ata- for SATA disks, nvme- for NVMe sticks. These names contain the model and the serial number. They do not change between reboots, unlike /dev/sdb or /dev/nvme1n1.
DISK=/dev/disk/by-id/ata-YOUR_MODEL_SERIAL
Stores the stable identifier of the drive in a variable named DISK. Each later command reuses it. You do not type the long name again. You never name a device letter.
echo "$DISK"
Prints the variable to confirm that it is set. A blank line means that you opened a new terminal since you set it. Run the line DISK= again before you continue.
66.3
WIPE, FORMAT AND MOUNT — IN THE DISKS PANEL
Three buttons do the whole job. Wipe Disk erases the drive. Initialize Disk with GPT writes an empty partition table. The wizard Directory partitions, formats, mounts, and registers it. One thing is simpler than for the external drive. An internal drive needs no rule udev for USB auto-suspend. Skip that whole step of the chapter Ch. 65 · Add an external drive.
Warning — this erases the drive
These steps erase the selected disk. This is right for a drive that is new and blank. It is a disaster for a drive that already holds files. You reuse a drive that has data? Do not wipe it. Mount it by hand instead (the supplement for the terminal below shows the step to mount). Copy the files off first. The dialog for the confirmation prints the device name. Match it against the panel Disks before you confirm.
In homelab → Disks, select the row of the new drive. Then select Wipe Disk. Confirm.
The dialog names the disk. Read that name. It is your last check.
The row is still selected. Select Initialize Disk with GPT. It acts at once, with no dialog. The button is greyed out when the disk already has a GPT table. This means that the step is done.
Under Disks, open Directory. Then select Create: Directory. Fill in the four fields from the table below.
Four fields. The list Disk offers only drives that Proxmox sees as free.
Select Create. A task window prints each step as it runs: the partition, the format, the mount.
Check the result: homelab → Disks → Directory lists the new mount. The storage appears under homelab in the left tree.
Wizard reference — Create: Directory
Field
Entry
Disk
Pick your new drive (for example /dev/sdb). The list offers only disks that Proxmox sees as free and that have a GPT table already. An empty list means that you skipped step 1 or step 2.
Filesystem
ext4. It is the same filesystem that the route with typing formats. It is the safe default for a drive for general use.
Name
storage. This one word becomes both the ID of the Proxmox storage and the mount path: /mnt/pve/storage.
Add Storage
Leave it ticked. It registers the drive in Datacenter → Storage. The wizards Create-CT and Create-VM can then use it.
Notice — what the wizard did, and where it put things
The wizard takes the whole disk as one partition. It formats it with the filesystem that you chose. It mounts it at /mnt/pve/<Name>. You cannot type a different path. It does not use /etc/fstab. Instead it writes a mount unit of systemd. This is a small file that systemd reads to know what to mount and where. That unit is tied to the UUID of the partition. This is a fixed ID number that is stamped onto the partition itself. It is not tied to the device name of the drive. So the mount survives each reboot. It does not matter if the device letter of the drive ever changes. With Add Storage ticked, it also registers the storage and sets the safety flag is_mountpoint for you. This is a small on-or-off setting that Proxmox checks before it writes. So Proxmox refuses to write when the drive is not mounted.
The new storage starts by allowing each type of content. To narrow it, go to Datacenter → Storage. Select the storage. Select Edit. Open Content. It is one dropdown with tick boxes inside it. For a data drive, tick Disk image and Container. Add Backup if you also keep vzdump archives here.
You prefer the terminal? — wipe, partition, format, and mount by hand
This is the route to take when you want more than one partition on the drive, or a mount path that the wizard cannot give you. It uses the variable $DISK that you set in the section before. Each flag is explained in full in the chapter for the external drive, Ch. 65 · Add an external drive.
Clear any old partition table. Then make one Linux partition that spans the whole disk.
Read the table again, so that the new partition device appears. Then format it as ext4.
⌨ Type this on the Proxmox host (homelab)
sgdisk --zap-all "$DISK" # clear any old partition table
sgdisk -n1:0:0 -t1:8300 -c1:storage "$DISK" # one partition, whole disk, Linux filesystem
partx -u "$DISK" && udevadm settle # kernel re-reads the table; wait for $DISK-part1
mkfs.ext4 -L storage "$DISK-part1" # format ext4 (works for both ata- and nvme- by-id)
To make more than one partition, repeat the line sgdisk -n with a size. For example, sgdisk -n1:0:+1T -t1:8300 -c1:data "$DISK" makes a first partition of 1 TB. Then run mkfs.ext4 on each -partN in turn.
Then mount it. Mount by UUID with nofail. The host then boots even if the drive is ever removed. /mnt/storage below is an example. Put yours where you want it. A GUI SFTP file manager (see Ch. 12 · After every build + common Proxmox tasks, section "Move a file to or from the server") can make that folder and edit /etc/fstab as well as typing can. But the command to reload and mount still has to run in the shell shown below.
Make the folder for the mount point.
Add one line to /etc/fstab that is keyed by the UUID of the partition. Then mount it now.
⌨ Type this on the Proxmox host (homelab)
mkdir -p /mnt/storage
echo "UUID=$(blkid -s UUID -o value "$DISK-part1") /mnt/storage ext4 defaults,nofail 0 2" >> /etc/fstab
systemctl daemon-reload && mount -a
df -h /mnt/storage # confirm it mounted
A drive that you mount in this way is not Proxmox storage yet. Register it in the next section.
sgdisk --zap-all "$DISK"
Wipes the GPT partition table of the disk completely. You start from a clean disk. This is the equivalent with typing of the button Wipe Disk.
sgdisk -n1:0:0 -t1:8300 -c1:storage "$DISK"
Makes partition 1 that spans the whole disk (0:0 = the default start to the default end). Sets its type to 8300 (Linux filesystem). Labels it storage.
partx -u "$DISK" && udevadm settle
Tells the kernel to read the new table again. Then waits until the device link $DISK-part1 exists. The tool partprobe by itself is not installed on Proxmox by default. partx -u comes with the base system. It does the same job.
mkfs.ext4 -L storage "$DISK-part1"
Formats the new partition with ext4. Labels it storage. This erases anything that the partition held.
Adds a line to /etc/fstab for the mount at boot. It is keyed by the permanent UUID of the partition, not by a device letter. nofail lets the host boot even if the drive is missing. The last two numbers 0 2 are the settings for dump and for the order of fsck.
systemctl daemon-reload && mount -a
Loads the mount configuration again. Mounts everything in /etc/fstab that is not mounted yet. It applies the new line without a reboot.
df -h /mnt/storage
Shows the free space of the mount in sizes that are easy to read. It confirms that the mount worked.
Notice — to grow the media library, mount the drive at /srv/media
This drive is to hold the shared media library? Then its home is /srv/media. This is the exact path that the media containers already bind-mount as /data. This part has no buttons. The wizard Directory always mounts under /mnt/pve/. So you type these steps in the host >_ Shell instead.
/srv/media holds data on the SSD already. So do not mount the new drive straight over it. That would only hide the old files. It would not move them. Instead you migrate. Mount the new drive somewhere else first. Copy the files across. Then switch the mount over to /srv/media. Each container keeps its bind-mount pct set <CTID> -mp0 /srv/media,mp=/data and never notices. Do not point any container at a new path. The exact numbered steps for this migration are the same for an internal drive as for a USB one. Follow them in the section on the migration of the chapter for the external drive. Use the name by-id with ata- or nvme- that you set above: Ch. 65 · Add an external drive. That section also shows how to get the space back on the SSD after the move.
66.4
REGISTER A DRIVE THAT YOU MOUNTED BY HAND AS PROXMOX STORAGE
You used the wizard Directory? Then the drive is registered already. Skip this section. This one is for a drive that you mounted yourself. The wizard Create-CT can then put the disks of containers on it. VM images or backups can also live there.
Go to Datacenter → Storage → Add → Directory.
Set ID to storage. Set Directory to the mount path that you chose. It is /mnt/storage in the example above.
Open Content and tick what the drive may hold. It is one dropdown with tick boxes inside it. It is not a row of boxes on the dialog. Tick Disk image and Container for the data of apps. Add Backup if you also keep vzdump archives here.
Select Add. The drive now appears as a storage target in the wizards Create-CT and Create-VM.
This dialog only registers a path. It formats nothing. It mounts nothing.
One safety flag, is_mountpoint, has no field anywhere in that dialog. This single line in the host >_ Shell is the only way to set it. Run it right after you select Add.
⌨ Type this on the Proxmox host (homelab)
pvesm set storage --is_mountpoint 1 # refuse writes unless the drive is actually mounted
That flag makes Proxmox refuse to write when the drive is not mounted. Without it, a drive that is not mounted turns into a plain empty folder on the root SSD of the host. Proxmox fills that SSD with copies that protect nothing.
You prefer the terminal? — register the storage with one command
⌨ Type this on the Proxmox host (homelab)
pvesm add dir storage --path /mnt/storage --content rootdir,images --is_mountpoint 1
# then, in the Create-CT wizard, pick storage "storage" for the container's disk
pvesm add dir storage --path /mnt/storage
Registers a plain directory as a new storage pool named storage. It points at the folder on the drive.
--content rootdir,images
Allows this storage to hold the root filesystems of containers (rootdir) and the disk images of VMs (images). Add ,backup to also keep vzdump archives here.
--is_mountpoint 1
Tells Proxmox that the path of the storage is a disk that is mounted from outside. Proxmox then treats the storage as offline, and refuses to write, when nothing is mounted there. This is the one flag that the GUI leaves out.
Notice — for the media library, mount the drive at /srv/media, not at a new path
To register the drive as Proxmox storage above is for the root filesystems of containers and the disk images of VMs. Do not grow the shared media library in this way. Do not make a second source such as /mnt/storage/media and point the /data of a container at it. That splits the library across two places. The media containers then disagree about where /data lives. To put the library on this drive, mount the whole drive at /srv/media with the migration shown earlier in this chapter. (Mount in a neutral place. Run rsync across. Swap the mount.) Each media container then keeps the bind-mount pct set <CTID> -mp0 /srv/media,mp=/data that it has already. It never notices the change. The ownership and the mechanics of the bind-mount are explained in full in the chapter Ch. 65 · Add an external drive.
66.5
OR: MAKE THIS DRIVE THE BACKUP TARGET
Everything above assumes that the drive is extra room for the data of apps. It can do a different job instead. It can hold a second copy of each container, on hardware that is separate from the SSD. You want it for that? Then mount it at /srv/backups and not at /mnt/storage. The steps are the same as above, only with that path. Then register it under the name that the rest of the manual expects.
Notice — why the exact path and name matter here
Later chapters do not go to look for your drive. They use fixed names. Ch. 64 · Backups done right (3-2-1), Ch. 69 · Off-site backup, and Ch. 71 · Monthly maintenance all expect the backups at /srv/backups, registered in Proxmox as backups. You mount it somewhere else, or give it another name? Then those chapters point at a path that does not exist on your server. The commands fail with No such file or directory, and nothing explains why. Ch. 65 · Add an external drive does exactly the same thing for an external drive. So the two routes end up identical from here on.
Mount the drive at /srv/backups with the steps earlier in this chapter. Put that path wherever they say /mnt/storage. A backup drive starts empty. So there is nothing to copy across first.
Go to Datacenter → Storage → Add → Directory.
Set ID to backups. That is the name that the rest of the manual uses.
Set Directory to /srv/backups, the path where you just mounted it.
Open Content and tick Backup only. It is one dropdown with tick boxes inside it. It is not a row of boxes on the dialog. Untick Disk image. It is ticked when the dialog opens.
Select Add.
Set the safety flag, as with each drive that you mount by hand: run pvesm set backups --is_mountpoint 1 on the host. Without it, a drive that is not mounted lets Proxmox write backups onto the SSD under it. It fills the SSD in silence.
Now schedule the job itself. Ch. 20 · Backups before apps walks through the dialog Backup Job. Note that its walkthrough selects the storage local. It was written before you had a second drive. Follow the same screens. Pick backups in the dropdown Storage instead. It appears there when you finish the steps above. The dropdown does not offer it? Then the storage was not registered. Go back and finish that part first. A job that points at local writes to the boot SSD. This is exactly what this chapter exists to stop. The details of the job (nightly or weekly, how many to keep) are in Ch. 64 · Backups done right (3-2-1) and in Ch. 65 · Add an external drive, section "Or: make it a backup target".
66.6
WHEN IT GOES WRONG
You are not sure which disk is the new drive. Open homelab → Disks. Read the columns Model and Serial against the label on the drive. The boot SSD is the disk with Usage LVM. Never touch that one. From the shell, lsblk -o NAME,SIZE,MODEL,SERIAL,MOUNTPOINTS gives the same answer. The disk with / under MOUNTPOINTS is the boot SSD.
Wipe Disk fails with 'device /dev/sdb is already in use'. Something still holds the drive. It is mounted, or it is a member of an LVM group or of a ZFS pool. The button never greys out. So the refusal arrives as an error in the task window instead. Unmount the drive (umount /dev/sdb1). Or remove it from the volume group. Then wipe it again.
The list Disk of the wizard Directory is empty. The wizard offers only disks that are free and that have a GPT partition table already. Go back to Disks. Select the row. Run Wipe Disk, then Initialize Disk with GPT. Open the wizard again.
Right after you partition by hand, mkfs.ext4 fails with 'No such file or directory' on $DISK-part1. The kernel had not finished to make the link of the partition. Run partx -u "$DISK" && udevadm settle. Check the link with ls -l "$DISK-part1". Then run the mkfs line again. As an alternative, run apt install -y parted, then partprobe "$DISK".
The NVMe partition looks wrong. You expected nvme1n11, but you see nvme1n1p1. That is correct. NVMe partitions have a p before the number (nvme1n1p1). SATA disks do not (sdb1). Address the partition as $DISK-part1 through its name by-id. The difference then never bites.
After a reboot, the mount folder is empty. For a drive that you mounted by hand, the fstab line did not take. Run findmnt /mnt/storage. It is empty? Run mount -a. Then check that the UUID in /etc/fstab matches blkid "$DISK-part1". A mismatch means that the line points at the wrong partition. For a drive that the wizard set up, the mount is a unit of systemd instead. Run systemctl status mnt-pve-storage.mount. Read why it did not start.
A container cannot see the folder that is bind-mounted. A mount with pct set -mp0 is not active until the container restarts. Run pct reboot <CTID>. Then run pct exec <CTID> -- ls /data to confirm. The app inside reports 'Permission denied'? Run chown -R 101000:101000 /srv/media/{torrents,movies,tv,music,books} again on the host. The uid 1000 of an unprivileged container is host uid 101000. Skip photos. You run Immich? Then that folder must stay owned by 100000:100000. See Ch. 40 · Shared storage first.
A backup or a write to the pool storage fails with 'not a mountpoint' or 'not online'. The drive is not mounted. The flag is_mountpoint refuses to write. That is the flag that does its job. Run findmnt against the mount path. It is empty? Mount it (mount -a, or systemctl start mnt-pve-storage.mount for a mount that the wizard made). Then check that pvesm status shows storage as active.
66.7
REFERENCE CARD
Paste this in Proxmox under homelab → Notes. This is the own tab Notes of the node, next to Shell in the middle column. Select Edit. Paste. Save. It is a note for you in the future. It is not a shell command.
📋 Reference — paste into the node's Notes in Proxmox (not a shell command)
## Internal drive — on the HOST
mount /mnt/pve/storage · Proxmox storage id "storage" · docs https://pve.proxmox.com/pve-docs/chapter-pvesm.html
(mounted by hand instead? use your own path, e.g. /mnt/storage)
```sh
# is it mounted?
lsblk -o NAME,SIZE,MODEL,MOUNTPOINT
findmnt /mnt/pve/storage && df -h /mnt/pve/storage
systemctl status mnt-pve-storage.mount # the wizard's mount unit
# is Proxmox happy with it?
pvesm status # "storage" should read 'active'
# SMART health (smartmontools usually ships with Proxmox; if not: apt install -y smartmontools; ongoing checks -> Scrutiny chapter)
smartctl -H /dev/sdb # PASSED = healthy (use YOUR device from lsblk)
# stable name + UUID, if you ever re-add the fstab line
ls -l /dev/disk/by-id/ | grep -iE 'ata-|nvme-'
blkid /dev/disk/by-id/ata-YOUR_MODEL_SERIAL-part1
# remount everything in /etc/fstab (after a manual unmount)
mount -a
```
Explanation of each part
## Internal drive — on the HOST · mount … · docs …
A comment (it does not run). It notes the mount path, the ID of the Proxmox storage, and the official storage docs. The Notes of Proxmox show it as Markdown.
lsblk -o NAME,SIZE,MODEL,MOUNTPOINT
Lists disks with their mount points. You can see at a glance if the drive is mounted and where.
Confirms that something is mounted at the path. Then shows its free space. An empty result means that the drive is not mounted.
systemctl status mnt-pve-storage.mount
Shows the state of the mount unit of systemd that the wizard Directory wrote. The name of the unit is the mount path with the slashes turned into dashes. A mount that you made by hand in /etc/fstab has no unit. Use mount -a for that one.
pvesm status
Lists each Proxmox storage entry and whether each one is active. storage must read active when the drive is mounted.
smartctl -H /dev/sdb
Prints the verdict of SMART on the overall health of the drive. PASSED is healthy. For monitoring that goes on and for alerts, see Ch. 67 · Scrutiny — disk health.
ls -l /dev/disk/by-id/ … · blkid …-part1
Get back the stable name of the drive and the UUID of its partition. These are the two values that you need if you ever build the line of /etc/fstab again.
mount -a
Mounts everything in /etc/fstab that is not mounted yet. This is the quick fix after a manual unmount.
Part G · When you outgrow 500 GB
67Scrutiny — disk health
Scrutiny reads the report that each drive makes about itself. It warns you weeks before a disk fails. Build it now to watch your SSD. Each drive that you add later joins the dashboard by itself.
This chapter needs the items below. You came here directly? Do them first. Each item takes a short time. Nothing on this page works without them.
Proxmox is installed and works at https://192.168.1.220:8006. You can log in as root. See Ch. 6 · Install Proxmox. At your first visit, the browser shows a certificate warning. Select Advanced. Then select Proceed. The warning is normal. Proxmox makes its own certificate.
The Debian 13 image is downloaded. You do this one time. See Ch. 10 · The container wizard. Without the image, the Template list in the wizard is empty.
You have an SSH key from your PC (Ch. 9 · SSH & the terminal). Or you type a password in the two password boxes of the wizard. The wizard needs one of the two. The Next button stays grey until you give one.
You know your own network numbers. Where this chapter shows 192.168.1.x, use your own numbers. The rule is in Ch. 3 · How to read this manual. The address of this chapter must be outside the range that your router gives out by itself (the DHCP pool, often .100–.200, but yours can differ). An address inside the pool can go to a phone later. Two devices on one address break name lookups, and the cause is hard to find.
Commands marked HOST run on the server. In the Proxmox page, select homelab in the left tree. Then select >_ Shell. Commands marked CT run inside the container of this chapter. The chapter shows you how to get there.
The wizard does not work?Next is grey: you gave no password and no key. Give one of the two. The Template list is empty: the Debian image is not downloaded. Download it first. Each tab is explained in Ch. 10 · The container wizard.
Scrutiny watches the health of disks. Even with one SSD, it is worth running. It reads the S.M.A.R.T. report that is built into the drive, each hour. It warns you while your files are still readable. You add a second drive (see Ch. 65 · Add an external drive and Ch. 66 · Add an internal drive)? It appears on the dashboard by itself. You build this one time. You never touch it again.
Notice — this guide runs in two places
Scrutiny breaks the usual pattern. The dashboard runs inside CT 125. But a small collector runs on the Proxmox host (the server, 192.168.1.220). Only the host can read the physical disks. An unprivileged LXC container is already walled off from the hardware. Docker inside one is walled off a second time on top of that. So it cannot see the raw devices of the drives at all. So the docker run line runs inside CT 125. The download of the collector and the cron job run on the host. Each block of commands below says which.
Notice — read now, do later
You cannot open the shell of the container yet. CT 125 does not exist until you build it in the next section, CREATE THE CONTAINER, just below. Read this now, so that you know the two ways to get in. Come back when the container exists. Nothing breaks if you wait.
Notice — two ways in, when CT 125 exists
The container is built below. Two ways then open its shell. Run pct enter 125 on the host (first homelab → >_ Shell). Or run ssh root@192.168.1.246 from your PC. (The >_ Console button of the container shows a login: prompt. The containers of this manual cannot answer it. Skip it.)
The >_ Console button of the CT opens a login: prompt, not a shell. Use pct enter 125 from homelab → >_ Shell.
67.1
CREATE THE CONTAINER
Do this task with the mouse in the Proxmox web page. You type nothing. You prefer the command line? The box below does the same task with one pct create command.
Open https://192.168.1.220:8006.
Click homelab in the left tree.
Click the blue Create CT button at the top right.
Fill in each tab as the reference shows. Leave each field that is not listed at its default value.
General tab: CT ID 125, hostname scrutiny.
Keep Start after created unticked. Click Finish. The commands after the table finish the job on the host.
The Confirm tab: leave Start after created unticked.
Wizard reference — Create CT 125
Tab → Field
Entry
General → Node
Select homelab.
General → CT ID
Type 125. Do not keep the number that the wizard suggests.
General → Hostname
Type scrutiny.
General → Unprivileged container
Keep this box ticked.
General → Nesting
Keep this box ticked. It is ticked by default. The wizard has no box for keyctl, which Docker also needs. The host command after Finish sets it. It is the first line of the next listing.
General → Password / SSH public key
Keep the password empty. Paste your public key in the SSH field: ssh-ed25519 AAAA…your-key-here you@your-pc. With the key, you can run ssh root@192.168.1.246 from your PC. The command pct enter 125 on the host needs no password.
Template → Storage, Template
Select local. Then select debian-13-standard.
Disks → Storage, Disk size
Select local-lvm. Set 6 GiB.
CPU → Cores
Set 1 core.
Memory → Memory (MiB)
Set 1024. Keep Swap at its default.
Network → IPv4
Select Static. Set IPv4/CIDR to 192.168.1.246/24. Set Gateway to 192.168.1.1. Keep IPv6 at its default.
DNS → DNS domain
Keep this field empty. Do not type 192.168.1.1 here.
DNS → DNS servers
Always type 192.168.1.1. Never keep this field empty.
Confirm
Read the summary. Keep Start after created unticked. Select Finish.
The wizard has no box for three settings: the Docker permission keyctl, the timezone, and start at boot. The first command below sets all three. Run these 3 commands on the host. They set the missing settings, start the container, and open its shell. Each part is explained in Ch. 10 · The container wizard, section "The host command every build needs".
⌨ Type this on the Proxmox host (homelab)
Before you run anything on this page: every 192.168.1.x address below is this manual's example network. If your own network uses different numbers, substitute yours as you type — the rule is in Ch. 3 · How to read this manual. A command that runs with the wrong address usually succeeds and leaves you unreachable.
pct set 125 --features nesting=1,keyctl=1 --onboot 1 --timezone host
pct start 125
pct enter 125 # now INSIDE CT 125 — the rest of this page runs here
Prefer the terminal? — the same task with one pct create command
⌨ Type this on the Proxmox host (homelab)
TMPL=$(pveam available --section system | awk '/debian-13-standard/{print $2}' | tail -1)
pveam download local "$TMPL" # once per host; harmless to re-run
pct create 125 local:vztmpl/"$TMPL" \
--hostname scrutiny --cores 1 --memory 1024 --rootfs local-lvm:6 \
--net0 name=eth0,bridge=vmbr0,ip=192.168.1.246/24,gw=192.168.1.1 \
--nameserver 192.168.1.1 --features nesting=1,keyctl=1 --unprivileged 1 --onboot 1 --timezone host
pct start 125
pct enter 125 # you are now INSIDE CT 125 — everything below runs here
This part has no buttons. These commands run inside CT 125. In the host Shell (homelab → >_ Shell), run pct enter 125. You are still inside from the section before? Then continue.
You are now in the shell of CT 125. Install Docker. Then start the Scrutiny omnibus image. It is one container that holds both the web page and its small database.
Install the Docker engine.
Start Scrutiny, pinned to the release v0.9.5. Its config and database go on host folders that stay when you update.
You see an error with cgroup, overlay, or permission? Check the features of CT 125. On the Proxmox host (not inside the CT), run pct config 125 | grep features. The line must show keyctl=1,nesting=1. nesting lets the container run its own container engine. keyctl lets it manage a small set of security keys of the kernel that Docker uses inside. The line does not show both? Run pct set 125 --features nesting=1,keyctl=1. Then run pct reboot 125. Then run the docker run line again.
Notice — the dashboard is empty until the collector on the host runs
Open http://192.168.1.246:8080. You see an empty dashboard. This is expected. The omnibus image bundles its own collector. But from inside the walls of LXC plus Docker, it cannot read the physical disks of the host. So no drives appear yet. The next section installs the collector on the host. That is what really reads your SSD. Wait about half a minute after this docker run before you run the collector. At the first boot, the bundled InfluxDB takes about 20–30 seconds before it accepts data. A collector that runs earlier fails with "connection refused" or a 500 error.
The empty dashboard, before the first run of the collector on the host.
Explanation of each part
The Docker install line and the flags -d, --name, --restart, -v, and -p are explained in Ch. 9 · SSH & the terminal. These parts are specific to Scrutiny:
-p 8080:8080
Opens port 8080 of the CT and sends it to port 8080 inside the container. You can then open the web dashboard. The collector on the host can also send data to it.
-v /opt/scrutiny/config:/opt/scrutiny/config
Keeps the configuration of Scrutiny in a folder of the CT. It stays when the container is deleted and made again.
-v /opt/scrutiny/influxdb:/opt/scrutiny/influxdb
Keeps the InfluxDB database that is bundled with Scrutiny in a folder. It stores the history of the health readings of each drive. Your history stays when you update.
ghcr.io/analogj/scrutiny:v0.9.5-omnibus
The image to run: Scrutiny in the form "omnibus". It bundles the web page and the database in one container. v0.9.5 was the latest release when this chapter was checked. The authors of Scrutiny warn against the tags latest and master that move. They can update by themselves to a build that is broken. Keep this the same version as the collector below.
67.3
INSTALL THE COLLECTOR — ON THE HOST
Type exit to leave CT 125 first. These commands run on the Proxmox host itself. The collector is a single program that you download. It reads the S.M.A.R.T. data of each disk with the smartctl of the host. It sends the result to the API of the dashboard. It must run on the host, because only the host can see the physical disks.
Notice — the collector needs smartctl
The collector calls smartctl. It comes from the package smartmontools. Proxmox normally ships it already. (Its own view of disks uses it.) A run of the collector reports smartctl: executable file not found? Then install it on the host with apt install -y smartmontools.
Refresh http://192.168.1.246:8080 after the first run of the collector. Your SSD now shows as a card. The cron line runs the collector again each hour. So it builds a history.
The SSD now shows as a card after the first run of the collector.Explanation of each part
curl -L … -o /usr/local/bin/scrutiny-collector
Downloads the collector of Scrutiny from GitHub. This is the piece that really reads the health of the disk. The flag -L follows redirects. The flag -o saves it to that file path. The host has curl already. You install nothing.
chmod +x /usr/local/bin/scrutiny-collector
Marks the file that you downloaded as executable. You can then run it as a program.
/usr/local/bin/scrutiny-collector run --api-endpoint "http://192.168.1.246:8080"
Runs the collector one time. It scans the S.M.A.R.T. data of each disk. It sends the results to the Scrutiny dashboard at that address. Run it by hand any time that you want a refresh at once.
Writes a cron job that runs the collector by itself each hour, as root. The health of the disk is then checked with no work by hand. The line PATH= is essential. Jobs in /etc/cron.d otherwise run with only /usr/bin:/bin. But smartctl lives in /usr/sbin. Without it, each hourly scan fails in silence, although to run the command by hand works. printf also makes sure of the newline at the end that a cron file needs.
CT 125 (scrutiny) — disk 6 GiB · CPU 1 · RAM 1024 MB · IP 192.168.1.246 (the same subnet as the rest of the homelab). The dashboard is at http://192.168.1.246:8080.
Notice — the dashboard keeps restarting
The container is killed for memory, or the dashboard restarts by itself? Raise its RAM to 2048 MB (125 → Resources → Memory → Edit).
Memory and Swap share one dialog. 2048 MiB is 2 GiB.
The omnibus image bundles InfluxDB 2. It can use a lot of memory in a short time when it compacts the database.
67.4
WHEN YOU ADD A DRIVE LATER
You do not build anything again to watch a new disk. The next hourly run of the collector scans it. It appears on the dashboard by itself. Only one case needs a hand: an external USB drive.
Notice — internal drives are automatic. USB drives may need one line
An internal drive (see Ch. 66 · Add an internal drive) is found by smartctl --scan. It appears by itself. An external USB drive (see Ch. 65 · Add an external drive) sits behind a USB-to-SATA bridge. Those bridges often report "unsupported" with no S.M.A.R.T. data. You must tell smartctl that the type of the device is sat.
You add a USB drive, and it is missing from the dashboard? Force its device type. Do this on the host. You can make the config file below by typing the heredoc that is shown. Or open /opt/scrutiny/config/collector.yaml on the host with a text editor over SFTP instead (see Ch. 12 · After every build + common Proxmox tasks, section "Move a file to or from the server"). Type the same lines. In both cases, the collector is not a service in the background. It reads this file only at the moment that you run it. So to run it again afterwards is enough. There is nothing to restart.
Find the path of the drive: run smartctl --scan. Note its /dev/sdX.
Check that the type sat reads its health: smartctl -d sat -a /dev/sdX. (-d sat forces that device type. -a prints each S.M.A.R.T. attribute.) It must now print S.M.A.R.T. attributes.
Tell the collector to use that type for good. Make the config file below on the host.
Run the collector again. The USB drive now appears.
⌨ Type this on the Proxmox host (homelab)
mkdir -p /opt/scrutiny/config
cat > /opt/scrutiny/config/collector.yaml <<'EOF'
version: 1
devices:
- device: /dev/sdX # the USB drive's path from `smartctl --scan`
type: 'sat'
EOF
/usr/local/bin/scrutiny-collector run --api-endpoint "http://192.168.1.246:8080"
Notice — where the collector looks for that file
The collector reads /opt/scrutiny/config/collector.yaml on the host by itself. You need no flag. This file lives on the host, next to the program of the collector. It is not the same folder as the volume /opt/scrutiny/config of the CT inside CT 125. Match the layout version: 1 and devices: exactly. Replace /dev/sdX with the real path.
67.5
HOW TO USE IT
Scrutiny is a dashboard that you only read. The collector feeds it each hour. You only watch it.
Open http://192.168.1.246:8080. Each drive shows as a card with its status (passed or failed), temperature, capacity, and hours that it was on. Drives appear only after the collector on the host runs. The page is empty? Run the command of the collector from the Reference card.
Click the card of a drive to open its page of detail. It lists each S.M.A.R.T. attribute with its current value, its state of pass, and a graph of its history. Use this page to spot a value that slowly gets worse over weeks.
The page of detail of a drive: each S.M.A.R.T. attribute plus a graph of history.
Click Settings at the top. Set Temperature to Celsius. Set Device Status – Thresholds to Both. Either the limits of S.M.A.R.T. from the maker or the stricter thresholds of Scrutiny can then flag a drive.
Settings: Temperature Celsius, Device Status Thresholds Both.
Look at the cards one time each week. The cron job refreshes the data each hour. A card shows failed? Back up that drive now. Then plan a replacement. This early warning is the whole purpose of the app.
67.6
WHEN IT GOES WRONG
The dashboard opens but shows no drives, or it stays empty. The built-in collector of the omnibus container cannot read the physical disks of the host from inside the walls of LXC plus Docker. You must run the collector on the host. On the Proxmox host, run /usr/local/bin/scrutiny-collector run --api-endpoint "http://192.168.1.246:8080". Then refresh the page. (This is why the guide installs a separate collector on the host.)
A run by hand of the collector works, but the hourly runs by themselves never appear, and the log shows smartctl: executable file not found in $PATH. Jobs in cron.d run with a minimal PATH that leaves out /usr/sbin, where smartctl lives. Make sure that /etc/cron.d/scrutiny starts with the line PATH=/usr/local/sbin:/usr/local/bin:/usr/sbin:/sbin:/usr/bin:/bin (see the command above). smartctl is missing completely? Install it on the host: apt install -y smartmontools.
A USB drive is missing from the dashboard, or it shows 'unsupported' with no S.M.A.R.T. data. USB-to-SATA bridges need their device type forced to sat. First check that it works: smartctl -d sat -a /dev/sdX on the host. (Replace sdX with the path from smartctl --scan.) Then add the drive to /opt/scrutiny/config/collector.yaml with type: 'sat' (see "When you add a drive later"). Run the collector again.
The collector on the host fails right after docker run with 'connection refused' or a 500 error. At the first boot, the InfluxDB that is bundled with the omnibus image takes about 20–30 seconds to start before the web API accepts data. Wait about half a minute after you start the container of the dashboard. Then run the collector again.
The container of the dashboard is killed again and again for memory, or it restarts by itself. The InfluxDB 2 that is bundled can use a lot of memory in a short time when it compacts. Raise the RAM of CT 125 to 2048 MB in 125 → Resources → Memory. Reboot the container.
67.7
A download step fails with Temporary failure resolving deb.debian.org, or with another "cannot resolve" message. The container has no working DNS server. It cannot change a name into an address. This is not a typing mistake. It does not fix itself. In the Proxmox page, select this container in the left tree. Open DNS. Select Edit. Type your router address in DNS servers (192.168.1.1 here; use your own). Then run pct reboot 125 in the host shell. Run the failed step again.
A command fails. You do not know if you are on the server or in the container. Read the prompt. In the container, it ends with the name of the container. On the server, it shows root@homelab. The prompt still shows root@homelab after pct enter? Then the command did not work. Type exit. Run the pct enter line again. Check the prompt before you paste anything else. You can paste a build block on the server by mistake. It seems to work. It installs without an error, and the app even answers. But the app is on the server, and it must not be there.
How to see that it happened, and how to undo it. The app does not open at the container address (192.168.1.246). It does open at the server address (192.168.1.220) on the same port. Then the app is on the host. To remove it, run docker rm -f scrutiny in the host shell. Then run pct enter 125. Check that the prompt changed. Paste the build block again. You lose nothing in the container, because nothing was built there. The first command can show Error: No such container. This is good. It means that the app was never on the host. Do not paste the build block again. Look for another cause.
The page does not open. The browser spins, or says it cannot connect. Do these checks in order, in the host shell. 1. Is the container running? Run pct status 125. It must say running. If it does not, run pct start 125. 2. Is the container at the address that you typed? Run pct config 125 | grep net0. It shows the real address. A wrong digit in the wizard puts the container at another address, and nothing warns you. 3. Does the app run in the container? Run pct enter 125. Then run docker ps. An empty list means that the app did not start. Run docker ps -a to see that it stopped. Run docker logs to see why. 4. Does the app answer in the container? Run curl -I http://localhost followed by the port of the app. You get a reply here, but nothing from your PC? Then the address or your own network is the problem. The app is fine. Your browser reaches 192.168.1.246 but not the port? Then the app is down. It reaches neither? Then the container is down.
Docker does not start, or you see Cannot connect to the Docker daemon, a keyring error, or an overlay error. This is the most common failure in these guides. It means that the two container features are off. A later pct set --features can switch them off, also when you set them before. Run this in the host shell, not in the container: pct set 125 --features nesting=1,keyctl=1. Then run pct reboot 125. Then run the failed step again. Type both settings on one line. If you send only one setting, it replaces the pair and switches the other one off.
REFERENCE CARD
Paste this in 125 → Summary → Notes. The key facts then stay with the container. Then add a monitor in Kuma on the URL of the dashboard (see Ch. 14 · Uptime Kuma). Attach your notification of ntfy (see Ch. 13 · ntfy). Add a tile in Homarr (see Ch. 18 · Homarr dashboard). Take a snapshot. Before you ever run the update line on this card, compare it with the docker run you actually used at install. The card is a snapshot of the standard build: if you added anything of your own — a device, an extra -e setting, a second folder — it is not on the card, and re-running the card's line drops it. The container comes back up looking healthy with your setting gone.
📋 Reference — paste into this container's Notes in Proxmox (not a shell command)
## Scrutiny — CT 125
dashboard http://192.168.1.246:8080 · docs https://github.com/AnalogJ/scrutiny
collector runs on the HOST, not in this CT
```sh
# is the dashboard running? (in CT 125)
docker ps --filter name=scrutiny
curl -fsS http://localhost:8080 >/dev/null && echo OK # quick health check
# logs (last 50)
docker logs scrutiny --tail 50
# stop / start / restart
docker stop scrutiny
docker start scrutiny
docker restart scrutiny
# is there an update? ("Image is up to date" = no)
docker pull ghcr.io/analogj/scrutiny:v0.9.5-omnibus
# update (config + history survive in /opt/scrutiny)
docker pull ghcr.io/analogj/scrutiny:v0.9.5-omnibus && docker rm -f scrutiny && docker run -d --name scrutiny --restart=unless-stopped -p 8080:8080 -v /opt/scrutiny/config:/opt/scrutiny/config -v /opt/scrutiny/influxdb:/opt/scrutiny/influxdb ghcr.io/analogj/scrutiny:v0.9.5-omnibus
```
```sh
# ON THE HOST — force a scan now / inspect the hourly job
/usr/local/bin/scrutiny-collector run --api-endpoint "http://192.168.1.246:8080"
cat /etc/cron.d/scrutiny
smartctl --scan # list the disks the collector sees
```
Part G · When you outgrow 500 GB
68Back up any folder, on a schedule
Pick any folder on your PC that you cannot afford to lose. restic copies it to the server every few hours. The copy is encrypted, versioned, and has no repeated data. You do no work after the setup.
In this chapter
Before you start
This chapter needs the items below. You came here directly? Do them first. Each item takes a short time. Nothing on this page works without them.
Proxmox is installed and works at https://192.168.1.220:8006. You can log in as root. See Ch. 6 · Install Proxmox. At your first visit, the browser shows a certificate warning. Select Advanced. Then select Proceed.
These commands run on your own PC, not on the server. Open a terminal on the computer that has the folder you want to back up. On macOS or Linux, use Terminal. On Windows, use PowerShell or a WSL shell. You type nothing on this page in the Proxmox web page.
You know your own network numbers. Where this chapter shows 192.168.1.x, use your own numbers. The rule is in Ch. 3 · How to read this manual.
The folder /srv/backups exists. It is registered in Proxmox as a storage named backups. You make it when you add a drive: Ch. 65 · Add an external drive for an external drive, Ch. 66 · Add an internal drive for an internal drive. Ch. 64 · Backups done right (3-2-1)uses this folder, but it does not make it. You added no drive yet? Then you must register the storage yourself first.
This chapter builds no container. Another chapter built each container that it mentions.
Notice — which computer this chapter is written for
The route with steps here is for a Linux PC. The backup tool itself, restic, runs just as well on Windows and Mac. Everything about the copy is the same on all three: encryption, versions, restore. What differs is the last part, to make it run by itself on a schedule. This chapter uses a Linux feature that is called a systemd timer.
So: on Windows or a Mac, you can follow this chapter. You end up with a backup that works and that you run by hand. This is really worth having. To make it automatic, you need the scheduler of your own system. It is Task Scheduler on Windows and launchd on a Mac. This manual does not teach either. That is a real gap. It is not an oversight. It is better that you know it now than after an hour of work.
This chapter protects a folder that lives on your PC, not on the server. It can be your documents, your notes, a library of photos, a code project, anything that cannot be replaced. It uses restic to send that folder to the server (192.168.1.220) over SSH on a schedule. The copy is encrypted (private, also on the disk of the server). It is versioned (each run is its own snapshot that you can restore). It has no repeated data (only the bytes that changed are stored, so months of snapshots use little space).
Notice — where these commands run
This chapter has no buttons. restic is a program that you install on your PC. It has no equivalent in Proxmox. It never touches the web page of Proxmox at all. Everything below runs in a terminal on your PC, where the folder lives. It does not run on the server. It does not run inside a container. The server is only the destination that receives the data. The two lines ssh root@192.168.1.220 … reach into the server to make the destination folder. They still start from your PC. restic in a terminal is not the only way to back up a folder. Tools with a GUI, such as Duplicati or the web page of Kopia, do the same job through buttons instead of typed commands. You give up a little control. This chapter teaches restic because it is the tool that the rest of the manual builds on.
Notice — this is a second, separate repository
Ch. 64 · Backups done right (3-2-1) makes a restic repository on the server itself, at /srv/backups/restic, with its own password file on the server. This chapter makes a different one for your PC, at /srv/backups/documents, with its own password file on your PC. They do not share anything. You lose the password of one? The other is not affected. Both live under /srv/backups. So the off-site copy of Ch. 69 · Off-site backup covers both.
68.1
ONE-TIME SETUP ON YOUR PC
Install restic. Give your PC a login over SSH to the server with no password. Make the encryption password. Then make the empty encrypted repository on the server.
Install restic with the package manager of your distribution.
Make an SSH key with no passphrase, but only if you do not have one already.
Copy that key to the server. The job that runs by itself then logs in with no password.
Make a random password for the repository. Lock its file down.
Check the free space on the server. Make the destination folder. Then set up the repository. Aim for at least 3× the current size of the folder. This leaves room for the history of snapshots.
Replace /home/youruser/Documents with the real folder that you want to protect. Replace youruser with your own Linux user name.
⌨ Type this on your PC
Before you run anything on this page: every 192.168.1.x address below is this manual's example network. If your own network uses different numbers, substitute yours as you type — the rule is in Ch. 3 · How to read this manual. A command that runs with the wrong address usually succeeds and leaves you unreachable.
sudo apt install -y restic # Debian/Ubuntu · Fedora: sudo dnf install restic · Arch: sudo pacman -S restic
[ -f ~/.ssh/id_ed25519 ] || ssh-keygen -t ed25519 -N '' -f ~/.ssh/id_ed25519 # make a passwordless SSH key ONLY if you have none (-N '' = empty passphrase, REQUIRED so the unattended job can log in)
ssh-copy-id root@192.168.1.220 # let your PC log into the server passwordless (type the server's root password once when asked)
mkdir -p ~/.config/restic
openssl rand -base64 24 > ~/.config/restic/backup.pass # the repository password
chmod 600 ~/.config/restic/backup.pass
ssh root@192.168.1.220 'df -h /srv' # how much free space is on the server SSD? this copy lives there for now
ssh root@192.168.1.220 'mkdir -p /srv/backups' # destination folder on the server
export RESTIC_PASSWORD_FILE=~/.config/restic/backup.pass
restic -r sftp:root@192.168.1.220:/srv/backups/documents init # create the encrypted repository
Notice — where /srv/backups lives, and where it goes later
The server has one SSD of 500 GB. So /srv/backups sits on that same SSD for now. That is fine for a folder of documents or notes. But a large library fills the SSD fast. You add a real drive later (Ch. 65 · Add an external drive, which covers how to mount a drive at /srv/backups)? Then to move this repository there takes three steps. Stop the timer (sudo systemctl stop folder-backup.timer). Copy the old folder /srv/backups onto the new drive at the same path. Then start the timer again. The path of the repository in the service file and the timer on your PC do not change. The line df -h /srv above tells you how much room you have until then.
Explanation of each part
sudo apt install -y restic
Installs restic, a backup tool that encrypts and removes repeated data in files. It does not ask for confirmation (-y). The comment shows the same for Fedora and Arch. Use the line that matches your Linux desktop.
An SSH key is a digital key. It lets one computer log in to another with no password. This makes a key only if you do not have one already. It uses no passphrase (-N ''). So the job on a schedule can use the key with no typing.
ssh-copy-id root@192.168.1.220
Copies your public SSH key to the server. Future SSH and backup connections then need no password. It asks for the root password of the server one time.
mkdir -p ~/.config/restic
Makes a folder for the configuration of restic. The flag -p also makes parent folders. It gives no error if the folder exists.
Makes 24 random bytes. Encodes them as text. Saves them as the encryption password. restic uses this password to protect each snapshot.
chmod 600 ~/.config/restic/backup.pass
Limits the password file so that only its owner can read or write it. No other user on the PC can see it.
ssh root@192.168.1.220 'df -h /srv'
Connects to the server. Shows the free space on the SSD that holds /srv. The backup lives here until you add a drive. So check that there is room for your folder plus its history.
ssh root@192.168.1.220 'mkdir -p /srv/backups'
Connects to the server. Makes the destination folder for the repository.
Makes a new, empty restic repository at that path on the server. The connection uses SFTP. This is secure transfer of files over SSH. documents is only the name of the subfolder for this repository. Use one repository for each folder that you back up.
Warning — this password is the only key
Save the password of the repository (~/.config/restic/backup.pass) in Ch. 22 · Vaultwarden right now. Without it, the encrypted backup is unrecoverable for good. There is no reset, no recovery, and no support line. Never edit or make that file again after init. Its exact bytes are the only key to your snapshots.
Notice — you use Windows, not Linux?
restic also runs natively on Windows. Install it (winget install restic.restic). Run the same commands restic -r sftp:… init and restic backup in PowerShell. Schedule them with Task Scheduler instead of a systemd timer. The repository, the encryption, and the steps to restore are the same. Only the way to "run it on a schedule" differs. The setup of Task Scheduler is outside this chapter. Follow the official guide of restic for scheduling on Windows at restic.readthedocs.io for the exact steps of Task Scheduler.
68.2
THE SCHEDULED JOB — A SYSTEMD TIMER
Make two files on your PC, where the folder lives. Do not make them on the server. The service file says what to run. The timer file says when. The first line of each block, which starts with #, is only a comment that names the file. Leave it in or remove it.
Open the service file in an editor with admin rights: sudo nano /etc/systemd/system/folder-backup.service. Any text editor works here, if it runs with admin rights. nano is only the one that this chapter uses.
Paste the service block. Set User=, the path of the password, and the folder to back up to your own values.
Save and exit. In nano, press Ctrl+O, Enter, then Ctrl+X.
Do the same for /etc/systemd/system/folder-backup.timer with the timer block.
⌨ Save as /etc/systemd/system/folder-backup.service on your PC
# /etc/systemd/system/folder-backup.service
[Unit]
Description=Back up a folder to the homelab server
[Service]
Type=oneshot
User=youruser
Environment=RESTIC_PASSWORD_FILE=/home/youruser/.config/restic/backup.pass
ExecStart=/usr/bin/restic -r sftp:root@192.168.1.220:/srv/backups/documents backup /home/youruser/Documents
ExecStartPost=/usr/bin/restic -r sftp:root@192.168.1.220:/srv/backups/documents forget --keep-last 5 --prune
Notice — the placeholder youruser
youruser is your own Linux user name on your PC. It is the name that you log in with, the folder under /home/. Replace all four places with it: the line User=, the two paths, and the source folder. The service must run as you, not as root. Your SSH key, your backup.pass, and the folder that you back up all live in your home directory. You are not sure of your user name? Run whoami.
Explanation of each part — the service file
/etc/systemd/system/folder-backup.service
A service file of systemd. It holds instructions that tell Linux how to run the backup as a task in the background.
[Unit] / Description=
A label that people can read. It shows in logs and in the output of the status.
[Service]
Defines how the task runs.
Type=oneshot
Tells systemd that the task runs one time and exits. It is not a service that stays running.
User=youruser
Runs the backup as your normal user, not as root. It can then read your SSH key, your password file, and your folder.
Sets the variable for the encryption password for restic. systemd does not take over variables that you exported in your shell. So the path is written out in full, under your own home directory.
Runs after each backup. --keep-last 5 keeps only the 5 newest snapshots. --prune then deletes the data that was discarded and frees the space. With one run every 5 hours, that is about a day of history. restic does not store repeated data. So files that did not change cost almost nothing. Raise the number for a longer history.
⌨ Save as /etc/systemd/system/folder-backup.timer on your PC
A timer file of systemd. It sets when the matching folder-backup.service runs.
[Unit] / Description=
A label for the timer that people can read.
[Timer]
Defines the schedule.
OnCalendar=*-*-* 00/5:00:00
Runs the job every 5 hours: at 00:00, 05:00, 10:00, 15:00, and 20:00. *-*-* means any year, month, or day. 00/5 means "start at hour 0, then every 5th hour". The last gap, from 20:00 to 00:00, is 4 hours, because 5 does not divide 24 evenly. Change this line for a different rhythm.
Persistent=true
The PC was off or asleep when a run was due? The backup that was missed then runs as soon as it turns on again. It is not skipped.
[Install] / WantedBy=timers.target
Tells systemd to start this timer by itself at startup, when you enable it.
68.3
ENABLE AND TEST
Load the new files. Switch the timer on. Then run one backup by hand. You then do not have to wait for the schedule to prove that it works.
⌨ Type this on your PC
sudo systemctl daemon-reload
sudo systemctl enable --now folder-backup.timer
systemctl list-timers folder-backup.timer # confirm the next run
sudo systemctl start folder-backup.service # TEST IT NOW: run one backup by hand instead of waiting for the timer
journalctl -u folder-backup.service -n 30 --no-pager # read the result: a healthy run ends with "processed … files"; a problem shows a line starting with "Fatal:"
Explanation of each part
sudo systemctl daemon-reload
Tells systemd to read its configuration on the disk again. It then picks up the new service file and timer file.
sudo systemctl enable --now folder-backup.timer
Turns the timer on for good. enable starts it at each boot. --now starts it at once.
systemctl list-timers folder-backup.timer
Shows when the timer last ran and when it is due next. Use it to confirm that the schedule is active.
sudo systemctl start folder-backup.service
Runs one backup by hand, right now. It proves that everything works before you trust the schedule.
Shows the last 30 lines of the log of the test run. A run that is healthy ends with a summary such as "processed N files". A failure shows a line that starts with "Fatal:".
68.4
RESTORE AND CHECK
A backup that you never restored is only a hope. List your snapshots. Then pull one back into a scratch folder. Check that the files really come out.
⌨ Type this on your PC
export RESTIC_PASSWORD_FILE=~/.config/restic/backup.pass
restic -r sftp:root@192.168.1.220:/srv/backups/documents snapshots # list every snapshot
restic -r sftp:root@192.168.1.220:/srv/backups/documents restore latest --target /tmp/restore-check # pull your files back into a scratch folder
systemctl status folder-backup.service # did the last scheduled run succeed?
Restores the files from the newest snapshot into /tmp/restore-check. Open a few of them to confirm that the backup is real. Then delete the folder.
systemctl status folder-backup.service
Shows if the last run on the schedule worked or failed. It shows recent lines of the log.
Notice — this is still one building
This copy lives on the server, in the same house as your PC. A fire, a theft, or a flood that reaches one reaches both. For real safety off-site, add a second copy in the cloud that is encrypted. See Ch. 69 · Off-site backup. It is the "1 off-site" of the rule 3-2-1 that the chapter on strategy (Ch. 64 · Backups done right (3-2-1)) set out at the start of this part.
68.5
WHEN IT GOES WRONG
ssh-copy-id root@192.168.1.220 prints "ERROR: No identities found". Or the job on the schedule never makes snapshots, and journalctl shows SSH that asks for a password or a passphrase. You have no SSH key without a passphrase that you can use. Make one. Copy it. Then prove that it logs in with no prompt: ssh-keygen -t ed25519 -N '' -f ~/.ssh/id_ed25519 && ssh-copy-id root@192.168.1.220 && sudo -u youruser ssh root@192.168.1.220 true. That last command must return without a request for a password. Run it as youruser, your own user name. This is the user that the backup service runs as.
The timer fires, but systemctl status folder-backup.service or journalctl shows "Host key verification failed". A fingerprint is how your PC checks that it really talks to your server and not to an impostor. The account youruser never confirmed it. So the job that runs by itself refuses to connect. It does not trust a stranger. Run the login one time, with you present, and type yes: sudo -u youruser ssh root@192.168.1.220 true. That stores the host key in /home/youruser/.ssh/known_hosts. Each later run connects in silence.
restic backup fails with "wrong password or no key found", although init worked earlier. The service reads a different password from the one that made the repository. Check that Environment=RESTIC_PASSWORD_FILE of the service points at exactly the same /home/youruser/.config/restic/backup.pass. Never make that file again or edit it after init. Its bytes are the only key. This is why you saved it in Ch. 22 · Vaultwarden. The file is lost? Then the repository cannot be recovered. You must start a new one.
restic refuses to run and shows "repository is already locked", after your PC rebooted or a run was cut off in the middle of a backup. An old lock was left behind. Check first. Run ps aux | grep restic on your PC. Nothing shows up? Then no run is active. It is safe to clear the lock and try again: restic -r sftp:root@192.168.1.220:/srv/backups/documents unlock. It stops and asks for the password of the repository. This is the random string that you saved earlier. Do not try to remember it. Open the file where you stored it and paste it. Or add --password-file /path/to/your/passfile to the command. It then reads the same file that the job on the schedule uses.
On a large backup, the job dies part of the way with "connection lost" or "unexpected EOF" over SFTP. This is common while restic scans a lot of data that did not change. The SSH server drops the connection that is idle. On your PC, add a keep-alive to ~/.ssh/config. (Make the file with nano ~/.ssh/config if it does not exist yet.) Add a line Host 192.168.1.220. Under it, indented, add ServerAliveInterval 60 and ServerAliveCountMax 240. The indentation only needs to be consistent (spaces or tabs, either is fine). It does not need an exact match. This is the fix that restic documents. Run the backup again.
Part G · When you outgrow 500 GB
69Off-site backup
Send an encrypted copy of your backups off-site with rclone. A fire, a theft, or a flood at home then cannot take your data with it.
This chapter needs the items below. You came here directly? Do them first. Each item takes a short time. Nothing on this page works without them.
Proxmox is installed and works at https://192.168.1.220:8006. You can log in as root. See Ch. 6 · Install Proxmox. At your first visit, the browser shows a certificate warning. Select Advanced. Then select Proceed.
You know where the host shell is. In the Proxmox page, select homelab in the left tree. Then select >_ Shell. You type each command of this page there, unless a step says otherwise. This is the server itself. It is not a container and it is not your own PC.
You know your own network numbers. Where this chapter shows 192.168.1.x, use your own numbers. The rule is in Ch. 3 · How to read this manual.
The folder /srv/backups exists. It is registered in Proxmox as a storage named backups. You make it when you add a drive: Ch. 65 · Add an external drive for an external drive, Ch. 66 · Add an internal drive for an internal drive. Ch. 64 · Backups done right (3-2-1)uses this folder, but it does not make it. You added no drive yet? Then you must register the storage yourself first.
This chapter builds no container. Another chapter built each container that it mentions.
Notice — this is the "one off-site" of a bigger plan
A single encrypted copy in one cloud is a big gain. But alone, it is not a full strategy for backups. The chapter on strategy at the start of this part explained it: Ch. 64 · Backups done right (3-2-1). The discipline is the rule 3-2-1: three copies, two kinds of media, one off-site. This chapter builds that "one off-site" leg.
69.1
INSTALL RCLONE AND CONNECT THE CLOUD (HEADLESS)
Everything in this chapter runs on the Proxmox host. This is the server homelab at 192.168.1.220. It does not run inside a container. This part has no buttons. You type commands in the Shell (homelab → >_ Shell). The host also has no web browser. So you authorise the cloud account from your PC and paste the result back. This is the standard headless setup of rclone.
On the server, install rclone with the command on the right.
Start the setup wizard by itself with rclone config. It is interactive. It asks questions and waits for your answers. Do not paste it together with the install line.
Answer n (new remote). Name it gdrive. For the type of storage, choose drive (Google Drive).
Leave client_id and client_secret blank. Press Enter for each.
For scope, choose 1, "Full access all files". Leave root_folder_id and service_account_file blank.
At "Edit advanced config?" answer n.
At "Use web browser to automatically authenticate?" answer n. This is the headless path. The server has no browser. rclone prints a line: rclone authorize "drive". Leave the wizard waiting. Run that line on your own PC, as the next step shows.
⌨ Type this on the Proxmox host (homelab)
Before you run anything on this page: every 192.168.1.x address below is this manual's example network. If your own network uses different numbers, substitute yours as you type — the rule is in Ch. 3 · How to read this manual. A command that runs with the wrong address usually succeeds and leaves you unreachable.
apt update && apt install -y rclone
Notice — the next command asks you questions
The install line above is the only thing that you paste here. The setup wizard is a separate command. It is interactive. It prints a question, waits, and reacts to what you type. Run it by itself.
⌨ Type this on the Proxmox host, by itself
rclone config
Finish the link from your PC. It has a browser:
Install rclone on your PC. This is a different machine from the server. So the line apt above does not apply here. Use the one for your own computer:
Windows: open Start → Terminal and run winget install Rclone.Rclone. Close that window and open a new one afterwards. It then picks up the new command.
Mac: you have Homebrew? Run brew install rclone in Terminal. You do not? Follow the steps for Mac on rclone.org/install.
Linux:sudo apt install -y rclone on Debian or Ubuntu. sudo dnf install -y rclone on Fedora.
Now run the exact line rclone authorize "drive" that the server printed. Copy it from the screen of the server, with the quotes, and paste it into the terminal of your PC.
A browser window opens. Sign in to Google. Grant access.
rclone prints a long block with a token. Copy all of it.
Paste that token back into the prompt on the server that is waiting.
At "Configure this as a Shared Drive (Team Drive)?" answer n. Then answer y to keep the remote.
⌨ Type this on your PC (it has a browser)
rclone authorize "drive"
# sign in to Google in the browser that opens,# then copy the whole token it prints and paste it# back into the server's prompt
Notice — match the versions of rclone
The two machines should run the same version of rclone. The command authorize on your PC makes a token that the server rejects? Run rclone version on both. Update the older one. On Debian and Ubuntu, the package of the distribution can be old. The current build is curl https://rclone.org/install.sh | sudo bash.
Explanation of each part
apt update && apt install -y rclone
Refreshes the list of packages. Then installs rclone. This is a tool for the command line. It syncs files to and from cloud storage as if the cloud were a local folder. The flag -y confirms by itself.
rclone config
Starts the wizard for setup that is interactive. You use it to add and authenticate a "remote". This is a connection to a cloud account that is saved.
scope: full access
Lets rclone read and write files that it makes in your Drive. This is the level that rclone needs to upload your backups and later restore them.
rclone authorize "drive"
You run it on a machine that has a browser. It does the sign-in to Google there. It prints a token that you paste into the server that has no screen. So the server never needs a browser of its own.
69.2
ADD ENCRYPTION SO THE CLOUD CANNOT READ YOUR BACKUPS
There are still no buttons here. Stay in the Shell on homelab. The remote gdrive that you just made talks to the cloud in the clear. Wrap it in a crypt remote. Each file is then encrypted on the server before it leaves. rclone points crypt at a folder inside gdrive. It encrypts both the content of the files and their names.
Start the wizard again. Answer n. Name this one gdrive-crypt. For the type of storage, choose crypt.
For remote, enter gdrive:proxmox-backup. This is the folder inside Drive that holds the encrypted data.
For filename_encryption, choose standard. For directory_name_encryption, choose true.
At the prompt for the password, choose g to make a strong one (or y to type your own). At the prompt for the salt (password2), choose g to make one.
Confirm with y.
⌨ Type this on the Proxmox host (homelab)
# n (new) → name: gdrive-crypt → storage: crypt# remote: gdrive:proxmox-backup (folder to encrypt into)# filename_encryption: standard# directory_name_encryption: true# password: g (generate) → salt/password2: g (generate) → y
Warning — this password is the only key
The encryption happens on the server. So the crypt password and the salt are the only way to decrypt the copy that is off-site. Save them now in your password manager. Ch. 22 · Vaultwarden is the one that this manual builds. You lose them? Then the copy in the cloud is unreadable for good, also for you. The provider of the cloud only ever sees data that is scrambled. This is the whole point.
Explanation of each part
storage: crypt
A remote that wraps another. It does not talk to a cloud directly. It encrypts. Then it hands the data to another remote (here, gdrive).
remote: gdrive:proxmox-backup
Tells crypt where to put the encrypted files: the folder proxmox-backup inside your remote gdrive.
filename_encryption: standard
Encrypts the file names too, not only the content. So the cloud cannot even see what your files are called.
salt (password2)
A second secret that is mixed into the encryption. A random one makes it stronger. You must save it next to the password.
69.3
TEST IT, THEN AUTOMATE A NIGHTLY RUN
First, check where your dumps really are. The backup job in Ch. 20 · Backups before apps writes to the storage named local. That storage keeps its files in /var/lib/vz/dump. It does not keep them in /srv/backups. /srv/backups holds dumps only if you registered that storage yourself (see Ch. 64 · Backups done right (3-2-1) and Ch. 65 · Add an external drive) and pointed the job at it. Run ls /var/lib/vz/dump and ls /srv/backups on the host. BOTH print nothing? Stop. You have no backups yet. There is nothing for this chapter to send off-site. That is the normal state if you did not do Ch. 20 · Backups before apps. Go and build the backup job there. Let it run one time. (Or run vzdump --all --mode snapshot --storage local by hand to make one now.) Then come back. To sync an empty folder is the failure that this whole chapter exists to prevent. rclone reports success while it does it. One of the two listings shows .tar.zst files? Then use that path. Each /srv/backups below means "whichever of those two is yours". Push it up one time by hand to confirm that it works. Then let a systemd timer run it each night after the dump finishes.
Run the test sync. rclone uploads each file in /srv/backups, encrypted. It prints a live progress bar.
That works? Make the files .service and .timer with the block on the right. The timer fires each night at 04:00. This is well clear of any vzdump run. It does not matter if you kept the job each week on Sunday at 03:00 from Ch. 64 · Backups done right (3-2-1), or if you built a job each night for a backup target in Ch. 65 · Add an external drive.
Load systemd again. Enable the timer.
Check that it is scheduled: systemctl list-timers gdrive-backup.timer.
Then prove that it really runs. Scheduled is not the same as working. Do not wait for 04:00 to find out. Start the job by hand one time: systemctl start gdrive-backup.service. Then read what it did: journalctl -u gdrive-backup.service -n 30 --no-pager. You want to see rclone that transfers files. You want the unit to end in code=exited, status=0/SUCCESS. A status that is not zero, or directory not found, means that the path inside the service file is not the path that you used in the test by hand above. Fix the line ExecStart to match. Start it again. The timer only decides when the service runs. The service is broken? Then the timer fires it and it fails each night, and nothing tells you.
⌨ Type this on the Proxmox host (homelab)
# test: push the backup folder up, encrypted
rclone sync /srv/backups gdrive-crypt: --progress --fast-list
# automate: run every night at 04:00 — clear of any vzdump job, weekly or nightly
cat > /etc/systemd/system/gdrive-backup.service <<'EOF'
[Service]
Type=oneshot
ExecStart=/usr/bin/rclone sync /srv/backups gdrive-crypt: --fast-list --transfers 4 --retries 3 --max-delete 20
EOF
cat > /etc/systemd/system/gdrive-backup.timer <<'EOF'
[Timer]
OnCalendar=*-*-* 04:00:00
Persistent=true
[Install]
WantedBy=timers.target
EOF
systemctl daemon-reload && systemctl enable --now gdrive-backup.timer
Notice — --max-delete 20 protects the copy in the cloud
rclone sync deletes files in the cloud that are no longer in /srv/backups. Suppose the backup drive is unplugged one night, and /srv/backups is empty. Without a limit, the sync would delete your whole copy in the cloud to match the empty folder. --max-delete 20 stops it after 20 deletes in one run. The run then fails with an error. It does not wipe the copy. You really delete many old backups on purpose? Then raise the number for one run by hand.
Notice — timer times are the local time of the server
OnCalendar uses the own clock of the server. 04:00 lands at the wrong hour? Then your timezone is off. Check it with timedatectl. List the options with timedatectl list-timezones.
Notice — why sync, and a timer
rclone sync makes the cloud a mirror of /srv/backups. It uploads new backups. It removes old ones that you already deleted locally. So the copy in the cloud always matches what is on the server. Persistent=true runs the job that was missed if the server was off at 04:00. The shared app of rclone for Google has a low limit on the rate. Uploads crawl or return 403? Then there is an optional fix for advanced users. Most readers can skip it. Make your own client_id for the Google Drive API (the docs of rclone walk through it). Enter it in the config of the remote.
Explanation of each part
rclone sync /srv/backups gdrive-crypt:
Makes the remote gdrive-crypt match /srv/backups exactly. It uploads files that are new or changed. It removes remote files that no longer exist locally.
--progress
Shows a live progress bar while the sync runs.
--fast-list
Lists the remote files in fewer, larger calls to the API instead of many small ones. It is faster for big folders. It uses more memory.
cat > …/gdrive-backup.service <<'EOF' … EOF
Writes a "service" file of systemd. This is a task that the system can run. The command uses the text between the two markers EOF.
Type=oneshot
The service runs one command and then exits. It does not stay running in the background.
The command that the service runs: sync the backup folder. Upload 4 files at once. Try a failed file again up to 3 times. Stop if a run would delete more than 20 files.
OnCalendar=*-*-* 04:00:00
Sets the timer to fire each day at 04:00.
Persistent=true
The server was off or asleep at the time that was set? Then it runs the job that was missed as soon as it comes back.
WantedBy=timers.target
Registers the timer to start by itself at boot, with the other tasks on a schedule.
systemctl daemon-reload
Tells systemd to read its files again. It then notices the new service and timer.
systemctl enable --now gdrive-backup.timer
Turns the timer on at once (--now). Sets it to start at each future boot (enable).
69.4
RESTORE TEST — DO IT ONE TIME, NOW
A backup that you never restored is a guess, not a backup. Pull one file back down. Check that it opens. rclone decrypts on the way in. So the names show in plain text.
⌨ Type this on the Proxmox host (homelab)
rclone ls gdrive-crypt: | head # see your dumps (names shown decrypted)
rclone copy gdrive-crypt:PASTE-A-PATH-FROM-THE-LINE-ABOVE /tmp/restore-test/
Notice — copy the path exactly as rclone ls printed it
Do not type dump/ from memory. Where the file sits depends on which folder you synced. You synced /srv/backups? Then you see paths such as dump/vzdump-lxc-104-….tar.zst. You synced /var/lib/vz/dump? Then the archives sit at the top with no folder in front. rclone ls prints the real path in both cases. Copy that. A path that you guess returns directory not found. It makes a backup that works look broken.
# then confirm the copied file opens:
ls -lh /tmp/restore-test/ && tar -tf /tmp/restore-test/*.tar.zst | head
Explanation of each part
rclone ls gdrive-crypt:
Lists each file in the remote that is encrypted, with sizes. You read through the crypt remote. So the names appear decrypted.
| head
Shows only the first 10 lines. A long list then does not fill the screen.
rclone copy gdrive-crypt:<path from 'rclone ls'> /tmp/restore-test/
Downloads one backup file into a local folder for tests. Open it to check that a restore really works.
69.5
PART B — BACK UP THE DATA THAT VZDUMP MISSES
Notice — skip this Part if you built Layer 2 already
You built Layer 2 of Ch. 64 · Backups done right (3-2-1)? Then its restic repository lives at /srv/backups/restic. This is inside the very folder that Part A above syncs off-site. Your photos and files are covered already. Part B below would only set up a second, separate repository in the cloud for the same data. It exists for readers who skipped Layer 2 and want data that cannot be replaced off-site, without a second drive. Layer 2 runs already? Then you are done. Move on to Ch. 65 · Add an external drive or Ch. 66 · Add an internal drive.
This part has no buttons either. Stay in the Shell on homelab. vzdump backs up the system and the configuration of each container. But it skips bind-mounts. These are folders such as /srv/media that a container only borrows from the host. It does not store them inside itself. Your files that cannot be replaced on that shared path /srv/media are not in the sync above. These are the photos of Ch. 52 · Immich and the files of Ch. 53 · Nextcloud. Back that data up separately with restic. It keeps several days of past copies. It uploads only what changed. It goes straight to the same cloud through rclone. (The scanned documents of Paperless-ngx are not on this list. They live on the own container disk of Ch. 30 · Paperless-ngx. They are not on /srv/media. So vzdump already carries them in Part A above. No extra step is needed.)
Install restic. Make a password for the repository into a file that only root can read, /root/.restic-pass-cloud. It is a different file and a different key from the local restic repository in Ch. 64 · Backups done right (3-2-1). Do not reuse /root/.restic-pass-local. That is the password of the local repo of Layer 2. Use this new path, /root/.restic-pass-cloud. If you overwrite the other file, the nightly local backup of Layer 2 is orphaned.
Save that password in your password manager. Like the crypt password, it is the only way to restore.
Set up the repository. It rides on the plain remote gdrive (restic does its own encryption on top).
Back up only the folders that you cannot download again.
⌨ Type this on the Proxmox host (homelab)
apt update && apt install -y restic
printf '%s' "$(openssl rand -base64 24)" > /root/.restic-pass-cloud && chmod 600 /root/.restic-pass-cloud
# SAVE it: cat /root/.restic-pass-cloud → store in your password manager
restic -r rclone:gdrive:proxmox-restic -p /root/.restic-pass-cloud init
# back up only what you cannot re-download:
ls -d /srv/media/*/ # FIRST: see which folders you actually have
restic -r rclone:gdrive:proxmox-restic -p /root/.restic-pass-cloud backup /srv/media/photos /srv/media/files
Notice — back up only the folders that you have
/srv/media/photos exists only if you built Ch. 52 · Immich. /srv/media/files exists only if you built Ch. 53 · Nextcloud. Both are optional chapters. Run the line ls first. Delete from the restic command each folder that it does not list. restic prints no such file or directory for a path that is missing. Each path is missing? Then it saves no snapshot at all, and it still exits. Put your own folders in instead: any path under /srv/media that holds data that you would miss.
Warning — save the restic password too
The restic repository is encrypted with the password in /root/.restic-pass-cloud. The SSD of the server dies, and you never copied that password out? Then the restic copy off-site cannot be recovered. Store it in Ch. 22 · Vaultwarden the moment that you make it.
Explanation of each part
apt update && apt install -y restic
Refreshes the list of packages. Then installs restic, a backup tool that encrypts files and removes repeated data before it stores them.
openssl rand -base64 24
Makes 24 random bytes of cryptographic data. Encodes them as text. This is a strong random password.
printf '%s' "$(…)" > /root/.restic-pass-cloud
Writes that password into a file with no newline at the end. restic reads this file as the password of the repository.
chmod 600 /root/.restic-pass-cloud
Limits the file so that only root can read it.
restic -r rclone:gdrive:proxmox-restic -p … init
Makes a new empty repository that is encrypted in the folder proxmox-restic in the cloud. It is reached through rclone. -r sets the repository. -p points to the file with the password.
Encrypts and uploads those folders. In later runs it sends only what changed since the last backup.
69.6
TRIM OLD SNAPSHOTS, THEN AUTOMATE
Run the command to trim one time by hand. Watch it work. Then put the backup and the trim on their own timer each night at 04:30. This is half an hour after the sync of rclone. So the two jobs never fight for the bandwidth of the upload.
Keeps one snapshot for each day for 7 days, one for each week for 4 weeks, and one for each month for 6 months.
--prune
After it forgets snapshots, it deletes the data that is now unused and that they referred to. This frees storage.
two ExecStart= lines
A oneshot service runs each ExecStart in order: back up first, then trim. This is one job each night.
OnCalendar=*-*-* 04:30:00
Runs each day at 04:30, 30 minutes after the sync of rclone. The two then do not upload at once.
69.7
WHAT IS AND IS NOT BACKED UP
Off-site coverage after both parts
Data
How
Off-site?
Systems of containers and small databases (Vaultwarden, the *arr apps, AdGuard, the database of Immich, the documents of Paperless, and the rest)
vzdump → rclone (Part A)
✅ yes
Photos and files on the shared bind-mount (Immich, Nextcloud, at /srv/media)
restic (Part B)
✅ yes
Movies, TV, ROMs, LanCache, game files
—
❌ no. You can download these again. So they do not justify the space or the time to upload.
Notice — the point
Part A covers your containers. Part B covers your data that cannot be replaced. Together they are a complete copy off-site of everything that you could not simply get again from the internet. This is the off-site leg of the strategy 3-2-1 that the chapter on strategy (Ch. 64 · Backups done right (3-2-1)) set out at the start of this part. With a local vzdump and the layers of restic in place, the plan is now complete.
69.8
WHEN IT GOES WRONG
rclone: command not found. You are on the wrong machine. Each command here runs on the Proxmox host (192.168.1.220), not inside a container. Install rclone there: apt install -y rclone.
The sign-in to Google fails, or the config says "could not fetch token". The server that has no screen has no browser. Run the line rclone authorize "drive" that it printed on your PC. Sign in there. Paste the token back. The token is still rejected? Then the two versions of rclone differ. Run rclone version on both. Update the older one.
Uploads crawl or hit limits on the rate with 403. The shared app of rclone for Google is slowed. Make your own client_id for the Google Drive API (the Drive docs of rclone walk through it). Enter it in the config of the remote with rclone config → edit gdrive.
The nightly sync stops with an error about too many deletes. This is --max-delete 20 that does its job. Check ls /srv/backups first. It is empty? Then the backup drive is not mounted. Mount it (mount -a). Do not run the sync until the files are there again. You really removed many old backups? Then run the sync once by hand with a higher number, for example --max-delete 200.
The restore says "wrong password" or cannot decrypt. The crypt password (Part A) or the restic password (Part B) is the only key. Use the exact value that you saved in Ch. 22 · Vaultwarden. Without it, recovery is not possible. This is by design.
The timer for the nightly run never runs. Check that it is scheduled: systemctl list-timers 'gdrive-backup.timer' and systemctl status gdrive-backup.timer must show it as enabled and active. Always type the full path -r rclone:gdrive:proxmox-restic in each restic command. Do not shorten it, even if it worked one time without it.
restic reports "repository is already locked". A run before was cut off. Confirm that nothing runs (systemctl status restic-backup.service). Then clear the old lock: restic -r rclone:gdrive:proxmox-restic -p /root/.restic-pass-cloud unlock.
69.9
REFERENCE CARD
Paste this in the Notes of the node homelab in Proxmox (homelab → Notes, its own tab, not inside Summary). It is a note for you in the future. It is not a shell command. The backups here are systemd timers on the host. They are not a container.
📋 Reference — paste into the homelab node's Notes in Proxmox (not a shell command)
## Off-site backup — host (rclone + restic, systemd timers)
docs https://rclone.org/drive/ · https://rclone.org/crypt/ · https://restic.readthedocs.io
```sh
# --- are the timers scheduled? ---
systemctl list-timers 'gdrive-backup.timer' 'restic-backup.timer'
systemctl status gdrive-backup.timer restic-backup.timer
# --- run a backup NOW (don't wait for the timer) ---
systemctl start gdrive-backup.service # containers → cloud (encrypted)
systemctl start restic-backup.service # /srv/media data → cloud
# --- watch the last run's log ---
journalctl -u gdrive-backup.service -n 50 --no-pager
journalctl -u restic-backup.service -n 50 --no-pager
# --- what's off-site? ---
rclone ls gdrive-crypt: | head # vzdump copy (names decrypted)
restic -r rclone:gdrive:proxmox-restic -p /root/.restic-pass-cloud snapshots
# --- RESTORE a file ---
rclone copy gdrive-crypt:<path from 'rclone ls'> /tmp/restore-test/
restic -r rclone:gdrive:proxmox-restic -p /root/.restic-pass-cloud restore latest --target /tmp/restore --include /srv/media/photos
# --- if restic says "already locked" after an interrupted run ---
restic -r rclone:gdrive:proxmox-restic -p /root/.restic-pass-cloud unlock
# KEYS live in your password manager (Vaultwarden): the rclone crypt password+salt
# AND /root/.restic-pass-cloud. Lose them and the off-site copy is unreadable.
# This is the "1 off-site" of the 3-2-1 strategy from the strategy chapter.
```
Part H · Ops & troubleshooting
70When it breaks: troubleshooting
Nearly every problem in a homelab traces back to a short list of causes. Work down this page from the top.
This chapter needs the items below. You came here directly? Do them first. Each item takes a short time. Nothing on this page works without them.
Proxmox is installed and works at https://192.168.1.220:8006. You can log in as root. See Ch. 6 · Install Proxmox. At your first visit, the browser shows a certificate warning. Select Advanced. Then select Proceed.
You know where the host shell is. In the Proxmox page, select homelab in the left tree. Then select >_ Shell. You type each command of this page there, unless a step says otherwise. This is the server itself. It is not a container and it is not your own PC.
You know your own network numbers. Where this chapter shows 192.168.1.x, use your own numbers. The rule is in Ch. 3 · How to read this manual.
The folder /srv/backups exists. It is registered in Proxmox as a storage named backups. You make it when you add a drive: Ch. 65 · Add an external drive for an external drive, Ch. 66 · Add an internal drive for an internal drive. Ch. 64 · Backups done right (3-2-1)uses this folder, but it does not make it. You added no drive yet? Then you must register the storage yourself first.
This chapter builds no container. Another chapter built each container that it mentions.
This opens Part H. The part opens with the two habits that every homelab needs. One is this page for troubleshooting, for when something breaks. The other is the monthly routine of maintenance (Ch. 71 · Monthly maintenance) that keeps it from breaking. A short third chapter, update notifications (Ch. 72 · Update notifications), is the piece of infrastructure that makes that monthly routine take minutes, not an afternoon. Build it early. Everything after those is optional tools for operations. You can add them in any order, or skip them.
70.1
FIRST AID — ANY CONTAINER
First, connect to the machine that runs the broken app. These commands need Docker. Docker runs inside the container (CT) of each app. It does not run on the Proxmox host (the server, 192.168.1.220).
Open a shell inside the container of the broken app. From the host, homelab → >_ Shell, run pct enter <CTID>. Or connect with SSH straight in: ssh root@<the own IP of that container> (for example 192.168.1.223). That second route asks for no password. The Create CT wizard installed your SSH key when you built the container. That key is the login (Ch. 9 · SSH & the terminal). Skip the own button >_ Console of the container. It opens a login: prompt that wants a password. The containers of this manual were built with the field for the password left empty. So nothing that you type there can ever get in. Nothing is broken. pct enter is simply the way in.
The >_ Console button of the CT opens a login: prompt, not a shell. Use pct enter <CTID> from homelab → >_ Shell.
This part has no buttons. Type the five first-aid commands in that shell. Read what they tell you.
Then open a shell on the Proxmox host itself. Click homelab in the tree. Then click >_ Shell.
The node homelab is selected. Shell is below Notes in the left menu.
Type df -h and free -h there too. The host can run out of disk or memory just as a container can. Note that free -h shows the RAM right now, not last night. A process that the kernel killed at 03:00 gave back its memory hours ago. So it reads as healthy after the very failure that you chase. To see if the out-of-memory killer struck, ask the log of the kernel instead: dmesg -T | grep -i -E "killed process|out of memory". A line there names the process and the time.
⌨ Type this inside the app's container
Before you run anything on this page: every 192.168.1.x address below is this manual's example network. If your own network uses different numbers, substitute yours as you type — the rule is in Ch. 3 · How to read this manual. A command that runs with the wrong address usually succeeds and leaves you unreachable.
docker ps -a # is it running? (Exited = it crashed)docker logs NAME --tail 50 # WHY it stopped — read the last linesdocker restart NAME # the "turn it off and on again"
df -h # disk full? (a common silent killer)
free -h # out of RAM? (the OOM killer strikes at night)
Explanation of each part
docker ps -a
Lists each Docker container, the small isolated app packages that Docker runs. It includes the stopped ones. The flag -a means all containers, not only the ones that run.
docker logs NAME --tail 50
Shows the recent output and log messages of a container. A crash usually explains itself there. The flag --tail 50 limits it to the last 50 lines. Replace NAME with the name of the container from docker ps -a.
docker restart NAME
Stops and starts one container again. This clears most apps that are stuck or crashed. Replace NAME with the name of the container.
df -h
Shows the free and used space on each mounted disk in sizes that are easy to read, such as GB. Use it to check if the disk filled up.
free -h
Shows how much RAM is used, free, and cached, in sizes that are easy to read. Use it to check if the machine ran out of memory.
70.2
COMMON PROBLEMS AND CAUSES
Match the symptom. Apply the fix. Most rows are a change of one line.
Common problems and causes
Symptom
Likely cause and fix
No internet inside a new CT
A blank DNS field makes the container copy the own DNS setting of the host. It may point somewhere that the container cannot reach. Fix it in the Proxmox web page. Select the container in the left tree. Open its tab DNS. Click Edit. Type 192.168.1.1 (your router) in DNS servers. Leave DNS domain empty. Then restart the container, so that it picks up the change: pct reboot <CTID> on the host. AdGuard runs? Then you can use 192.168.1.223 there instead. Ch. 10 · The container wizard shows those same two fields. Ch. 16 · AdGuard Home covers this.
command not found: nslookup, curl, unzip…
A new Debian CT is minimal. The tool is simply not installed yet. Install it. Then run the command again: apt install -y curl for curl, apt install -y dnsutils for nslookup, apt install -y unzip for unzip. Each install guide in this manual installs curl next to Docker for exactly this reason.
"permission denied" when it writes to /data
Ownership. Each file on Linux has a number that says which user owns it. These containers are built unprivileged. This means that Proxmox shifts those numbers by 100000 on purpose. The users of a container are then nobodies on the host. The user 1000 inside the container is stored as 101000 outside it. The shared folder lives on the host at /srv/media. It is plugged into the CT as /data. If that folder still has the number that is not shifted, the app is not its owner and cannot write. On the host (.220), run chown -R 101000:101000 /srv/media/{torrents,movies,tv,music,books}. chown changes the owner. -R means the folder and everything inside it. You list the subfolders of the media stack, not the whole tree. This matters if you also run Immich. Its subfolder /srv/media/photos must stay owned by 100000, not 101000. So never apply this to /srv/media as a whole when photos exists. This one really is a command that you type. A file explorer or an SFTP connection cannot stamp a whole tree of folders with a raw number for the owner. The change must happen on the host, not inside the container. Ch. 40 · Shared storage first explains the shared folder.
Port already in use — it will not bind :53 or :80
Something else already holds the port. For AdGuard, that something has a name. Debian ships a small DNS helper that is built in, systemd-resolved. It sits on port 53 (at the address 127.0.0.53) before AdGuard ever starts. Turn it off inside the own CT of AdGuard. Run systemctl disable --now systemd-resolved to stop it and to keep it stopped after a reboot. Then run rm -f /etc/resolv.conf and echo "nameserver 192.168.1.1" > /etc/resolv.conf. This points the own lookups of names of that container at the router. Then delete the AdGuard container and run it again. Ch. 16 · AdGuard Home walks through it in its section "When it goes wrong", with the full command on one line. For any other app, the cure is different. Give the container a spare port on that CT instead. For example, -p 8081:80 in place of -p 80:80.
A bind-mount looks empty inside the CT
A mount that you added with pct set is not active until the container restarts. Reboot it: pct reboot <CTID> on the host.
The web page is unreachable
Check the IP and the port. Check that the container runs (docker ps). Then knock on the door of the app from the Proxmox host itself. Open homelab → >_ Shell and run curl -I http://ADDRESS:PORT. Fill in the own address and port of the app from its chapter. curl fetches a web page. -I asks for only the first lines of the reply. A reply means that the app is up. The trouble is then between your PC and the server. "Connection refused" or a long timeout means that the app itself is the problem. Go and read its logs.
A compose app will not install
Docker Compose is missing. Install the own package of Debian: apt install -y docker-compose. On Debian 13, this is Compose v2. So both docker compose (with a space) and docker-compose (with a hyphen) work. Check with docker compose version. It must print v2.x. Do not install docker-compose‑plugin. That package name exists only in the own repository of Docker Inc. It is not in Debian. So apt cannot find it here, and the install fails with the error 'package not found'.
A database app is corrupted after a crash
Almost always memory. A machine runs out of RAM? Then Linux saves itself. It picks a program and kills it at once. This mechanism has the nickname OOM killer (out-of-memory killer). A database that is cut down in the middle of a write is exactly how its file ends up damaged. Restore the container from a backup (Ch. 64 · Backups done right (3-2-1)). Then stop promising the containers more memory in total than the machine really has. Set honest limits. Watch the numbers in Ch. 15 · Beszel.
Notice — the two containers that take the house with them
An ordinary app goes down? Only that app is affected. Two are different. AdGuard (Ch. 16 · AdGuard Home) answers DNS for the whole network. LanCache (Ch. 61 · LanCache) sits in the path of game downloads. The internet "stops working" for everyone at once? Check those two first. Get the house back online while you fix it. Point DNS back at the router (192.168.1.1). The quick way is one change, not many. Open the admin page of your router. Find where you set DNS to the address of AdGuard. Put 192.168.1.1 or 1.1.1.1 back. Each device follows within a few minutes. Or right away, if you turn its Wi-Fi off and on. The router is out of reach? Then do it for each device. The setting lives inside the details of the Wi-Fi network itself (Android: Wi-Fi → the network → Advanced → IP settings → Static. iPhone: Wi-Fi → ⓘ → Configure DNS → Manual. Windows and Mac: the IPv4 and DNS settings of the network adapter). Set it back to automatic when AdGuard answers again.
70.3
RESTORE A CONTAINER FROM A BACKUP
A container is broken beyond a restart? Roll it back to a copy that works. This assumes that you have a backup target. You add a drive and schedule the job in Part G. Ch. 64 · Backups done right (3-2-1) sets it up properly.
Go to Datacenter → Storage → your backup storage → Backups.
Select the backup that you want, by date.
Click Restore. Type a container ID. You are not sure? Use a spare ID such as 999 first. The original is then left alone until you know that the backup is good.
Check that test copy before you trust it. Start CT 999. Open homelab → >_ Shell. Run pct enter 999. Then run docker ps -a to see that the container of the app came back. Run ls inside its data folder to see that your files are there. The copy carries the settings of the original, including its network address. So start it only while the original is stopped. If not, two machines claim one address. It looks right? Then delete the test copy and restore over the real container.
Notice — locked out of SSH by fail2ban?
Wrong logins that repeat got your own PC banned? Clear it from the host >_ Shell: fail2ban-client set sshd unbanip YOUR-IP. Ch. 73 · fail2ban covers the list of bans.
Datacenter → Storage → your backup storage → Backups, with a backup row selected and Restore open.
You prefer the terminal? — the same restore with one command
⌨ Type this on the Proxmox host (homelab)
ls -lht /var/lib/vz/dump && ls -lht /srv/backups/dump 2>/dev/null # whichever exists: the default job of Part C writes to "local" = /var/lib/vz/dump; a job pointed at the "backups" storage writes to /srv/backups/dumppct stop ID
pct restore ID /srv/backups/dump/vzdump-lxc-ID-DATE.tar.zst --storage local-lvm --force
# safer: restore to scratch id 999 to test without touching the originalpct restore 999 /srv/backups/dump/vzdump-lxc-ID-DATE.tar.zst --storage local-lvm
Explanation of each part
ls -lht /var/lib/vz/dump · ls -lht /srv/backups/dump
Lists the backup files with permissions, size, and date, the newest first. Use it to find the archive that you want to restore. The name of the file carries the ID of the container and the date. Use the path of the folder that exists. If the archive is in /var/lib/vz/dump, put that path in the restore command.
pct stop ID
Stops the Proxmox container so that the restore can overwrite it safely. Replace ID with the number of the container.
pct restore ID …tar.zst --storage local-lvm --force
Restores a container from an archive of a backup onto the same container ID. vzdump is the backup tool of Proxmox. tar.zst is its archive that is compressed. --storage local-lvm picks where the disk lands. --force overwrites the container that exists. It does not refuse.
pct restore 999 …tar.zst --storage local-lvm
The same restore, but into a new scratch container with the number 999. It does not overwrite the original. This lets you inspect the backup before you delete anything that is live.
70.4
FREQUENTLY ASKED QUESTIONS
Check that the backup really ran. Do not look at the Backup grid for this. It shows the schedule of the job. It does not show its result. Look for the archive itself: run ls -lht on your folder of dumps. It is /var/lib/vz/dump for the job of Part C that writes to local. It is /srv/backups/dump for a job that you pointed at the storage backups. The date of the newest file is the last time that a backup really finished.
Datacenter → Backup — the list of jobs with schedule, next run, storage, and retention.
FAQ
Question
Answer
A container is down. Is the whole house affected?
Only AdGuard (DNS) and LanCache touch the whole network. For each other app, only that one app is down. docker restart fixes most cases.
Did the backup of last night run?
Look at the date of the newest archive, as the paragraph above says. (You set the job up in Ch. 20 · Backups before apps and Ch. 64 · Backups done right (3-2-1).) A job that failed shows TASK ERROR only in the list of tasks of Proxmox. It sends no alert.
How do I update one app safely?
Inside the CT of that app (pct enter <CTID>, or SSH to its IP), three commands in this order. docker pull IMAGE downloads the newer copy of the image of the app. This is the template that cannot be changed, which a container is built from. docker rm -f NAME then removes the container that runs. -f only means "do not ask, remove it although it runs". It does not touch the folders where your data lives. Last, run the original docker run command of that app again, with no change. It builds a fresh container from the new image. It plugs the same folders in again. So your settings and your library come straight back. Where do you find that original command? It is printed in the own chapter of the app. Most chapters end with a reference card. You paste it into the field Notes of that container in Proxmox. The card carries the full line to update the app, ready to copy. The same move of delete and make again, in five numbered steps, is in Ch. 12 · After every build + common Proxmox tasks, section “Change a setting on a Docker app”. For a risky update, take a snapshot first. That chapter covers snapshots too.
Everything feels slow, or services flap at random.
Check the RAM with free -h. Compare it with what your machine really has. 16 GB is the comfortable amount that this manual recommends. But 8 GB works too if you run fewer apps at one time. Do not run each heavy app at once. Watch the numbers in Ch. 15 · Beszel. Give memory to what needs it.
Can I move a service to another drive or CT later?
Yes. It is less frightening than it sounds. The data of the app is not inside the container. It sits in real folders on the disk. The lines -v of its docker run command plug them into the app. Back those folders up first (Ch. 64 · Backups done right (3-2-1)). Copy them to the new place. Then delete the container of the app. Make it again with the paths -v changed to match. The exact five steps are in Ch. 12 · After every build + common Proxmox tasks, section “Change a setting on a Docker app”. To delete the container does not touch the folders. To move bulk data onto a real drive is Part G: Ch. 65 · Add an external drive and Ch. 66 · Add an internal drive.
70.5
REFERENCE CARD
The first-aid drill on one card. Click homelab in the Proxmox tree. Then click Notes. Click Edit. Paste this in. The commands are then one click away when something breaks. Run the lines docker inside the CT of the broken app. Run the line pct on the host.
Example — the tab Notes of Proxmox in Edit mode, with a reference card pasted into it. This is the same picture wherever the manual shows this step. The card that you paste is the one from your own chapter. It is not the one shown here.📋 Reference — paste into the node's Notes in Proxmox (not a shell command)
## First aid — node homelab
dashboard https://192.168.1.220:8006 · docs https://pve.proxmox.com/pve-docs/
```sh
# inside the broken app's CT (pct enter <CTID>)
docker ps -a # is it running? Exited = crashed
docker logs NAME --tail 50 # WHY it stopped
docker restart NAME # turn it off and on again
df -h # disk full?
free -h # out of RAM? (16 GB total)
# missing tool? install it, then retry
apt install -y curl dnsutils unzip
# on the HOST: did the OOM killer strike? (free -h only shows RAM right now)
dmesg -T | grep -i -E "killed process|out of memory"
# restore a container from backup (on the host Shell)
pct restore 999 /srv/backups/dump/vzdump-lxc-ID-DATE.tar.zst --storage local-lvm
```
Part H · Ops & troubleshooting
71Monthly maintenance
Ten boring minutes each month are what keep the server from failing when you least expect it. Check the updates, the disk, and the backups.
This chapter needs the items below. You came here directly? Do them first. Each item takes a short time. Nothing on this page works without them.
Proxmox is installed and works at https://192.168.1.220:8006. You can log in as root. See Ch. 6 · Install Proxmox. At your first visit, the browser shows a certificate warning. Select Advanced. Then select Proceed.
You know where the host shell is. In the Proxmox page, select homelab in the left tree. Then select >_ Shell. You type each command of this page there, unless a step says otherwise. This is the server itself. It is not a container and it is not your own PC.
You know your own network numbers. Where this chapter shows 192.168.1.x, use your own numbers. The rule is in Ch. 3 · How to read this manual.
The folder /srv/backups exists. It is registered in Proxmox as a storage named backups. You make it when you add a drive: Ch. 65 · Add an external drive for an external drive, Ch. 66 · Add an internal drive for an internal drive. Ch. 64 · Backups done right (3-2-1)uses this folder, but it does not make it. You added no drive yet? Then you must register the storage yourself first.
This chapter builds no container. Another chapter built each container that it mentions.
71.1
THE MONTHLY CHECKLIST
Set a reminder that repeats, on your phone or in a calendar, for the first of each month. (You set up notifications with ntfy in Ch. 72 · Update notifications? A message from ntfy on a schedule works just as well.) When it fires, log in to Proxmox at https://192.168.1.220:8006. Work down this list. Nothing here takes long. The point is to catch a small problem while it is still small.
Apply updates. Update the host first. Click homelab in the tree. Open Updates. Click Refresh to check for new packages.
The Updates panel lists each package with a newer version when Refresh finishes.
Click Upgrade. Proxmox opens a new browser tab. It shows the upgrade live. There is no box to confirm.
The upgrade runs in its own tab. Leave it open until it finishes.
When it finishes, the tab prints TASK OK in green at the bottom. That confirms that the upgrade is complete. Anything else means that something failed. It can be a red error, or the tab stuck with no new lines for several minutes. Read the last lines of the output before you close the tab.
You prefer the terminal? — the same task with two commands
⌨ Type this on the Proxmox host (homelab)
Before you run anything on this page: every 192.168.1.x address below is this manual's example network. If your own network uses different numbers, substitute yours as you type — the rule is in Ch. 3 · How to read this manual. A command that runs with the wrong address usually succeeds and leaves you unreachable.
Refreshes the list of versions of packages that are available. It matches the button Refresh of the Updates panel.
apt dist-upgrade
Installs each update that is available. It handles changes in the dependencies of packages on the way. It matches the button Upgrade of the Updates panel.
Then update the apps. First you have to know which apps have a newer version that is waiting.
Notice — read now, do later
You cannot do this the quick way yet. It needs Watchtower. This is a small program that checks each day for a new version of the image of the container of each app. It pings your phone when one is ready. You install it in Ch. 72 · Update notifications, the next chapter. Read this so that you know it exists. Come back after that chapter. Let its pings tell you what needs an update. Nothing breaks if you wait. Until then, check by hand as described next.
To check by hand, you must be inside each app container. The Proxmox host itself has no command docker. It answers docker: command not found. From homelab → >_ Shell, run pct enter <CTID> first. (pct list prints each container and its number.) Check that the prompt changed. Then run docker images to list the images that this CT uses. Then run docker pull <image> for each one. "Image is up to date" means no update. Anything else means that one arrived. Watchtower runs? Then its pings tell you the same thing with no typing. This is what keeps this monthly routine short. Update each stateful app by hand. A stateful app is one that stores data that you would miss if it vanished, such as a database or a saved game. (A stateless app keeps nothing that is worth missing. It is safe to let Watchtower update those by itself.) To update a stateful app, take a snapshot first (Ch. 12 · After every build + common Proxmox tasks). Then run three commands in order. docker pull … downloads the new image. docker rm -f … deletes the old container. This does not touch the saved data of the app. It lives outside the container, in the folder that is plugged in. docker run … starts a fresh container from the new image, with the same options as before. The own chapter of each app keeps that exact line of three commands ready to copy in its reference card in Notes. It is the same kind of card that the section Reference Card of this chapter (below) shows for this checklist.
Check disk space. Open Beszel. Read the gauge for the disk (Ch. 15 · Beszel). Check that the SSD is not near full. Libraries of media and the seeds of qBittorrent live in /srv/media. This is the shared folder that you set up in Ch. 40 · Shared storage first. That folder fills an SSD of 500 GB fast. Clear old downloads and finished seeds. The SSD stays tight? Add a real drive in Ch. 65 · Add an external drive.
You prefer the terminal? — the same check with one command
⌨ Type this on the Proxmox host (homelab)
df -h # disk space, per mounted filesystem
You did not build Ch. 15 · Beszel? It is the one chapter of Part C that is optional. Use the host shell instead: homelab → >_ Shell, then df -h /. Read the column Use%.
Check the headroom of memory. Read the gauge of memory in Beszel. Check that the use of RAM still has a safe margin. It is always tight? Then you run too many heavy apps at once on 16 GB. Lower a limit in Ch. 12 · After every build + common Proxmox tasks, or stop one that you do not use.
You prefer the terminal? — the same check with one command
⌨ Type this on the Proxmox host (homelab)
free -h # RAM and swap, human-readable
Check the health of the disks. Open Scrutiny (Ch. 67 · Scrutiny — disk health). Check that the SSD, and each extra drive that you added in Part G, all report passed. The count of reallocated sectors must not be growing. A count that climbs from month to month is a drive on its way out. Replace it before it fails. You did not install Scrutiny yet? It is a chapter of Part G. Skip this line until you build it. Nothing breaks if you wait.
Check that the backups ran. Open Datacenter → Backup. Check that your backup job is listed, with the right schedule and the right storage for the target. It is the weekly job sun 03:00 that Ch. 20 · Backups before apps makes. You changed it to a job each night in Ch. 65 · Add an external drive? Then it shows 03:00.
The Backup grid confirms that the job exists and when it runs next.
The grid shows the schedule of the job. It does not show if it worked. To find out if it really ran, look for the archive itself. In homelab → >_ Shell, run ls -lht /srv/backups/dump/ | head (or ls -lht /var/lib/vz/dump/ | head if your job writes to local). The date of the newest file is the last time that a backup really finished. The newest one is older than your schedule? Then the job does not run. Nothing on the Backup screen would have told you.
⌨ On the Proxmox host
ls -lh /srv/backups/dump # confirm recent dates on the newest files
You built the off-site copy of Ch. 69 · Off-site backup? Also run journalctl -u gdrive-backup.service -n 5 --no-pager. It must end with status=0/SUCCESS. Also check that /srv/backups is not empty. The sync stops by itself if the drive is not mounted. It then tells you nothing else.
Scan for devices that you do not know. Open WatchYourLAN (Ch. 74 · WatchYourLAN). Look for any device on the LAN that you do not recognise. A machine that you did not expect is worth a second look. That chapter comes later than this one. So you did not build WatchYourLAN yet? Skip this line until you have. Nothing breaks if you wait.
71.2
THE ONE CHECK THAT REALLY MATTERS: TEST A RESTORE
A backup that you never restored is not a backup. It is a hope. A backup job that is green proves that a file was written. It does not prove that the file works. Every few months, prove it. Restore one container to an ID that you throw away. Check that it starts. Then delete the copy.
This drill uses commands, not menus. You type them in the host Shell (homelab → >_ Shell). This lets you start the copy that you restored with its network cable "unplugged" in the same breath. This walkthrough sets that detail by hand. The dialog for restore with the mouse does not.
Open the host Shell (click homelab → >_ Shell). The command pct is a command of the Proxmox host. It does not exist inside any container.
Find the folder that your backup files are in. It is one of two, depending on where your backup job writes. It is /var/lib/vz/dump if the Storage of the job still reads local. (This is the setting that Ch. 20 · Backups before apps gave it. It is still yours if you did not do Part G.) It is /srv/backups/dump if you moved the job onto a second drive in Ch. 64 · Backups done right (3-2-1). The Monthly Checklist section above shows where to read that column. The commands on the right use /srv/backups/dump. Yours is the other one? Swap that folder into each line before you run it.
Pick a container of your own to test. Type pct list in the Shell. It prints each container on this server, one for each line, with its ID number and its name. Choose one that runs Docker apps. Nearly all the containers of the manual do. The Project Zomboid server is one that does not. The third of the commands on the right would fail on it. Choose also a container without a bind-mount. A copy that you restore keeps the line of the mount, for example the shared folder /srv/media. An app could then write into your real shared folder from the copy. Vaultwarden is a good choice. Note the ID of that container. The commands on the right use 104 as the example. This is Vaultwarden on the own server of the manual. Wherever you see 104, type your own ID instead. To check that this container really is in the backups, run ls /srv/backups/dump (or ls /var/lib/vz/dump). Look for a file named vzdump-lxc- plus your ID.
Run the four commands on the right, with those two swaps made. They restore a real backup into a spare container that is numbered 999. They start it with its network cable left "unplugged", so that it cannot clash with the live container. They check that the app answers. Then they destroy the copy. Leave the 999 alone. That number is the copy that you throw away. It is meant to be the same each time. The last of the four removes container 999. Do not skip it. Run it even if an earlier step failed. If you leave it behind, the drill of next month refuses at its first command, because ID 999 is taken. The natural reading of that error is that the drill itself is broken. You stopped part of the way? Clean up by hand: pct stop 999 && pct destroy 999.
The step for the restore, the start, or docker ps fails? Then you found a broken backup on a scratch container. This is exactly where you want to find it. Fix the backup job before you rely on it. Its settings, and how to change them, are in Ch. 20 · Backups before apps. Ch. 64 · Backups done right (3-2-1) covers how to point it at a second drive.
Warning — do this before you trust the backup
The first test of a restore almost always turns up something. It can be a bind-mounted folder that was never in the backup. It can be a secret that you kept only in the Notes of the container. That is normal, and you can fix it. Write down what was missing. Add it to what gets backed up. Carry on. To find a gap today does not mean that anything of yours is lost. It is far better to learn that on a scratch container today than during a real outage at 2 a.m. Real backups off the disk, and the rule 3-2-1, are taught in Ch. 64 · Backups done right (3-2-1).
⌨ Type this on the Proxmox host (homelab)
pct restore 999 "$(ls -t /srv/backups/dump/vzdump-lxc-104-*.tar.zst | head -1)" --storage local-lvm # e.g. Vaultwarden — picks the newest matching backuppct set 999 -net0 name=eth0,bridge=vmbr0,firewall=1,link_down=1 # keep the cable "unplugged" so 999 can't collide with the live CT 104pct start 999 && pct exec 999 -- docker ps # does it run?pct stop 999 && pct destroy 999 # clean up the scratch copy
Restores the backup of the container that you picked into a temporary container that is numbered 999. (104 is only the example ID.) You can then test the backup without touching the real one. The part ls -t … | head -1 picks the newest backup file that matches, by itself, from whichever folder of dumps your job writes to.
pct set 999 -net0 name=eth0,bridge=vmbr0,firewall=1,link_down=1
A container that was restored keeps the network settings of the original, the static IP included. link_down=1 leaves the virtual network cable of 999 unplugged. So it cannot collide on the LAN with the real container that still runs, which it was copied from.
pct start 999 && pct exec 999 -- docker ps
Starts the test container. That works? Then && runs docker ps inside it. pct exec 999 -- runs a command inside container 999. It confirms that Docker and its apps came back up.
pct stop 999 && pct destroy 999
The backup is proven good? Then this stops the test container and deletes it for good. It existed only for the drill.
71.3
REFERENCE CARD
The whole checklist on one card. Click homelab in the Proxmox tree. Then open its tab Notes (a tab of its own, not under Summary). Click Edit. Paste this in. The routine of next month is then one click away. Its lines for the restore drill carry the own example of the manual: container 104 and the folder /srv/backups/dump. After you paste, edit those two to match your server: your own container ID, and /var/lib/vz/dump if the Storage of your backup job still reads local. The section for the restore drill above explains how to find both.
Example — the tab Notes of Proxmox in Edit mode, with a reference card pasted into it. This is the same picture wherever the manual shows this step. The card that you paste is the one from your own chapter. It is not the one shown here.📋 Reference — paste into the node's Notes in Proxmox (not a shell command)
## Monthly maintenance — node homelab
dashboard https://192.168.1.220:8006 · docs https://pve.proxmox.com/pve-docs/
Run on the 1st of each month:
1. Updates — host first, then stateful apps by hand (snapshot first)
2. Disk space — SSD not near full; clear old /srv/media + seeds
3. Memory — safe margin left (Beszel)
4. Disk health — Scrutiny: all drives "passed", no growing bad sectors
5. Backups — job listed and on schedule; NEWEST ARCHIVE date is recent (ls -lht); off-site job ends status=0/SUCCESS
6. Unknown devices — nothing new in WatchYourLAN
Every few months: run the restore drill below.
```sh
# --- update the Proxmox host (or use Updates > Upgrade in the web UI) ---
apt update && apt dist-upgrade
# --- quick space / memory check ---
df -h
free -h
# --- are backups fresh? (newest file = last real run) ---
ls -lht /srv/backups/dump | head -5
# --- restore drill: prove a backup actually works ---
pct restore 999 "$(ls -t /srv/backups/dump/vzdump-lxc-104-*.tar.zst | head -1)" --storage local-lvm
pct set 999 -net0 name=eth0,bridge=vmbr0,firewall=1,link_down=1 # cable unplugged
pct start 999 && pct exec 999 -- docker ps # does it run?
pct stop 999 && pct destroy 999 # clean up
```
Part H · Ops & troubleshooting
72Update notifications
Update notifications turn the monthly maintenance routine into a job of twenty minutes, not an afternoon. This is infrastructure. It is not an optional app.
This chapter needs the items below. You came here directly? Do them first. Each item takes a short time. Nothing on this page works without them.
Proxmox is installed and works at https://192.168.1.220:8006. You can log in as root. See Ch. 6 · Install Proxmox. At your first visit, the browser shows a certificate warning. Select Advanced. Then select Proceed.
You know where the host shell is. In the Proxmox page, select homelab in the left tree. Then select >_ Shell. You type each command of this page there, unless a step says otherwise. This is the server itself. It is not a container and it is not your own PC.
You know your own network numbers. Where this chapter shows 192.168.1.x, use your own numbers. The rule is in Ch. 3 · How to read this manual.
You built Ch. 13 · ntfy already. The steps below use that chapter: a container, an address, a key, or a job that must exist. You cannot finish this chapter without it.
This chapter builds no container. Another chapter built each container that it mentions.
The monthly checklist in Ch. 71 · Monthly maintenance is short for one reason. On the day of maintenance, you do not open ten dashboards to hunt for the app that changed. One push already told you. Without this chapter, each day of maintenance starts with that hunt. With it, you apply the updates that matter and skip the rest. This is why it leads Part H, next to troubleshooting and maintenance, ahead of the optional tools for operations. Build it early, not last.
The mechanism is simple. Two words carry most of this chapter. Learn them first. A CT is one of the small machines that you build in Proxmox. Jellyfin lives in one. AdGuard lives in another. A Docker app is one program that runs inside a CT. One CT can hold several of them. Watchtower is a Docker app. Its only job is to check the other Docker apps beside it, on a schedule. It pushes an "update available" alert to your phone through ntfy. You decide when to apply it. The reference card in every app promises this chapter. It says "the Update notifications chapter adds automatic pings." Build Ch. 13 · ntfy first, so that Watchtower has somewhere to send the alerts. Then run one Watchtower for each Docker CT. That one covers each Docker app inside that CT. Set it to monitor-only. It then tells you when an app has an update that is waiting.
Notice — which Watchtower image
The original image containrrr/watchtower was not rebuilt in over two years. This manual uses the fork nickfedor/watchtower instead. People maintain it actively. It is a drop-in replacement. It has the same environment variables (WATCHTOWER_NOTIFICATION_URL, WATCHTOWER_MONITOR_ONLY) and the same labels com.centurylinklabs.watchtower.*. You run the old image already? Switch over with the update command of one line in the Reference Card at the end of this chapter. It pulls the new image, removes the old Watchtower, and starts the replacement in one go. Do not run the install command again. Docker refuses it with name already in use, because the old watchtower still sits there under that name. Nothing is lost either way. Each Watchtower setting lives on that command line, not in a saved file.
72.1
ONE WATCHTOWER FOR EACH CONTAINER
This part has no buttons. You type commands inside the CT where you add Watchtower. Enter it from the host with pct enter <ID> (open homelab → >_ Shell first). Watchtower has no wizard for the install. The single command below is the whole install. You type it one time for each CT. Then you never touch Watchtower again.
Notice — read now, do later
You may expect the one browser panel of this manual for Docker to handle this instead. It does not, so do not wait for it. You build that tool, Dockge, later in this Part (Ch. 75 · Dockge). Read about it when you get there. Even then, it would not help here. It drives only apps that were built from a compose file in the folder /opt/stacks of its own CT. Watchtower is not one of those. Nothing breaks if you wait. The command that you type below is the whole install either way.
Watchtower sees only the Docker apps on its own machine. It cannot look into another CT. So the rule is one Watchtower for each Docker CT. Install it one time inside each CT that runs Docker apps. That one Watchtower covers each app in that CT. A CT that runs six apps still needs exactly one.
From the Proxmox host, go into a Docker CT. Type pct enter <CTID>. You are now inside that container.
In the command on the right, replace THIS-CT-NAME with the name of the app (for example adguard). Replace tk_YOUR-TOKEN with your real ntfy token. Replace Region/City with your time zone (see the notice below). Then run it.
Repeat for each Docker CT. Do not work from memory. Open the Container & IP map in the back matter. It is not a numbered chapter. Look for Container & IP map in the index or the search box of the manual. Do not scroll the list of chapters. Check off each Docker CT as you add Watchtower to it. Then none is skipped by silence. Each Watchtower reports only on the apps beside it.
The setting WATCHTOWER_MONITOR_ONLY=true makes this safe. Watchtower reports updates. It never applies them. Note the ?scheme=http on the URL of the notification. It is not optional.
⌨ Type this inside the Docker CT
Before you run anything on this page: every 192.168.1.x address below is this manual's example network. If your own network uses different numbers, substitute yours as you type — the rule is in Ch. 3 · How to read this manual. A command that runs with the wrong address usually succeeds and leaves you unreachable.
Where you see TZ=Region/City, replace it with the name of your own zone. For example, America/New_York or Europe/Berlin. A new Docker app keeps its clock on UTC until you tell it otherwise. UTC is one fixed clock for the world. It is not the time where you live. Without TZ, the check fires at 4 AM UTC. That can be the middle of your afternoon. Run timedatectl list-timezones inside this same CT to see each valid name. It prints a long list. It opens in a view that scrolls? Press q to leave. A wrong zone only makes clocks and schedules odd. Nothing breaks.
Notice — prove that it works before you build the next container
A wrong token fails silently. Watchtower reports success. Your phone stays quiet. You do not find out for weeks. Fire one test notification now, from the host shell, with the same token that you just pasted. Your phone must buzz within a second or two.
⌨ On the Proxmox host — replace the token with yours
curl -H "Authorization: Bearer tk_YOUR-TOKEN" \
-d "test from the homelab" \
http://192.168.1.227/homelab-alerts
Nothing arrives? The token is wrong, or the name of the topic does not match the one in the URL of Watchtower above (homelab-alerts). Fix it here, before the next chapter builds anything that depends on these alerts.
Notice — that curl proves the server, not Watchtower
The line above talks to ntfy directly. It proves that your token, your topic, and your ntfy server are good. But it never touches WATCHTOWER_NOTIFICATION_URL. A typo inside that URL still passes this test and still leaves you silent. Prove the whole chain too. Inside the CT, run docker logs watchtower --tail 20. A notification URL that is malformed is reported there in plain text. That is the only place where Watchtower complains about it. Do not expect a startup message. The install command on this page sets WATCHTOWER_NO_STARTUP_MESSAGE=true. So silence in the log is normal. It proves nothing either way. You read it only for a line with an error. To prove the whole chain from end to end, make Watchtower again for a short time without that flag. The startup notice then arrives on your phone. You saw it? Put the flag back.
Warning — the token is required, and its absence fails silently
Your ntfy server denies anonymous publishes. So replace tk_YOUR-TOKEN with your real ntfy token. Print it again from the ntfy CT. On the Proxmox host, run pct enter 106. Then run docker exec -it ntfy ntfy token list. That second command runs a command inside the app ntfy that runs. The part -it keeps the session interactive. The output then comes back to your screen. Without the token, ntfy rejects each alert with HTTP 403, and no error appears. Watchtower simply goes quiet. You assume that all is well. The empty username before the : is on purpose. The token goes in the position of the password. Your ntfy server does not run on the default port? Add the port to the host: …@192.168.1.227:8080/homelab-alerts….
Notice — why ?scheme=http
The notifier of ntfy defaults to https. Your self-hosted ntfy serves plain http. Without this flag, each alert fails silently. There is no error. A ping is just missing. This is the most common reason why Watchtower "does not notify."
Explanation of each part
docker run -d --name watchtower --restart=always
Starts a container in the background with the name watchtower. It always restarts after a crash or after a reboot of the CT.
--hostname THIS-CT-NAME
Names the machine that Watchtower reports as. It becomes the title of each alert. Set it to the app that lives in this CT.
-e TZ=Region/City
Sets the timezone of the container. Without it, the daily check runs on UTC time, not your local time.
-e WATCHTOWER_NO_STARTUP_MESSAGE=true
Suppresses the notification "Watchtower started". It would otherwise arrive from each CT at each restart.
-v /var/run/docker.sock:/var/run/docker.sock
Gives Watchtower access to the control socket of Docker. It needs this to see the other containers on this host and to check the versions of their images. Without it, you get the error "permission denied" or "cannot connect".
Sets where the alert goes. It is written in the URL format that the notification engine of Watchtower expects. To set this variable is all that you need to turn notifications on. The older variable WATCHTOWER_NOTIFICATIONS is legacy. This chapter does not use it. The empty username with the token as the password sends the token to ntfy. The topic is homelab-alerts. scheme=http selects plain HTTP.
-e WATCHTOWER_SCHEDULE="0 0 4 * * *"
The schedule, written as a cron expression. Cron is the standard Linux way to say "repeat this at these times." Watchtower wants the form with six fields. The first field is seconds. This one reads: at second 0, minute 0, hour 4, each day. So it makes one check each day at 04:00.
-e WATCHTOWER_MONITOR_ONLY=true
Checks for updates and reports them. It never applies them. This is the safe default that this chapter uses for each container.
nickfedor/watchtower
The Watchtower image that people maintain. This is the tool that watches the other containers for newer versions.
72.2
MONITOR-ONLY IS THE DEFAULT
Warning — do not let Watchtower update by itself anything that holds data
Watchtower installs new versions by itself at 4 AM while you sleep? Sooner or later, it installs one with a bug in it. The app may not start again at all. Or it may start and refuse the password that worked yesterday. Nobody is awake to notice. The new version also throws away the old one. That is exactly the copy that you would need to go back to. So keep each Docker app in monitor-only mode. Watchtower tells you that an update exists. You read the release notes of the app. Then you apply it by hand with the update line on the reference card of that app. This is the whole point of the promise "Watchtower pings you". It is a doorbell, not an autopilot.
Anything with data must stay monitor-only: Ch. 22 · Vaultwarden, each database, Paperless, Immich, the *arr apps, and Jellyfin. The command in the section before sets WATCHTOWER_MONITOR_ONLY=true for the whole CT. That covers them all. Leave it that way.
Advanced — update one disposable container by itself
To update by itself is defensible for a container that is truly stateless and disposable. This is one that you could delete and make again with no loss. Do it for one container with a label. Do not remove the flag monitor-only of the whole CT. Keep WATCHTOWER_MONITOR_ONLY=true on Watchtower. Mark the one container that you trust:
⌨ Type this inside the Docker CT
# exempt one container from monitor-only (Watchtower will auto-update just this one):
docker run -d --name myapp \
--label com.centurylinklabs.watchtower.monitor-only=false \
… myapp/image
# or exclude a container from Watchtower entirely:
docker run -d --name myapp \
--label com.centurylinklabs.watchtower.enable=false \
… myapp/image
The label com.centurylinklabs.watchtower.monitor-only overrides the setting of the whole CT for that one container. The label com.centurylinklabs.watchtower.enable=false removes a container from the view of Watchtower completely. Use it for anything that you pin to a fixed version on purpose.
Notice — not everything is a Docker container
Watchtower watches Docker images only. A few services in this manual are not Docker containers. The Ch. 59 · Project Zomboid server server is one. It is installed straight onto Debian with SteamCMD. It has no image for Watchtower to check. Those get no automatic ping. Look in their own chapter for the update command. Run it by hand on your own schedule. For a strategy to pin versions across the whole homelab, see Ch. 71 · Monthly maintenance.
72.3
WHEN IT GOES WRONG
Watchtower runs, but no alert for an update ever arrives. Almost always the URL of the notification. Check that it ends in ?scheme=http (your ntfy is plain HTTP). Check that the token is real, not the literal tk_YOUR-TOKEN. Test the destination on its own first. From inside the CT, run curl -H "Authorization: Bearer tk_YOUR-TOKEN" -d "test" http://192.168.1.227/homelab-alerts, with your real token typed in place of tk_YOUR-TOKEN. -H adds a header line that proves who you are. -d is the body of the message, here the word test. A notification must land on your phone within a second. You installed curl when you built this CT. The shell says curl: command not found? Run apt install -y curl.
Nothing is ever detected or reported. Watchtower sees only its own host. You started one Watchtower and expected it to cover each CT? It does not. Run one inside each Docker CT (pct enter <CTID>, then the run command). One Watchtower for each CT covers all apps in that CT.
Watchtower installed an update by itself and broke an app. That Watchtower was not in monitor-only mode. Stop the cause first. Make it again with -e WATCHTOWER_MONITOR_ONLY=true. Use the update line in the Reference Card below. It stops the old Watchtower, removes it, and starts the corrected one in a single command. The broken app itself carried the label com.centurylinklabs.watchtower.monitor-only=false? A label cannot be peeled off an app that runs. It is fixed at the moment that the app is created. To "remove" it means to run the own docker run line of that app again, from its reference card, with the line --label left out.
Then get the app itself back. The lines docker run in this manual end in a plain name of an image with no version on it. For example, lscr.io/linuxserver/jellyfin. This means "whichever copy is newest." A newer copy is pulled down? Docker does not delete the older one. It stays on the machine, on its own line. That is all that "if you kept one" means. Run docker images inside the CT to look. It lists each copy of an image that is stored on that machine, one for each line, each with an ID and an age. An older line for that app is still listed? Put the app back on it. docker rm -f jellyfin removes the broken app. Then run the usual docker run line of that app from its reference card. Type the ID of the older copy in place of the name of the image at the end. Your data folders are untouched by any of this. They live on the host. The lines -v only plug them in. docker images no longer lists the older copy? Restore the snapshot of the CT that you took before the update instead. Ch. 12 · After every build + common Proxmox tasks, section "Take a snapshot before a risky change", has those steps.
The log shows "permission denied" on the Docker socket. The mount of the socket is missing. Watchtower needs -v /var/run/docker.sock:/var/run/docker.sock to see and check the other apps. Make it again with that flag. Run the update line in the Reference Card below. It already carries the flag. It stops the old Watchtower, removes it, and starts the fixed one in one go.
The title of the alert is a string of hex, not the name of the app. The flag --hostname was not set. Make Watchtower again with the same update line in the Reference Card below. Set --hostname to the app that this CT runs (adguard, for example). The title then reads clearly.
72.4
REFERENCE CARD
Paste this into the Notes of any CT that runs Watchtower. Before you ever run the update line on this card, compare it with the docker run you actually used at install. The card is a snapshot of the standard build: if you added anything of your own — a device, an extra -e setting, a second folder — it is not on the card, and re-running the card's line drops it. The container comes back up looking healthy with your setting gone. The update line below still says TZ=Region/City. That is a placeholder, not a real timezone: run it unchanged and the app comes back on UTC while looking perfectly healthy, so every schedule and timestamp silently shifts. Put your own zone in before you use this card — the same one you set at install.
Open the CT in the Proxmox tree. Then click Summary → Notes.
Click Edit.
Paste the card below. Click OK to save.
Example — the tab Notes of Proxmox in Edit mode, with a reference card pasted into it. This is the same picture wherever the manual shows this step. The card that you paste is the one from your own chapter. It is not the one shown here.
The card is a reminder for you in the future. It is not a shell command. Watchtower has no web page of its own. Ch. 75 · Dockge does not list it either, because it was not built from a compose file. So each action that you use each day stays a command that you type inside the CT (pct enter <ID> from homelab → >_ Shell). There are only about six of those commands. They are all on the card below. You copy them. You never have to remember them.
Before you paste, replace THIS-CT-NAME, Region/City, and tk_YOUR-TOKEN with the real values of this container. This card is for each container. The one that you paste into the Notes of adguard is not the one that you paste into the Notes of jellyfin.
📋 Reference — paste into the CT’s Notes in Proxmox (not a shell command)
## Watchtower — one per Docker CT (monitor-only)
alerts to ntfy topic homelab-alerts · docs https://watchtower.nickfedor.com/
```sh
# is it running?
docker ps --filter name=watchtower
# logs (last 50) — shows each daily check and any update found
docker logs watchtower --tail 50
# force a check right now instead of waiting for 4 AM
docker exec watchtower /watchtower --run-once --monitor-only
# stop / start / restart
docker stop watchtower
docker start watchtower
docker restart watchtower
# is there an update to Watchtower itself? ("Image is up to date" = no)
docker pull nickfedor/watchtower
# update Watchtower (all settings are on the command line, nothing to preserve)
docker pull nickfedor/watchtower && docker rm -f watchtower && docker run -d --name watchtower --restart=always --hostname THIS-CT-NAME -e TZ=Region/City -e WATCHTOWER_NO_STARTUP_MESSAGE=true -v /var/run/docker.sock:/var/run/docker.sock -e WATCHTOWER_NOTIFICATION_URL="ntfy://:tk_YOUR-TOKEN@192.168.1.227/homelab-alerts?scheme=http" -e WATCHTOWER_SCHEDULE="0 0 4 * * *" -e WATCHTOWER_MONITOR_ONLY=true nickfedor/watchtower
```
Part H · Ops & troubleshooting
73fail2ban
Fail2ban watches the log of a login. A few failed tries from one address, and it blocks that address in the firewall for a while.
This chapter needs the items below. You came here directly? Do them first. Each item takes a short time. Nothing on this page works without them.
Proxmox is installed and works at https://192.168.1.220:8006. You can log in as root. See Ch. 6 · Install Proxmox. At your first visit, the browser shows a certificate warning. Select Advanced. Then select Proceed.
You know where the host shell is. In the Proxmox page, select homelab in the left tree. Then select >_ Shell. You type each command of this page there, unless a step says otherwise. This is the server itself. It is not a container and it is not your own PC.
You know your own network numbers. Where this chapter shows 192.168.1.x, use your own numbers. The rule is in Ch. 3 · How to read this manual.
This chapter builds no container. Another chapter built each container that it mentions.
From here to the end of Part H, the chapters are optional tools for operations. Add them in any order. Skip the ones that you do not need. This one hardens the logins that you expose to the internet.
Fail2ban is not its own container. It runs where the logs live. For SSH, it runs on the Proxmox host (the server, 192.168.1.220). For any web login that you expose, it runs inside the Nginx Proxy Manager container (see Ch. 17 · Nginx Proxy Manager). A set number of logins fail from one IP address? Fail2ban adds a firewall rule. The rule blocks that address for a set time.
Notice — honest scope
Your setup is only on the LAN and on Tailscale? Then there is almost nothing to brute-force. Tailscale uses keys, not passwords (see Ch. 19 · Remote access: Tailscale). The game servers do not use a password that fail2ban can watch. Fail2ban earns its keep when you expose a web login through NPM or a port-forward. Set up the SSH jail on the host now. It is cheap. It catches the one login that is truly reachable. Add the NPM jail later, when you publish a web login.
73.1
PROTECT SSH ON THE HOST
This part has no buttons. You type commands as root on the host itself. Do not type them in a container.
Notice — you can lock yourself out
You connect over SSH from outside your LAN or Tailscale range? This can be a friend's house, a coffee shop, or a new device before Tailscale is set up on it. Add that address to ignoreip first. If not, a few mistyped passwords ban you with any real attacker. It happens anyway? The fix is one line. See When it goes wrong below.
Open a shell on the host first.
Open the Proxmox web console at https://192.168.1.220:8006.
Click homelab → Shell in the left menu.
Install fail2ban.
Write a file jail.local. It turns on the sshd jail. It sets the limits for retries and for the ban.
Enable and start the service.
Check the status of the sshd jail. This confirms that it watches.
You can also connect over SSH instead: ssh root@192.168.1.220.
Step 4 only writes a text file. You prefer a text editor to a terminal? Read the notice under the commands.
Node → Shell, an item at the top level in the left menu of the node.⌨ Type this on the Proxmox host (homelab)
Before you run anything on this page: every 192.168.1.x address below is this manual's example network. If your own network uses different numbers, substitute yours as you type — the rule is in Ch. 3 · How to read this manual. A command that runs with the wrong address usually succeeds and leaves you unreachable.
The file jail.local is the standard file for overrides. It sits beside the defaults of the package. It wins over them. So your settings survive updates of the package. It turns on the sshd jail. In 10 minutes (findtime), 4 bad logins from one address earn a ban of 1 hour (bantime). A firewall rule that fail2ban manages enforces the ban. The line ignoreip lists your loopback, your whole LAN, and your Tailscale range as trusted. A mistyped password from a device of yours can then never lock you out. Only attackers from outside get banned.
Notice — you can write these files from your desktop instead
Each fail2ban setting in this chapter lives in a plain text file. Fail2ban reads what those files say the next time that it starts. So the terminal is not the only way in. You can open the server in the file manager of your own computer. Edit the files there, like files on a USB stick. The steps are in Ch. 12 · After every build + common Proxmox tasks, section "Move a file to or from the server". Use 192.168.1.220 as the address of the host here. Use 192.168.1.224 for CT 103 in the next section. On the host, the file to create is /etc/fail2ban/jail.local. Type into it only the lines that the listing shows from [sshd] down to ignoreip. The line cat and the two markers INI exist only to write that file from a terminal. Leave them out. The same connection also lets you browse folders on the server, such as the folder of logs of NPM later in this chapter. The file manager cannot run commands. So apt install, systemctl, and fail2ban-client still need a shell.
Notice — the sshd jail is already on by default
On Debian and Proxmox, the protection of SSH switches itself on when the package finishes its install. The package ships its own configuration file that enables the sshd jail for you. The line enabled = true that you write in jail.local is then explicit and harmless. Its real job is to let you set maxretry, findtime, bantime, and ignoreip in one place that you control. Leave the file of the package alone. Put your own changes in jail.local.
Notice — where fail2ban reads the SSH log
Proxmox keeps its system messages in one internal database. It does not use a pile of separate log files. That database has a name: the systemd journal. On Debian 13, the sshd jail reads the journal, not a text file. It already knows to do that on its own. (The default of the package that says so is the line sshd_backend = systemd.) This is good news. The protection of SSH works out of the box, even on a minimal install of Proxmox. That install has no file /var/log/auth.log for fail2ban to read. You do not need to set logpath. Leave it out. Let the default stand.
Explanation of each part
apt install -y fail2ban
Installs fail2ban. This tool watches log files for logins that fail again and again. It blocks the addresses at fault for a short time. The flag -y skips the prompt to confirm.
cat > /etc/fail2ban/jail.local <<'INI' … INI
Writes a file of configuration, jail.local, that overrides the defaults of fail2ban. It uses a heredoc. This is a block of text that ends at the marker INI. So you do not need to open a text editor. The own default settings of the package sit in a separate file, /etc/fail2ban/jail.d/defaults-debian.conf. That file turns the sshd jail on for you. jail.local wins over it. You never need to touch it.
[sshd]
The section of the configuration that controls the protection of SSH. SSH is the login to a remote terminal.
enabled = true
Turns this rule of protection on for SSH.
maxretry = 4
Allows at most 4 attempts to log in that fail before it bans the address.
findtime = 10m
Counts those failed attempts in a window of 10 minutes that rolls.
bantime = 1h
Blocks the address at fault for 1 hour after a ban.
A list of addresses that are never banned: this machine (127.0.0.1/8), your whole home network (192.168.1.0/24), and your Tailscale VPN range (100.64.0.0/10). A mistyped password from a device that you trust can never lock you out. Only attackers from outside get banned.
systemctl enable --now fail2ban
Starts the fail2ban service at once. Sets it to start by itself at each future boot.
fail2ban-client status sshd
Checks the status of fail2ban for the SSH rule. It includes the addresses that are banned now.
73.2
ADD A JAIL FOR AN EXPOSED WEB LOGIN
Notice — this second jail needs the proxy, the first does not
Everything above protects SSH. It runs on the server alone. The jail below watches the login page of Ch. 17 · Nginx Proxy Manager. So it applies only if you built that chapter. You did not? You are finished here. Skip to the end.
The SSH jail above is all that most setups need. Add this second jail only if you publish a web login. An example is an app that you reach through NPM from the internet. NPM logs each request. So a jail can watch those logs. It bans an address that tries to log in again and again and fails. The logs live inside the NPM container. So fail2ban runs there, in CT 103, not on the host.
NPM writes its access logs to a folder that it calls /data/logs/. That folder is not private to NPM. It is shared with CT 103 around it. So the same files are visible at two different paths. /data/logs/ from inside NPM. /opt/npm/data/logs/ from the own shell of CT 103 (see Ch. 17 · Nginx Proxy Manager). The second path is the one that you use here. Logins that failed and requests that are forbidden show up in those files as lines with 401 and 403. Each is tagged with the address of the client. This jail bans an address that trips too many of them.
Open the shell of the container first.
Select homelab → >_ Shell. This is the own terminal of the server.
Run pct enter 103. It puts you inside CT 103 as root, with no password.
The >_ Console button of the CT opens a login: prompt, not a shell. Use pct enter 103 from homelab → >_ Shell.
One limit: a ban can only work if NPM sees the real address of the visitor. A port-forward on your router keeps it. A tunnel service shows the address of the tunnel, and then every visitor looks the same. The log then names the wrong address. Check a line in the log (see the optional walk-through) before you trust the jail.
This part has no buttons. You type commands inside CT 103. The two files that it creates are ordinary text files, exactly like jail.local of the host. So the route with the file manager from Protect SSH on the host works here too. Connect to 192.168.1.224. The files to create are /etc/fail2ban/filter.d/npm-auth.conf and /etc/fail2ban/jail.d/npm.conf. Each holds only the lines between its line cat and its closing marker INI. To install and to restart fail2ban still needs this shell.
Install fail2ban inside the container.
Write a filter that recognises the log lines 401 and 403 of NPM.
Write a jail that watches the access logs of NPM with that filter. It bans in two places: in the firewall of the container, and in the chain of Docker, as the next notice explains.
Restart fail2ban. Check that the new jail is listed.
⌨ Type this inside CT 103 (the NPM container)
apt install -y fail2ban
cat > /etc/fail2ban/filter.d/npm-auth.conf <<'INI'
[Definition]
failregex = ^\[.*\] .* (401|403) .* \[Client <HOST>\]
ignoreregex =
INI
cat > /etc/fail2ban/jail.d/npm.conf <<'INI'
[npm-auth]
enabled = true
filter = npm-auth
logpath = /opt/npm/data/logs/*_access.log
maxretry = 5
findtime = 10m
bantime = 1h
ignoreip = 127.0.0.1/8 192.168.1.0/24 100.64.0.0/10
action = nftables-allports[name=npm-auth]
iptables-allports[name=npm-auth-docker, chain=DOCKER-USER]
INI
systemctl restart fail2ban
fail2ban-client status npm-auth
iptables -S DOCKER-USER # must list a line that jumps to f2b-npm-auth-docker
Warning — why the jail has two ban lines
NPM runs in Docker. Docker sends the traffic for ports 80, 443 and 81 through its own path in the firewall. The default ban of fail2ban only guards the normal path. It blocks a service such as SSH. It does not block a port that Docker published. This was tested: with only the default ban, a banned address was still able to reach the NPM ports, and fail2ban showed the ban as active. The second line, iptables-allports[... chain=DOCKER-USER], adds the ban to the chain that Docker reads first. Keep both lines. Do not remove the second one. Test that it works: iptables -S DOCKER-USER must show a line -j f2b-npm-auth-docker. To test a ban for real, run fail2ban-client set npm-auth banip <the IP of your PC>, try to open the NPM page from that PC, and unban with fail2ban-client set npm-auth unbanip <the IP of your PC>. You see the NPM page while banned? Then the ban does not work. See When it goes wrong.
Notice — match the log line to your app
The line failregex above catches any 401 or 403 in the proxy log of NPM. This is a good net for general use. Leave it exactly as it is unless you have a reason not to. You want to ban one day on the failed-login line of one app instead? The optional walk-through below does it step by step. Whatever you change, test it with fail2ban-client -t before you rely on it.
Optional — point the pattern at the own login line of one app
Skip this unless the general net above is not enough for you. It is the most fiddly task in the chapter. Take it slowly.
First, what failregex really is. It is a search pattern. It is a line of text where most characters mean themselves. A few stand for "anything". Three pieces do all the work in the pattern that you pasted:
.*
Stands for any run of characters, none at all included. It is how you say "skip whatever sits here, I do not care what it is".
(401|403)
Means "either 401 or 403 at this spot". The bar is a plain "or".
<HOST>
The own marker of fail2ban for "the address to ban appears right here". Each filter needs exactly one of these. It must sit where the log line prints the address of the client.
The ^ at the start means "from the beginning of the line". A backslash before a character (\[) means "this is a literal square bracket, not a special one". Everything else matches itself.
Open one of the log files of NPM. Look at a real line. Browse to /opt/npm/data/logs/ with the file manager described earlier. Open a file whose name ends in _access.log. Or, in the shell of CT 103, run tail -n 3 /opt/npm/data/logs/*_access.log. tail prints the end of a file. -n 3 asks for the last three lines.
Make one login that fails, on purpose. A fresh line then appears. In a browser, open the login page of an app that you publish through NPM. Type a wrong password one time.
Look at the newest line in the log. Copy it somewhere where you can read it whole. A line of this kind looks roughly like this, shortened to fit the page: [16/Mar/2026:21:04:11 +0000] - - 401 - GET https app.example.com "/login" [Client 203.0.113.9] …
Lay the pattern over that line piece by piece. ^\[.*\] covers the date in square brackets. The first .* skips the fields for cache and upstream (the two dashes). (401|403) lands on the code of the response. The second .* skips everything up to [Client . And <HOST> lands exactly on 203.0.113.9. This is the address that would get banned.
Now change as little as you can. To narrow the jail to one app, add the own text of that app to the pattern, where the line shows it. For example, its host name or its login path. Leave the part <HOST> untouched.
Save the filter file. Then run fail2ban-client -t in CT 103. It reads each configuration file of fail2ban. It prints the first thing that it cannot understand. Silence means that the files are valid. Then run systemctl restart fail2ban, so that the new pattern takes effect.
The jail then bans nobody at all? The pattern no longer matches the real line. Put the original failregex back. Restart. You are exactly where you started. Nothing else in the setup depends on this.
Explanation of each part
/etc/fail2ban/filter.d/npm-auth.conf
A filter file. It holds the pattern (failregex) that tells fail2ban what a request that failed looks like in the log of NPM. <HOST> is the placeholder of fail2ban for the address to ban.
Matches a log line that returns the status 401 (unauthorised) or 403 (forbidden). It records the address of the client in the field [Client …] of NPM. NPM writes a status of the cache and a status of the upstream ahead of the code of the response (- - 401 -). So the .* in the middle skips those two fields. Then the pattern looks for 401 or 403.
/etc/fail2ban/jail.d/npm.conf
A jail file in jail.d/, which fail2ban reads by itself. It ties the filter to a place for the log and to the settings of the ban.
logpath = /opt/npm/data/logs/*_access.log
Points the jail at each access log of each proxy host of NPM at once. A new proxy host is then covered with no extra edits.
Sets what a ban does. The first line blocks the address in the firewall of the container. That protects normal services. The second line adds the address to DOCKER-USER, the chain that Docker reads first. That protects the ports that Docker published (80, 443, 81). Docker installs iptables with it, so you need no extra package.
maxretry = 5
Allows 5 requests that fail or are forbidden from one address in findtime before a ban. Web pages make several requests. So this is set a little higher than for SSH.
fail2ban-client status npm-auth
Confirms that the new jail loaded. Shows any addresses that it banned.
73.3
WHEN IT GOES WRONG
You cannot connect by SSH to the host. Your own address got banned, from too many password tries or from a test of the ban. SSH is blocked. Use another door. Open the Shell of the host in the Proxmox web console at https://192.168.1.220:8006 (Datacenter → homelab → Shell). Then run fail2ban-client set sshd unbanip <your-ip>. You do not know the address? Run fail2ban-client unban --all instead. The line ignoreip prevents this for devices on the LAN and on Tailscale. Add yours there if it keeps happening.
apt install -y fail2ban fails with E: Unable to locate package fail2ban, a 404, or a hash-sum mismatch. The lists of packages are old. Run apt update first. Then install again. On Proxmox, apt update may also print a line with 401 for something called pve-enterprise. That is the source of software of Proxmox for paid support. It turns you away because you have no subscription. This is expected. It has nothing to do with fail2ban. Ignore it. Fail2ban comes from the free repositories of Debian, not from the one of Proxmox.
fail2ban-client status sshd returns Sorry but the jail 'sshd' does not exist, or the service refuses to start after you paste the configuration. This almost always means a typo in /etc/fail2ban/jail.local. Test the configuration with fail2ban-client -t. Then read the exact error with journalctl -u fail2ban -e. That second command shows the log messages of the system. journalctl prints the log. -u fail2ban narrows it to the fail2ban service alone. -e jumps straight to the end, where the newest lines are. Fix the line at fault. Then run systemctl restart fail2ban.
The log says that fail2ban banned an address, but that address still connects. Check if the ban ever reached the firewall. A ban is only a rule of the firewall. On Debian 13, fail2ban writes its rules into the firewall called nftables by default. It marks each rule that it adds with the short tag f2b. So run nft list ruleset. It prints all the rules of the firewall. Add | grep -i f2b after it. This filters the output down to the lines that contain f2b. One or more lines come back? Then the block is really in place. Nothing comes back? Then fail2ban loaded its rules, but it does not block anything. The jail watches. The firewall is not touched. Read journalctl -u fail2ban -e. Look for a line that mentions the action of the ban. The usual cause on a new Debian is that the backend of the firewall is missing. Install it with apt install -y nftables. Then run systemctl restart fail2ban and run the check again. Confirm that it enforces. Do not only confirm that it loaded.fail2ban-client status sshd says that the jail is up. That proves only that the file of rules parsed. The proof that it enforces is a real entry in nft list ruleset | grep -i f2b. Older guides check with a different firewall tool, iptables. That applies to you only if you set banaction = iptables-multiport in the configuration on purpose. The steps in this chapter never do.
Any fail2ban-client command prints Failed to access socket path: /var/run/fail2ban/fail2ban.sock. The service does not run. Start it with systemctl enable --now fail2ban. Wait a second. Try again.
The NPM jail bans an address, but that address can still open the NPM page. The jail has only the default ban. Docker's published ports need the second line. Check iptables -S DOCKER-USER. It must show -j f2b-npm-auth-docker. It does not? Add the action lines from the listing in Add a jail for an exposed web login. Run fail2ban-client -t. Then run systemctl restart fail2ban.
The NPM jail loads but never bans anyone. First confirm that the path of the log is right. Run ls /opt/npm/data/logs/ inside CT 103. Check that files that end in _access.log are listed. You can also just look at that folder in a file manager over SFTP, as Protect SSH on the host describes. The point is only to see that the files exist. Then make one login fail, on purpose. In a browser, open the login page of an app that you publish through NPM. Type a wrong password one time. Check the configuration again with fail2ban-client -t. Compare the fresh log line with your pattern. Use the optional walk-through in Add a jail for an exposed web login. A jail that stays empty usually means that the pattern does not match the real log line.
73.4
REFERENCE CARD
Paste this into the Notes of the host in Proxmox (select the node homelab and open its Notes panel). Depending on your version of Proxmox, that is a tab of its own, or a box in the tab Summary. Both hold the same thing. It renders as Markdown. It gives you the commands of fail2ban for daily use in one place.
Example — the tab Notes of Proxmox in Edit mode, with a reference card pasted into it. This is the same picture wherever the manual shows this step. The card that you paste is the one from your own chapter. It is not the one shown here.📋 Reference — paste into the host's Notes (not a shell command)
## fail2ban — HOST (SSH) + NPM CT 103 (web logins)
host shell https://192.168.1.220:8006 · docs https://github.com/fail2ban/fail2ban/wiki
```sh
# which jails are active?
fail2ban-client status
# banned addresses for one jail
fail2ban-client status sshd
# unban one device (use YOUR real IP, not the letter x)
fail2ban-client set sshd unbanip 192.168.1.x
# clear every ban in every jail at once
fail2ban-client unban --all
# test the config after any edit
fail2ban-client -t
# read errors / recent activity
journalctl -u fail2ban -e
# see the firewall rules fail2ban added (Debian 13 = nftables)
nft list ruleset | grep -i f2b
# start / stop / restart the service
systemctl start fail2ban · systemctl stop fail2ban · systemctl restart fail2ban
```
Part H · Ops & troubleshooting
74WatchYourLAN
WatchYourLAN sweeps your network and lists each device: name, IP, MAC, and vendor. It pings your phone the moment that an unknown one appears.
This chapter needs the items below. You came here directly? Do them first. Each item takes a short time. Nothing on this page works without them.
Proxmox is installed and works at https://192.168.1.220:8006. You can log in as root. See Ch. 6 · Install Proxmox. At your first visit, the browser shows a certificate warning. Select Advanced. Then select Proceed. The warning is normal. Proxmox makes its own certificate.
The Debian 13 image is downloaded. You do this one time. See Ch. 10 · The container wizard. Without the image, the Template list in the wizard is empty.
You have an SSH key from your PC (Ch. 9 · SSH & the terminal). Or you type a password in the two password boxes of the wizard. The wizard needs one of the two. The Next button stays grey until you give one.
You know your own network numbers. Where this chapter shows 192.168.1.x, use your own numbers. The rule is in Ch. 3 · How to read this manual. The address of this chapter must be outside the range that your router gives out by itself (the DHCP pool, often .100–.200, but yours can differ). An address inside the pool can go to a phone later. Two devices on one address break name lookups, and the cause is hard to find.
Optional — Ch. 13 · ntfy. This chapter can send you notifications, but only if that chapter is already running. All other steps work without it.
Commands marked HOST run on the server. In the Proxmox page, select homelab in the left tree. Then select >_ Shell. Commands marked CT run inside the container of this chapter. The chapter shows you how to get there.
The wizard does not work?Next is grey: you gave no password and no key. Give one of the two. The Template list is empty: the Debian image is not downloaded. Download it first. Each tab is explained in Ch. 10 · The container wizard.
WatchYourLAN scans your local network. It lists each device that it finds: name, IP, MAC, and the vendor of the hardware. It flags new or unknown devices. This is useful when the LAN also carries gadgets of IoT, a smart TV, and the phones of other people. It sends an alert when something new connects.
Notice — where these commands run
Run the shell commands inside CT 132. Do not run them on the Proxmox host (the server, 192.168.1.220). Do not run them on your PC. Open the shell of the container in one of two equivalent ways. In the Proxmox web UI, open homelab → >_ Shell and run pct enter 132. This needs no password. Or run ssh root@192.168.1.253 from your PC. Only the commands pct and pveam return to the host. Each is marked where you use it. One more thing about this container: it has to run Docker inside itself. A Proxmox container does not do that unless it has a setting called nesting. This is simply the permission for a container to run containers of its own. The step to create it below switches it on.
74.1
CREATE THE CONTAINER
Do this task with the mouse in the Proxmox web UI. There is nothing to type. You prefer the command line? The supplement below does the same task with one command pct create.
Open https://192.168.1.220:8006.
Click homelab in the left tree.
Click the blue button Create CT at the top right.
Complete each tab as the reference shows. Leave any field that is not listed at its default value.
Keep Start after created unticked. The wizard cannot set the feature keyctl that Docker needs. So one command on the host comes next.
The button Create CT — node view, top right.
The General tab, filled in with CT ID 132, hostname watchyourlan, and Unprivileged container ticked.
Wizard reference — Create CT 132
Tab → Field
Entry
General → Node
Select homelab.
General → CT ID
Type 132. Do not keep the number that the wizard suggests.
General → Hostname
Type watchyourlan.
General → Unprivileged container
Keep this box ticked.
General → Nesting
Keep this box ticked. It is ticked by default. The wizard has no box for keyctl, which Docker also needs. The host command after Finish sets it. It is the first line of the next listing.
General → Password / SSH public key
Keep the password empty. Paste your public key in the SSH field: ssh-ed25519 AAAA…your-key-here you@your-pc. With the key, you can run ssh root@192.168.1.253 from your PC. The command pct enter 132 on the host needs no password.
Template → Storage, Template
Select local. Then select debian-13-standard.
Disks → Storage, Disk size
Select local-lvm. Set 6 GiB.
CPU → Cores
Set 1 core.
Memory → Memory (MiB)
Set 1024. Keep Swap at its default.
Network → IPv4
Select Static. Set IPv4/CIDR to 192.168.1.253/24. Set Gateway to 192.168.1.1. Keep IPv6 at its default.
DNS → DNS domain
Keep this field empty. Do not type 192.168.1.1 here.
DNS → DNS servers
Always type 192.168.1.1. Never keep this field empty.
Confirm
Read the summary. Keep Start after created unticked. Select Finish.
The wizard has no box for three settings: the Docker permission keyctl, the timezone, and start at boot. The first command below sets all three. Run these 3 commands on the host. They set the missing settings, start the container, and open its shell. Each part is explained in Ch. 10 · The container wizard, section "The host command every build needs".
⌨ Type this on the Proxmox host (homelab)
Before you run anything on this page: every 192.168.1.x address below is this manual's example network. If your own network uses different numbers, substitute yours as you type — the rule is in Ch. 3 · How to read this manual. A command that runs with the wrong address usually succeeds and leaves you unreachable.
pct set 132 --features nesting=1,keyctl=1 --onboot 1 --timezone host
pct start 132
pct enter 132 # now INSIDE CT 132 — the rest of this page runs here
Notice — set your timezone
--timezone host makes the container match the Proxmox host. Without it, a new container uses UTC. Its logs and history are then hours off your local time. The Docker container that you start inside it later keeps a clock of its own. So you must name the zone a second time there. That is the part TZ=Region/City of the line docker run below. Where you see TZ=Region/City, replace it with the name of your own zone. For example, America/New_York or Europe/Berlin. Run timedatectl list-timezones on the host to see each valid name. A wrong zone only makes clocks and schedules odd. Nothing breaks.
Prefer the terminal? — the same task with one pct create command
⌨ Type this on the Proxmox host (homelab)
TMPL=$(pveam available --section system | awk '/debian-13-standard/{print $2}' | tail -1)
pveam download local "$TMPL" # once per host; harmless to re-run
pct create 132 local:vztmpl/"$TMPL" \
--hostname watchyourlan --cores 1 --memory 1024 --rootfs local-lvm:6 \
--net0 name=eth0,bridge=vmbr0,ip=192.168.1.253/24,gw=192.168.1.1 \
--nameserver 192.168.1.1 --features nesting=1,keyctl=1 --unprivileged 1 --onboot 1 --timezone host
pct start 132
pct enter 132 # you are now INSIDE CT 132 — everything below runs here
This part has no buttons. You type commands inside CT 132. You are already there from pct enter 132 above. (You closed that shell? Open homelab → >_ Shell and run pct enter 132 again.)
The >_ Console button of the CT opens a login: prompt, not a shell. Use pct enter 132 from homelab → >_ Shell.
You are now in the shell of CT 132. Install Docker. Then start WatchYourLAN in one Docker container.
How the scan works is worth one paragraph. It decides how the container starts. To find your devices, WatchYourLAN shouts a short question onto the network: "who is using this address?" It writes down whoever answers. That question is called ARP. It only travels as far as the network that the asker is plugged into. So the container must share the own network connection of CT 132. It must not get a small private one of its own. The part --network host of the command below arranges that. On a private network of its own, it would find exactly one device: itself.
Install the Docker engine and curl.
Start WatchYourLAN so that it shares the network of CT 132. Tell it which interface to scan. Keep its data in a folder outside the container, which survives updates.
The command ends in an error? Read the message. Look for the words cgroup, overlay, or permission denied anywhere in it. Any of the three means the same thing. CT 132 did not get nesting. This is the permission that a Proxmox container needs before it can run Docker inside itself. On the Proxmox host (not inside the CT), run pct set 132 --features nesting=1,keyctl=1. Then run pct reboot 132. Then run the line docker run again.
Explanation of each part
apt update && apt install -y docker.io curl
Refreshes the list of packages that are available. Then installs Docker (the engine for containers) and curl, with no prompt to confirm (-y). A new Debian container has no curl. You use it for the health check on the Reference card.
docker run -d --name watchyourlan --restart=unless-stopped
Starts a container in the background with the name 'watchyourlan'. It restarts by itself after a crash or a reboot, unless someone stopped it by hand.
--network host
It does not give the container a virtual network of its own that is isolated. It shares the network of the host machine directly. This is required so that the scanner can send ARP and see each device on your real LAN.
-e IFACES="eth0"
Tells the app which network interface to scan. Here it is the wired card of the container, eth0. Separate several names with spaces to scan more than one.
-e TZ=Region/City
Sets the timezone of the container. The GUI then shows times in your local zone. Replace it with a real name from timedatectl list-timezones.
-v /opt/watchyourlan:/data/WatchYourLAN
Stores the database of devices and the settings of the app on the host at /opt/watchyourlan. They survive when the container is deleted and made again.
aceberg/watchyourlan:v2
The Docker image to run: WatchYourLAN. It is a light scanner of IPs. It lists which devices are online or offline. It keeps an inventory that rolls in the volume of data. The :v2 on the end names the version that you want. You always get version 2 of the app. That matters, because the jump from version 1 to version 2 changed how the app works. Its maker may later ship a version 3 that changes things again. Your container will not switch to it by itself.
Notice — the name of the interface must match
Run ip a inside CT 132 to confirm the name of the interface. In a Proxmox container, it is almost always eth0. It shows something else (for example ens18)? Put that name in the part -e IFACES= of the command. Make the container of the app again. The exact five steps are in Ch. 12 · After every build + common Proxmox tasks, section "Change a setting on a Docker app". Your devices that are saved in /opt/watchyourlan are not affected. A plain docker restart will not pick up the change. Each setting that you hand over with -e is fixed at the moment that the container is created. You can only change it if you build the container again.
74.3
NAME YOUR DEVICES & TURN ON ALERTS — IN THE WEB GUI
Open http://192.168.1.253:8840. Use the IP of the CT, 192.168.1.253, not the host 192.168.1.220. There is no account and no wizard for setup. The Home page shows a table of each device that the first scan found. The columns are Name, IP, MAC, Hardware (the vendor, your best clue), Date (last seen), Known, and On. A green check in On means that the device is online now.
The Home page after the first scan — columns Name, IP, MAC, Hardware, Date, Known, and On.
First, name what you recognise
Give each device that you know a name now. A stranger then stands out later.
Click the button Edit above the table, next to the search box. Each cell Name becomes a text field.
Type a name for each device that you recognise. For example smart TV, phone, or your PC. Use the column Hardware for the vendor to identify the ones with no label.
Set the switch Known on for each device that you recognise. A device with the switch off is a possible stranger. Examine it.
Click Edit again to leave the edit mode.
Edit mode — cells Name that you can edit, switches Known that are visible.
Click the symbol ⋮ at the end of any row to open the page of that device. It has a chart of the history online and offline, with controls for ping, Wake-on-LAN, and delete.
Click History in the top bar. It shows when each device connected and disconnected. This is handy to find a device that keeps dropping the Wi-Fi.
The page of a device, opened from the menu ⋮ — a chart of history, with ping, Wake-on-LAN, and delete.The History page — events of connect and disconnect for each device.
Then, make a new device ping your phone
WatchYourLAN sends alerts through Shoutrrr. This manual pushes to your phone with ntfy. Set a URL of Shoutrrr. Each unknown MAC that appears then pings you at once.
Install the ntfy app on your phone. Subscribe to a name of a topic that you invent, for example wyl-home-7f3k. Any device that knows the name of the topic can post to it. So make it long and not easy to guess.
In the Web GUI, click Config in the top navigation bar. Scroll to the field for the URL of Shoutrrr.
Use your own ntfy server if you built one. These alerts name the devices on your home network. ntfy.sh is a public server. Anyone who guesses your topic can read them. You did Ch. 13 · ntfy? Send them to your own server instead. Use the same form of address that Ch. 72 · Update notifications uses: ntfy://:tk_YOUR-TOKEN@192.168.1.227/wyl-home-7f3k?scheme=http, with your own token tk_…. The alerts then never leave your house.
You skipped that chapter? The public server works. Set it to ntfy://ntfy.sh/wyl-home-7f3k. This is the scheme ntfy://, the server, then your topic. Keep the name of the topic long and not easy to guess. Remember that anyone who learns it can read your list of devices.
Click Save. Then click Test notification to confirm that a message reaches your phone.
The basic page Config (Config in the top navigation bar) — the field for the URL of Shoutrrr is set to an address of ntfy, with the buttons Save and Test notification.
Notice — set it at creation time instead
The page Config above is the easy route. It is enough. There is a second route. You can make the address part of the command that builds the container. Add one more line -e, -e SHOUTRRR_URL="ntfy://ntfy.sh/wyl-home-7f3k", to the command docker run. Make the container of the app again. The exact five steps are in Ch. 12 · After every build + common Proxmox tasks, section "Change a setting on a Docker app". Your devices that are saved in /opt/watchyourlan are not affected. To push to your own ntfy server (see Ch. 13 · ntfy) and not to the public one, swap ntfy.sh for the address of your server in the URL of Shoutrrr.
A new MAC address appears? WatchYourLAN messages that topic at once. Open the GUI. Give the device a name. Set Known. Or work out what it is.
Notice — your own phone can look like a stranger
Modern phones use a random Wi-Fi MAC address for each network. So your own phone can show up as a new unknown device. Open the Wi-Fi settings on the phone for your home network. Turn the option private / random MAC off. The phone then keeps one stable address that WatchYourLAN recognises.
74.4
WHEN IT GOES WRONG
The Web GUI at http://192.168.1.253:8840 loads, but the list of devices is empty or shows only the container itself. The name in IFACES is wrong, or --network host is missing. Run ip a inside CT 132 to find the real interface (usually eth0). Then run docker rm -f watchyourlan. Run the line docker run again with the correct -e IFACES=. Confirm that --network host is there. Without it, the scanner can only see itself.
To install or run Docker inside the CT fails: 'failed to start docker daemon', an error of overlay or overlay2, or an error of cgroup or permission. A Proxmox container does not run Docker inside itself until it gets nesting. This is the permission for a container to run containers of its own. On the Proxmox host, run pct set 132 --features nesting=1,keyctl=1. Then run pct reboot 132. Back inside CT 132, run systemctl restart docker. Try the command docker run again.
New devices show up in the GUI, but no notification ever reaches your phone. WatchYourLAN sends a notification only when a URL of Shoutrrr is set. Click Config in the top navigation bar. Set the URL to the one that you chose above: ntfy://:tk_YOUR-TOKEN@192.168.1.227/<your-topic>?scheme=http for your own server, or ntfy://ntfy.sh/<your-topic> for the public one. (Or add -e SHOUTRRR_URL="…" to docker run and make the container again.) Subscribe to that same topic in the ntfy app on your phone. Use the test button to confirm. The own server of ntfy rejects a missing or wrong token with no visible error. See Ch. 72 · Update notifications.
You changed TZ, IFACES, or another value -e and ran docker restart watchyourlan, but the old value is still in effect. Environment variables are fixed when the container is created, not at a restart. Make it again. Run docker rm -f watchyourlan. Then paste the full command docker run … again with the new value. The data in /opt/watchyourlan is kept.
74.5
A download step fails with Temporary failure resolving deb.debian.org, or with another "cannot resolve" message. The container has no working DNS server. It cannot change a name into an address. This is not a typing mistake. It does not fix itself. In the Proxmox page, select this container in the left tree. Open DNS. Select Edit. Type your router address in DNS servers (192.168.1.1 here; use your own). Then run pct reboot 132 in the host shell. Run the failed step again.
A command fails. You do not know if you are on the server or in the container. Read the prompt. In the container, it ends with the name of the container. On the server, it shows root@homelab. The prompt still shows root@homelab after pct enter? Then the command did not work. Type exit. Run the pct enter line again. Check the prompt before you paste anything else. You can paste a build block on the server by mistake. It seems to work. It installs without an error, and the app even answers. But the app is on the server, and it must not be there.
How to see that it happened, and how to undo it. The app does not open at the container address (192.168.1.253). It does open at the server address (192.168.1.220) on the same port. Then the app is on the host. To remove it, run docker rm -f watchyourlan in the host shell. Then run pct enter 132. Check that the prompt changed. Paste the build block again. You lose nothing in the container, because nothing was built there. The first command can show Error: No such container. This is good. It means that the app was never on the host. Do not paste the build block again. Look for another cause.
The page does not open. The browser spins, or says it cannot connect. Do these checks in order, in the host shell. 1. Is the container running? Run pct status 132. It must say running. If it does not, run pct start 132. 2. Is the container at the address that you typed? Run pct config 132 | grep net0. It shows the real address. A wrong digit in the wizard puts the container at another address, and nothing warns you. 3. Does the app run in the container? Run pct enter 132. Then run docker ps. An empty list means that the app did not start. Run docker ps -a to see that it stopped. Run docker logs to see why. 4. Does the app answer in the container? Run curl -I http://localhost followed by the port of the app. You get a reply here, but nothing from your PC? Then the address or your own network is the problem. The app is fine. Your browser reaches 192.168.1.253 but not the port? Then the app is down. It reaches neither? Then the container is down.
Docker does not start, or you see Cannot connect to the Docker daemon, a keyring error, or an overlay error. This is the most common failure in these guides. It means that the two container features are off. A later pct set --features can switch them off, also when you set them before. Run this in the host shell, not in the container: pct set 132 --features nesting=1,keyctl=1. Then run pct reboot 132. Then run the failed step again. Type both settings on one line. If you send only one setting, it replaces the pair and switches the other one off.
REFERENCE CARD
Paste this into 132 → Summary → Notes. The essentials then travel with the container. Before you ever run the update line on this card, compare it with the docker run you actually used at install. The card is a snapshot of the standard build: if you added anything of your own — a device, an extra -e setting, a second folder — it is not on the card, and re-running the card's line drops it. The container comes back up looking healthy with your setting gone. The update line below still says TZ=Region/City. That is a placeholder, not a real timezone: run it unchanged and the app comes back on UTC while looking perfectly healthy, so every schedule and timestamp silently shifts. Put your own zone in before you use this card — the same one you set at install.
Example — the tab Notes of Proxmox in Edit mode, with a reference card pasted into it. This is the same picture wherever the manual shows this step. The card that you paste is the one from your own chapter. It is not the one shown here.📋 Reference — paste into this container's Notes in Proxmox (not a shell command)
## WatchYourLAN — CT 132
dashboard http://192.168.1.253:8840 · host-network ARP scan · docs https://github.com/aceberg/WatchYourLAN
```sh
# is it running?
docker ps --filter name=watchyourlan
curl -fsS http://localhost:8840 >/dev/null && echo OK # quick health check
ip a # confirm the interface name for IFACES
# logs (last 50)
docker logs watchyourlan --tail 50
# stop / start / restart
docker stop watchyourlan
docker start watchyourlan
docker restart watchyourlan
# is there an update? ("Image is up to date" = no)
docker pull aceberg/watchyourlan:v2
# update / change IFACES, TZ, or notifications (data survives in /opt/watchyourlan)
docker pull aceberg/watchyourlan:v2 && docker rm -f watchyourlan && docker run -d --name watchyourlan --restart=unless-stopped --network host -e IFACES="eth0" -e TZ=Region/City -v /opt/watchyourlan:/data/WatchYourLAN aceberg/watchyourlan:v2
```
Part H · Ops & troubleshooting
75Dockge
Dockge gives you a panel in the browser to start, stop, edit, and update your Docker compose stacks. These are the same jobs that you would do over SSH.
This chapter needs the items below. You came here directly? Do them first. Each item takes a short time. Nothing on this page works without them.
Proxmox is installed and works at https://192.168.1.220:8006. You can log in as root. See Ch. 6 · Install Proxmox. At your first visit, the browser shows a certificate warning. Select Advanced. Then select Proceed. The warning is normal. Proxmox makes its own certificate.
The Debian 13 image is downloaded. You do this one time. See Ch. 10 · The container wizard. Without the image, the Template list in the wizard is empty.
You have an SSH key from your PC (Ch. 9 · SSH & the terminal). Or you type a password in the two password boxes of the wizard. The wizard needs one of the two. The Next button stays grey until you give one.
You know your own network numbers. Where this chapter shows 192.168.1.x, use your own numbers. The rule is in Ch. 3 · How to read this manual. The address of this chapter must be outside the range that your router gives out by itself (the DHCP pool, often .100–.200, but yours can differ). An address inside the pool can go to a phone later. Two devices on one address break name lookups, and the cause is hard to find.
Commands marked HOST run on the server. In the Proxmox page, select homelab in the left tree. Then select >_ Shell. Commands marked CT run inside the container of this chapter. The chapter shows you how to get there.
The wizard does not work?Next is grey: you gave no password and no key. Give one of the two. The Template list is empty: the Debian image is not downloaded. Download it first. Each tab is explained in Ch. 10 · The container wizard.
Notice — which machine you type on
Run each command on this page inside CT 133. Do not run them on the Proxmox host (the server, 192.168.1.220). Only a few commands for the host run there, such as pct. Each is marked where you use it. Two ways open that shell. Run pct enter 133 on the host (homelab → >_ Shell first). Or run ssh root@192.168.1.254 from your PC. (The own button >_ Console of the container shows a prompt login: that the containers of this manual cannot answer. Skip it.)
The >_ Console button of the CT opens a login: prompt, not a shell. Use pct enter 133 from homelab → >_ Shell.
75.1
CREATE THE CONTAINER
Do this task with the mouse in the Proxmox web UI. There is nothing to type. You prefer the command line? The supplement for the terminal does the same task with one command pct create.
Open https://192.168.1.220:8006.
Click homelab in the left tree.
Click the blue button Create CT at the top right.
Create CT sits at the top right of the node view.
Complete the tabs of the wizard as the reference table shows. Leave any field that is not listed at its default.
The General tab filled in with CT ID 133 and hostname dockge.
Docker needs a special permission called keyctl. The wizard of the container cannot turn it on by itself. So finish with the host commands below the table. They turn it on for you.
Prefer the terminal? — the same task with one pct create command
⌨ Type this on the Proxmox host (homelab)
Before you run anything on this page: every 192.168.1.x address below is this manual's example network. If your own network uses different numbers, substitute yours as you type — the rule is in Ch. 3 · How to read this manual. A command that runs with the wrong address usually succeeds and leaves you unreachable.
TMPL=$(pveam available --section system | awk '/debian-13-standard/{print $2}' | tail -1)
pveam download local "$TMPL" # once per host; harmless to re-run
pct create 133 local:vztmpl/"$TMPL" \
--hostname dockge --cores 1 --memory 1024 --rootfs local-lvm:6 \
--net0 name=eth0,bridge=vmbr0,ip=192.168.1.254/24,gw=192.168.1.1 \
--nameserver 192.168.1.1 --features nesting=1,keyctl=1 --unprivileged 1 --onboot 1 --timezone host
pct start 133
pct enter 133 # you are now INSIDE CT 133 — everything below runs here
Type 133. Do not keep the number that the wizard suggests.
General → Hostname
Type dockge.
General → Unprivileged container
Keep this box ticked.
General → Nesting
Keep this box ticked. It is ticked by default. The wizard has no box for keyctl, which Docker also needs. The host command after Finish sets it. It is the first line of the next listing.
General → Password / SSH public key
Keep the password empty. Paste your public key in the SSH field: ssh-ed25519 AAAA…your-key-here you@your-pc. With the key, you can run ssh root@192.168.1.254 from your PC. The command pct enter 133 on the host needs no password.
Template → Storage, Template
Select local. Then select debian-13-standard.
Disks → Storage, Disk size
Select local-lvm. Set 6 GiB.
CPU → Cores
Set 1 core.
Memory → Memory (MiB)
Set 1024. Keep Swap at its default.
Network → IPv4
Select Static. Set IPv4/CIDR to 192.168.1.254/24. Set Gateway to 192.168.1.1. Keep IPv6 at its default.
DNS → DNS domain
Keep this field empty. Do not type 192.168.1.1 here.
DNS → DNS servers
Always type 192.168.1.1. Never keep this field empty.
Confirm
Read the summary. Keep Start after created unticked. Select Finish.
The wizard has no box for three settings: the Docker permission keyctl, the timezone, and start at boot. The first command below sets all three. Run these 3 commands on the host. They set the missing settings, start the container, and open its shell. Each part is explained in Ch. 10 · The container wizard, section "The host command every build needs".
⌨ Type this on the Proxmox host (homelab)
pct set 133 --features nesting=1,keyctl=1 --onboot 1 --timezone host
pct start 133
pct enter 133 # now INSIDE CT 133 — the rest of this page runs here
You are now in the container. Each command below runs there.
75.2
INSTALL DOCKGE
This part has no buttons. You type commands inside CT 133. You are already there from pct enter 133 above. (You closed that shell? Open homelab → >_ Shell and run pct enter 133 again.)
Install Docker. Create the two folders that Dockge uses. Start the container. The tool curl is added next to Docker. The health check in the reference card then works later.
Install Docker and curl.
Create /opt/dockge/data for the own database of Dockge. Create /opt/stacks for the compose stacks that it manages. You prefer to click, not to type? A graphical SFTP client can create the same two folders. See Ch. 12 · After every build + common Proxmox tasks, section "Move a file to or from the server", for how to connect one.
Start the Dockge container.
Open http://192.168.1.254:5001. Create the admin account on the first visit.
First visit: create the admin account.
Summary of the container: CT 133 / dockge, 6 GiB of disk, 1 CPU, 1024 MB of RAM. Network: 192.168.1.254 (a fixed address on your home network). Features: Nesting + keyctl (the two switches of permission that Docker needs, both explained above).
Updates the list of packages. Installs the Docker engine and curl. The flag -y answers the prompt to confirm for you. Dockge bundles its own docker compose inside its image. So you do not install a separate package for compose here.
mkdir -p /opt/dockge/data /opt/stacks
Creates a folder for the own data of Dockge. Creates a separate folder for the compose stacks (groups of containers) that Dockge manages.
docker run -d --name dockge --restart=unless-stopped -p 5001:5001
Starts a container in the background with the name dockge. It restarts by itself after a crash or a reboot. It exposes its web interface on port 5001.
-v /var/run/docker.sock:/var/run/docker.sock
Gives the container access to Docker itself. Dockge can then create, start, and stop other containers for you.
-v /opt/dockge/data:/app/data
Stores the own settings and database of Dockge on the host at /opt/dockge/data. They survive when you build the container again.
-v /opt/stacks:/opt/stacks
Shares the same path of the stacks folder between the host and the container. Dockge can then read and write the compose files that it manages.
Points Dockge at the folder that holds its stacks. This must match the mount /opt/stacks above. Then runs the Dockge image. The tag :1 pins it to major version 1. A future version 2.0 that breaks things never installs by surprise.
Notice — set your timezone
The setting --timezone host above covers the LXC itself. It does not cover Dockge or the apps that you run inside it. A Docker app that you add later keeps its own clock. The logs of that app come out in UTC? Add the line -e TZ=Region/City to its command docker run, with the name of your own zone. (In a compose file, add TZ: Region/City under environment:.) Run timedatectl list-timezones to see each valid name. A wrong zone only makes clocks and schedules odd. Nothing breaks.
Notice — Dockge sees only its own Docker
Dockge controls the Docker that runs on its own container. It cannot reach compose apps that live in other LXCs. To drive them all from one Dockge, use its multi-agent feature. Run a small Dockge agent in each Docker CT. Then click Add Agent here. If not, Dockge manages only the stacks that you keep under /opt/stacks beside it.
The dialog Add Agent, to connect a Dockge agent in another CT.Setting up an agent in another CT
An "agent" is nothing special. It is a second Dockge, installed the same way as the one on this page. Repeat the commands apt install and docker run from INSTALL DOCKGE above inside the other Docker CT. Then open its own http://<IP of that CT>:5001 one time. Create its admin account, exactly as you did here. Back on this Dockge, click Add Agent. Fill in the URL of that CT (for example http://192.168.1.221:5001), the admin username and password that you just created there, and an optional friendly name. Then click Connect. Its stacks now show up with the stacks of this CT in one dashboard.
75.3
HOW TO USE IT
Dockge gives you buttons in place of the commands docker compose. Do these steps to build your first stack.
Open http://192.168.1.254:5001. On the first visit, create the admin account with a username and a password.
The main dashboard lists each stack, with + Compose to add one.
Click + Compose to make a new stack. Give it a short name in lowercase. Dockge creates the folder /opt/stacks/<name>.
Write or paste the content of compose.yaml in the editor on the right. You have only a command docker run …? Paste it in the box Docker Run. Then click Convert to Compose. Dockge writes the yaml for you.
The box Docker Run on the page for a new stack, with Convert to Compose.
Click Deploy. Dockge saves the file and starts the stack. The pane of the terminal at the bottom shows the output live, including pulls of images and errors.
The pane of the terminal that streams the output of the pull of an image, live, after Deploy.
For daily control, open a stack. Use Start, Stop, or Restart. Use Update to pull newer images and to build the containers again. Data in volumes that are mapped stays safe.
The page of a stack: Start, Stop, Restart, and Update.
To change a setting, edit the yaml on the page of the stack. Click Deploy again. This is the full loop for configuration and upgrades.
75.4
WHEN IT GOES WRONG
Docker does not start inside CT 133, or docker run fails with an error that mentions keyctl or the keyring of the kernel. Your type of container (LXC) needs an extra switch of permission called keyctl. It is separate from the switch Nesting that you already turned on. Docker needs it before it can run inside. On the Proxmox host, run pct set 133 --features nesting=1,keyctl=1. Then run pct reboot 133. Then run the install again.
The browser cannot open http://192.168.1.254:5001 and the page never loads. Inside CT 133, run docker ps. The container dockge must show Up. It is missing? Run docker logs dockge --tail 50 to see why. Docker itself is down? Run systemctl status docker. Also confirm that you browse from a device on the same network 192.168.1.x (the same home Wi-Fi or router as the server).
docker run stops with "Bind for 0.0.0.0:5001 failed: port is already allocated". Something already uses port 5001. Stop that service. Or map a different port of the host. Change -p 5001:5001 to -p 5002:5001. Then open http://192.168.1.254:5002 instead.
The dashboard of Dockge is empty, or apps that exist such as Immich and Paperless do not appear. Dockge lists only stacks whose folder lives under /opt/stacks. This is one folder for each stack, each with a compose.yaml. Create or move each stack as /opt/stacks/<name>/compose.yaml. Dockge cannot see apps that run in other LXCs directly. Run a small Dockge agent in each of those CTs. Add it here with Add Agent.
You open a stack and see a warning like "the attribute version is obsolete, it will be ignored". This warning is harmless. Docker Compose v2 ignores the old line version: at the top. To silence it, delete the line version: "3.x" from the compose.yaml of that stack. Save.
75.5
A download step fails with Temporary failure resolving deb.debian.org, or with another "cannot resolve" message. The container has no working DNS server. It cannot change a name into an address. This is not a typing mistake. It does not fix itself. In the Proxmox page, select this container in the left tree. Open DNS. Select Edit. Type your router address in DNS servers (192.168.1.1 here; use your own). Then run pct reboot 133 in the host shell. Run the failed step again.
A command fails. You do not know if you are on the server or in the container. Read the prompt. In the container, it ends with the name of the container. On the server, it shows root@homelab. The prompt still shows root@homelab after pct enter? Then the command did not work. Type exit. Run the pct enter line again. Check the prompt before you paste anything else. You can paste a build block on the server by mistake. It seems to work. It installs without an error, and the app even answers. But the app is on the server, and it must not be there.
How to see that it happened, and how to undo it. The app does not open at the container address (192.168.1.254). It does open at the server address (192.168.1.220) on the same port. Then the app is on the host. To remove it, run docker rm -f dockge in the host shell. Then run pct enter 133. Check that the prompt changed. Paste the build block again. You lose nothing in the container, because nothing was built there. The first command can show Error: No such container. This is good. It means that the app was never on the host. Do not paste the build block again. Look for another cause.
The page does not open. The browser spins, or says it cannot connect. Do these checks in order, in the host shell. 1. Is the container running? Run pct status 133. It must say running. If it does not, run pct start 133. 2. Is the container at the address that you typed? Run pct config 133 | grep net0. It shows the real address. A wrong digit in the wizard puts the container at another address, and nothing warns you. 3. Does the app run in the container? Run pct enter 133. Then run docker ps. An empty list means that the app did not start. Run docker ps -a to see that it stopped. Run docker logs to see why. 4. Does the app answer in the container? Run curl -I http://localhost followed by the port of the app. You get a reply here, but nothing from your PC? Then the address or your own network is the problem. The app is fine. Your browser reaches 192.168.1.254 but not the port? Then the app is down. It reaches neither? Then the container is down.
Docker does not start, or you see Cannot connect to the Docker daemon, a keyring error, or an overlay error. This is the most common failure in these guides. It means that the two container features are off. A later pct set --features can switch them off, also when you set them before. Run this in the host shell, not in the container: pct set 133 --features nesting=1,keyctl=1. Then run pct reboot 133. Then run the failed step again. Type both settings on one line. If you send only one setting, it replaces the pair and switches the other one off.
REFERENCE CARD
Paste this into 133 → Summary → Notes. Proxmox renders it as Markdown. So the card stays easy to read and the commands stay one click away. Before you ever run the update line on this card, compare it with the docker run you actually used at install. The card is a snapshot of the standard build: if you added anything of your own — a device, an extra -e setting, a second folder — it is not on the card, and re-running the card's line drops it. The container comes back up looking healthy with your setting gone.
Example — the tab Notes of Proxmox in Edit mode, with a reference card pasted into it. This is the same picture wherever the manual shows this step. The card that you paste is the one from your own chapter. It is not the one shown here.📋 Reference — paste into this container's Notes in Proxmox (not a shell command)
## Dockge — CT 133
dashboard http://192.168.1.254:5001 · stacks in /opt/stacks · docs https://github.com/louislam/dockge
```sh
# is it running?
docker ps --filter name=dockge
curl -fsS http://localhost:5001 >/dev/null && echo OK # quick health check
# logs (last 50)
docker logs dockge --tail 50
# stop / start / restart
docker stop dockge
docker start dockge
docker restart dockge
# is there an update? ("Image is up to date" = no)
docker pull louislam/dockge:1
# update (settings survive in /opt/dockge/data, stacks in /opt/stacks)
docker pull louislam/dockge:1 && docker rm -f dockge && docker run -d --name dockge --restart=unless-stopped -p 5001:5001 -v /var/run/docker.sock:/var/run/docker.sock -v /opt/dockge/data:/app/data -v /opt/stacks:/opt/stacks -e DOCKGE_STACKS_DIR=/opt/stacks louislam/dockge:1
# multi-agent: run a dockge agent in each other Docker CT, then "Add Agent" in the UI
```
(the Update notifications chapter adds automatic pings when a new image is available)
Part H · Ops & troubleshooting
76Grafana + Prometheus
Grafana draws the graphs. Prometheus stores the numbers. Node-exporter measures the machine. Three small containers turn dashboard 21674 into a live view of CPU, memory, disk, and network that goes back weeks.
This chapter needs the items below. You came here directly? Do them first. Each item takes a short time. Nothing on this page works without them.
Proxmox is installed and works at https://192.168.1.220:8006. You can log in as root. See Ch. 6 · Install Proxmox. At your first visit, the browser shows a certificate warning. Select Advanced. Then select Proceed. The warning is normal. Proxmox makes its own certificate.
The Debian 13 image is downloaded. You do this one time. See Ch. 10 · The container wizard. Without the image, the Template list in the wizard is empty.
You have an SSH key from your PC (Ch. 9 · SSH & the terminal). Or you type a password in the two password boxes of the wizard. The wizard needs one of the two. The Next button stays grey until you give one.
You know your own network numbers. Where this chapter shows 192.168.1.x, use your own numbers. The rule is in Ch. 3 · How to read this manual. The address of this chapter must be outside the range that your router gives out by itself (the DHCP pool, often .100–.200, but yours can differ). An address inside the pool can go to a phone later. Two devices on one address break name lookups, and the cause is hard to find.
Commands marked HOST run on the server. In the Proxmox page, select homelab in the left tree. Then select >_ Shell. Commands marked CT run inside the container of this chapter. The chapter shows you how to get there.
The wizard does not work?Next is grey: you gave no password and no key. Give one of the two. The Template list is empty: the Debian image is not downloaded. Download it first. Each tab is explained in Ch. 10 · The container wizard.
Notice — which machine you type on
Run each command on this page inside CT 136. Do not run them on the Proxmox host (the server, 192.168.1.220). Only the commands pct run on the host. Each is marked where you use it. Open the shell of the container in one of two equivalent ways. In the Proxmox web UI, open homelab → >_ Shell and run pct enter 136. This needs no password. Or run ssh root@192.168.1.212 from your PC.
Notice — this measures the container, not the Proxmox host
Node-exporter reports on the machine where it runs. Here that is CT 136. The numbers for CPU, memory, disk, and network are those of this container. They are not those of the Proxmox host. This is good enough to learn Grafana and to watch the stack itself. To graph the Proxmox host, node-exporter must run on the host. This chapter does not set that up. Ch. 15 · Beszel already shows the host.
76.1
CREATE THE CONTAINER
Do this task with the mouse in the Proxmox web UI. There is nothing to type. You prefer the command line? The supplement for the terminal does the same task with one command pct create.
Open https://192.168.1.220:8006.
Click homelab in the left tree.
Click the blue button Create CT at the top right.
The button Create CT.
Complete the tabs of the wizard as the reference table shows. Leave any field that is not listed at its default.
The General tab: CT ID 136, hostname observability.
The wizard cannot set the feature keyctl. This is a permission of the kernel that Docker needs to manage its containers. The wizard to create cannot turn it on for you. So finish with the host commands below the table.
Wizard reference — Create CT 136
Tab → Field
Entry
General → Node
Select homelab.
General → CT ID
Type 136. Do not keep the number that the wizard suggests.
General → Hostname
Type observability.
General → Unprivileged container
Keep this box ticked.
General → Nesting
Keep this box ticked. It is ticked by default. The wizard has no box for keyctl, which Docker also needs. The host command after Finish sets it. It is the first line of the next listing.
General → Password / SSH public key
Keep the password empty. Paste your public key in the SSH field: ssh-ed25519 AAAA…your-key-here you@your-pc. With the key, you can run ssh root@192.168.1.212 from your PC. The command pct enter 136 on the host needs no password.
Template → Storage, Template
Select local. Then select debian-13-standard.
Disks → Storage, Disk size
Select local-lvm. Set 15 GiB.
CPU → Cores
Set 2 cores.
Memory → Memory (MiB)
Set 2048. Keep Swap at its default.
Network → IPv4
Select Static. Set IPv4/CIDR to 192.168.1.212/24. Set Gateway to 192.168.1.1. Keep IPv6 at its default.
DNS → DNS domain
Keep this field empty. Do not type 192.168.1.1 here.
DNS → DNS servers
Always type 192.168.1.1. Never keep this field empty.
Confirm
Read the summary. Keep Start after created unticked. Select Finish.
The wizard has no box for three settings: the Docker permission keyctl, the timezone, and start at boot. The first command below sets all three. Run these 3 commands on the host. They set the missing settings, start the container, and open its shell. Each part is explained in Ch. 10 · The container wizard, section "The host command every build needs".
⌨ Type this on the Proxmox host (homelab)
Before you run anything on this page: every 192.168.1.x address below is this manual's example network. If your own network uses different numbers, substitute yours as you type — the rule is in Ch. 3 · How to read this manual. A command that runs with the wrong address usually succeeds and leaves you unreachable.
pct set 136 --features nesting=1,keyctl=1 --onboot 1 --timezone host
pct start 136
pct enter 136 # now INSIDE CT 136 — the rest of this page runs here
You are now in the container. Each command below runs there.
Prefer the terminal? — the same task with one pct create command
⌨ Type this on the Proxmox host (homelab)
TMPL=$(pveam available --section system | awk '/debian-13-standard/{print $2}' | tail -1)
pveam download local "$TMPL" # once per host; harmless to re-run
pct create 136 local:vztmpl/"$TMPL" \
--hostname observability --cores 2 --memory 2048 --rootfs local-lvm:15 \
--net0 name=eth0,bridge=vmbr0,ip=192.168.1.212/24,gw=192.168.1.1 \
--nameserver 192.168.1.1 --features nesting=1,keyctl=1 --unprivileged 1 --onboot 1 --timezone host
pct start 136
pct enter 136 # you are now INSIDE CT 136 — everything below runs here
This part has no buttons. These commands run inside CT 136. From the host Shell (homelab → >_ Shell), run pct enter 136. You are still inside from the section before? Carry on. To open the host Shell is the one step in the GUI. Every command after that is typed.
The whole loop is three small containers. node-exporter reads the statistics of the machine. Prometheus scrapes and stores them. Grafana draws them. You write two files: a configuration for the scrape of Prometheus and a compose file. Then you start them together.
Open homelab → >_ Shell and run pct enter 136. It puts you inside the container as root, with no password. Or run ssh root@192.168.1.212 from your PC.
The >_ Console button of the CT opens a login: prompt, not a shell. Use pct enter 136 from homelab → >_ Shell.
Install Docker, Docker Compose, and curl. A new Debian container has no curl. The health check of the reference card needs it.
Create /opt/observability and move into it.
Write prometheus.yml. It tells Prometheus to pull the metrics of node-exporter every 15 seconds.
Write docker-compose.yml. This is the bundle of three containers.
Run docker compose up -d to start all three in the background.
Check that it runs: docker compose ps shows all three services with the status Up. The first start can take a minute or two. The page does not answer yet? Wait and refresh before you change anything.
You prefer a mouse to typing? Connect to 192.168.1.212 with a file-explorer tool over SFTP. Use WinSCP on Windows. Use Dolphin or Files on Linux or Mac. The exact steps to connect are in Ch. 12 · After every build + common Proxmox tasks, section "Move a file to or from the server". Open /opt/observability. Create both files there with a text editor, in place of the commands cat > below. Either way, you end up with the same two files.
Summary of the container: CT 136 / observability, 15 GiB of disk, 2 CPU, 2048 MB of RAM, 192.168.1.212/24, Nesting + keyctl.
Refreshes the list of packages. Then installs Docker (the engine for containers), Docker Compose (which starts several containers together from one file), and curl (the health check of the reference card uses it). The flag -y answers the prompt to confirm for you.
mkdir -p /opt/observability && cd /opt/observability
Creates a folder to hold the two configuration files of this stack. Moves into it.
cat > prometheus.yml <<'EOF' … EOF
Writes the configuration file of Prometheus. It tells Prometheus to scrape (pull) metrics every 15 seconds from a target named node-exporter on port 9100.
scrape_interval: 15s
Sets how often Prometheus pulls fresh metrics: every 15 seconds.
targets: ['node-exporter:9100']
The address that Prometheus polls: the name of the node-exporter container and port 9100. Compose resolves the name node-exporter to the right container on its private network. So you never hard-code an IP.
cat > docker-compose.yml <<'EOF' … EOF
Writes the file that defines which containers to run and how they connect. Each image is pinned to a major version, not to :latest. A future release that breaks things then never installs by surprise. The reason is the same as for the tag :1 of Dockge earlier in this Part.
prometheus (service)
The database and collector of metrics. It stores data as a time series. It exposes its web UI on port 9090. It mounts the configuration file as read-only. The named volume prom_data keeps its stored metrics between restarts.
node-exporter (service)
A small program that reads the own statistics for hardware of the machine where it runs: CPU, RAM, disk, network. It exposes them on port 9100 for Prometheus to collect.
pid: host
Lets this container see the list of processes of the machine that runs it, not only its own. Here that machine is CT 136. This is needed for statistics that are accurate.
command: ["--path.rootfs=/host"]
Tells node-exporter where inside the container the real filesystem is mounted. Its readings then reflect that machine, not the container of node-exporter.
volumes: ["/:/host:ro,rslave"]
Mounts the whole filesystem (/) of the machine into the container at /host, read-only (ro). The option rslave for propagation of mounts lets the container read the real information about disk and mounts in a safe way.
grafana (service)
The web app for dashboards and graphs. It reads data from Prometheus and shows it. Its web UI runs on port 3000. Its settings and dashboards persist in the volume grafana_data.
restart: unless-stopped
Restarts each container by itself after a crash or a reboot, unless you stopped it by hand.
volumes: {prom_data: {}, grafana_data: {}}
Declares two named areas of storage that Docker manages. The data of Prometheus and Grafana then survives restarts and updates of the containers.
docker compose up -d
Starts all three services in the background. This is detached mode. The flag -d sets it.
Notice — the clock of the app is separate
The setting --timezone host above covers the LXC. A Docker app that runs inside the LXC keeps its own clock. The times of a graph look wrong? Add a line TZ under the block environment: of Grafana in docker-compose.yml. For example:
Run timedatectl list-timezones to see each valid name for your area. Then run docker compose up -d again. Grafana restarts with the new setting.
76.3
CONNECT PROMETHEUS AND IMPORT DASHBOARD 21674
The containers run. But Grafana does not yet know where to read data, and it has no dashboard. You fix both in the web UI of Grafana. This is a setup that you do one time.
Notice — several groups of panels stay blank, and that is normal
Dashboard 21674 ("All in one") is built to cover several types of device at once. It does not cover only this stack. Next to node-exporter, it has groups of panels for a Raspberry Pi or PiKVM, Windows Exporter, a Solis solar inverter, smart plugs from Tuya, and rates of currency exchange. This chapter gives you node-exporter only. So only the panels for CPU, memory, disk, and network fill in. The groups for PiKVM, Windows, solar, Tuya, and currency stay on "No data" for ever, because you have none of those sources of data. That is expected. It is not a broken install. The entry WHEN IT GOES WRONG below covers what a real failure looks like.
Open Grafana at http://192.168.1.212:3000. The first login is admin / admin. Grafana then makes you set a new password.
First login: admin / admin, then a change of password that is forced.
Add a data source: Connections → Data sources → Add data source → Prometheus. Set the URL to http://prometheus:9090. This is the name of the compose service. It is notlocalhost.
URL of the data source: http://prometheus:9090.
Click Save & test. It must report that the data source works.
A green message of success confirms the connection.
Import the dashboard: Dashboards → New → Import. Type 21674 in the box for the ID. Click Load.
The Import screen: ID 21674, then Load.
At the bottom of the import screen, select your Prometheus data source in the dropdown DS_PROMETHEUS. Then click Import. The panels of node-exporter (CPU, memory, disk, network) fill in within a minute. The notice above explains why the rest stay blank.
DS_PROMETHEUS set to your Prometheus data source, then Import.
Notice — logs are a separate layer that is optional
Dashboard 21674 uses no logs. You may later want central logs as well. Add Loki beside this stack. Loki is a store for logs that collects and indexes the text of logs, the way that Prometheus collects numbers. Add also a small helper program that is called a "shipper". It copies your log files into Loki. Then add Loki as a second data source in Grafana.
The shipper to use is Alloy. An older shipper called Promtail reached end-of-life in March 2026. So use Alloy for anything that is new. Skip this whole notice if you want only the dashboard of metrics.
Notice — this overlaps Beszel, on purpose
The core is three light containers. Expect roughly 1–1.5 GB of RAM in use. This stack overlaps Ch. 15 · Beszel on metrics of the system. Keep Beszel for the view at a quick glance. Use this stack for the dashboard that is detailed and weeks deep. On a machine with 16 GB, run a few heavy apps at once, not all of them. Watch the totals in Beszel so that you stay within budget.
76.4
HOW TO USE IT
The import that you do one time is done. Daily use has two controls: the range of time and the rate of refresh.
Open http://192.168.1.212:3000 and log in.
Click Dashboards in the left menu. Open the dashboard All in one (21674). It shows live panels for CPU, RAM, disk, and network of this container.
The dashboard All in one (21674), live.
Use the picker for the range of time at the top right to change the window. Select Last 6 hours for recent events. Select Last 7 days for trends. The dropdown beside it sets the interval of auto-refresh, for example 1m. The page then updates itself.
The picker for the range of time and the interval of auto-refresh, top right.
Hover over a graph to read the exact value at a point in time. Open the menu ⋮ of a panel. Select View to see it full-screen. Press Esc to go back.
One panel, opened full-screen with its menu ⋮ → View.
Click the star at the top of the dashboard to make it a favourite. Then open Administration → Default preferences. Set it as the Home Dashboard. Grafana then opens this page at each login.
Administration → Default preferences — Home Dashboard set to the favourite 21674.
76.5
WHEN IT GOES WRONG
Docker does not start inside CT 136, or docker compose up -d fails with an error that mentions keyctl or the keyring of the kernel. LXC is the type of container that this CT uses. "Unprivileged" means that it runs with fewer permissions of the host by default, for safety. So this unprivileged LXC needs the feature keyctl turned on by hand, not only Nesting. On the Proxmox host, run pct set 136 --features nesting=1,keyctl=1. Then run pct reboot 136. Then run the install again.
Dashboard 21674 shows "No data" on the panels for CPU, memory, disk, and network. This is not only the groups for PiKVM, Windows, solar, Tuya, and currency that the notice above already excuses. Either the Prometheus data source is not added, or node-exporter is not scraped. Confirm that the URL of the data source is http://prometheus:9090. Then open the own page of Prometheus, Status → Targets. Browse http://192.168.1.212:9090/targets. Check that node-exporter shows as UP.
The own Targets page of Prometheus — node-exporter shown as UP.
The import screen asks for a data source that does not match. You import 21674? Choose your Prometheus data source in the dropdown DS_PROMETHEUS at the bottom of the import screen before you click Import.
The Prometheus container does not start.prometheus.yml must use spaces for indentation, never tabs. Run cd /opt/observability && docker compose logs prometheus. Look for an error of YAML parse. Fix the spacing. Then run docker compose up -d again.
You cannot log into Grafana. The first login is admin / admin. It forces a change of password. You are locked out? Reset it from inside CT 136:
You prefer the terminal? — reset the admin password with one command
Replace <newpass> with a password that you choose. Type the password itself there, not the angle brackets.
⌨ Type this inside CT 136
docker ps
Read that output first. Find the row of Grafana. Compose names it from the folder. So it is observability-grafana-1 unless you renamed /opt/observability. Use the name that you really see in the next line. Replace <newpass> with a real password. If you type it as it is, the angle brackets become the password.
⌨ Then this, with your own container name and password
A container stops with "Bind for 0.0.0.0:3000 failed: port is already allocated" (or 9090 or 9100). Another service already uses that port. Stop it. Or change the number on the left of the line ports: of that service in docker-compose.yml. For example "3001:3000". Then run docker compose up -d and open the new port. It is quickest to type the change here. But the same route with a file explorer from earlier in this chapter (WinSCP or Dolphin or Files over SFTP into /opt/observability) works just as well if you prefer not to type it.
76.6
A download step fails with Temporary failure resolving deb.debian.org, or with another "cannot resolve" message. The container has no working DNS server. It cannot change a name into an address. This is not a typing mistake. It does not fix itself. In the Proxmox page, select this container in the left tree. Open DNS. Select Edit. Type your router address in DNS servers (192.168.1.1 here; use your own). Then run pct reboot 136 in the host shell. Run the failed step again.
A command fails. You do not know if you are on the server or in the container. Read the prompt. In the container, it ends with the name of the container. On the server, it shows root@homelab. The prompt still shows root@homelab after pct enter? Then the command did not work. Type exit. Run the pct enter line again. Check the prompt before you paste anything else. You can paste a build block on the server by mistake. It seems to work. It installs without an error, and the app even answers. But the app is on the server, and it must not be there.
How to see that it happened, and how to undo it. The app does not open at the container address (192.168.1.212). It does open at the server address (192.168.1.220) on the same port. Then the app is on the host. To remove it, run cd /opt/observability && docker compose down (this app is a Compose stack — several containers at once, so there is no single name to remove) in the host shell. Then run pct enter 136. Check that the prompt changed. Paste the build block again. You lose nothing in the container, because nothing was built there. The first command can show Error: No such container. This is good. It means that the app was never on the host. Do not paste the build block again. Look for another cause.
The page does not open. The browser spins, or says it cannot connect. Do these checks in order, in the host shell. 1. Is the container running? Run pct status 136. It must say running. If it does not, run pct start 136. 2. Is the container at the address that you typed? Run pct config 136 | grep net0. It shows the real address. A wrong digit in the wizard puts the container at another address, and nothing warns you. 3. Does the app run in the container? Run pct enter 136. Then run docker ps. An empty list means that the app did not start. Run docker ps -a to see that it stopped. Run docker logs to see why. 4. Does the app answer in the container? Run curl -I http://localhost followed by the port of the app. You get a reply here, but nothing from your PC? Then the address or your own network is the problem. The app is fine. Your browser reaches 192.168.1.212 but not the port? Then the app is down. It reaches neither? Then the container is down.
Docker does not start, or you see Cannot connect to the Docker daemon, a keyring error, or an overlay error. This is the most common failure in these guides. It means that the two container features are off. A later pct set --features can switch them off, also when you set them before. Run this in the host shell, not in the container: pct set 136 --features nesting=1,keyctl=1. Then run pct reboot 136. Then run the failed step again. Type both settings on one line. If you send only one setting, it replaces the pair and switches the other one off.
REFERENCE CARD
Paste this into 136 → Summary → Notes. Proxmox renders it as Markdown. So the card stays easy to read and the commands stay one click away.
Example — the tab Notes of Proxmox in Edit mode, with a reference card pasted into it. This is the same picture wherever the manual shows this step. The card that you paste is the one from your own chapter. It is not the one shown here.📋 Reference — paste into this container's Notes in Proxmox (not a shell command)
## Grafana + Prometheus — CT 136
dashboard http://192.168.1.212:3000 · Prometheus http://192.168.1.212:9090 · docs https://grafana.com/docs/grafana/latest/
stack lives in /opt/observability · dashboard id 21674 needs a Prometheus data source at http://prometheus:9090
```sh
# is it running?
cd /opt/observability && docker compose ps
curl -fsS http://localhost:3000 >/dev/null && echo OK # quick health check
# logs (last 50)
cd /opt/observability && docker compose logs --tail 50
# stop / start / restart
cd /opt/observability && docker compose stop
cd /opt/observability && docker compose start
cd /opt/observability && docker compose restart
# is there an update? ("up to date" = no)
cd /opt/observability && docker compose pull
# update (metrics survive in the prom_data + grafana_data volumes)
cd /opt/observability && docker compose pull && docker compose up -d
```
(the Update notifications chapter adds automatic pings when a new image is available)
Part H · Ops & troubleshooting
77Speedtest Tracker
Run a test of your internet speed on a schedule. Graph download, upload, and latency over days and weeks. The cable company says "it is fine"? You then have the record to prove otherwise.
This chapter needs the items below. You came here directly? Do them first. Each item takes a short time. Nothing on this page works without them.
Proxmox is installed and works at https://192.168.1.220:8006. You can log in as root. See Ch. 6 · Install Proxmox. At your first visit, the browser shows a certificate warning. Select Advanced. Then select Proceed. The warning is normal. Proxmox makes its own certificate.
The Debian 13 image is downloaded. You do this one time. See Ch. 10 · The container wizard. Without the image, the Template list in the wizard is empty.
You have an SSH key from your PC (Ch. 9 · SSH & the terminal). Or you type a password in the two password boxes of the wizard. The wizard needs one of the two. The Next button stays grey until you give one.
You know your own network numbers. Where this chapter shows 192.168.1.x, use your own numbers. The rule is in Ch. 3 · How to read this manual. The address of this chapter must be outside the range that your router gives out by itself (the DHCP pool, often .100–.200, but yours can differ). An address inside the pool can go to a phone later. Two devices on one address break name lookups, and the cause is hard to find.
Optional — Ch. 13 · ntfy. This chapter can send you notifications, but only if that chapter is already running. All other steps work without it.
Commands marked HOST run on the server. In the Proxmox page, select homelab in the left tree. Then select >_ Shell. Commands marked CT run inside the container of this chapter. The chapter shows you how to get there.
The wizard does not work?Next is grey: you gave no password and no key. Give one of the two. The Template list is empty: the Debian image is not downloaded. Download it first. Each tab is explained in Ch. 10 · The container wizard.
77.1
CREATE THE CONTAINER
You do this task with the mouse in the Proxmox web UI. There is nothing to type. You prefer the command line? The supplement for the terminal below does the same task with one command pct create.
Open https://192.168.1.220:8006.
Click homelab in the left tree.
Click the blue button Create CT at the top right.
Node view, the blue button Create CT, top right.
Complete the tabs as the reference for the wizard shows. Leave any field that is not listed at its default value.
The General tab, filled in as the reference for the wizard below shows.
Docker needs one extra switch of permission. The wizard has no box for it. It is called keyctl. This manual runs that one command for you on the host as the final step.
Wizard reference — Create CT 137
Tab → Field
Entry
General → Node
Select homelab.
General → CT ID
Type 137. Do not keep the number that the wizard suggests.
General → Hostname
Type speedtest.
General → Unprivileged container
Keep this box ticked.
General → Nesting
Keep this box ticked. It is ticked by default. The wizard has no box for keyctl, which Docker also needs. The host command after Finish sets it. It is the first line of the next listing.
General → Password / SSH public key
Keep the password empty. Paste your public key in the SSH field: ssh-ed25519 AAAA…your-key-here you@your-pc. With the key, you can run ssh root@192.168.1.213 from your PC. The command pct enter 137 on the host needs no password.
Template → Storage, Template
Select local. Then select debian-13-standard.
Disks → Storage, Disk size
Select local-lvm. Set 6 GiB.
CPU → Cores
Set 1 core.
Memory → Memory (MiB)
Set 1024. Keep Swap at its default.
Network → IPv4
Select Static. Set IPv4/CIDR to 192.168.1.213/24. Set Gateway to 192.168.1.1. Keep IPv6 at its default.
DNS → DNS domain
Keep this field empty. Do not type 192.168.1.1 here.
DNS → DNS servers
Always type 192.168.1.1. Never keep this field empty.
Confirm
Read the summary. Keep Start after created unticked. Select Finish.
The wizard has no box for three settings: the Docker permission keyctl, the timezone, and start at boot. The first command below sets all three. Run these 3 commands on the host. They set the missing settings, start the container, and open its shell. Each part is explained in Ch. 10 · The container wizard, section "The host command every build needs".
⌨ Type this on the Proxmox host (homelab)
Before you run anything on this page: every 192.168.1.x address below is this manual's example network. If your own network uses different numbers, substitute yours as you type — the rule is in Ch. 3 · How to read this manual. A command that runs with the wrong address usually succeeds and leaves you unreachable.
pct set 137 --features nesting=1,keyctl=1 --onboot 1 --timezone host
pct start 137
pct enter 137 # now INSIDE CT 137 — the rest of this page runs here
Notice — set your timezone
The option --timezone host makes the container follow the clock of the host. Where a placeholder Region/City appears later, replace it with your own zone. List the valid names with timedatectl list-timezones. Pick the line that matches your city, for example America/New_York or Europe/Berlin. A correct timezone matters here. The test each hour must fire at the right hour. The timestamps of the graph must match your local clock.
Prefer the terminal? — the same task with one pct create command
⌨ Type this on the Proxmox host (homelab)
TMPL=$(pveam available --section system | awk '/debian-13-standard/{print $2}' | tail -1)
pveam download local "$TMPL" # once per host; harmless to re-run
pct create 137 local:vztmpl/"$TMPL" \
--hostname speedtest --cores 1 --memory 1024 --rootfs local-lvm:6 \
--net0 name=eth0,bridge=vmbr0,ip=192.168.1.213/24,gw=192.168.1.1 \
--nameserver 192.168.1.1 --features nesting=1,keyctl=1 --unprivileged 1 --onboot 1 --timezone host
pct start 137
pct enter 137 # you are now INSIDE CT 137 — everything below runs here
This part has no buttons. You type each command below inside the shell of CT 137. To open that shell is the one step in the GUI. Click homelab in the left list. Then click >_ Shell. Run pct enter 137.
The >_ Console button of the CT opens a login: prompt, not a shell. Use pct enter 137 from homelab → >_ Shell.
Notice — two other ways in
The host Shell is not the only door. ssh root@192.168.1.213 from your PC lands at the same place. (The own button >_ Console of the container shows a prompt login: that the containers of this manual cannot answer. Skip it.) Only the commands pct and pveam themselves run on the host. Everything else below runs inside CT 137.
Warning — never change APP_KEY after the first run
Speedtest Tracker refuses to start without an APP_KEY. This is a secret key that scrambles your saved history of tests. Only this app, with this exact key, can read it back. The commands below make the key one time. They store it in /opt/speedtest/app_key. They read it back at each start with base64:$(cat /opt/speedtest/app_key). Keep that file. The key ever changes? Then each result that you already recorded becomes unreadable. The app can throw errors of decryption at login. Back up /opt/speedtest with the rest of your data. You can copy the whole folder with a command in the terminal. Or you can drag it out with a file manager over SFTP (see Ch. 12 · After every build + common Proxmox tasks, section "Move a file to or from the server").
Notice — tests each hour use real bandwidth
A speed test can transfer close to 1 GB for each run on a fast connection. The default schedule each hour can add up to tens of GB each day. Know this if your plan is metered, capped, or by satellite. To test less often, set the schedule before the first run. For example, -e SPEEDTEST_SCHEDULE="0 */4 * * *" for every 4 hours. You already ran the container one time? To change that value, edit the command docker run below. Make the container again. Run docker rm -f speedtest-tracker. Then run the same line docker run again with the new schedule. That only replaces the container that runs. Your saved history in /opt/speedtest is untouched.
Type these commands inside CT 137. Do not type them on the Proxmox host (the server at 192.168.1.220) or on your PC.
Install Docker and curl. (The reference card uses curl for a health check.)
Create the folder for data. Make the key for encryption one time. The test [ -f … ] || writes the key only if it does not exist yet. So each later run reuses the same key.
Start the container. Replace both placeholders Region/City with your own timezone before you run it.
docker later reports command not found, or the container does not start right after the install? Run systemctl enable --now docker. Then try the line docker run again.
⌨ Type this inside CT 137
apt update && apt install -y docker.io curl
mkdir -p /opt/speedtest
# make the encryption key ONCE and save it — every later run reuses the same key
[ -f /opt/speedtest/app_key ] || openssl rand -base64 32 > /opt/speedtest/app_key
docker run -d --name speedtest-tracker --restart=unless-stopped -p 8080:80 \
-e PUID=1000 -e PGID=1000 -e TZ="Region/City" -e DISPLAY_TIMEZONE="Region/City" \
-e APP_KEY="base64:$(cat /opt/speedtest/app_key)" \
-e APP_URL="http://192.168.1.213:8080" \
-e DB_CONNECTION=sqlite -e SPEEDTEST_SCHEDULE="0 * * * *" \
-v /opt/speedtest:/config lscr.io/linuxserver/speedtest-tracker
Explanation of each part
apt update && apt install -y docker.io curl
Refreshes the list of packages. Installs Docker, the tool that you need to run apps in containers. Installs also curl, which the reference card uses for a quick health check.
Creates the folder for data. Then makes the key for encryption of the app one time and saves it to a file. The part [ -f … ] || means "create the key only if it does not exist yet". So each later run reuses the same key. This matches the official method. The docs make the key with echo "base64:$(openssl rand -base64 32)". But to write it to a file keeps it the same across restarts and upgrades.
docker run -d --name speedtest-tracker --restart=unless-stopped -p 8080:80
Starts a container in the background with the name speedtest-tracker. It restarts by itself after a crash or a reboot. It maps port 8080 of the host to port 80 of the container, its web port.
-e PUID=1000 -e PGID=1000
Sets the ownership of files that the app uses inside its own container to UID/GID 1000. Each CT in this manual runs as root, with no separate user for a desktop. So this only gives the files of the app a fixed owner that is not root, inside its own filesystem. You do not need a matching account with UID 1000 on the host or in the CT.
Sets the clock of the container and the times that the dashboard shows to your local zone. Scheduled tests then run at the correct hour. The timestamps of the graph match your local time. Replace both placeholders with your own name of tz, for example America/New_York.
-e APP_KEY="base64:$(cat /opt/speedtest/app_key)"
Reads the key that you saved above. Gives it to the app as its secret key for encryption. To read it from the file keeps it the same across restarts and upgrades.
-e APP_URL="http://192.168.1.213:8080"
Tells the app the address where you really reach it. Links in the dashboard, in emails, and in notifications then point back to the correct place.
-e DB_CONNECTION=sqlite
Tells the app to use SQLite, a simple database in a file. It does not use a separate database server. This is the driver that is recommended for a small install.
-e SPEEDTEST_SCHEDULE="0 * * * *"
A schedule in cron that tells the app to run a test of the internet speed by itself each hour, on the hour.
-v /opt/speedtest:/config
Stores the configuration, the database, and the key for encryption of the app on the host at /opt/speedtest. They survive restarts and upgrades of the container.
lscr.io/linuxserver/speedtest-tracker
The image of the container to run: the build of Speedtest Tracker by LinuxServer.io. This is the current image that people maintain for the project.
77.3
FIRST RUN
The app runs. Open the web app. Secure it. Confirm that it works.
On any computer or phone on your home network, open http://192.168.1.213:8080 in a web browser.
Log in with the account that is built in: admin@example.com / password.
The login page with the fields for the default account filled in.
Change the email and the password right away. Click the avatar at the top right. Then click Profile. Write the new password down.
The Profile page, with the fields for email and password being changed.
Run your first test now. Do not wait for the hour on the schedule. Click Queue Speedtest on the dashboard. The result appears after one or two minutes. Refresh the page.
The dashboard with the button Queue Speedtest, before any result exists.
77.4
USE IT — READ THE GRAPH
After the first login, the app runs on its own. The test each hour fills the graphs. You return to read them.
Read the dashboard. The cards show the latest download, upload, and ping. The graphs show the values across time. Watch for drops in the evening. Watch for drops that last across many days.
The dashboard after several tests each hour — cards for download, upload, and ping, with graphs of time that are filled with data.
To examine one test, open Results in the left sidebar. The page shows the full table of each test that was recorded. It includes which server ran it.
The Results page — the full table of each test that was recorded, with its server.
Set a threshold (optional). Open Settings. In the section for thresholds, set a minimum speed. The app then marks slower runs as failed.
The Settings page, section for thresholds, with a field for a minimum speed being set.
Turn on alerts (optional). In the section for notifications, connect a channel. Use your Ch. 13 · ntfy server, or a webhook of Discord. (A webhook is a private URL that Discord gives to one channel of your server. Any app that posts to that URL then shows up there as a message. Create one in the channel under Settings → Integrations → Webhooks.) The app then sends an alert for each test that fails. A slow night reaches your phone. You do not need to watch the dashboard.
The Settings page, section for notifications, that connects a channel with ntfy or a webhook of Discord.
You pick ntfy? It needs your token. The ntfy server that you built in Ch. 13 · ntfy refuses anything without one. It refuses in silence. The app reports the alert as sent. Your phone never rings. Use the same form of address that Ch. 72 · Update notifications uses, with your own token tk_… in it: ntfy://:tk_YOUR-TOKEN@192.168.1.227/homelab-alerts?scheme=http. Then send a test from the app. Wait until it really arrives on your phone before you trust it.
Notice — collect a week before you conclude
One slow result usually means a test server that is busy. It does not mean a bad connection. The same drop each evening for weeks points to a problem with the ISP. The history holds dates, speeds, and the test server that was used. Keep it open during the call to support as evidence.
77.5
WHEN IT GOES WRONG
At the start, the logs warn that APP_KEY is missing, or the web page is blank or shows an error 500. The container has no valid key. Inside CT 137, make sure that the key file exists. Run [ -f /opt/speedtest/app_key ] || openssl rand -base64 32 > /opt/speedtest/app_key. This writes a key only if there is none. Never run openssl … > /opt/speedtest/app_key without the test [ -f … ] ||. It overwrites a key that exists. Make sure that the command docker run includes -e APP_KEY="base64:$(cat /opt/speedtest/app_key)". Then make the container again. Run docker rm -f speedtest-tracker. Run the full command docker run again.
It worked before. After you make the container again, you cannot log in, or the logs show errors of decryption (unable to decrypt / MalformedUtf8). The APP_KEY changed. Data that was encrypted with the old key cannot be read. Keep the original value in /opt/speedtest/app_key. Always reuse it. Never make it again. The file is lost? Then the old results cannot be recovered. Run docker rm -f speedtest-tracker. (A stop alone leaves the name taken. The new docker run then dies with an error for a conflict of names.) Then run rm -rf /opt/speedtest. Then repeat the mkdir and the docker run commands from the install section, from the start. That makes a fresh key and starts a clean history.
You reach the login page but you do not know a username or a password. There is no button "create account". The app ships with a default admin account: admin@example.com / password. Log in with those. Then change the email and the password at once. Use the avatar at the top right → Profile.
Links in notifications or emails point to http://localhost or to the wrong address. A flag -e is only read when the container is created. A plain docker restart does not pick up a value that you changed. Edit the command docker run so that -e APP_URL="http://192.168.1.213:8080" shows the address that you really use to reach it. Then run docker rm -f speedtest-tracker, followed by that line docker run that you edited. Your data in /opt/speedtest is untouched.
Tests on a schedule report speeds that are clearly slower than a test by hand. Tests that fire exactly on the hour can hit servers that are congested. Start the schedule on a minute when traffic is low. For example -e SPEEDTEST_SCHEDULE="13 */2 * * *" (minute 13, every 2nd hour). Then make the container again. Run docker rm -f speedtest-tracker and run it again.
The browser shows "This site can't be reached" at 192.168.1.213:8080. The container does not run, or port 8080 is taken. Inside CT 137, run docker ps. speedtest-tracker is not listed? Run docker logs speedtest-tracker --tail 50 to see why it stopped. Then run docker restart speedtest-tracker. The logs mention that the port is already allocated? Edit -p 8080:80 in the command docker run to a free port of the host, for example -p 8081:80. Then run docker rm -f speedtest-tracker and the line docker run that you edited, again. You then reach the dashboard at the new port, for example http://192.168.1.213:8081.
77.6
A download step fails with Temporary failure resolving deb.debian.org, or with another "cannot resolve" message. The container has no working DNS server. It cannot change a name into an address. This is not a typing mistake. It does not fix itself. In the Proxmox page, select this container in the left tree. Open DNS. Select Edit. Type your router address in DNS servers (192.168.1.1 here; use your own). Then run pct reboot 137 in the host shell. Run the failed step again.
A command fails. You do not know if you are on the server or in the container. Read the prompt. In the container, it ends with the name of the container. On the server, it shows root@homelab. The prompt still shows root@homelab after pct enter? Then the command did not work. Type exit. Run the pct enter line again. Check the prompt before you paste anything else. You can paste a build block on the server by mistake. It seems to work. It installs without an error, and the app even answers. But the app is on the server, and it must not be there.
How to see that it happened, and how to undo it. The app does not open at the container address (192.168.1.213). It does open at the server address (192.168.1.220) on the same port. Then the app is on the host. To remove it, run docker rm -f speedtest-tracker in the host shell. Then run pct enter 137. Check that the prompt changed. Paste the build block again. You lose nothing in the container, because nothing was built there. The first command can show Error: No such container. This is good. It means that the app was never on the host. Do not paste the build block again. Look for another cause.
The page does not open. The browser spins, or says it cannot connect. Do these checks in order, in the host shell. 1. Is the container running? Run pct status 137. It must say running. If it does not, run pct start 137. 2. Is the container at the address that you typed? Run pct config 137 | grep net0. It shows the real address. A wrong digit in the wizard puts the container at another address, and nothing warns you. 3. Does the app run in the container? Run pct enter 137. Then run docker ps. An empty list means that the app did not start. Run docker ps -a to see that it stopped. Run docker logs to see why. 4. Does the app answer in the container? Run curl -I http://localhost followed by the port of the app. You get a reply here, but nothing from your PC? Then the address or your own network is the problem. The app is fine. Your browser reaches 192.168.1.213 but not the port? Then the app is down. It reaches neither? Then the container is down.
Docker does not start, or you see Cannot connect to the Docker daemon, a keyring error, or an overlay error. This is the most common failure in these guides. It means that the two container features are off. A later pct set --features can switch them off, also when you set them before. Run this in the host shell, not in the container: pct set 137 --features nesting=1,keyctl=1. Then run pct reboot 137. Then run the failed step again. Type both settings on one line. If you send only one setting, it replaces the pair and switches the other one off.
REFERENCE CARD
Paste this into 137 → Summary → Notes in Proxmox. The essentials then travel with the container. Before you ever run the update line on this card, compare it with the docker run you actually used at install. The card is a snapshot of the standard build: if you added anything of your own — a device, an extra -e setting, a second folder — it is not on the card, and re-running the card's line drops it. The container comes back up looking healthy with your setting gone. The update line below still says TZ=Region/City. That is a placeholder, not a real timezone: run it unchanged and the app comes back on UTC while looking perfectly healthy, so every schedule and timestamp silently shifts. Put your own zone in before you use this card — the same one you set at install.
Example — the tab Notes of Proxmox in Edit mode, with a reference card pasted into it. This is the same picture wherever the manual shows this step. The card that you paste is the one from your own chapter. It is not the one shown here.📋 Reference — paste into this container's Notes in Proxmox (not a shell command)
## Speedtest Tracker — CT 137
dashboard http://192.168.1.213:8080 · docs https://docs.speedtest-tracker.dev/
```sh
# is it running?
docker ps --filter name=speedtest-tracker
curl -fsS http://localhost:8080 >/dev/null && echo OK # quick health check
# logs (last 50)
docker logs speedtest-tracker --tail 50
# stop / start / restart
docker stop speedtest-tracker
docker start speedtest-tracker
docker restart speedtest-tracker
# is there an update? ("Image is up to date" = no)
docker pull lscr.io/linuxserver/speedtest-tracker
# update (settings + APP_KEY survive in /opt/speedtest — never delete it)
docker pull lscr.io/linuxserver/speedtest-tracker && docker rm -f speedtest-tracker && docker run -d --name speedtest-tracker \
--restart=unless-stopped -p 8080:80 -e PUID=1000 -e PGID=1000 -e TZ="Region/City" -e DISPLAY_TIMEZONE="Region/City" \
-e APP_KEY="base64:$(cat /opt/speedtest/app_key)" -e APP_URL="http://192.168.1.213:8080" \
-e DB_CONNECTION=sqlite -e SPEEDTEST_SCHEDULE="0 * * * *" -v /opt/speedtest:/config lscr.io/linuxserver/speedtest-tracker
```
(the Update notifications chapter adds automatic pings when a new image is out)
Explanation of each part
docker ps --filter name=speedtest-tracker
Lists the container if it runs. An empty result means that it is stopped. Check the logs next.
curl -fsS http://localhost:8080 >/dev/null && echo OK
Asks the app for its web page from inside the container. It prints OK only when the server answers. This is a fast confirmation that the app is up.
docker logs speedtest-tracker --tail 50
Shows the most recent 50 lines of the log output of the app, to troubleshoot.
Stops, starts, or restarts the container. For example, to apply a fix or to recover from a crash.
docker pull lscr.io/linuxserver/speedtest-tracker
Downloads the newest version of the image. "Image is up to date" means that there is no update.
docker rm -f speedtest-tracker
Removes the old container by force. It stops the container first. You can then replace it.
docker run … lscr.io/linuxserver/speedtest-tracker
Makes the container again from the image that you just downloaded, with the same settings as the original. It uses the same folder of data /opt/speedtest and the key for encryption that is stored there. So your recorded history is kept.
Part H · Ops & troubleshooting
78Where to go next
The manual ends here. Your homelab does not. A few honest words about the road ahead, the people who are already on it, and how to ask for help like someone who fixes things.
In this chapter
78.1
What you actually built
Step back for a second. You followed even the spine of this manual? Then a machine in your house blocks ads for everyone that you live with. It watches itself. It taps your phone when something is wrong. It answers to friendly names that you invented. You went further? Then it streams your media, guards your passwords, backs up your photos, and hosts the server that your friends play on. You did that. You read with care and you typed what you read. This is exactly what Ch. 1 · Welcome — what a homelab is promised.
More important: you now know what a container is. You know how to read a command before you run it. Everything else in this manual builds on those two things: IP addresses, DNS, reverse proxies. That knowledge transfers. It is the same knowledge that runs each datacenter on earth, at the size of a house.
78.2
Where the people are
Self-hosting has one of the friendliest communities in computing. You are now a member. Here is where to read, to learn, and in time to answer the questions of other people:
r/selfhosted — the stream of new apps. Someone posts a new tool that you can host yourself almost every day. The comments tell you honestly if it is any good.
r/homelab — the side of hardware: photos of racks, deals on mini-PCs, threads like "is this server worth $50". This is also where builds like the one in this manual get shared.
The Proxmox forum — use it when the question is about the host itself. The answers there come from people (and staff) who live in Proxmox all day.
awesome-selfhosted (search for the name in any search engine) — the giant list, curated, of each app that you can host yourself, sorted by category. Your catalog in Part D had 17 apps. This list has a thousand. Browse it the way that you read a menu: hungry, but do not order everything.
Each app in this manual has its own community. The link to the docs is on the spec plate of each chapter. This is the info box at the top of the chapter. It is also the door to the forum of the app, its Discord server, or its discussions on GitHub.
78.3
How to evaluate a new app before you install it
The instinct of the catalog is "ooh, I want that". It is the engine of this hobby. It deserves a seatbelt. Before a new app gets a container, the habits of this manual give you a checklist of thirty seconds:
Do people maintain it actively? Look at the date of the last release and the open issues on its repository. On GitHub, that is the page with the green button Code. Release dates and issues are both tabs near the top. A password manager that nobody has touched for two years is not a password manager.
Does it have a Docker image and docs that are honest? The instructions to install are a forum post from someone else? Wait.
What does it want to store? Can you rebuild that data, or is it irreplaceable? Irreplaceable means that it joins the backup plan (Ch. 64 · Backups done right (3-2-1)) before it holds anything real.
How much RAM does it want? Do you have the room? Check Beszel before and after. This is the habit from Ch. 21 · Choosing your apps.
Build it the way that this manual built everything. Use the full ritual after the build (Ch. 12 · After every build + common Proxmox tasks): its own container and a static address, a card in Notes, a monitor in Kuma with your alert in ntfy, a tile in Homarr, and a snapshot. That checklist keeps app number twenty as tidy as app number two.
78.4
How to ask for help like a sysadmin
One day, something will break in a way that Ch. 70 · When it breaks: troubleshooting does not cover. You will ask strangers for help. The difference between a post that nobody reads and a post that gets solved is almost all in how you ask:
Say what you expected. Say what happened instead. Say what you already tried. Three sentences.
Paste the exact text of the error. Do not describe it. Do not post a photo of your monitor. Copy it. Paste it inside a block of code. Type three backtick characters ( ``` ). Then the text of the error. Then three more backticks on their own line. Reddit and Discord both turn that into a clean box that is easy to read.
Include the logs around the failure. The reference card of each chapter for an app carries its command for logs. The chapters that build no container have nothing to log. These are the chapters on drives and on backups. Include also the basic shape of your setup: "Proxmox, Debian container, Docker, app version X".
Remove anything private before you post. This means your public IP, the names of real domains, tokens (the long random API keys that some apps use in place of a password), and passwords. (You learned the habit of placeholders in this manual. Use it in your own posts.)
You fixed it? Post the fix. You in the future, with a search engine, will thank you more often than you would believe.
Notice — you will be the helper sooner than you think
Six months from now, someone will post a problem that you already lived through. Answer them. This is the tax and the privilege of the hobby. To explain a thing is also the fastest way to find out how well you really know it.
78.5
The road from here
Nobody's homelab is finished. That is the point of the hobby. These are the common next steps, in rough order of appetite:
More storage and real discipline for backups. This manual covered it in Part G. You skipped it? Go back. Do not skip it for ever.
Clustering. Add a second Proxmox machine. The two can share the work. They cover for each other if one goes down. Search for "Proxmox clustering guide" when you are ready. It is a project of its own. It is not an add-on of five minutes.
A real domain name with valid certificates for HTTPS. You do not type the local IP address of your server. You type a name that you own. The padlock in the browser is real, not self-signed. The docs of the app for the reverse proxy (linked from its spec plate) cover how to get a free certificate through Let's Encrypt.
VLANs. These split your one home network into several separate ones on the same router. A smart bulb, a camera, or a game console that is hacked then cannot reach your server, even if it is compromised. Search for the model of your router plus "VLAN setup". You see then if yours supports it.
And one day you tell someone at work "oh, I run that at home". You then realise that the manual worked.
Thanks for building along. Now go and break something. You know how to fix it.
Back matter
Glossary
Every underlined term in the manual, in one list. Click any dotted-underline word in a chapter to see its definition in place.
#
*arr apps
A family of media-organizing tools (Sonarr, Radarr) that auto-fetch and sort shows and movies.
.env file
A plain text file of an app's settings, one NAME=value line each, read by the app every time it starts.
/24
The tail of an address like 192.168.1.220/24. It means: the first three number-groups name the network, the last one names the machine — every address starting with the same three groups is on the same home network.
0.0.0.0
An address meaning "every network interface" — a service listening on it can be reached from any device on your network, not just your own PC.
2FA
2FA — Two-Factor Authentication: a second proof (like a phone code) on top of your password.
3-2-1 backup
Keep three copies of data, on two media types, with one stored off-site.
:latest
A label meaning "newest version" of a software image, which can change without warning.
A
ActivityPub
The shared language servers use to follow each other, so a post or a music library on one server shows up on another.
admin token
A secret code that grants full administrator access to a service.
Alloy
Grafana Alloy — an agent that gathers metrics and logs and ships them to Prometheus/Loki.
API endpoint
API — Application Programming Interface: a specific web address where one program requests data from another.
API key
API — Application Programming Interface: a secret code that lets your app use another service.
API token
A long password that lets a program, rather than a person clicking in a web page, change settings on an online account.
ARP
ARP — Address Resolution Protocol: how devices find each other's hardware address on a local network.
B
Backblaze B2
A cheap online storage service for keeping backups off-site.
Basic Auth
A simple login method sending a username and password with each request.
Bedrock Edition
The Minecraft edition for consoles, phones, tablets, and the Microsoft Store app — it cannot join a Java Edition server without a bridge plugin like GeyserMC.
bind mount
Sharing a folder on your host computer directly into a container.
blkid
A Linux command that shows disks and their unique identifiers.
blocklist
A list of addresses or names that are automatically denied access.
brute-force
An attack that guesses passwords by trying countless combinations rapidly.
by-id
A stable disk name based on the drive's model and serial number.
C
chmod 600
A command making a file readable and writable only by its owner.
chown
A Linux command that changes which user and group own a file or folder, so a program running as that user may read and write it.
CIDR
A notation meaning a network of about 254 addresses, like 192.168.1.x.
CLI
CLI — Command-Line Interface: controlling software by typing text commands instead of clicking.
Cloudflare challenge
The "checking your browser" page some sites show to block bots; Prowlarr cannot get past it on its own.
consume folder
A watched folder on the server: anything you copy into it is imported by the app on its own, with no web page involved.
container
A lightweight, isolated box that runs one app with everything it needs.
coordinator stick
A small USB radio that plugs into the Home Assistant machine and lets it talk to Zigbee devices.
credential
A username, password, or key used to prove who you are.
cron
A timetable telling the scheduler when to run a task automatically.
CT
CT — Container: a lightweight Linux system that shares the host's core, not a full virtual machine.
curl
A command-line tool for fetching web pages or talking to services.
D
deb822
A newer, easier-to-read format for telling apt where to download software from — used in the repository files this chapter writes.
Debian
A stable, widely-used free Linux operating system.
deduplication
A backup tool trick where identical chunks of data are stored only once, even across many backups, to save space.
deny-all
A rule that blocks everyone unless another rule allows them (an ACL, Access Control List).
device passthrough
A Proxmox setting that lets one container use a piece of the server's hardware directly, such as the graphics chip.
DHCP
DHCP — Dynamic Host Configuration Protocol: the service, usually run by your router, that automatically lends each device on the network a temporary IP address.
direct-play
Playing a video as-is, without converting it first, saving processing power.
Discord webhook
A private web address Discord gives one of your server's channels — anything that posts to that URL shows up as a message there.
DNS
DNS — Domain Name System: the internet's phonebook turning names into numeric addresses.
DNS challenge
The way a certificate authority checks you really own a domain name: it asks you to put a short one-off record into that domain's DNS, then reads it back.
DNS rewrite
A rule in your own DNS server that answers a chosen name with an address you pick, instead of asking the internet.
Docker
Software that packages and runs apps in isolated containers.
docker compose
A tool that defines and runs multi-container apps from one settings file.
Docker daemon
The background service that actually builds and runs Docker containers.
Docker image
A read-only template containing an app and everything it needs to run.
docker run
A command that starts a new container from an image.
Docker socket
A special file Docker uses to answer "what containers are running right now" — mounting it into another container lets that container ask the same question.
docker.sock
The internal channel programs use to control Docker; powerful and sensitive.
DoH
DoH — DNS-over-HTTPS: looking up website names privately through an encrypted connection.
E
Egg
A Pelican server template (Minecraft, Palworld, Rust…) that supplies the correct install and startup commands for that game.
EmulatorJS
A browser-based emulator that lets you play classic console games (NES/SNES/GBA/PS1 era) straight from a web page, no extra software installed.
env-file
A plain text file storing settings and passwords apps read at startup.
environment variable
A named setting passed to a program to configure how it behaves.
EULA
EULA — End User License Agreement: the legal terms you accept to use software.
exit node
A Tailscale device that routes another device's entire internet connection through it — useful for browsing as if you were on your home network.
ext4
A common, reliable way Linux organizes files on a disk.
F
fail2ban
A tool that watches the log of a service. It blocks an address for a while after too many failed logins.
failregex
The search pattern a fail2ban filter uses to recognise a failed-login line in a log, with <HOST> marking where the address to ban appears.
federation
Separate servers connecting so users on different ones can interact.
ffmpeg
A powerful tool for converting and processing video and audio.
filesystem
The way files and folders are organized and stored on a disk.
firewall
A guard that controls which network connections are allowed in or out.
FlareSolverr
A helper container that solves Cloudflare's browser-check challenge on behalf of an app that can't pass it itself.
force-remove
Deleting a Docker container without stopping it first — the -f flag on docker rm.
forward-auth
A proxy trick where every request is checked by a login service before it reaches the app.
fstab
A Linux file listing which disks to mount automatically at startup.
full-text search
Searching the entire text of documents, not just their titles.
G
GameDig
A game-server query tool Uptime Kuma uses to check whether a game server is up and how many players are online — only works for games whose server answers a query protocol.
gateway
The device on your network that connects you to the internet.
A version-control system that tracks changes to files (code, notes) over time.
Gitea
A lightweight self-hosted service for storing git repositories — your own private GitHub.
gluetun
A container that routes other containers' traffic through a VPN safely.
Gotenberg
A service that converts documents like Word files into PDFs.
GPT
GUID Partition Table — the modern way a disk stores its map of partitions. Every disk this manual formats uses it; its older cousin is called MBR.
Grafana
A tool that turns metrics and logs into live dashboards and graphs.
guest
Proxmox's collective word for anything it runs — a container or a virtual machine. A backup job that says "all guests" means every container and VM on the server.
H
HAOS
HAOS — Home Assistant Operating System: a ready-made system for running smart-home software.
hardlink
A second name pointing to the same file, saving disk space.
hardware transcoding
Using the graphics chip to convert video quickly instead of the slower main processor.
headless
A computer with no screen or keyboard attached — you control it entirely from another machine, over the network.
healthcheck
A tiny self-test some Docker apps run on a timer; docker ps then shows (healthy) or (unhealthy) next to the app's status.
heap
Heap — the part of memory that a Java program (a Minecraft server, for example) uses for its data. You set its upper limit, such as 4 GB, with a flag.
heredoc
A way to type several lines of text straight into a command.
HTTPS
HTTPS — HyperText Transfer Protocol Secure: the encrypted, padlock version of web browsing.
I
identity provider
The one service that holds your logins and vouches for you to other apps.
IdP
IdP — Identity Provider: the service that holds your logins and vouches for you to apps.
iGPU
A graphics chip built into the processor itself; media apps can borrow it to convert video cheaply.
image
A frozen, ready-made copy of a program and everything it needs. You download an image once; a container is the running copy started from it.
image pinning
Pinning locks an app to a fixed version instead of the ever-changing "latest".
image tag
The version label after the colon in a Docker image name — jellyfin:10.9 means version 10.9, and latest means "whatever is newest right now".
indexer
A service that searches sites and finds downloadable content for other apps.
inotify
A built-in Linux service that tells a program the instant a file appears in a folder it is watching, instead of the program checking over and over.
IoT
IoT — Internet of Things: everyday devices like bulbs and sensors connected to the network.
iptables
A Linux tool for setting firewall rules that allow or block traffic.
is_mountpoint
A check confirming a folder actually has a disk attached to it.
J
jail
One fail2ban rule set: which log to watch, what a failed attempt looks like in it, how many failures earn a ban, and how long the ban lasts.
Java Edition
The Minecraft edition for Windows, macOS, and Linux computers — the only edition that can join a self-hosted server directly.
journalctl
A Linux command for reading system and service log messages.
JRE
JRE — Java Runtime Environment: the software needed to run Java-based programs.
K
kernel
The program that actually talks to a computer's hardware — its CPU, memory, and disk — on behalf of everything else running on it.
keyctl
A Linux kernel feature Docker needs to run inside an unprivileged container. Proxmox has no GUI checkbox for it — the wizard chapter sets it with one command: pct set <id> --features nesting=1,keyctl=1.
L
LAN
LAN — Local Area Network: the private network of devices in your home.
LDAP
LDAP — a directory protocol many apps use to check usernames and passwords centrally.
Let's Encrypt
A free service that issues security certificates for websites.
Loki
A log database (by Grafana) that stores and searches logs from all your services.
LXC
LXC — the Linux container technology that Proxmox uses for a CT. A CT shares the core of the host.
M
MAC
MAC — Media Access Control: a unique hardware ID built into a network device.
machine learning
ML — Machine Learning: software that learns patterns from data instead of being explicitly programmed.
MagicDNS
A Tailscale option that gives every machine on your tailnet a short name instead of a bare number.
MariaDB
An open-source database server, a drop-in replacement for MySQL — some apps use it to store their library or application data.
Meilisearch
A fast search engine you add to make your app's content searchable.
MFA
MFA — Multi-Factor Authentication: requiring more than one proof of identity to log in.
mkfs.ext4
A command that formats a disk with the ext4 filesystem.
mod loader
A program that runs on top of Minecraft so mods can plug into the game - Forge and Fabric are the two common ones.
modpack
A bundle of game mods packaged to install together easily.
monitor-only
A mode that watches and reports but makes no changes.
mount
Make a folder on the host computer show up inside a container too, so both see the exact same files.
mount unit
A small file systemd reads to know what to mount and where — the systemd equivalent of an /etc/fstab line.
MQTT
MQTT — Message Queuing Telemetry Transport: a lightweight messaging system smart devices use to talk.
MQTT broker
A small message-relay program that passes updates between smart-home add-ons like Zigbee2MQTT and Home Assistant.
N
nameserver
A server that answers requests to translate website names into addresses.
NAT
NAT — Network Address Translation: letting many devices share one internet address.
Nesting
A Proxmox switch letting a container run Docker or containers inside it.
nftables
The modern Linux firewall system that replaced iptables on current Debian; fail2ban uses it by default on Debian 13 to add and remove ban rules.
node exporter
A small program that exposes a machine's CPU/RAM/disk stats for Prometheus to read.
node-exporter
A small program that exposes a machine's CPU/RAM/disk stats for Prometheus to read.
nofail
A disk setting that lets the system boot even if that disk is missing.
NPM
NPM — Nginx Proxy Manager: a friendly web tool for routing web traffic to your services.
nslookup
A command that tests turning a website name into its address.
ntfy
A simple service that sends push notifications to your phone.
O
observability
Being able to see what your systems are doing via metrics, logs, and dashboards.
OCR
OCR — Optical Character Recognition: turning pictures of text into editable, searchable text.
OIDC
OIDC — OpenID Connect: a standard that lets apps trust one central login service.
ONVIF
ONVIF — a standard many IP cameras support for network discovery and video streaming. Where a camera's app lists RTSP, ONVIF, or Third-Party Compatibility as a toggle, turning it on is usually what exposes the live-stream URL Frigate or Home Assistant needs.
OOM killer
OOM — Out Of Memory: a Linux safeguard that stops programs when memory runs out.
OpenJDK
OpenJDK — Open Java Development Kit: the free software for running and building Java programs.
openssl rand
A command that generates random data for making secure secret keys.
P
P2P
P2P — Peer-to-Peer: computers sharing directly with each other, without a central server.
partition
A section of a disk treated as a separate drive.
pct
The Proxmox command-line tool for managing its containers.
PGID
PGID — Process Group ID: a number telling a container which user group to run as.
plaintext
Text stored plainly, unencrypted and readable by anyone who sees it.
polling
Checking something again every few seconds on a timer, instead of waiting to be told the moment it changes.
port
A container doorway made reachable from outside the container.
port 53
The standard network doorway used for DNS name lookups.
port mapping
Linking a container's doorway to one on your host computer.
port-forward
Telling your router to send incoming internet traffic to a specific device.
POST
A way of sending data to a web address — here, it's how n8n delivers your notification message to ntfy.
PostgreSQL
A powerful, popular free database, often nicknamed Postgres.
Prometheus
A database that regularly pulls and stores time-series metrics (CPU, RAM…) for graphing.
Proxmox
Free software for running virtual machines and containers on one computer.
proxy host
A rule that forwards a web address to one of your internal services.
PUID
PUID — Process User ID: a number telling a container which user to run as.
pvesm
The Proxmox command-line tool for managing its storage.
Q
qcow2
A disk file format for virtual machines that grows as needed.
qm importdisk
A Proxmox command that imports a disk image into a virtual machine.
QSV
QSV — Quick Sync Video: Intel chips' built-in feature for fast video conversion.
Quick Sync
QSV — Quick Sync Video: Intel chips' built-in feature for fast video conversion.
R
RAID
RAID — combines multiple disks so data survives one drive failing (mirroring/striping).
rclone
A command-line tool that syncs files to and from cloud storage (Google Drive, Backblaze B2, S3, and more) as if it were a local folder; its crypt remote type encrypts files before they leave your server.
RCON
RCON — Remote Console: a game server's remote-admin channel, used to run commands and trigger a clean save before shutdown.
Redis
A very fast in-memory database often used for temporary data and caching.
registrar
A company that sells and registers domain names, such as Cloudflare, Porkbun or Namecheap.
registry
The online catalogue an app's images are published to.
remote path mapping
A Radarr/Sonarr setting that rewrites the folder name the download app reports into a different one — needed only when two apps see the same files at different paths.
resolv.conf
A Linux file listing which servers to use for looking up website names.
restic
A backup tool that encrypts your data and avoids storing duplicates.
reverse proxy
A front door that routes web visitors to the right internal service.
root
The account on a Linux machine that is allowed to do anything. Inside the manual’s containers you work as root because you are the only person on the machine.
rootfs
A container's own main filesystem holding its operating system files.
RSS
RSS — Really Simple Syndication: a feed format that delivers site updates automatically.
RTSP
RTSP — Real-Time Streaming Protocol: the way IP cameras send their live video feed.
S
scp
scp — Secure Copy: a command that copies files securely between computers.
scrape
When a monitoring tool periodically pulls fresh metrics from a service.
screen
A tool that keeps terminal programs running even when you log out.
secure context
A browser's name for a page that arrived over https:// or from http://localhost — only such pages may use password encryption.
seed ratio
How much you've uploaded compared to downloaded when sharing files.
seeding
When a torrent app keeps uploading your downloaded file back out to other people even after your own download has finished.
SFTP
SFTP — SSH File Transfer Protocol: a secure way to copy files over an existing SSH connection, with no extra server software to install.
sgdisk
A command-line tool for creating and editing disk partitions.
Shoutrrr
A URL format (like ntfy://… or discord://…) that several self-hosted apps use to describe one notification destination in a single string, instead of a separate settings form per service.
SMART
SMART — Self-Monitoring Analysis and Reporting Technology: a disk's built-in health self-check.
smartctl
A command that reads a disk's built-in health information.
snapshot
A saved point-in-time copy you can roll back to later.
split DNS
A rule that says: for names ending in this one domain, ask this DNS server; leave every other name alone.
SQLite
A tiny self-contained database stored in a single file.
SSD
SSD — Solid State Drive: fast storage with no moving parts.
SSH
SSH — Secure Shell: a secure way to log into another computer's command line remotely.
SSH fingerprint
A short code your computer checks the first time it connects to a server, to make sure it's really talking to that server and not an impostor.
SSO
Single Sign-On — log in once, then reach many apps without logging in again each time.
stateless
Describes a container that keeps no data of its own, so wiping it and starting it again loses nothing.
static IP
A fixed network address that never changes for a device.
subnet
A network block of about 254 addresses, written as /24.
subnet router
A Tailscale device that shares your whole home LAN with the rest of your tailnet, so remote devices can reach 192.168.1.x addresses too, not just the server itself.
Subsonic
Subsonic — a common standard (an API) that music apps use to connect to your music server.
systemctl
A Linux command for starting, stopping, and managing background services.
systemd
The Linux system that starts and manages background services.
systemd journal
The single internal database where Debian and Proxmox keep their system messages, instead of many separate text log files.
systemd timer
A schedule file that tells the operating system to run a command at a set time or interval, like an alarm clock for a command.
systemd unit
A short text file that tells Linux's own service manager how to run a program automatically — start it on boot, restart it if it crashes.
systemd-resolved
A small DNS helper built into Debian that answers name lookups for the machine itself; it sits on port 53, so it must be turned off before AdGuard can use that port.
T
tailnet
Your own private network of devices connected through Tailscale. Every device on it reaches every other device directly, over an encrypted link, wherever each one physically is.
Tailscale
A tool that securely links your devices over the internet like one private network.
TCP
TCP — Transmission Control Protocol: a reliable way computers send data in order.
thin provisioning
Allocating disk space only as it's actually used, not all upfront.
Tika
A tool that extracts text and details from many document types.
time-series
Data points recorded over time (e.g. CPU every few seconds) — what metric dashboards graph.
TLS
TLS — Transport Layer Security: the encryption that keeps web connections private.
token
A secret code used to prove identity or grant access.
TUN device
A fake network card made in software; VPN programs like Tailscale send their encrypted traffic through one.
U
udev rule
A Linux instruction controlling how a device is handled when plugged in.
uid mapping
The shift that Proxmox applies to user numbers inside an unprivileged container. Root in the container is stored as a nobody number on the host, such as 100000.
unprivileged container
A safer container that can't act as the host's root superuser.
upstream DNS
The outside name-lookup server your system asks when it can't answer itself.
UTC
The world's reference clock; computers use it by default until you tell them your own time zone.
UUID
UUID — Universally Unique Identifier: a long unique code identifying a disk or item.
V
VLAN
VLAN — Virtual LAN: splits one physical network into separate isolated ones (e.g. IoT vs your PCs).
VM
VM — Virtual Machine: a full computer simulated in software on your hardware.
volume
The "-v" option that gives a container a storage area for its data.
VPN
VPN — Virtual Private Network: an encrypted tunnel that hides and protects your traffic.
vzdump
The Proxmox tool that backs up virtual machines and containers.
W
Watchtower
A tool that automatically updates your running containers to newer versions.
Web UI
UI — User Interface: the web page you use to control an app.
webhook
An automatic message one app sends another when something happens.
whitelist
A list of who or what is explicitly allowed, blocking everyone else.
Wings
The Pelican daemon that launches each game server in its own container and streams the console back to the Panel.
Z
ZFS
ZFS — an advanced filesystem that can mirror disks and take instant snapshots.
Zigbee
A low-power wireless standard many smart-home devices use.
Zigbee2MQTT
A bridge connecting Zigbee smart devices to your home-automation software.
zstd
A fast compression method that shrinks files to save space.
Back matter
Index
Every app and container, alphabetically, with the chapter that covers it.
Every container at a glance — the ID, the address, and the chapter that builds it. Print it, pin it next to the server.
The map
Disk and memory values are maximums, not reservations — containers use only what they need. Addresses follow this manual's example network (192.168.1.x); yours may differ per Ch. 3.